• About
    • Contact
    • Press
    • Sponsor
  • DIY
    • Home & Garden
    • Jewellery & Accessories
    • Yarn Crafts
  • Sewing
    • patternless & self drafted
    • Refashions
    • Commercial Patterns
    • Sewing Tips
    • Overlockers
  • The Refashioners

Portia Lawrie

DIY, how to, Sewing, Tips and Tricks, Tutorials

How To: Remove Stitch Marks from Fabric

07/17/15

With The Refashioners 2015 juuuuust around the corner,  and this years community challenge running in parallel, there may be just a few people this August refashioning shirts! I thought, what better time to share this little technique  for getting rid of stitch marks! The kind you get when you unpick a hem or  dart, or remove a pocket.; and simple pressing just isn’t cutting it.  Welll…it is possible to minimise and, in some cases, completely remove those marks. It’s not a complete cure in all cases  as it depends on a few different factors. BUT, I think you’ll agree from the before and after shots, it’s worth a try, right?How to minimise or remove stitch marks from fabric at www.makery,uk


How to minimise or remove stitch marks from fabric at www.makery,uk

Here’s what I’m talking about. This is a piece of cotton fabric where I was trying out some Sashiko embroidery. Wasn’t happy with it, so unpicked it in order to start again. One problem….stitch marks!! (I’m using this as a sample for this how to as the weave is larger and easier to photograph, but this applies to machine and hand stitching alike.)

How to minimise or remove stitch marks from fabric at www.makery,uk

Here it is after a simple press. Better. But not great! What happens with holes is the weft and warp threads of the fabric get moved out of alignment as the needle passes through the fabric and they stay that way even once the thread is removed. If you look closely at the first two pics (tap to enlarge and zoom in) you can see the individual threads are skewed around the stitch holes.
How to minimise or remove stitch marks from fabric at www.makery,uk

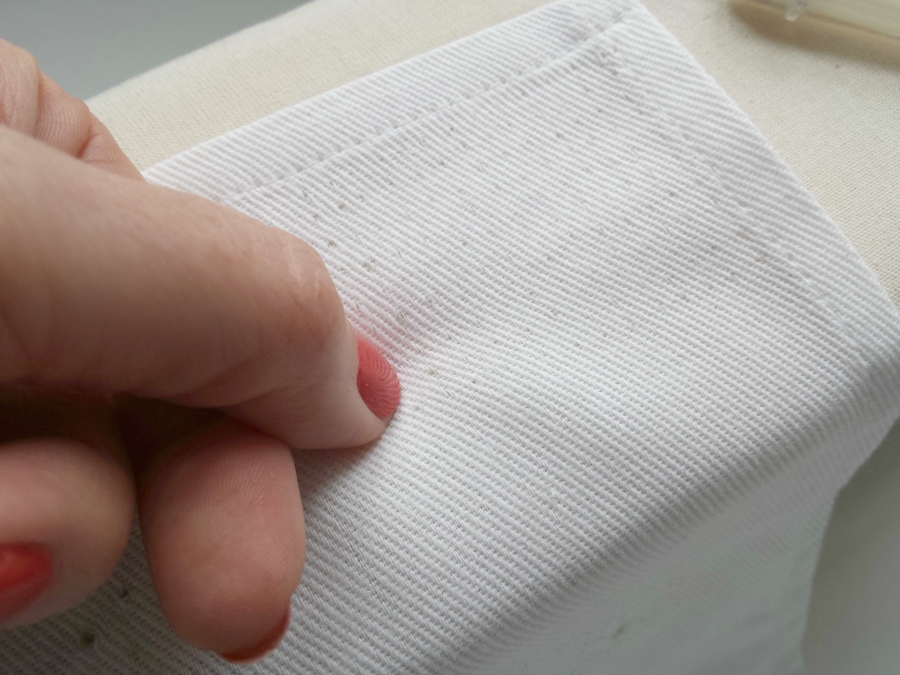
Now for the secret to erasing those stitch marks! Use your nail…

How to minimise or remove stitch marks from fabric at www.makery,uk

…or a spoon. With a firm pressure appropriate to the sturdiness of your fabric, drag it across the weft (left to right then right to left) and the warp of the fabric (up and down) Press with steam and repeat 2 to 3 times.

How to minimise or remove stitch marks from fabric at www.makery,uk

See the difference? The repeated dragging action manipulates those warp and weft threads back into place and the steam fixes them there. Clever huh? But we’re not quite done…

How to minimise or remove stitch marks from fabric at www.makery,uk

Flip the fabric over and repeat on the other side. Drag your nail/spoon across left and right, then up and down then press with steam…

How to minimise or remove stitch marks from fabric at www.makery,uk

All done!

How to minimise or remove stitch marks from fabric at www.makery,uk

Quite a difference huh? This technique will work on most wovens to a greater or lesser degree depending on two factors. The fineness and weave of the fabric itself AND how long those stitches have been in there. In some instances the fabric will be too delicate or the stitches will have been in too long (I’m talking existing garments type long!) for this to be completely effective. BUT in a lot of cases this will help erase all memories of that bodged stitching (we all bodge seams right?!) so no-one will ever know 😉


DIY, how to, Sewing, Sewing Basics, Tips and Tricks, Tutorials

How To: Make bias tape with a gadget

07/12/15

How to make bias tape with a gadget at www.portialawrie.co.uk

Bias tape has a multitude of uses. Fact. I LOVE bias tape! But store bought tape can have its limitations in terms of colour, quality and width. Once you’ve mastered making your own you can create bias tape quickly and easily to match perfectly with any project. Whether you use it as a binding, a facing, piping, whatever it is; custom made bias lends a touch of quality to your sewing in a way that it’s “off the peg” cousin can’t quite manage. There are a couple of methods that I use to make bias tape. This post covers using a shop bought bias maker. (I’ll cover the other in a separate post)

How to make bias tape with a gadget at www.portialawrie.co.uk

Start with a bias strip the right width for your bias maker. Bias strips should be twice the width that you want your finished bias tape to be. (Want an easy way to make bias strips? See here). With the strip RS down/WS facing up, insert one end of the strip into the widest end of the bias gadget ensuring the fabric strip is as central as possible…..

How to make bias tape with a gadget at www.portialawrie.co.uk

Gradually feed the fabric strip along . I find it helps to use something pointy to help it along…

How to make bias tape with a gadget at www.portialawrie.co.uk

Feed it through until juuuuust a teeny bit pops out the end of your bias maker

How to make bias tape with a gadget at www.portialawrie.co.uk

Press the tip of the strip as it pokes through…

How to make bias tape with a gadget at www.portialawrie.co.uk

Take hold of the handle of the gadget and gently slide it along the fabric strip about a centimetre at a time, pressing as you go

How to make bias tape with a gadget at www.portialawrie.co.uk

Keep going all the way to the end of the strip. Slide the gadget along the strip a centimetre then press. Slide it along another centimetre then press, and so on; until you’ve gone the length of your bias strip…

How to make bias tape with a gadget at www.portialawrie.co.uk

and there you have it…nice neat bias tape ready to use on your next sewing project 🙂


This tutorial first appeared as a guest post on Seams & Scissors. 

DIY, how to, overlocker, overlockers, serger, Sewing, Sewing Basics, Tips and Tricks, Tutorials, Uncategorized

Serger Series – Part 3: Nailing Tension

06/29/15

How to nail serger tension once and for all

Loopy stitching and puckered or curled fabric edges be gone! It’s time to nail the whole tension thing once and for all! The best way to diagnose a problem when it crops up is to understand the effect that the various tension settings have on the various threads that form your overlock stitch; and the best way to do THAT is to sew a sample swatch for each one.  Yes there are more fun things to be doing like actually making stuff! But this is a one time task which, once you’ve done it, will give you the means to diagnose problems, and put them right, quickly and easily without any of that “why the HELL is it doing that?!! kind of frustration. So that’s gotta be worth it, right?!! If nothing else it will save your loved ones from putting up with the “effiing & blinding/cussing” coming from your general direction (I KNOW that’s not just me!)

How to thread a serger at www.portialawrie.co.uk

So. First things first. You’ll need to thread each needle and looper with a different colour thread. (If you can match it to the colours in your threading diagram even better! Threading guide here if you need it)  This will aid in identifying which thread is doing what, the effect it has on other threads and generally help to differentiate.

How to nail serger tension once and for all

This is what the aim of the game is. One swatch for each needle and looper with each swatch containing samples of the stitch at each tension setting. At the end of which you’ll be able to mark the optimum tension settings (and ratios) for each thread. I’ll explain further along how this is useful as you might well be thinking that working out your tension on calico is pointless when you’re sewing predominantly with knits & possibly a whole variety of fabrics…but bear with me. It does make sense I promise!

How to nail serger tension once and for all

So for the swatches I used simple calico. Just because it’s plain, medium weight, I had some, and I could draw on it easily and permanently. If you have other fabric that fits that criteria, fab. Use it. You’ll also need a ruler, biro/pen and fabric scissors…

How to nail serger tension once and for all

Cut 4 strips about 8″ wide (one for each tension dial) and long enough to accommodate a 1.5″ section for each of your tension settings plus a header. So basically, my serger has tension settings from 1-9. So I divided each strip into 10  x  1.5″ sections.

How to nail serger tension once and for all

Fold/press in half along the length. Then at the top of each one write the name of the thread/section you are swatching (so…left needle, right needle, upper looper, lower looper) and the colour of the thread that you have used for that section. (I also added the number that corresponds to that section on my threading diagram. But this isn’t that necessary. Call it thoroughness overkill on my part!) Then write the numbers 1-9 down the left hand side of each strip….

So the process is the same for each swatch. Start with all dials at a medium setting of say 3 or 4. Something that you know will give you a basic overlock stitch without being ridiculously loose or tight. Just set them all the same. Then “swatch” each tension dial in turn as follows. Left Needle, Right Needle, Upper Looper, Lower Looper. (So basically left to right on your tension dials).

Starting with the left needle, set the tension dial to 1…How to nail serger tension once and for all

…then serge down the right hand side or your swatch fabric until your needles hit the line. Stop.

Move the tension dial to 2…How to nail serger tension once and for all

Serge until your needles hit the next line…How to nail serger tension once and for all

Stop.

How to nail serger tension once and for all

Set your tension dial to 3…

How to nail serger tension once and for all

Serge until your needles hit the next line and stop.

How to nail serger tension once and for all

I suspect you’re getting the gist now! Keep moving the tension dial up one increment at a time…

How to nail serger tension once and for all

…and sewing up to the next line…until you’ve swatched each tension setting on that dial. At that point, examine the stitch and mark the tension setting that gives you the best, most balanced stitch. (more detail on what constitutes a balanced stitch further down, so bear with. We’ll get to that part) Set the tension dial at that setting. Leave it there, and move on to the next tension dial and repeat the process for that one. once you’ve established the optimum setting for the second dial, set it to that, and move onto the third, then the fourth…

How to nail serger tension once and for all

So, by the time you’ve done all that you’ll end up with 4 of these! So, now what to do?

What these Swatches Tell You…

So how do swatches made on calico relate to sewing with knits? I might have gone to all this trouble to get a perfect stitch on a double thickness of calico, but the tensions will be completely different when I start sewing jersey, right? Welllll…yes…..and no! The numbers may be different but the basic concept of what these swatches tell me will be much the same, proportionately, whatever fabric I’m using. Firstly there’s the ratio/differential between each setting. From my swatches above you’ll see that  my “ratios” are 6-6- 4-3. (Don’t be surprised if this differs slightly from your manual’s recommended settings! Every machine is different.) So basically my needle tensions are the same as eachother, and my looper tensions are 2 and/or 3 notches lower than my needles. This rough relationship between the tension settings is my starting point with any other fabrics I now sew with. It’s a ratio that I now know, works. So when I sit down at my serger with a new piece of jersey, I might lower them all by half a notch, if my common sense tells me to do so, but generally my starting point is roughly the same.  It may be +/- half a notch or a notch, but in my experience (and I sew with mostly light or medium weight knits and wovens) there isn’t a dramatic deviation from those numbers or ratios even after I’ve done a test swatch on my fabric. Now, before I even start….I know I’m roughly in the right ball park!

The other thing these swatches tell you is why your overlock stitch or fabric is behaving in a particular way and allows you to identify where you might need to fine tune from your starting point. Take a look….

Left Needle  (Too Loose)

We’re looking at the BLUE thread here. (Ignore the rest) With the needle tension set really low, much as with a standard machine, the stitches will not sit flat on the surface of the fabric. You can see a little “daylight” between the stitches and the fabric here at the lowest setting. It’s not terrrrrrible but wait….How to nail serger tension once and for all

How to nail serger tension once and for allOn the reverse it’s waaaay more obvious that the tension on the blue thread is too low. See those little blue loops that gradually get smaller as you move from the left to the right of the image? IAs the tension increases the thread will sit more flush with the fabric. So if your left needle thread is looping at the back like that…increase the tension.

Left Needle  (Too Tight)

There’s alot more play and forgiveness in needle tension  than there is in looper tension in my experience. Especially at the upper/tighter end of the tension scale. The effect here isn’t quite as obvious on this calico as it might be on a fine tissue knit but at the highest tension setting (we’re still looking at the BLUE thread. Last segment. Left of the screen, numbered 9) you can see the fabric is starting to pucker ever so slightly…..How to nail serger tension once and for allHow to nail serger tension once and for all

Maybe more visible on the reverse….see that slight dimpling along the stitch line and the way the corner can’t lay flat? It’s all just a little bit “tense” isn’t it?! So any sign of puckering along the stitch line, lower your needle tension.

Right Needle  (Too Loose)

This time we’re looking at the CREAM thread and the right hand needle. As I said, both my needles are always set at the same tension and the effect that having the tension too low or too high is the same….How to nail serger tension once and for allHow to nail serger tension once and for all

Loopy means it’s too low. Increase the tension.

Right Needle (Too Tight)

This time, the blue thread has already been set to the right tension. We’re looking at the CREAM thread and on the highest setting it’s causing the same puckering that the blue thread did… look at the way the edge of the fabric on the far left is sliiiiightly wavy and not sitting flat….How to nail serger tension once and for all

How to nail serger tension once and for all

See the way the corner is lifting, the sliiight wave to the fabric edge and that slight dimpling along the stitch line again? Same as before….reduce the thread tension.

So to summarise…needle tensioning on a serger is pretty much the same as on a standard machine. Check the underside as well as the top. If it puckers it’s too tight. If it loops it’s too loose. adjust up or down accordingly. Simple!

The Loopers

The loopers is where the “balancing the stitch” part comes in. The upper and lower looper threads form loops that loop round eachother and cover the edge of the fabric. Hence the term loopers, I’m guessing! To get a “balanced stitch” you want the part where the upper and lower loopers link together, to sit right on the edge of the fabric. We’re almost at that part; but first lets look at the way incorrect tensioning affects the upper and lower loopers interact with eachother. They have a co-dependant relationship if you like! If one’s not quite right then the other can’t do it’s thang!

Upper Looper (too loose)

We’re looking at the GREY thread in this pic. Having the upper looper  tension too loose allows the loops to float over and under the edge of the fabric…How to nail serger tension once and for all

To put it another way, the loops of the upper looper (grey), should be exactly the same length as the loops of the lower looper (yellow) and meet eachother at the edge of the fabric. If your upper looper thread is passing over and under the edge of your fabric like this, but not causing it to curl….it’s too loose. Increase the tension on the upper looper.

Upper Looper (too tight)

At the other end of the scale if the upper looper tension thread is too tight, it will make the grey thread loops too short/tight and pull the lower looper thread (yellow) round from the other side and curl the edge of the fabric in the process….How to nail serger tension once and for allHow to nail serger tension once and for all

So if you have short loops on top pulling and curling the fabric around from underneath like this? Your upper looper tension is too tight.

Lower Looper (too loose)

We are looking at the YELLOW thread of my lower looper now. It’s the same interaction as before but the effect is reversed. If the lower looper tension is too loose, it allows the lower looper thread to float round to the top of the fabric rather than sit on the edge. You’ll notice this makes the grey upper looper threads too short in relation.How to nail serger tension once and for all

But there is no curl which means it’s a “looseness” problem rather than a “tightness” problem. Increase the lower looper tension.

Lower Looper (too tight)

With the lower looper tension set too tight the YELLOW thread (now no longer visible) is pulling the upper looper (grey) thread around and under and curling the fabric edge again, but this time it’s curling under….How to nail serger tension once and for all

Curling is sign that one oor other of your loopers is too tight. If it curls upwards it’s your upper looper. If it curls under, as it does here, it’s your lower looper. Lower the tension of the lower looper.

The “Perfectly” balanced stitch…

So this is what we’re aiming for. The holy grail of serging. The “perfectly” balanced stitch. Truthfully there’s no such thing as perfection, lol! But this is what to look for as you are deciding on the optimum setting for each swatch, and setting your tension for each new fabric.

Stitching lines (blue and cream thread) flat to fabric and not looping or causing puckers on either side. Upper Looper loops (grey thread) extend right to the edge of the fabric where they meet the Lower Looper loops (yellow thread) from the underside…How to nail serger tension once and for all

How to nail serger tension once and for all

The lower looper thread from the underside view. Neat little “Y” shapes with just the teeniest bit of the blue and cream needle threads visible from the other side. The yellow “Y”s (lower loops) extend right to the edge of the fabric where the meet the grey thread of the Upper Looper loops….

How to nail serger tension once and for all

….and finally that spot, right along the edge of the fabric (extremely tricky to photograph one handed!), but hopefully you can see both looper threads meeting and looping around eachother to enclose that raw edge. In essence, THAT is the perfectly balanced serger stitch.

The swatches give you a starting point at which you have a rough idea of the tension ratios of your machine. From there,  you can diagnose problems with any given fabric, by looking at how it (and the stitch) is behaving and comparing it to your swatches. He’s a few “rules of thumb” I’ve discovered since getting to know my serger this way.  In general if part of the stitch is loopy, then the tension is too loose.  Loopy = Loose. Get it?! The swatches will help you identify which part of the stitch you are looking at and adjust the relevant tension dial. If the fabric edge is curling then one of your loopers is too tight. If it curls upwards it’s your upper looper. If it curls downwards it’s your lower looper. If there’s puckering along the length, then needle tensions are likely too tight.

So, with serger swatches in hand, the next time you sit down at your machine, hopefully there will be less cussing, and more beautifully balanced stitches 🙂

Questions?? Feel free to leave them in the comments section and I’ll do my best to answer!

Serger Series: Part 1. Anatomy

Serger Series: Part 2. Threading

DIY, how to, Me Elsewhere, refashioning, Restyles, sewing publications, Uncategorized

Simply Sewing: Issue 5

06/25/15

So Issue 5 of Simply Sewing has hit the stands with the lovely Lisa Comfort from Sew Over It gracing the cover. First time so far they’ve used an actual sewing industry personality on the cover as opposed to a model and personally, I find it pretty cool to see a familiar face from the sewing community up there….Simply Sewing Magazine

Kinda lends some credibility and legitimacy to the whole affair, ya know?? I like recognising the person on the cover of a magazine. You immediately identify with that magazine as then being part of your community rather than just another generic sewing magazine taking up shelf space. So good shout there Simply Sewing!

Simply Sewing Magazine

Here’s a peek at the contents page…

Simply Sewing Magazine

My contribution this month is this shirt refashion. Super simple! I honestly love the zingy floral contrast here; and the brief for this was “super summery”. Check that then! Having said that, personally I could see this working so well with neutrals/stripes/chambray….that kinda thing. I may have a shirt or two in my refashioning pile somewhere…..

Simply Sewing Magazine

This issue sees the start of a 3 issue sewalong with this month’s cover girl. Here’s a random piece of trivia….that there skirt in the picture? That was made as a sample by our very own Zoe! Small world huh?

Simply Sewing Magazine

I am always intrigued and often in awe of people that manage to carve a living in this emerging sewing community so this interview with Claire Louise Hardie is particularly interesting to me…

Simply Sewing Magazine

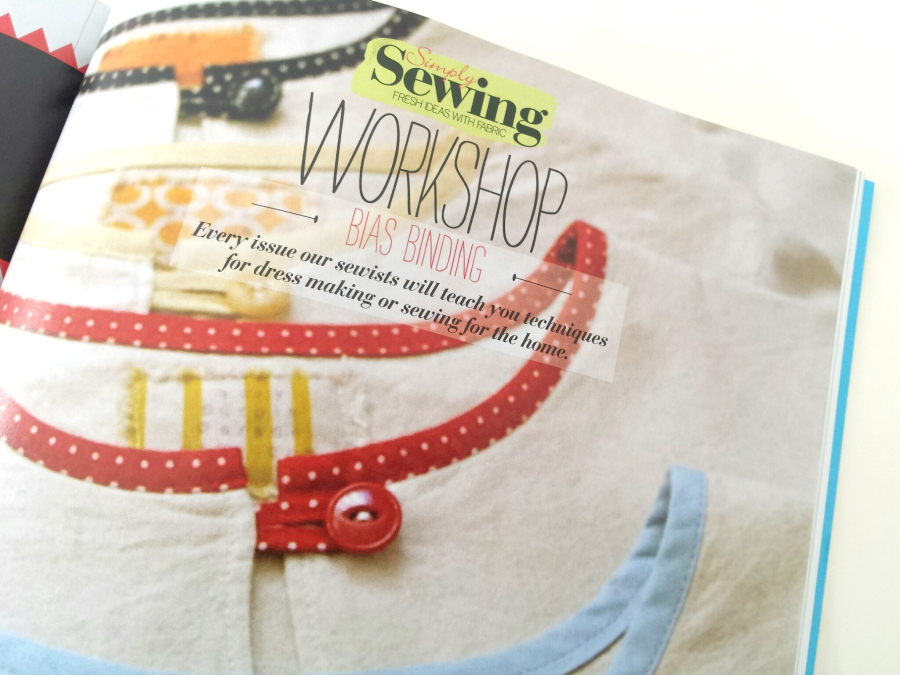
Nice little guide to one of my favourite notions….bias binding!

Simply Sewing Magazine

I’ve had this wooden yardstick stashed for a while with plans for doing exactly this!

Issue 5 is out now and available in larger supermarkets and branches of WH Smiths, or you can subscribe via the website 🙂

DIY, Dressmaking, how to, jersey, knits, overlocker, overlockers, serger, Sewing, Sewing Basics, sewing machines, Tips and Tricks, Tutorials, Uncategorized

Serger Series – Part 2: Threading

06/02/15

How to thread a serger at www.portialawrie.co.uk

And so we come to it. If you have been “dreading the threading” I promise it really isn’t as intimidating as it seems at first glance. With the exception of the lower looper, which is a teeny bit fiddly, the rest is super straightforward. I know I for one had built this up in my head to be super scary; (when I was doing my garment construction course I’d always wait until the thing was already threaded and then jump on. Managed to avoid threading an overlocker for my whole time there, lol!) and when I finally took the bull by the horns, I was all “oh!! is that it?!!” This is a long photo heavy post but don’t let that put you off. The process itself takes 5 minutes. I’ve just taken alot of pictures, ha ha! You can click on each image to open seperately and zoom in for more detail 😉

PREPARATIONHow to thread a serger at www.portialawrie.co.uk

You’ll need 4 cones of thread. Thread snips and tweezers. The hook nose tweezers are the most useful and if you’re a butter fingers like me then a second pair is handy too. The trickiest part about threading is accessing some of the teeny spaces where the thread has to run; but with tweezers…its a breeze. I’m using different colours here just for illustration purposes. It’s easier for you to follow the route of each thread that way.

How to thread a serger at www.portialawrie.co.uk

Every machine will come with a threading guide. Either on board like mine, or in the manual. Have it to hand. Note the numbers at the top of the diagram. That is the order in which you thread. So, upper looper (red), lower looper (yellow), right needle (green) and finally, left needle (blue). That’s the order we’re going in. (BTW, If you have a secondhand machine that didn’t come with a manual, or you lost yours, then they are often available for free online as PDF downloads. Check out Manual Owl as a good place to start).

How to thread a serger at www.portialawrie.co.uk

Start by turning all your tension dials to zero. This sets the tension discs inside at their most open position and helps ensure that the thread passes between them when you’re threading.

How to thread a serger at www.portialawrie.co.uk

Pull up the telescopic thread bar at the back….

FIRST STAGE (applies to all 4 thread cones)How to thread a serger at www.portialawrie.co.uk

Position your thread cone on the appropriate spool holder. (We’re starting with the upper looper). Pass the thread through the corresponding loop at the top of the thread bar…

How to thread a serger at www.portialawrie.co.uk

Hold the thread horizontally. The thread from the cone in your right hand and the loose end in your left and slide it up under that hook like part. Then take the loose end and run it in the channel that leads to the tension discs at the front. This part is easy to get the wrong way round which can lead to snapped threads.  Don’t want those!  This little wire thread guide has two upper loops at the top of it and the larger hook/loop that extends down. The thread runs from the thread bar above, under the right loop and the downwards hook/loop first and then runs over the top left loop and into the tension disc channel. Click the image to enlarge and zoom in.

UPPER LOOPER (red channel)How to thread a serger at www.portialawrie.co.uk

The thread then runs along that channel and round to the front where you run it between the two metal tension discs of the tension dial and down into the next part of the channel…

How to thread a serger at www.portialawrie.co.uk

…then snugs into another thread guide underneath…

How to thread a serger at www.portialawrie.co.uk

From there join the  red dots! Each thread position is indicated with a read dot and the thread is held there by a little hook that you pass the thread behind. Once you thread the final part of the upper looper (tweezers are useful there! Also, rotate the hand wheel at the side until the upper looper rotates into the most accessible position) the thread passes under the presser foot and off to the side.

How to thread a serger at www.portialawrie.co.uk

Upper looper done! See the red thread marked “1” on my threading diagram? That’s what we’ve just done. We’re now moving on to the lower looper. Marked “2” with the threading route indicated by the yellow thread. Note to the left of the main threading diagram there are two separate diagrams of the lower looper in close up. As I said, the lower looper is slightly trickier.  To the extent that it warrants it’s own diagram, lol! But fear not. It’s fiddly rather than complex.

UPPER LOOPER (yellow channel)How to thread a serger at www.portialawrie.co.uk

The steps up until this point are identical to the red upper looper. To recap: from the thread cones, through the thread bar and rear thread guides, between the tension discs and down into the thread guide underneath…

How to thread a serger at www.portialawrie.co.uk

Follow the yellow dots (in the same way as you did the red for the upper looper), until you get to this point. AKA the slightly trickier part; Rotate the handwheel again so that the lower looper is at its most accessible position, and grab the thread with those hook nose tweezers! In this pic I have hold of the thread with my tweezers and the lower looper, the bit we want to thread, is just behind my tweezers, and just in front of the upper looper. It’s the bit that looks a little like a tiny penknife blade running horizontally behind my tweezrs and it has a little threading hole in the end of it. We need to pass the thread behind it, then over the top of it…

How to thread a serger at www.portialawrie.co.uk

…and then pull the thread towards us until it slides and then slots into a little dip/crevace right on the “elbow” of the lower looper…

How to thread a serger at www.portialawrie.co.uk

Here it is zoomed in a bit. A little blurred (sorry, it was soooo tricky to photograph one handed!) but you can just make out the little nick in the elbow of the upper looper where the thread has to sit….it passes up behind the elbow, over the top and sits in that little cut out/nick….

How to thread a serger at www.portialawrie.co.uk

From there thread the pointy end, and making sure you don’t tangle it with the thread from the upper looper (which sits directly behind it) pass the tail end under the presser foot and off to the side (2 sets of tweezers come in handy here!). Exactly as you did for the upper looper…

How to thread a serger at www.portialawrie.co.uk

Another close up for you. That’s the trickiest part done!!

NEEDLE THREADING (blue and green channels)How to thread a serger at www.portialawrie.co.uk

This part is pretty much the same as a standard sewing machine except you need to do it twice! Start with the right hand needle (green channel). Threading process is exactly the same as the loopers up until the point it passes through the tension discs. Then it goes under a small thread guide, under a slightly larger thread guide and OVER the thread guide marked with the green dot…

How to thread a serger at www.portialawrie.co.uk

Then down to the needles. Right needle is marked A. Into the little pig tail curl …

How to thread a serger at www.portialawrie.co.uk

use tweezers to thread because the cutting blade gets in the way . Especially if you’re right handed…

How to thread a serger at www.portialawrie.co.uk

Then, as with the previous two thread tails; pass under the presser foot and off to the side…

How to thread a serger at www.portialawrie.co.uk

Lastly the left needle (blue channel). Same as the right needle except it only passes under the larger thread guide then OVER the thread guided indicated by the blue dot…

How to thread a serger at www.portialawrie.co.uk

thread and pass the thread tail under the presser foot and off to the side as before.  ****YOU’RE ALL DONE AND THREADED!!*** One last thing to do though. Chain off…

How to thread a serger at www.portialawrie.co.uk

Re-engage your tension discs by setting dials to 3…

How to thread a serger at www.portialawrie.co.uk

Plug in and switch on….

How to thread a serger at www.portialawrie.co.uk

Lower the presser foot and grab hold of your thread tails…

How to thread a serger at www.portialawrie.co.uk

Pull thread tails round to the back, engage the presser foot and serge of a little chain…

How to thread a serger at www.portialawrie.co.uk

Trim any excess and leave a 3″ tail.  All done!! Hope this was useful and that it helps at least someone out there realise that threading a serger is really not as terrible as it first appears. I know this is a photo heavy post which might make this artificially seem like a lengthy process . In reality it takes me 5 minutes, if that! Please please trust me. Try it. And you’ll see 🙂

You can view the first post in this series here.

Next up is tensioning and getting a nicely balanced stitch. I’ve discovered the COOLEST trick for that. Watch this space!

DIY, how to, overlocker, serger, Sewing, Tips and Tricks, Tutorials, Uncategorized

Serger Series – Part 1: Anatomy

05/21/15

A beginner serger series at www.portialawrie.co.uk

On November 4th 2013 I got my longed for overlocker. *Confession*. Up until a few weeks back I had only ever used the 4 thread overlock that it had come factory threaded with. I had literally been too scared to unthread the thing for fear of being unable to re thread it. Resolutely sticking to this method of changing the thread cones. Sound familiar? Well a few weeks ago, after my machine had a bit of a hissy fit at me; I decided enough was enough. I decided that, like in any successful relationship, if she and I were going to fulfil our relationship potential; then I had to invest some time in getting to know her better.

So over the past few weeks I’ve taken my overlocker to bits (yep, with a screwdriver and everything) cleaned it, reassembled it, and played with it. I’ve watched you tube videos, played with sample swatches  and **shock horror** read my manual!! (C’mon…I’m not the only one to never read a manual, right??) What I’ve discovered is that overlockers are nowhere near as scary as I thought. Yes, they still sound and run like sewing machines on steroids BUT threading one is now like “oh, was that it?!” and diagnosing (and correcting) the cause of loopy weird stitching is now a piece of cake.

So I  thought I’d share my discoveries in a new series aimed at beginner, scaredy cats like me. Cos I know you’re out there. Just wanting to get serging/buy a serger  and wondering if you’ll be able to get to grips with it. Well….you will!A beginner serger series at www.portialawrie.co.uk

The best place to start is a tour of a serger and it’s various components. What they are and what they do. First I better introduce you to my machine. A Singer 14SH754.  A 2, 3 and 4 thread overlock machine with differential feed. (We’ll get to what differential feed is in a bit!) Here’s how she looks from the front….

A beginner serger series at www.portialawrie.co.uk

and from this angle you can see the key elements at the side and the back of the machine. Ready for the tour? Here goes….

A beginner serger series at www.portialawrie.co.uk

Starting at the back you have the thread spools. No different to a sewing machine except there are 4. Those clear plastic things that sit at the bottom of the spools are removable and are there to accommodate the large thread cones that you typically use on a serger. Remove those and you can use a normal size thread spools. So if you have a more obscure colour and don’t want to buy 4 massive cones of it, you can use normal ones too! In the middle is a telescopic metal thread bar. The whole thing extends up and the threads slip inbetween the crossover part at the top of each loop and sit in the bottom of the loop. There to separate and guide the individual threads and keep them at tension.

A beginner serger series at www.portialawrie.co.uk

Visible just behind the carry handle in the previous pic. More thread guides. This time they look like the hook part of a hook and eye fastening. There to help keep the the threads separated, at tension, and guide them through that channel there, that leads to the tension dials/discs around the front….

A beginner serger series at www.portialawrie.co.uk

Lastly (at the back, for now) the presser foot lever. Just the same as on a standard machine. Raises and lowers the presser foot. Simple as. That white “bar” you can see to the left is part of the knife mechanism. We’ll get to that in a mo!

A beginner serger series at www.portialawrie.co.uk

Moving around to the side. There’s your presser foot. Nothing strange there. Note the angle of the needles and the presser foot bar though. On a standard machine the presser foot bar and needles point straight down. Slightly angled on a serger. Also note the white bar that we saw in the previous pic has the blade attached to it….

A beginner serger series at www.portialawrie.co.uk

Presser foot lifts up and down as on a standard machine. Underneath are the feed dogs and throat plate. As on a standard machine. Presser feet are changeable (for different actions/stitches) on overlockers just as they are on standard machines. So…just the blade that’s any different here really!

A beginner serger series at www.portialawrie.co.uk

There are your needles from the front. Released and changed using those tiny screws. Left needle (B) sits higher than the right needle (A). The little “pig tail” curls keep the needle threads separate, at tension and guide them into the right place for threading. In the right foreground of the pic you can see that blade again…

A beginner serger series at www.portialawrie.co.uk

The blade points downwards and snugs into the presser foot. You can disengage it by pushing it in towards the white cylinder and using the black knob on the right to rotate it out of the way…

A beginner serger series at www.portialawrie.co.uk

Here is the blade from a different angle. In reality there are 2 blades. The one that is attached to the presser foot bar and moves up and down. And a fixed blade that sits just under the throat plate/feed dogs…as you sew, the fabric slides over the throat plate and between the upper and lower blades…

A beginner serger series at www.portialawrie.co.uk

As the needles move down, so does the upper blade. Slicing the fabric between the upper and lower blades in the process. Ouch! (At the same time that this is happening, the needles behind it will be picking up the threads from the lower looper to help form the stitch on the underside of the fabric)

A beginner serger series at www.portialawrie.co.uk

Just infront of the blade you can see a white switch with “R” stamped to the left of it and “S” stamped to the right; and below that a black dial. This relates to adjusting the stitch width. For normal overlocking that white button is pushed forward to the “S” position. We’ll revisit “non normal” stitching in a later post 😉

A beginner serger series at www.portialawrie.co.uk

So we’re back round to the front….

A beginner serger series at www.portialawrie.co.uk

Open the door at the front and this is what you see. The part that seems scary. The inner workings of the upper and lower loopers. But bear with. It’s honestly not that scary 🙂

A beginner serger series at www.portialawrie.co.uk

Let’s start up top with the tension dials. Ignore the numbers here. I’ve been playing and we’ll get to those in another post. For now let’s talk function. Just the same as a standard machine except, again, there are 4 instead of 1. They set how “tight” your stitch sits in the fabric. Inside each tension dial are 2 metal discs that look a bit like finger cymbals. Same as a standard machine, the higher the number you set the dial, the closer the discs squeeze together and the tighter they hold the thread that runs between them. That tension is transferred to the stitch as it goes through your fabric. Getting the correct tension for your fabric is pretty important and I have a whole separate post lined up for that 🙂 For now…just note that they are colour coded….

A beginner serger series at www.portialawrie.co.uk

Underneath each tension dial are yet more thread guides. Alot of thread guides on a serger. But then there’s alot of thread to guide! Thread guides on this machine that are directly under their alotted tension dials are left plain. The rest are colour coded with coloured dots, that relate to the relevant tension dial,  so you know which thread should be passing through…

A beginner serger series at www.portialawrie.co.uk

And here is the cause of my irrational past fear. The upper and lower loopers! Upper looper (red) forms the overlock stitch ontop of your fabric. Lower looper (yellow) forms the overlock stitch on the underside of your fabric. Undeniably the lower looper is  sliiiiightly tricky to thread. The rest is a cinch, honestly!

A beginner serger series at www.portialawrie.co.uk

Here’s a slightly different angle….The reason the lower looper (yellow dots and diagram) is slightly more tricky is because the lever thingy part of it (that part of the diagram on the right of the photo) is tucked right under the feed dogs/throat plate and even when fully extended, requires a little bit of slight of hand to loop the the thread around it. But that’s why it has it’s own diagram I guess. Never the less, after a couple of goes (tweezers are a MUST) you get the knack and it’s fine…

A beginner serger series at www.portialawrie.co.uk

This machine, and most machines will have a threading guide on board. But I have a whole post lined up on threading too. So we will return to that. I think that’s enough on threading for now! Nearly there. How you feeling? Geeked out yet? Just a couple of bits left to see!

A beginner serger series at www.portialawrie.co.uk

Back round to the side of the machine. A couple of dials and a lever…

A beginner serger series at www.portialawrie.co.uk

Top dial is your stitch length. For the majority of standard stitches set between 2.5 and 3…

A beginner serger series at www.portialawrie.co.uk

The big wheel is your hand wheel for your needles. Just like a standard machine. On/off switch and power source behind that. Nothing different there. In front however is the differential feed lever. This controls the rate at which the feed dogs pull the fabric through the machine and depending on the setting can either stretch the fabric out, or gather it. For normal stitching its set at 1 (in the middle). Again…separate post line up for that too 😉
A beginner serger series at www.portialawrie.co.uk

Worth noting the air vents for keeping the motor from overheating. Do not obstruct whilst in use.

A beginner serger series at www.portialawrie.co.uk

Then finally back to the back and a little tip. I keep a photograph of the make and model numbers of my machines on my phone. Then if I’m out and about and accidentally stumble into a haberdashery (as you do…accidentally) and want to check if a bobbin/blade/presser foot is compatible with my machine…then I can tell the store owner what my machine is…because I can never remember model numbers!

Anyway….there ends part one. Alot of images I know but hopefully useful in acquainting you with the anatomy of a serger and preparing the ground for the next few posts which will hopefully have you fearlessly serging away in no time.

Watch this space. Next up…the dreaded threading!!

DIY, how to, Sewing, Tips and Tricks, Tutorials, Uncategorized

How to Seam Rip like a Pro!

04/30/15


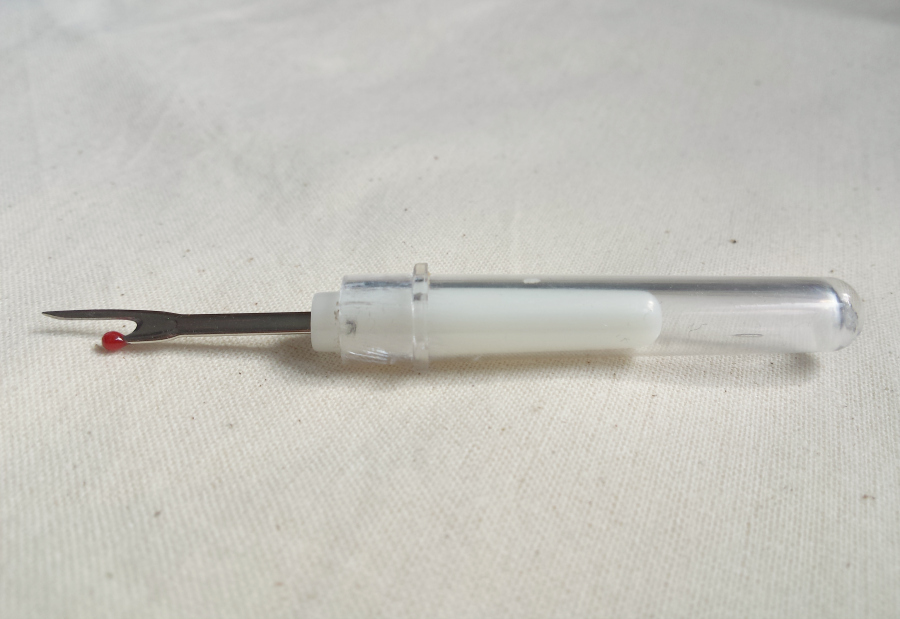
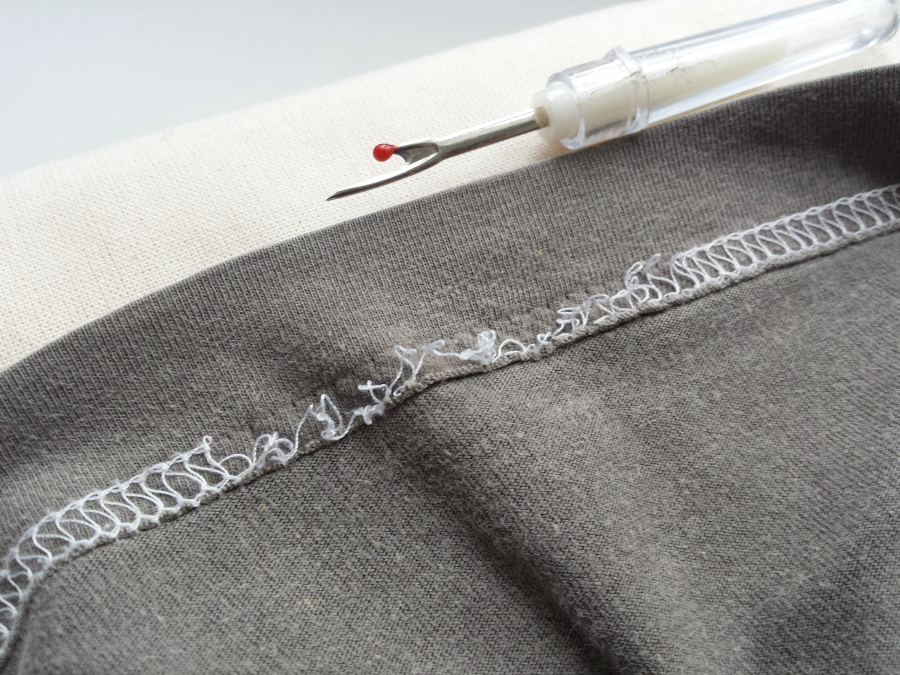
I once wrote a little poem about my seam ripper. That’s how much I rely on it. Odds are you use yours alot to. If you make mistakes, are a perfectionist, or you toile a lot, then you most likely have a close personal relationship with a seam ripper.  But did yours come with instructions for use? Nope mine either. And while you might think it’s pretty obvious how to use a seam ripper,  did you know there are several camps when it comes to how to “properly” use one? I say “properly” because I  don’t personally believe there is a right way and wrong way to everything and if something works for you, then it works. Period. What follows is simply the method that works for me! (I do alot of seam ripping!)seam ripper

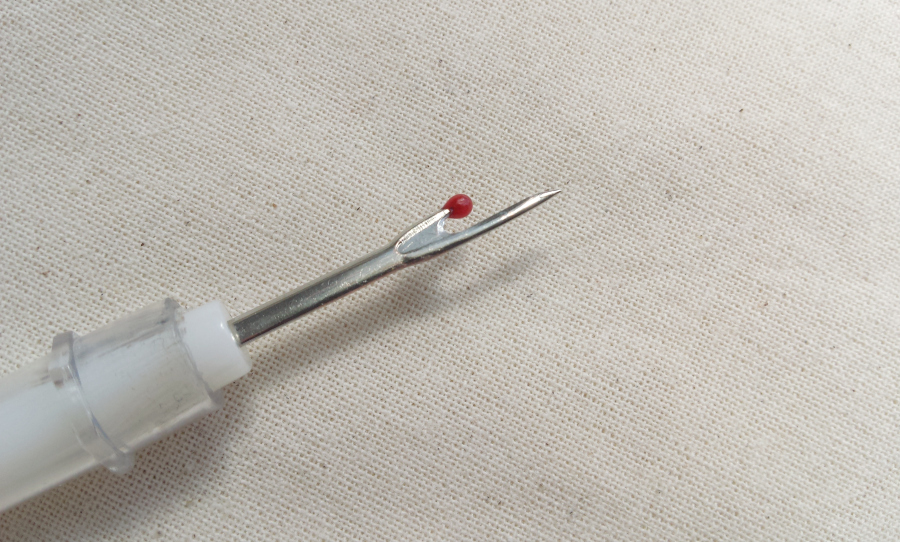
Firstly, for the sake of humility I should point out that the “Pro” I refer to in the title of this post is not me. It’s my sewing tutor who has been the cause of many a face palm moment for me. This method of seam ripping was one of them. Left to my own devices when I first started sewing,  I just automatically  ripped the stitches straight up the centre of the seam and pulled the seam apart as I went. This is one method of seam ripping. But I wasn’t even doing that properly, lol! Did you know that little red ball is supposed to face downwards when you seam rip? I didn’t! This is a great video of that method of using a seam ripper and she has the POSHEST seam ripper I have ever seen….Let’s call that Method 1…

seam ripper

A perfectly good method of seam ripping. Except for me..I worry that it can pull/distort the stitch holes on more delicate fabrics (if your stitch ripper isn’t particularly sharp, even more so) and all the little threads that result are really annoying. You can use a strip of masking tape to remove them, but I guess I kinda got used to this method which has the added bonus of being able to pull the thread out in large sections or even one continuous length. Less mess and faff.


Method 2:

Seam rip like a pro at www.portialawrie.co.uk

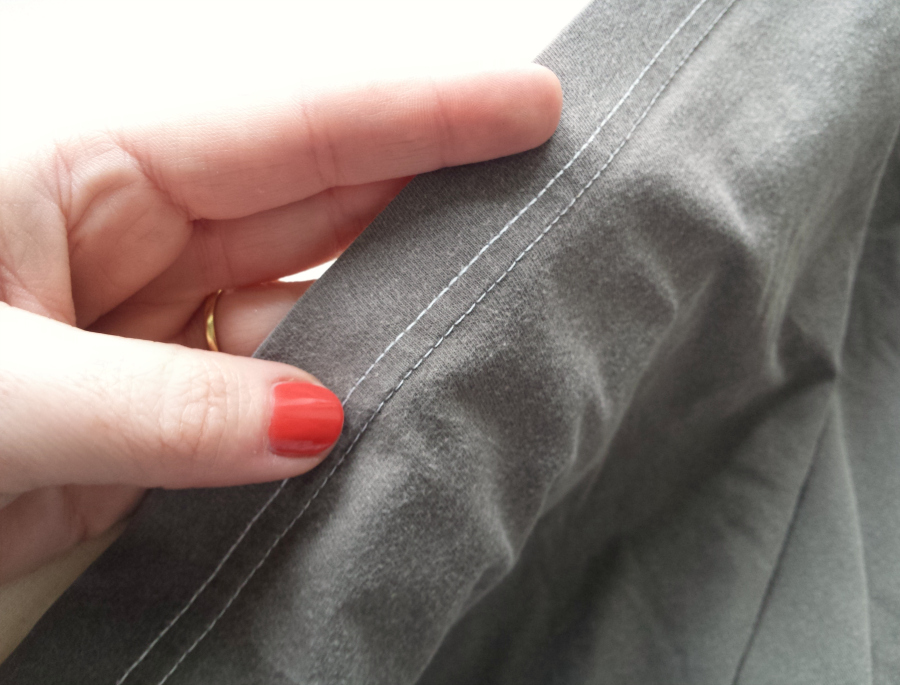
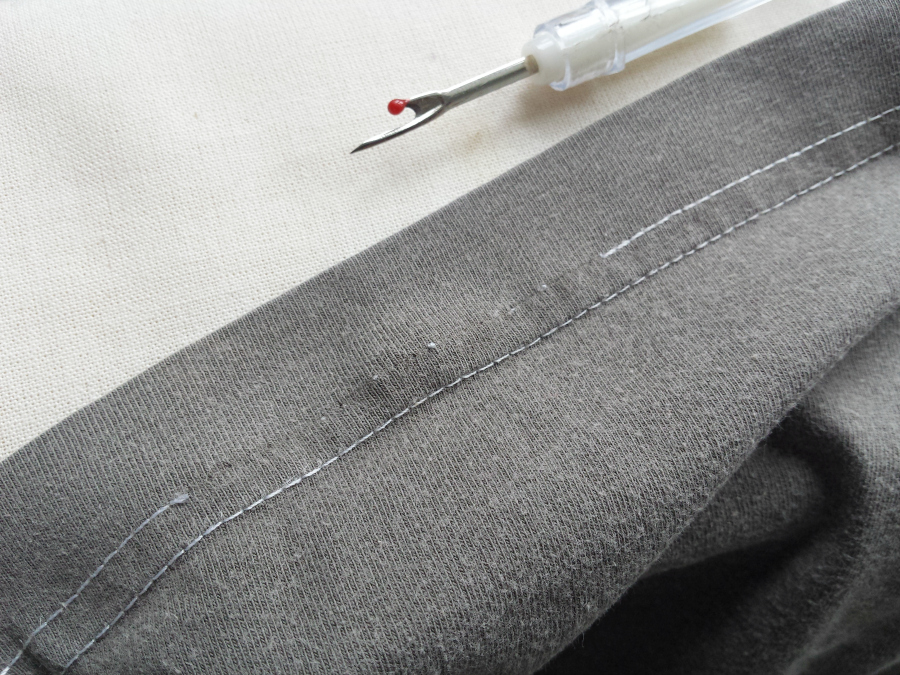
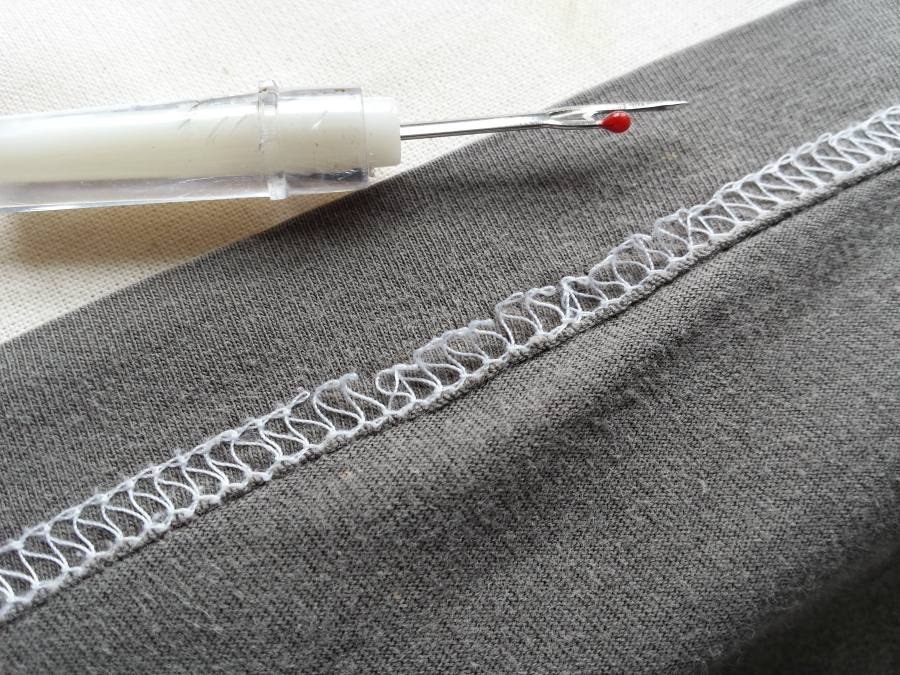
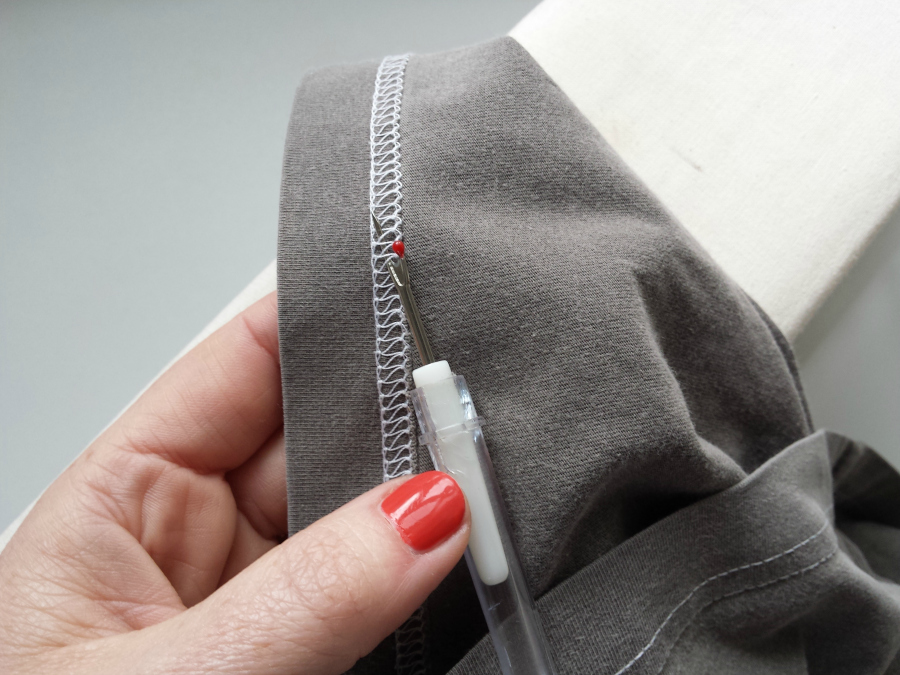
So I’m unpicking a serged hem here but the principles apply to a standard seam/hem too. There are your top stitches right there…

Seam rip like a pro at www.portialawrie.co.uk

And there are your bottom stitches…

Seam rip like a pro at www.portialawrie.co.uk

This is how I would have ripped out that stitching before my tutor showed me the light all those years ago! This is how I stitch rip everything these days..

Seam rip like a pro at www.portialawrie.co.uk

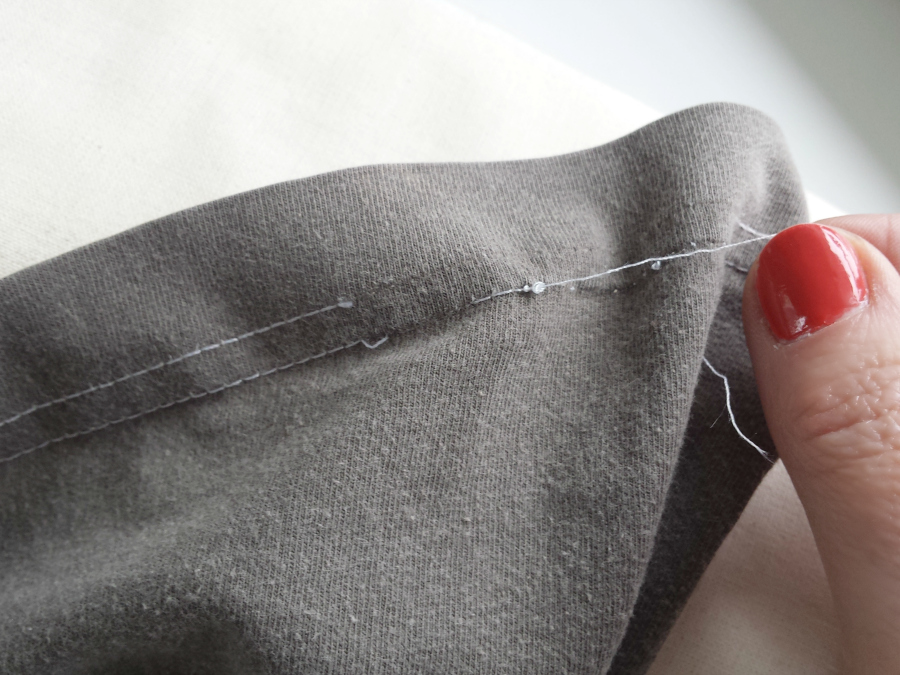
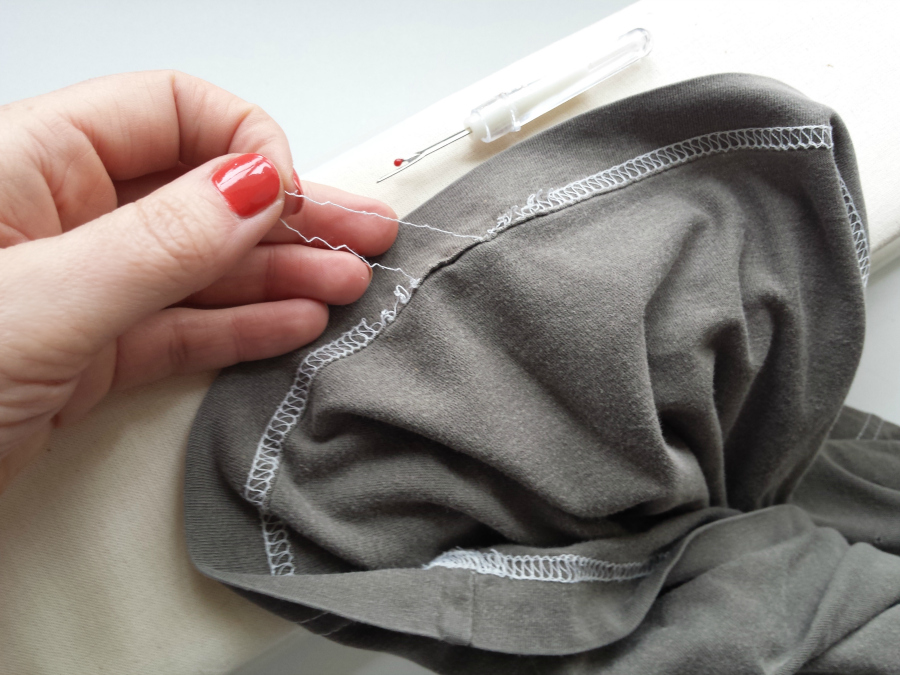
Depending on the fabric I work in 2-3″ sections at a time. I unpick from the top side, (ie the side that was uppermost when you stitched. Not the bobbin thread side) leaving a small tail at either end. No need to unpick all those stitches in the middle…

Seam rip like a pro at www.portialawrie.co.uk

Just pull it right out!

Seam rip like a pro at www.portialawrie.co.uk

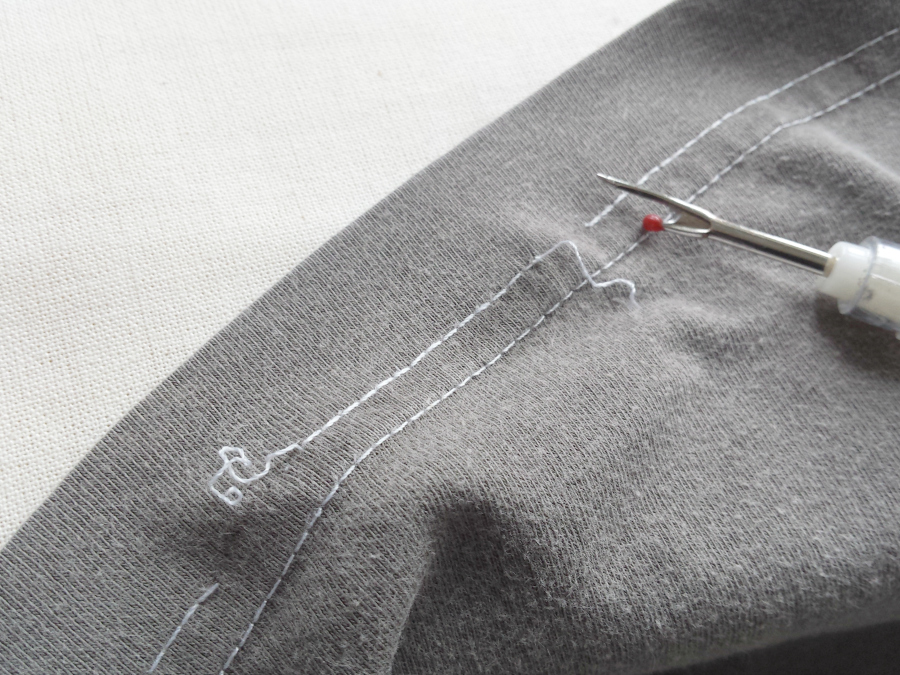
From the reverse? Pulling that section of topstitch out, releases the threads underneath. They’ve lost their anchor thread.  If you were ripping a standard seam you can skip the next 2 steps…

Seam rip like a pro at www.portialawrie.co.uk

Pull out the adjacent line of stitching as you did the first…

Seam rip like a pro at www.portialawrie.co.uk

and the rest of the thread on the underside is released…

Seam rip like a pro at www.portialawrie.co.uk

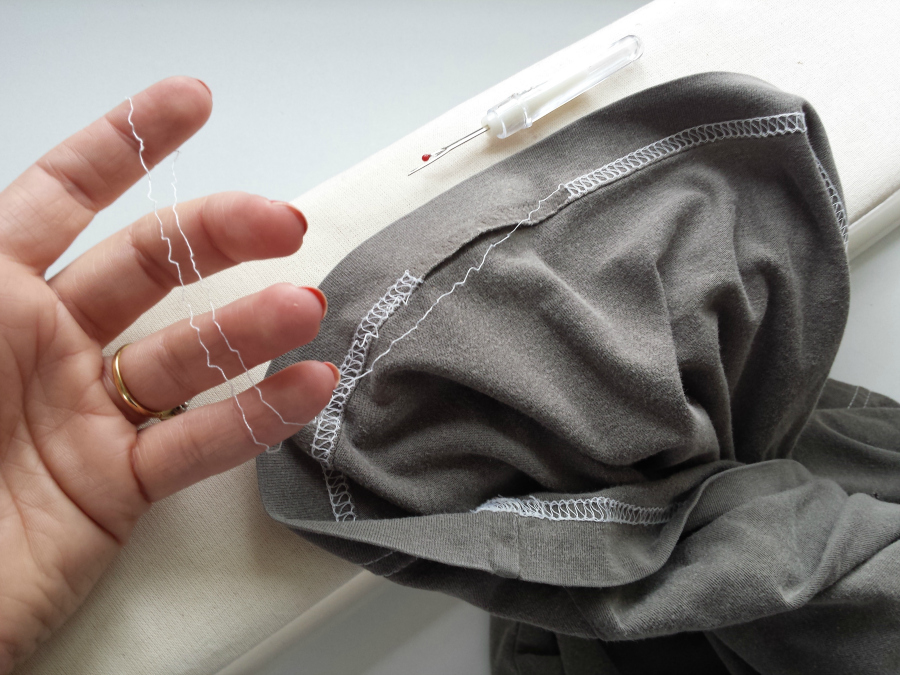
From that point you can then pull the underside thread loose in one…long….

Seam rip like a pro at www.portialawrie.co.uk

…continuous strip! No tiny thread pieces to hoover up.

This method works on serger and standard stitching.  But personally I think both methods have their place. Method 1 is quicker but has more thread bits to clear up and you potentially risk damaging finer fabric. But if you’re making a toile in calico then it’s perfect because you’re not going to worry too much about pulling every tiny bit of thread out, calico is sturdy, and speed is the factor on a test garment as opposed to what marks or threads are left behind. Conversely, Method 2 is undoubtedly a little slower. But it’s marginal. And there’s less tidying up to do afterwards and less strain on the fabric itself.

Like anything in life…it’s horses for courses!

What’s your preferred method for removing stitches or do you use both methods?

DIY, how to, Sewing, Tips and Tricks, Tutorials

DIY: Magnetic Pin Dish

04/22/15

Magnetic pin dish DIY at www.portialawrie.co.uk


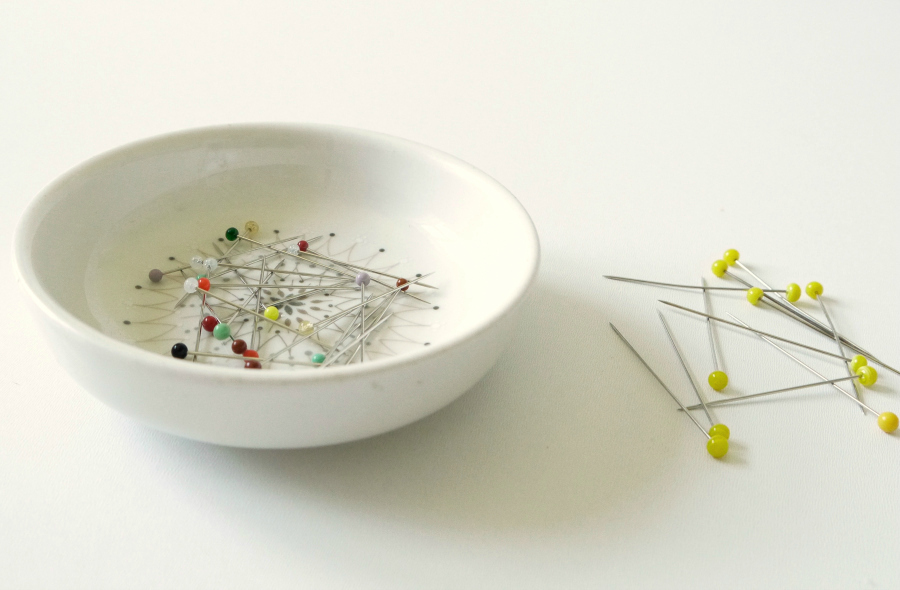
Spilled pins are just one of those little niggles we can all do without.  A simple fix is a magnetic pin dish. You can buy them. They’re not expensive. But then they’re not that pretty either. OR you can make your own. Well, naturally, you’d want something pretty and DIY’d right?


Magnetic pin dish DIY at www.portialawrie.co.uk

I have had my eye out for the perfect little dish for this for like, a year. Seriously! Why didn’t I just buy a magnetic pin dish? Cos I’m stubborn and I didn’t want a lump of plastic when I could have something pretty and vintage. So I waited. I knew I’d come across one eventually and today I did.  For the princely sum of 50p.  Isn’t it divine?! I already had the magnets from my clay fridge magnets diy and there’s always a tube of superglue in this house….


Magnetic pin dish DIY at www.portialawrie.co.uk

This dish had the perfect size recess in the base for the magnets….or these magnets are the perfect size for that recess…well, whichever way round it is….perfect fit.


Magnetic pin dish DIY at www.portialawrie.co.uk

No more spilt pins!


Magnetic pin dish DIY at www.portialawrie.co.uk

“But wait, what if you spill other pins that aren’t safely in the dish already ?!” I hear you ask! (Just play along. I know you didn’t say that. Just pretend you did, ok?)


Magnetic pin dish DIY at www.portialawrie.co.uk

Just a skim over your spillage with the base of your newly magnetised pin dish and jobs a goodun’.

BTW…if you plan on doing this, and the spacing/neatness of the magnets bothers you; glue one magnet at a time and leave about 30 seconds before you stick the next one. Until the glue is dry, the next magnet you place near it will automatically attract it towards it and they’ll naturally bunch together like that little trio at the back there.

Magnetic pin dish DIY at www.portialawrie.co.uk

I like my little pin dish. It’s coming in handy as I keep leaving my pincushion downstairs by the ironing board and then having to run back downstairs and get it when the pins are ready to come out again! So this is sitting by my sewing machine upstairs to collect the pins as they come out.

At the moment I sew upstairs behind the bedroom door, and iron downstairs on a counter top board. Any cutting out or pinning is done on my knees on the floor (and that’s starting to affect my knees and my back).  Truth be told I have to summon alot of motivation to sew at the moment and I don’t seem to get as much done either. Between being up and down the stairs every 5 minutes; and setting up and packing away either side of that, I’m lucky if I get 2 hours together to sew. All this since we moved in August and I left my beloved summerhouse behind. Sniff. But….happy days!!!! We have finally ordered my new summerhouse! Yay! It arrives in 4 weeks and this time it’s bigger than my last one AND double glazed! So my patience has it’s rewards. As the saying goes, “everything comes to she who waits”…..I  can’t wait!!!  Yippee!

What’s your sewing space situation? Is it a faff for you to set up and pack away each time? Can you not remember the last time you actually ate at your dining table? Or are you lucky enough to have your own sewing space??

DIY, how to, refashioning, Restyles, Tutorials

Refashion: Turn a Jumper into a Slouchy Boho Bag

04/15/15

Turn an unwanted jumper into a slouchy boho bag at www.portialawrie.co.uk

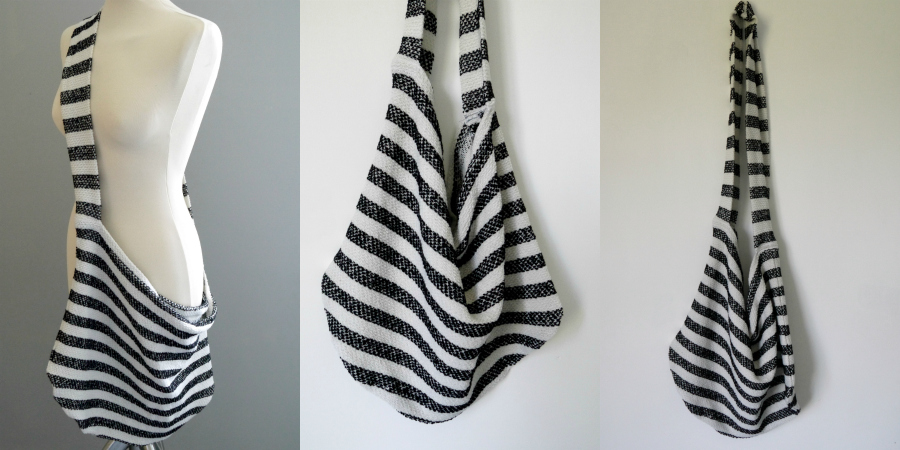
Another take on a sweater to bag refashion! This time, instead of a tote style bag, a cross body slouch boho style bag; and considering the sun we’ve had today, (Summer….is it really you?!) I can see this heading down the beach with me this weekend. So easy and quick. Want to make your own? Read on….

Turn an unwanted jumper into a slouchy boho bag at www.portialawrie.co.uk

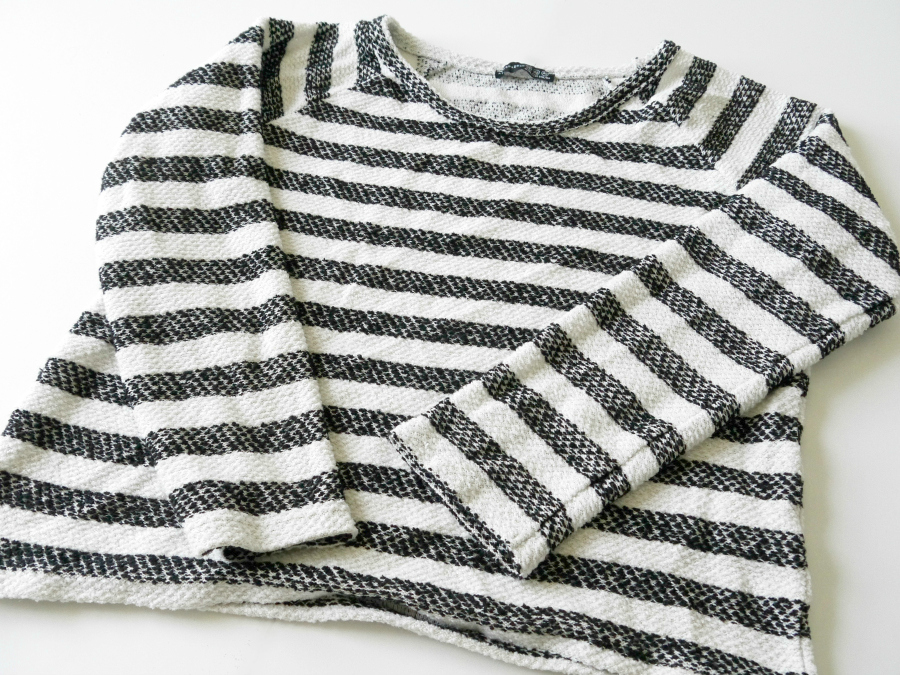
So another sweater that  has shrunk over time. But I really like the bold black and white stripe so it would be a shame not to reincarnate it in some way…

Turn an unwanted jumper into a slouchy boho bag at www.portialawrie.co.uk

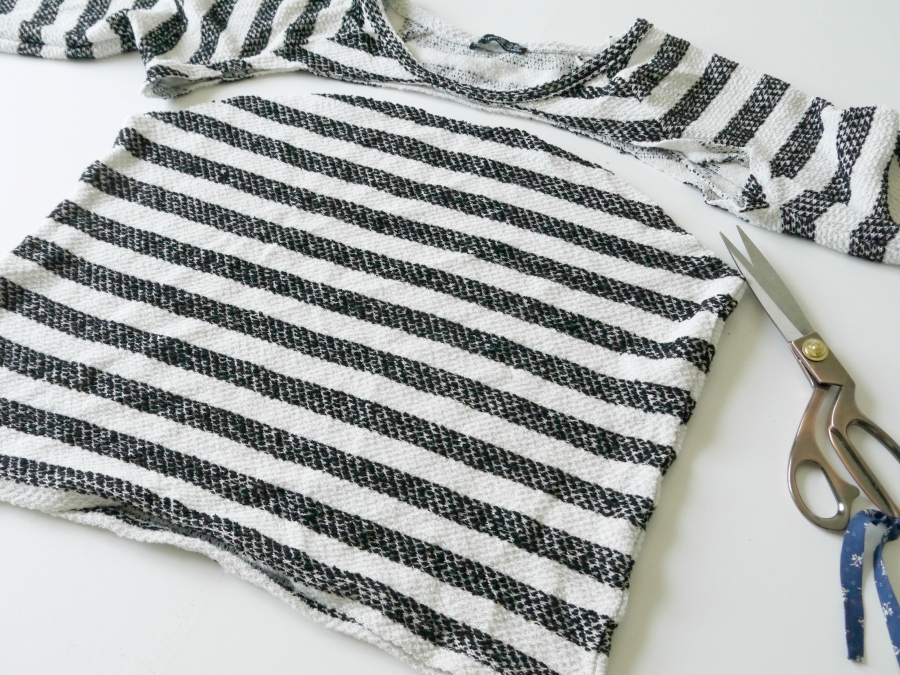
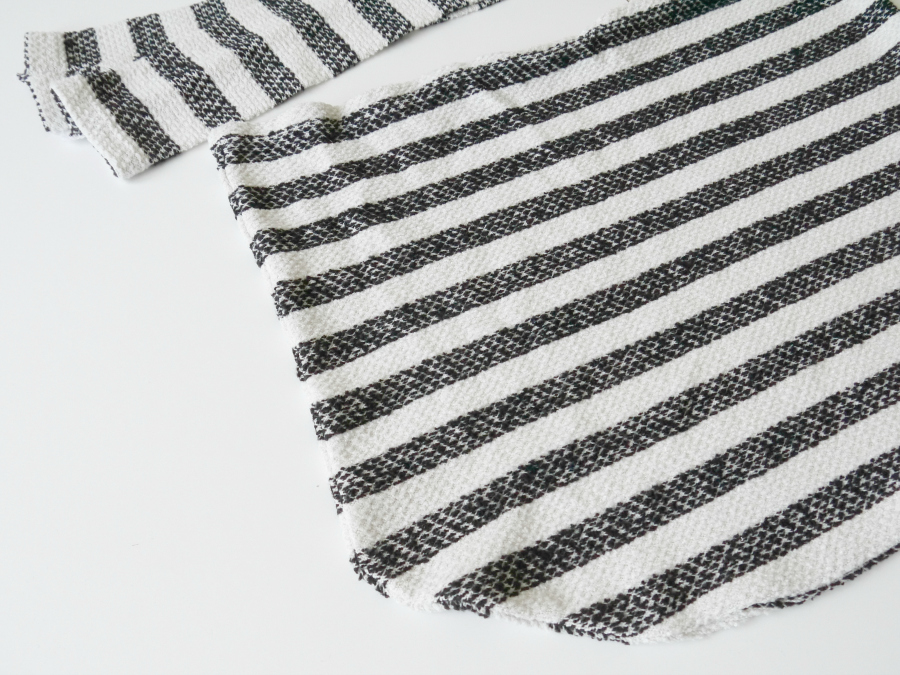
Cut an even curve from side seam to side seam, under the arms like so…

Turn an unwanted jumper into a slouchy boho bag at www.portialawrie.co.uk

Turn inside out, serge that curve closed, turn right side out and flip the other way up. Your old hem is now the top of your bag….the bottom is now serged closed.

Turn an unwanted jumper into a slouchy boho bag at www.portialawrie.co.uk

Separate/cut the sleeves from the rest of the sweater following the armhole curve and cutting straight across/at a 90 degree at the shoulder….

Turn an unwanted jumper into a slouchy boho bag at www.portialawrie.co.uk

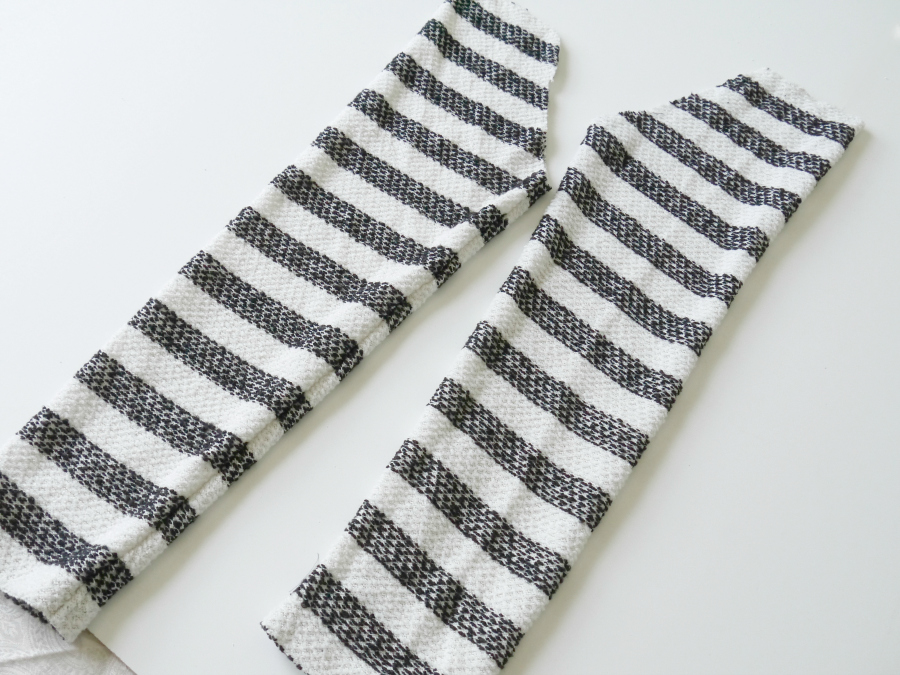
Cut the sleeves right open. Those two edges you see aligned in the pic are the shoulders. Align those RS together and serge/zig zag to join…

Turn an unwanted jumper into a slouchy boho bag at www.portialawrie.co.uk

Fold in half lengthways, RS together then trim away the excess as pictured so you have one looooong folded strip an even width all the way along…

Turn an unwanted jumper into a slouchy boho bag at www.portialawrie.co.uk

Serge/zigzag the long edge together. Turn RS out, press, and serge/zig zag the ends…

Turn an unwanted jumper into a slouchy boho bag at www.portialawrie.co.uk

Pin the strap in place either side of the inside of your bag. Secure with a couple of rows of zig zag stitch the entire width of the strap…

Turn an unwanted jumper into a slouchy boho bag at www.portialawrie.co.uk

Job’s a goodun’ and you’re ready for the beach, the farmers market, the coffee shop….wherever you want your sweater bag to take you!

DIY, home, how to, interiors, organising, repurposing, Upcycling

DIY: Clay Wrapped Pots

04/13/15

clay wrapped pots at www.portialawrie.co.uk

I love me a pot, jar, “caddy”. I like coralling things together and having little places for everything; keeps me CALM; and pots are perfect for that. If it can be a pretty pot, then I’m a very happy bunny indeed…

clay wrapped pots at www.portialawrie.co.uk

And these are pretty, non? My love affair with air dry clay continues and these pots are very much in keeping with the style of my torn clay bowls. In fact the process  is more or less identical….

clay wrapped pots at www.portialawrie.co.uk

Except for the “mold” of course. That is….these pots hold a sneaky secret!

clay wrapped pots at www.portialawrie.co.uk

Boring old food cans!

clay wrapped pots at www.portialawrie.co.uk

Cunningly disguised….

clay wrapped pots at www.portialawrie.co.uk

…and keeping me calm 😉
You don’t need a step by step tute for these, right? Good…because I fluffed the photography up so I don’t have one for you, lol.  Just follow the same steps as for the torn clay bowls but instead of draping it over a bowl, wrap it around a can and trim the base with a sharp knife. Wetting the surface of the clay before you wrap helps it stick to the can and itself once wrapped.

Simple as that!

Newer Posts
Older Posts
Portia
Follow
Sewbox

© Copyright 2026. Portia Lawrie. All Rights Reserved. Managed by WordPress Web Dev Cornwall .