• About
    • Contact
    • Press
    • Sponsor
  • DIY
    • Home & Garden
    • Jewellery & Accessories
    • Yarn Crafts
  • Sewing
    • patternless & self drafted
    • Refashions
    • Commercial Patterns
    • Sewing Tips
    • Overlockers
  • The Refashioners

Portia Lawrie

DIY, how to, Sewing, Sewing Basics, Tips and Tricks, Tutorials

How To: Make bias tape with a gadget

07/12/15

How to make bias tape with a gadget at www.portialawrie.co.uk

Bias tape has a multitude of uses. Fact. I LOVE bias tape! But store bought tape can have its limitations in terms of colour, quality and width. Once you’ve mastered making your own you can create bias tape quickly and easily to match perfectly with any project. Whether you use it as a binding, a facing, piping, whatever it is; custom made bias lends a touch of quality to your sewing in a way that it’s “off the peg” cousin can’t quite manage. There are a couple of methods that I use to make bias tape. This post covers using a shop bought bias maker. (I’ll cover the other in a separate post)

How to make bias tape with a gadget at www.portialawrie.co.uk

Start with a bias strip the right width for your bias maker. Bias strips should be twice the width that you want your finished bias tape to be. (Want an easy way to make bias strips? See here). With the strip RS down/WS facing up, insert one end of the strip into the widest end of the bias gadget ensuring the fabric strip is as central as possible…..

How to make bias tape with a gadget at www.portialawrie.co.uk

Gradually feed the fabric strip along . I find it helps to use something pointy to help it along…

How to make bias tape with a gadget at www.portialawrie.co.uk

Feed it through until juuuuust a teeny bit pops out the end of your bias maker

How to make bias tape with a gadget at www.portialawrie.co.uk

Press the tip of the strip as it pokes through…

How to make bias tape with a gadget at www.portialawrie.co.uk

Take hold of the handle of the gadget and gently slide it along the fabric strip about a centimetre at a time, pressing as you go

How to make bias tape with a gadget at www.portialawrie.co.uk

Keep going all the way to the end of the strip. Slide the gadget along the strip a centimetre then press. Slide it along another centimetre then press, and so on; until you’ve gone the length of your bias strip…

How to make bias tape with a gadget at www.portialawrie.co.uk

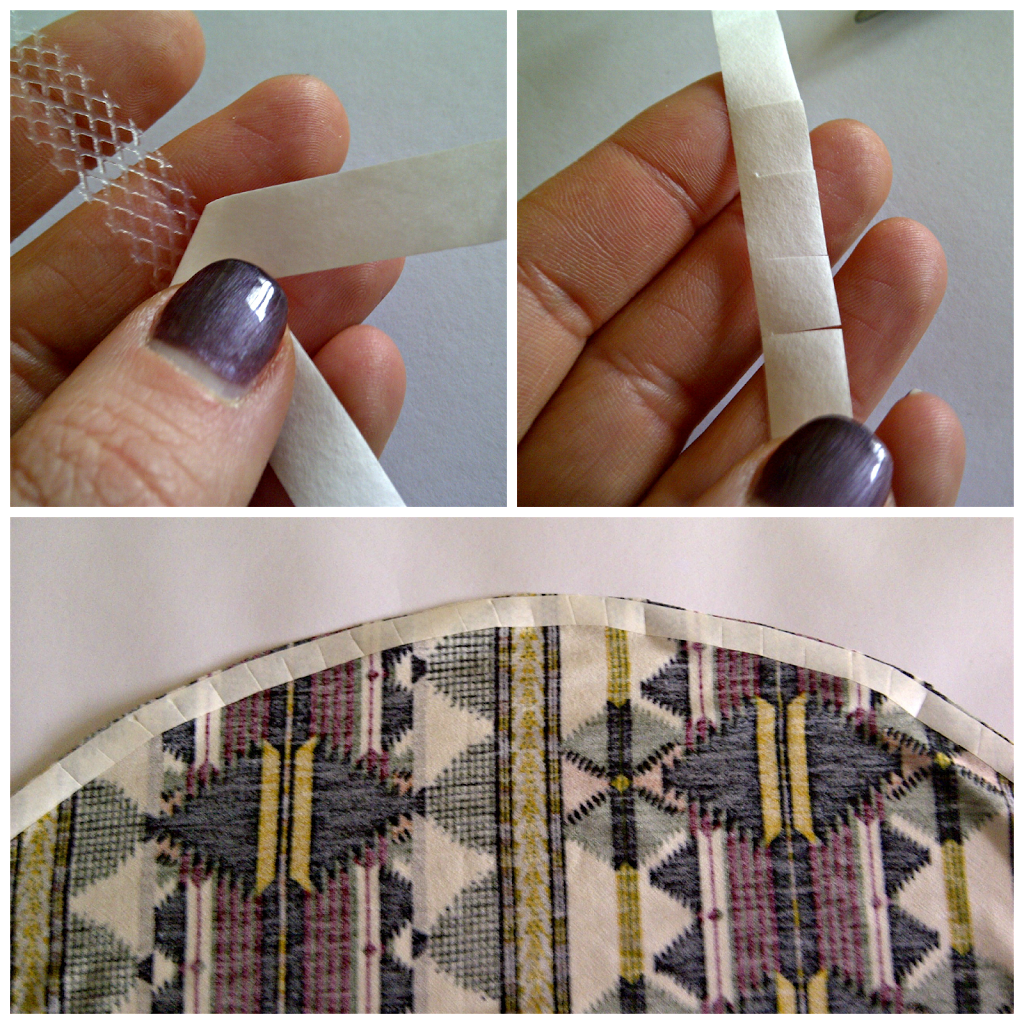
and there you have it…nice neat bias tape ready to use on your next sewing project 🙂


This tutorial first appeared as a guest post on Seams & Scissors. 

DIY, how to, overlocker, overlockers, serger, Sewing, Sewing Basics, Tips and Tricks, Tutorials, Uncategorized

Serger Series – Part 3: Nailing Tension

06/29/15

How to nail serger tension once and for all

Loopy stitching and puckered or curled fabric edges be gone! It’s time to nail the whole tension thing once and for all! The best way to diagnose a problem when it crops up is to understand the effect that the various tension settings have on the various threads that form your overlock stitch; and the best way to do THAT is to sew a sample swatch for each one.  Yes there are more fun things to be doing like actually making stuff! But this is a one time task which, once you’ve done it, will give you the means to diagnose problems, and put them right, quickly and easily without any of that “why the HELL is it doing that?!! kind of frustration. So that’s gotta be worth it, right?!! If nothing else it will save your loved ones from putting up with the “effiing & blinding/cussing” coming from your general direction (I KNOW that’s not just me!)

How to thread a serger at www.portialawrie.co.uk

So. First things first. You’ll need to thread each needle and looper with a different colour thread. (If you can match it to the colours in your threading diagram even better! Threading guide here if you need it)  This will aid in identifying which thread is doing what, the effect it has on other threads and generally help to differentiate.

How to nail serger tension once and for all

This is what the aim of the game is. One swatch for each needle and looper with each swatch containing samples of the stitch at each tension setting. At the end of which you’ll be able to mark the optimum tension settings (and ratios) for each thread. I’ll explain further along how this is useful as you might well be thinking that working out your tension on calico is pointless when you’re sewing predominantly with knits & possibly a whole variety of fabrics…but bear with me. It does make sense I promise!

How to nail serger tension once and for all

So for the swatches I used simple calico. Just because it’s plain, medium weight, I had some, and I could draw on it easily and permanently. If you have other fabric that fits that criteria, fab. Use it. You’ll also need a ruler, biro/pen and fabric scissors…

How to nail serger tension once and for all

Cut 4 strips about 8″ wide (one for each tension dial) and long enough to accommodate a 1.5″ section for each of your tension settings plus a header. So basically, my serger has tension settings from 1-9. So I divided each strip into 10  x  1.5″ sections.

How to nail serger tension once and for all

Fold/press in half along the length. Then at the top of each one write the name of the thread/section you are swatching (so…left needle, right needle, upper looper, lower looper) and the colour of the thread that you have used for that section. (I also added the number that corresponds to that section on my threading diagram. But this isn’t that necessary. Call it thoroughness overkill on my part!) Then write the numbers 1-9 down the left hand side of each strip….

So the process is the same for each swatch. Start with all dials at a medium setting of say 3 or 4. Something that you know will give you a basic overlock stitch without being ridiculously loose or tight. Just set them all the same. Then “swatch” each tension dial in turn as follows. Left Needle, Right Needle, Upper Looper, Lower Looper. (So basically left to right on your tension dials).

Starting with the left needle, set the tension dial to 1…How to nail serger tension once and for all

…then serge down the right hand side or your swatch fabric until your needles hit the line. Stop.

Move the tension dial to 2…How to nail serger tension once and for all

Serge until your needles hit the next line…How to nail serger tension once and for all

Stop.

How to nail serger tension once and for all

Set your tension dial to 3…

How to nail serger tension once and for all

Serge until your needles hit the next line and stop.

How to nail serger tension once and for all

I suspect you’re getting the gist now! Keep moving the tension dial up one increment at a time…

How to nail serger tension once and for all

…and sewing up to the next line…until you’ve swatched each tension setting on that dial. At that point, examine the stitch and mark the tension setting that gives you the best, most balanced stitch. (more detail on what constitutes a balanced stitch further down, so bear with. We’ll get to that part) Set the tension dial at that setting. Leave it there, and move on to the next tension dial and repeat the process for that one. once you’ve established the optimum setting for the second dial, set it to that, and move onto the third, then the fourth…

How to nail serger tension once and for all

So, by the time you’ve done all that you’ll end up with 4 of these! So, now what to do?

What these Swatches Tell You…

So how do swatches made on calico relate to sewing with knits? I might have gone to all this trouble to get a perfect stitch on a double thickness of calico, but the tensions will be completely different when I start sewing jersey, right? Welllll…yes…..and no! The numbers may be different but the basic concept of what these swatches tell me will be much the same, proportionately, whatever fabric I’m using. Firstly there’s the ratio/differential between each setting. From my swatches above you’ll see that  my “ratios” are 6-6- 4-3. (Don’t be surprised if this differs slightly from your manual’s recommended settings! Every machine is different.) So basically my needle tensions are the same as eachother, and my looper tensions are 2 and/or 3 notches lower than my needles. This rough relationship between the tension settings is my starting point with any other fabrics I now sew with. It’s a ratio that I now know, works. So when I sit down at my serger with a new piece of jersey, I might lower them all by half a notch, if my common sense tells me to do so, but generally my starting point is roughly the same.  It may be +/- half a notch or a notch, but in my experience (and I sew with mostly light or medium weight knits and wovens) there isn’t a dramatic deviation from those numbers or ratios even after I’ve done a test swatch on my fabric. Now, before I even start….I know I’m roughly in the right ball park!

The other thing these swatches tell you is why your overlock stitch or fabric is behaving in a particular way and allows you to identify where you might need to fine tune from your starting point. Take a look….

Left Needle  (Too Loose)

We’re looking at the BLUE thread here. (Ignore the rest) With the needle tension set really low, much as with a standard machine, the stitches will not sit flat on the surface of the fabric. You can see a little “daylight” between the stitches and the fabric here at the lowest setting. It’s not terrrrrrible but wait….How to nail serger tension once and for all

How to nail serger tension once and for allOn the reverse it’s waaaay more obvious that the tension on the blue thread is too low. See those little blue loops that gradually get smaller as you move from the left to the right of the image? IAs the tension increases the thread will sit more flush with the fabric. So if your left needle thread is looping at the back like that…increase the tension.

Left Needle  (Too Tight)

There’s alot more play and forgiveness in needle tension  than there is in looper tension in my experience. Especially at the upper/tighter end of the tension scale. The effect here isn’t quite as obvious on this calico as it might be on a fine tissue knit but at the highest tension setting (we’re still looking at the BLUE thread. Last segment. Left of the screen, numbered 9) you can see the fabric is starting to pucker ever so slightly…..How to nail serger tension once and for allHow to nail serger tension once and for all

Maybe more visible on the reverse….see that slight dimpling along the stitch line and the way the corner can’t lay flat? It’s all just a little bit “tense” isn’t it?! So any sign of puckering along the stitch line, lower your needle tension.

Right Needle  (Too Loose)

This time we’re looking at the CREAM thread and the right hand needle. As I said, both my needles are always set at the same tension and the effect that having the tension too low or too high is the same….How to nail serger tension once and for allHow to nail serger tension once and for all

Loopy means it’s too low. Increase the tension.

Right Needle (Too Tight)

This time, the blue thread has already been set to the right tension. We’re looking at the CREAM thread and on the highest setting it’s causing the same puckering that the blue thread did… look at the way the edge of the fabric on the far left is sliiiiightly wavy and not sitting flat….How to nail serger tension once and for all

How to nail serger tension once and for all

See the way the corner is lifting, the sliiight wave to the fabric edge and that slight dimpling along the stitch line again? Same as before….reduce the thread tension.

So to summarise…needle tensioning on a serger is pretty much the same as on a standard machine. Check the underside as well as the top. If it puckers it’s too tight. If it loops it’s too loose. adjust up or down accordingly. Simple!

The Loopers

The loopers is where the “balancing the stitch” part comes in. The upper and lower looper threads form loops that loop round eachother and cover the edge of the fabric. Hence the term loopers, I’m guessing! To get a “balanced stitch” you want the part where the upper and lower loopers link together, to sit right on the edge of the fabric. We’re almost at that part; but first lets look at the way incorrect tensioning affects the upper and lower loopers interact with eachother. They have a co-dependant relationship if you like! If one’s not quite right then the other can’t do it’s thang!

Upper Looper (too loose)

We’re looking at the GREY thread in this pic. Having the upper looper  tension too loose allows the loops to float over and under the edge of the fabric…How to nail serger tension once and for all

To put it another way, the loops of the upper looper (grey), should be exactly the same length as the loops of the lower looper (yellow) and meet eachother at the edge of the fabric. If your upper looper thread is passing over and under the edge of your fabric like this, but not causing it to curl….it’s too loose. Increase the tension on the upper looper.

Upper Looper (too tight)

At the other end of the scale if the upper looper tension thread is too tight, it will make the grey thread loops too short/tight and pull the lower looper thread (yellow) round from the other side and curl the edge of the fabric in the process….How to nail serger tension once and for allHow to nail serger tension once and for all

So if you have short loops on top pulling and curling the fabric around from underneath like this? Your upper looper tension is too tight.

Lower Looper (too loose)

We are looking at the YELLOW thread of my lower looper now. It’s the same interaction as before but the effect is reversed. If the lower looper tension is too loose, it allows the lower looper thread to float round to the top of the fabric rather than sit on the edge. You’ll notice this makes the grey upper looper threads too short in relation.How to nail serger tension once and for all

But there is no curl which means it’s a “looseness” problem rather than a “tightness” problem. Increase the lower looper tension.

Lower Looper (too tight)

With the lower looper tension set too tight the YELLOW thread (now no longer visible) is pulling the upper looper (grey) thread around and under and curling the fabric edge again, but this time it’s curling under….How to nail serger tension once and for all

Curling is sign that one oor other of your loopers is too tight. If it curls upwards it’s your upper looper. If it curls under, as it does here, it’s your lower looper. Lower the tension of the lower looper.

The “Perfectly” balanced stitch…

So this is what we’re aiming for. The holy grail of serging. The “perfectly” balanced stitch. Truthfully there’s no such thing as perfection, lol! But this is what to look for as you are deciding on the optimum setting for each swatch, and setting your tension for each new fabric.

Stitching lines (blue and cream thread) flat to fabric and not looping or causing puckers on either side. Upper Looper loops (grey thread) extend right to the edge of the fabric where they meet the Lower Looper loops (yellow thread) from the underside…How to nail serger tension once and for all

How to nail serger tension once and for all

The lower looper thread from the underside view. Neat little “Y” shapes with just the teeniest bit of the blue and cream needle threads visible from the other side. The yellow “Y”s (lower loops) extend right to the edge of the fabric where the meet the grey thread of the Upper Looper loops….

How to nail serger tension once and for all

….and finally that spot, right along the edge of the fabric (extremely tricky to photograph one handed!), but hopefully you can see both looper threads meeting and looping around eachother to enclose that raw edge. In essence, THAT is the perfectly balanced serger stitch.

The swatches give you a starting point at which you have a rough idea of the tension ratios of your machine. From there,  you can diagnose problems with any given fabric, by looking at how it (and the stitch) is behaving and comparing it to your swatches. He’s a few “rules of thumb” I’ve discovered since getting to know my serger this way.  In general if part of the stitch is loopy, then the tension is too loose.  Loopy = Loose. Get it?! The swatches will help you identify which part of the stitch you are looking at and adjust the relevant tension dial. If the fabric edge is curling then one of your loopers is too tight. If it curls upwards it’s your upper looper. If it curls downwards it’s your lower looper. If there’s puckering along the length, then needle tensions are likely too tight.

So, with serger swatches in hand, the next time you sit down at your machine, hopefully there will be less cussing, and more beautifully balanced stitches 🙂

Questions?? Feel free to leave them in the comments section and I’ll do my best to answer!

Serger Series: Part 1. Anatomy

Serger Series: Part 2. Threading

DIY, Dressmaking, how to, jersey, knits, overlocker, overlockers, serger, Sewing, Sewing Basics, sewing machines, Tips and Tricks, Tutorials, Uncategorized

Serger Series – Part 2: Threading

06/02/15

How to thread a serger at www.portialawrie.co.uk

And so we come to it. If you have been “dreading the threading” I promise it really isn’t as intimidating as it seems at first glance. With the exception of the lower looper, which is a teeny bit fiddly, the rest is super straightforward. I know I for one had built this up in my head to be super scary; (when I was doing my garment construction course I’d always wait until the thing was already threaded and then jump on. Managed to avoid threading an overlocker for my whole time there, lol!) and when I finally took the bull by the horns, I was all “oh!! is that it?!!” This is a long photo heavy post but don’t let that put you off. The process itself takes 5 minutes. I’ve just taken alot of pictures, ha ha! You can click on each image to open seperately and zoom in for more detail 😉

PREPARATIONHow to thread a serger at www.portialawrie.co.uk

You’ll need 4 cones of thread. Thread snips and tweezers. The hook nose tweezers are the most useful and if you’re a butter fingers like me then a second pair is handy too. The trickiest part about threading is accessing some of the teeny spaces where the thread has to run; but with tweezers…its a breeze. I’m using different colours here just for illustration purposes. It’s easier for you to follow the route of each thread that way.

How to thread a serger at www.portialawrie.co.uk

Every machine will come with a threading guide. Either on board like mine, or in the manual. Have it to hand. Note the numbers at the top of the diagram. That is the order in which you thread. So, upper looper (red), lower looper (yellow), right needle (green) and finally, left needle (blue). That’s the order we’re going in. (BTW, If you have a secondhand machine that didn’t come with a manual, or you lost yours, then they are often available for free online as PDF downloads. Check out Manual Owl as a good place to start).

How to thread a serger at www.portialawrie.co.uk

Start by turning all your tension dials to zero. This sets the tension discs inside at their most open position and helps ensure that the thread passes between them when you’re threading.

How to thread a serger at www.portialawrie.co.uk

Pull up the telescopic thread bar at the back….

FIRST STAGE (applies to all 4 thread cones)How to thread a serger at www.portialawrie.co.uk

Position your thread cone on the appropriate spool holder. (We’re starting with the upper looper). Pass the thread through the corresponding loop at the top of the thread bar…

How to thread a serger at www.portialawrie.co.uk

Hold the thread horizontally. The thread from the cone in your right hand and the loose end in your left and slide it up under that hook like part. Then take the loose end and run it in the channel that leads to the tension discs at the front. This part is easy to get the wrong way round which can lead to snapped threads.  Don’t want those!  This little wire thread guide has two upper loops at the top of it and the larger hook/loop that extends down. The thread runs from the thread bar above, under the right loop and the downwards hook/loop first and then runs over the top left loop and into the tension disc channel. Click the image to enlarge and zoom in.

UPPER LOOPER (red channel)How to thread a serger at www.portialawrie.co.uk

The thread then runs along that channel and round to the front where you run it between the two metal tension discs of the tension dial and down into the next part of the channel…

How to thread a serger at www.portialawrie.co.uk

…then snugs into another thread guide underneath…

How to thread a serger at www.portialawrie.co.uk

From there join the  red dots! Each thread position is indicated with a read dot and the thread is held there by a little hook that you pass the thread behind. Once you thread the final part of the upper looper (tweezers are useful there! Also, rotate the hand wheel at the side until the upper looper rotates into the most accessible position) the thread passes under the presser foot and off to the side.

How to thread a serger at www.portialawrie.co.uk

Upper looper done! See the red thread marked “1” on my threading diagram? That’s what we’ve just done. We’re now moving on to the lower looper. Marked “2” with the threading route indicated by the yellow thread. Note to the left of the main threading diagram there are two separate diagrams of the lower looper in close up. As I said, the lower looper is slightly trickier.  To the extent that it warrants it’s own diagram, lol! But fear not. It’s fiddly rather than complex.

UPPER LOOPER (yellow channel)How to thread a serger at www.portialawrie.co.uk

The steps up until this point are identical to the red upper looper. To recap: from the thread cones, through the thread bar and rear thread guides, between the tension discs and down into the thread guide underneath…

How to thread a serger at www.portialawrie.co.uk

Follow the yellow dots (in the same way as you did the red for the upper looper), until you get to this point. AKA the slightly trickier part; Rotate the handwheel again so that the lower looper is at its most accessible position, and grab the thread with those hook nose tweezers! In this pic I have hold of the thread with my tweezers and the lower looper, the bit we want to thread, is just behind my tweezers, and just in front of the upper looper. It’s the bit that looks a little like a tiny penknife blade running horizontally behind my tweezrs and it has a little threading hole in the end of it. We need to pass the thread behind it, then over the top of it…

How to thread a serger at www.portialawrie.co.uk

…and then pull the thread towards us until it slides and then slots into a little dip/crevace right on the “elbow” of the lower looper…

How to thread a serger at www.portialawrie.co.uk

Here it is zoomed in a bit. A little blurred (sorry, it was soooo tricky to photograph one handed!) but you can just make out the little nick in the elbow of the upper looper where the thread has to sit….it passes up behind the elbow, over the top and sits in that little cut out/nick….

How to thread a serger at www.portialawrie.co.uk

From there thread the pointy end, and making sure you don’t tangle it with the thread from the upper looper (which sits directly behind it) pass the tail end under the presser foot and off to the side (2 sets of tweezers come in handy here!). Exactly as you did for the upper looper…

How to thread a serger at www.portialawrie.co.uk

Another close up for you. That’s the trickiest part done!!

NEEDLE THREADING (blue and green channels)How to thread a serger at www.portialawrie.co.uk

This part is pretty much the same as a standard sewing machine except you need to do it twice! Start with the right hand needle (green channel). Threading process is exactly the same as the loopers up until the point it passes through the tension discs. Then it goes under a small thread guide, under a slightly larger thread guide and OVER the thread guide marked with the green dot…

How to thread a serger at www.portialawrie.co.uk

Then down to the needles. Right needle is marked A. Into the little pig tail curl …

How to thread a serger at www.portialawrie.co.uk

use tweezers to thread because the cutting blade gets in the way . Especially if you’re right handed…

How to thread a serger at www.portialawrie.co.uk

Then, as with the previous two thread tails; pass under the presser foot and off to the side…

How to thread a serger at www.portialawrie.co.uk

Lastly the left needle (blue channel). Same as the right needle except it only passes under the larger thread guide then OVER the thread guided indicated by the blue dot…

How to thread a serger at www.portialawrie.co.uk

thread and pass the thread tail under the presser foot and off to the side as before.  ****YOU’RE ALL DONE AND THREADED!!*** One last thing to do though. Chain off…

How to thread a serger at www.portialawrie.co.uk

Re-engage your tension discs by setting dials to 3…

How to thread a serger at www.portialawrie.co.uk

Plug in and switch on….

How to thread a serger at www.portialawrie.co.uk

Lower the presser foot and grab hold of your thread tails…

How to thread a serger at www.portialawrie.co.uk

Pull thread tails round to the back, engage the presser foot and serge of a little chain…

How to thread a serger at www.portialawrie.co.uk

Trim any excess and leave a 3″ tail.  All done!! Hope this was useful and that it helps at least someone out there realise that threading a serger is really not as terrible as it first appears. I know this is a photo heavy post which might make this artificially seem like a lengthy process . In reality it takes me 5 minutes, if that! Please please trust me. Try it. And you’ll see 🙂

You can view the first post in this series here.

Next up is tensioning and getting a nicely balanced stitch. I’ve discovered the COOLEST trick for that. Watch this space!

DIY, how to, Sewing, Sewing Basics, sewing patterns, Tips and Tricks, Tutorials

Top Tip: Foolproof notches…

06/26/13


I see alot of instructions out there that state “snip notches”. My dressmaking tutor however, always drummed it into us to cut our notches outward rather than inward, and as a result this is how I have always notched my pattern pieces. For two reasons really. Firstly, an outward notch like this is a more visible guide for lining things up than little snips in fabric that can sometimes be barely visible. Secondly, as someone who invariably has to adjust my seams to fit, notching outwards means I retain all of the seam allowance to play with. Whereas if I were to make a snip into the seam allowance to the depth of that little triangle, I’m reducing the “play” I have in my seam allowances by almost half. Here’s how…

Before cutting out each pattern piece, I use another pattern piece to trace the exact mirror image of my notches to create little diamond shapes…

On double notches like this, I’ll join the tips of the two diamonds to create a tab shape. The resulting pattern piece, once cut, has a completely accurate and very visible outward notch. Which makes the pattern pieces much easier to line up when assembling the garment AND, leaves me all of my seam allowance to play with when inevitable fitting issues arise!

Cutting these notches out can require some patient scissor skills! I employ the method below, making my cuts in the numerical order shown, to keep them nice and accurate and neat…

When I first started sewing I was always in a rush to get those pattern pieces cut out and get started! Fiddly preparations like this were an annoyance! I’ve learnt to my cost though, that the quality of my finished garments starts from the moment I crack open that pattern and start cutting. And actually, now, this meticulous prep has kind of become a bit of a therapeutic, zoning out, zen kind of relaxation! You’ll note also, that hole reinforcers have become my friends when marking and reinforcing my dots on pattern pieces!

How about you? Do you notch in or out? Or do you have any genius ways of marking your pattern pieces?
Please feel free to share!

DIY, refashioning, Restyles, Sewing, Sewing Basics, Tutorials

Refashion: Monochrome Maxi (inc Tutorial)

05/09/13

I’ve been wanting to try out a maxi skirt for a while. The really gathered ones just don’t suit me. Gathering around the waist in general is a no no for me. (I’m too straight up and down, so any gathering at the waist just makes my waist look thick).  But when I saw this slim fitting jersey maxi dress, I thought it would make a cute skirt….

Nothing really wrong with the dress. But another no no for me are racer backs. I need a bit of “soft scaffolding” to keep my “ladies” sitting where they ought to, and I have a thing about not having my bra straps on show. So I just chopped off the top section and added an elasticated waistband….

Now I know many of you won’t need the full deets on how to add an elasticated waistband, because, well, it’s one of the first and easiest things we learn. But I’m mindful too of the fact that I will occasionally play host to some readers just embarking on their sewing “journey” 😉 So I wanted to document  this process for my archives….because of it’s versatility it kinda HAS to be in there…just in case anyone ever needs it 🙂

Encased Elastic Waistband:

1. If like me, you’re refashioning a dress into a skirt, then start by cutting in a straight line, straight across, and remove the top portion.
2. Turn under and press a 5/8″ hem, (stitch if you like but not necessary) then turn over again, according to the width of your elastic (mine was 1.5″ wide) plus 2-3mm extra. Pin in place.
3. Stitch close to the inner edge, leaving approx 2″ open/unstitched.  I used a stretch stitch because I was working with jersey, If working with a woven fabric, a simple straight stitch will suffice.
4. Put your length of elastic around your waist. Stretch it around until it’s under tension and feels like it would hold your skirt up, but still feels comfortable. Holding it in place with one hand, use a pen to mark on both ends, where you want to join the elastic.

5. Attach a safety pin to one to one end of the elastic
6. Feed the safety pin through the gap you left in the waistband
7. Start feeding the elastic through
8. As you ruche the fabric and pull the elastic through, take care that the elastic doesn’t twist.

9. Keep feeding the elastic through until it comes out the same place you started. Again making sure you don’t twist it.
10. Line up the marks you made earlier
11. with the two ends of elastic overlapped, and the pen lines lined up, stitch and back stitch along these lines
12. Trim the excess elastic close to the stitching and then slip stitch or machine stitch that little opening closed; and it’s done 🙂

Such an easy waistband. Probably the easiest there is; and with so many different applications for all manner of garments whether woven or knit fabric.

Sewing, Sewing Basics, sewing patterns, Tips and Tricks

Top Tip: Reinforcing Pattern Markings

05/07/13

If you’ve got a pattern that you’ve used multiple times (we all have a favourite right?!), then you’ll know how battered those little pattern markings get after you’ve tailor tacked them a few times. Once they’ve been used a couple of times, those small holes can easily enlarge or tear and well, that’s just a pain in the rear! Here’s a handy way of making them more durable….

Simples!

hemming, jersey, knits, Sewing Basics, Tips and Tricks

Curved hem “cheat”!

03/11/13

It’s fair to say, I like me a curved hem. It’s also fair to say, I find them a buggar to sew. But last week my college tutor delved into the college stash and pulled out this hemming aid. (I was working on my Aztec top at the time) She had no idea what it was called, or where it had come from. All she knew is that it was bloody brilliant for hemming knits. She demonstrated it on a straight hem sample. Brilliant, I thought! And duly took some home with me to finish my top. Then, as I do alot, I made it slightly more complicated for myself, by deciding I wanted a high/low curved hem (my own worst enemy I am!). And therin lay the challenge that spawned one of my favourite things…..a eureka moment!

I think this stuff is akin to Steam a Seam. Karen goes into more detail here about the overall process of using it. But this “cheat” is primarily concerned with how you get the stuff to go around a curved hem; when it is essentially a straight strip of paper. Hmmmm……

Notching that’s how! After all, don’t we use notching on fabric seam allowances to achieve all those curved elements; like collars, sleeve seams etc. Stands to reason then, that to curve that straight strip of paper backed stuff, notching would do the trick, right? Right! So I notched the entire strip before pressing it to my hem edge. As I worked along the edge I used the notches to manipulate my strip to follow the curved edge of my hem. Worked like a dream! When it came to peeling the paper backing off, it was a bit fiddlier, as essentially I was adhering the strip to itself where the notches overlapped to create the curve. But this was seriously a minor detail. The paper backing still came off fine, just in 3 or 4 pieces rather than one smooth strip. It pressed over beautifully with none of those mini folds/pleats that I often have to fight with when sewing a curved hem. I applied the same technique to my curved neckline too, which was alot easier than facing it or applying binding.  Happy days!

Gonna try this on a woven fabric to see if it’s as effective there. If it is, then I can see this stuff becoming a staple in my sewing supplies. (I really ought to stop calling it “stuff” if we’re gonna have a long term relationship….;)

cuffs, DIY, refashioning, Sewing Basics, Tutorials

Adding a Simple Cuff to a Sleeve….

11/26/12

Firstly some apologies. This post was meant to go out over a week ago. But here at home we seem to have been visited by every bug going. The winter vomiting bug, flu and chest infections. All of which has meant a few weeks of broken sleep culminating in feeling like we’ve been hit by a train. I finally conceded defeat last week and got some antibiotics from the doctor. So apologies for the delay in posting this.
Secondly the quality of these photos isn’t great. The only windows in my summerhouse are north facing. So even in the summer natural light is at a premium. At this time of year? Well the graininess of these photos says it all! In addition to all that, there have been some developments on the TV front that have taken up some of my time. (More on that in another post!)
Anyhow, back to the business in hand! Simple and cute little turn up cuffs and how easy it is to do them. I used them on this refashioned top recently. It’s a technique that could be applied to an existing garment or one that you make from scratch; and is a neat little way of adding a bit of detail to a plain garment…

1. Begin by measuring the circumference of your sleeve. You can measure all the way round OR, if your sleeve is the same size front and back (as mine is), laid flat, measure seam to seam and then double the measurement. Then decide how wide you want your cuff to be.
2. Make a simple rectangular pattern piece as follows: Length =  Sleeve circumference + seam allowance on both sides. Width = Desired width of cuff x 2 + seam allowance on both edges.
3. Pin to fabric and cut out.
4. You’ll need 2 obviously!

5. Right sides together, sew the ends together to form a loop. Press seam allowances open, then trim excess seam allowance.
6. Fold in half along the length, wrong sides together and lining up the raw edges. Press.

7. With the garment inside out and lining up the seam of your cuff with the underarm seam of your sleeve; pin the raw edge of the cuff to the raw edge of your sleeve.
8. Stitch cuff to sleeve according to your seam allowance.
9. Turn cuff through to the right side of your garment and press. Understitch seam allowance to sleeve. Trim excess seam allowance away.
10. I used a zig zag stitch to understitch my seam allowance. Understitching and finishing off my raw edges in one go. Then “anchor” the cuff in place with a couple of strategic slip stitches. I place a couple of stitches on the underarm seam; and used a button to anchor the cuff in place on the top side.

If you are drafting your cuff pattern from an actual tissue pattern (as opposed to adding them to an existing garment) then simply measure the width of the front and back sleeve pieces and add these measurements together to get the length of your cuff pattern piece. No need to add seam allowance either side of the length, as this will have already been included in the measurements you took from your existing pattern. So there you have it. Simple and cute turn up cuffs. Easy peasy!

DIY, Sewing, Sewing Basics, Tips and Tricks

Nifty Tip – No Bias Maker? No Problem!

06/16/12

I’m working on a refashioning project at the moment and needed some slightly wider bias tape than my bias maker could make. Buggar I thought. I really didn’t want to waste time trapsing into town on the off chance that the meagre haberdashery section of our local hardware store might have a bias tape maker in the size I need, if at all. I was on a roll. I needed that bias tape NOW!! Then, somewhere from the dark recesses of my mind I remembered this little trick…..

I had to fold and press the first inch by hand (mind your fingers on that iron!) Then the pin acts as a makeshift guide, pinned snug to the width of the bias you are making. Then you pinch the sides of the bias strip together centrally just before the pin, just to keep things even and steady; pressing as you pull it through the other side.
I cannot take credit for this little stroke of genius. I read it somewhere, on someone’s blog (for the life of me I can’t find it again  now) about 2-3 years ago, and it’s been sat unnoticed in my memory banks until just the moment when I needed it, when it popped up with a cheery little “here I am!”. You gotta love how helpful the dark recesses of your mind can be!
Incidentally you can check out an easy way to make bias strips here; and if you think it was your blog/tutorial that provided me with this genius little trick, please do contact me so I can provide you with proper credit and a link 🙂

DIY, hemming, machine feet, narrow hemming foot, Sewing, Sewing Basics, Tips and Tricks, Tutorials

Using a Narrow Hemming Foot

06/08/12

The last couple of weeks I have had a baptism of fire in respect of narrow hemming. My inability to say no led me to agree to shorten a friend’s sister’s wedding dress for her to wear to someone elses wedding, without looking like the bride herself. (Are you keeping up?) The latter aspect was easily remedied by making a gathered chiffon cumberbund and matching flower corsage in vibrant shades of pink. Wedding appropriate but no longer “bridal”. The biggest hurdle for me was the hemming. Three layers each almost 3metres in circumference. Silk chiffon, silk satin, and a lining fabric from hell. Slippery as anything AND I’ve ended up with some of it welded to my ironing board cover! Aaaargh!

Anyhow, EVENTUALLY, after some practice scraps (and alot of swearing), I got there……

Ths is the machine foot concerned. A narrow hemming foot. (available in a few diffrent widths) It’s comprised of a narrow shaft with a guide”curl” of metal over the top. The idea being that as you feed the fabric through the curly bit guides it over and under the shaft where it is promptly stitched in place; creating a clean narrow (or baby) hem. After a bit of practice, it really does beat turning and stitching a hem yourself and as you’d imagine is much quicker…

Starting and finishing is the trickiest part. And I can’t say I’ve mastered either perfectly, but after digesting a few online tutorials, I opted to start off by turning and pinning the first inch by hand. Then edge stitching close to the innermost fold, as if this were a standard machine foot….

With the first inch sewn, and the needle in the down position, raise the foot and gently manouvre the raw edge of the fabric over and round the shaft like so…

Then lower the foot back down. The width of the “hem” as you feed it through the foot should sit within the “open” part of the foot. (There are grooves on both sides of mine to help with this but other models may differ.) Essentially the folded edge should not be allowed to slip under the the right side of the foot; and the raw edge should not be allowed to cover the left side of the foot. I found the only way to avoid this was to work steadily and carefully.  I worked my way along the hem about 2″ at a time. Finger folding the hem and gently holding it in place (being careful not the stretch the fabric as this can result in a “curly” hem) as I fed it through….

This is how it emerges on the other side as you feed it through. (Make sure you trim raw edges before starting. Can you see the loose threads poking through on the finished section here?)

Every fabric I tried this on reacted differently. Some I had to lift slightly and feed them down into the foot. Some I had to maintain a good tension on the fabric for it to work. Some I had to feed through from the front and gently pull through from behind at the same time. Basically, practice, practice, practice on scraps first. When all said and done though, a pleasing finish…..

So, lesson 1 learnt – How to use a narrow hemming foot. Lesson 2? When will I learn to say no to time consuming alterations for other people??!! Gah! Probably never, I’m such a sap!

NB: Thanks to A Perfect Nose for pointing me in the direction of this post which has ALOT of interesting points, and discussion and links in the comment section. Especially about tackling intersecting seams, which I neglected to mention. (essentially I treated these in the same way as starting off. Disengaing the hemming foot, turning under by hand, stitching as normal, then re-inserting the fabric into the hemming foot and continuing on.)  It seems I am not alone in finding this a tricky one to use. When I say practice, practice, practice, I exagerate not! I wish I had kept the practice scraps to show you how much I bodged it before I got anywhere near a decent result!

Older Posts
Portia
Follow
Sewbox

© Copyright 2026. Portia Lawrie. All Rights Reserved. Managed by WordPress Web Dev Cornwall .