• About
    • Contact
    • Press
    • Sponsor
  • DIY
    • Home & Garden
    • Jewellery & Accessories
    • Yarn Crafts
  • Sewing
    • patternless & self drafted
    • Refashions
    • Commercial Patterns
    • Sewing Tips
    • Overlockers
  • The Refashioners

Portia Lawrie

challenges, competitions, Dressmaking

Can a refashion win again??

01/04/18

Regular readers of this blog will know that last year, I won this….

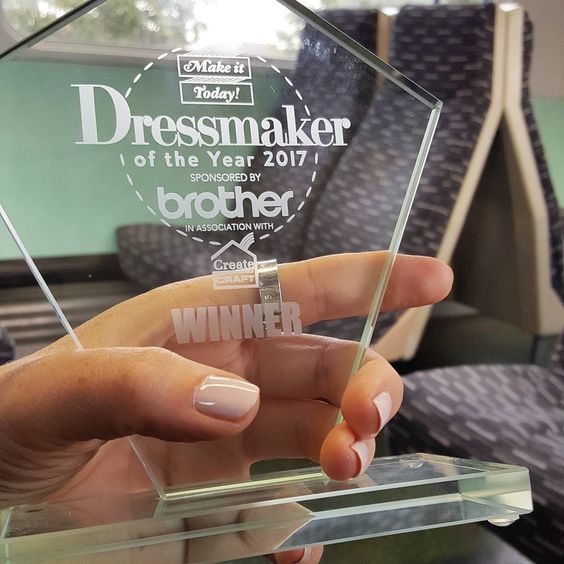
Yep. You’re looking at Dressmaker of the Year 2017. Mad! What makes me particularly proud is that the coat that won it was a refashion. Didn’t just win the upcycling category. It won the whole darn thing. Says something about how the perception of refashioning is changing dontcha think??

Well think of this as a call to arms my fellow refashioners! Once again the spotlight is up for grabs. Entries for Dressmaker of the Year 2018 are open now and until 19th March, including a category for refashionng (they call it upcycling. Semantics.) Now I happen to know there are some PHENOMENAL refashions out there from all of you who entered community challenges in the last few series of The Refashioners. Yes….past makes count , and you can enter as many different garments as you like. (Link to prizes, terms and how enter at the end of this post). So get entering those makes into this comp, and let’s show how awesome, creative and stylish refashioning can be!

dressmaker of the year 2018

I’m not allowed to enter this year. Sniff. Instead, they’ve asked me to come along and be on the judging panel for this years finalists! Eeep! So I shall be casting my eye over your fabulous entries along with some other names you may have heard of 😉 (I may potentially embarrass myself by fangirling Vicky Gill. )

dressmaker of the year 2018

There are 6 categories to enter. You can enter as many different garments as you like. (You don’t have to make something especially for the comp. It can be something you have already made and are particularly proud of INCLUDING your Refashioners makes don’t forget!)  Here is where to enter and the amazing prizes to be won. Good luck!!

dressmaker of the year 2018


Dressmaking, finished garments, Sewing

The Copycat Crepe Top – (Part 1) + Giveaway!!!

02/19/16

copycat crepe top

So last week heralded a couple of firsts for me.  Actually three to be precise! A week of learning new stuff you could say. Which after a week of battling with fit issues was a welcome change.  Sometimes, if something is getting on your wick, you just gotta park it and switch focus to shake off the fog I think. A change is as good as a rest after all. And after a week of what felt like pulling teeth, the week I spent doing this, went so smoothly I started looking around behind me to see where the sewing demon was hiding. Wondering when it was going to jump out and fluff my make right at the eleventh hour. Said demon must be off in the Bahamas somewhere. (Shedquarters is obviously too cold for that fiery little devil at this time of year 😉  )  Because nothing went wrong on this make and there was so much that could have!

So now you’re possibly wondering what my 3 firsts were? Well this top is actually a direct copy of a top I found in a charity shop. I didn’t like the colour and it was 1-2 sizes too big. But I really liked the style.  A crepe tee with a relaxed fit , simple scoop neck, and shirt tail hem.  I hadn’t seen a pattern exactly like this, so I decided to make a pattern of my own, copying the pattern pieces directly from that ready to wear top on the left (below)  I toiled it (middle below) and what do ya know? It worked.  But, still too big. Then people, I was really pushing my luck. I decided I would have a go at grading my new pattern to the correct size. And blow me, that only went and worked too! (below right)THE COPYCAT CREPE TOP

So that’s two firsts. Producing an exact copy of a rtw top AND grading. I was going to include all of that process in today’s post but there turned out to be waaaaay too much for one post. So next week I’ll be sharing 2 additional posts. One on the copying of the pattern. (now available here) One on the grading of it… (now available here)THE COPYCAT CREPE TOP

And what of my third first this week? Set in sleeves! Of course I’ve sewn set in sleeves before; but I hate them with a passion and I’m pretty rubbish and impatient with the traditional method. So this week I tried the method of inserting them flat (turns out pretty much everyone I know already does this) and oh my! I could have cried with happiness! Look at that sleeve head people! Gorgeous right?! Never again will I avoid sewing stuff with set in sleeves just because it’s a faff! (Yes I am that lazy!)sleeve head

There’s still a few tweaks I think I need to make to the final pattern. Namely some discreet darts in the front,  and, surprise surprise, a sway back adjustment! But on a top like this, designed to be a relaxed, chilled out fit I was more than happy to make it up as is, in some delicious Isobel poly viscose crepe from The Splendid Stitch. As well as the black it’s currently also available in the three colours on the right. (I’m hoping Amy will expand her colour range on this one!) The cream best shows the gorgeous texture. It is SO soft. Super easy to work with. Drapes beautifully and best of all, straight out of the machine and onto the hanger with super minimal creasing. That my friends, is my holy grail of a fabric!Splendid Stitch Isobel Poly Viscose Crepe


Giveaway details: Amy from The Splendid Stitch is offering you guys the chance to win either £30 to spend on fabric from her beautiful range (first prize) or a sewing pattern of your choice (second prize). To enter follow The Splendid Stitch on Facebook, Twitter, Instagram or their blog. Each follow is an additional entry. Just leave me a comment here to let me know how many entries you made. Giveaway is open internationally (The Splendid Stitch is Glasgow based but ships worldwide) and closes midnight GMT on Monday 29th Feb. The winner will be selected at random and contacted directly by email. (Leave that in the comments too if it’s not easily accessible via your profile).

What’s more,  until the end of February, Amy is also offering you an extra 15% off your purchase when you enter the code PORTIA15 at checkout! Thankyou very much Amy!

DIY, Dressmaking, fabric, finished garments, free pattern download, Freebies, grainline, hemlock tee, how to, knits, minerva, overlocker, serger, Sewing, sewing patterns, Tips and Tricks, tops, Tutorials, Uncategorized

Hemlock Tee: How to Sew a Deconstructed Jersey Neckline Finish

07/24/15

Not really a secret that I love the Hemlock Tee pattern from Grainline Studio. If you follow me on Instagram you’ll have seen a few of these pop up recently that haven’t yet been blogged. One you will have seen in my previous post. This one is just a simple grey jersey…DECONSTRUCTED JERSEY NECKLINE FINISH

This would not be particularly noteworthy apart from the fact I wanted to let you know this jersey from Minerva Crafts is frikkin gorgeous! So soft. So drapey. Not too flimsy. Need more in my life!

I also wanted to share my favourite jersey neckline finish of the moment! I’m not a massive fan of conventional ribbed neck bands . I like my tees to look a little more deconstructed and I really like the raw edge of jersey fabric. The way it curls  when you stretch it! But obviously  a neckline still needs some stability. So recently I’ve been opting for this neckline finish…DECONSTRUCTED JERSEY NECKLINE FINISH

It’s applied in exactly the same way as the pattern describes, with one exception. Instead of the folded edge of the neck band edging your neckline…you flip the band the other way round before applying it,  and have the raw edge exposed instead!

Here’s a quick step by step. If you’ve never applied a jersey neckband before you may also find this useful as it covers the whole process…at least this is how I do it!DECONSTRUCTED JERSEY NECKLINE FINISH

Take your neckband pattern piece and press it with some spray starch (helps stop the edges curling too much as you work); sew together the ends to form a loop then fold in half.

DECONSTRUCTED JERSEY NECKLINE FINISH

Taking the join as your centre back marker, mark your centre front point using a pin. Do this by folding the band in half with the join smack band in the middle. Mark the CF point with a pin on the opposite side.

DECONSTRUCTED JERSEY NECKLINE FINISH

Mark the sides with of the neckband with a pin too..

Have your tee right side out…DECONSTRUCTED JERSEY NECKLINE FINISH

Pin the CF of your neckband to the CF of your neckline. I’m going for that raw edge finish on mine remember. So I’m lining up the folded edge of my neckband with the raw edge of my neckline. If you want the clean/folded edge finish to your neckline, then line up the raw edges of your neck band with the raw edge of your neckline. Savvy?

DECONSTRUCTED JERSEY NECKLINE FINISH

Pin the sides of your neck band to your shoulder seams and the CB of your neck band to the  CB of your neckline. So your neckband is now pinned at both shoulders seams, the BB, and the CF of the right side of your neckline.

DECONSTRUCTED JERSEY NECKLINE FINISH

Serge to join. I work in 1/4 sections at a time. ie from pin to pin. Hold the layers of fabric under just enough tension for the neckband to match the length of the neckline. It will be drafted ever so slightly smaller than the neckline circumference which enables it to naturally want to turn to the inside .  So pull on it juuuust enough as it runs through the serger, but be careful not to stretch it out.

DECONSTRUCTED JERSEY NECKLINE FINISH

Press! Seam allowance/serged edge downwards…

DECONSTRUCTED JERSEY NECKLINE FINISH

Top/Edge stitch around the neckline to secure the seam allowance. So you now have a finished neckline with a raw edge detail (or if you attached the band the other way, a finished neckline with a clean folded edge!). If you want it a bit narrower you can start with a narrower band in the first place OR trim it down at this stage….

DECONSTRUCTED JERSEY NECKLINE FINISH

Make a notch/snip to the depth you want…

DECONSTRUCTED JERSEY NECKLINE FINISH

And trim!

DECONSTRUCTED JERSEY NECKLINE FINISH

I went even narrower on this one and part of me wishes I’d  restrained myself a little, lol! After laundering, the edges will soften, and depending on how long you’ve left them, (ahem) curl a little too.

You might ask what the point is in lining up the folded edge of the band with the raw edge of the neckline in the first place. You could just attach the band as normal, trim, and you still end up with a raw edge. I just prefer to do it this way because I find it easier to line up a folded edge with one raw edge, than it is to align 3 raw edges; and I find the inside finish cleaner this way too. Either way would work and it’s one of those cases of personal preference.

I’ve done a variation with a twist  of this on the hemlock in my previous post. The one I’ve yet to blog about! Then there’s one more that I’ve made; (and two more that I’m about to make). Plus my first stab at Suzy Pants and 3 completed Maya variations that are also unblogged!

I literally have too many blog posts to squeeze in before the launch of The Refashioners 2015.

Oh yeah, and I ought to refashion a shirt too, gasp!!

DIY, Dressmaking, how to, jersey, knits, overlocker, overlockers, serger, Sewing, Sewing Basics, sewing machines, Tips and Tricks, Tutorials, Uncategorized

Serger Series – Part 2: Threading

06/02/15

How to thread a serger at www.portialawrie.co.uk

And so we come to it. If you have been “dreading the threading” I promise it really isn’t as intimidating as it seems at first glance. With the exception of the lower looper, which is a teeny bit fiddly, the rest is super straightforward. I know I for one had built this up in my head to be super scary; (when I was doing my garment construction course I’d always wait until the thing was already threaded and then jump on. Managed to avoid threading an overlocker for my whole time there, lol!) and when I finally took the bull by the horns, I was all “oh!! is that it?!!” This is a long photo heavy post but don’t let that put you off. The process itself takes 5 minutes. I’ve just taken alot of pictures, ha ha! You can click on each image to open seperately and zoom in for more detail 😉

PREPARATIONHow to thread a serger at www.portialawrie.co.uk

You’ll need 4 cones of thread. Thread snips and tweezers. The hook nose tweezers are the most useful and if you’re a butter fingers like me then a second pair is handy too. The trickiest part about threading is accessing some of the teeny spaces where the thread has to run; but with tweezers…its a breeze. I’m using different colours here just for illustration purposes. It’s easier for you to follow the route of each thread that way.

How to thread a serger at www.portialawrie.co.uk

Every machine will come with a threading guide. Either on board like mine, or in the manual. Have it to hand. Note the numbers at the top of the diagram. That is the order in which you thread. So, upper looper (red), lower looper (yellow), right needle (green) and finally, left needle (blue). That’s the order we’re going in. (BTW, If you have a secondhand machine that didn’t come with a manual, or you lost yours, then they are often available for free online as PDF downloads. Check out Manual Owl as a good place to start).

How to thread a serger at www.portialawrie.co.uk

Start by turning all your tension dials to zero. This sets the tension discs inside at their most open position and helps ensure that the thread passes between them when you’re threading.

How to thread a serger at www.portialawrie.co.uk

Pull up the telescopic thread bar at the back….

FIRST STAGE (applies to all 4 thread cones)How to thread a serger at www.portialawrie.co.uk

Position your thread cone on the appropriate spool holder. (We’re starting with the upper looper). Pass the thread through the corresponding loop at the top of the thread bar…

How to thread a serger at www.portialawrie.co.uk

Hold the thread horizontally. The thread from the cone in your right hand and the loose end in your left and slide it up under that hook like part. Then take the loose end and run it in the channel that leads to the tension discs at the front. This part is easy to get the wrong way round which can lead to snapped threads.  Don’t want those!  This little wire thread guide has two upper loops at the top of it and the larger hook/loop that extends down. The thread runs from the thread bar above, under the right loop and the downwards hook/loop first and then runs over the top left loop and into the tension disc channel. Click the image to enlarge and zoom in.

UPPER LOOPER (red channel)How to thread a serger at www.portialawrie.co.uk

The thread then runs along that channel and round to the front where you run it between the two metal tension discs of the tension dial and down into the next part of the channel…

How to thread a serger at www.portialawrie.co.uk

…then snugs into another thread guide underneath…

How to thread a serger at www.portialawrie.co.uk

From there join the  red dots! Each thread position is indicated with a read dot and the thread is held there by a little hook that you pass the thread behind. Once you thread the final part of the upper looper (tweezers are useful there! Also, rotate the hand wheel at the side until the upper looper rotates into the most accessible position) the thread passes under the presser foot and off to the side.

How to thread a serger at www.portialawrie.co.uk

Upper looper done! See the red thread marked “1” on my threading diagram? That’s what we’ve just done. We’re now moving on to the lower looper. Marked “2” with the threading route indicated by the yellow thread. Note to the left of the main threading diagram there are two separate diagrams of the lower looper in close up. As I said, the lower looper is slightly trickier.  To the extent that it warrants it’s own diagram, lol! But fear not. It’s fiddly rather than complex.

UPPER LOOPER (yellow channel)How to thread a serger at www.portialawrie.co.uk

The steps up until this point are identical to the red upper looper. To recap: from the thread cones, through the thread bar and rear thread guides, between the tension discs and down into the thread guide underneath…

How to thread a serger at www.portialawrie.co.uk

Follow the yellow dots (in the same way as you did the red for the upper looper), until you get to this point. AKA the slightly trickier part; Rotate the handwheel again so that the lower looper is at its most accessible position, and grab the thread with those hook nose tweezers! In this pic I have hold of the thread with my tweezers and the lower looper, the bit we want to thread, is just behind my tweezers, and just in front of the upper looper. It’s the bit that looks a little like a tiny penknife blade running horizontally behind my tweezrs and it has a little threading hole in the end of it. We need to pass the thread behind it, then over the top of it…

How to thread a serger at www.portialawrie.co.uk

…and then pull the thread towards us until it slides and then slots into a little dip/crevace right on the “elbow” of the lower looper…

How to thread a serger at www.portialawrie.co.uk

Here it is zoomed in a bit. A little blurred (sorry, it was soooo tricky to photograph one handed!) but you can just make out the little nick in the elbow of the upper looper where the thread has to sit….it passes up behind the elbow, over the top and sits in that little cut out/nick….

How to thread a serger at www.portialawrie.co.uk

From there thread the pointy end, and making sure you don’t tangle it with the thread from the upper looper (which sits directly behind it) pass the tail end under the presser foot and off to the side (2 sets of tweezers come in handy here!). Exactly as you did for the upper looper…

How to thread a serger at www.portialawrie.co.uk

Another close up for you. That’s the trickiest part done!!

NEEDLE THREADING (blue and green channels)How to thread a serger at www.portialawrie.co.uk

This part is pretty much the same as a standard sewing machine except you need to do it twice! Start with the right hand needle (green channel). Threading process is exactly the same as the loopers up until the point it passes through the tension discs. Then it goes under a small thread guide, under a slightly larger thread guide and OVER the thread guide marked with the green dot…

How to thread a serger at www.portialawrie.co.uk

Then down to the needles. Right needle is marked A. Into the little pig tail curl …

How to thread a serger at www.portialawrie.co.uk

use tweezers to thread because the cutting blade gets in the way . Especially if you’re right handed…

How to thread a serger at www.portialawrie.co.uk

Then, as with the previous two thread tails; pass under the presser foot and off to the side…

How to thread a serger at www.portialawrie.co.uk

Lastly the left needle (blue channel). Same as the right needle except it only passes under the larger thread guide then OVER the thread guided indicated by the blue dot…

How to thread a serger at www.portialawrie.co.uk

thread and pass the thread tail under the presser foot and off to the side as before.  ****YOU’RE ALL DONE AND THREADED!!*** One last thing to do though. Chain off…

How to thread a serger at www.portialawrie.co.uk

Re-engage your tension discs by setting dials to 3…

How to thread a serger at www.portialawrie.co.uk

Plug in and switch on….

How to thread a serger at www.portialawrie.co.uk

Lower the presser foot and grab hold of your thread tails…

How to thread a serger at www.portialawrie.co.uk

Pull thread tails round to the back, engage the presser foot and serge of a little chain…

How to thread a serger at www.portialawrie.co.uk

Trim any excess and leave a 3″ tail.  All done!! Hope this was useful and that it helps at least someone out there realise that threading a serger is really not as terrible as it first appears. I know this is a photo heavy post which might make this artificially seem like a lengthy process . In reality it takes me 5 minutes, if that! Please please trust me. Try it. And you’ll see 🙂

You can view the first post in this series here.

Next up is tensioning and getting a nicely balanced stitch. I’ve discovered the COOLEST trick for that. Watch this space!

Dressmaking, finished garments, marilla walker, pdf patterns, Sewing, sewing patterns, tops

FO: Maya Top by Marilla Walker

04/21/15

Marilla Walker Maya Top at www.portialawrie.co.uk

This top has been sat unfinished for about 3 months. Seriously. I am a serial UFO’er.  All it needed was the neckline facing and the sleeves hemming. I love the fabric and the style is right up my strata so why oh why have I taken this long to finish it? Simple answer is, there is no answer. Apart from I need to give myself a slap! I LOVE this top.  The curved hem, the boat neck the kimono sleeve. I mean if ever a pattern was made for me this is it…


The fabric is an ebay purchase at £4.95 a metre. (You may recognise it from my banded tee) It has a veeeeery subtle metallic element to the lighter part of the weave. Nothing flashy. Like you could hardly notice if I hadn’t told you and you were standing right next to me. That kinda subtle. The overall effect is like a luxe tie dye if that makes any sense whatsoever?? I have no idea what the fabric content is and sadly the seller has run out, but hey ho, I like!

Marilla Walker Maya Top at www.portialawrie.co.uk

It’s not complex. But it is versatile. The pattern comes in two lengths (a dress and a top) with button through and hem variations and I’m already planning some customisations as this is the perfect basic to have a play with.


In terms of sizing it’s pretty spot on. What I would add is there is not a great deal of play with the size of the armhole. It’s snug. So if you’re cutting a smaller size than you normally would for some reason, blend it back up to your usual size at the sleeves.

PicMonkey Collage

You can introduce yourself to Marilla here (she’s lovely. Say Hi) if you haven’t discovered her yet, be sure to check out her blog!

DIY, Dressmaking, fabric, jersey, knits, minerva, self drafted, Sewing, Tips and Tricks, Tutorials

Asymmetric Pleated Tunic

03/12/15

DIY Asymmetric Gathered Tunic at www.portialawrie.co.uk

This mustard knit has been sat in my stash since a few months before we moved last year. I recovered it from storage last week. It is soooooo stretchy and since I didn’t have the right colour cones for my overlocker, I opted to sew this on my standard machine. One word. Aaaargh! But hey…with the aid of a walking foot and a bit of coaxing I got there. The finish isn’t perfect. But in truth this is very much a toile/prototype of an idea I wanted to try out. So in the context of that…I’m content.

Content enough to want to share, because I think in principle, this idea works.  The concept is essentially an easy way to give a shapeless garment definition through simple gathering. So I started by making a shapeless garment! Two simple rectangles sewn together across the top and sides with holes left open for the head and the arms. Not dissimilar to my pashmina refashion…but with less chalking (!) and plenty of width to play with…literally two rectangles…then neckline and armholes finished then hemmed…

DIY Asymmetric Gathered Tunic at www.portialawrie.co.uk

Then I simply pinched out pleats, gathering the excess fabric into one point. Eventually settling on four pleats set off centre just on the lower bust curve. The problem I sometimes have with overly loose tops is that, because I have a largish bust, they have a tendency to hang from the bust point, disguising any shape below the bust and well…just looking a bit “tenty”. Once I’d settled on my arrangement of pleats I simply hand stitched them in place. It provides juuuust enough shaping whilst still allowing me to indulge my love of loose tops!

I could see this being useful for refashioning oversized tops and shirts…..don’t be surprised if you see this technique pop up again basically!

DIY, Dressmaking, how to, repurposing, Sewing, Tutorials, Upcycling

DIY: GIANT PYRAMID PINCUSHION

03/10/15

Make a giant pyramid pincushion from denim scraps at www.portialawrie.co.uk

This is a project that is long overdue for me!  I’ve been working with a teeny pincushion for several years  and I’ve been hankering after something more substantial for a while now. I use several different types of pins depending on the fabric I’m sewing and my teeny pumpkin cushion just wasn’t cutting the mustard anymore….they wouldn’t all fit for a start, and I’d end up trying to fish out my fine steel pins from between the big round heads of my quilting pins. Annoying!


Make a giant pyramid pincushion from denim scraps at www.portialawrie.co.uk

You’ll need old jeans, rice,  and ultra fine wire wool. I’d read somewhere that stuffing your pincushion with wire wool helps keep your pins sharp. The rice serves a dual purpose. It weights the pincushion down. But I was also concerned about the steel wool “rusting” over time. Rust is caused by metal + moisture. Rice absorbs moisture. So hopefully it will help keep the rust away!


Make a giant pyramid pincushion from denim scraps at www.portialawrie.co.uk

Cut a rectangle twice as long as it is wide. Mine was 14″ x 7″. Cut a strip of fabric 1″ x 7″ for the tab. I zig zagged the edges of my tab strip to prevent fraying. Fray check or clear nail polish would also do. I didn’t want to rouleau it as I wanted a kind of scrappy denim effect but you could, if you wanted a cleaner finish…


Make a giant pyramid pincushion from denim scraps at www.portialawrie.co.uk

Fold the tab strip end to end and stitch at a 45 degree angle to one corner or your rectangle…


Make a giant pyramid pincushion from denim scraps at www.portialawrie.co.uk

Fold in half and stitch as shown. Along the top edge, then down the side, leaving about 3″ in the middle of that side seam for turning.  Leave the bottom edge open. (Folded edge is on the right. I triple stitched all seams for strength). Trim all edges. Clip corners.


Make a giant pyramid pincushion from denim scraps at www.portialawrie.co.uk

Now with that open bottom edge…close and stitch it so the bottom seam is at a 90 degree angle to the top edge (this creates the pyramid. You see what was the side seam with the opening, is now in the centre of the bottom edge)…


Make a giant pyramid pincushion from denim scraps at www.portialawrie.co.uk

Turn through to the right side. Pyramid!


Make a giant pyramid pincushion from denim scraps at www.portialawrie.co.uk

Put a generous amount of rice in for weight (I used half a cereal bowl for mine)


Make a giant pyramid pincushion from denim scraps at www.portialawrie.co.uk

Then stuff with the finest grade wire wool you can get. Don’t get the coarse stuff…it’ll just make it lumpy! If it does get a bit lumpy, us a little wadding around the inside. Slip stitch the opening closed once it’s plump enough. (It needs to be pretty solid)


Make a giant pyramid pincushion from denim scraps at www.portialawrie.co.uk

And there you go! Giant pyramid pincushion. Those yellow pins are quilting ones. Then I have glass headed standard pins and fine steel ones. Because my pyramid has 3 sides, (excluding the base. Obvs we all know a pyramid has 4 sides!) each type of pin has it’s own little place. So not only is there now room for them all, I don’t get them mixed up. One less thing to bug me!


Make a giant pyramid pincushion from denim scraps at www.portialawrie.co.uk

Oh and to give you an idea of scale!

Dressmaking, Pattern Drafting, Sewing, Tips and Tricks

top tip: budget friendly pattern weights

03/06/15

Pattern weights are awesome. Fact. They’re quicker than pinning and they don’t tear your tissue patterns or leave pin holes in delicate fabrics. (They’re especially useful for tracing patterns).  My jaw nearly hit the floor when I saw what Dritz were charging for 4 pattern weights on Amazon recently. £30+ !!! Seriously Dritz! WTF!?

These are my pattern weights…

Pattern Weights

I’ve used them for several years and they cost me a big fat £0. They are lead curtain weights, also known as penny weights (they’re actually the size of a 2p piece so I presume the reference relates to the OLD penny). They cost me nothing because I harvested them from the hems of some old curtains that I was using for another project. That said, they’re pretty inexpensive to buy. (Seriously Dritz?! £30 for pattern weights??)

Pattern Weights

I wanted some larger pattern weights so I’ve also ordered some giant washers from Amazon. (Couldn’t get ’em locally sadly). Also super cheap.  I guess the moral is, most particularly if you’re new to sewing, don’t be fooled by all the tools and gadgets that manufacturers dangle in front of you to tempt you to part with your cash. They’re almost always a cheaper alternative! MUCH cheaper (Dritz, I’m looking at you. Yes you! ).

More or less anything with a smooth flat base will do as a pattern weight.  (I’m secretly considering these gorgeous slate pieces) Experienced sewers…what do you use as pattern weights?

Dressmaking, hemlock tee, refashioning, Sewing, Thrifting

Refashion: Polka Dot skirt to Tee

04/21/14

Simple gathered skirts are a great source of fabric for refashioning…

Once you remove the waistband lay the fabric flat, just look how much there is to play with…essentially a very wide tube of fabric…

To create this top I simply folded the tube in half…

When I have a slippery fabric like this (a very light drapey polycotton) I sometimes find it tricky to get a double fold. The under layer will slip and slide and flop about. To overcome this I fold over my metre rule which acts to butt the underneath fold right up against the outer fold. Then I gently slide the metre rule out again and place my pattern pretty sharpish, before the fold slips again!

I used the hemlock tee as a base pattern…

and extended the shoulder line to create a grown on sleeve. Exactly as I did here….and here…

cut out….

Pinned…

and sewed along the shoulder and side seams…

I hemmed the sleeves, bias faced the neckline and the hem is original to the skirt (so no sewing required there). I incorporated a couple of side slits in the hem for comfort and ease and I was done 🙂

Even though I’m not a skirt wearer, I’ll always check out the skirt rail in a charity shop. Look for simple skirts gathered into a simple waistband, in a fabric and print you love, and turn it into a cool and comfortable summer top 🙂


Dressmaking, finished garments, grainline, hemlock tee, knits, Sewing, tops

FO: Hemlock Tee (& a haircut!)

09/09/13

So, the mission for some new tops for Autumn has begun in earnest. I’ve made 4 so far in the past week. First up is this version of Grainline’s Hemlock Tee. This is a heavyweight jersey. Not quite a sweatshirt. I guess you could say somewhere between a jersey and a ponte. So it’s toasty warm 🙂 I picked this length of fabric up from a charity shop for a mere £1 so it’s a super cheap and super quick make too.

Oh, yeah, and I had all my hair lopped off too. Bit of a spur of the moment thing. I spent the night before my appointment pinning hairstyles on Pinterest. Heck I just felt like a change and blow drying that bob everyday was becoming a faff. (Especially now my mornings involve a proper school run). Still getting used to it and can’t stop fiddling with it for the moment. It’s only been 2 days. You’ll probably notice the stark contrast in colour too. I haven’t coloured my hair for a few months over the summer (just no point!). So all the colour has been sun bleached  out and this is the nearest I’ve been to my natural colour for some years (ahem, grey included! You can’t see it in these pics, but it’s there!)….

Anway, back to the Hemlock Tee. Seriously, what’s not to love about this pattern?! It’s quick, easy, FREE, and it chimes perfectly with my hankering for some slouchy, comfy tops for Autumn. In fact, if you saw my previous post you may have noticed it is almost identical to one of the inspiration pics I posted there…

I made some slight changes. I omitted the neckline band the pattern calls for and simply rolled the neckline under and narrow hemmed it. (Same with the hem and cuffs) I cut the ubiquitous high low hem, and added a patch pocket. I don’t have an overlocker so the whole thing was sewn on my standard sewing machine. As this fabric doesn’t fray there was no need for me to finish the raw edges. (I was going for quick rather than thorough 😉 Similarly, this is quite a stable knit; so neither did I have to employ any special stitches. I used a standard straight stitch on all seams and hems; and simply held the fabric under a small amount of tension (in other words I stretched it slightly) as it fed through my machine, and that seems to have done the job beautifully!

I spent so long avoiding knits.  (Probably because my first attempt to sew jersey on my machine involved a cheap low quality jersey and a hungry feed dog….)
I thought they were preserve of sergers, but apparently not! Yes a serger provides a better finish, but I think as long as you choose a relatively stable, good quality jersey, they’re not the “be all and end all” of sewing with knits by any means…


Older Posts
Portia
Follow
Sewbox

© Copyright 2026. Portia Lawrie. All Rights Reserved. Managed by WordPress Web Dev Cornwall .