• About
    • Contact
    • Press
    • Sponsor
  • DIY
    • Home & Garden
    • Jewellery & Accessories
    • Yarn Crafts
  • Sewing
    • patternless & self drafted
    • Refashions
    • Commercial Patterns
    • Sewing Tips
    • Overlockers
  • The Refashioners

Portia Lawrie

DIY, how to, overlocker, overlockers, Sewing, Tips and Tricks, Tutorials

Overlocker Tips: Sewing a Knit Neckline

11/23/16

OK, so another overlocker quickie today. If you’re not new to overlockers, then look away now, because you’ll already know this. But if you are sewing your first steps on an overlocker, after sewing side seams, this is the next thing you are going to want to know. Adding a neckline band…how to sew a knit neckline

(Actually this technique can be applied at the cuffs and hem too, as an alternative to straightforward hemming. Only difference there, is that the edges are straight and not curved and the band you are applying doesn’t necessarily need to be that much shorter than the edge you are applying it to. But that’s another post! )

And before anyone asks, because yes, this fabric is awesome, it’s from here 😉

Back to necklines. A neckline band is simply a long strip of fabric, sewn together (at the short ends with RS together) to form a loop, then folded in half (WS together with raw edges aligned)….how to sew a knit neckline

The total circumference of the neckband should generally be 2-3″ shorter than the circumference of the neckline you are applying it to. (This can be dependant on the amount of stretch in your fabric, but in most cases 2-3″ gets you there. I have an in depth post on that coming soonish). The band is cut shorter,then the stretch inherent in the knit fabric is used to ease it onto the neckline. Once attached, it will ping back to it’s original size and in the process it will pull the neckline inwards slightly; and this action is what allows the neckband to sit flat against the body. Make sense?

With the neckband sewn in a loop and folded over, mark the CB (the seam on your band), CF, and sides with pins. (Essentially 4 equally spaced pins dividing your neckband into quarters). On your neckline mark the CB and CF with pins…how to sew a knit neckline


With your garment right side out, we are pinning the band to the neckline with raw edges aligned. We are pinning at 4 points initially. Pin the CB and CF of your band to the CB and CF of your neckline. Then pin the sides of your band, to the shoulder seams points of your neckline…how to sew a knit neckline


Between those four points you have pinned,  the neckline will be longer than the band as pictured below. Obviously, because we cut the neckband shorter…how to sew a knit neckline


By stretching the neckband we can get it to “temporarily” be the same length as the neckline…how to sew a knit neckline


Work your way around each quarter section of the neckband, (the gaps between each of the original four pins) stretching it to fit the neckline and pinning in place as you go. Pin perpendicular to the raw edge (vertically) as pictured.how to sew a knit neckline


There it is all pinned in place. Don’t worry that the neckline looks longer and wavy still. We sort that out at the machine…how to sew a knit neckline

When you serge around this seam, you will need to stretch the neck band again. So you are holding the whole thing at tension, (so the neckband and neckline sit flat and flush against eachother) as it passes under the presser foot. (Remove the pins as you go! )

It helps to orientate the garment so that when you sew, the neckline (which is slightly longer) is facing the feed dogs, and the neckband is on top. In the same way as a sewing machine will feed the bottom layer of fabric ever so slightly quicker, so does a serger. Not massively. But it helps. ( You can also engage the differential feed on your serger to aid this process. But that’s another post.  Stretching the neckband manually like this works just fine!)how to sew a knit neckline

When serging “in the round” like this, just before your needles reach the point where you started, manouver the edge of your seam to the inside of the blade. So you continue sewing but are no longer cutting. (You don’t want to cut the overlock stitches you have already sewn). Continue sewing about 1″ past your starting point, so you have a double section of overlock stitch. (It’s a bit like the equivalent of a backstitch on a standard machine without the going backwards part! You’re securing the first part of your stitching by going over it again). At this point, stop sewing, lift your presser foot, then serge off a chain long enough to tie off.  (See previous post on finishing off your thread tails).

Et voila. A neckline to be proud of!how to sew a knit neckline

Thing with an overlocker is, it’s more noisy than it is actual scary. Just like your standard machine, it will only go as fast as you stamp on the foot pedal. Don’t stamp on the foot pedal is what I meant to say! Go gently, and you’ll be fine. And in no time at all you’ll be wondering what all the fuss (and fear) was about and you’ll be whizzing through necklines lighting fast. (Oh and at this stage above, you would press the seam to the inside and topstitch down using your standard machine. I’ve pressed but not topstitched here because my Janome HATES knits. So I’m on the hunt for an alternative to replace her. Any suggestions welcomed. If your standard machine sews knits like a dream, I wanna know!)

DIY, how to, overlocker, overlockers, serger, Sewing, Tutorials, Uncategorized

Overlocker tips: Burying thread tails

11/07/16

I have a few overlocker related posts in the works. Burbling away in the background. One in particular is quite exciting to the geek in me. And if you follow me on Instagram you may already know what that one will be about 😉

I’ve noticed a few “new overlockers” popping up on my feeds courtesy of another Lidl/Aldi deal. And because I have a few knit projects going on I thought it would be perfect timing to take a few pics as I go of the various little techniques involved in using an overlocker, for those of you who are new to this magnificent piece of kit. Be sure to check out these posts too if you’re a little nervous of your “beast”, and you’ll have it tamed in no time. But trust me, (because I’ve been there) it is very much worth your time, getting to know your machine properly at the start. You’ll feel so much more at ease when you come to sew a garment that you care about getting right, with fabric you care about not wasting, if you take a little time before hand to get to know, and have a play with your machine on scraps/samples first. And these posts (covering anatomy, threading, and tension settings) should give you a good jumping off point.  Just click on the image to view each post….

Anatomy of a serger/overlocker How to thread your serger/overlocker Establish the correct tension settings for your serger/overlocker

But in the meantime I thought I’d share a finishing tip for thread tails. Just as with sewing a standard seam, you’ll have thread tails to secure and finish. Firstly, there is no backstitch option on an overlocker obvs. So I always knot to secure, close to the stitching…burying-overlocker-threads-1


Thread the tail onto a yarn needle…burying-overlocker-threads-1burying-overlocker-threads-1


Pass the needle through the looper threads for about 2 inches…burying-overlocker-threads-1burying-overlocker-threads-1


Then pull the complete tail all the way through…burying-overlocker-threads-1burying-overlocker-threads-1

….and snip the excess close to the stitching.

how to bury overlocker thread

That’s it. Thread tails neatly buried 🙂 For an even neater finish you can pass the tail/needle under the threads right on the edge of the fabric (where the upper and lower looper threads meet & wrap round eachother) & inbetween the two layers of fabric of the overlocked edge. So they are sandwiched and invisible. I do that when I’m feeling particularly conscientious 😉  This piece is a neckband. If I’d buried the tails on the reverse of this, then it would be invisible on the finished garment once the seam is pressed to the inside and topstitched down. Depends on how neat you want to be of course. If you’re anything like me that’s often mood related, lol! Whatever you do though, this has got to be better than a dangly tail!


DIY, how to, overlocker, overlockers, serger, Sewing, Tips and Tricks, Tutorials

Top Tip: Transfer thread from large cones to small spools

01/06/16

how to decant thread from an overlocker cone to standard spools (1)

Picture the scene. It was New Years Day. (Happy 2016 everyone!) A rare opportunity over the holidays to duck into Shedquarters and sneak some sewing in. All ready to rock and roll and then……aaargh! Not enough thread spools in the right colour for my overlocker!

I can be a bit blasé about gathering supplies/notions for a project. I’ve developed quite a stash and kinda just assumed I would have enough standard spools in the general vicinity of this colour to cobble together a workable overlock stitch. (‘cos I use this colour all the time! Not! Doh!). But no. I had one cone in the colour I needed. Loads of it. But all on one cone. Hmmmm….how to decant thread from an overlocker cone to standard spools (9)

But as always with me, necessity is the mother of invention. Some of my favourite ideas emerge when I’m facing a (probably self imposed) hurdle and am scratching my head trying to figure out a work around. Plus, since this little solution means you need only buy one cone of overlocker thread (in that obscure colour that you need but will never use up in a million years) this one saves money and what better way to start off a cash strapped January than with a money saving hack right?how to decant thread from an overlocker cone to standard spools (2)

If you’re like me and hold on to empty thread spools because they are “bound to come in handy for something” at some point; then this would be the moment you are vindicated in your hoardiness! You’ll need 4 empty thread spools (These guttermann ones are particulary perfect as explained in a moment). Some double sided sticky tape. A spare bobbin from your sewing machine. how to decant thread from an overlocker cone to standard spools (3)

Stick a piece of the tape on the flat end of the thread spool….

Remove the backing and firmly press your empty bobbin on top,,,how to decant thread from an overlocker cone to standard spools (4)

how to decant thread from an overlocker cone to standard spools (5)

Pop the thread cone in a mug/cup in front of your standard sewing machine.  We are essentially going to treat the empty spool as a bobbin. Which is why I said these particular thread spools are quite useful. On the opposite end of the spool to where you stuck the bobbin, there are holes that you can use in the same way as the hole you would normally use in the top of the bobbin. Pop your thread through one of those holes just as you would on a bobbin…how to decant thread from an overlocker cone to standard spools (6)

Then attach the whole assembly to the bobbin winder on your standard machine just as if you were going to wind a normal bobbin…how to decant thread from an overlocker cone to standard spools (7)

Then start winding! Hold the thread at slight tension with your hands and feed it onto the thread spool in an even manner by gently moving the thread up and down as it winds so that it distributes along the full length of the spool in an even manner. how to decant thread from an overlocker cone to standard spools

And that’s that! Repeat for all the other spools, using the same bobbin. It’s removable because you only used double sided tape. But you may not want to use it in your sewing machine after due to a sticky residue. So I’ve just set mine aside and reserved it for this purpose; because I am so going to want to do this again at some point!how to decant thread from an overlocker cone to standard spools

There are other methods out there for doing this but this one suits me because it’s simple, quick and straightforward. The main morals of this story?

  • Don’t throw away empty spools!
  • Standard spools do work on an overlocker
  • If you HAVE to buy a overlocker thread in an obscure colour that you’ll only use once…just buy ONE and do this!
DIY, how to, overlocker, overlockers, serger, Sewing, Sewing Basics, Tips and Tricks, Tutorials, Uncategorized

Serger Series – Part 3: Nailing Tension

06/29/15

How to nail serger tension once and for all

Loopy stitching and puckered or curled fabric edges be gone! It’s time to nail the whole tension thing once and for all! The best way to diagnose a problem when it crops up is to understand the effect that the various tension settings have on the various threads that form your overlock stitch; and the best way to do THAT is to sew a sample swatch for each one.  Yes there are more fun things to be doing like actually making stuff! But this is a one time task which, once you’ve done it, will give you the means to diagnose problems, and put them right, quickly and easily without any of that “why the HELL is it doing that?!! kind of frustration. So that’s gotta be worth it, right?!! If nothing else it will save your loved ones from putting up with the “effiing & blinding/cussing” coming from your general direction (I KNOW that’s not just me!)

How to thread a serger at www.portialawrie.co.uk

So. First things first. You’ll need to thread each needle and looper with a different colour thread. (If you can match it to the colours in your threading diagram even better! Threading guide here if you need it)  This will aid in identifying which thread is doing what, the effect it has on other threads and generally help to differentiate.

How to nail serger tension once and for all

This is what the aim of the game is. One swatch for each needle and looper with each swatch containing samples of the stitch at each tension setting. At the end of which you’ll be able to mark the optimum tension settings (and ratios) for each thread. I’ll explain further along how this is useful as you might well be thinking that working out your tension on calico is pointless when you’re sewing predominantly with knits & possibly a whole variety of fabrics…but bear with me. It does make sense I promise!

How to nail serger tension once and for all

So for the swatches I used simple calico. Just because it’s plain, medium weight, I had some, and I could draw on it easily and permanently. If you have other fabric that fits that criteria, fab. Use it. You’ll also need a ruler, biro/pen and fabric scissors…

How to nail serger tension once and for all

Cut 4 strips about 8″ wide (one for each tension dial) and long enough to accommodate a 1.5″ section for each of your tension settings plus a header. So basically, my serger has tension settings from 1-9. So I divided each strip into 10  x  1.5″ sections.

How to nail serger tension once and for all

Fold/press in half along the length. Then at the top of each one write the name of the thread/section you are swatching (so…left needle, right needle, upper looper, lower looper) and the colour of the thread that you have used for that section. (I also added the number that corresponds to that section on my threading diagram. But this isn’t that necessary. Call it thoroughness overkill on my part!) Then write the numbers 1-9 down the left hand side of each strip….

So the process is the same for each swatch. Start with all dials at a medium setting of say 3 or 4. Something that you know will give you a basic overlock stitch without being ridiculously loose or tight. Just set them all the same. Then “swatch” each tension dial in turn as follows. Left Needle, Right Needle, Upper Looper, Lower Looper. (So basically left to right on your tension dials).

Starting with the left needle, set the tension dial to 1…How to nail serger tension once and for all

…then serge down the right hand side or your swatch fabric until your needles hit the line. Stop.

Move the tension dial to 2…How to nail serger tension once and for all

Serge until your needles hit the next line…How to nail serger tension once and for all

Stop.

How to nail serger tension once and for all

Set your tension dial to 3…

How to nail serger tension once and for all

Serge until your needles hit the next line and stop.

How to nail serger tension once and for all

I suspect you’re getting the gist now! Keep moving the tension dial up one increment at a time…

How to nail serger tension once and for all

…and sewing up to the next line…until you’ve swatched each tension setting on that dial. At that point, examine the stitch and mark the tension setting that gives you the best, most balanced stitch. (more detail on what constitutes a balanced stitch further down, so bear with. We’ll get to that part) Set the tension dial at that setting. Leave it there, and move on to the next tension dial and repeat the process for that one. once you’ve established the optimum setting for the second dial, set it to that, and move onto the third, then the fourth…

How to nail serger tension once and for all

So, by the time you’ve done all that you’ll end up with 4 of these! So, now what to do?

What these Swatches Tell You…

So how do swatches made on calico relate to sewing with knits? I might have gone to all this trouble to get a perfect stitch on a double thickness of calico, but the tensions will be completely different when I start sewing jersey, right? Welllll…yes…..and no! The numbers may be different but the basic concept of what these swatches tell me will be much the same, proportionately, whatever fabric I’m using. Firstly there’s the ratio/differential between each setting. From my swatches above you’ll see that  my “ratios” are 6-6- 4-3. (Don’t be surprised if this differs slightly from your manual’s recommended settings! Every machine is different.) So basically my needle tensions are the same as eachother, and my looper tensions are 2 and/or 3 notches lower than my needles. This rough relationship between the tension settings is my starting point with any other fabrics I now sew with. It’s a ratio that I now know, works. So when I sit down at my serger with a new piece of jersey, I might lower them all by half a notch, if my common sense tells me to do so, but generally my starting point is roughly the same.  It may be +/- half a notch or a notch, but in my experience (and I sew with mostly light or medium weight knits and wovens) there isn’t a dramatic deviation from those numbers or ratios even after I’ve done a test swatch on my fabric. Now, before I even start….I know I’m roughly in the right ball park!

The other thing these swatches tell you is why your overlock stitch or fabric is behaving in a particular way and allows you to identify where you might need to fine tune from your starting point. Take a look….

Left Needle  (Too Loose)

We’re looking at the BLUE thread here. (Ignore the rest) With the needle tension set really low, much as with a standard machine, the stitches will not sit flat on the surface of the fabric. You can see a little “daylight” between the stitches and the fabric here at the lowest setting. It’s not terrrrrrible but wait….How to nail serger tension once and for all

How to nail serger tension once and for allOn the reverse it’s waaaay more obvious that the tension on the blue thread is too low. See those little blue loops that gradually get smaller as you move from the left to the right of the image? IAs the tension increases the thread will sit more flush with the fabric. So if your left needle thread is looping at the back like that…increase the tension.

Left Needle  (Too Tight)

There’s alot more play and forgiveness in needle tension  than there is in looper tension in my experience. Especially at the upper/tighter end of the tension scale. The effect here isn’t quite as obvious on this calico as it might be on a fine tissue knit but at the highest tension setting (we’re still looking at the BLUE thread. Last segment. Left of the screen, numbered 9) you can see the fabric is starting to pucker ever so slightly…..How to nail serger tension once and for allHow to nail serger tension once and for all

Maybe more visible on the reverse….see that slight dimpling along the stitch line and the way the corner can’t lay flat? It’s all just a little bit “tense” isn’t it?! So any sign of puckering along the stitch line, lower your needle tension.

Right Needle  (Too Loose)

This time we’re looking at the CREAM thread and the right hand needle. As I said, both my needles are always set at the same tension and the effect that having the tension too low or too high is the same….How to nail serger tension once and for allHow to nail serger tension once and for all

Loopy means it’s too low. Increase the tension.

Right Needle (Too Tight)

This time, the blue thread has already been set to the right tension. We’re looking at the CREAM thread and on the highest setting it’s causing the same puckering that the blue thread did… look at the way the edge of the fabric on the far left is sliiiiightly wavy and not sitting flat….How to nail serger tension once and for all

How to nail serger tension once and for all

See the way the corner is lifting, the sliiight wave to the fabric edge and that slight dimpling along the stitch line again? Same as before….reduce the thread tension.

So to summarise…needle tensioning on a serger is pretty much the same as on a standard machine. Check the underside as well as the top. If it puckers it’s too tight. If it loops it’s too loose. adjust up or down accordingly. Simple!

The Loopers

The loopers is where the “balancing the stitch” part comes in. The upper and lower looper threads form loops that loop round eachother and cover the edge of the fabric. Hence the term loopers, I’m guessing! To get a “balanced stitch” you want the part where the upper and lower loopers link together, to sit right on the edge of the fabric. We’re almost at that part; but first lets look at the way incorrect tensioning affects the upper and lower loopers interact with eachother. They have a co-dependant relationship if you like! If one’s not quite right then the other can’t do it’s thang!

Upper Looper (too loose)

We’re looking at the GREY thread in this pic. Having the upper looper  tension too loose allows the loops to float over and under the edge of the fabric…How to nail serger tension once and for all

To put it another way, the loops of the upper looper (grey), should be exactly the same length as the loops of the lower looper (yellow) and meet eachother at the edge of the fabric. If your upper looper thread is passing over and under the edge of your fabric like this, but not causing it to curl….it’s too loose. Increase the tension on the upper looper.

Upper Looper (too tight)

At the other end of the scale if the upper looper tension thread is too tight, it will make the grey thread loops too short/tight and pull the lower looper thread (yellow) round from the other side and curl the edge of the fabric in the process….How to nail serger tension once and for allHow to nail serger tension once and for all

So if you have short loops on top pulling and curling the fabric around from underneath like this? Your upper looper tension is too tight.

Lower Looper (too loose)

We are looking at the YELLOW thread of my lower looper now. It’s the same interaction as before but the effect is reversed. If the lower looper tension is too loose, it allows the lower looper thread to float round to the top of the fabric rather than sit on the edge. You’ll notice this makes the grey upper looper threads too short in relation.How to nail serger tension once and for all

But there is no curl which means it’s a “looseness” problem rather than a “tightness” problem. Increase the lower looper tension.

Lower Looper (too tight)

With the lower looper tension set too tight the YELLOW thread (now no longer visible) is pulling the upper looper (grey) thread around and under and curling the fabric edge again, but this time it’s curling under….How to nail serger tension once and for all

Curling is sign that one oor other of your loopers is too tight. If it curls upwards it’s your upper looper. If it curls under, as it does here, it’s your lower looper. Lower the tension of the lower looper.

The “Perfectly” balanced stitch…

So this is what we’re aiming for. The holy grail of serging. The “perfectly” balanced stitch. Truthfully there’s no such thing as perfection, lol! But this is what to look for as you are deciding on the optimum setting for each swatch, and setting your tension for each new fabric.

Stitching lines (blue and cream thread) flat to fabric and not looping or causing puckers on either side. Upper Looper loops (grey thread) extend right to the edge of the fabric where they meet the Lower Looper loops (yellow thread) from the underside…How to nail serger tension once and for all

How to nail serger tension once and for all

The lower looper thread from the underside view. Neat little “Y” shapes with just the teeniest bit of the blue and cream needle threads visible from the other side. The yellow “Y”s (lower loops) extend right to the edge of the fabric where the meet the grey thread of the Upper Looper loops….

How to nail serger tension once and for all

….and finally that spot, right along the edge of the fabric (extremely tricky to photograph one handed!), but hopefully you can see both looper threads meeting and looping around eachother to enclose that raw edge. In essence, THAT is the perfectly balanced serger stitch.

The swatches give you a starting point at which you have a rough idea of the tension ratios of your machine. From there,  you can diagnose problems with any given fabric, by looking at how it (and the stitch) is behaving and comparing it to your swatches. He’s a few “rules of thumb” I’ve discovered since getting to know my serger this way.  In general if part of the stitch is loopy, then the tension is too loose.  Loopy = Loose. Get it?! The swatches will help you identify which part of the stitch you are looking at and adjust the relevant tension dial. If the fabric edge is curling then one of your loopers is too tight. If it curls upwards it’s your upper looper. If it curls downwards it’s your lower looper. If there’s puckering along the length, then needle tensions are likely too tight.

So, with serger swatches in hand, the next time you sit down at your machine, hopefully there will be less cussing, and more beautifully balanced stitches 🙂

Questions?? Feel free to leave them in the comments section and I’ll do my best to answer!

Serger Series: Part 1. Anatomy

Serger Series: Part 2. Threading

DIY, Dressmaking, how to, jersey, knits, overlocker, overlockers, serger, Sewing, Sewing Basics, sewing machines, Tips and Tricks, Tutorials, Uncategorized

Serger Series – Part 2: Threading

06/02/15

How to thread a serger at www.portialawrie.co.uk

And so we come to it. If you have been “dreading the threading” I promise it really isn’t as intimidating as it seems at first glance. With the exception of the lower looper, which is a teeny bit fiddly, the rest is super straightforward. I know I for one had built this up in my head to be super scary; (when I was doing my garment construction course I’d always wait until the thing was already threaded and then jump on. Managed to avoid threading an overlocker for my whole time there, lol!) and when I finally took the bull by the horns, I was all “oh!! is that it?!!” This is a long photo heavy post but don’t let that put you off. The process itself takes 5 minutes. I’ve just taken alot of pictures, ha ha! You can click on each image to open seperately and zoom in for more detail 😉

PREPARATIONHow to thread a serger at www.portialawrie.co.uk

You’ll need 4 cones of thread. Thread snips and tweezers. The hook nose tweezers are the most useful and if you’re a butter fingers like me then a second pair is handy too. The trickiest part about threading is accessing some of the teeny spaces where the thread has to run; but with tweezers…its a breeze. I’m using different colours here just for illustration purposes. It’s easier for you to follow the route of each thread that way.

How to thread a serger at www.portialawrie.co.uk

Every machine will come with a threading guide. Either on board like mine, or in the manual. Have it to hand. Note the numbers at the top of the diagram. That is the order in which you thread. So, upper looper (red), lower looper (yellow), right needle (green) and finally, left needle (blue). That’s the order we’re going in. (BTW, If you have a secondhand machine that didn’t come with a manual, or you lost yours, then they are often available for free online as PDF downloads. Check out Manual Owl as a good place to start).

How to thread a serger at www.portialawrie.co.uk

Start by turning all your tension dials to zero. This sets the tension discs inside at their most open position and helps ensure that the thread passes between them when you’re threading.

How to thread a serger at www.portialawrie.co.uk

Pull up the telescopic thread bar at the back….

FIRST STAGE (applies to all 4 thread cones)How to thread a serger at www.portialawrie.co.uk

Position your thread cone on the appropriate spool holder. (We’re starting with the upper looper). Pass the thread through the corresponding loop at the top of the thread bar…

How to thread a serger at www.portialawrie.co.uk

Hold the thread horizontally. The thread from the cone in your right hand and the loose end in your left and slide it up under that hook like part. Then take the loose end and run it in the channel that leads to the tension discs at the front. This part is easy to get the wrong way round which can lead to snapped threads.  Don’t want those!  This little wire thread guide has two upper loops at the top of it and the larger hook/loop that extends down. The thread runs from the thread bar above, under the right loop and the downwards hook/loop first and then runs over the top left loop and into the tension disc channel. Click the image to enlarge and zoom in.

UPPER LOOPER (red channel)How to thread a serger at www.portialawrie.co.uk

The thread then runs along that channel and round to the front where you run it between the two metal tension discs of the tension dial and down into the next part of the channel…

How to thread a serger at www.portialawrie.co.uk

…then snugs into another thread guide underneath…

How to thread a serger at www.portialawrie.co.uk

From there join the  red dots! Each thread position is indicated with a read dot and the thread is held there by a little hook that you pass the thread behind. Once you thread the final part of the upper looper (tweezers are useful there! Also, rotate the hand wheel at the side until the upper looper rotates into the most accessible position) the thread passes under the presser foot and off to the side.

How to thread a serger at www.portialawrie.co.uk

Upper looper done! See the red thread marked “1” on my threading diagram? That’s what we’ve just done. We’re now moving on to the lower looper. Marked “2” with the threading route indicated by the yellow thread. Note to the left of the main threading diagram there are two separate diagrams of the lower looper in close up. As I said, the lower looper is slightly trickier.  To the extent that it warrants it’s own diagram, lol! But fear not. It’s fiddly rather than complex.

UPPER LOOPER (yellow channel)How to thread a serger at www.portialawrie.co.uk

The steps up until this point are identical to the red upper looper. To recap: from the thread cones, through the thread bar and rear thread guides, between the tension discs and down into the thread guide underneath…

How to thread a serger at www.portialawrie.co.uk

Follow the yellow dots (in the same way as you did the red for the upper looper), until you get to this point. AKA the slightly trickier part; Rotate the handwheel again so that the lower looper is at its most accessible position, and grab the thread with those hook nose tweezers! In this pic I have hold of the thread with my tweezers and the lower looper, the bit we want to thread, is just behind my tweezers, and just in front of the upper looper. It’s the bit that looks a little like a tiny penknife blade running horizontally behind my tweezrs and it has a little threading hole in the end of it. We need to pass the thread behind it, then over the top of it…

How to thread a serger at www.portialawrie.co.uk

…and then pull the thread towards us until it slides and then slots into a little dip/crevace right on the “elbow” of the lower looper…

How to thread a serger at www.portialawrie.co.uk

Here it is zoomed in a bit. A little blurred (sorry, it was soooo tricky to photograph one handed!) but you can just make out the little nick in the elbow of the upper looper where the thread has to sit….it passes up behind the elbow, over the top and sits in that little cut out/nick….

How to thread a serger at www.portialawrie.co.uk

From there thread the pointy end, and making sure you don’t tangle it with the thread from the upper looper (which sits directly behind it) pass the tail end under the presser foot and off to the side (2 sets of tweezers come in handy here!). Exactly as you did for the upper looper…

How to thread a serger at www.portialawrie.co.uk

Another close up for you. That’s the trickiest part done!!

NEEDLE THREADING (blue and green channels)How to thread a serger at www.portialawrie.co.uk

This part is pretty much the same as a standard sewing machine except you need to do it twice! Start with the right hand needle (green channel). Threading process is exactly the same as the loopers up until the point it passes through the tension discs. Then it goes under a small thread guide, under a slightly larger thread guide and OVER the thread guide marked with the green dot…

How to thread a serger at www.portialawrie.co.uk

Then down to the needles. Right needle is marked A. Into the little pig tail curl …

How to thread a serger at www.portialawrie.co.uk

use tweezers to thread because the cutting blade gets in the way . Especially if you’re right handed…

How to thread a serger at www.portialawrie.co.uk

Then, as with the previous two thread tails; pass under the presser foot and off to the side…

How to thread a serger at www.portialawrie.co.uk

Lastly the left needle (blue channel). Same as the right needle except it only passes under the larger thread guide then OVER the thread guided indicated by the blue dot…

How to thread a serger at www.portialawrie.co.uk

thread and pass the thread tail under the presser foot and off to the side as before.  ****YOU’RE ALL DONE AND THREADED!!*** One last thing to do though. Chain off…

How to thread a serger at www.portialawrie.co.uk

Re-engage your tension discs by setting dials to 3…

How to thread a serger at www.portialawrie.co.uk

Plug in and switch on….

How to thread a serger at www.portialawrie.co.uk

Lower the presser foot and grab hold of your thread tails…

How to thread a serger at www.portialawrie.co.uk

Pull thread tails round to the back, engage the presser foot and serge of a little chain…

How to thread a serger at www.portialawrie.co.uk

Trim any excess and leave a 3″ tail.  All done!! Hope this was useful and that it helps at least someone out there realise that threading a serger is really not as terrible as it first appears. I know this is a photo heavy post which might make this artificially seem like a lengthy process . In reality it takes me 5 minutes, if that! Please please trust me. Try it. And you’ll see 🙂

You can view the first post in this series here.

Next up is tensioning and getting a nicely balanced stitch. I’ve discovered the COOLEST trick for that. Watch this space!

finished garments, grainline, hemlock tee, knits, overlockers, refashioning

FO: Sheer Knit Hemlock Tee Variation…

02/22/14

I recently whipped up this variation on Grainline’s Hemlock Tee. It’s made using a sheer knit fabric (hence I also had to whip up the vest top underneath!) that I bought from Minerva crafts at £4.99/m available here. I bought the ivory, which as you can see is much more white in reality. I used the exact same process on this make as I used for this pashmina refashion if you want more step by step deets….;)

Thinking I might whip up a few vest tops in different colours to layer underneath. (In fact if Minerva had this type of fabric in a range of colours  I’d probably make more of these too) I kinda hashed this vest top a bit. It hardly qualifies as self drafted as I literally laid a vest top I already had straight onto the jersey fabric, cut around it, and then whizzed it through the overlocker. Not my finest hour, lol!  Can any of you recommend a simple vest pattern??

Oh,and I had a couple of emails asking to see what my recently refashioned coat actually looked like on…and being the obedient gal that I am…

My best friend, who is extremely honest (which I love about her 😉  said that when she had seen my recent post about this coat, she thought it looked a bit “granny’ish” on the mannequin; but that actually it looked better on. I’m still not sure whether that meant that she approved overall. But I’m happy to settle for “granny chic”….

DIY, finished garments, how to, knits, overlockers, Sewing, Tutorials

DIY: Simple Tube Skirt

01/18/14

Aw, man! It’s been aaaaages! Actually a matter of a few weeks but it feels like ages. My new job has been taking up alot of my time & energy over the Christmas period and then….then my sewing machine went and died on me (she’s better now you’ll be pleased to hear!). But thankyou to all of you who have dropped me a line to check I haven’t fallen off the face of the earth!

Whilst said sewing machine was out of action I’ve had a bit of a dabble with my new overlocker (yay for Aldi!). I have to say, I’m slightly smitten! If you want a quick dressmaking fix and the ability to whip a garment up in under an hour….you can’t beat a bit of overlocking to fill the sewing void! This skirt is a case in point. Made from an Aztec ponte esque double jersey from Minerva Crafts currently in the sale at £4.99 per metre; whipped up in less than 40 mins; sooooooo comfy and sooooo easy! Look, adjustable length too! No magic to that… it’s just because it sits comfortably on the hips or the waist, depending on your preference….

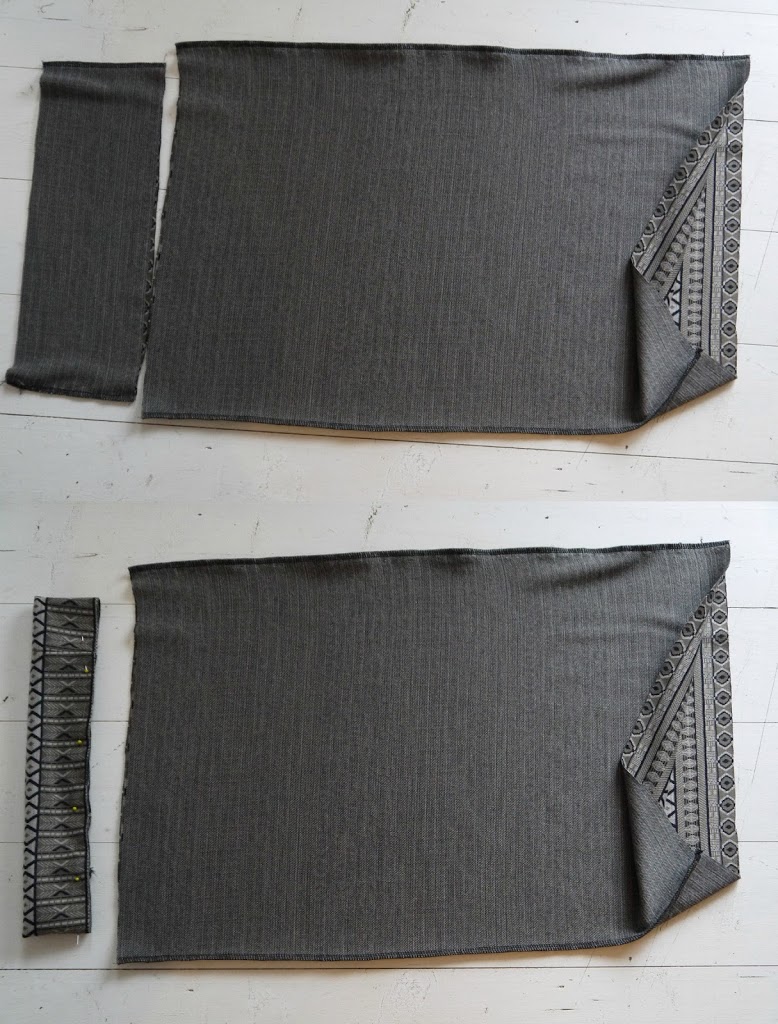
Start by creating a simple tube, serged down both sides, that fits you snugly and is several inches longer than you want the finished skirt to be. Then lop a band off the top that is double the width you want your finished waistband to be, plus a bit of seam allowance…

Serge about 1 1/2″ off one side of that band so it is slightly shorter than the width of your skirt top. Then fold the band in half, wrong sides together with raw edges even…

To attach the waistband, turn the skirt part right side out, then pin the band, right sides together, to the top of the skirt, with raw edges all together. Serge all the way round…..stretching slightly to take up the slack of the skirt top, which is obviously slightly larger than the band…

Then flip the waistband up and press…ta dah! I PROMISE, this is the comfiest waistband EVER! Then simply hem the skirt to the desired length and your’re done 🙂

Please feel free to share your super quick and easy serger projects in the comments section….I’m on the lookout for more! Consider me hooked!


miscellaneous, overlockers

I got one!!!

11/06/13

…or rather my lovely better half J got one for me! Bless his cottons! I had to go to work, so J left the house just after 7am and made the 45 minute drive to our nearest Lidl store, so he was there before it opened! (Gotta love a man that does that for his missus 🙂 I bought him a lovely wool scarf from work as a thankyou 🙂 Even then it was a close call. Our nearest store only had 2 of these in stock and there was already someone waiting at the door when J arrived. She too was there to nab one of these beauties! So I pity anyone turning up later because by 8:05am this particular store was sold out of  machines AND thread….

I was so excited to hear that some of you managed to get your hands on one too! I let out a little “yay” every time a comment popped into my inbox to that effect 🙂 Thankyou too, to those of you who had experience with these machines and stopped by to let us know how great they are 🙂 I’ve yet to discover that for myself as I haven’t allowed myself to have a play with it yet (I have allowed myself to stroke it a few times as I walk past it…just me then??) as I’ve been busy on a couple of other projects. How disciplined am I?! One to be shared shortly (shhhh!) and the other was assembling my Andy Coat PDF and tracing off the pattern pieces. (Man is THAT back breaking when you don’t have a standing height table!)

So, if you managed to snag one of these…have you had a play with it yet??

miscellaneous, overlockers

Bargain Alert!! Singer Overlocker at Lidl….

11/03/13

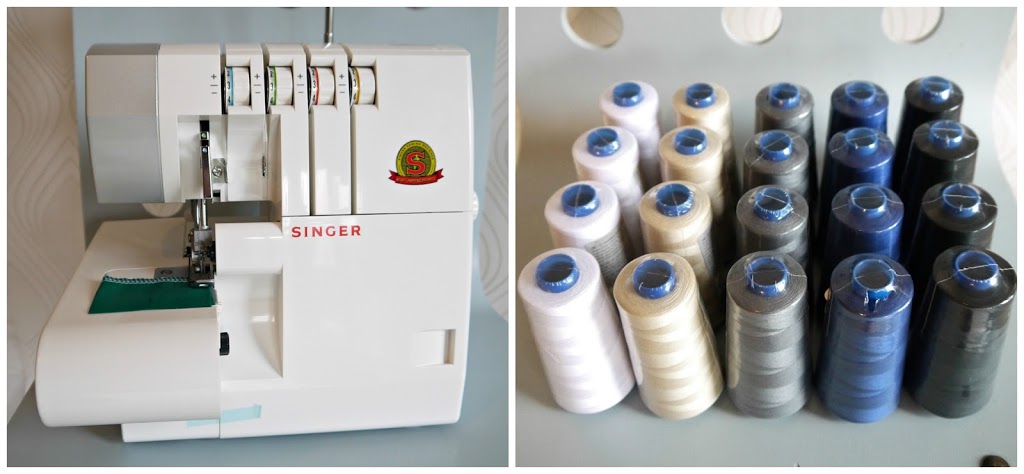
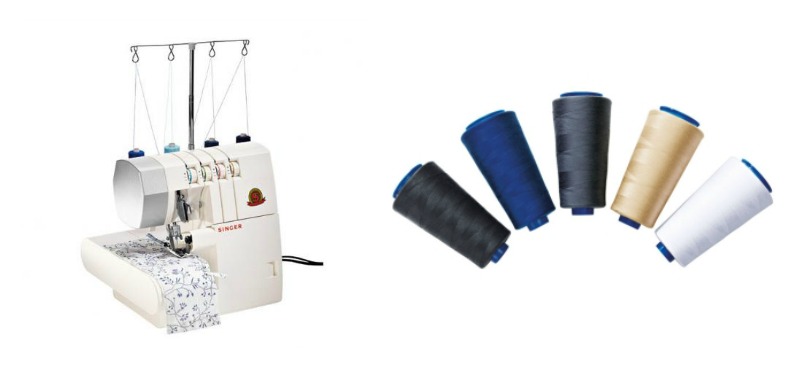
Just a quickie that I had to share with you all! As of tomorrow (Monday 4th Nov 2013)  Lidl stores will be offering this Singer overlocker (complete with 3 year manufacturer warranty) for a mere £149!!!

In addition they’ll be selling cones of overlocker thread in a range of neutral colours, 2 for £2 or £1.49 each.
For more deets (and your closest participating store) check out their website.
I suspect these will sell out fast!!
Anyone have any knowledge or experience of this machine? Please leave a comment!! I for one would like to know whether this is a worthwhile purchase as J will be heading to our local Lidl in the morning to try and snag me one of these before they all disappear…..;)

Portia
Follow
Sewbox

© Copyright 2026. Portia Lawrie. All Rights Reserved. Managed by WordPress Web Dev Cornwall .