• About
    • Contact
    • Press
    • Sponsor
  • DIY
    • Home & Garden
    • Jewellery & Accessories
    • Yarn Crafts
  • Sewing
    • patternless & self drafted
    • Refashions
    • Commercial Patterns
    • Sewing Tips
    • Overlockers
  • The Refashioners

Portia Lawrie

DIY, how to, Sewing, Tutorials

HACK: Cuffed Kimono Tee

03/13/18

This was one of those projects where I just wanted a new top. Fast. I only had a small piece of this gorgeous ponte. Not enough to cut a separate body and sleeves. But I didn’t want e sleeveless top either. A short kimono sleeve is a good workaround and can save the day in these kind of scenarios!HACK: Cuffed Kimono Tee

I lengthened the short kimono sleeves further by adding cuffs made from the off cuts. The waste from this project was practically non existent…HACK: Cuffed Kimono Tee

It’s a simple hack on an existing tee pattern. This is a tracing of the hemlock tee from Grainline. Using the body pieces as a guide I cut a kimono shape outide of the pattern piece. For the shoulder I simply followed the angle of the shoulder line as far as I could (given the limitations of what fabric I had). When it comes to the underarm curve note it’s position in relation to the original underarm point. (Which you can just about make out in this pic. You’ll note that the underarm curve starts 2-3″ below the original underarm point and the sleeve is overall much wider.HACK: Cuffed Kimono Tee

Unfold and use as a template to cut a second identical piece…sew RS together at the shoulders. You can press the seams to the back and top stitch the shoulder seams for a nice finish. (I do this on most of my makes).HACK: Cuffed Kimono Tee

mm

HACK: Cuffed Kimono TeeHACK: Cuffed Kimono Tee

Sew the underarm curves on both sides as pictured….HACK: Cuffed Kimono Tee

Neckline is finished with a simple neckband as per this post…HACK: Cuffed Kimono Tee

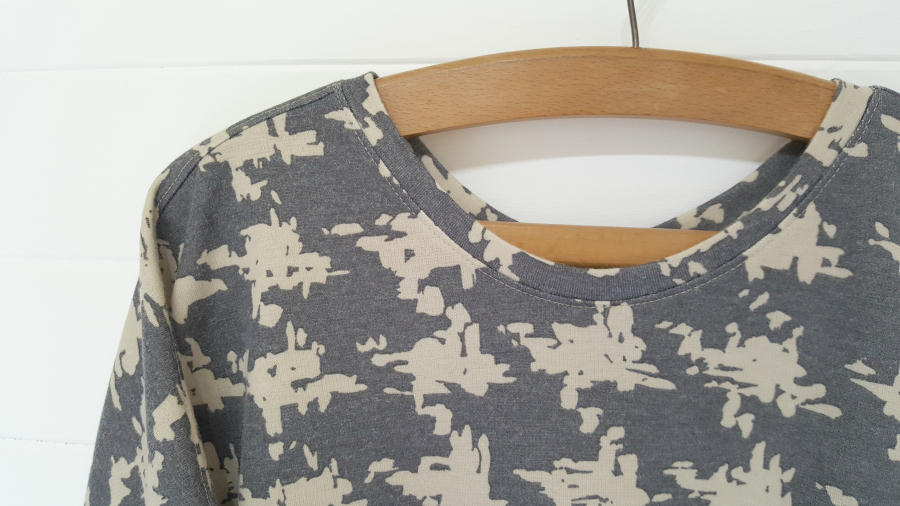
Cuffs are loops of fabric the same circumference as your sleeve hems, folded in half WS together…HACK: Cuffed Kimono TeeHACK: Cuffed Kimono Tee

Then pinned to the sleeve hems with raw edges aligned, sewn together and pressed away from the garment, with the SA top stitched in place. I had a little bulk at the point where the underarm seam met the join in cuff . Rather than force it through and make the machine “climb over it” (Even with a shim it never makes for a good stitch); I started the stitch one side of the bulky area and finished it the other side. Topstitching in this instance is really only decorative. So a little gap in the line of stitching, in a spot that won’t be noticeable during wear, is no biggie in my book!HACK: Cuffed Kimono Tee

This has turned out to be one of those fail safe tees. Throw it on for immediate comfort (and hopefully style!) Yook me about an hour to make as my machines were already threaded up wth the right colour thread from my previous make. (Love it when that happens…HACK: Cuffed Kimono Tee

Here’s a close up of that fabric. Lush right? I think it’s out of stock currently but their range of pontes and other jerseys is always ace.HACK: Cuffed Kimono Tee

I like quick projects like this sometimes. Every now and then you just need a quick sewing fix that doesn’t tax the brain too much and gives you a wearable garment at the end!

DIY, how to, Sewing, Tutorials

TIP: Encased Elastic Waistband (another way)

02/26/18

Encased Elastic Waistband (another way)

Really there is nothing more comfy than a wide elasticated waistband is there? It’s also generally regarded to be one of the quickest and easiest of the waistband options to execute. Especially when you’re new to sewing. Now this may just be me, but bear with me here. Yes an encased elasticated waistband is pretty straightforward. But I’ve always found it to be….erm…..fiddly and annoying! Attaching a safety pin  (or similar) to one end of the elastic. Feeding it through  the already sewn casing where it will invariably twist or get snagged on the seam allowances at some point on it’s journey. Wrestling it out the other side and then attempting to get the ends of the elastic under the presser foot with and entire garment hanging off the end of it. And let’s not forget absent mindedly sewing the elastic “twisted” and only realising after you’ve closed up the casing.

Ok that was a bit disproportionately ranty. But if any of it sounds familiar then you too might want to try a different way. Which is how I’ve started constructing my elasticated waistbands recently.

Start with your elastic already sewn together in a loop and your waistband casing also already sewn together in a loop and folded in half. RS out. Your waistband should be the same length as the circumference of the garments wiastline. It should be double the width of your elastic + approx 6mm (thats 3mm either side for wiggle room  for the elastic) + the original seam allowance (usually 5/8″ either side). If you already have a pattern piece for your waistband….use that and simply add 6mm to the width 🙂

Encased Elastic Waistband (another way)

Place the elastic inside the casing with the edge of the elastic butted up to the fold…( I haven’t left quite enough seam allowance here. There’s a better example of the ideal amount of seam allowance a couple of pics further down)Encased Elastic Waistband (another way)

Place under the presser foot. (A zipper foot can be handy here but not vital). Keeping the elastic butted up against the fold sew a long machine basting stitch 3mm away from the edge of the elastic. In this pic you may be able to see I am holding the whole thing at tension and using my thumb to feel where the edge of the elastic is . Keep feeding it through the sewing machine like this. Once you reach a point where there is more casing left than elastic, with the needle down, lift the presser foot. Ruche the casing over the elastic (towards the back of the machine), until the bit you have left to sew lays flat. Lower presser foot. Finish sewing/basting 🙂Encased Elastic Waistband (another way)

You’ll end up with an encased elastic waistband. It just isn’t attached to your garment yet! BUT it’s easier to sew in my view and the bottom edge of the elastic is not going to snag on any seam allowances so should run smoothly through the casing. You’ll also never have that scenario where you accidentally sew the casing a smidge too small for your elastic (which leads to distorted/curling elastic) because you are sewing the casing using the elastic itself as a guide. (This pic is also a better example of the amount of seam allowance left either side of the elastic)Encased Elastic Waistband (another way)

To attach the waistband simply pin to together RS together and raw edges aligned as pictured…Encased Elastic Waistband (another way)

Serge or sew just to the right of your line of basting stitch which should be more or less your original seam allowance…Encased Elastic Waistband (another way)

Once waistband and garment are sewn together, and the raw edges finished, press the SA down towards garment, remove basting and your done!Encased Elastic Waistband (another way)

This will work on wovens or knits. The only caveat is to be careful using this with pockets that are secured at the waistline as this could create a little too much bulk in these area, depending on the weight of the fabric. In seam pockets that sit further down are a ok 🙂

DIY, how to, organising, Sewing, Tutorials, Uncategorized

DIY: Felt Needle Organiser

01/30/18

MACHINE NEEDLE HANGING ORGANISER A few days ago I posted details of this on Instagram. People kinda went a bit nuts for it. (Hey I don’t mind being called a genius on social media. Schucks. (“Feigns humility but secretly enjoys the flattery”) It’s not genius (we’ll leave that term to groundbreaking, world changing scientific discoveries). But genius offen lies in simplicity. And I guess it’s one of those super simple, easy to do kinda things that solves a few problems in one go.

Life is full of petty little annoyances which on their own could be called trivial. But collectively…if you spend a whole day subjected to petty little annoyances? That amounts to one BIG annoyance. I’m a great believer that if you can check off those buggers one by one…then cumulatively, when you lump all those solved problems together, that leads to a much less annoyed (read calmer and nicer) individual.

Someone commented on IG that this seems alot of faff for needles. It’s actually not faffy at all. Can’t have taken me more than 10 minutes to cut and sew (not counting taking the photographs in between) and it is super duper easy too. And those 10 minutes will hopefully solve some of those pesky annoyance critters.

So I have several bug bears when it comes to those little machine needle packets:

  1. Having my needles to hand
  2. Finding the packet I want quickly. (I semi addressed that here but it’s still open to improvement)
  3. Knowing I’m running low at a glance and need to restock
  4. Remembering what needle is currently in the machine (I always forget)
  5. When a needle has been used, but not yet ready for the bin, it usually goes in a pin cushion to save it. Then I forget what it is and throw it out anyway.

(NB: I am fully aware that needles are colour coded or marked (in frikkin microscopic writing) to identify their type. But going through every single packet to find the matching colour codes; or cracking out a microscope (which I don’t have) to read the engraved numbers? Well that’s the very definition of faff to me. )MACHINE NEEDLE HANGING ORGANISER

I really don’t need to write a tutorial for this. It’s pretty apparent how this is made.

I used this felt.  Bought for another project that never materialised so it’s been sat in my stash for like, two years??!! (Hangs head in shame). So yes, this quick and easy make will not only save your sanity, it’s also a great stash buster. You don’t have to use felt. Leather scraps word would work. As would a little quilted version in fabric. Or fabric stiffened with interfacing. Neoprene could be quite funky! Anyway…you get the idea.

It’s a rectangle. With narrow strips sewn across it ( the strips need to be approx half the height of a needle packet)…then separated into individual pockets with lines of stitching. That’s it.MACHINE NEEDLE HANGING ORGANISER

MACHINE NEEDLE HANGING ORGANISER

So lets work through the various problems this hangy felt thing solves. Firstly,  I can organise my needles by type and then size in the little individual pockets. When inserted upside down, I can clearly see the part of the casing that shows the needle type and size AND the number of needles of each type and size that I have left. (That solves 1, 2 & 3 from my list).MACHINE NEEDLE HANGING ORGANISER

When I have a needle that I’ve used but still has some life left in it, I can pin it through the felt right infront of it’s corresponding packet. That solves number 5.MACHINE NEEDLE HANGING ORGANISER

This pocket at the bottom…in a different colour…is where I place the pack that corresponds to the needle currently in my machine. And that solves number 4. Boom!MACHINE NEEDLE HANGING ORGANISER

You could up the anti by embroidering each pocket with the needle type you plan to store in it. This only occurred to me after I’d made the thing. But I did a little tester to see how it would look and I kinda like it!MACHINE NEEDLE HANGING ORGANISER

My hangy thing is held up using these clips. If I recall correctly I actually found them in a charity shop. But you can get them quite readily on Amazon. I quite like these black ones!MACHINE NEEDLE HANGING ORGANISER


Then it’s simply hung from some of these net curtain wire end loops (I have no idea of the proper name for them) screwed into my wall right behind my machine.MACHINE NEEDLE HANGING ORGANISER

MACHINE NEEDLE HANGING ORGANISER

MACHINE NEEDLE HANGING ORGANISER

In the interests of keeping it real and just in case you had any misconceptions about my level of organizing, take a look at that overflowing zip draw and that draw of thread spools. Neither of which will actually close now. They might get their own felt hangy thing one day….or not.

finished garments, jersey, knits, Sewing

FO x 2: (well 3 technically!) My perfect boxy tee

04/28/17

One might say that this simple boxy tee was nearly 3 years in the making! Why? Because I discovered an abandoned experiment in my stash from that time period. I picked it up…looked at it quizzically….wondered why it had been cast aside because…it looked like just the kind of tee I’d been looking for recently. So I sewed it up in half an hour and what do you know….it was exactly the shape and proportion I had been hankering after in my wardrobe. So I made 2 more!

self drafted box tee (5)

The first being this incarnation in a pique type knit from Stoff & Stil. I love the irregular sketchy arrows and the monochrome makes it a really versatile addition. The top is self drafted….but very simply so. Rectangles for body and sleeves but with a slight curve for the sleeve heads and armholes, and curves cut out for the front and back neckline. My original experimental one was literally just rectangles but I loved the proportions so much that I drafted a pattern and added in those subtle refinements….self drafted box tee (5)self drafted box tee

Then I liked that one so much that I made another! Also in a Stoff & Stil fabric. This is a slightly looser version. But all 3 (the original, which is black, and these two) are in constant rotation. It’s like I had my holy grail of tees sitting in my WIP pile for 3 years! What the heck?!! Revisit your WIPs people! Seriously….you started them for a reason!self drafted box tee self drafted box tee

So needless to say….I will be making a few more of these.

I also want to direct your attention to the neckbands on these babies. Notice they are perfectly turned in and laying flat? Well in the past this has always been a bit touch and go for me. (wavy neckbands anyone? Ack!) But I have been working on a formula for calculating the exact length of neckband you need, for any given neckline circumference….and any given fabric. (You may have read my initial ruminations here!) Because…it seemed to me that I needed to factor in the stretch percentage of the fabric I was using. A fabric with 40% stretch was not going to turn in the same way as a 60% stretch fabric cut to the same length. Well if my last few knit makes are anything to go by…I’ve nailed it! And there will be a post coming your way soon. So if you ever got frustrated at wavy or puckered neckbands….stay tuned!

finished garments, Freebies, Giveaways, Sewing

FO: Vogue 9160 & The Eve Appeal + a Giveaway

03/17/17

VOGUE PATTERNS BLOGGER TOUR FOR THE EVE APPEAL - VOGUE 1960 - PORTIA LAWRIE (3)


Cocktails anyone? A couple of weeks back Vogue Patterns (The McCall Pattern company) launched a year long sewalong in aid of The Eve Appeal. Part of this includes a blogger tour which is where your’s truly comes in today. Yep I’m up….and….well….running a liiiiiitle late this morning. Might be to do with all the champagne and peach schnapps I had to drink last night. (My fave cocktail. Dunno what that’s called, lol!) So why the references to cocktails? Well you may remember I took part in last years event The Big Vintage Sewalong….and well….you gotta have a theme right? And this years theme is cocktails! Yum! They’ve even come up with their own recipe and you can sup it while joining in with sewists nationwide, by sewing up one of the patterns from a selection of 20, and raising money for The Eve Appeal in the process. Savvy? Good…here’s me with an empty glass having drunk the house dry…VOGUE PATTERNS BLOGGER TOUR FOR THE EVE APPEAL - VOGUE 9160 - PORTIA LAWRIE (9)

Soooooo, what did I make then? Not being a cocktail dress kinda gal, (and actually not at ease in any kind of “formal/dressy” attire), this one really pushed me out of my comfort zone. But not one to shy away from a challenge (that would be super hypocritical of me considering what I put you all through every year with The Refashioners , ha!), I duly accepted said challenge and this is what I came up with. You know….if I ever get invited out for cocktails….VOGUE PATTERNS BLOGGER TOUR FOR THE EVE APPEAL - VOGUE 9160 - PORTIA LAWRIE (9)

My Idea of dressing up is heels and a bold lippy, whilst keeping the outfit itself understated. Indeed this make (in a gorgeous grey washed linen from Ditto fabrics that I’m in love with) would look equally at home with a cropped stripey tee and birkies! I love clothes that do double duty don’t you?

The pattern is Vogue 9160….yep…. a jumpsuit pattern….Now I have been admiring the jumpsuit trend from afar since it emerged. But I’ve steered clear as I KNOW it won’t suit me. I’m too conscious of a tubby middle section right now (I’ve gone up a whle dress size recently!) One piece garments rarely do. So my original intention was always to adapt this into a two piece, with the appearance of a jumpsuit, by making it out of the same fabric.VOGUE PATTERNS BLOGGER TOUR FOR THE EVE APPEAL - VOGUE 9160 - PORTIA LAWRIE

I knew I didn’t want the scalloped lace or lining elements of this pattern. I wanted to pare it right down and simplify it by just using one fabric for the whole thing. But I really struggled to find a fabric (in time) that would be substantial enough for the bottoms but not too heavy for the top. Crepe would be a good one I think.  Or a mid weight cupro or sandwashed silk. In the end I decided that the linen was not quite right for the top portion, which led me more towards view C.  A Contrast top and bottom with a tie belt. I swapped out the top portion of the pattern for a looser fitting top in a lurex knit (I’m not a fan of anything too close fitting up top), then set about turning the bottom half of the pattern into trousers by adding a simple narrow waistband and back zip fastening.

But what elevates this make to something dressier I think….is the tie belt. I made a slightly longer version than the pattern so I could wrap it round twice and wear it more Obi style…VOGUE PATTERNS BLOGGER TOUR FOR THE EVE APPEAL - VOGUE 9160 - PORTIA LAWRIE

I like…..NEVER…wear anything tucked in. That’s how conscious I am of my (lack of ) waist. But I do have proportionately narrow hips so from a “glass half full” perspective, I try to focus on those instead. But what I like about this make is what the belt does. Aside from the added interest, it cinches me in at the waist and draws the eye down to hip level where I’m narrowast. The overall effect is actually quite slimming and I don’t feel self conscious at all in these…VOGUE PATTERNS BLOGGER TOUR FOR THE EVE APPEAL - VOGUE 9160 - PORTIA LAWRIE

VOGUE PATTERNS BLOGGER TOUR FOR THE EVE APPEAL - VOGUE 9160 - PORTIA LAWRIE

It even camouflages my Mum/crisp/bloaty/bulge at the front! So the obi style tie belt may be a bit of a revelation for me!

Vogue Patterns  are giving one reader the chance to win a copy of this pattern…VOGUE PATTERNS BLOGGER TOUR FOR THE EVE APPEAL - VOGUE 9160 - PORTIA LAWRIE

To enter,  share this post on social media, then leave me a comment to let me know where you shared. Multiple shares gives multiple entries. Giveaway is open UK only (sorry) and closes at midnight GMT on Friday 24th March! Good luck!

More info on this year long event and the list of patterns can be found here and you can find out more about this fantastic charity and their other awareness and fundraising activities here.

VOGUE PATTERNS BLOGGER TOUR FOR THE EVE APPEAL - VOGUE 9160 - PORTIA LAWRIE


DIY, Giveaways, how to, Sewing, Tips and Tricks, Tutorials

Perfect Pinning (+ a giveaway!!)

02/22/17

Pins. It’s just as simple as sticking them through the fabric right? Well, not quite. Firstly, there’s the type of pin you use. Right tools for the right job applies to pins as much as it applies to any other sewing tool. Some pins are longer/sharper/finer depending on the type of fabric and project you are undertaking. Some excellent info about pin types and their uses here, here, and here….pinning tips

Then there is the question of quality. As with many tools, not all pins are created equal. The best pins will slide smoothly through your fabric without snagging and without force; and they will last you many years without becoming blunt or rusting if used and stored correctly. My personal bug bear are cheap pins with plastic heads. Ack! I only ever use glass headed pins. They tend to be of better quality and most importantly, if you’re pressing around them, they don’t melt if you accidentally touch them with the iron! (I learnt that lesson early!)

But what about how to pin? It’s one of those things that, when I first started sewing, I assumed was a no brainer.  Stick it through the fabric. Job done. Right? Well no. There’re subtleties to pinning, as with any sewing technique. Little things. But things that collectively, can incrementally improve your sewing. So I thought I’d share a few of my “personal pinning protocols” (shameless opportunity for alliteration seized, ha!). Little things that I was taught when I first learnt to sew and stick to still…and the logic behind them…pinning tips

This is the way I pin the most. Always within the seam allowance. So if my pins do end up leaving holes (some fabrics render this likely) then they are not visible on the outside of the garment. It also means that I can leave my pins in place until the very last second as they pass to the side of the presser foot rather than the middle of it. So shifting of fabric is minimised. I will also always pin with the points facing towards the presser foot. It makes them easy to pull out as you go. (If they were facing the other way…well…cack handed!)

pinning tips

When sewing some seams, you’ll be required to stop at a given point and back stitch and/or switch to a different stitch length. (Think preparing a seam for zip insertion for instance). I always mark this point with a different coloured pin, pinned at right angles to my other pins. It just gives me a visual aid and a precise marker as to where I want that needle to stop.

pinning tips

When pattern matching is important I will pin at right angles to the seam that I am sewing. When sewing stripes for instance, I will pin stripe on top of stripe at regular and small intervals.  Pinning at right angles “locks” the fabric more effectively than pinning in a linear way. The difference on a plain and/or stable fabric is negligible. But even minimal shifting will be visually really obvious on stripes. I will also employ this method of pinning on more slippery fabrics. There is an argument for always pinning this way all the time. But I tend to employ it when I want to ramp up the accuracy and precision on seams where the slightest shift would be really obvious either visually or where accurate alignment is vital. (easing in collars, sleeves, necklines etc) If I can get away with just using a few pins, pinned vertically and spaced far apart then I will always default to that. Heck, I have been know to dispense with pins altogether. Some projects are more forgiving than others. But sometimes, when it absolutely has to be accurate, this is the method I go for.

pinning tips

Now I am right handed. And my pin dish sits to the right hand side of my machine. So actually the way that I have pinned in the previous photo is actually a bit illogical.  Because I end up pulling the pins out with my left hand, passing them across to my right hand (or worse, holding them in my mouth as I go!) so I can put them in the pin dish to the right hand side of me. It’s actually a tad cack handed for me. And I have no explanation for that. Used to bug my sewing teacher no end, lol! When pinning at right angles it would make more sense to have the heads facing to the right like this. Just saying. But the cack handed way in which I do it is now so ingrained in my muscle memory, it’s unlikely to change now!

How you pin isn’t just about the direction of pinning of course. It also has to do with how you hold the fabric when you pin. This is how I would automatically put my pins in when I first started sewing. I’d pick the fabric up and stick the pins in like so…pinning tips

That is until my sewing teacher walked up and slapped my hand! (Old school she was!) I will preface this next bit of advice by saying that, as with most rules, there are exceptions. There are times that you can get away with doing this and times you when it will affect the accuracy of your pinning. Depending on the fabric, as you pick it up like this, the layers can shift. On trickier, more slippery fabrics, the more you move them, the more they shift….

pinning tips

As a rule, if you can keep your fabric flat like so…

pinning tips

And pin on the flat, then there will be less chance of layers shifting and therefore, more accuracy across your project.

Talking of keeping things flat…pinning tips

Pins are not always the final step when you absolutely must have a completely flat and secure fabric sandwich before you pass it through the machine…zips are the most obvious example of a situation where it’s vital that everything lies flat and secure before you put a permanent line of stitching in there…

pinning tips

If you’ve ever questioned why you ought to baste a zip rather than just pin it…just look at the photo above and the effect that pinning can have on your seamline, compared to how flat the fabric edge is on the basted section! Now I’m not saying baste everything. Life (and sewing time) is too short for that! But when it absolutely has to be accurate, you’ll be pleased you added in the extra step. Promise!

So, if all of that has you wanting to up your pin game, then here’s a treat for you. The pins featured in this post (above and below) are Hiroshima pins. Japanese pins of superior quality. They come in the most gorgeous packaging (I’m such a sucker for packaging)…hiroshima pins
hiroshima pins


And they are like miniature works of art in their own right. In order below are tulip hiroshima glass headed patchwork pins, Akari pins and Shizuku pins…pinning tipshiroshima pinshiroshima pins

Aren’t they STUNNING! They are part of the newly expanded range of hiroshima pins now available at Beyond Measure. Grace has the most exquisite taste. And she is very generously offering one reader the chance to win 4 packs of luxury Hiroshima pins of their choice.

To be in with a chance of winning simply subscribe to Grace’s newsletter here. Additional entries for facebook and instagram follows. Then leave a comment here to let me know how many entries (ie what you’ve followed/subscribed to). Giveaway is open internationally and closes at midnight GMT on Sunday 26th February.

Good luck and happy pinning!!

DIY, how to, Sewing, Tips and Tricks, Tutorials, Uncategorized

How to shorten metal open ended zipper….

01/30/17

Very specific and what you could call “niche” post today. But I cannot be the only one to hit this obstacle so I’m sharing.  On a recent project  I hit a bit of a snag with this metal open ended zipper. (Who am I kidding. I hit a snag on EVERY project. Occupational hazard for a refashioner!) It was about an inch longer than I needed it to be. I’ve marked with chalk where I wanted the stoppers to be…Makery - How to Shorten an open ended metal zipper


Shortening a standard closed and plastic zipper is pretty straightforward.  With this zip though, I couldn’t shorten from the bottom. (Damn). That’s where the fittings are that make this an open ended zipper. It’s chunky and the design I had in mind called for the the zip stops (at the top of the zip) to still be visible on the finished garment.  So simply sewing thread stoppers wasn’t going to cut it.  (double damn).Shorten a metal open ended zipper

In some cases the fabric that encloses the end of the zipper at the top is sufficient to act as a stopper in itself. But in this instance that was not the case either….I couldn’t order another zip as the length I needed was not standard; and in any case, I much prefer to use what I have if I can. (Damn, damn, damn, damn, damn). So, in short (pun intended), I needed to shorten the zip from the top instead…

So if you ever find yourself in a similar position, here’s how to shorten an open ended metal zipper…Makery - How to Shorten an open ended metal zipper

I needed to move this little sucker (above) down to where that chalk mark is. And this is one chunky metal zipper, so there was some serious brute force involved in this.

Makery - How to Shorten an open ended metal zipper

Before doing anything,  unzip the zip about halfway down and create some makeshift stoppers with pins. If you’re anything like me you may inadvertently pull the zip pull straight off the top after you’ve removed the stoppers. Yes I have done that. After the zip was sewn into a garment. (Face palm).

Makery - How to Shorten an open ended metal zipper

You’ll need some jewellery pliers and side cutters for this…

Makery - How to Shorten an open ended metal zipper

Using the side cutters, and starting with the zipper tooth in front of your chalk mark, snip the end of the zip tooth off… then cut away as much of the rest of it as you can…

Makery - How to Shorten an open ended metal zipper

Then use the pliers to wiggle and remove what’s left…

Makery - How to Shorten an open ended metal zipper

Remove 5 or 6 teeth in this way, on both sides of the zip….

Makery - How to Shorten an open ended metal zipper

Cut away the excess zipper tape…

Makery - How to Shorten an open ended metal zipper

You’re left with these zipper stops on the parts you cut away. Now you CAN buy zipper repair kits like these. And there will be replacement zipper stops included in those. If those meet your needs you can skip the next couple of steps. But  I didn’t have time to order and wait for a kit to arrive (I was on a deadline and everything is right down to the wire right now). Plus, you know, that “working with what I have” thing in me!

Makery - How to Shorten an open ended metal zipper

This was by far the trickiest step. It’s on there pretty firmly so this is where the brute force part comes in. Use the pliers (A second pair comes in handy if you have them) to wiggle/lever/coax the zipper stop off the zipper tape. Not shown in this pic, but I found cutting away the zipper tape as close to the stopper as possible, and then fraying it, aided the process of loosening it’s grip a little. As did swearing.

shorten a metal zipper - portialawrie.co.uk

Eventually you’ll get the little sucker off. Open it up slightly (2 sets of pliers again)…

shorten a metal zipper - portialawrie.co.uk

Slide it onto the zipper tape in the position of the first tooth you removed and use the pliers to clamp it firmly in place. (Repeat for both sides of the zip)

Makery - How to Shorten an open ended metal zipper

Ta dah!

So yeah! Random I know. But someone, someday, is going to find this useful. You’re welcome 😉


DIY, how to, refashioning, Sewing, Tutorials, Uncategorized

Refashion: Vintage Jersey Dress to Tunic Shirt

01/17/17

Finding time to blog my makes (or indeed sew much for myself) has been a struggle for the latter part of 2016. Since The Refashioners in fact. Many things last year took their toll on my sewjo ( What a bloody awful year it was!) and as a result I’ve neglected this blog for the last few months.  I think I’ve been having some kind of  existential blogging crisis. For a while I questioned whether I was just falling out of love with blogging and had my head turned by Social Media. Recently I’ve been more inclined to share on IG. It’s quick. And writing a blog post is not. But I don’t think it’s that….VINTAGE JERSEY DRESS REFASHION (5)

It’s more to do with my sewing and me personally. Creatively I’ve been in a bit of a rut. Emotionally I’ve felt the need to go into my shell and hibernate for a while. I’m doing a gazillion things….but none of them “properly”.  (Which I hate). I have a gazillion ideas.  But precious little time or energy. And when presented with a time window I can use, I’m paralyzed by indecision and procrastination; or worse still, rushing and bodging! So none of them are reaching fruition. I think I just need to regroup.  Take a long deep breath.  How do you clear a creative log jam? Sometimes absorbing myself in simple, mindless tasks is enough for me. Things that occupy me just enough, but not too much. And as evidence of that, right after this little simple refashion, I sewed up something else, that I am really proud of and will share  with you, I promise. But in the meantime….here’s my little icebreaker…

VINTAGE JERSEY DRESS REFASHION (5)

Unmistakable vintage M&S label. Back when it was called St Michael! Oh yeah, and pre vanity sizing! This dress dates from the late 70’s I’d say. LOVE the geometric print and thick jersey fabric.  Love the button placket and mandarin collar. Not so keen on the frumpy bottom half. A younger sewist with better legs than I, may choose to modernise this little beauty by going down the mini dress route. On the right person that would look ace. I am not that person 😉

VINTAGE JERSEY DRESS REFASHION (5)

So I altered the bottom section to reflect one of my favourite details. A shirt tail hem. Very simple alteration. Lay the garment flat with side seams (in the centre of this pic) pinned on top of eachother.  (Doing this ensures any alteration cuts you make will be even & centred) Draw out your curves in chalk making sure the lines are at 90 degree angles at the folded edges that are the CF and CB (this prevents a peak or wedge in the centre of your curved line when you open the garment out after cutting). The curves meet at the side seam.

VINTAGE JERSEY DRESS REFASHION (5)

I pinned along my chalk lines to stop anything shifting as I cut. Cut just underneath the line of pins. I eyeballed an approximate hem allowance. I wasn’t feeling the need to be precise, but you could always mark one in. To finish the hem I simply serged the raw edge, turned under and stitched in place. (Where the curves meet at the side seams, it helps to unpick a little of the side seams to give you room to manoeuvre and turn under neatly).

VINTAGE JERSEY DRESS REFASHION (5)

This pic better shows the effect before and after cutting. Apologies for the poor quality. A) It’s winter. B) I totally neglected to take a proper before photo.

VINTAGE JERSEY DRESS REFASHION (5)

A simple alteration which makes this garment much more wearable for me. It’s super warm and cosy too! It’s bugging me a little that I didn’t swap to black thread to sew this hem. It didn’t seem as obvious in the gloomy light I was sewing in at the time.  I may go back and change that I think. I have a “sewlution” this year. I don’t normally do resolutions. But if I have one sewing related one this year it’s this: ” Sew less, just sew it better”.  If I’m going to fully break out of my rut, niggles like that are not going to help. Best I go back and sort that hem out then!

DIY, how to, overlocker, overlockers, Sewing, Tips and Tricks, Tutorials

Overlocker Tips: Sewing a Knit Neckline

11/23/16

OK, so another overlocker quickie today. If you’re not new to overlockers, then look away now, because you’ll already know this. But if you are sewing your first steps on an overlocker, after sewing side seams, this is the next thing you are going to want to know. Adding a neckline band…how to sew a knit neckline

(Actually this technique can be applied at the cuffs and hem too, as an alternative to straightforward hemming. Only difference there, is that the edges are straight and not curved and the band you are applying doesn’t necessarily need to be that much shorter than the edge you are applying it to. But that’s another post! )

And before anyone asks, because yes, this fabric is awesome, it’s from here 😉

Back to necklines. A neckline band is simply a long strip of fabric, sewn together (at the short ends with RS together) to form a loop, then folded in half (WS together with raw edges aligned)….how to sew a knit neckline

The total circumference of the neckband should generally be 2-3″ shorter than the circumference of the neckline you are applying it to. (This can be dependant on the amount of stretch in your fabric, but in most cases 2-3″ gets you there. I have an in depth post on that coming soonish). The band is cut shorter,then the stretch inherent in the knit fabric is used to ease it onto the neckline. Once attached, it will ping back to it’s original size and in the process it will pull the neckline inwards slightly; and this action is what allows the neckband to sit flat against the body. Make sense?

With the neckband sewn in a loop and folded over, mark the CB (the seam on your band), CF, and sides with pins. (Essentially 4 equally spaced pins dividing your neckband into quarters). On your neckline mark the CB and CF with pins…how to sew a knit neckline


With your garment right side out, we are pinning the band to the neckline with raw edges aligned. We are pinning at 4 points initially. Pin the CB and CF of your band to the CB and CF of your neckline. Then pin the sides of your band, to the shoulder seams points of your neckline…how to sew a knit neckline


Between those four points you have pinned,  the neckline will be longer than the band as pictured below. Obviously, because we cut the neckband shorter…how to sew a knit neckline


By stretching the neckband we can get it to “temporarily” be the same length as the neckline…how to sew a knit neckline


Work your way around each quarter section of the neckband, (the gaps between each of the original four pins) stretching it to fit the neckline and pinning in place as you go. Pin perpendicular to the raw edge (vertically) as pictured.how to sew a knit neckline


There it is all pinned in place. Don’t worry that the neckline looks longer and wavy still. We sort that out at the machine…how to sew a knit neckline

When you serge around this seam, you will need to stretch the neck band again. So you are holding the whole thing at tension, (so the neckband and neckline sit flat and flush against eachother) as it passes under the presser foot. (Remove the pins as you go! )

It helps to orientate the garment so that when you sew, the neckline (which is slightly longer) is facing the feed dogs, and the neckband is on top. In the same way as a sewing machine will feed the bottom layer of fabric ever so slightly quicker, so does a serger. Not massively. But it helps. ( You can also engage the differential feed on your serger to aid this process. But that’s another post.  Stretching the neckband manually like this works just fine!)how to sew a knit neckline

When serging “in the round” like this, just before your needles reach the point where you started, manouver the edge of your seam to the inside of the blade. So you continue sewing but are no longer cutting. (You don’t want to cut the overlock stitches you have already sewn). Continue sewing about 1″ past your starting point, so you have a double section of overlock stitch. (It’s a bit like the equivalent of a backstitch on a standard machine without the going backwards part! You’re securing the first part of your stitching by going over it again). At this point, stop sewing, lift your presser foot, then serge off a chain long enough to tie off.  (See previous post on finishing off your thread tails).

Et voila. A neckline to be proud of!how to sew a knit neckline

Thing with an overlocker is, it’s more noisy than it is actual scary. Just like your standard machine, it will only go as fast as you stamp on the foot pedal. Don’t stamp on the foot pedal is what I meant to say! Go gently, and you’ll be fine. And in no time at all you’ll be wondering what all the fuss (and fear) was about and you’ll be whizzing through necklines lighting fast. (Oh and at this stage above, you would press the seam to the inside and topstitch down using your standard machine. I’ve pressed but not topstitched here because my Janome HATES knits. So I’m on the hunt for an alternative to replace her. Any suggestions welcomed. If your standard machine sews knits like a dream, I wanna know!)

DIY, how to, overlocker, overlockers, serger, Sewing, Tutorials, Uncategorized

Overlocker tips: Burying thread tails

11/07/16

I have a few overlocker related posts in the works. Burbling away in the background. One in particular is quite exciting to the geek in me. And if you follow me on Instagram you may already know what that one will be about 😉

I’ve noticed a few “new overlockers” popping up on my feeds courtesy of another Lidl/Aldi deal. And because I have a few knit projects going on I thought it would be perfect timing to take a few pics as I go of the various little techniques involved in using an overlocker, for those of you who are new to this magnificent piece of kit. Be sure to check out these posts too if you’re a little nervous of your “beast”, and you’ll have it tamed in no time. But trust me, (because I’ve been there) it is very much worth your time, getting to know your machine properly at the start. You’ll feel so much more at ease when you come to sew a garment that you care about getting right, with fabric you care about not wasting, if you take a little time before hand to get to know, and have a play with your machine on scraps/samples first. And these posts (covering anatomy, threading, and tension settings) should give you a good jumping off point.  Just click on the image to view each post….

Anatomy of a serger/overlocker How to thread your serger/overlocker Establish the correct tension settings for your serger/overlocker

But in the meantime I thought I’d share a finishing tip for thread tails. Just as with sewing a standard seam, you’ll have thread tails to secure and finish. Firstly, there is no backstitch option on an overlocker obvs. So I always knot to secure, close to the stitching…burying-overlocker-threads-1


Thread the tail onto a yarn needle…burying-overlocker-threads-1burying-overlocker-threads-1


Pass the needle through the looper threads for about 2 inches…burying-overlocker-threads-1burying-overlocker-threads-1


Then pull the complete tail all the way through…burying-overlocker-threads-1burying-overlocker-threads-1

….and snip the excess close to the stitching.

how to bury overlocker thread

That’s it. Thread tails neatly buried 🙂 For an even neater finish you can pass the tail/needle under the threads right on the edge of the fabric (where the upper and lower looper threads meet & wrap round eachother) & inbetween the two layers of fabric of the overlocked edge. So they are sandwiched and invisible. I do that when I’m feeling particularly conscientious 😉  This piece is a neckband. If I’d buried the tails on the reverse of this, then it would be invisible on the finished garment once the seam is pressed to the inside and topstitched down. Depends on how neat you want to be of course. If you’re anything like me that’s often mood related, lol! Whatever you do though, this has got to be better than a dangly tail!


Older Posts
Portia
Follow
Sewbox

© Copyright 2026. Portia Lawrie. All Rights Reserved. Managed by WordPress Web Dev Cornwall .