• About
    • Contact
    • Press
    • Sponsor
  • DIY
    • Home & Garden
    • Jewellery & Accessories
    • Yarn Crafts
  • Sewing
    • patternless & self drafted
    • Refashions
    • Commercial Patterns
    • Sewing Tips
    • Overlockers
  • The Refashioners

Portia Lawrie

refashion, refashioning, repurposing, Restyles, the refashioners, The Refashioners 2016, Uncategorized

The Refashioners 2016: Mirjam

08/02/16

The Refashioners 2016 - Mirjam Liechti

Hi, this is Mirjam from miushka.com and I’m wearing a top made out of a pair of jeans!! But first things first. I was so excited when Portia asked if I wanted to take part as a blogger in this year’s refashioners. Of course I wanted to! I really got a kick out of last year’s community challenge, and contributing my piece as a blogger this year is just a little bit mind-blowing. So here I was, with a piece of thrifted and washed but unwearably frumpy clothing: the old pair of jeans.The Refashioners 2016 - Mirjam Liechti

Last year I made trousers from a shirt, so this year I would go the other way and make a top from trousers. I set myself two challenges. Firstly, I wanted to use just one pair of jeans to make a new piece of clothing (I only used a second pair of old jeans to produce some contrast bias binding for the neckline). Secondly, I did not want to leave any waste from that one pair of old jeans I was using. I used up practically everything from my original pair of jeans, except for some tiny scraps and offcuts. I got enough material from the jeans to make a top and was even left with some shorts to wear it with.

To begin with, I cut my jeans four times and reassembled the pieces to make the top and shorts.The Refashioners 2016 - Mirjam Liechti


So simple, right?! This is what I love most about refashioning: It really doesn’t take much at all, just some bold cuts and a little constructive rearrangement. I used the bottom parts of the trouser legs as sleeves, leaving the original hem intact. The mid-part of the trouser legs I turned upside-down, so the wider parts of the legs would be sitting around my belly – I haven’t told you yet, but I’m making a maternity top here, so I’ll need the extra belly room!The Refashioners 2016 - Mirjam Liechti

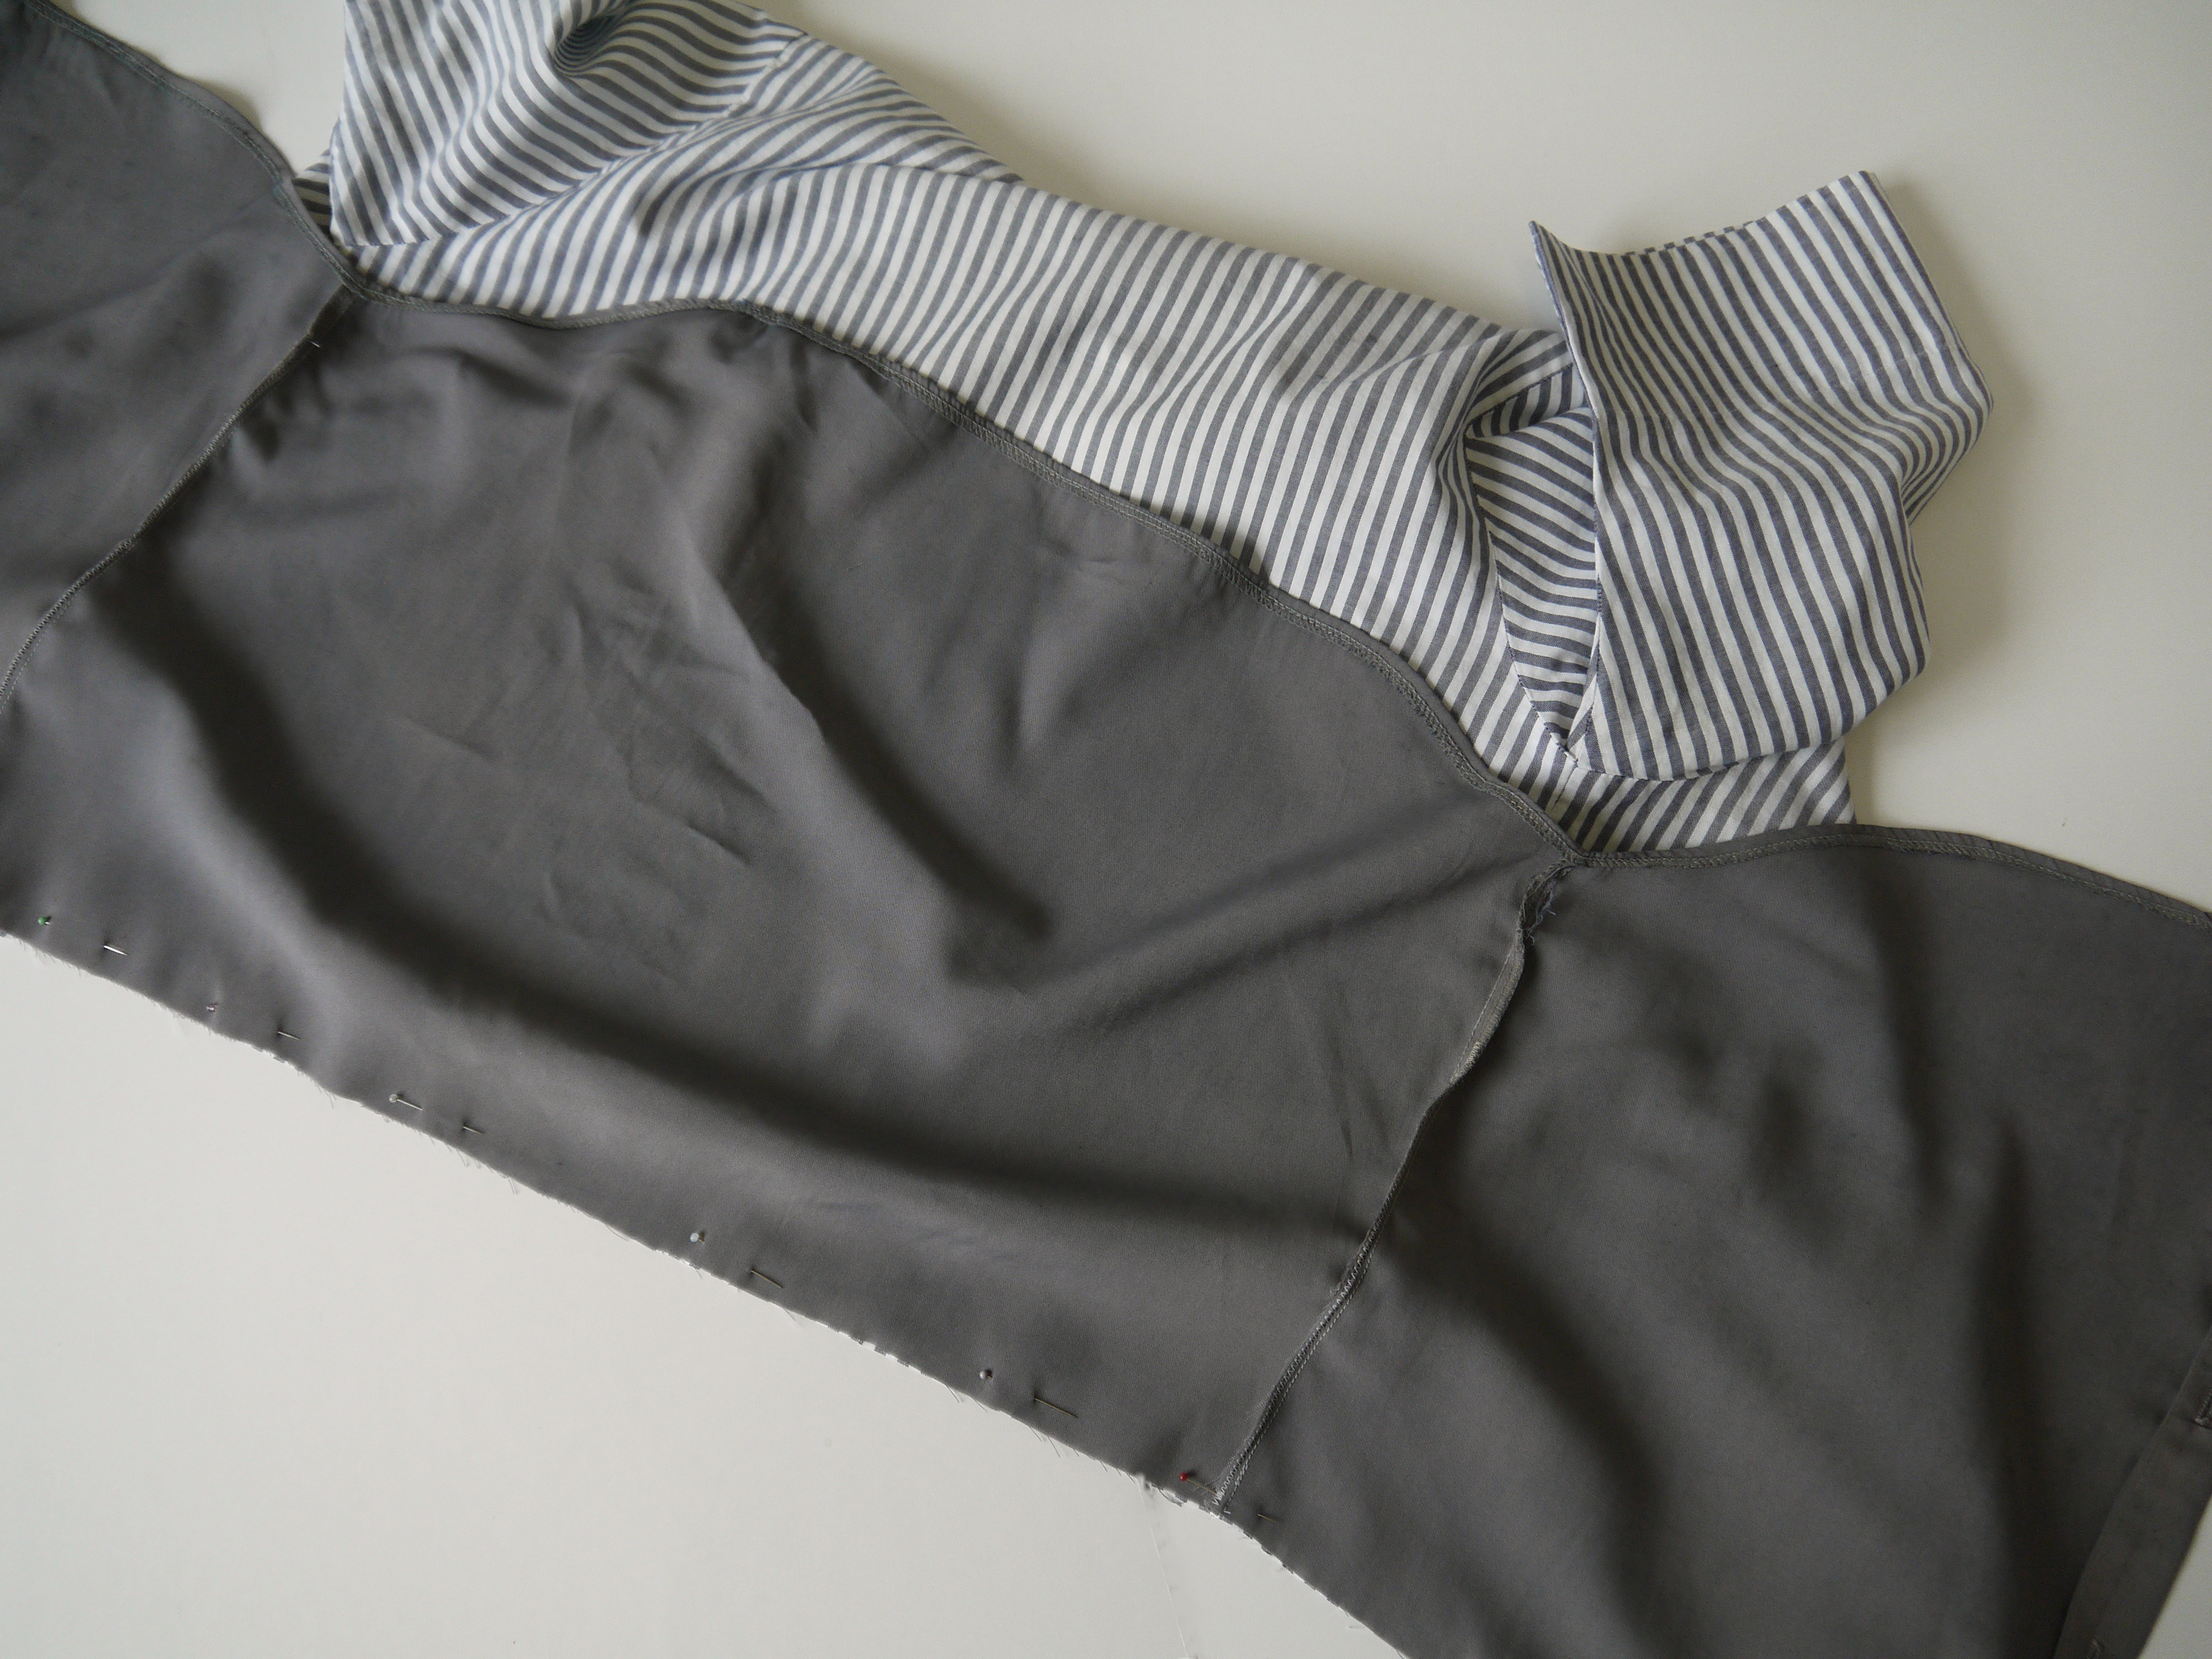
I ripped the inner leg seams to expose the dark edges. Then I joined the two legs to form the bodice. I’d only just gotten a new toy – my very first overlocker machine – so I played around with the stitches a bit. To close the centre front and centre back seam I used my overlocker’s flatlock stitch. For this you stitch two layers of fabric together and then lay them flat open and wiggle and jiggle the layers of fabric until the seam is all flat. Magic!The Refashioners 2016 - Mirjam Liechti
­

Next, I attached the sleeves, adjusting the fit a little by cutting off bits of fabric here and there. To give shape to the sleeves and to make them sit on my shoulders I opened half the shoulder seams, taking in a bit of fabric when restitching. To finish the neckline I used bias binding made from another old pair of jeans.The Refashioners 2016 - Mirjam Liechti

The Refashioners 2016 - Mirjam LiechtiThe Refashioners 2016 - Mirjam Liechti

At this point, my top was really boxy, if not huge. A good thing around the growing belly, but not very flattering. So I added bust darts, but left enough room so I wouldn’t have to add any closures. I can easily pull the top over my head. And there’s still enough room for my belly to grow (at the time of writing I have four months to go!). I finished the hem by folding it over and inserting a thin elastic strap to keep the stiff fabric from sticking out too much.The Refashioners 2016 - Mirjam Liechti


So that’s the top – what about the shorts, though? Well, these were basically just left over, as I’d only used the trouser legs to make the top. I left the shorts as they were after the first cuts.The Refashioners 2016 - Mirjam Liechti

They fit nicely around the hip and I like the length I cut them in the first place. The edges are left raw and for that decent denim look I’m now waiting for the shorts to fray with washing and wearing.The Refashioners 2016 - Mirjam Liechti

Thank you, Portia, for creating and organizing such an inspiring challenge for the sewing community. I really can’t wait to see what everyone makes of it!

Well first of all…HUGE congrats Mirjam on your impending new arrival!!  Secondly…do you know what floats my “oooooh that’s clever” boat most about this make??  The way Mirjam has cut the armscye curves/sleeves out of those leg cuffs, and that the “opposite” curve in the leftover leg then informs the shape of the neckline. Flipping those larger pieces upside down with the wider part at the bottom. Doing it like this gives maximum use of the fabric available.  And when it comes to refashioning jeans, (where flat fabric is at a premium) it’s a very clever approach and one worth noting! Replacing those flat fell seams with the less bulky flatlock approach also makes the seam more fluid. Nice touch!

You can find  Mirjam here or here. And if you’re inspired to get your refashion on and enter the Community Challenge and be in with a chance of winning some epic prizes…DO IT! Deadline for entries is 30th Sept. Midnight GMT.

The Refashioners 2016 - Huge Prize Package

….I think you’ve go the idea now right? Essentially we want you to refashion some jeans! (You can find the full details/small print of the brief here). BUT, if you want to be in with a chance of winning one of these amazing prize packages you need to SHARE that refashion with us in one of the following ways:

  • On Instagram: Share a pic using the hashtags #therefashioners2016  and #jeanius
  • On Pinterest: There is a community board here where you can pin your makes. (You will need to request an invite to join)
  • On Facebook: There is a community board here where you can post your makes (You will need to request an invite to join)

Only entries shared via the above 3 methods will be entered into the competition. Closing date for entries is 30th September 2016 Midnight GMT.
DIY, how to, repurposing, Tutorials

DIY: Copper & Wool Tassel Key Fob

11/25/15

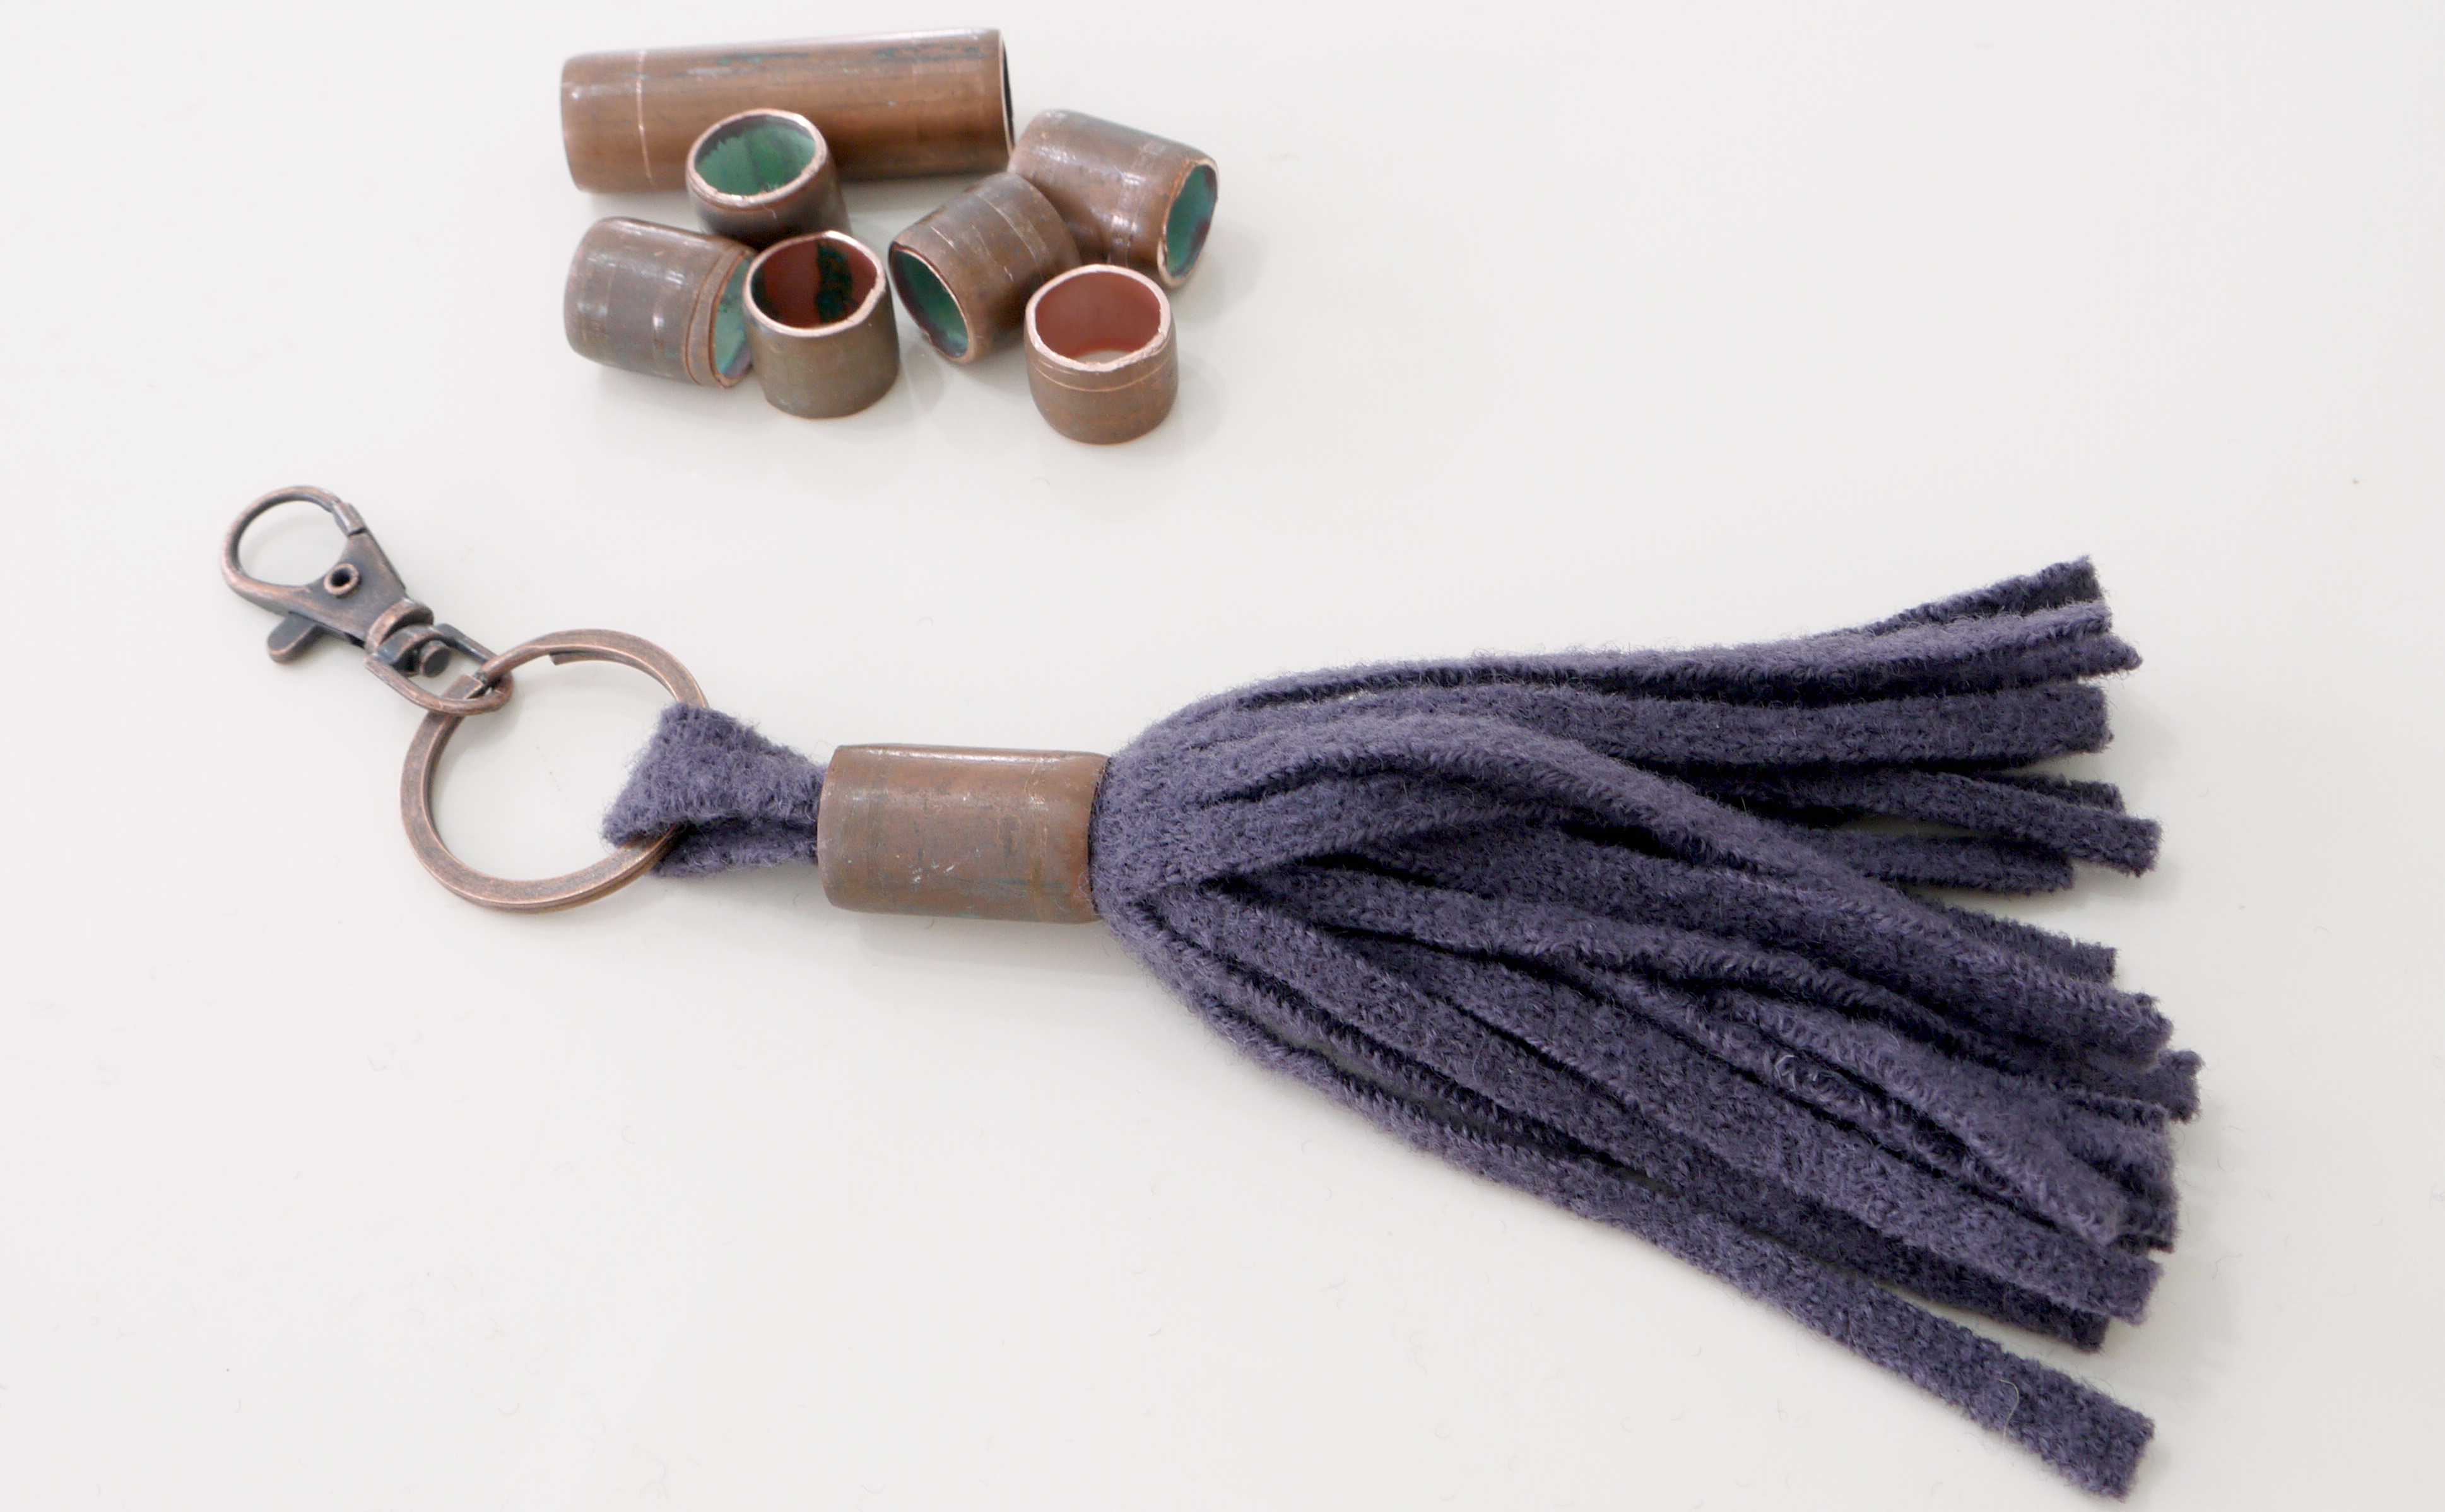
Just a quick and cheeky little diy for you this morning. I’ve been playing alot recently with more crafting related projects having just recovered my crafting/jewelry toolkit from storage. This rather tactile keyfob combines the textures and tones of copper and boiled wool. Still needs a bit of refinement I think….but I thought you’d enjoy it anyway as the contrast of materials really works I think!copper and wool tassel keyring

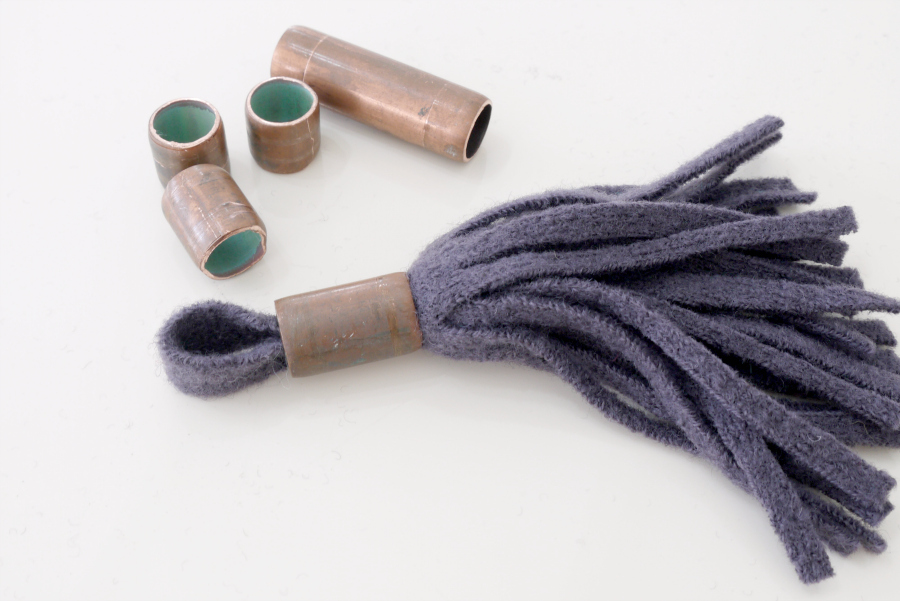
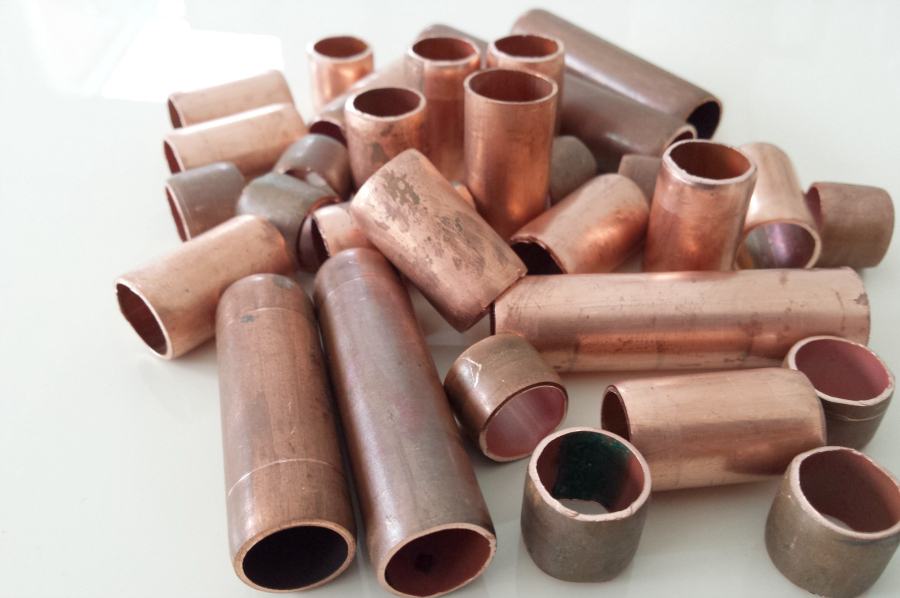
This is standard 15mm copper plumbing pipe. Just some offcuts that someone on our local feecycle style facebook group kindly gave me to have a play with. I’m getting slightly obsessed with metal tubing and piping; and repurposing hardware supplies into something  prettier. (You may recall my necklace and pendant from last week!) Pinterest as usual is full of inspiration…copper and wool tassel keyring

The tassel part utilises some boiled wool swatches that I got from Dragonfly Fabrics a couple of years back when I was deciding on fabric for my Freemantle coat. Yes they were only swatches (measuring about 6″ x 4″) but they really were too delicious to discard. So they’ve sat in my stash for aaaaages.

copper and wool tassel keyring

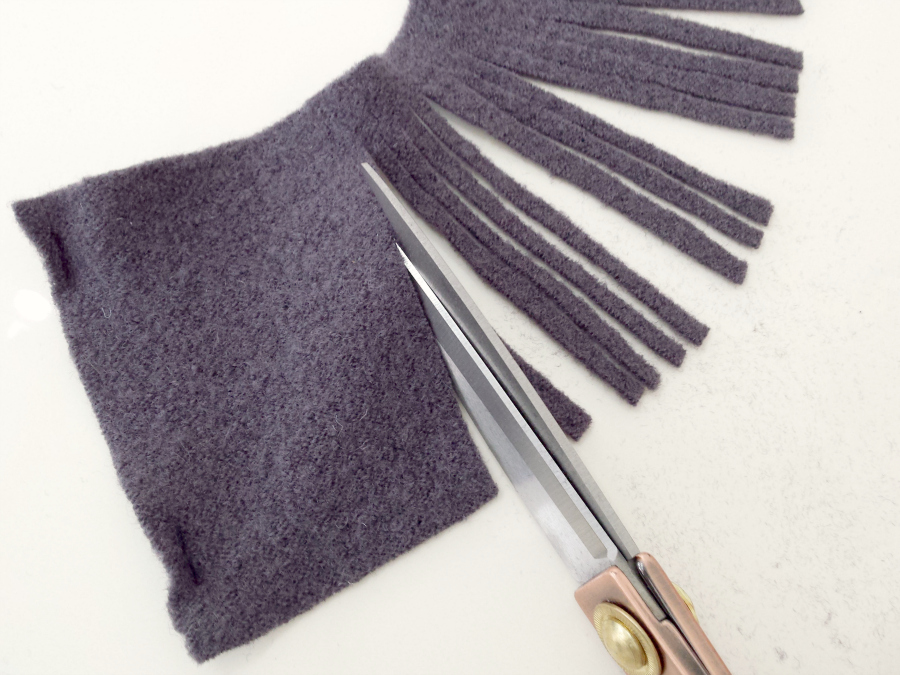
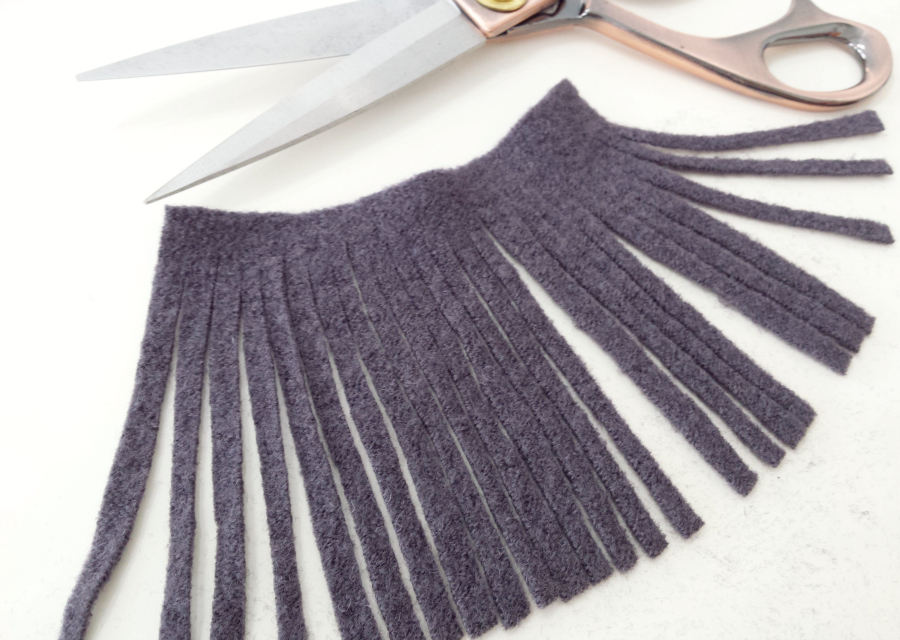
Not in the least bit complicated as you can probably work out! Cut the wool piece into narrow strips, creating a fringe and leaving the top 1/2″ uncut. The beauty of boiled wool of course is that it doesn’t fray. So it’s perfect for creating no fuss  fringing. You can see in the picture above, on the left of the fabric piece, there are some staple marks where the swatches were stapled to card. I removed a 1cm wide strip from the left edge to remove that. But set it aside…

copper and wool tassel keyring

copper and wool tassel keyring

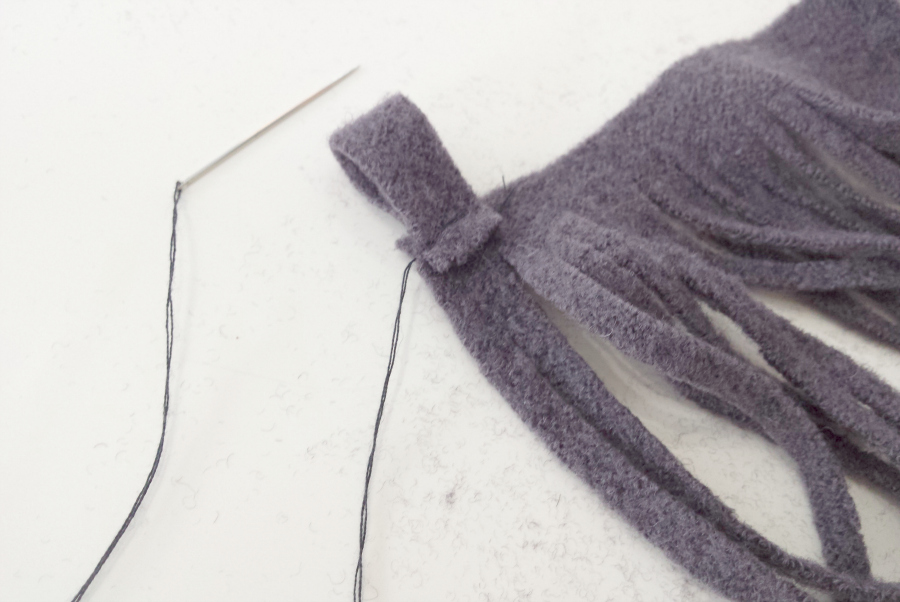
…and used a section of it to make a loop that is stitched to the top corner…

copper and wool tassel keyring

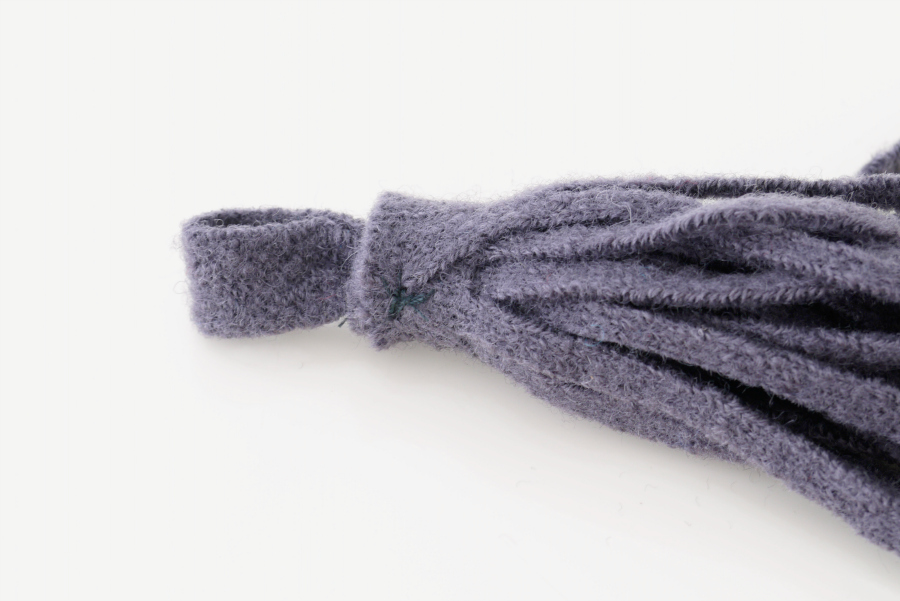
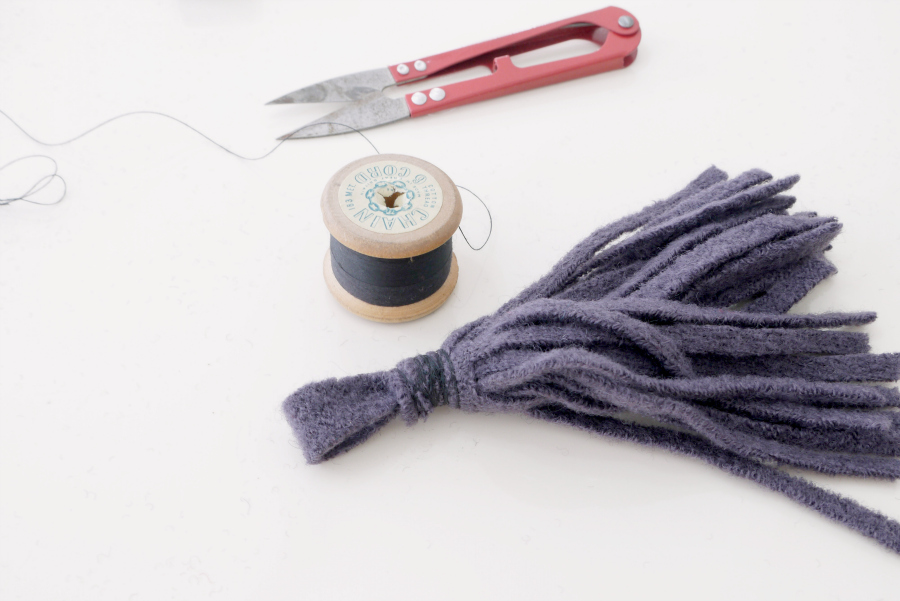
Roll it all up tightly and stitch to secure. Stitch through the whole neck of the tassel. Boiled wool is like sewing through butter so it’s super easy to pass a needle even through several layers like this…

copper and wool tassel keyring

At this point , the neck of my tassel was to wide to sit in my 15mm copper pipe. I simply wrapped it with thread to compress it. Again, this is a cinch with boiled wool as it’s so deliciously squidgy!

copper and wool tassel keyring

Once the neck of the tassel was narrow enough I slid on the piece of copper tube and slid it down until it was a snug fit. Then popped a few drops of superglue into the top of the pipe for a little extra security.

copper and wool tassel keyring

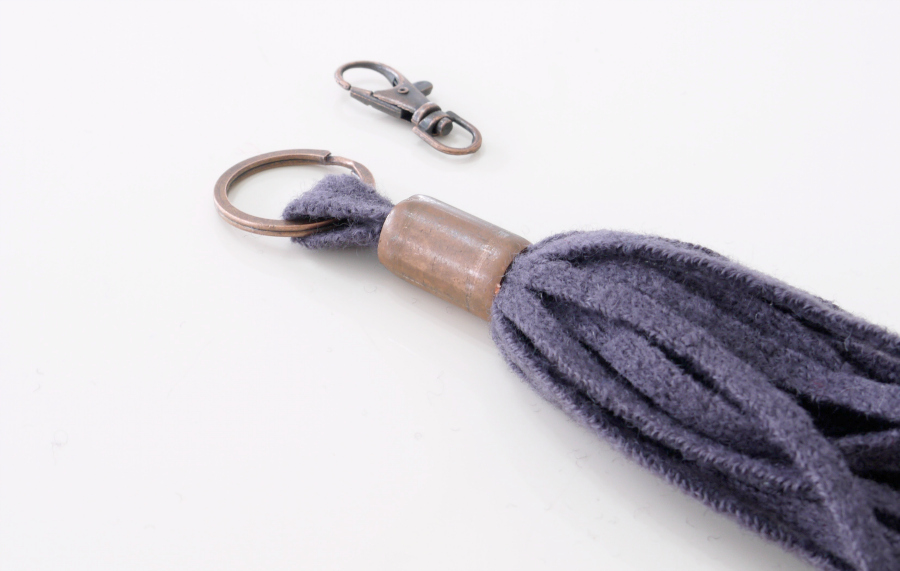
Slide a split ring through the tab; add a lobster clasp…

copper and wool tassel keyring

Done! The resulting keyring is quite lightweight. Not sure it’s up to the rigorous use that my car keys get; being shoved in and out of bags and pockets on a daily basis. (Elliott nicked the really sturdy red leather one I made. Pfff!!!) But it does make the perfect decorative fob for the key that sits in our living room french doors AND this heather shade matches perfectly with our colour palette. It’s a lovely little added touch of luxury and detail to keys that sit permanently in doors, cabinets, drawers and the like.

Don’t forget the giveaway courtesy of Dragonfly fabrics closes on Sunday.

DIY, how to, jewelry, repurposing, Tutorials, Uncategorized

DIY: Pendant from Brass Tube Offcuts

11/16/15

DIY PENDANT FROM BRASS TUBING OFFCUTS

If you thought my rubber and brass tube necklace was simple, this pendant is even more so!

DIY PENDANT FROM BRASS TUBING OFFCUTS

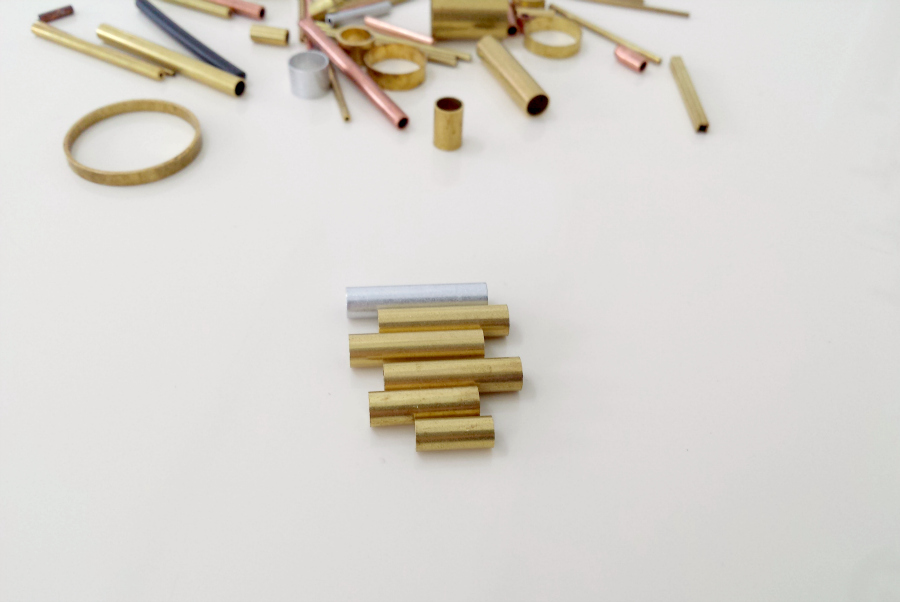
The pieces come from the same batch of tubing offcuts in the previous post. This time  6 pieces of metal tube the same diameter and graduating lengths (approx 1″ and smaller)…

DIY PENDANT FROM BRASS TUBING OFFCUTS

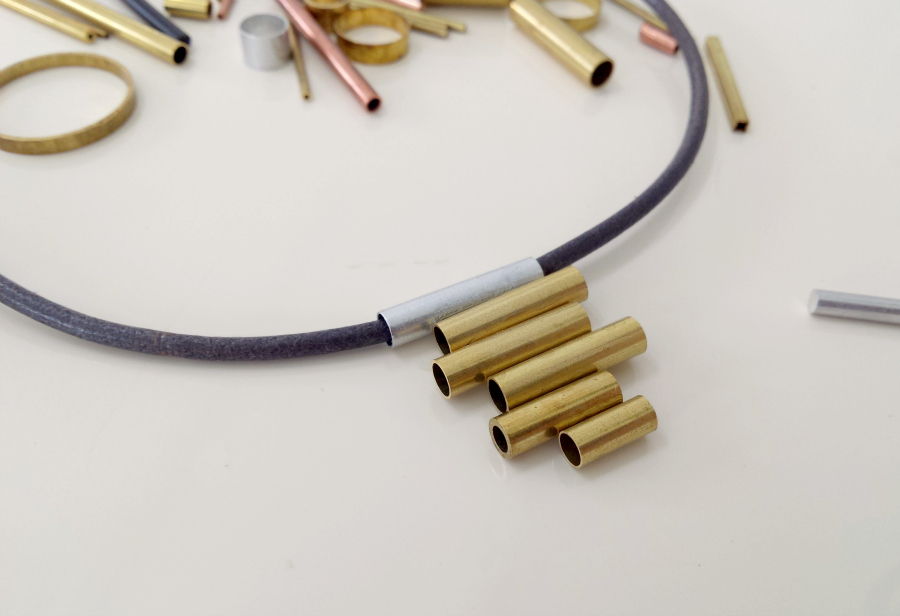
I played around with arranging them and settled on this staggered configuration…

DIY PENDANT FROM BRASS TUBING OFFCUTS

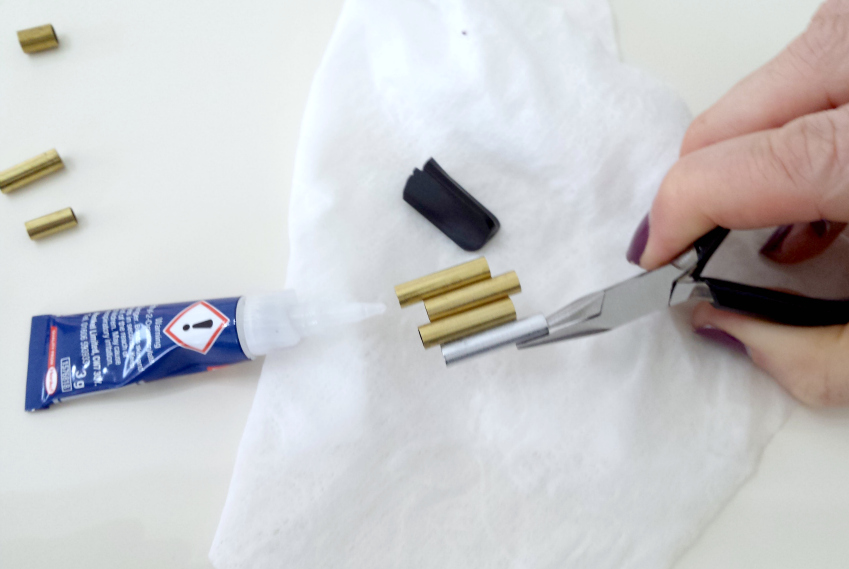
Then grasping one of the tubes with a set of small pliers…I simply super glued each tube in turn along the length, holding in place for about 30 seconds before moving onto the next….(be sure to use a glue suitable for metal)

DIY PENDANT FROM BRASS TUBING OFFCUTS

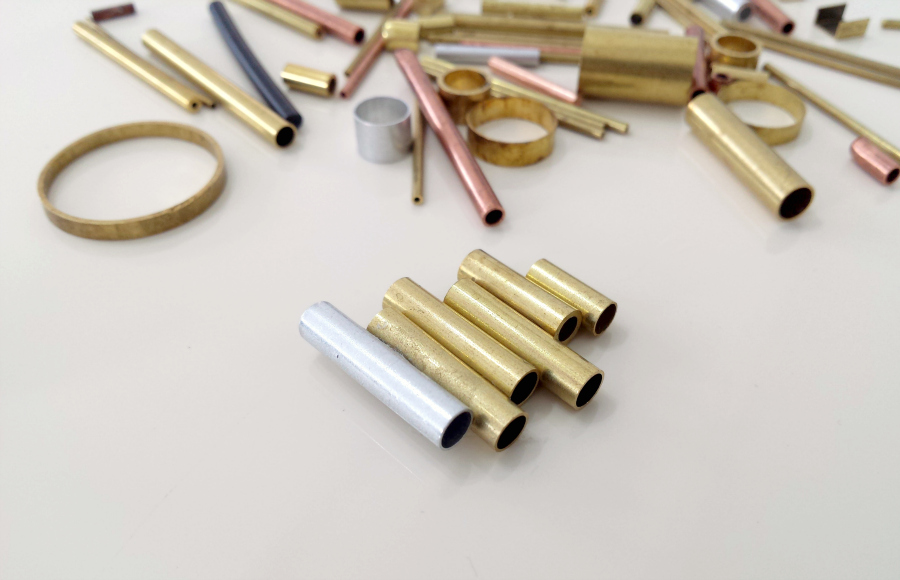
Leave to dry…

DIY PENDANT FROM BRASS TUBING OFFCUTS

Thread onto a piece of leather, rubber, or your favourite chain!

Doesn’t get easier than that, right?!

DIY, how to, jewelry, repurposing, Tutorials

DIY: Rubber & Brass Tube Necklace

11/10/15

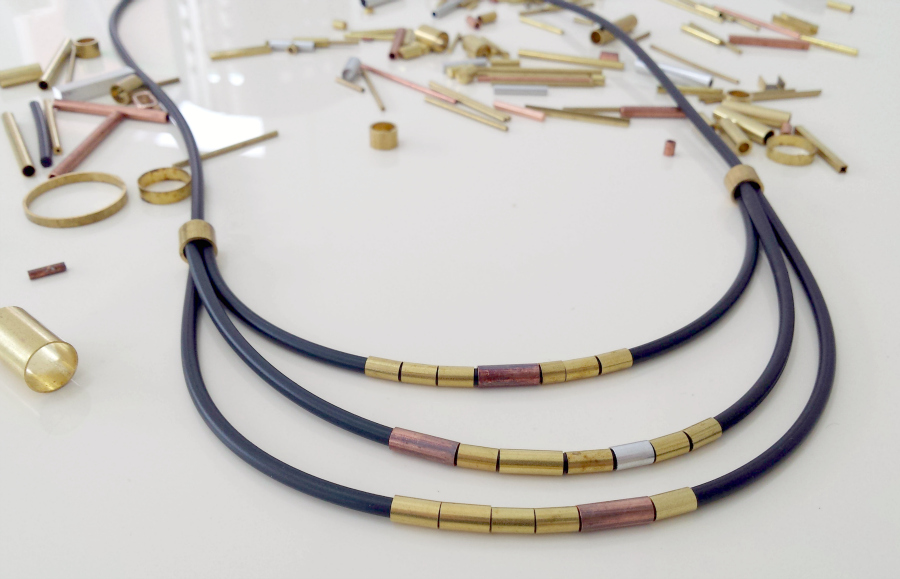
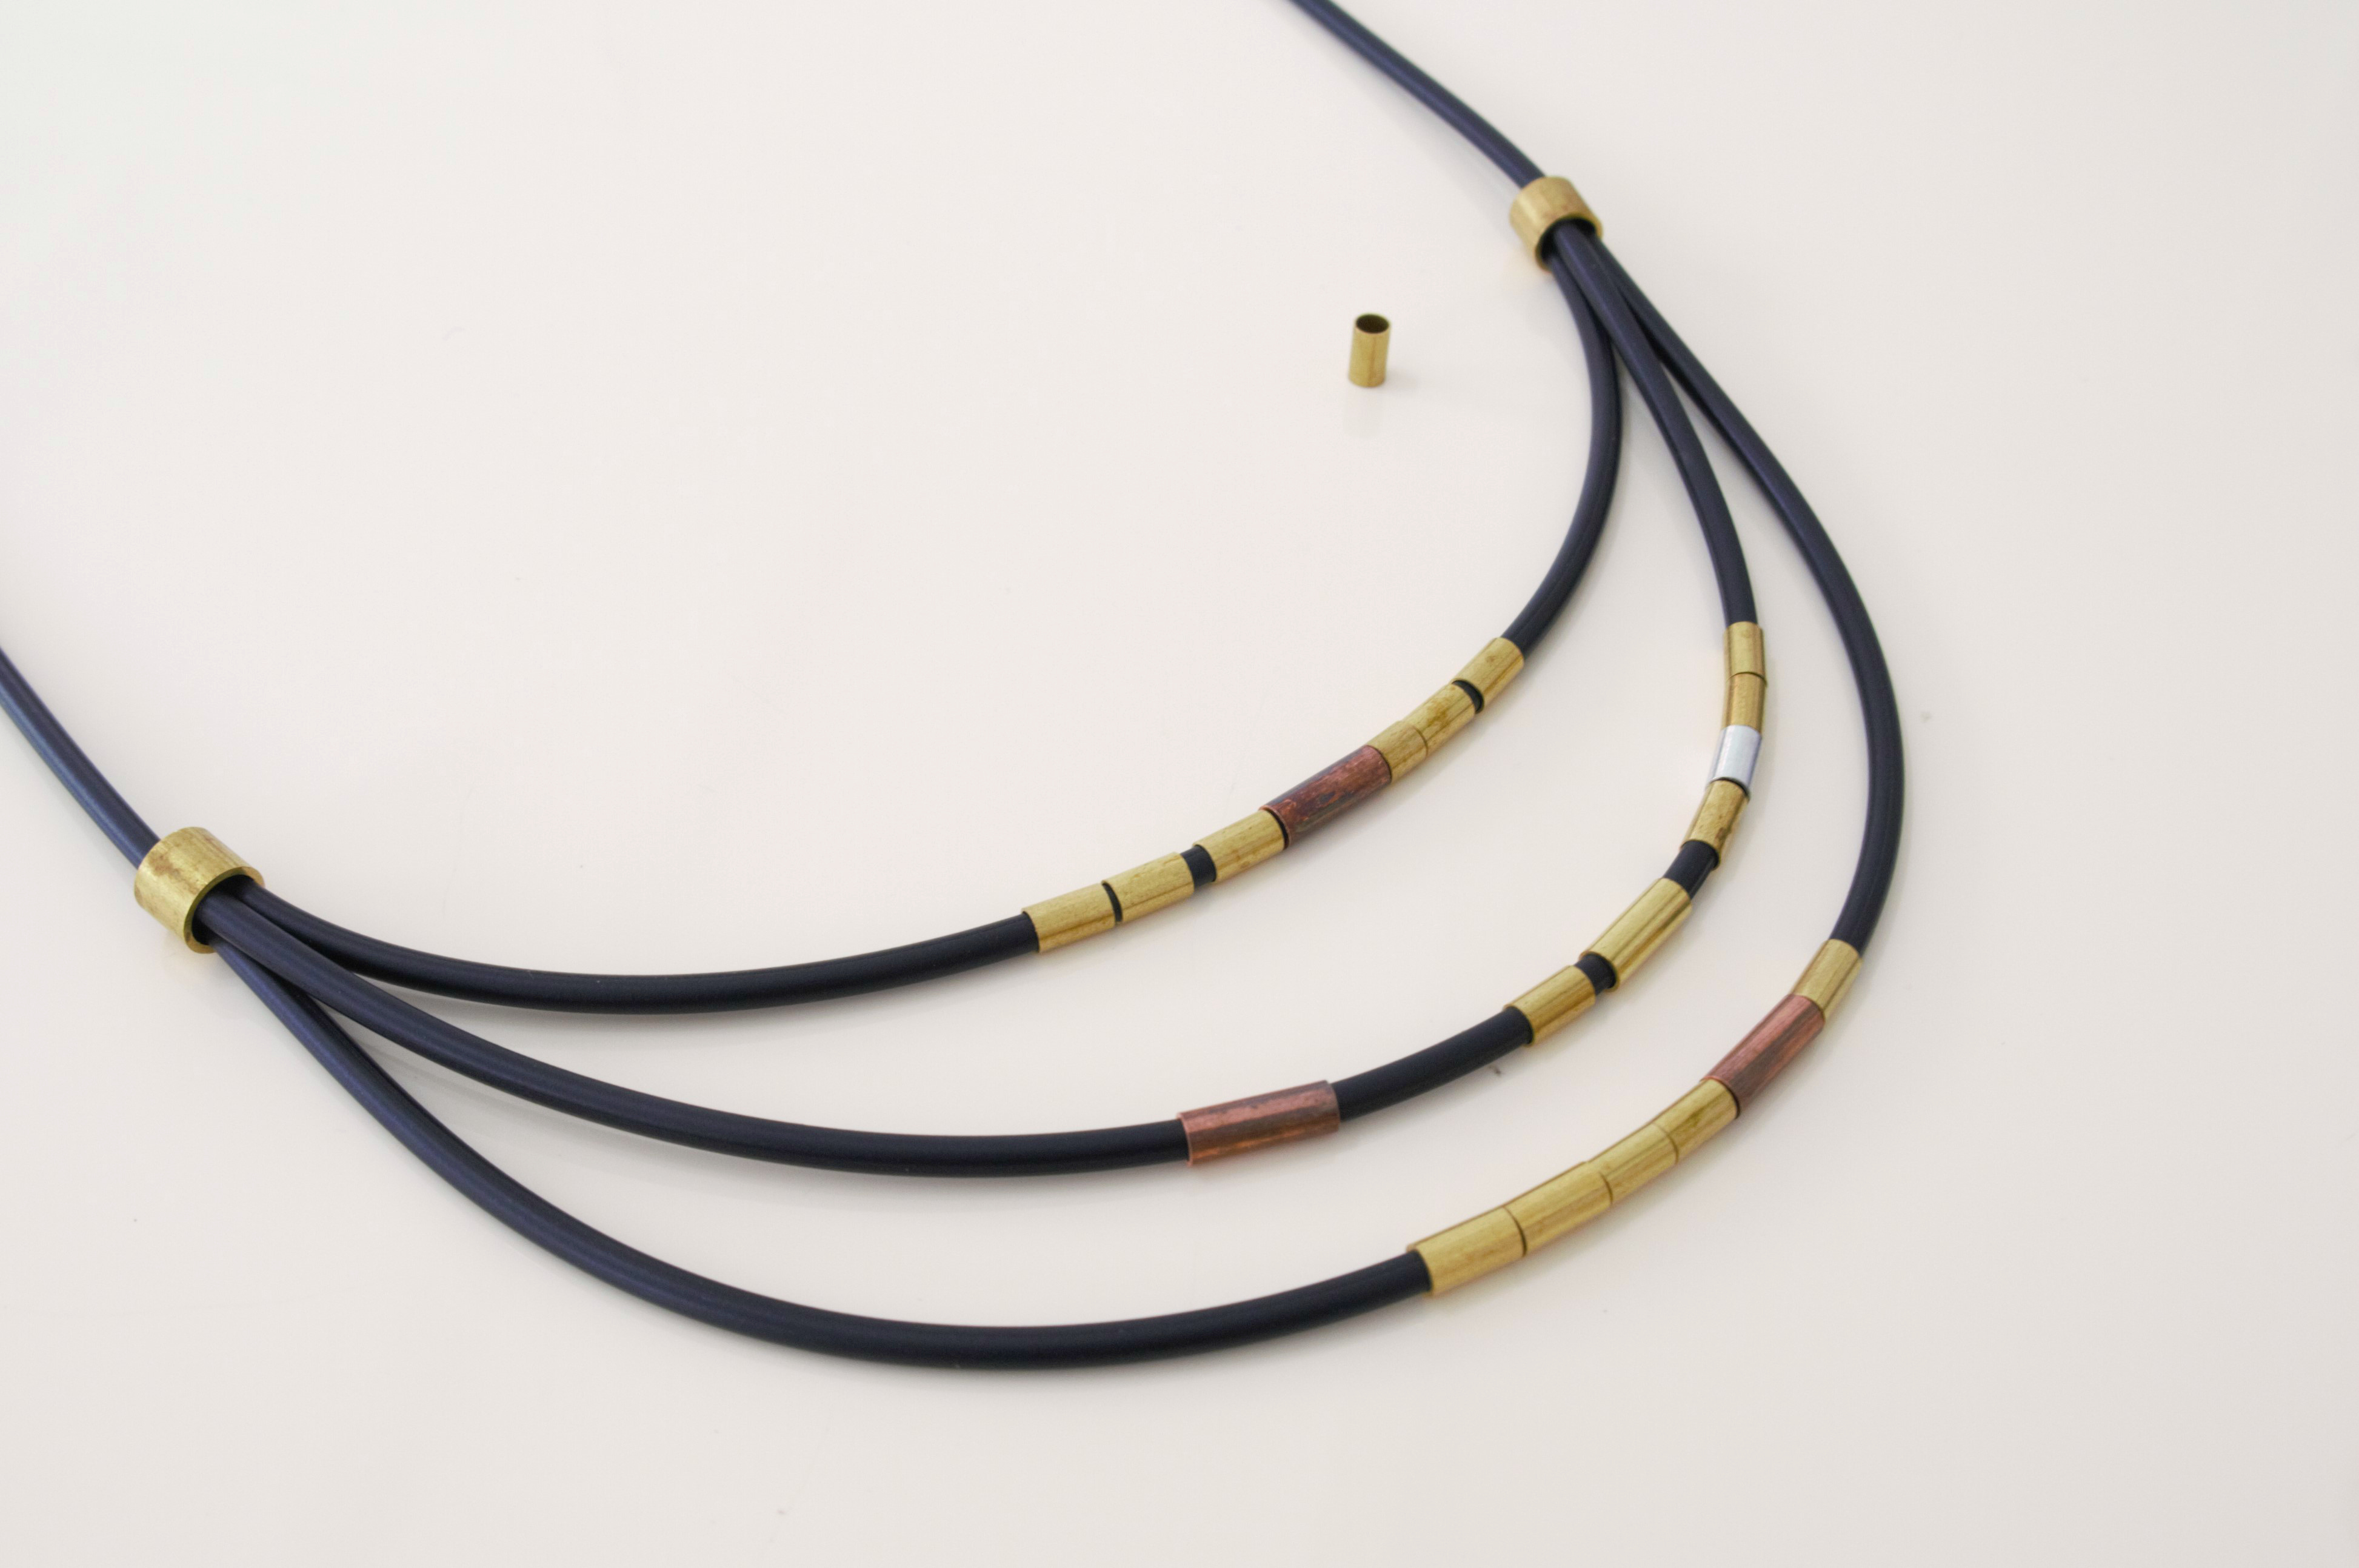
This is what happens when my weekend plans get messed up and I’m forced to stay home with nothing specific to do. I start playing with random materials to see what I can come up with. I love using materials for something other than their intended purpose. This necklace is comprised entirely of “stuff” more at home in the hardware shop. But I find the contrast between the metals and rubber really pleasing….DIY RUBBER AND METAL TUBE NECKLACE

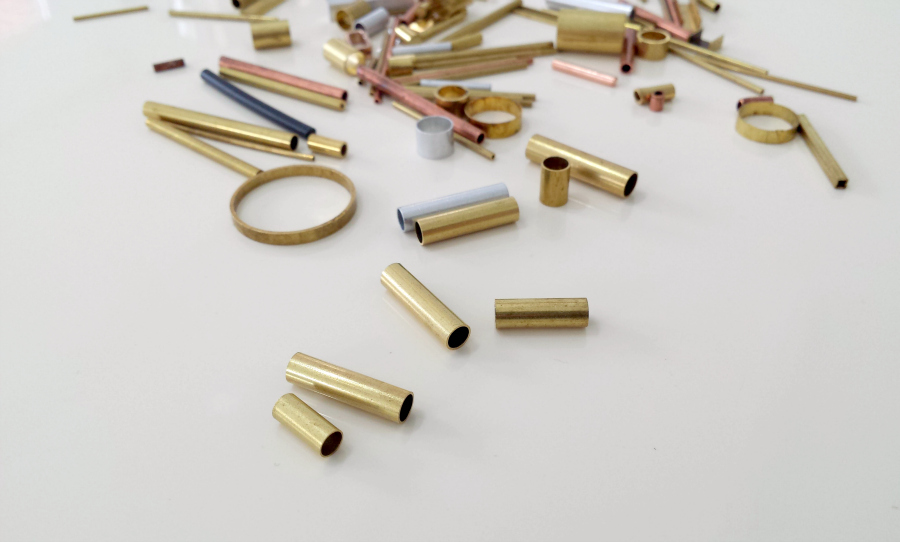
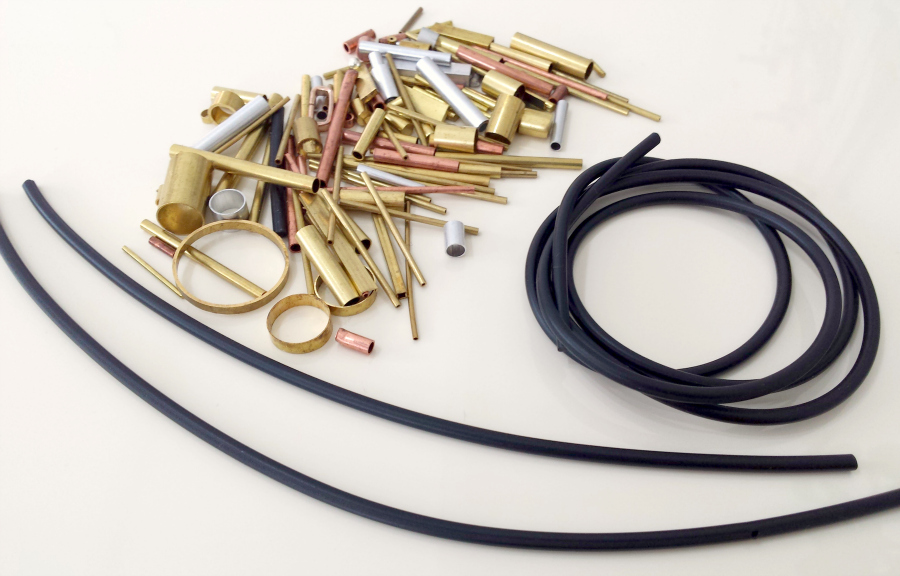
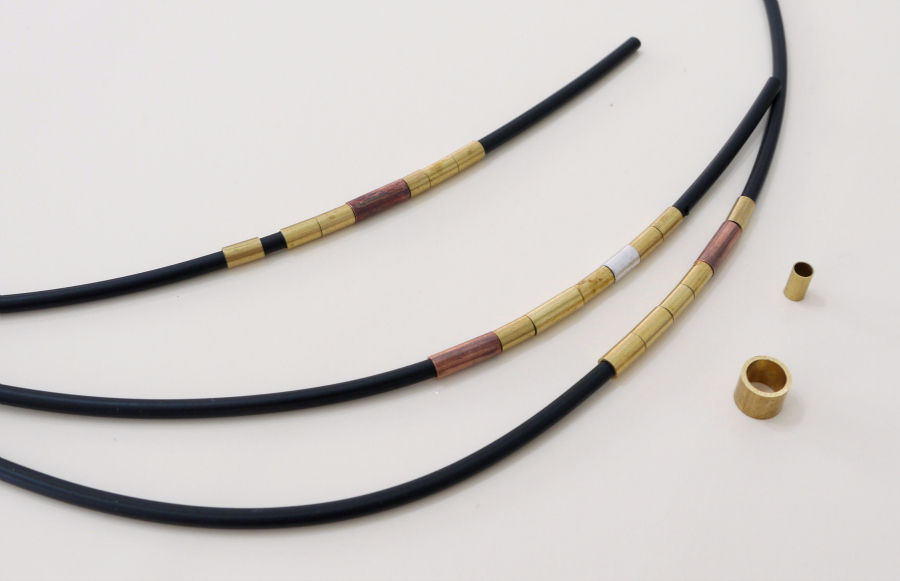
The metal elements of this necklace come from a mixed bag of tubing offcuts I randomly came across on Ebay a few months back. I was looking for something else entirely when I came across this bag of offcuts. I THINK they are used in precision engineering and things like model steam engines/trains etc. But in any case they looked mighty puuuuurty to me! So I bought them thinking I’d have a play and see what happened. The rubber cord is a length of this Nitrile O Ring cord which is used in oil/fuel/water seals for car and lawnmower engines. This one is the 3mm diameter cord but it comes in a variety of different thicknesses and you can buy it by the metre or in premade circles. All of which I am tempted to explore further for jewellery. But enough of my ponderings! Just look how easy this is to make….DIY RUBBER AND METAL TUBE NECKLACE

Cut 3 pieces of the rubber cord measuring approx 33″, 9″ and 7″

DIY RUBBER AND METAL TUBE NECKLACE

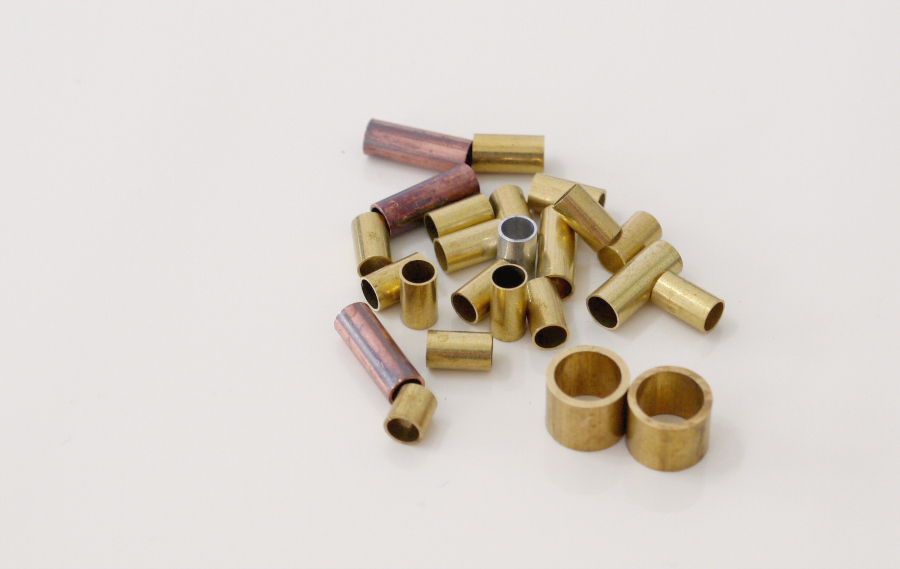
Seperate out the tubing offcuts that are the same diameter as the cord (these will be the “beads”) plus 2 larger pieces of tube that will snugly fit all 3 pieces of cord (these are used like cord “crimps” to hold the cords together).

DIY RUBBER AND METAL TUBE NECKLACE

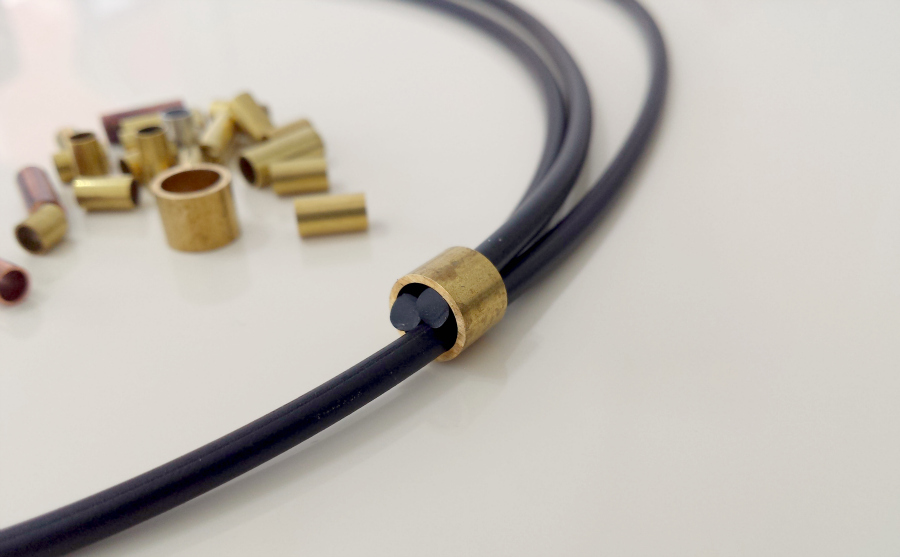
Take one of the larger pieces and thread all 3 lengths of rubber cord through it, with the longest piece extending out about 10″ and the ends of the 2 shorter lengths of cord flush with the top.

DIY RUBBER AND METAL TUBE NECKLACE

Thread  the “beads” onto all 3 of the rubber cords in whatever arrangement pleases you. I have a couple of copper and aluminium elements thrown in there too. Set one of the smaller pieces of metal tubing offcuts to one side.

DIY RUBBER AND METAL TUBE NECKLACE

Slide on the second larger metal tube to clamp it all together, just like you did the first.

DIY RUBBER AND METAL TUBE NECKLACE

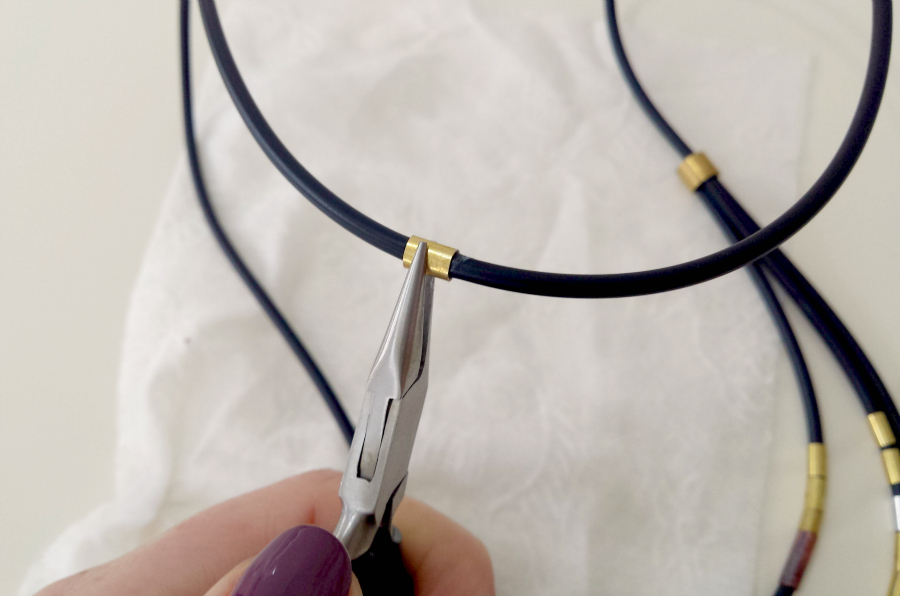
You’ll have the two cut ends of the longer length of cord left to join together. Slide that smaller bit of tube on one end. Join the cut ends of the rubber with a dab of super glue and hold in place for a few seconds. While the glue is still tacky, slide the tube offcut over to hide the join and crimp slightly with a pair of pliers.

DIY RUBBER AND METAL TUBE NECKLACE

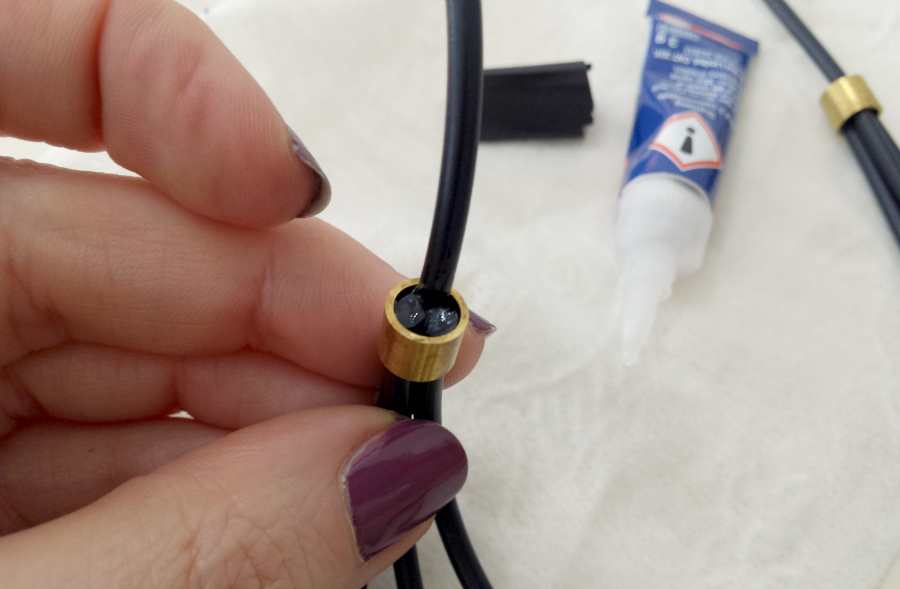
Pop a few dabs of superglue into the top of the larger metal tubes where the rubber cords all meet too. Just to give an extra bit of hold. Quickly wipe away any excess that may drip through onto the cords below.

DIY RUBBER AND METAL TUBE NECKLACE

Leave to dry and you’re done!

DIY RUBBER AND METAL TUBE NECKLACE

I’m really rather taken with it.  I don’t think it’s obvious at all that these are hardware/engineering materials and the whole thing has a contemporary and minimalist feel with clean, simple lines. And I love the textures and subtle metallic elements.  Awesome with some simple black evening wear or over a plain collared shirt right?


DIY, home, how to, interiors, organising, repurposing, Upcycling

DIY: Clay Wrapped Pots

04/13/15

clay wrapped pots at www.portialawrie.co.uk

I love me a pot, jar, “caddy”. I like coralling things together and having little places for everything; keeps me CALM; and pots are perfect for that. If it can be a pretty pot, then I’m a very happy bunny indeed…

clay wrapped pots at www.portialawrie.co.uk

And these are pretty, non? My love affair with air dry clay continues and these pots are very much in keeping with the style of my torn clay bowls. In fact the process  is more or less identical….

clay wrapped pots at www.portialawrie.co.uk

Except for the “mold” of course. That is….these pots hold a sneaky secret!

clay wrapped pots at www.portialawrie.co.uk

Boring old food cans!

clay wrapped pots at www.portialawrie.co.uk

Cunningly disguised….

clay wrapped pots at www.portialawrie.co.uk

…and keeping me calm 😉

You don’t need a step by step tute for these, right? Good…because I fluffed the photography up so I don’t have one for you, lol.  Just follow the same steps as for the torn clay bowls but instead of draping it over a bowl, wrap it around a can and trim the base with a sharp knife. Wetting the surface of the clay before you wrap helps it stick to the can and itself once wrapped.

Simple as that!

DIY, Dressmaking, how to, repurposing, Sewing, Tutorials, Upcycling

DIY: GIANT PYRAMID PINCUSHION

03/10/15

Make a giant pyramid pincushion from denim scraps at www.portialawrie.co.uk

This is a project that is long overdue for me!  I’ve been working with a teeny pincushion for several years  and I’ve been hankering after something more substantial for a while now. I use several different types of pins depending on the fabric I’m sewing and my teeny pumpkin cushion just wasn’t cutting the mustard anymore….they wouldn’t all fit for a start, and I’d end up trying to fish out my fine steel pins from between the big round heads of my quilting pins. Annoying!


Make a giant pyramid pincushion from denim scraps at www.portialawrie.co.uk

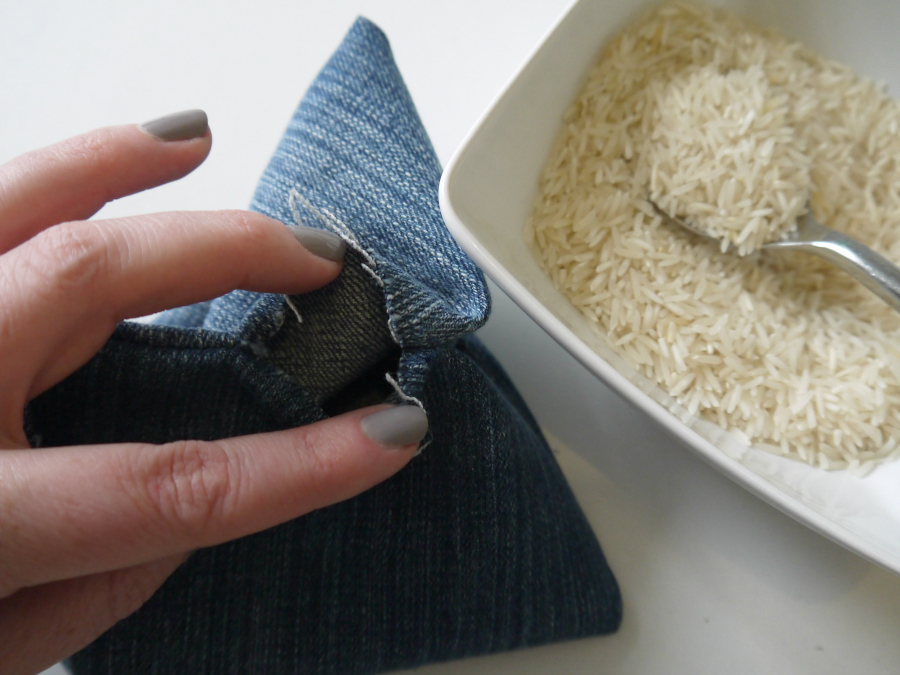
You’ll need old jeans, rice,  and ultra fine wire wool. I’d read somewhere that stuffing your pincushion with wire wool helps keep your pins sharp. The rice serves a dual purpose. It weights the pincushion down. But I was also concerned about the steel wool “rusting” over time. Rust is caused by metal + moisture. Rice absorbs moisture. So hopefully it will help keep the rust away!


Make a giant pyramid pincushion from denim scraps at www.portialawrie.co.uk

Cut a rectangle twice as long as it is wide. Mine was 14″ x 7″. Cut a strip of fabric 1″ x 7″ for the tab. I zig zagged the edges of my tab strip to prevent fraying. Fray check or clear nail polish would also do. I didn’t want to rouleau it as I wanted a kind of scrappy denim effect but you could, if you wanted a cleaner finish…


Make a giant pyramid pincushion from denim scraps at www.portialawrie.co.uk

Fold the tab strip end to end and stitch at a 45 degree angle to one corner or your rectangle…


Make a giant pyramid pincushion from denim scraps at www.portialawrie.co.uk

Fold in half and stitch as shown. Along the top edge, then down the side, leaving about 3″ in the middle of that side seam for turning.  Leave the bottom edge open. (Folded edge is on the right. I triple stitched all seams for strength). Trim all edges. Clip corners.


Make a giant pyramid pincushion from denim scraps at www.portialawrie.co.uk

Now with that open bottom edge…close and stitch it so the bottom seam is at a 90 degree angle to the top edge (this creates the pyramid. You see what was the side seam with the opening, is now in the centre of the bottom edge)…


Make a giant pyramid pincushion from denim scraps at www.portialawrie.co.uk

Turn through to the right side. Pyramid!


Make a giant pyramid pincushion from denim scraps at www.portialawrie.co.uk

Put a generous amount of rice in for weight (I used half a cereal bowl for mine)


Make a giant pyramid pincushion from denim scraps at www.portialawrie.co.uk

Then stuff with the finest grade wire wool you can get. Don’t get the coarse stuff…it’ll just make it lumpy! If it does get a bit lumpy, us a little wadding around the inside. Slip stitch the opening closed once it’s plump enough. (It needs to be pretty solid)


Make a giant pyramid pincushion from denim scraps at www.portialawrie.co.uk

And there you go! Giant pyramid pincushion. Those yellow pins are quilting ones. Then I have glass headed standard pins and fine steel ones. Because my pyramid has 3 sides, (excluding the base. Obvs we all know a pyramid has 4 sides!) each type of pin has it’s own little place. So not only is there now room for them all, I don’t get them mixed up. One less thing to bug me!


Make a giant pyramid pincushion from denim scraps at www.portialawrie.co.uk

Oh and to give you an idea of scale!

DIY, dyeing, how to, refashion, refashioning, repurposing, Restyles, Thrifting, Tips and Tricks, Tutorials

diy: tea dyed floral shirt

02/27/15

Use tea to add a unique vintage twist to a white shirt at www.portialawrie.co.uk

Next time you’re brewing a cuppa, why not brew a little extra and use it to give a subtle vintage twist to a “too bright” shirt. I say too bright, in my case I mean too white. White simply doesn’t suit my skin tone. Bright, is not a feature in my colour palette either. BUT I really loved this top that I thrifted earlier this week. So I bought the cheapest jumbo box of teabags I could find and set to work. Did I mention I actually hate tea? I’m a coffee girl all the way. But it does have it’s uses….


Use tea to add a unique vintage twist to a white shirt at www.portialawrie.co.uk

I used 100 cheap teabags. (Typhoo if you were wondering. On spesh at £2.50 for 200)…


Use tea to add a unique vintage twist to a white shirt at www.portialawrie.co.uk

Brewed my tea solution in about 1.5 litres of hot water for about 10 minutes….


Use tea to add a unique vintage twist to a white shirt at www.portialawrie.co.uk

Strained the teabags (give em a good squeeze) and then topped up my pan with about another 1.5 litres of boiling water (this is a standard casserole pan if that gives you an idea of the size)…


Use tea to add a unique vintage twist to a white shirt at www.portialawrie.co.uk

Wet the garment first, then submerge in the tea….


Use tea to add a unique vintage twist to a white shirt at www.portialawrie.co.uk

Bring to an enthusiastic simmer, then turn off the heat and allow to steep in the solution for at least an hour. Preferably 2. Stir/turn frequently to ensure an even result. Then pour away the solution, rinse until water runs clear in warm, graduating to cool, water. Then chuck in the tumble dryer to help set the colour…


Use tea to add a unique vintage twist to a white shirt at www.portialawrie.co.uk

And check out the difference! It’s actually a vintagey peach colour in the flesh. and definitely more “me” and importantly, more likely to get worn.

Now, lets talk about fabric content. I actually wasn’t expecting great results with this because it’s only really supposed to work on natural fibres. (I’ve used this method to dye silk before here) This top, although it looked and felt like a lightweight cotton, is actually 100% viscose. But, hey, it worked. So far I’ve hand washed it twice with no obvious fade…next time I’ll try it on a delicate wash in the machine and see how it goes. Will keep you posted!

DIY, how to, refashioning, repurposing, Restyles, Sewing, stripes, Thrifting, Tutorials, vintage

refashion: the combo shirt

02/25/15


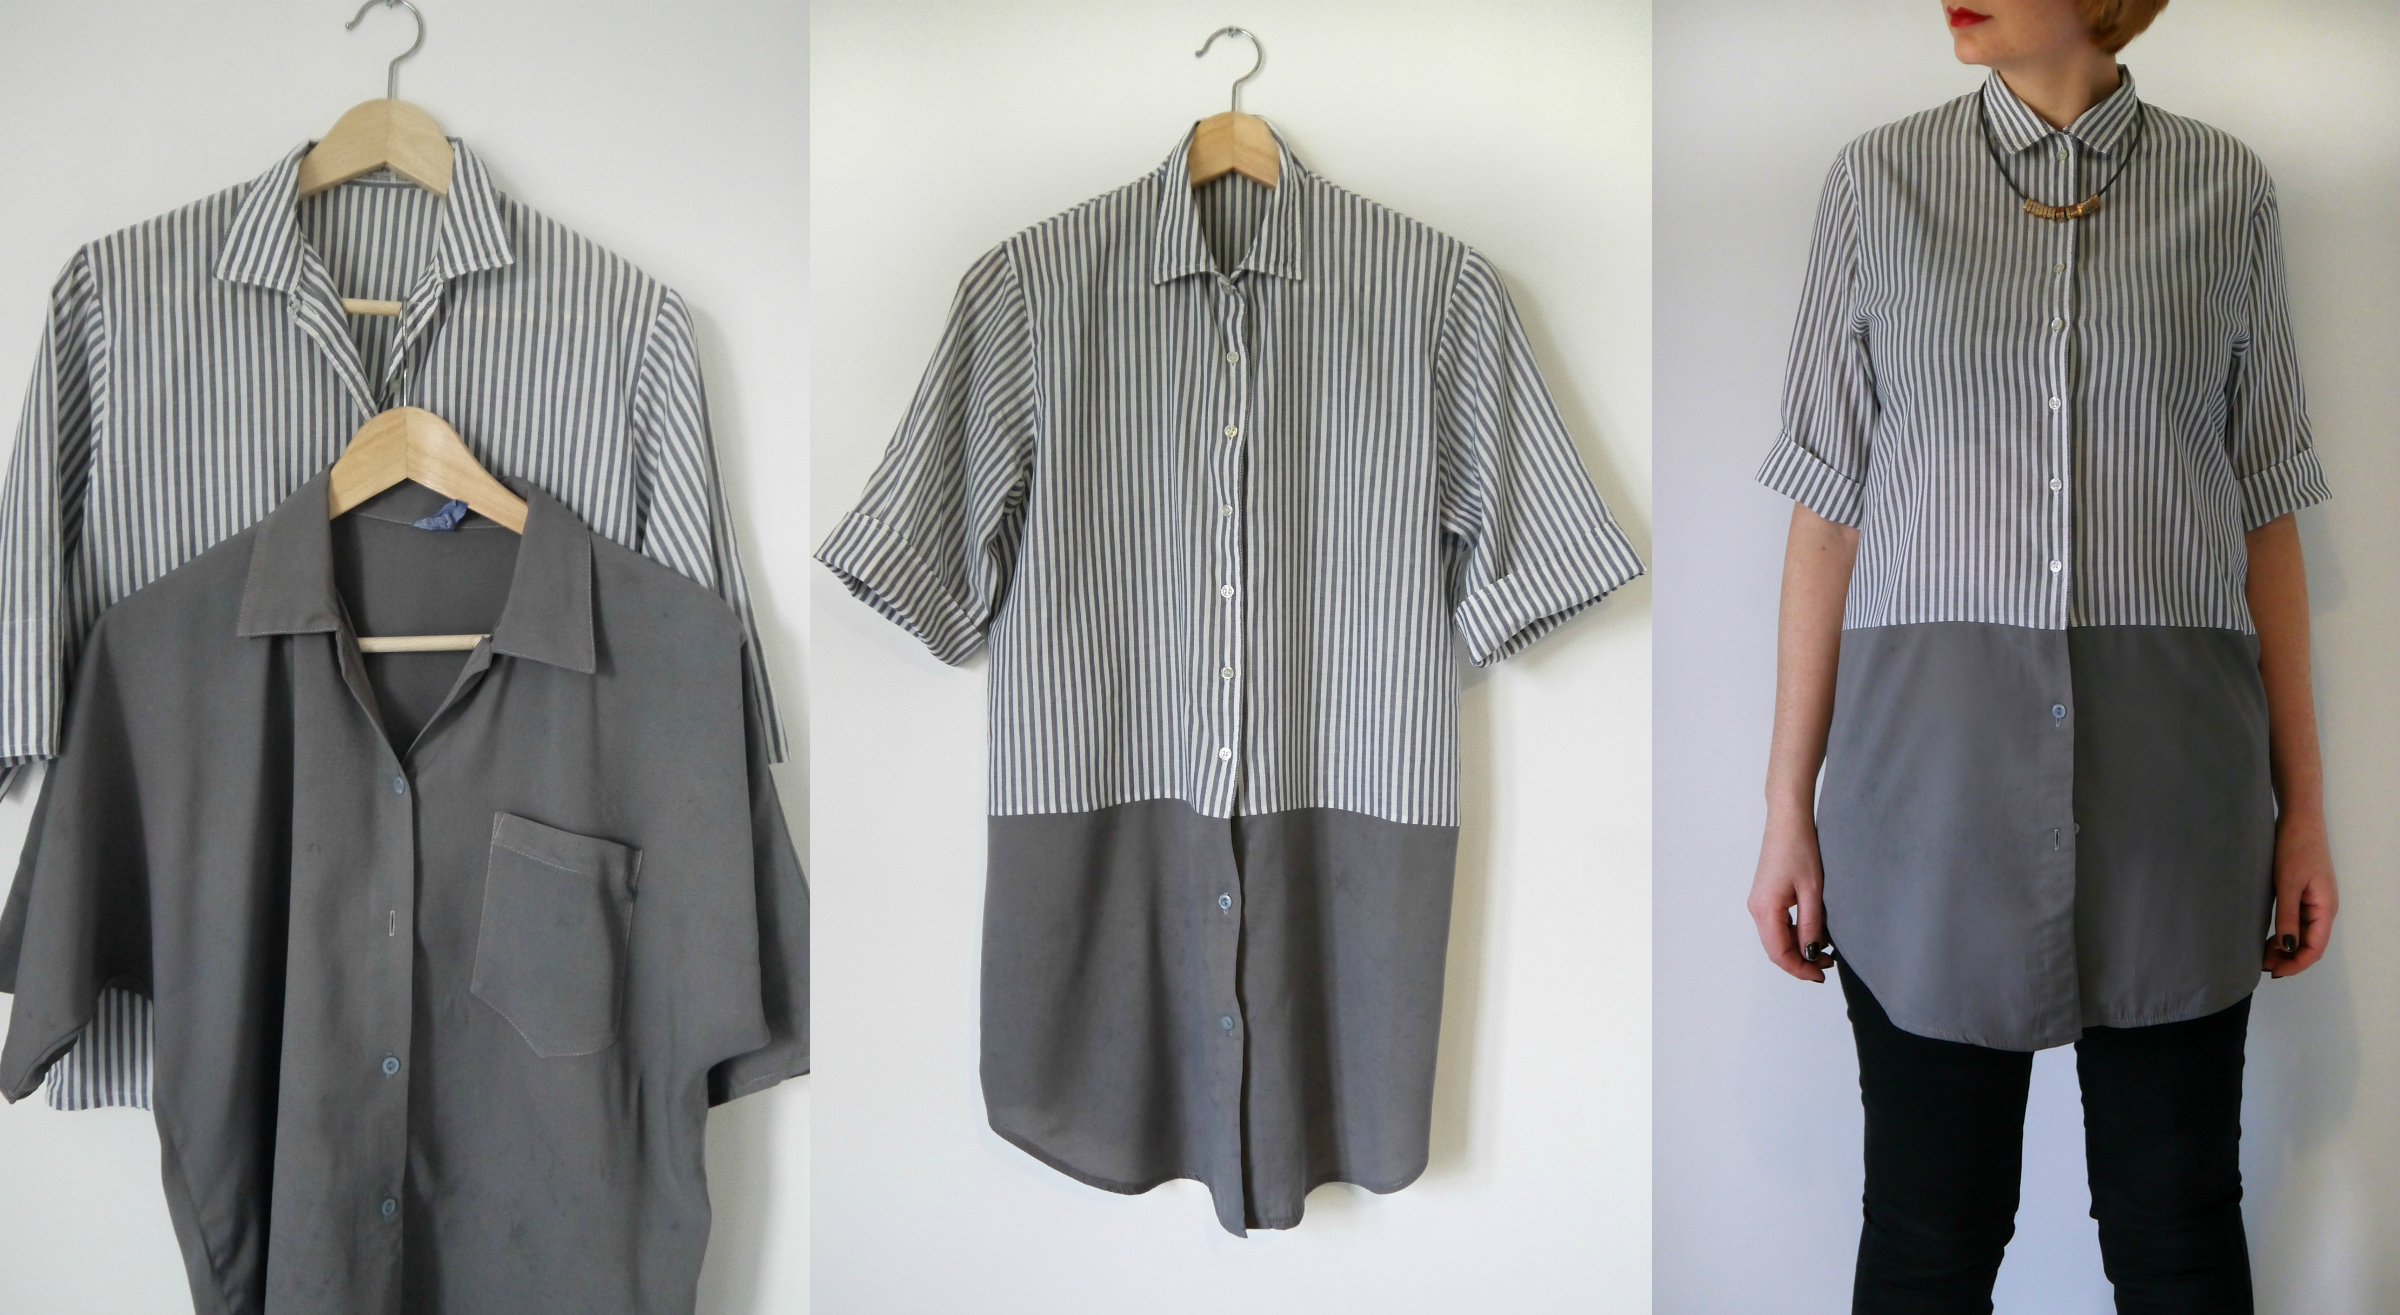
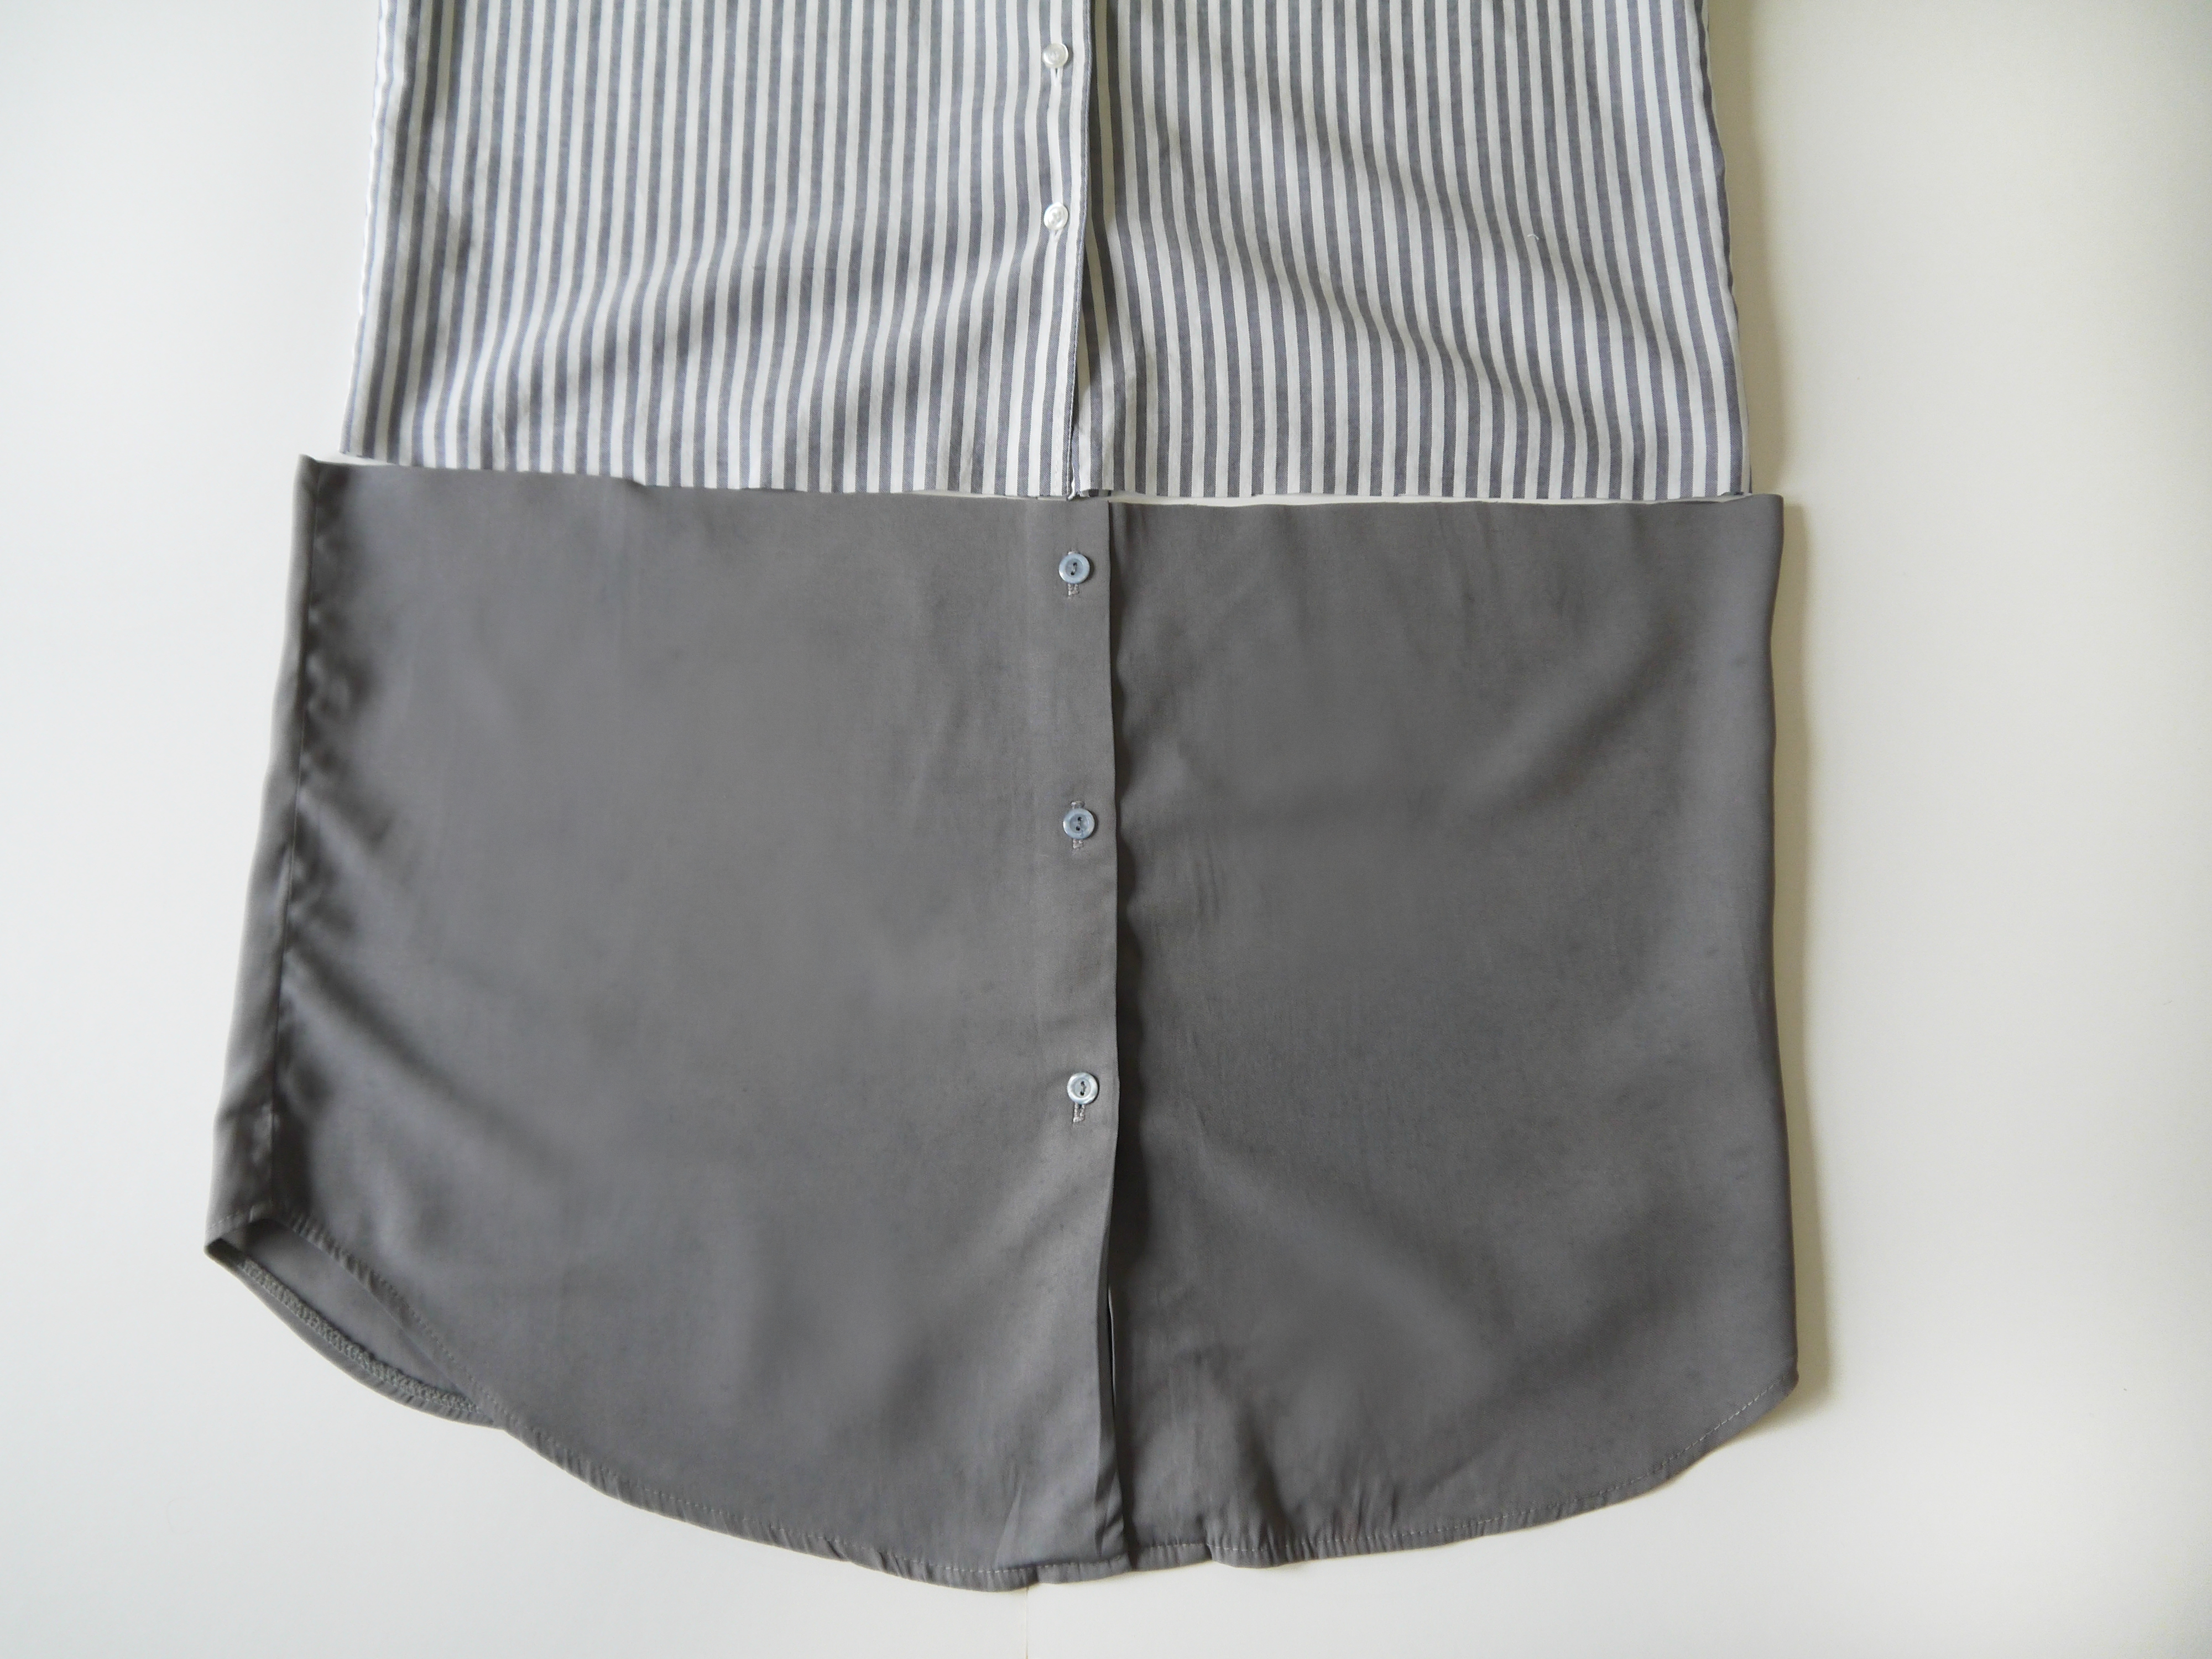
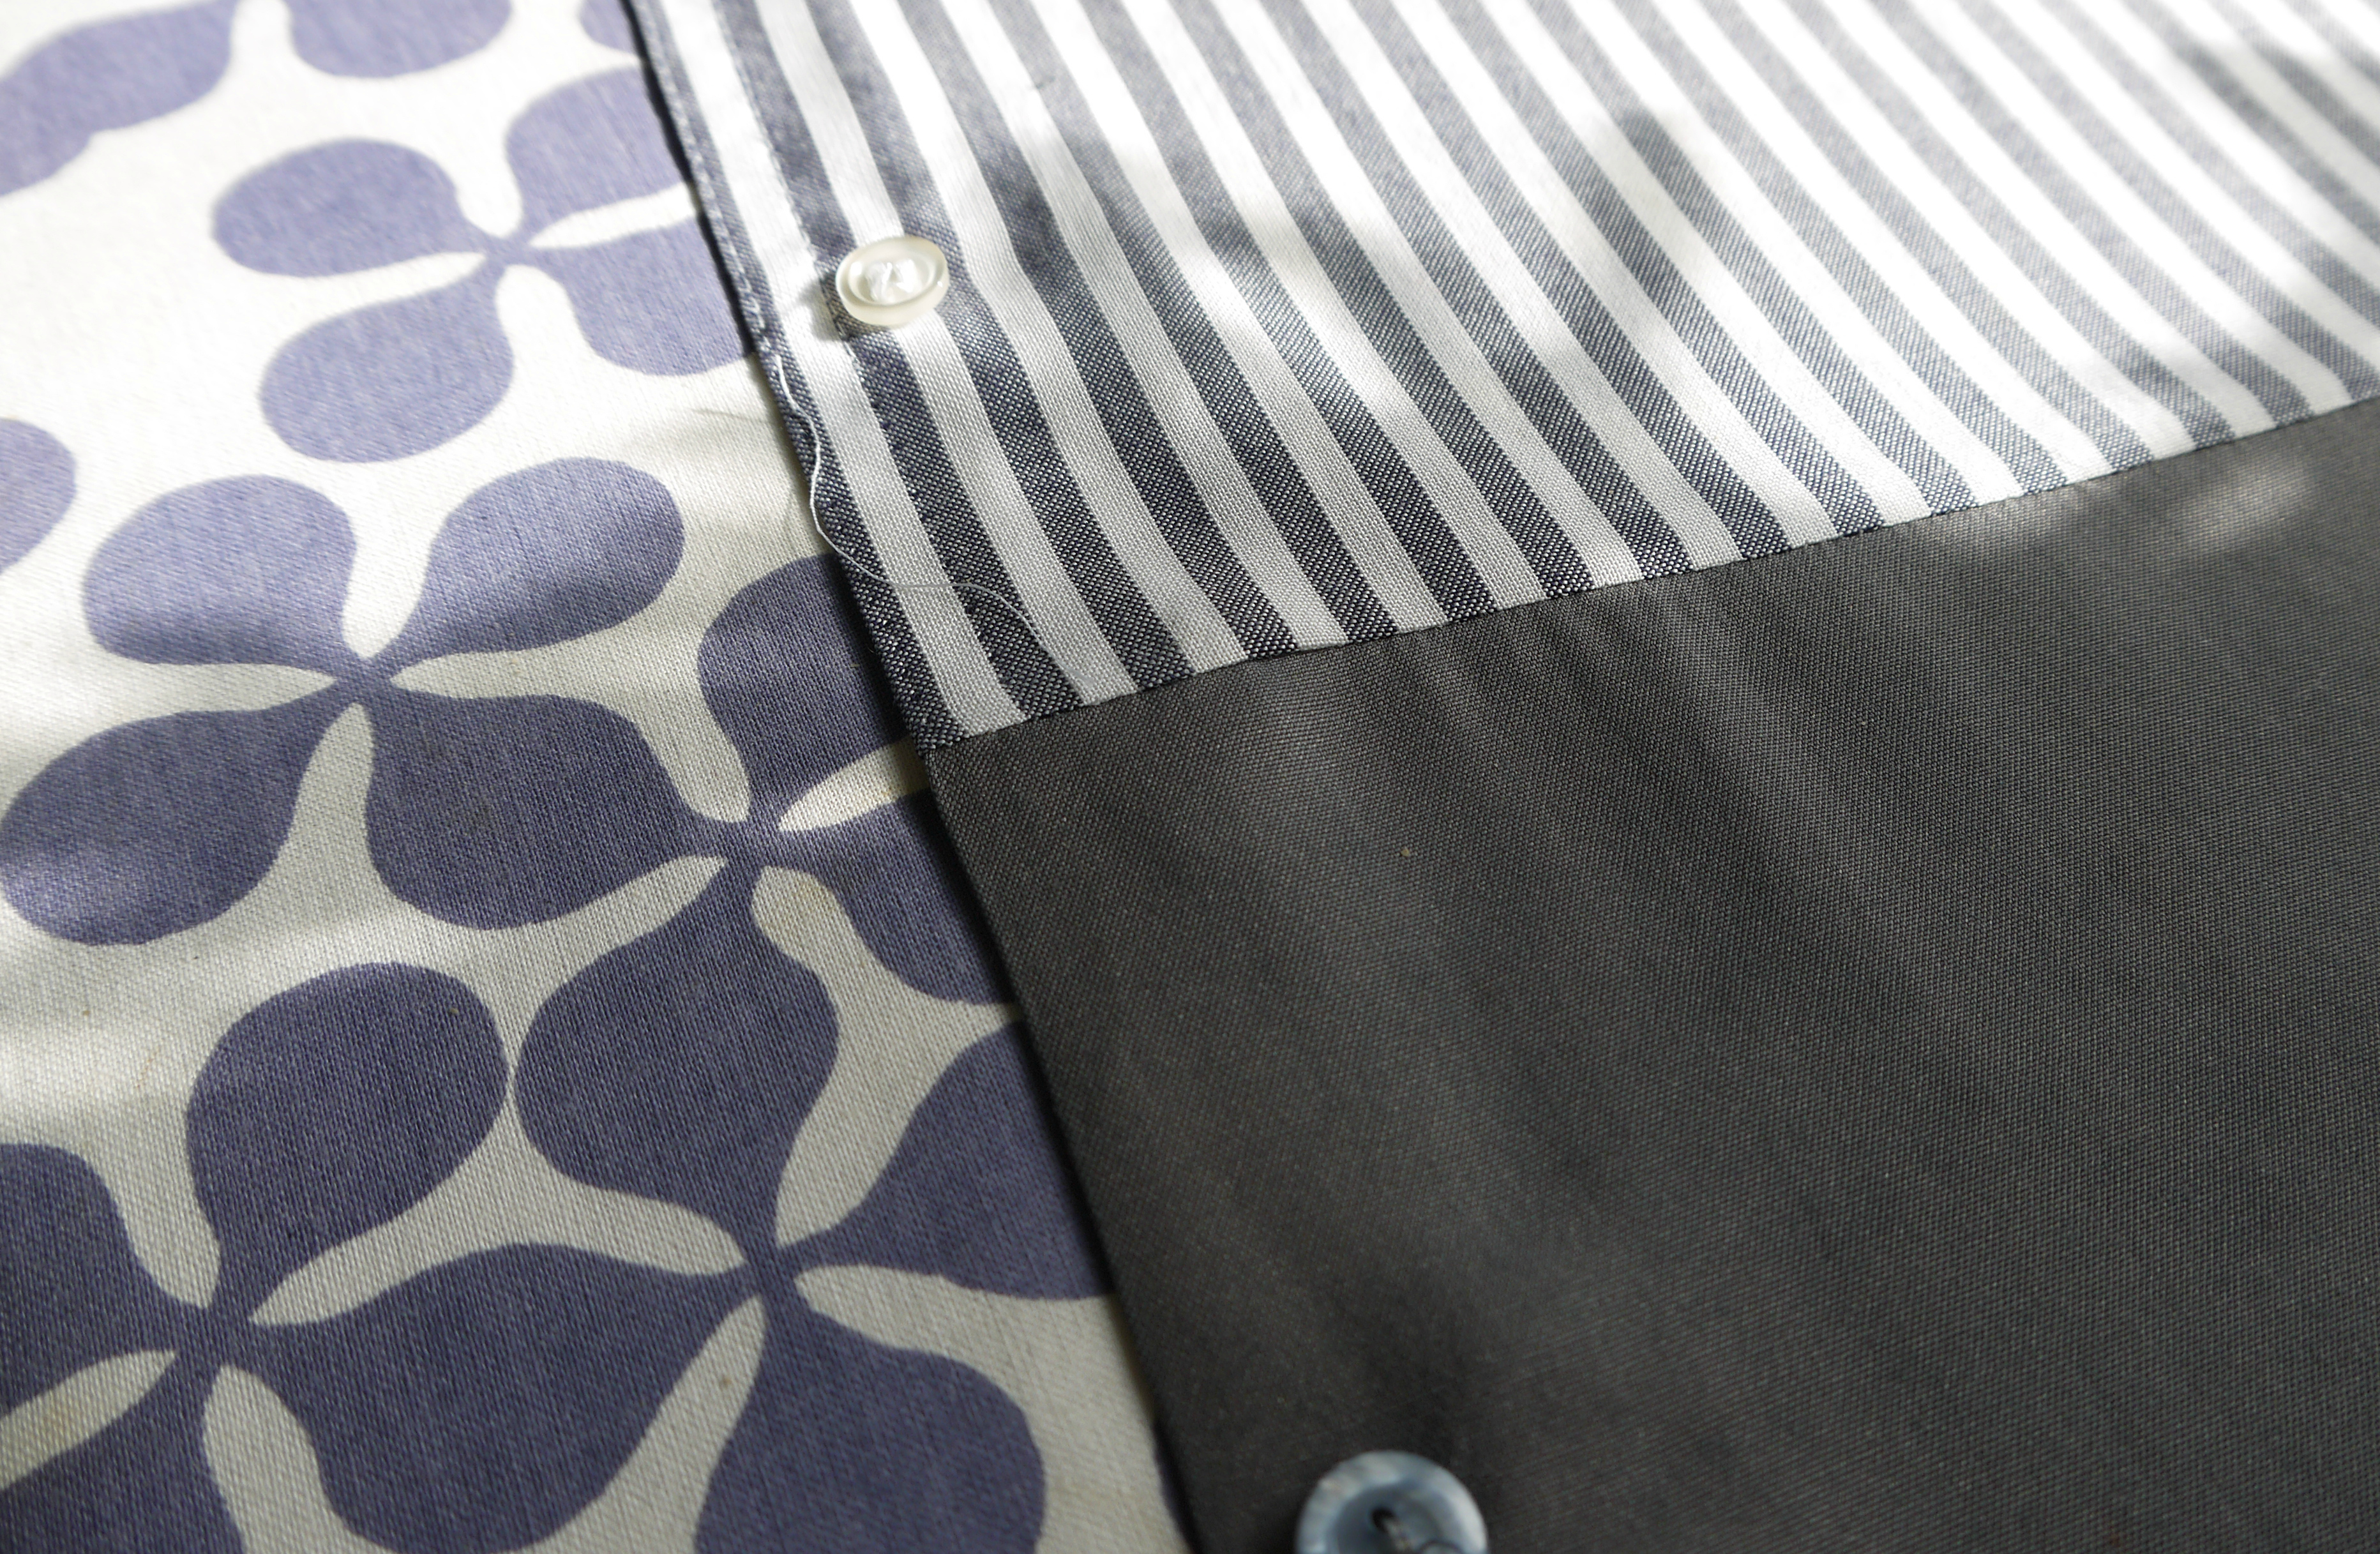
THE COMBO SHIRT REFASHION at www.portialawrie.co.ukI’d had both these vintage shirts hanging in my wardrobe for a few months. The spoils of a thrifting trip. The stripe one is a vintage Jaeger but was too short and had a straight hem which was not flattering on me at all. I like me a shirt tail hem….which fortuitously…the grey one had….hmmm…no brainer right?! Here’s how…


Turn 2 shirts into one at www.portialawrie.co.uk

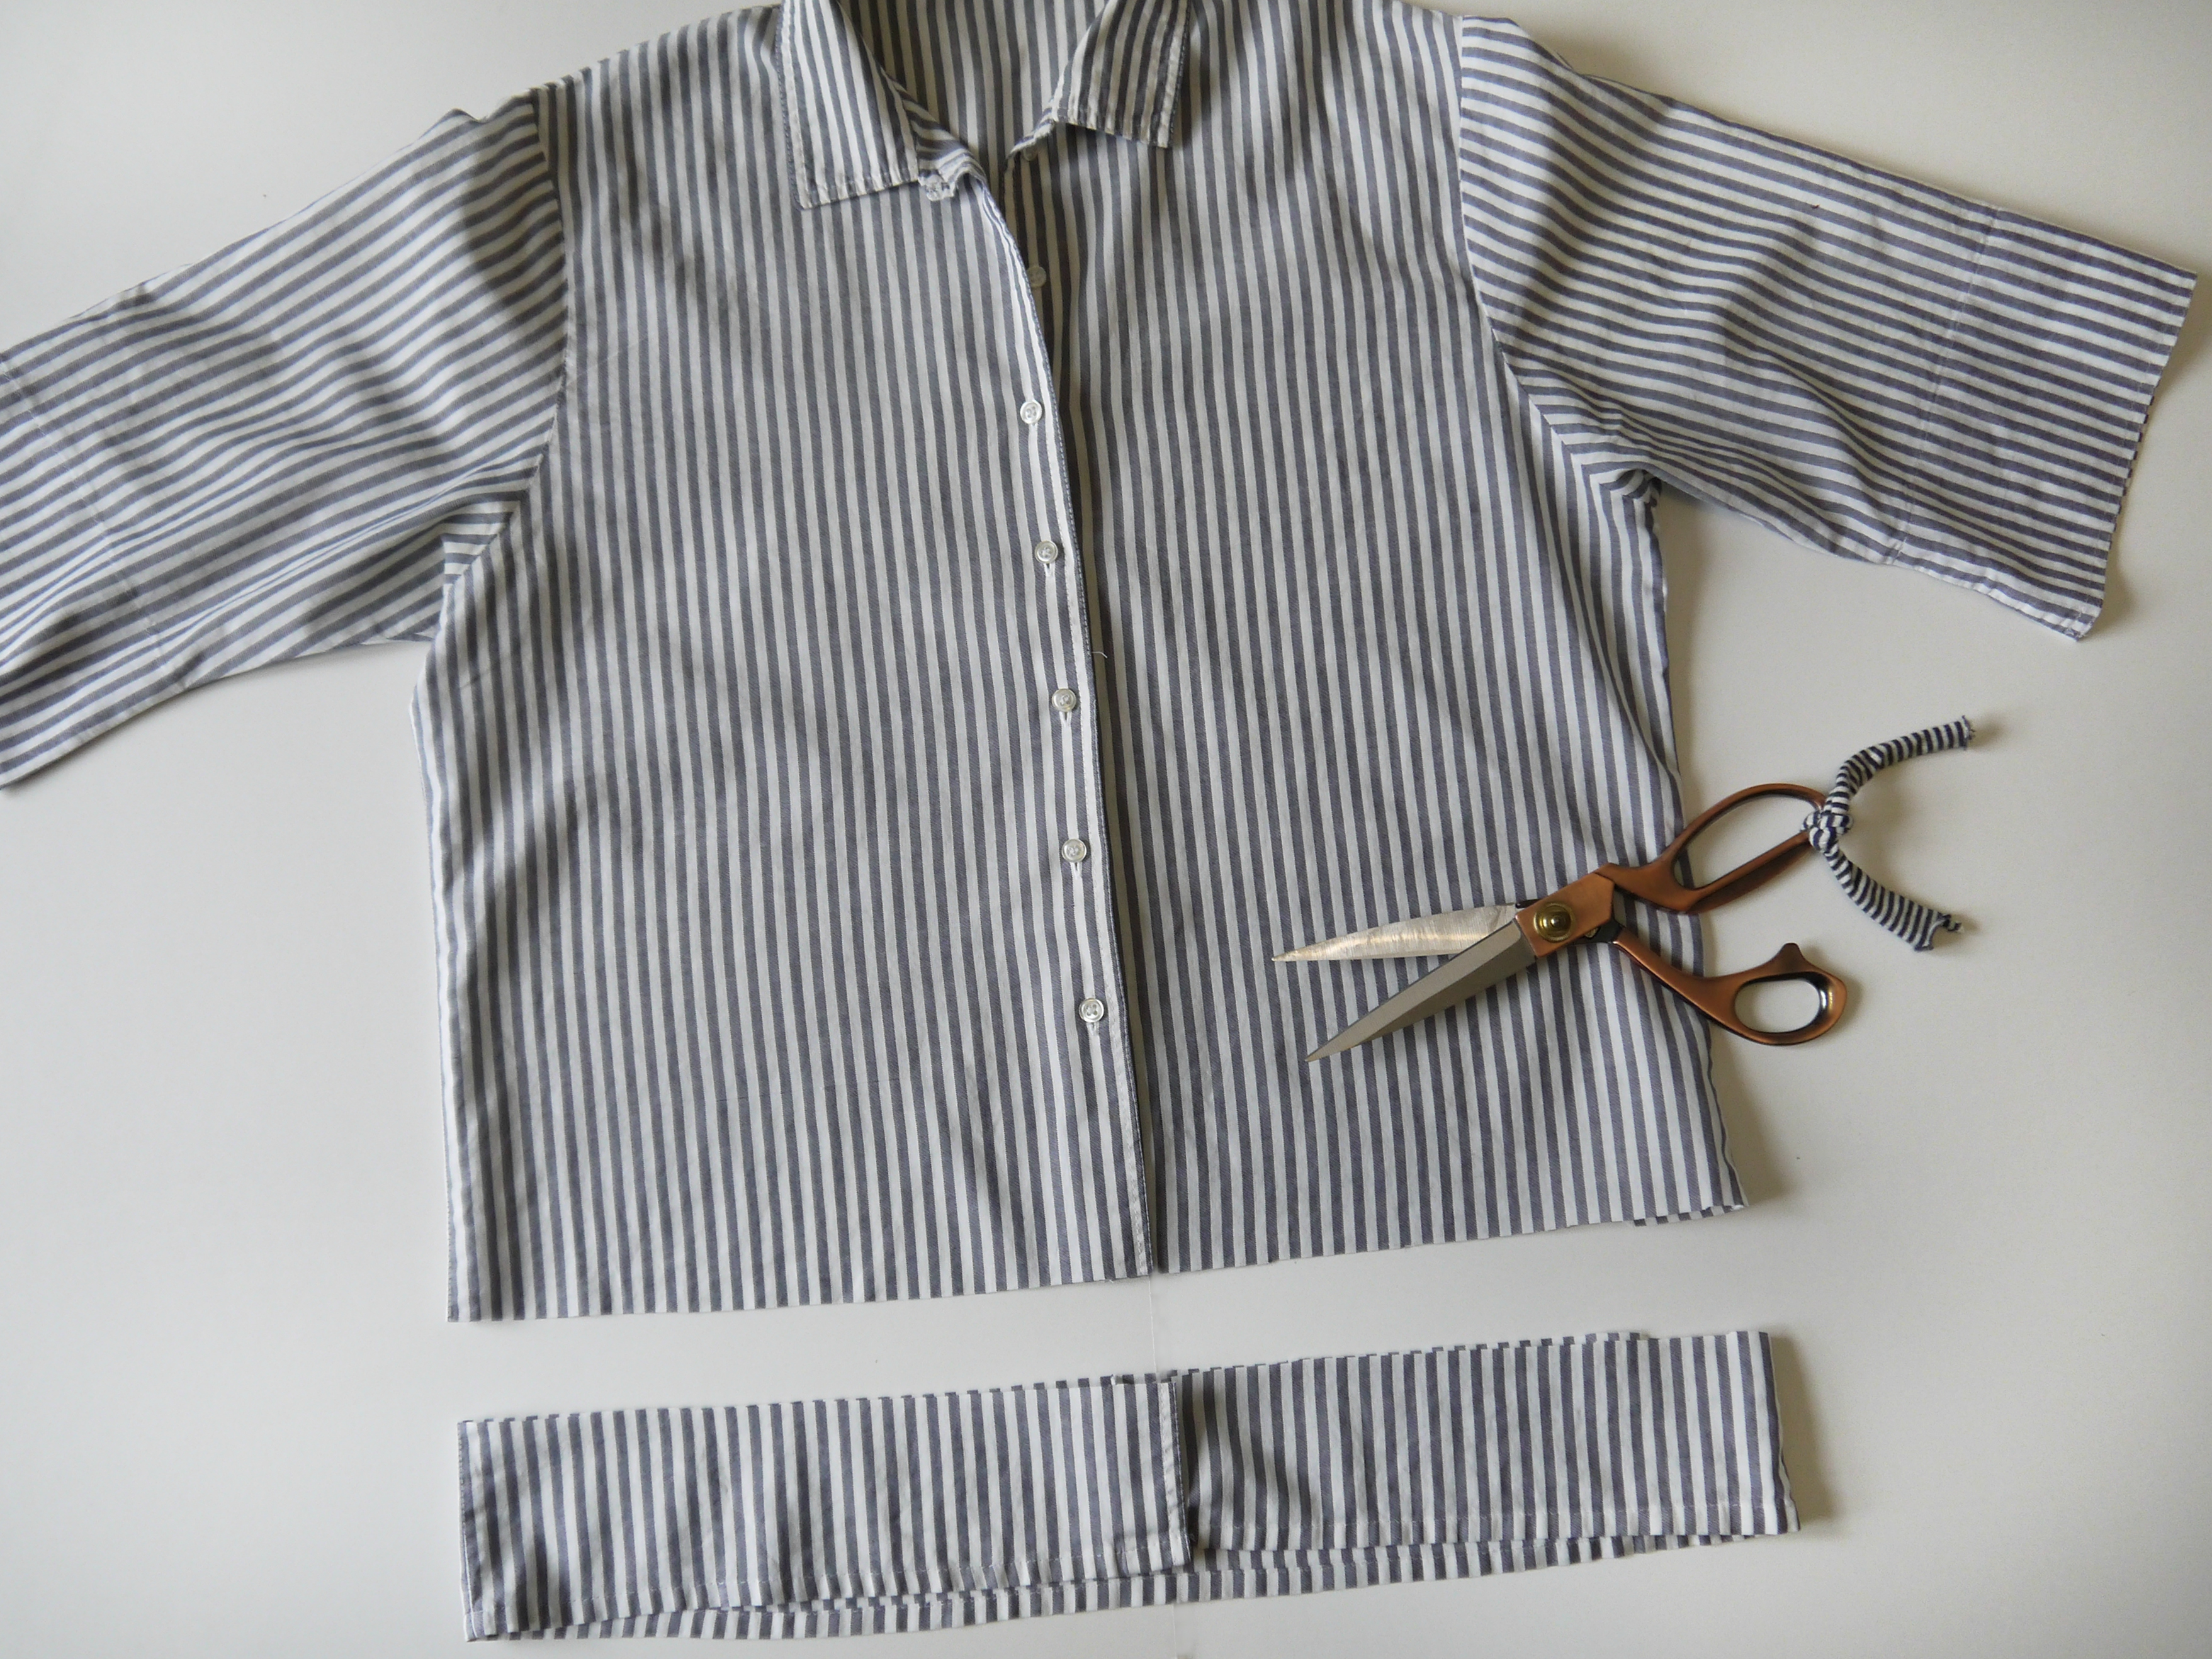
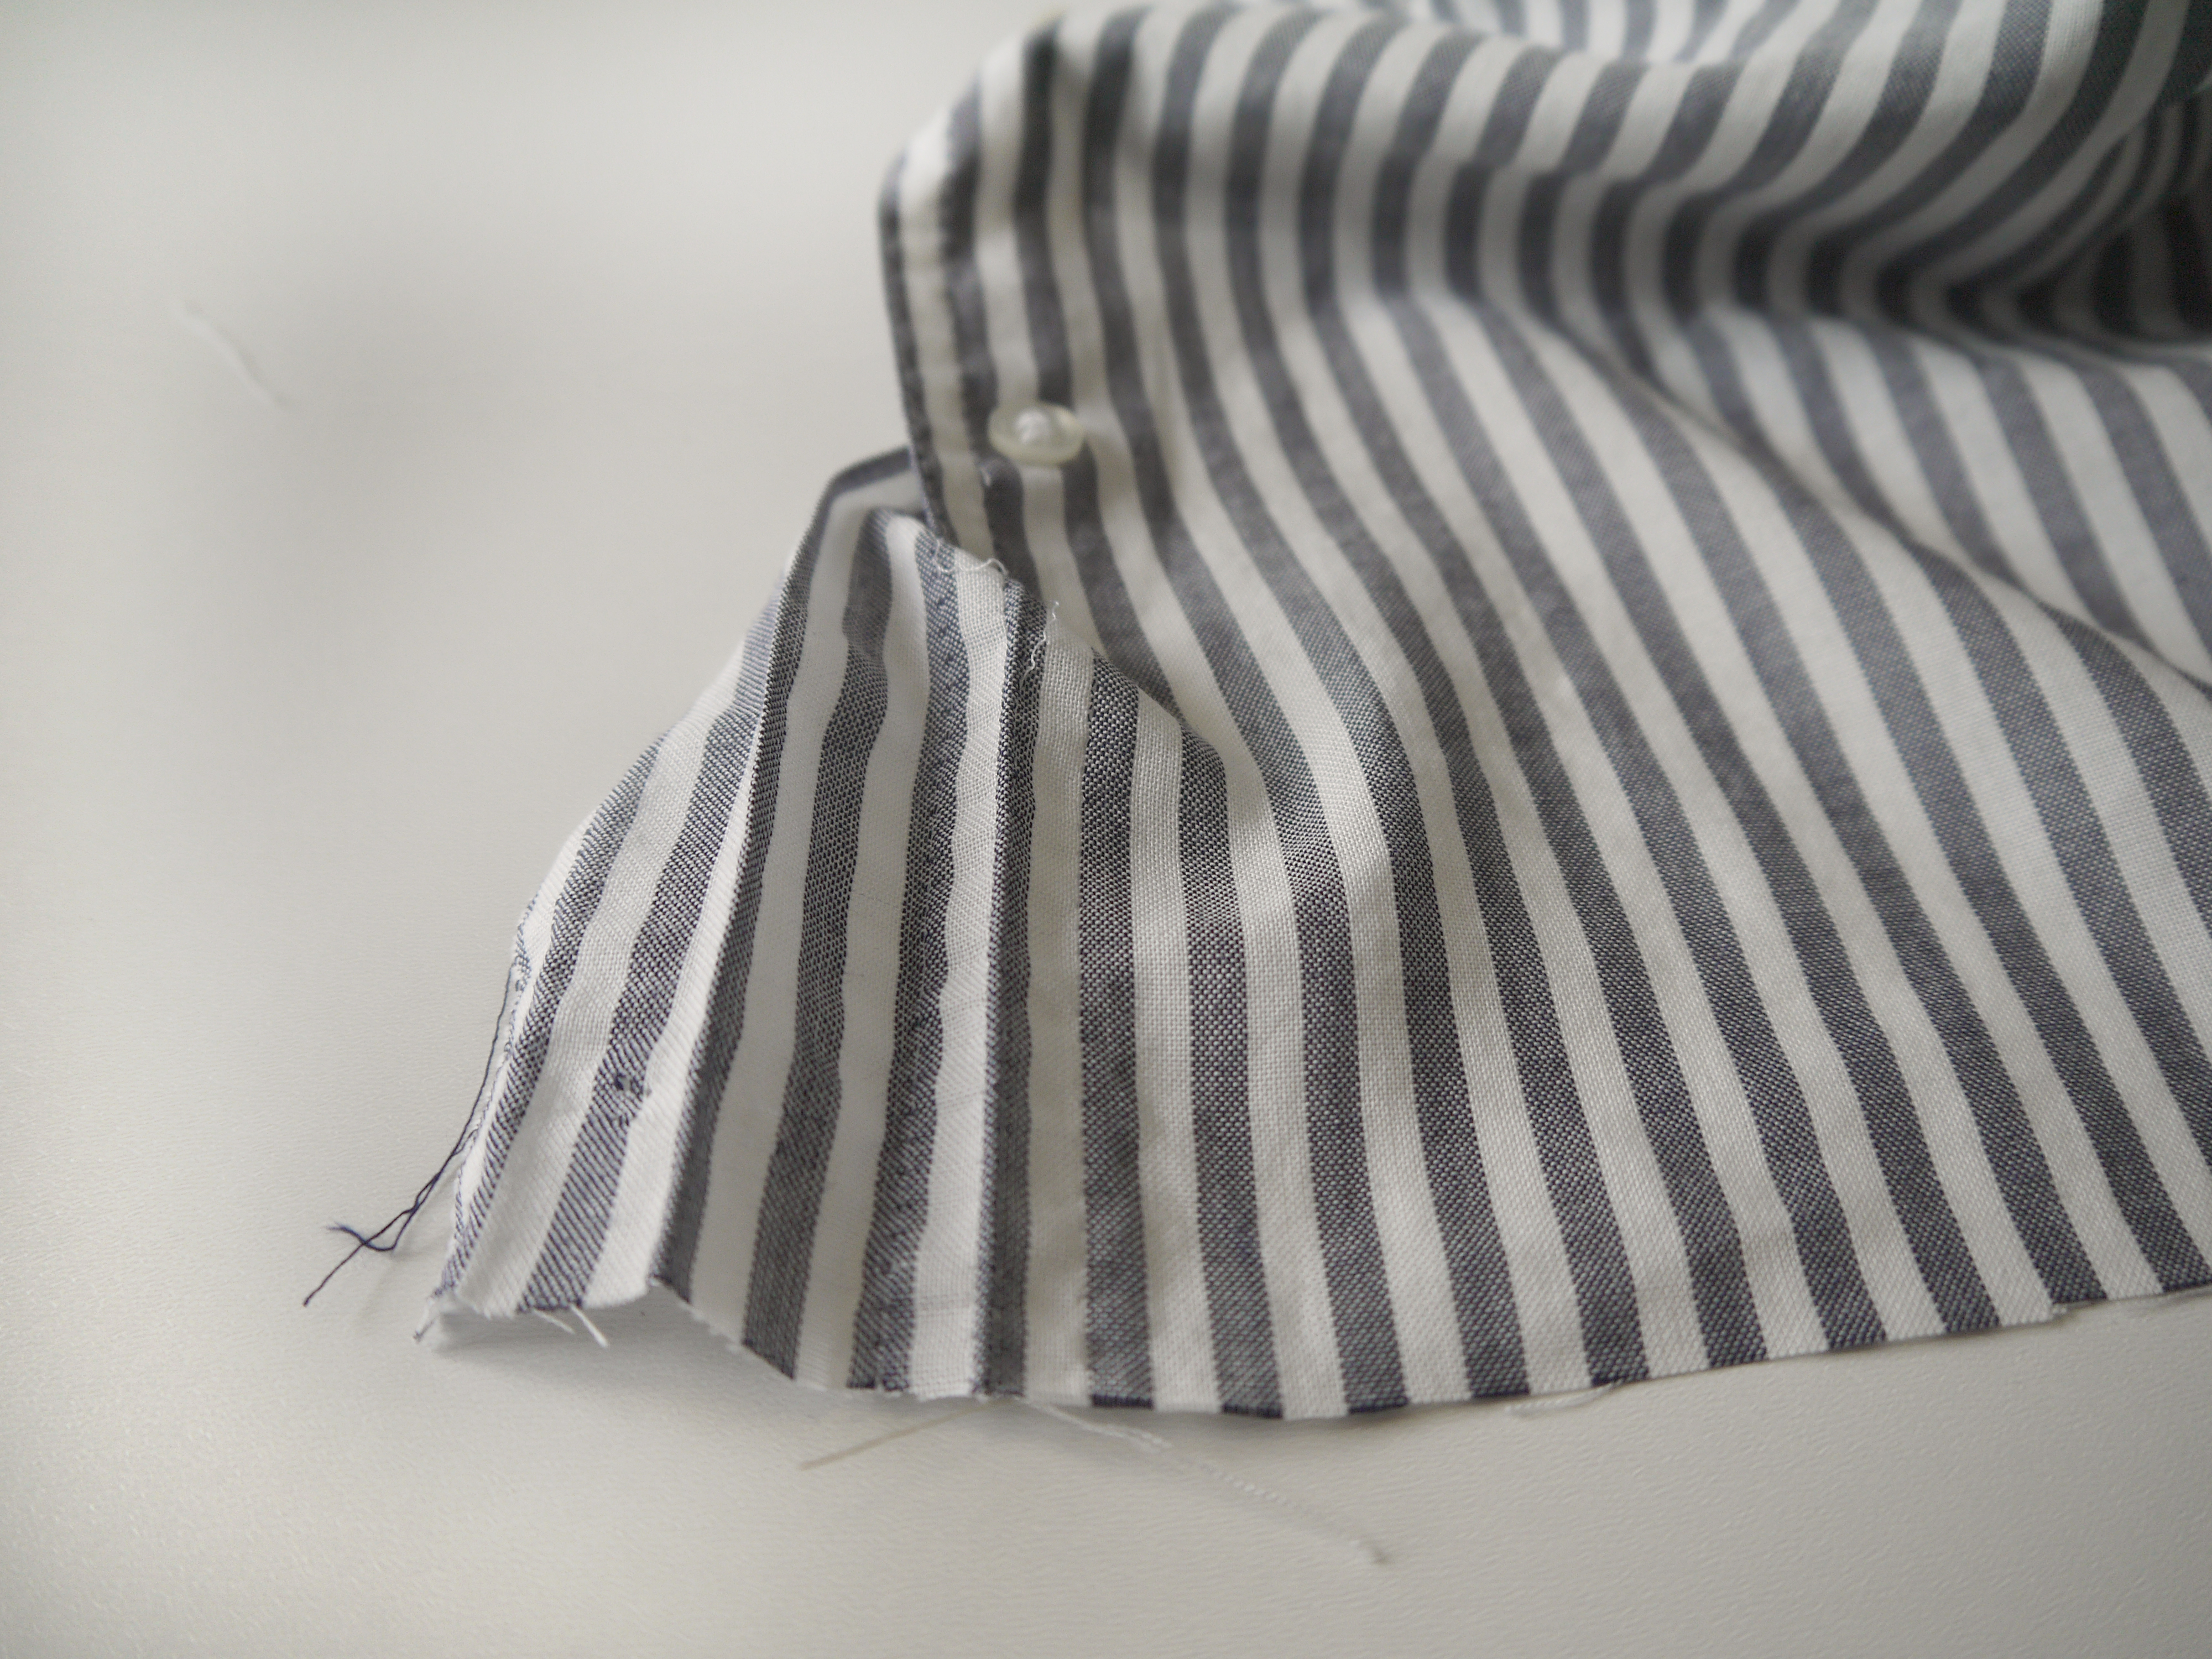
Trim the first shirt to the point where you want the colour block effect to start, plus desired seam allowance. Don’t cut to close to a button/button hole as we’re going to need to unpick and manipulate those button bands in a bit…


Turn 2 shirts into one at www.portialawrie.co.uk

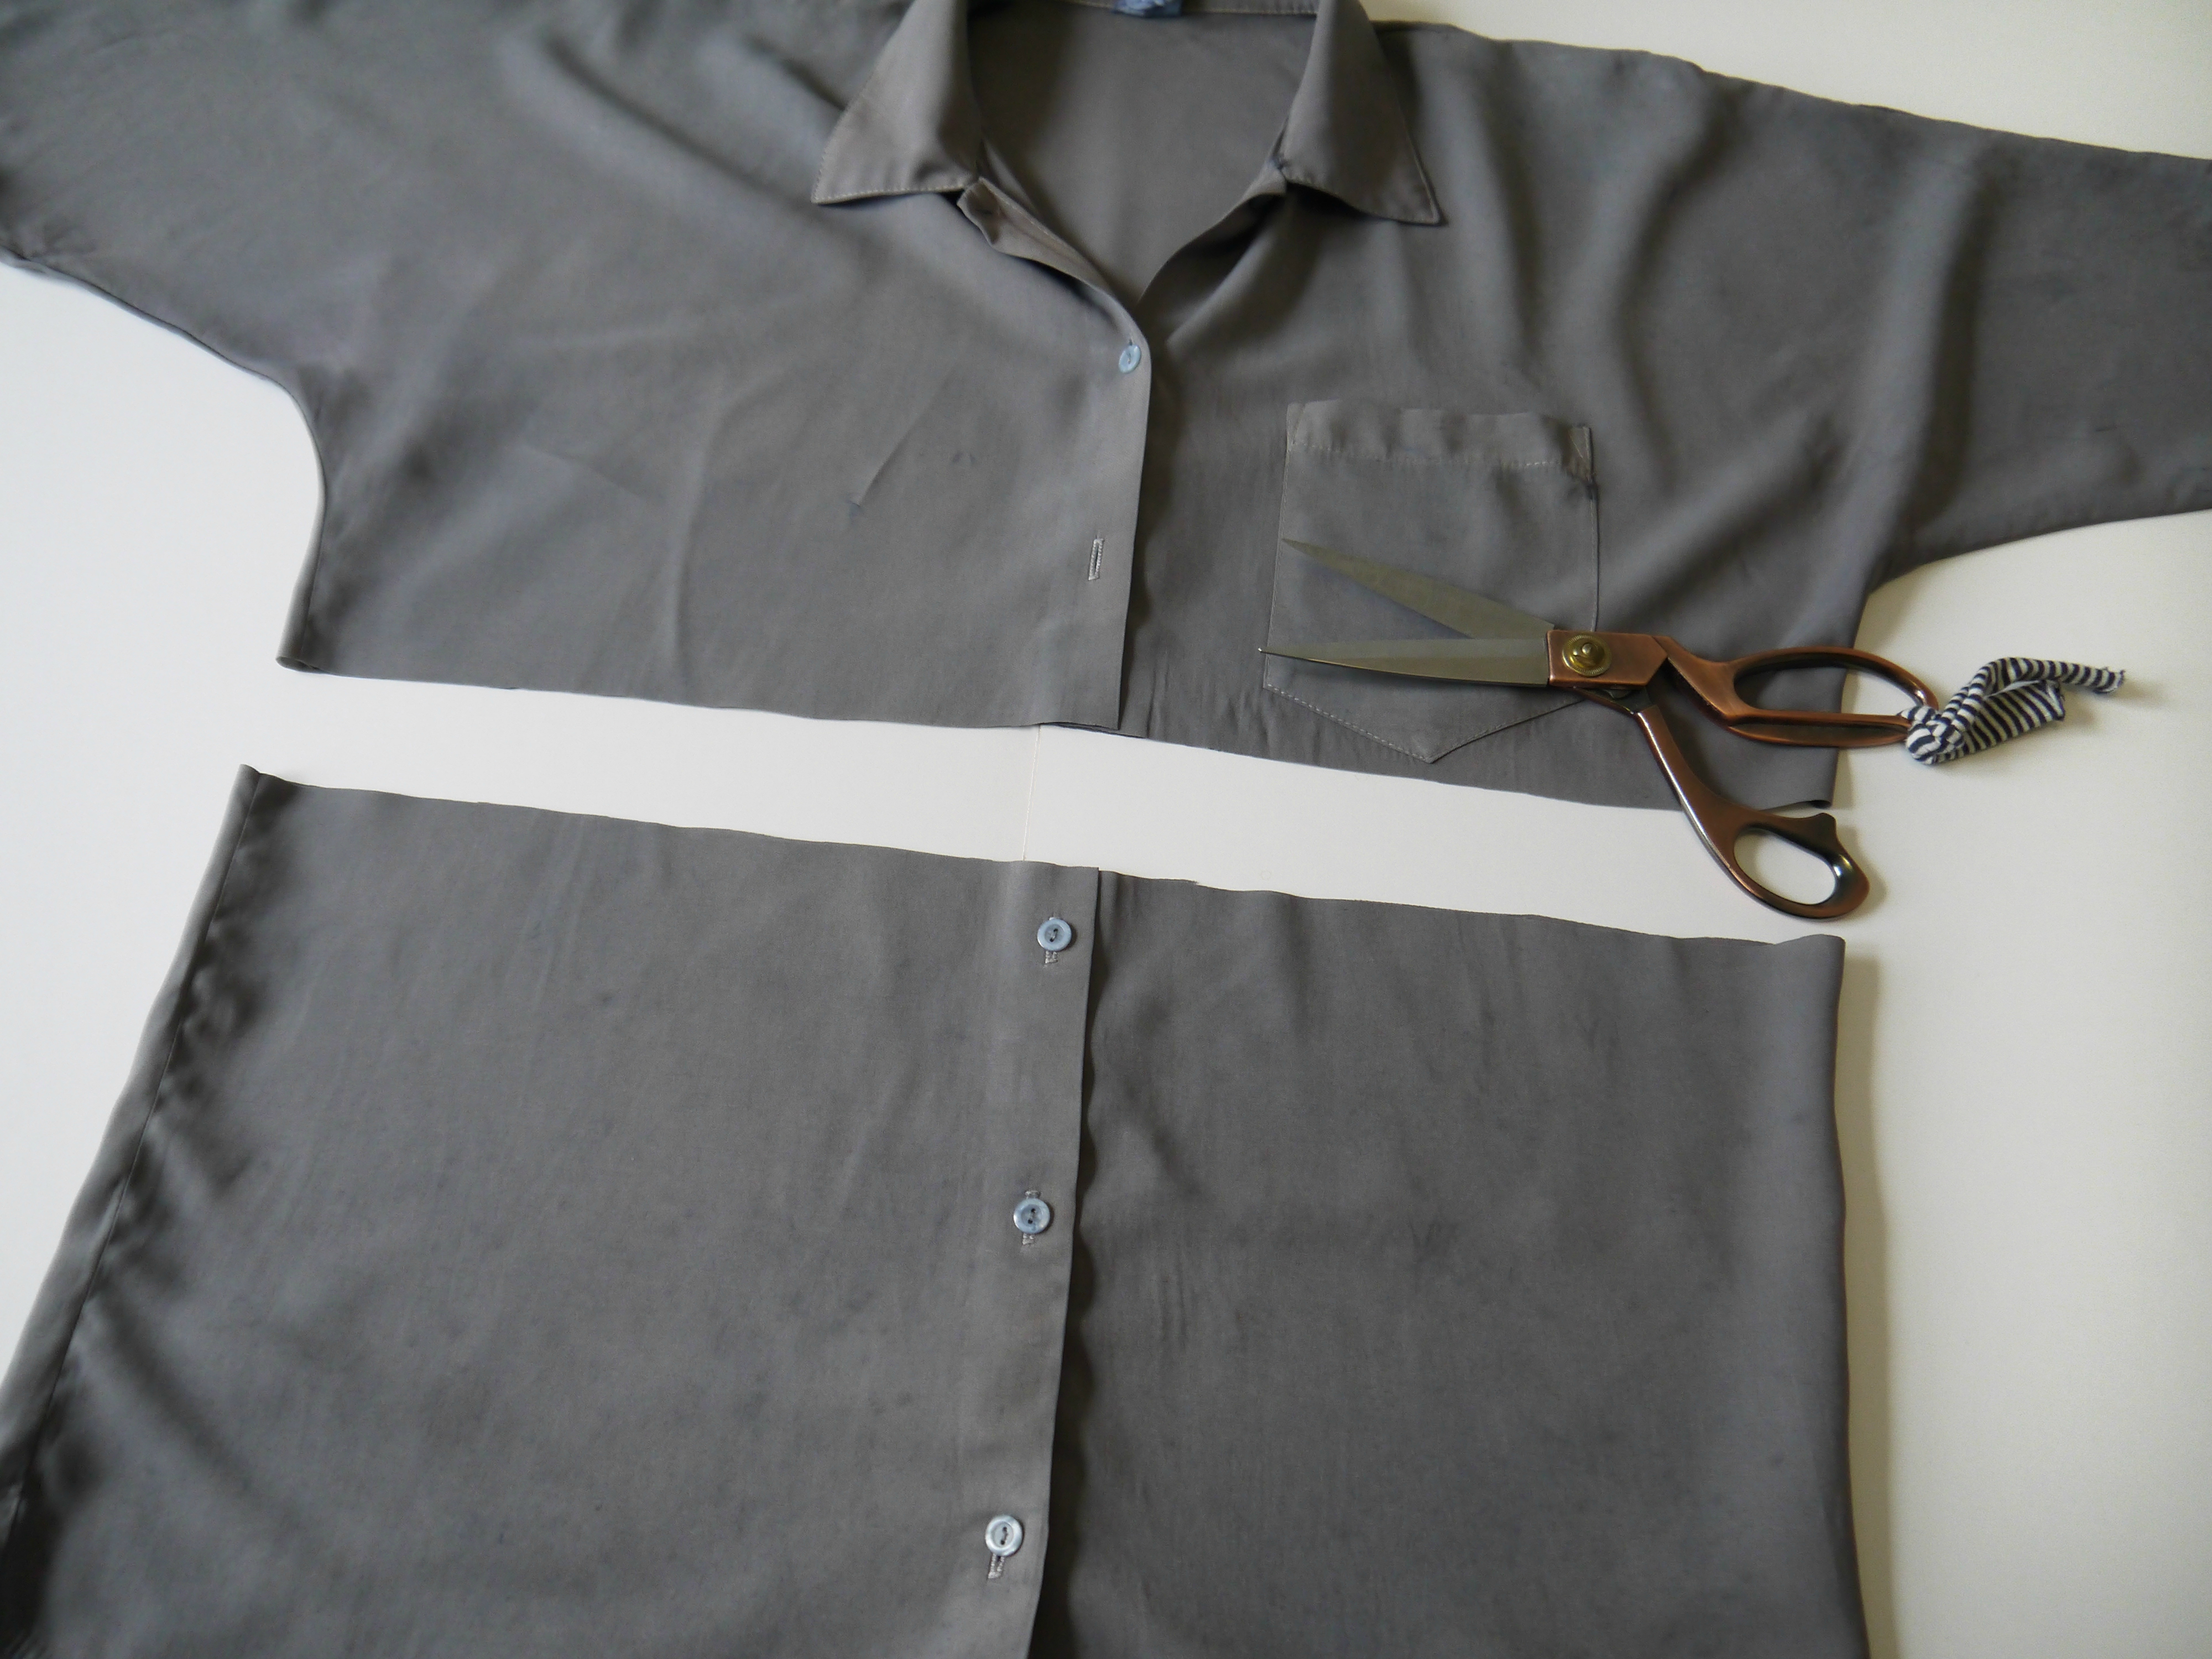
Cut the bottom half of the second shirt. Again, give yourself room to manoeuvre on the button plackets. (I ended up cutting about 1″ below that top button in the end)


Turn 2 shirts into one at www.portialawrie.co.uk

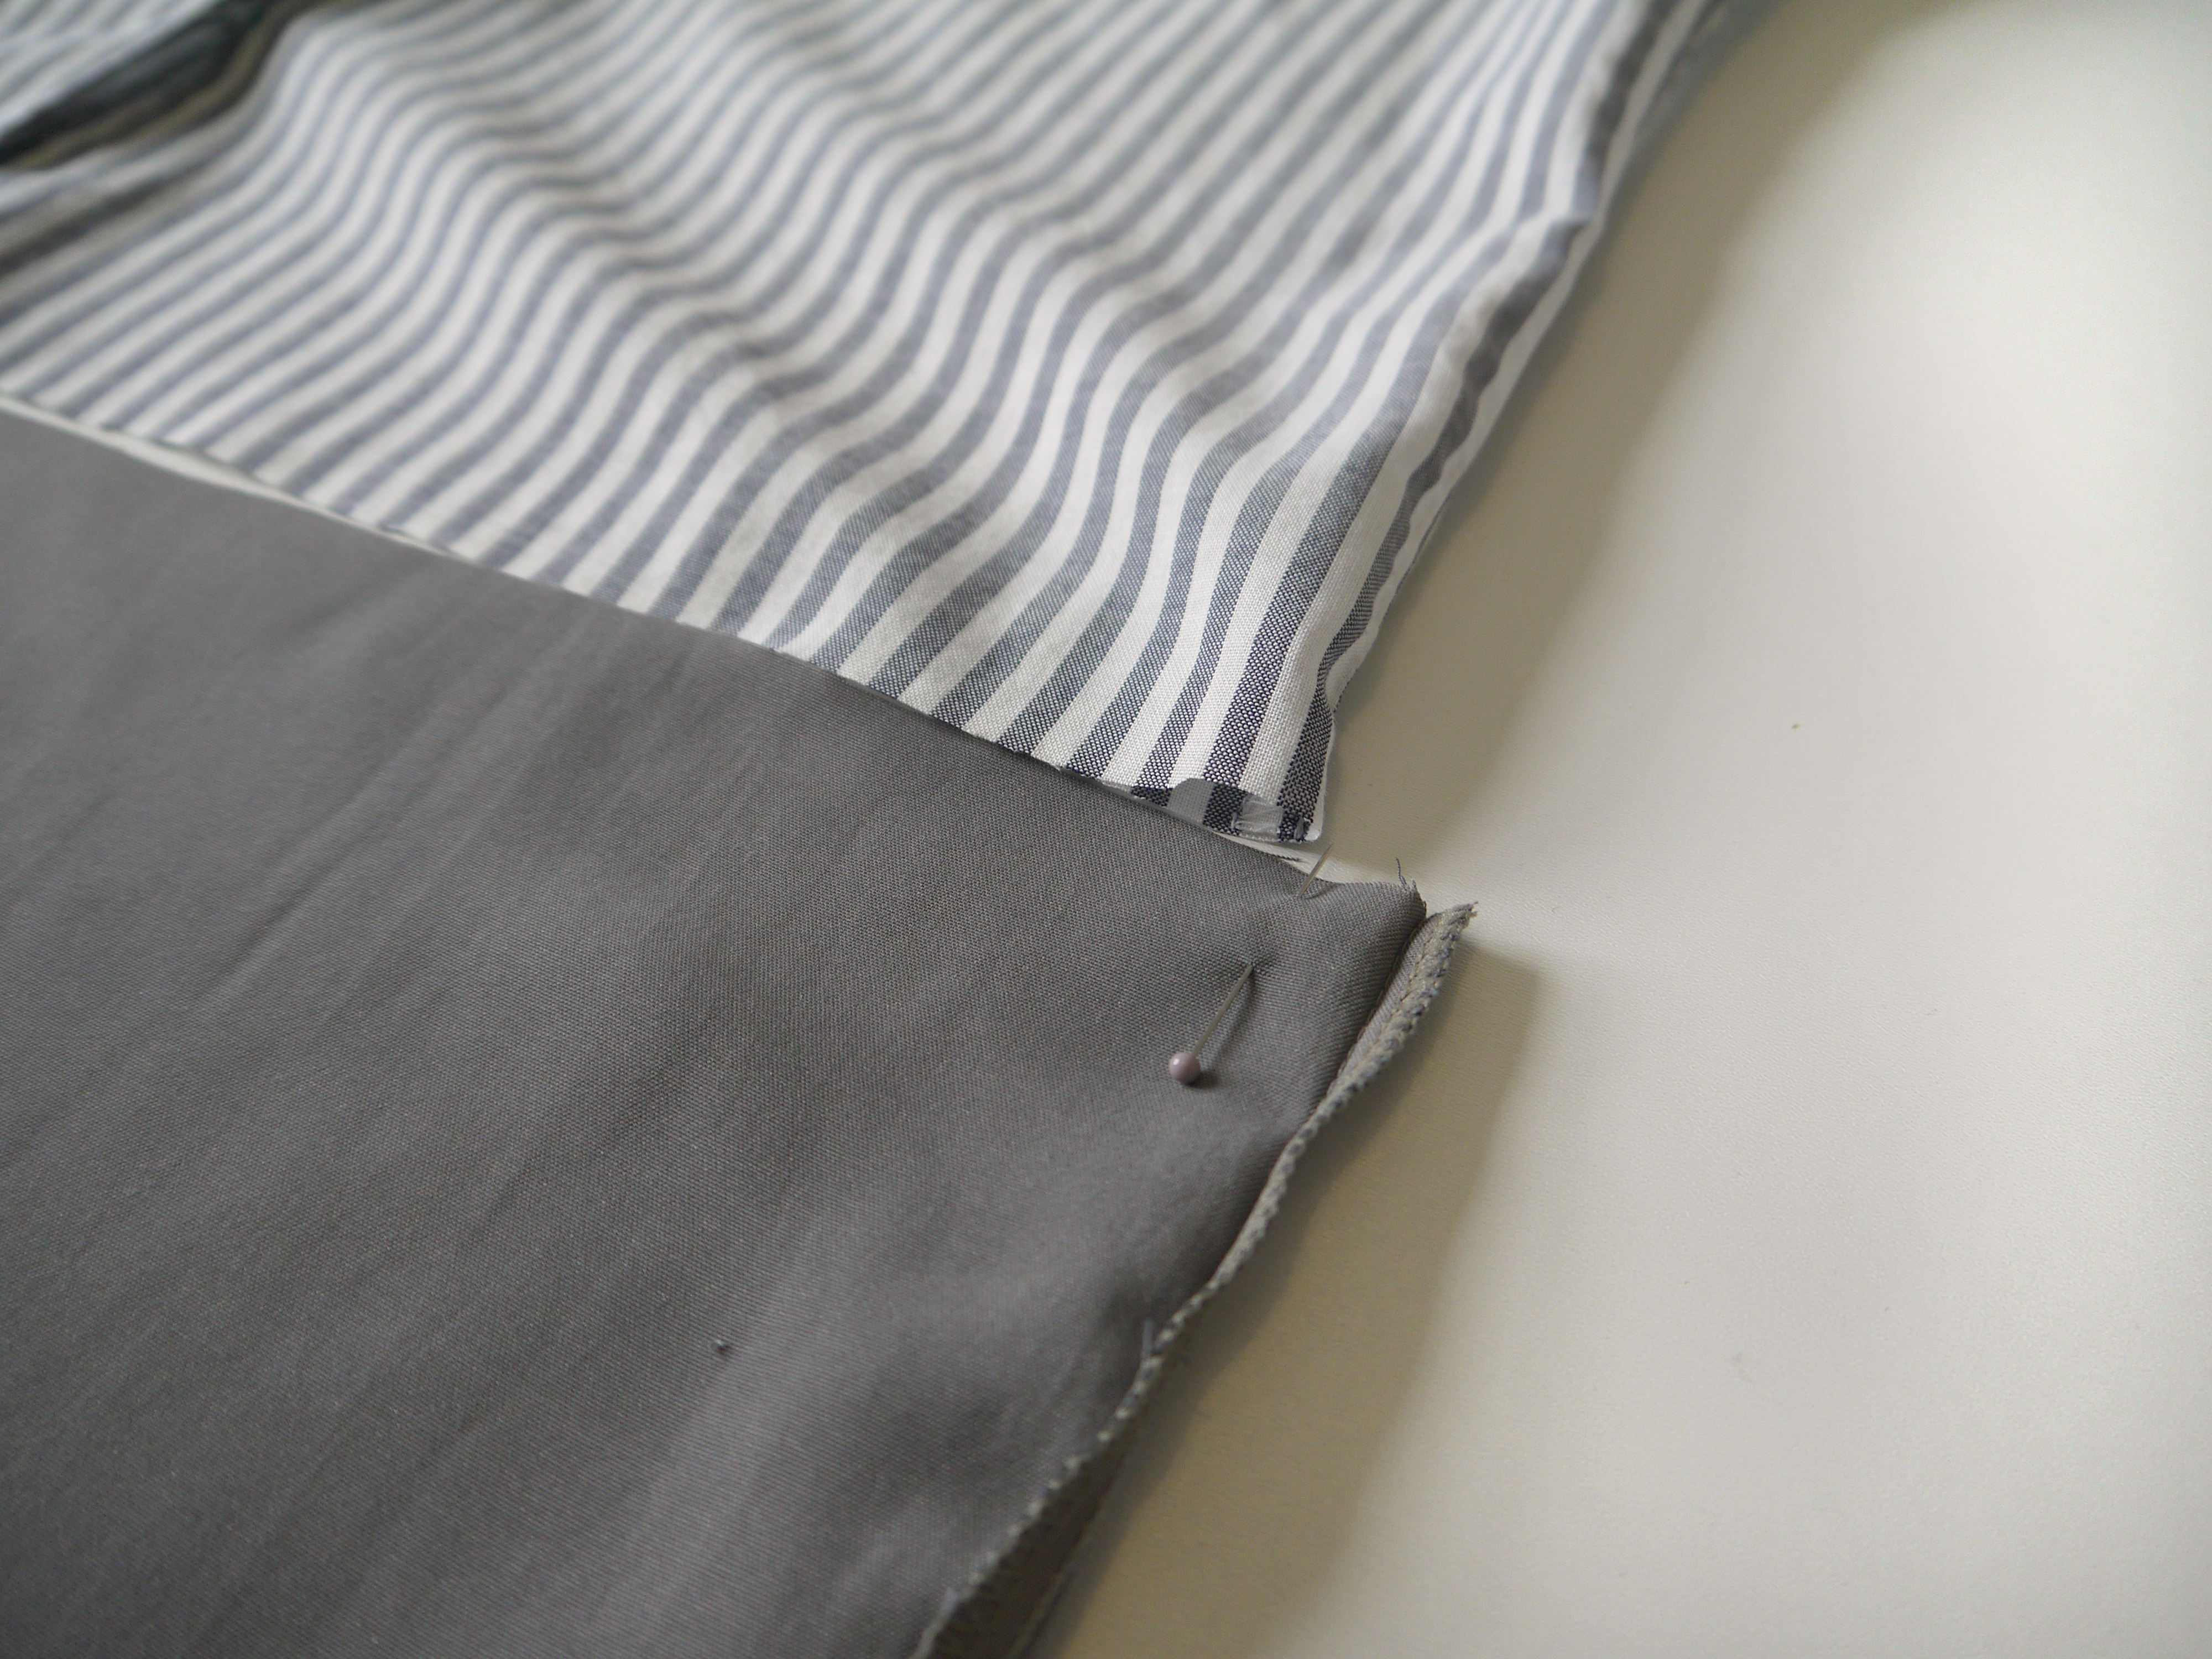
As we’re going to join the two pieces they need to be the same size, so if either the top or the bottom is bigger, like this…


Turn 2 shirts into one at www.portialawrie.co.uk

Then mark with a pin either side how much it needs to be taken in….


Turn 2 shirts into one at www.portialawrie.co.uk

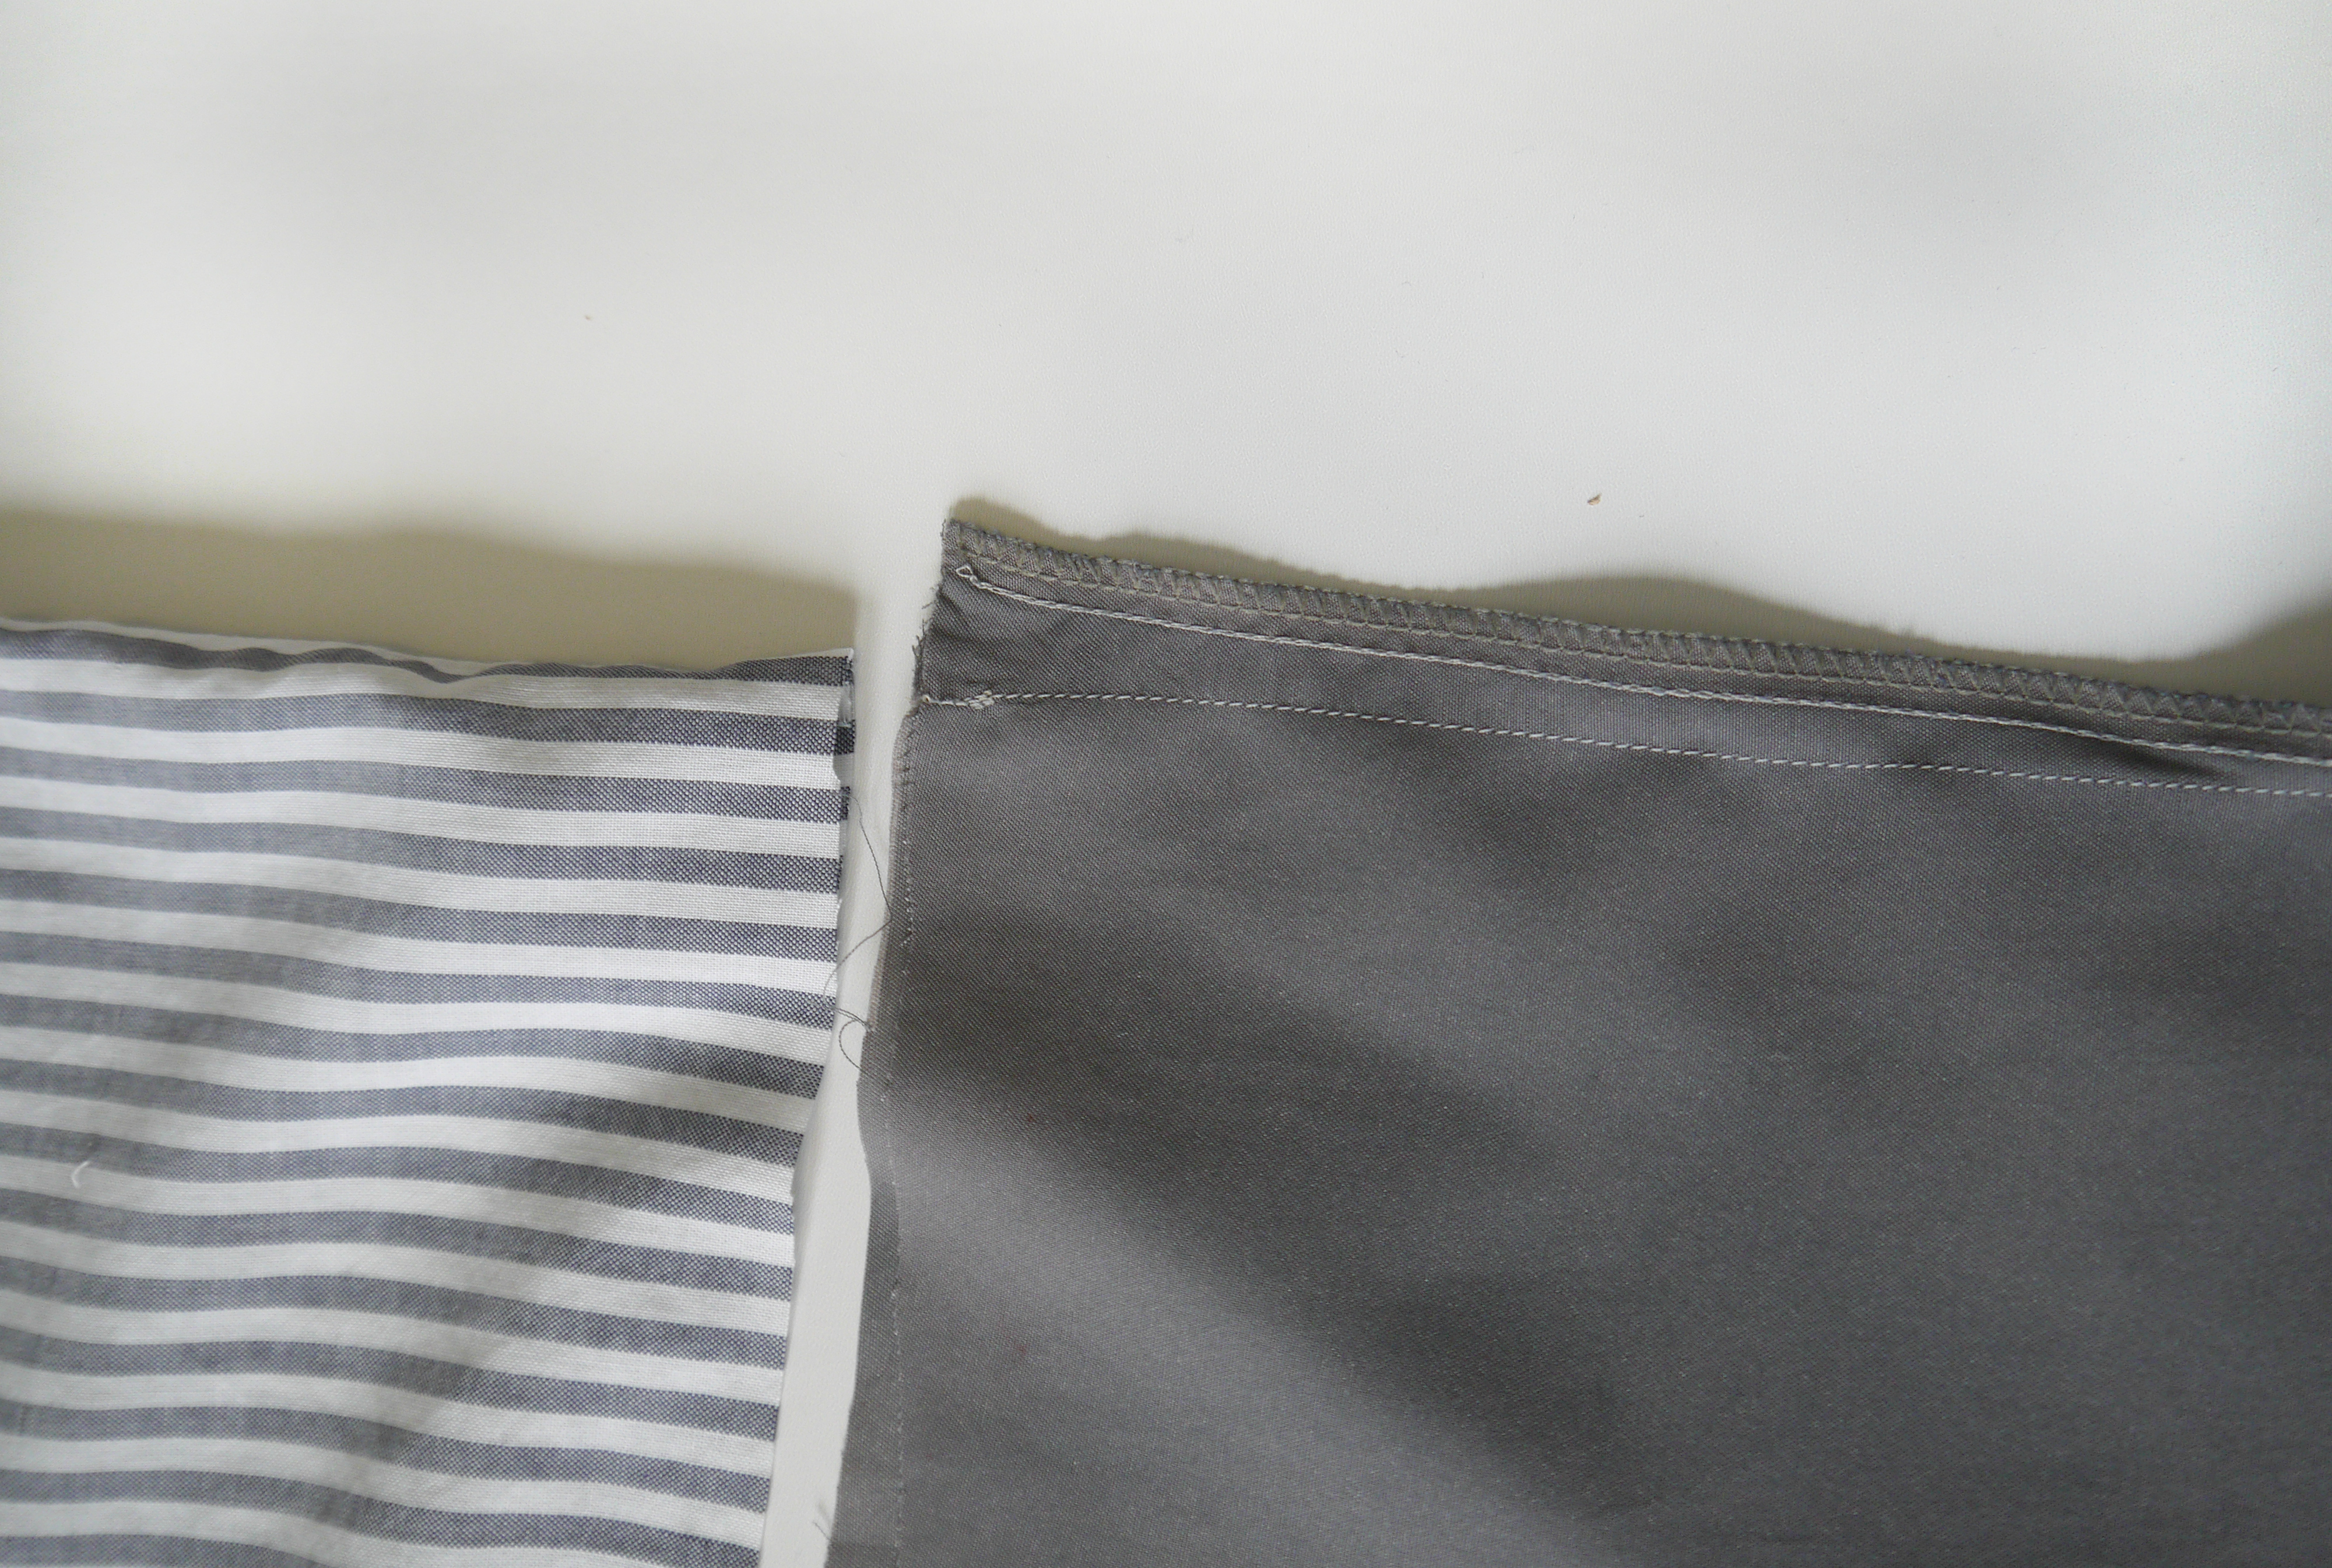
Start stitching there, and taper your line of stitching gradually until you meet the original line of stitching as close to the hem as you can. Zig zag and trim, or serge the new edge…


Turn 2 shirts into one at www.portialawrie.co.uk

Now this is why we needed some wriggle room on the button plackets away from button holes and buttons. Simply joining the 2 pieces together would create too much bulk around the plackets and the join would be partially visible from side on. It just wouldn’t be a clean finish. Just cos it’s a refashion, doesn’t mean we don’t have standards! So unpick the plackets until you can lay them out flat…


Turn 2 shirts into one at www.portialawrie.co.uk

Then join the two pieces and finish the raw edge….


Turn 2 shirts into one at www.portialawrie.co.uk

Then press everything, turn the button bands back under, and re stitch the plackets where the original stitching was…


Turn 2 shirts into one at www.portialawrie.co.uk

Et voila!. Much better!  I’m kicking myself a bit because the button spacing is a bit whack. It’s only just out, but I know it’s there (and so do you now because I just did a sewist classic and pointed it out, lol!) I either need to put another button hole in…or I might settle for a concealed press stud. But the join does line up perfectly at the placket, so I’m giving myself some kudos there considering I totally eyeballed it. (Are you guys serial measurers or do you eyeball it? I tend to flit between the two. I think I have a dual personality as a sewer. Accurate and neat with some things and truly slapdash with others!) The side seams are like a mm off, so near perfect. Overall though, this one is going in the “win” pile. I like.

What do you reckon? You gonna give this one a go?

Oh, btw, the diy for the necklace in this pic can be found here…

DIY, how to, jersey, knits, refashion, refashioning, repurposing, Restyles, Sewing, sweatshirt, Thrifting, Tips and Tricks, Tutorials, Uncategorized, Upcycling

DIY: Sweatshirt Market Tote Bag

02/23/15

Turn a Sweatshirt into A Tote Bag
This sweatshirt was no longer as slouchy as I would like (one too many tumbles in a too hot dryer…yep!) and was languishing unloved in my wardrobe. So I thought I’d turn it into a handy little market tote, (complete with reinforced handles) ready for my next shopping trip… here’s how….

Turn a Sweatshirt into A Tote Bag

Start by pressing and laying out flat with shoulder seams lined up….

Turn a Sweatshirt into A Tote Bag

Cut off the sleeves using the seams as a guide…

Turn a Sweatshirt into A Tote Bag

Cut a big “U” shape out of the neckline…

Turn a Sweatshirt into A Tote Bag

Turn inside out, remove ribbing, sew opening closed (I curved my corners), then turn right side out again….

Turn a Sweatshirt into A Tote Bag

Now for the handles. Cut 2 x 7″ sections from the ribbing you just removed….

Turn a Sweatshirt into A Tote Bag

Fold in half lengthwise and serge (you could also zig zag or stretch stitch) all the way along the open edge. Look what it does! Cuurves into a perfect handle shape!

Turn a Sweatshirt into A Tote Bag

Feed one side of a handle through the tube…

Turn a Sweatshirt into A Tote Bag

Secure/stitch the 2 handle/strap pieces together…

Turn a Sweatshirt into A Tote Bag

Then slide the tube of ribbing over the join to hide it and distribute evenly. Repeat for both handles….

Turn a Sweatshirt into A Tote Bag

and you’re done!

The beauty of this is that it provides a little more structure and support to what would otherwise be rather stretchy handles, which has kinda what put me off the idea of T Shirt bags in the past. Plus sweatshirt fabric is sturdier to begin with. I think this bag could take a few fresh apples and bananas without breaking into a sweat (unintentional pun 😉

Do you use reuseable shoppers? Handmade or shop bought? My worst habit is actually remembering to take them with me to the shop…doh!

decor, DIY, Future projects, home, Inspiration, jersey, jewelry, knits, Knitting, planning, refashion, refashioning, repurposing, Restyles, Uncategorized, Upcycling

DIY: 21 INSPIRATIONAL IDEAS FOR USING T SHIRT YARN

02/20/15

inspirational t shirt yarn ideasOK, so it’s fair to say I’ve developed a bit of an obsession with making T Shirt yarn. The next question of course is what to use it for! I’ve been browsing the interwebs for inspiration and thought I’d share a few ideas with you, just in case, you know, I’m not the only obsessive in the room….

t shirt yarn ideas

These chunky knit cushions are right near the top of my “To do” list.  A simple knit/purl square on chunky needles with a linen backing. What could possibly go wrong, right?! The ubiquitous T Shirt necklace deserves a mention here. This clutch bag, from what I can gather is knitted from lengths of rubber. No reason it couldn’t work in T Shirt yarn instead though…

t shirt yarn ideas

The idea of a cosy blanket knitted on chunky needles appeals to me right now (instructions here); and I can see potential in this tutorial for crocheted cord being used in a jewelery piece or perhaps as handles for a bag? Now I know this rug is not made from t shirt yarn but a) its lush so I just had to share (and there are other delicious yarn art examples in this post) and b) the concept/technique could surely be applied on a smaller scale with T Shirt yarn?

t shirt yarn ideas

I love copper, grey and simplicity. So this necklace tutorial particularly floats my boat. Again there are other tutorials included in this post from Brit +Co. Love this knitted tote pattern from Daily Fix and surely T Shirt yarn lends itself perfectly to macrame hanging plant holders. Several examples in this post from Censational Girl.

t shirt yarn ideas

I mean seriously, how delicious do these knitted floor cushions look? No tute, but the idea would be simple enough to replicate? I can think of a multitude of uses for these crochet baskets (tutorial here from nimi design.com) and this macrame wall hanging has a simple charm. I’m thinking the technique could also be adapted to form a decorative element for a T Shirt refashion (party in the back anyone?)  or maybe to create a cute string grocery bag?

t shirt yarn ideas

Spoiler alert! Rugs are at the forefront of my plans. This spiral rug from A Beautiful Mess, crochet rug from WhollyKao and woven rug from Viva Le Jar, all employ different techniques to equally cool ends…none use T Shirt yarn but….you could, right?

t shirt yarn ideas

This knitted rug pattern from Purl Bee could surely be adapted for T Shirt yarn. This free pattern for a crochet basket from Ravelry calls for 12mm cotton yarn so could be doable and I like the effect of this rope trivet from Design Sponge. I can’t help but think this nautical style of knotting could be fun to try too…

t shirt yarn ideas

Another slightly more simple knitted bag. I think even I could manage this one. I love the effect of this idea from Oleander & Palm. Simple lengths of coloured yarn hung in volume to great effect; and a random woven belt design that I came across that could totally work!

So, I hope that gives you a few ideas of what to do with your squidgy balls of jersey goodness! I’ve started playing around with knitting mine and have a few ideas in the works….watch this space!

Older Posts
Portia
Follow
Sewbox

© Copyright 2026. Portia Lawrie. All Rights Reserved. Managed by WordPress Web Dev Cornwall .