• About
    • Contact
    • Press
    • Sponsor
  • DIY
    • Home & Garden
    • Jewellery & Accessories
    • Yarn Crafts
  • Sewing
    • patternless & self drafted
    • Refashions
    • Commercial Patterns
    • Sewing Tips
    • Overlockers
  • The Refashioners

Portia Lawrie

refashion, refashioning, repurposing, Restyles, the refashioners, The Refashioners 2016, Uncategorized

The Refashioners 2016: Mirjam

08/02/16

The Refashioners 2016 - Mirjam Liechti

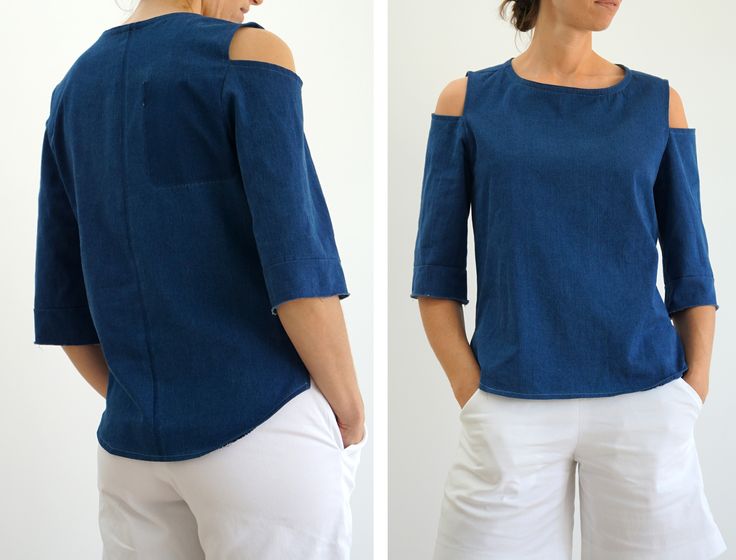
Hi, this is Mirjam from miushka.com and I’m wearing a top made out of a pair of jeans!! But first things first. I was so excited when Portia asked if I wanted to take part as a blogger in this year’s refashioners. Of course I wanted to! I really got a kick out of last year’s community challenge, and contributing my piece as a blogger this year is just a little bit mind-blowing. So here I was, with a piece of thrifted and washed but unwearably frumpy clothing: the old pair of jeans.The Refashioners 2016 - Mirjam Liechti

Last year I made trousers from a shirt, so this year I would go the other way and make a top from trousers. I set myself two challenges. Firstly, I wanted to use just one pair of jeans to make a new piece of clothing (I only used a second pair of old jeans to produce some contrast bias binding for the neckline). Secondly, I did not want to leave any waste from that one pair of old jeans I was using. I used up practically everything from my original pair of jeans, except for some tiny scraps and offcuts. I got enough material from the jeans to make a top and was even left with some shorts to wear it with.

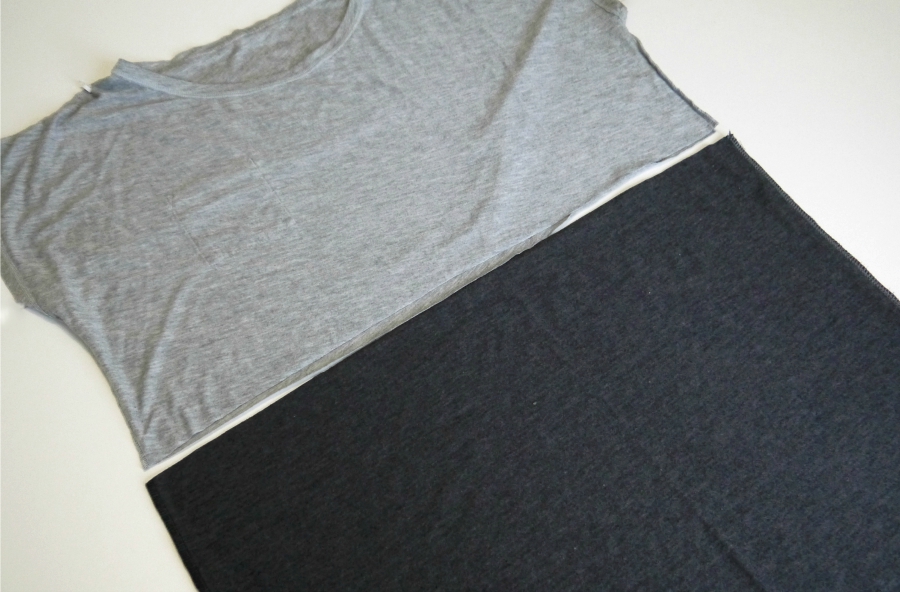
To begin with, I cut my jeans four times and reassembled the pieces to make the top and shorts.The Refashioners 2016 - Mirjam Liechti


So simple, right?! This is what I love most about refashioning: It really doesn’t take much at all, just some bold cuts and a little constructive rearrangement. I used the bottom parts of the trouser legs as sleeves, leaving the original hem intact. The mid-part of the trouser legs I turned upside-down, so the wider parts of the legs would be sitting around my belly – I haven’t told you yet, but I’m making a maternity top here, so I’ll need the extra belly room!The Refashioners 2016 - Mirjam Liechti

I ripped the inner leg seams to expose the dark edges. Then I joined the two legs to form the bodice. I’d only just gotten a new toy – my very first overlocker machine – so I played around with the stitches a bit. To close the centre front and centre back seam I used my overlocker’s flatlock stitch. For this you stitch two layers of fabric together and then lay them flat open and wiggle and jiggle the layers of fabric until the seam is all flat. Magic!The Refashioners 2016 - Mirjam Liechti
­

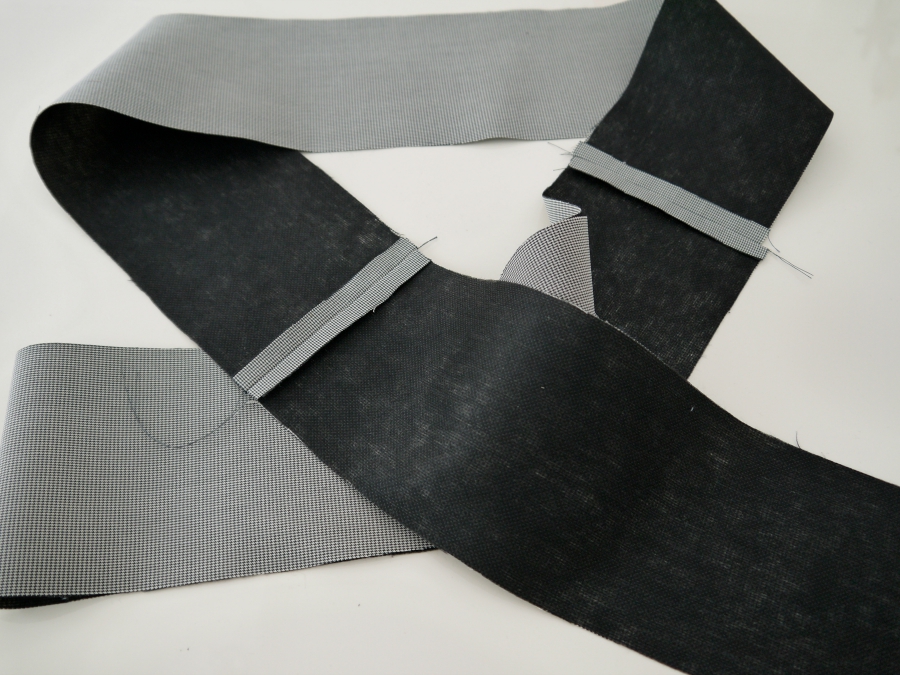
Next, I attached the sleeves, adjusting the fit a little by cutting off bits of fabric here and there. To give shape to the sleeves and to make them sit on my shoulders I opened half the shoulder seams, taking in a bit of fabric when restitching. To finish the neckline I used bias binding made from another old pair of jeans.The Refashioners 2016 - Mirjam Liechti

The Refashioners 2016 - Mirjam LiechtiThe Refashioners 2016 - Mirjam Liechti

At this point, my top was really boxy, if not huge. A good thing around the growing belly, but not very flattering. So I added bust darts, but left enough room so I wouldn’t have to add any closures. I can easily pull the top over my head. And there’s still enough room for my belly to grow (at the time of writing I have four months to go!). I finished the hem by folding it over and inserting a thin elastic strap to keep the stiff fabric from sticking out too much.The Refashioners 2016 - Mirjam Liechti


So that’s the top – what about the shorts, though? Well, these were basically just left over, as I’d only used the trouser legs to make the top. I left the shorts as they were after the first cuts.The Refashioners 2016 - Mirjam Liechti

They fit nicely around the hip and I like the length I cut them in the first place. The edges are left raw and for that decent denim look I’m now waiting for the shorts to fray with washing and wearing.The Refashioners 2016 - Mirjam Liechti

Thank you, Portia, for creating and organizing such an inspiring challenge for the sewing community. I really can’t wait to see what everyone makes of it!

Well first of all…HUGE congrats Mirjam on your impending new arrival!!  Secondly…do you know what floats my “oooooh that’s clever” boat most about this make??  The way Mirjam has cut the armscye curves/sleeves out of those leg cuffs, and that the “opposite” curve in the leftover leg then informs the shape of the neckline. Flipping those larger pieces upside down with the wider part at the bottom. Doing it like this gives maximum use of the fabric available.  And when it comes to refashioning jeans, (where flat fabric is at a premium) it’s a very clever approach and one worth noting! Replacing those flat fell seams with the less bulky flatlock approach also makes the seam more fluid. Nice touch!

You can find  Mirjam here or here. And if you’re inspired to get your refashion on and enter the Community Challenge and be in with a chance of winning some epic prizes…DO IT! Deadline for entries is 30th Sept. Midnight GMT.

The Refashioners 2016 - Huge Prize Package

….I think you’ve go the idea now right? Essentially we want you to refashion some jeans! (You can find the full details/small print of the brief here). BUT, if you want to be in with a chance of winning one of these amazing prize packages you need to SHARE that refashion with us in one of the following ways:

  • On Instagram: Share a pic using the hashtags #therefashioners2016  and #jeanius
  • On Pinterest: There is a community board here where you can pin your makes. (You will need to request an invite to join)
  • On Facebook: There is a community board here where you can post your makes (You will need to request an invite to join)

Only entries shared via the above 3 methods will be entered into the competition. Closing date for entries is 30th September 2016 Midnight GMT.

DIY, how to, refashioning, Restyles, Sewing, Thrifting, Tutorials

Refashion: Fleece Sweatshirt to Minimalist Cropped Jacket

01/25/16

refashion a fleece sweatshirt into a cropped jacket

It’s been all about the cozy around here. Temperatures as we know have been less than balmy and Shedquarters has been a little chilly to say the least. So an extra layer (or two) has been a prerequisite recently. Enter this oatmeal coloured “blah” fleece!

turn a aweatshirt into a cropped cardigan (1)

“Blah” because of the shape. But the fleece itself is super soft and has the appearance of felted wool….except way way softer! So I set about chopping it up….and this is what I ended up with!turn a aweatshirt into a cropped cardigan

A cute little cropped cardi/jacket with simple lines, that sits just on the hip at the front and dips down at the back. Couldn’t be simpler really. No raw edge finishing required as the fabric doesn’t fray. Just a few cut’s and minimal sewing. You can apply this to any similar fleece or sweatshirt. Here’s what I did…turn a aweatshirt into a cropped cardigan

Trimmed away the neckband close to the stitching and rounded off that V shape a little (optional)…

turn a aweatshirt into a cropped cardigan

Cut straight up the middle to create the opening….

turn a aweatshirt into a cropped cardigan

Cut a dipped/curved hem, removing the hem band in the process…

turn a aweatshirt into a cropped cardigan

Cut the sleeves down to my preferred “bracelet” length, leaving a little extra for turning…

turn a aweatshirt into a cropped cardigan

Turn and hem the cuffs and bottom hem…

turn a aweatshirt into a cropped cardigan

Turn and stitch a narrow hem arround the neckline. This would normally be a no no but as this fabric had a degree of stretch (and I didn’t have any fabric left for a facing) I went with it and it worked fine 🙂

turn a aweatshirt into a cropped cardigan

Then turn under and stitch either side of the opening….

turn a aweatshirt into a cropped cardigan

In all instances stitch as close to the raw edge as poss. This will give you a super clean finish and as you can see, that rule breaking I did with turning rather than facing the neckline? Not a problem 😉 Still a nice clean corner there . You can also see a double row of stitching along the vertical edge of the opening. (Partly decorative. Partly functional)

turn a aweatshirt into a cropped cardigan

And that’s that! It’s a perfect little extra layer to chuck on and much much less blah than the original! Even better, it takes about 30 mins. Gotta love fleece/sweatshirt fabric! More sweatshirt stuff coming up this week. Watch this space!

DIY, how to, refashion, refashioning, Restyles, Sewing, Thrifting, Tips and Tricks, trousers, Tutorials

Top Tips: For “Skinnifying” Jeans & Trousers

01/11/16

tips for skinnifying jeans and trousers

When looking for jeans or trousers I have the relatively common problem (especially when you’ve had kids!) of trousers that fit me in the waist/tum/bum area being waaaaay to big in the legs for my liking. Luckily I sew 🙂 So for years I’ve been addressing this minor annoyance by buying (usually thrifting) jeans than are super comfy in the waist/tum/bum area and simply reshaping the legs to fit my style. “Skinnifying” them if you like. I’ve been asked a few times if I am going to do a tutorial on the subject. Well, yes and no. This is a tutorial of sorts. But I hold your intelligence in high enough esteem to know that you probably get the gist that narrowing trousers means pinning the legs. Sewing a new seam and cutting away the excess. So while this post touches on that obvs, I wanted to focus on some of the other considerations you might want to take into account….

Fabric & Stretch: The “jeans” predominantly featured here are not jeans in the truest sense. They are not constructed in quite the same way as “traditional” jeans. (I’ll touch on that a bit further down) But they are made from a stretch denim. In my experience, denim with stretch is by far the most forgiving and easiest to work with when refitting the legs on jeans. And lets’s face it, the most comfortable to wear too! It’s also not a heavy denim. Another consideration when you’re using a home sewing machine which simply won’t have the power of the industrial machines that would have been used for heavy denim when they were originally produced…tips for skinnifying jeans and trousers (2)

Seam Construction: Both the inner and outer leg seams of this particular pair of jeans were constructed using standard straight seams. These are your friends when it comes to reshaping the legs on jeans or trousers; because it means you can easily narrow the leg evenly on both sides. Traditional construction uses a flat fell seam, usually on the inside leg, which is tougher and harder wearing. If you can avoid those….do.  I’ll touch on that a bit further down…tips for skinnifying jeans and trousers

tips for skinnifying jeans and trousers

Prep: To prepare the legs for reshaping it’s easier to completely unpick the hems then press the hems and the sides seams completely smooth and flat. Put on inside out, then pin to your desired fit. Take them off and even out the row of pins. Watch out here that you don’t narrow soooo much that you can’t get your foot through the ankle. Yep….done that. 😉

At the ankle, where you are going to hem, the pins should be at right angles to the original hem fold for the whole hem section. That section needs to be the same width above and below the hem fold in order to allow for proper hemming….tips for skinnifying jeans and trousers

Blending: In order to make the new and old seams blend seamlessly (so you don’t get an obvious dimple or tuck on the outside once you’re done) pin then start sewing within the original seam allowance and gradually cross over the original seamline to your new line of stitching…tips for skinnifying jeans and trousers (4)

Back & Front Leg Ratio: The back leg of a pair of jeans/trousers in general, will be wider than the front to allow for the calf muscle. You’ll want to retain this ratio in order to keep the side seams completely vertical when wearing. So when you press and pin make sure that this excess fabric remains distributed at the back leg…tips for skinnifying jeans and trousers

Ensuring Even alteration: You’ll want to ensure that you take away the fabric evenly on both legs. To do this I pin one leg to my desired fit. Then I line up both legs along all seams and use those pins to pin through both legs at the same time…tips for skinnifying jeans and trousers

So essentially you have both legs pinned together with the pins on top marking an identical line on the other leg underneath. Make sense?  You can also see in this pic the additional fabric of the back leg all bunched up in the middle…tips for skinnifying jeans and trousers

Marking: Obviously I can’t sew it like that! So I mark on top and between the pins on both sides to mark my new seam line…I have a set of pastel pencils that make an awesom alternative to tailor’s chalk btw!tips for skinnifying jeans and trousers

tips for skinnifying jeans and trousers

Sewing: Then simply remove the pins, sew on top of my chalk line, zig zag close to that line, then trim off the excess and hem…tips for skinnifying jeans and trousers

tips for skinnifying jeans and trousers

Considerations for “traditional” Jeans: So I mentioned flat fell seams.  Traditional jeans will generally have a standard seam on the outside (your friend) and a flat fell seam on the inside leg (not your friend!). You can see below the amount of stitching involved in a flat fell seam. This makes it super sturdy which is fantastic for the longevity of your jeans but not so great if you want to take it in at that seam. It is not possible to smoothly narrow  and blend that seam without unpicking all that stitching first. Even then you have that point wher the crotch and inside leg seams intersect to contend with. I have tried in the past and I will never bother again! So to my mind, and in my humblest of all humble opinions, it just isn’t worth it. I prefer to accept the limitations of traditionally constructed jeans and only narrow the leg on one side…tips for skinnifying jeans and trousers (15)

This does of course limit the amount you can narrow the legs by before it starts looking uneven; and that is just a matter of trial and error and personal taste. When narrowing just one side of a pair of jeans I will always use a long stitch to baste my new seam line and test the fit first before committing to cutting away the excess fabric.

If you are altering traditional denim then another consideration is the thickness of the fabric; especially at the hem. To retain the original hem you’ll likely be sewing through 3 layers of denim (see the pic below) plus an additional 3-4 layers when you sew across the intersection of the flat fell seam! tips for skinnifying jeans and trousers (14)

My machine is not powerful enough to do that on sturdier denim. So I reduce the strain by removing that bottom section of hem…tips for skinnifying jeans and trousers

And opting instead for a single fold hem with the raw edge zig zagged or overlocked…tips for skinnifying jeans and trousers

Another area where it can get pretty bulky is up in the hip pocket area. If you are beginning your blended seam as high up at that then there will be studs, pocket bags and top stitching to navigate. Which is why when I select jeans to refashion…I opt for those that don’t need taking in at the hips (these were the other half’s jeans)…tips for skinnifying jeans and trousers

Tools/Equipment: I thoroughly recommend using the right tools for the job. In my opinion and for my machine, denim needles make a difference in the ease of sewing and the quality of the resulting stitch. For an authentic looking hem, then top stitching thread matched to the original colour will give a professional finish. For sewing over the bulkiest part of the hem, placing a shim at the back of the presser foot will keep your presser foot horizontal and help avoid the skipped stitches that occur when sewing over bulky seams and the presser foot has to “climb” at an angle over the bulkiness of it all. You can buy shims. But a folded piece of card does the job for me. Also, machine needle cases are almost the perfect thickness to do the job; and if you’re lucky your presser foot may have a little button on the side that locks it into the horizontal position.tips for skinnifying jeans and trousers


So that’s that. My top tips for skinnifying jeans and trousers. Anything you want to add?? Please feel free to share!!!

Happy refashioning!

DIY, how to, refashioning, Restyles, Sewing, Thrifting, Tutorials, Uncategorized

Refashion: Contrast Texture Sweatshirt

12/18/15

This sweatshirt has been sitting in my refashion pile for several weeks. I have a preference for raglan sleeve sweatshirts as I find the fit more flattering. But this sweatshirt was so soft I nabbed it from the charity shop anyway. What’s more the underside of the fabric was really interesting to me (loopy terry texture and a pinkier colour than the right side) and even as I was lifting it off the rack in the shop, I knew I wanted to play with contrasting the wrong side of the fabric with the right side…sweatshirt refashion (1)

Whilst I am not overly sold on the final fit of this garment, I am in love with the contrast elements of it. I think it’s a really effective way of adding some interest to a plain sweatshirt and has applications for both refashioning and “from scratch” dressmaking. I’m sure it’s not just me that looks at the “wrong” side of the fabric and thinks….well that’s just as interesting as the intended right side. In fact I often spend time deciding which side of the fabric I prefer and want to use. The answer could be…..use both sides!sweatshirt refashion - contrast texture detail

The sleeves were a simple case of removing the ribbing cuffs and creating a turn up to display the underside of the fabric.

The triangular panels are also pretty simple. I did wing this a bit as it was an experiment. So there’s a couple of areas where I’ll tell you what I should have done to make things easier. But hey, the outcome is pretty much the same!sweatshirt refashion (14)

I began by opening the whole thing out. I knew I was going to need to reshape it at the side seams anyway. So began by cutting it open along the side seams and underarm seams…from the hem all the way to the cuff. Both Sides.

In this pic the whole thing is opened out (like a big cross) and then folded along the length, lining up sleeves and side seams so it lays flat and I could deal with the front and back of the sweatshirt separately. This is the front. I marked out and cut a wedge from the side. From the underarm to the hem. Cutting through both layers at once…sweatshirt refashion (15)

With hindsight, I’d actually advise removing the hem and any other bulkiness like it (I had those bulky hem vents) before marking and cutting the wedge. And actually I would measure and mark each side separately rather than cutting through two layers at once. The bulk of those seams and the double layers of thick sweatshirt fabric skewed my scissors resulting in slightly “non-identical” wedges. We need them to be identical for the next step.

Flip those wedges over and apply them to the opposite side of the sweatshirt (with a scant seam allowance) from which they were cut. Essentially reconstructing the shape of the sweatshirt. But now you have those contrasting wedges either side! sweatshirt refashion (16)

Press SA towards centre and top stitch.

Then repeat that process on the back…sweatshirt refashion (17)

…and reconstruct the sweatshirt by placing RS together and sewing together from cuff to hem on both sides…

I wanted to continue the “contrast triangle” element onto the neckline and swap out the ribbed triangle …sweatshirt refashion (3)

Plus I prefer a slightly deconstructed look as opposed to a thick band of ribbing…19

Pretty simple to do this using reverse applique.

First of all I made a snip up to the stitching line on the neckline ribbing…sweatshirt refashion (4)

sweatshirt refashion (5)

…and cut that ribbing away right next to the stitching line.

I’d shortened the sweatshirt at this stage so had some scraps left over…sweatshirt refashion (6)

I cut a square large enough to cover the triangle detail I was looking to reverse applique…

…and pinned it behind the triangle with the textured side facing outward…sweatshirt refashion (7)

Make sure it is smooth and flat.

Over at the sewing machine, line up your needle with the existing top stitching around the outside of the triangle…sweatshirt refashion (8)

sweatshirt refashion (9)

Then stitch right on top of that line of stitching to secure the new scrap of fabric in place…

This is how it looks on the reverse….sweatshirt refashion (10)

sweatshirt refashion (11)

Trim away the excess on the inside close to the line of stitching.

On the outside…make a snip into the “old” ribbed fabric that you want to remove being careful not to cut the new fabric behind!sweatshirt refashion (12)

sweatshirt refashion (13)

Then with small sharp scissors cut away the old ribbed fabric close to the stitching, to reveal the new fabric behind!

Hem…and that’s that!sweatshirt refashion (2)

I’m planning on revisiting this concept with my preferred raglan sleeve sweatshirt shape as I don’t feel 100% comfy in this shape. As I said, the fit part of this I’m not entirely content with. The contrast element concept though??sweatshirt refashion - contrast texture detail

Well, I think I should call that part a win don’t you??

DIY, how to, refashioning, Restyles, Sewing, Thrifting, Tutorials

Refashion: The Wonky Top

11/02/15

So, yeah! This is a top that on paper…shouldn’t work…but absolutely does! It’s made from this thrifted crepe jersey skirt and was a bit of an experiment that kinda really worked out!THE WONKY TOP SKIRT TO TOP REFASHION - TUTORIAL

The skirt itself is a quarter circle construction so everything is kinda on the bias. The resulting top therefore drapes in a really interesting way. The side seams are not actually horizontal but twist slightly around the body and it drapes differently on one side than it does on the other. Hence the “wonky” moniker! But hey…if Levi can get away with twisted denim…I think I can call it a design element on this top right??THE WONKY TOP SKIRT TO TOP REFASHION - TUTORIAL

You can see in the images above the difference in drape. It’s fairly standard on the left (middle pic). But the circle element is really apparent on the right; giving the whole thing a really interesting asymmetric feel.

The skirt was really simply made…THE WONKY TOP SKIRT TO TOP REFASHION - TUTORIAL

You can just about see in this pic how the grain runs on the diagonal…it’s a relatively heavy weight crepe jersey…THE WONKY TOP SKIRT TO TOP REFASHION - TUTORIAL

VERY simple steps in this refashion. I wanted to retain the original curved hem. So I folded the top portion over…THE WONKY TOP SKIRT TO TOP REFASHION - TUTORIAL

Then cut along the fold. This will become my neckline for the top…THE WONKY TOP SKIRT TO TOP REFASHION - TUTORIAL

I sloped the shoulders and cut out a neckline curve…THE WONKY TOP SKIRT TO TOP REFASHION - TUTORIAL

After sewing along the shoulders I lined up the side seams and cut out a short kimono sleeve and curved that into a new side seam…THE WONKY TOP SKIRT TO TOP REFASHION - TUTORIAL

Worth noting that the armhole is still sealed at this stage as that was the original side seam…so that had to be trimmed off to open up the armhole/sleeve…THE WONKY TOP SKIRT TO TOP REFASHION - TUTORIAL

After that I just sewed up the side seams (plain ole narrow zig zag on a standard machine with jersey needles). The hem was already finished so all that was left after that was to turn and stitch a simple narrow hem on the sleeves and neckline and that was it!THE WONKY TOP SKIRT TO TOP REFASHION - TUTORIAL

This was one of those makes that took no time at all and worked out even better than I had envisaged. Don’t you just love it when the sewing gods smile on you like that?

refashioning, Restyles, the refashioners

The Refashioners 2015 is now closed…

09/29/15

So that’s that! 2 months of shirt refashioning inspiration and posts and community challenge entries and general creative awesomeness….done!  Will be announcing the winner on Friday so stay tuned for that (it’s gonna be seriously hard to choose!).

In the meantime…enjoy some more shirt refashioning creativity form our amazing sewing community…

Morna, I have no words!853402b5cd9f066556dbf2a065cc13a8

This is the first of Amelia’s entries. A colour blocked DELIGHT based on a Dear Creatures piece. She also squeezed in a second refashion just before the deadline!The Refashioners 2015 - your makes (2)

Love this combination of a thrifted and dyed shirt and fabric stash scrap by Amy.The Refashioners 2015 - your makes (2)

This lady is prolific with her shirt refashions for herself and her sister….and now her Mum too!The Refashioners 2015 - your makes (1)

I love the way Najah writes! You should really check out her post about what she calls the “gender reassignment” of this little number. Love it!22

Adorable little refash from @swissknitwitch on IG. Even has a matching reversible little jacket! Gah, look at those little ballet toes! 🙂The Refashioners 2015 - your makes (11)

Phenomenal work from Lisa!The Refashioners 2015 - your makes (3)

Really like the simplicity of this make by Angelina. Based on Deer & Doe’s Datura pattern. And of course…it’s grey…which I love, lol!The Refashioners 2015 - your makes (3)

I’ve been wanting to share this one since it first got pinned! Adorable matching Pendleton shirt refashions!!!!The Refashioners 2015 - your makes (13)

Another Datura based refash from Camilla…The Refashioners 2015 - your makes (1)

Adorable refashion of a vintage shirt right?!005

The ever cool Gabby Young with this shirt refashion based on Lileth & Eve’s new  LE101 Drapey Blouse pattern…think I may be sold on this pattern Gabby!The Refashioners 2015 - your makes (10)


And this picture just sums up for me how much our sewing community has embraced this challenge and how much fun it’s been! I wanna party with these ladies!e65014128bf4ca6e13077793ae7c2101

I’m so sorry we couldn’t feature everyone’s makes here, but there were just so many. THAT’S how awesome it’s been. Words cannot express how excited I am that you’ve all got so involved and how clever and creative you all are!

For now…I’m off to TRY and pick a winner…which is gonna take some doing…

DIY, how to, refashioning, Restyles, Sewing, Tutorials, Uncategorized

Refashion: Colour Block Tee

09/17/15

I’m not sure refashions can get much simpler than this! This one first appeared in Issue 2 of Simply Sewing Magazine way back at the start of the year (hence the older pic!)…The licence for the content I create for Simply Sewing reverts back to me after 6 months. So I am reproducing it here for my records and your reference 🙂 Enjoy!!Colour Block Tee Refashion - portialawrie.co.uk

It’s a super quick and easy way to lengthen a jersey tee or just combine two plain tees for a bit of colour blocking interest.

One of the things I find with T Shirts is that, over time and many machine cycles, they shrink. Now I’m quite particular about the length of my tee as I hate flashing my midriff when I raise my arms, sit down lean over etc. So once a top sits a little too short on me, it ends up languishing unworn in my wardrobe. This quick and simple refashion solves the problem of a too short top AND nails the colour blocking trend, all in one fell swoop. What’s more, because we’re using the top of one tee and the bottom of the other, all the neck, sleeve and hemline finishing is already done! Colour Block Tee Refashion - portialawrie.co.uk

Cut your main tee (the light grey one in my case because I like the shape and fit of it) straight across from side seam to side seam, at the point you want the colour blocking to start, plus a little seam allowance. Retain the top portion.Colour Block Tee Refashion - portialawrie.co.uk

Cut the bottom half off your “donor” tee. (The dark grey one in my case. Ideally you want this one to be the same width or slightly wider than your main tee. I call it the “donor tee because it’s very kindly donating fabric to it’s  cousin, the light grey tee ;)) Colour Block Tee Refashion - portialawrie.co.uk

How much you cut off will depend on how deep you want your colour block band to be. For example, if you want a 12″ band, then measure 12″ up from the hem, plus a little seam allowance, and cut straight across at that point.Colour Block Tee Refashion - portialawrie.co.uk

Then, mark with a pin, how much you need to trim off to have your colour block band, be the same width as the top portion of your main tee…Colour Block Tee Refashion - portialawrie.co.uk

Sew, and trim the excess off the colour band to resize it. You need the side seams of the colour band to line up perfectly with the side seams of the main tee.Colour Block Tee Refashion - portialawrie.co.uk

Lay the two portions like so. The tee part right way out and the band part inside out, with the neckline of the tee facing the raw edge of the band…Colour Block Tee Refashion - portialawrie.co.uk

: Slide the tee all the way inside the band so that the two pieces are right sides together, and the raw edges of the tee line up with the raw edges of the band…Colour Block Tee Refashion - portialawrie.co.uk

Lining up the side seams first, and keeping raw edges even, pin and then sew all the way around.

Flip right side out, press the seam, and you’re done!Colour Block Tee Refashion - makery (9)


Tips:

T Shirt fabric can be a little tricky to work with. The raw edges can curl over and stretch out on jersey fabrics even if handled with care. To help with this, use a little spray starch on your fabric during construction, (especially along the cut edges) then launder it out afterwards

I used an overlocker for this project. But I happily sewed jersey fabric on my standard sewing machine before I was lucky enough to get an overlocker. They are fantastic for sewing with jersey but by no means essential, particularly on looser styles. A lot of modern sewing machines have a stretch stitch for exactly that reason. Failing that, use a straight stitch and hold the fabric under very slight tension/stretch as you feed it through the machine

Consider colour blocking skirts, jumpers and non jersey tops. Combine different textures and patterns. Combining different garments is a great way to rejuvenate and get more use out of old clothes as well as putting your own individual stamp on what you wear.


DIY, how to, refashioning, Restyles, Sewing, the refashioners, Thrifting, Tutorials

The Refashioners 2015 – Me (gulp!)

08/28/15

PORTIA LAWRIE - THE REFASHIONERS 2015 (1)

Aaaaand here we are! Unbelievably, at the end of an entire month of refashioning inspiration and…lets face it….more than a little genius thrown in for good measure! Helloooo again everyone! Feel like I haven’t seen you for aaaaaages!!

The trouble with organising an event like this is that, as the host, there’s an inevitable weight of expectation. Real or imagined. Actual or self imposed. Playing alongside this line up of talent is mildly intimidating. I can’t lie! But “comparison is the thief of joy” so let’s be real and stay true to ourselves. I’m not a couture technique kind of gal.  Never will be. I like simplicity. Both in terms of process and the finished garment. If I churned out something amazingly clever that just wasn’t me and I would never wear, you guys would know in an instant.  Trying to be something I’m not is not really my bag. So true to form, here’s a simple but oh so effective little refashion for you…..(secret squirell…..shhhh…..I actually really love this….just because it’s easy…don’t mean it doesn’t count, ha ha!)PORTIA LAWRIE - THE REFASHIONERS 2015 (2)

Ever noticed how an oversized man’s shirt, when worn, has the perfect armhole size, dropped shoulder and wide sleeve configuration for a kimono jacket??! That was my starting point….

THE REFASHIONERS 2015 - PORTIA LAWRIE (1)

This shirt had been sat in my stash for months. Even before my first email went out about this series. I think it was originally intended for a magazine article. But I ended up taking a different direction so it sat there. What I loved about this shirt was it’s size. Lots of fabric to work with. It’s colour. I love a versatile neutral. and last but not least, the fabric. Not easy to photograph, but it’s medium weight and drapey with a very slight sheen.

THE REFASHIONERS 2015 - PORTIA LAWRIE (2)

I started by removing the pocket. Often the biggest obstacle in a shirt refashion is having a pocket when you absolutely don’t want one. Luckily I managed to all but vanish the stitch marks using this technique.

THE REFASHIONERS 2015 - PORTIA LAWRIE (3)

Next, cut all around the button bands and collar to remove…

THE REFASHIONERS 2015 - PORTIA LAWRIE (6)

Stay stitch the neckline so it doesn’t distort as you work. If you’re like me and do lots of trying on and test pinning as you work out what you’re going to do (I tend to work things out on the fly rather than have a plan) then stabilising that neckline curve is a 2 minute job that’s well worth doing…THE REFASHIONERS 2015 - PORTIA LAWRIE (1)

Here’s how it looked at this stage. (I actually quite like this shape too!) But I continued…

THE REFASHIONERS 2015 - PORTIA LAWRIE (4)

Fold up your shirt along the length, lining up the shoulders and armhole curves…

THE REFASHIONERS 2015 - PORTIA LAWRIE (5)

This enables you to cut both sleeves equally in one go. I cut mine just below the elbow…

THE REFASHIONERS 2015 - PORTIA LAWRIE (2)

I reviewed the shape and proportions at this stage and decided on my next steps…

THE REFASHIONERS 2015 - PORTIA LAWRIE (8)

Lop off the shaped hem to shorten and create a boxier hemline…

THE REFASHIONERS 2015 - PORTIA LAWRIE (9)

Take a line from the shoulder point/neckline curve right down to the hem….it’s a gentle diagonal in this pic…but you could also go straight down at right angles. Either will work.

THE REFASHIONERS 2015 - PORTIA LAWRIE (10)

Mark a cutting line on both sides (eyeball if you’re brave…but I had a rep to protect on this occasion, lol!)…

THE REFASHIONERS 2015 - PORTIA LAWRIE (3)

And there you have your basic kimono shape. Just the neckline, hem and sleeves to finish…

THE REFASHIONERS 2015 - PORTIA LAWRIE (11)

Enter “donor” shirt number two! I had a moment of panic here. The stuff that I had planned to use for the kimono bands didn’t work out ( it was the remnants of this top and the combo really worked but in truth I bodged it!!) and I had nothing left in my stash that worked. So I nipped out to the local charity shop 10 minutes down the road and bought this one!

THE REFASHIONERS 2015 - PORTIA LAWRIE (12)

I pieced a band from the sleeves, interfacing the pieces before I joined them….you’ll want the finished band to be about an inch shorter than the neckline/opening or your jacket so measure accordingly…if you want a less structured, more fluid lapel, you could try skipping the interfacing. Which I may try next time.

THE REFASHIONERS 2015 - PORTIA LAWRIE (13)

Folded in half , RS together, the ends sewn, then turned through and pressed. (use a point turner or knitting needle to get those corners crisp) I had my neckline band…

THE REFASHIONERS 2015 - PORTIA LAWRIE (14)

Two important steps before applying the band. First press up the raw edge of the bottom hem by about half an inch.THE REFASHIONERS 2015 - PORTIA LAWRIE (15)

And notch into that neckline curve…up to but not through the stay stitching.

THE REFASHIONERS 2015 - PORTIA LAWRIE (16)

Baste or pin the band all the way around the RS of the neckline and opening like so. It’ll need a little bit of easing on around that notched neckline curve…

THE REFASHIONERS 2015 - PORTIA LAWRIE (18)

When you get to the hem part flip it over like so.  The WS of the hem flips over to the RS and encloses the bottom of the neckline band like so. (Ignore the extra seam allowance of the shirt fabric on the right. I was just playing with the placement a bit)

THE REFASHIONERS 2015 - PORTIA LAWRIE (17)

Sew right to the end of your hem fold like so and backstitch to secure…(I know this looks a bit odd if you’ve never used this technique before…but bear with me. It will make sense in a moment)

THE REFASHIONERS 2015 - PORTIA LAWRIE (19)

I trimmed and bound my raw edges at this stage. I didn’t take the bias tape all the way down to the end. Because we’re going to turn that through in a minute and I didn’t want the extra bulk preventing a nice sharp corner….

THE REFASHIONERS 2015 - PORTIA LAWRIE (20)

So here’s where we are at. This is the outside of the jacket. Looks a bit odd I know…

THE REFASHIONERS 2015 - PORTIA LAWRIE (21)

But look what happens when you turn that corner RS out 🙂 Creates a lovely clean finish. THE REFASHIONERS 2015 - PORTIA LAWRIE (22)

Here it is from the outside. Simply hem along that line where the pin is, and up to the seam where the band is joined to secure the hem allowance.THE REFASHIONERS 2015 - PORTIA LAWRIE (4)THE REFASHIONERS 2015 - PORTIA LAWRIE (23)

Here’s where we’re at…

THE REFASHIONERS 2015 - PORTIA LAWRIE (24)

Measure the sleeve opening….THE REFASHIONERS 2015 - PORTIA LAWRIE (25)

Create matching cuffs!THE REFASHIONERS 2015 - PORTIA LAWRIE (26)

Baste/apply…THE REFASHIONERS 2015 - PORTIA LAWRIE (27)

trim, bind, turn through, press everything…alot…

And you’re done!! Simples!PORTIA LAWRIE - THE REFASHIONERS 2015 (2)PORTIA LAWRIE - THE REFASHIONERS 2015 (1)PORTIA LAWRIE - THE REFASHIONERS 2015 (3)

And that’s it! Our job is done for another year and now it’s over to YOU!! Grab a shirt, get refashioning, share it, and be in with a chance of winning that awesome prize. Now worth just under £700!! Jaw dropping right?! We’ll be sharing a selection of your refashions right here throughout Sept and there’ll be inspiration posts to give you even more ideas and directions in which to go with your shirt refashioning. You have until 27th Sept to submit yours. 

I’d like to take this opportunity to thank all of the talented stitchers who shared their ideas with us this August. I for one, have a much longer sewing queue than I did at the start of August; there are so many ideas I want to try out!! Love and hugs and much gratitude to everyone involved. Phew…that’s it…we are done!

What now?

Over to YOU….show us what ya got!


DIY, how to, refashioning, Restyles, Sewing, the refashioners, the refashioners 2015, Thrifting, Tutorials

The Refashioners 2015 – Erin

08/27/15

THE REFASHIONERS 2015 - ERIN - CALIVINTAGE

Hello everyone, and a huge thanks to Portia for inviting me to take part in The Refashioners! First things first, I have to preface this by saying that I am a complete sewing novice who was absolutely terrified and intimidated by this project! But when Portia asked me if I’d be interested in participating, I knew it was just the kick in the butt that I needed to venture out and try something new. So I dove right in, scissors first, and completely destroyed my first “dummy” shirt. I suppose in retrospect that I could have drafted up some sort of pattern using butcher paper, but hindsight is 20/20, my friends. And it’s all a part of the learning process. So when it came to tackling my second try, I knew immediately that I was going to have to do something that maintained as much of the integrity of the original shirt as possible while still transforming it into something more wearable for me.THE REFASHIONERS 2015 - ERIN - CALIVINTAGE

Making this simple shirt took only a few little snips and stitches to complete. I tried it on to determine the length that I wanted to crop it up to, then used the excess fabric at the bottom of the shirt to fashion the ties for my wrap. Then I simply cut out the new neckline, sewed everything up, and added the wrap ties. Most wrap tops and dresses have a hole in one side to thread the tie, but because my ties were at the very bottom, I skipped that step entirely. In retrospect, I think I will probably add that little slit into the side, but it is still perfectly functional as is.THE REFASHIONERS 2015 - ERIN - CALIVINTAGE

I like the way the back of the shoulders is now a front yoke detail, and that it has a slightly oversized fit, but doesn’t leave me completely swimming in the garment. THE REFASHIONERS 2015 - ERIN - CALIVINTAGE

1. I started with a really nice vintage men’s shirt made in a textured cotton linen blend. I had actually bought it prior to the challenge thinking it might just hem it into a crop top and wear it with an oversized fit. At this point in the photo, I’d already removed the front pocket and inner tags using a seam ripper. The back of the shirt will eventually become the front, but don’t worry about the seam across the back! This will become the front bib of your new wrap top.

2. I tried on the shirt and marked where to cut the new hem, leaving a bit of sewing allowance. Then I simply chopped off the bottom of the shirt using the grid pattern on the shirt as a guide. If it had been a solid, I probably would have used a straight edge to help myself along. The remaining pieces of the shirt will later become the ties for the wrap!
THE REFASHIONERS 2015 - ERIN - CALIVINTAGE
3. After cutting the shirt, I simply ironed the new hem in place and took it for a pass through the sewing machine.
THE REFASHIONERS 2015 - ERIN - CALIVINTAGE
4. Since I don’t have a dress form, I just went ahead and put the shirt on again to mark the new neckline and wrap back with a few pins. To cut, I folded the shirt in half lengthwise to try and get both sides to mirror one another. Then I simply ironed the new hems and sewed them up!
THE REFASHIONERS 2015 - ERIN - CALIVINTAGETHE REFASHIONERS 2015 - ERIN - CALIVINTAGETHE REFASHIONERS 2015 - ERIN - CALIVINTAGE
5. The last step isn’t pictured, but all I did was cut the remaining fabric in half lengthwise and then sewed them into two simple fabric ties to affix to the ends of the wrap on the shirt. If you’d like your wrap to be a bit more secure, you can cut a hole along one side seam of the shirt to thread your belt through, but since I have them affixed to the very bottom of the shirt, it also works just fine like this.
THE REFASHIONERS 2015 - ERIN - CALIVINTAGETHE REFASHIONERS 2015 - ERIN - CALIVINTAGE
 And that’s a wrap! (See what I did there?) It may not be the trickiest of ideas, but it works for me. The best part is that it’s something that I will genuinely wear and I’ve learned so much in the process!


Just goes to show, that even if you consider yourself a novice sewer, if you keep it simple you can still totally transform your shirt! I love this Erin . Thanks so much for leaping in and trying something new!  The yoke front and the fact that the wrap is at the back is an edgier twist on a classic wrap blouse. And of course, as ever, wonderful styling 🙂

You can find Erin here and here. And don’t forget amazing prizes to be won as part of The Refashioners 2015 Community Challenge. Including a little something handmade from Erin! So get involved for a chance to win!!! Grab a shirt and get refashioning! You have until Sunday 27th Sept to enter! Tomorrow is the last of the blogger inspiration posts and then it’s over to you!!!

DIY, how to, refashioning, Restyles, Sewing, the refashioners, the refashioners 2015, Thrifting, Tutorials

The Refashioners 2015 – Sasha

08/26/15

Sasha - Fruits Flowers and Clouds - The Refashioners 2015

For me “refashion” does not simply mean recovering the fabric from a garment and making  another garment but also recombining the existing elements to give new life and meaning to an old garment. I’ve always been quite attracted by the styles merging the very masculine with the very feminine so the idea of taking a men’s dress shirt and mixing it with the feminine shape of the victorian underbust corset, as my first refashion was very exciting to me.Sasha - Fruits Flowers and Clouds - The Refashioners 2015


The road was not without bumps. I had no clear view of how to go about it and spells of “I don’t have enough fabric” anxiety.  So here it is: my first refashion and I’m very pleased with the result. I anticipate I’ll be wearing this a lot.

Process outline:

The original shirt – a men’s size 42 dress shirt in cotton twill.Sasha - Fruits Flowers and Clouds - The Refashioners 2015

Take off the collar unit and the cuffs and form a neck dart.

Mirror everything from one side to another ( I used tailors wax tracing paper and a tracing wheel to do so).Sasha - Fruits Flowers and Clouds - The Refashioners 2015

Blend the neckline and trim the excess.

Measure and cut along a line under the bust leaving intact the button placket and including seam allowances.Sasha - Fruits Flowers and Clouds - The Refashioners 2015

Sasha - Fruits Flowers and Clouds - The Refashioners 2015

Pin, measure and cut the sleeves and sides to create a sloping/drop shoulder short sleeve which also has the effect of reducing the overall fullness of the shirt.

Pin a couple of pleats in the sleeve, make a slit and attach the cuffs. Depending on the original shirt size they are potentially going to be smaller than your bicep circumference. I ended up by creating an extension tab with two buttons to close the gap.Sasha - Fruits Flowers and Clouds - The Refashioners 2015

Measure the neckline opening, shorten the original collar stand accordingly and use it to create a mandarin collar.

Sasha - Fruits Flowers and Clouds - The Refashioners 2015

Gather the excess fabric under bust and at the back

Drape a form fitting midsection from a large strip of fabric. Be sure to cut based on the abdomen circ + ease + sa. I mistakenly did not and ended up having to insert some triangles at the sides.Sasha - Fruits Flowers and Clouds - The Refashioners 2015

I pinned also a couple of darts to help shaping the back. I considered doing so for the front also but in the end I decided against it as I prefer it more relaxed. With the remaining fabric from the body and the sleeves create a long strip (under bust circ. + hips circ. times three)…Sasha - Fruits Flowers and Clouds - The Refashioners 2015

…and create 1″ pleats. I used some light fusible interfacing to help hold the pleats because my fabric was too soft and drapey.

Attach a row of pleats and the original shirt tails&hem (reduced in size to fit the waist piece) to the bottom of the waist piece.Sasha - Fruits Flowers and Clouds - The Refashioners 2015

Attach the waist piece to the upper bodice sandwiching in between another row of pleats.Sasha - Fruits Flowers and Clouds - The Refashioners 2015

Attach the waist piece to the button placket. Trim the button placket and close the hem! Done!Sasha - Fruits Flowers and Clouds - The Refashioners 2015Sasha - Fruits Flowers and Clouds - The Refashioners 2015

Thank you again to Portia for inviting me. When she asked me to join the stellar cast of this year’s Refashioners I must admit I felt a bit scared.  Honored but scared. First I never did a refashion before and second have you seen the heavy talent she enrolled!!!

Talent that includes you Sasha! Wow! Hard to believe Sasha’s never refashioned before. But this is exactly why I’ll often approach sewers who don’t refashion to be part of the blogger challenge. You just get a fresher take on things that way. One of the biggest aims of The Refashioners is to show refashioning in a different light. That as well as it’s eco credentials,  it can be creative, edgy, modern, individual and uber cool. Think I just aptly described Sasha’s refashion there don’t you? Job done then!

You can find Sasha here and here. We are almost at the end of a month of  refashion inspiration and ideas!  Next week sees the community challenge element gather pace and don’t forget amazing prizes to be won as part of The Refashioners 2015 Community Challenge.  So get involved for a chance to win!!! Grab a shirt and get refashioning! You have until Sunday 27th Sept to enter! 

Older Posts
Portia
Follow
Sewbox

© Copyright 2026. Portia Lawrie. All Rights Reserved. Managed by WordPress Web Dev Cornwall .