• About
    • Contact
    • Press
    • Sponsor
  • DIY
    • Home & Garden
    • Jewellery & Accessories
    • Yarn Crafts
  • Sewing
    • patternless & self drafted
    • Refashions
    • Commercial Patterns
    • Sewing Tips
    • Overlockers
  • The Refashioners

Portia Lawrie

DIY, how to, refashioning, Restyles, Sewing, the refashioners, the refashioners 2015, Thrifting, Tutorials

The Refashioners 2015 – Jenna

08/12/15

just sew jenna - the refashioners 2015

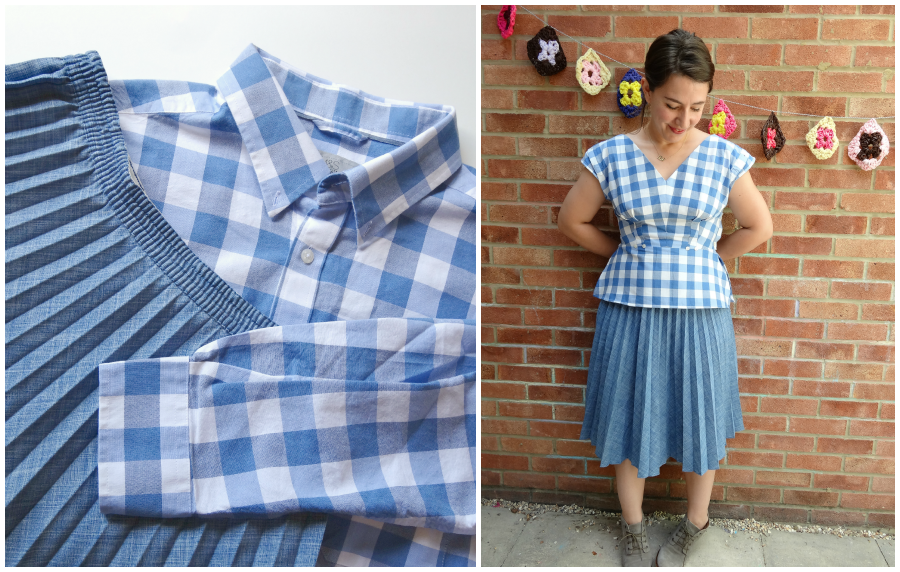
When Portia asked me to join in with this year’s Refashioners I was seriously overwhelmed!  I mean, the lineup is phenomenal!  Once I got over the shock though I remembered that I had already been planning a shirt refashion for a while so I calmed down a bit and began to think.  I do love a bit of refashioning – what’s not to love?  It’s cheap, environmentally friendly and often quick as parts of the existing garments can be reused.  I  blogged last year about making a shirt into a NewLook 6808 and recently I made a pair of shorts for my child from an old dress.  I have also just made some nightwear from three old shirts.  But I wanted this refashion to be something more experimental, maybe to push my boundaries a bit further than I had before.

It just so happened that I had found a seriously nice quality white shirt in a charity shop for about £2 (bargain!) and then my Dad visited and left me with a pile of his shirts that he doesn’t wear any more….just sew jenna - the refashioners 2015

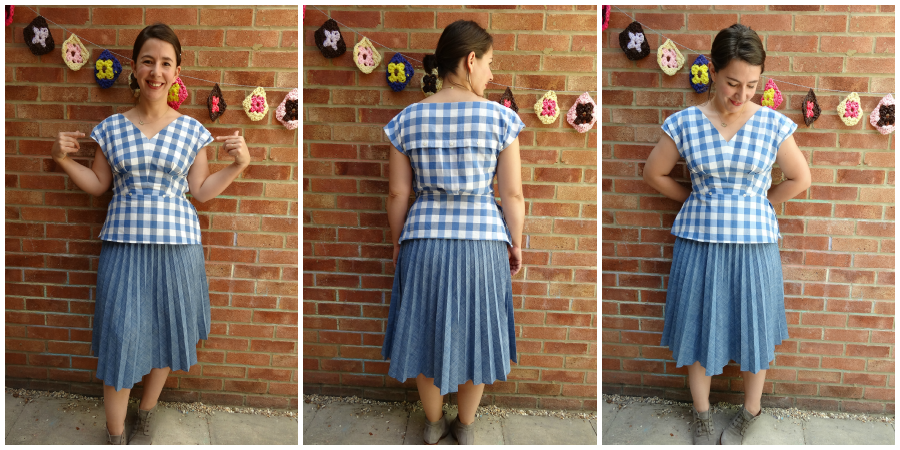
I really wanted to make a sundress out of shirts as I thought the fabric would lend itself nicely to a dress.  Of course there isn’t enough fabric on one shirt for a sundress so the obvious answer is to use two! just sew jenna - the refashioners 2015

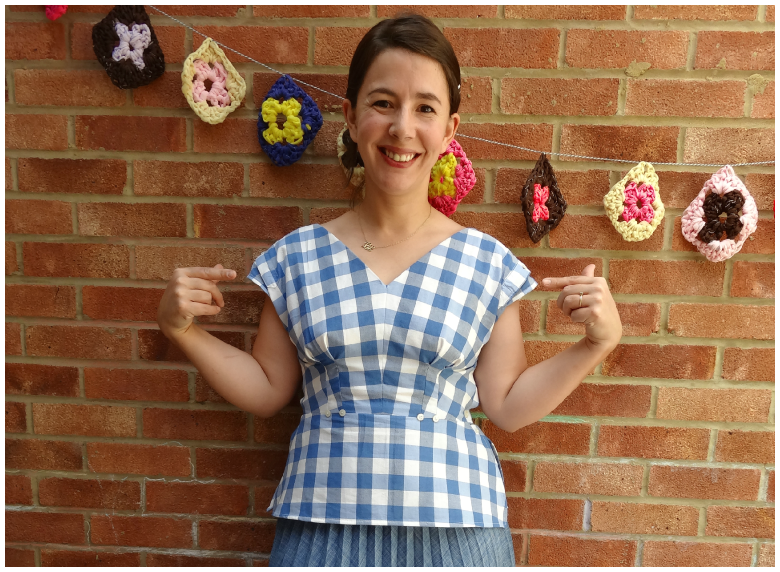
I started looking at patterns to use as my base and quickly dismissed a vintage sundress pattern as being too fabric hungry and was just about to turn to a vintage nightie pattern when Portia kindly lent me issue 4 of Simply Sewing Magazine which included the jumpsuit/camisole pattern from the last series of The Great British Sewing Bee.  Obviously this isn’t a jumpsuit but the bodice was exactly what I had in mind.just sew jenna - the refashioners 2015

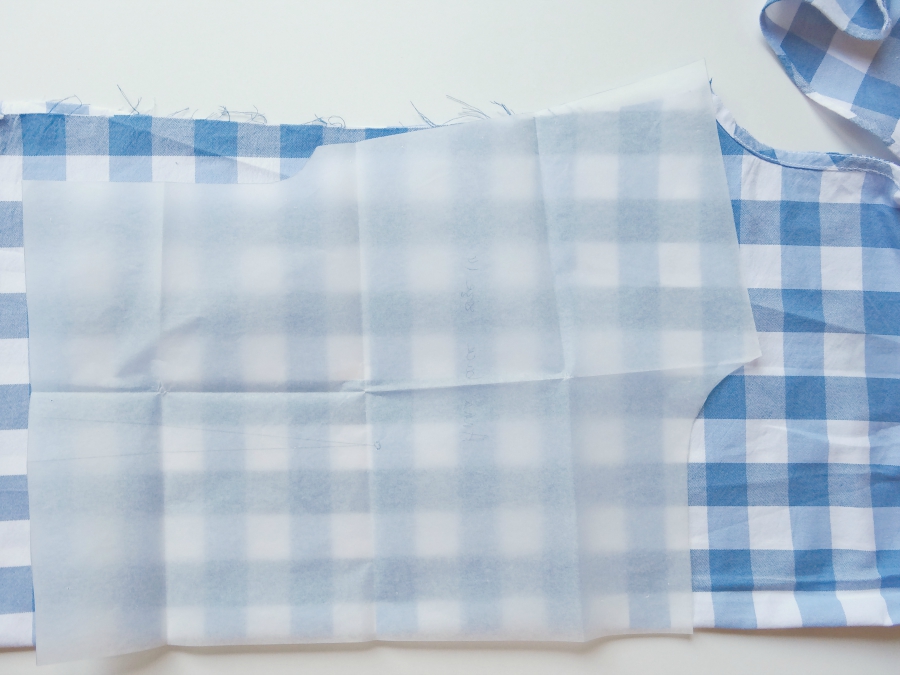
I decided I wanted the buttons running down the back of the dress as an accent so this was my starting point for the cutting out.  The main pattern pieces fitted on to the shirt quite easily but I did have to put a seam in the centre of the ruffle which was a bit of a shame. just sew jenna - the refashioners 2015

Also the shirt fabric is thicker than the recommended fabric so the ruffle doesn’t ruffle quite like it should, but I still like the effect.  There was not enough fabric for the facings so I used a sleeve from my second shirt for these.

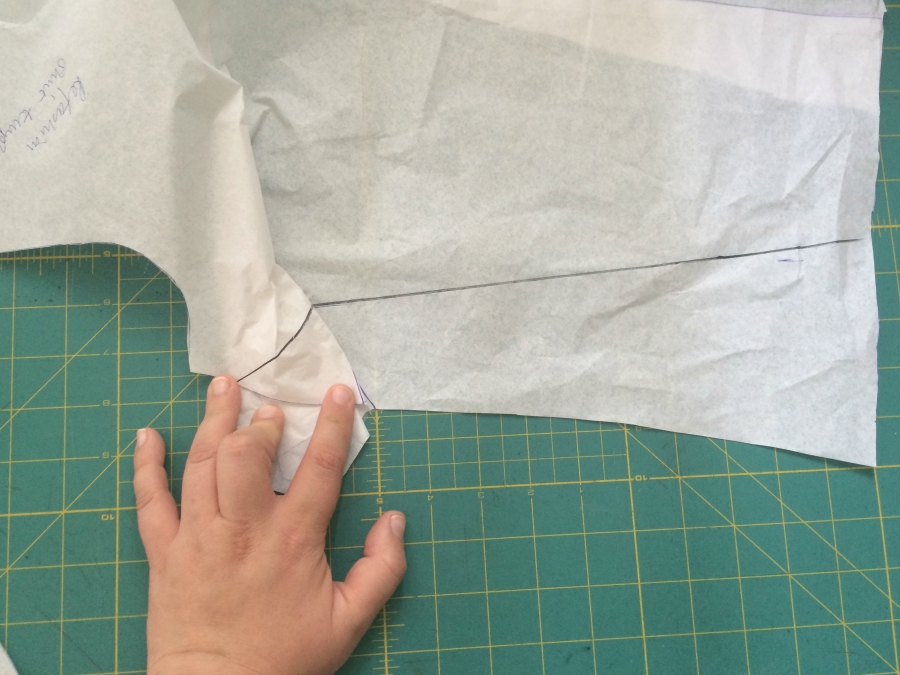
For the skirt section, I cut the shirt just above where the armhole starts, separated the front from the back and reattached them together with the front slightly lower down to compensate for the tail of the shirt now being the front. just sew jenna - the refashioners 2015

In truth, the front is still longer than the back so I could have gone further but I don’t really have a problem with this.  The new side seams are slightly angled outwards creating more of a shaped skirt than a straight one. just sew jenna - the refashioners 2015

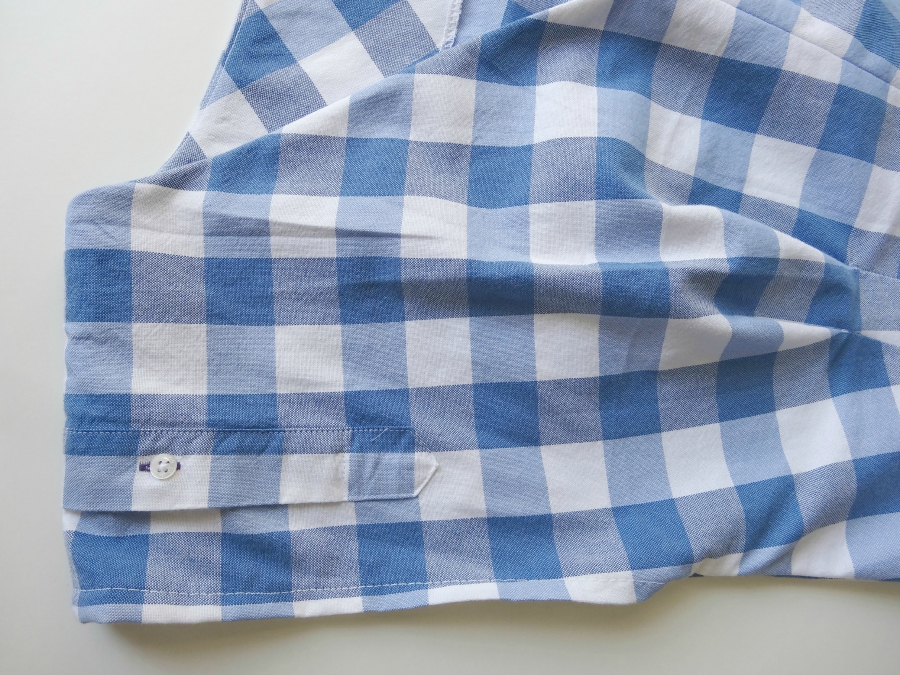
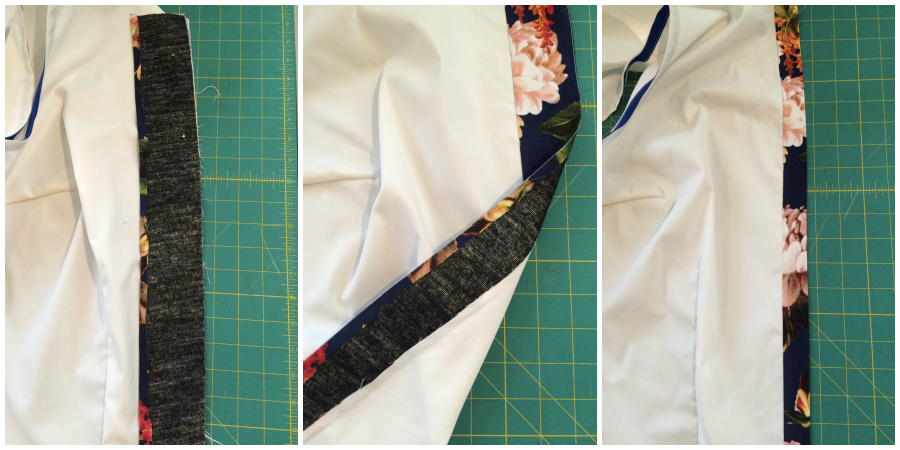
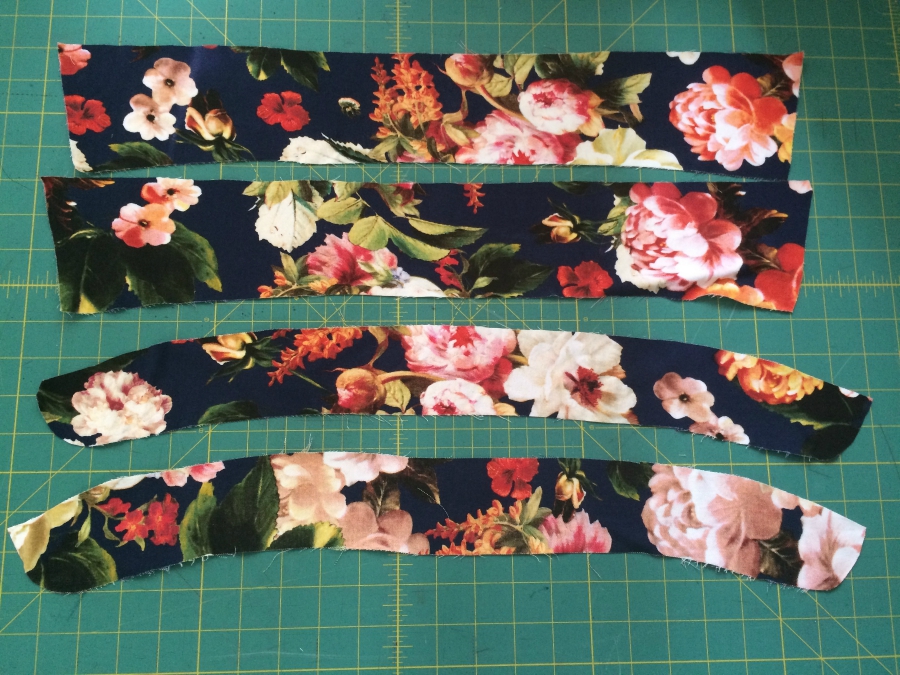
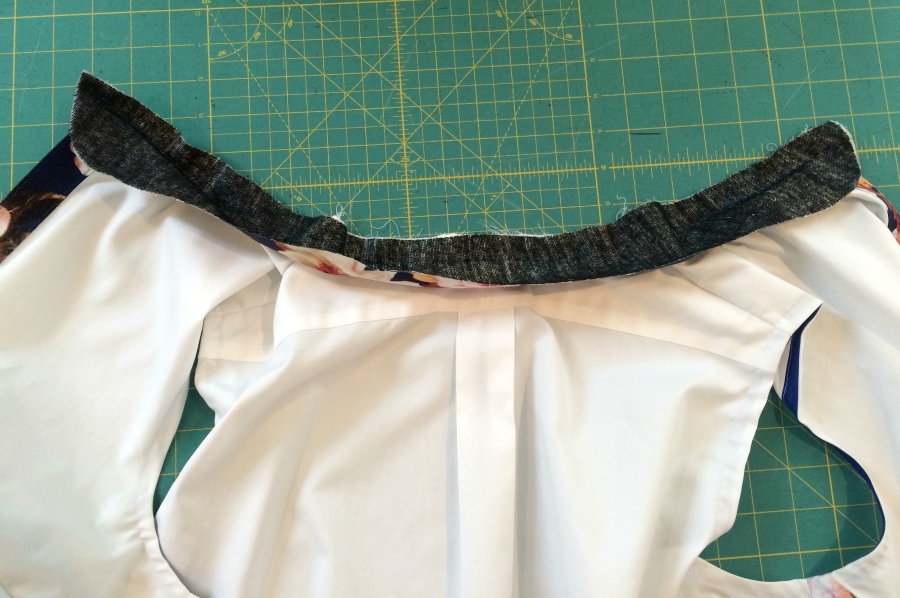
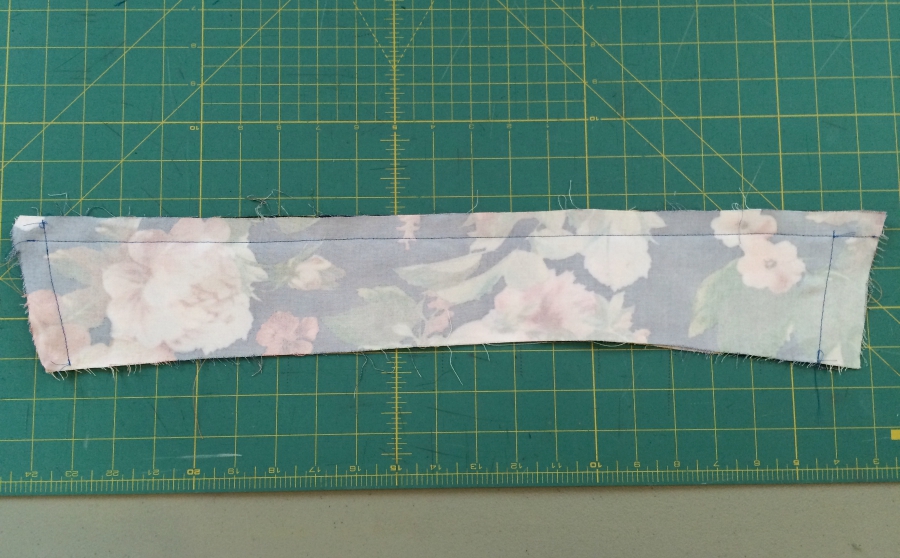
The final things I had to do were to create a channel for the elastic to go through at the waist and add some extra buttons and button holes.  I used the remaining sleeve from the blue shirt to make the bias binding for the channel.  As the fabric has a check running through it was really easy to make sure I was cutting correctly and I didn’t need a lot to go round the waist seam. just sew jenna - the refashioners 2015

just sew jenna - the refashioners 2015

The two extra button holes were needed just above the waist seam which was near the bottom of the original shirt, and at the bottom of the skirt.  I also added a popper right on the waist seam so the gap in between the buttons doesn’t gape under the strain of the elastic.  And done!just sew jenna - the refashioners 2015

I have loved this challenge so much!  Refashioning is such a fun thing to do, whether it is simply harvesting the fabric to reuse or altering something so it fits better it always gives me joy to know I am giving something new life!  Thank you so much to Portia for all her hard work organising this and for inviting me to take part, it’s been ace!

Thank YOU Jenna! ( Love this lady!) Such a cute way to combine two shirts. (and did you notice the nice little touch of a line of sahiko’esque embroidery on the ruffle?!) I’m a big fan of combining garments; and combining shirts is easy because the fabric is generally of a comparable weight and handle so they blend pretty easily.  So don’t just stop with one shirt! Use a whole array of them and combine different elements. Colour block. Pattern clash. Slice em all up and put em back together in a different order!

You can find Jenna here and here. And just like Marie, Jenna has also very generously  delved into her own personal pattern stash to add to the prize package!!  Take a look at ALL the amazing prizes to be won as part of The Refashioners 2015 Community Challenge. So get involved for a chance to win!!! Grab a shirt and get refashioning! You have until Sunday 27th Sept to enter! Stay tuned for more inspiration throughout the WHOLE of August!

 

DIY, how to, refashioning, Restyles, Sewing, the refashioners, the refashioners 2015, Tutorials

The Refashioners 2015 – Marie

08/11/15

A STITCH ODYSSEY - MARIE - THE REFASHIONERS 2015

Although refashioning is not a natural instinct or skill of mine, there was no way I could pass up Portia’s exciting invitation to take part in The Refashioners 2015! I had so much fun being super adventurous last time, and it felt good to push myself out of my comfort zone. This year, however, I took a slightly different approach which involved ticking off another #vintagepledge make off my list. There’s still plenty of time to sign up by the way, with some great prizes up for grabs!A STITCH ODYSSEY - MARIE - THE REFASHIONERS 2015

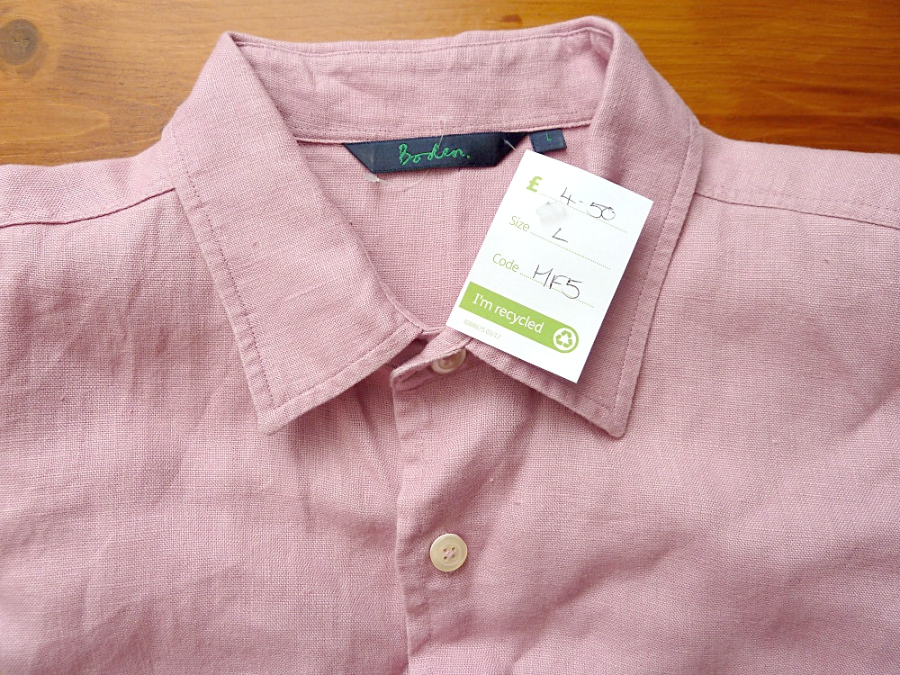
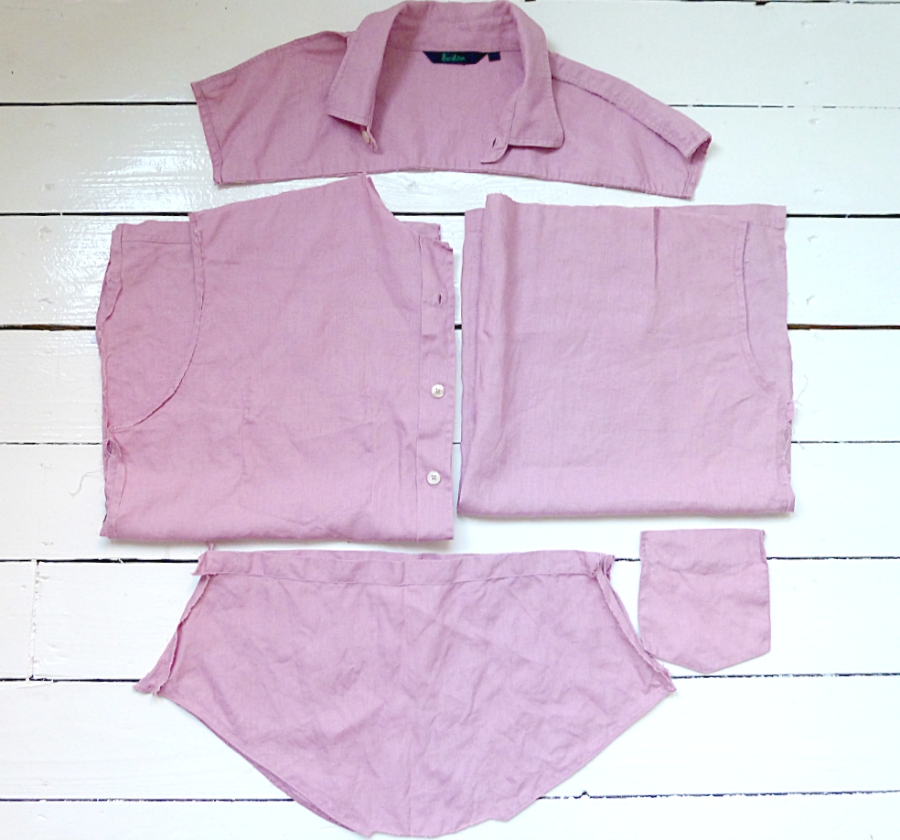
First came the shirt, of course. I chose to pick my own this year and I was over the moon when I found this 100% linen Boden shirt for a mere £4.50 in a local charity shop. It was in tip top condition and although I’m not usually a huge fan of pink, this shade of blush really appealed to me.

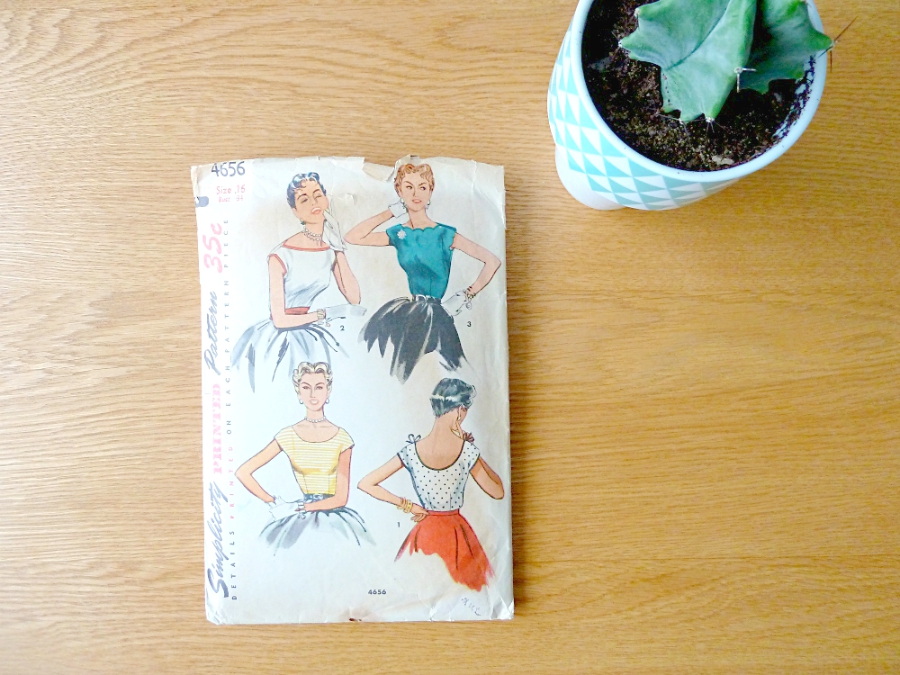
I wanted the fabric to sing and I also wanted to end up with a classic wardrobe staple. So I turned to 1950s Simplicity 4656…A STITCH ODYSSEY - MARIE - THE REFASHIONERS 2015

…and the rest as they say… is history…

A STITCH ODYSSEY - MARIE - THE REFASHIONERS 2015A STITCH ODYSSEY - MARIE - THE REFASHIONERS 2015

First, I took apart my shirt, taking extra care when unpicking the breast pocket. I didn’t want any unsightly rips to scupper my plans.A STITCH ODYSSEY - MARIE - THE REFASHIONERS 2015


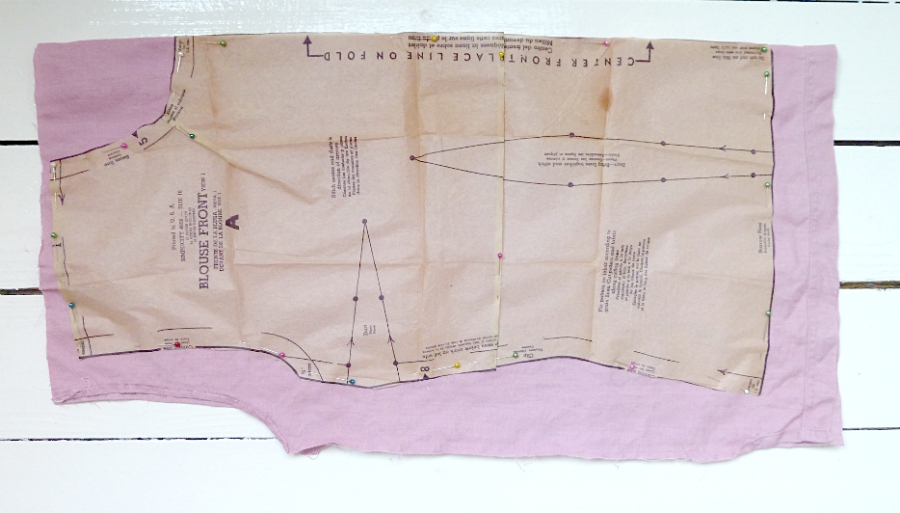
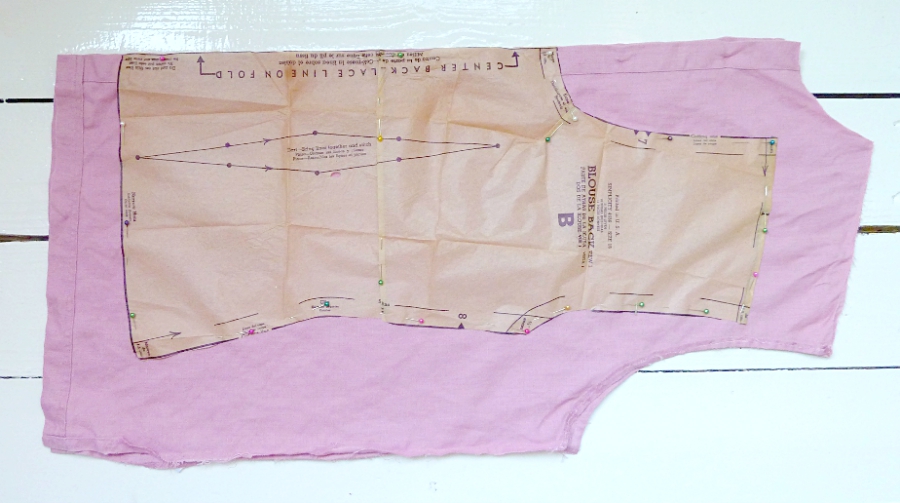
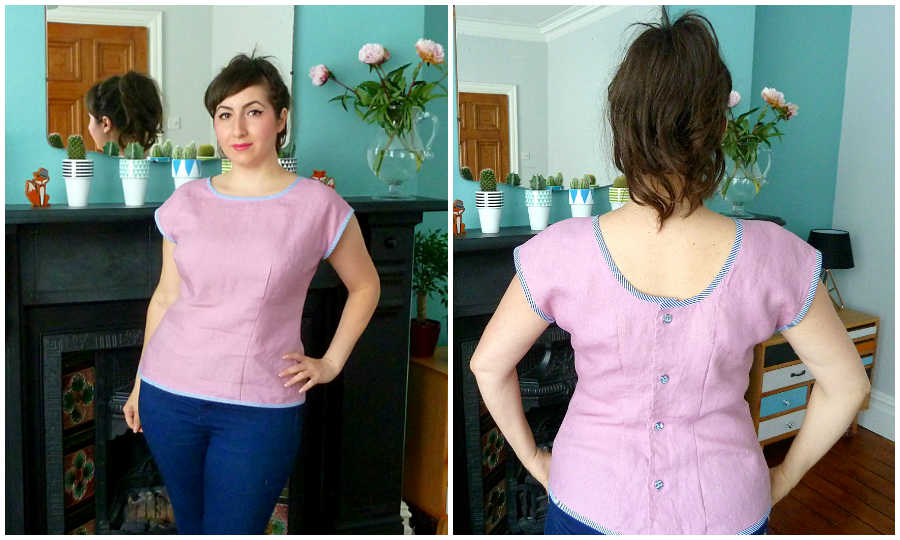
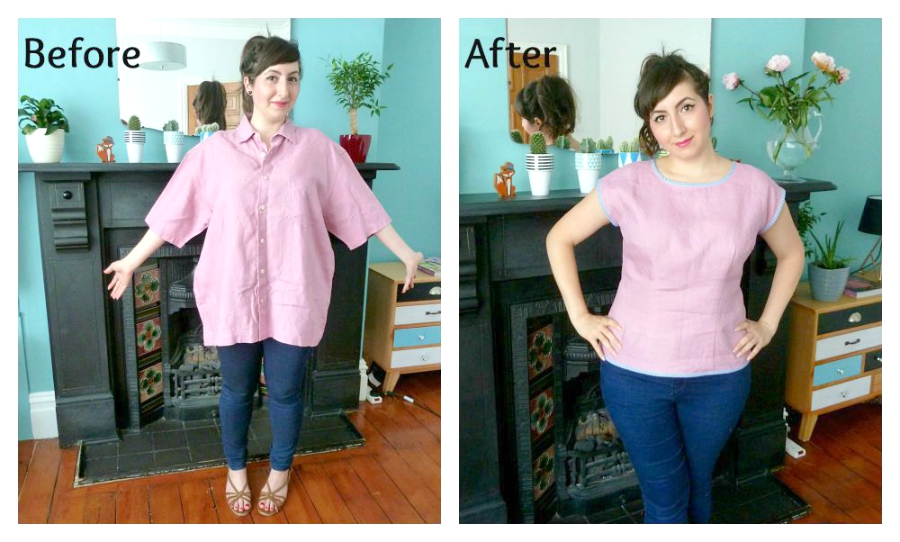
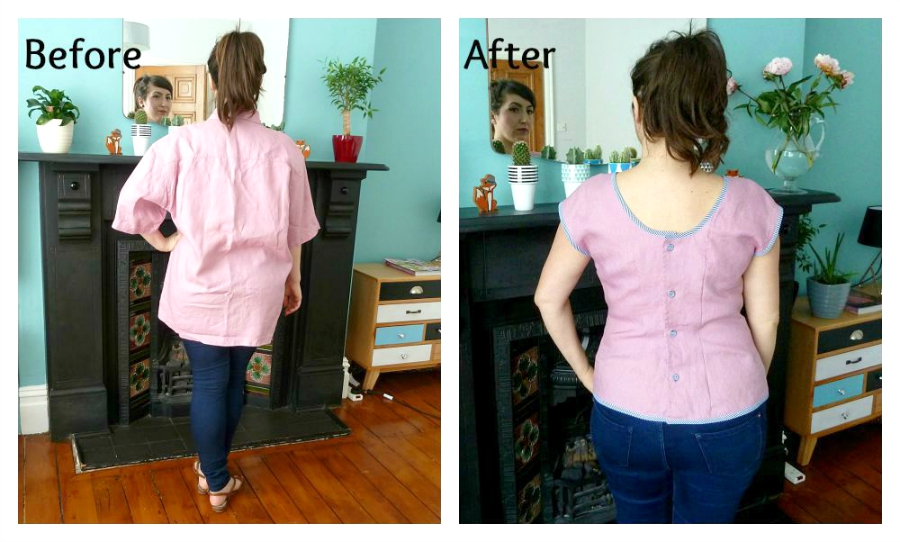
Instead of following the pattern’s instructions for a side zip, I really wanted to utilise the shirt’s buttons for some cute detail. So I cut out my back pattern piece on the folded shirt front and my front pattern piece on the folded shirt back.A STITCH ODYSSEY - MARIE - THE REFASHIONERS 2015A STITCH ODYSSEY - MARIE - THE REFASHIONERS 2015


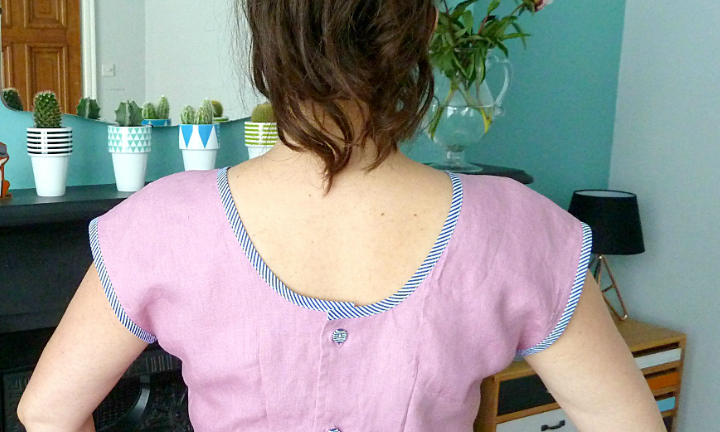
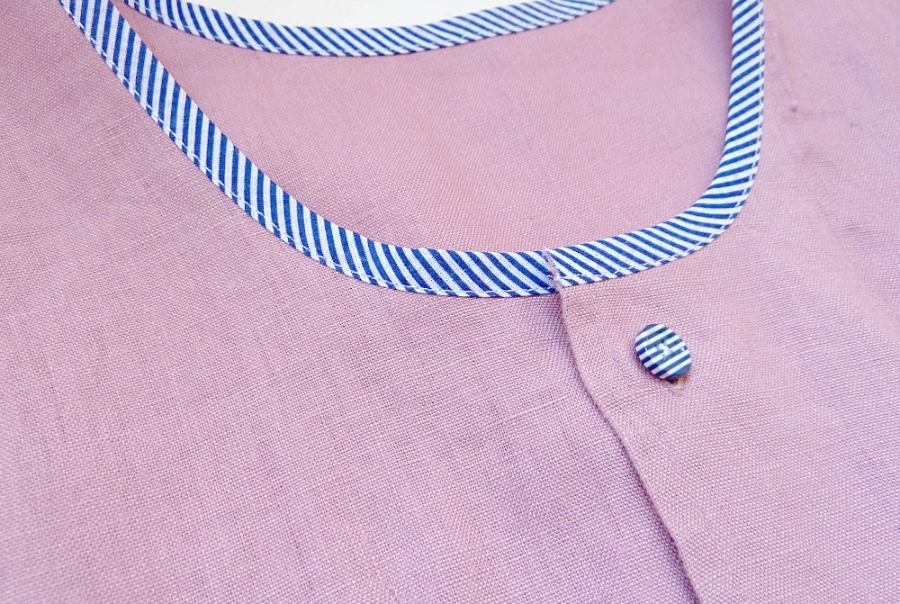
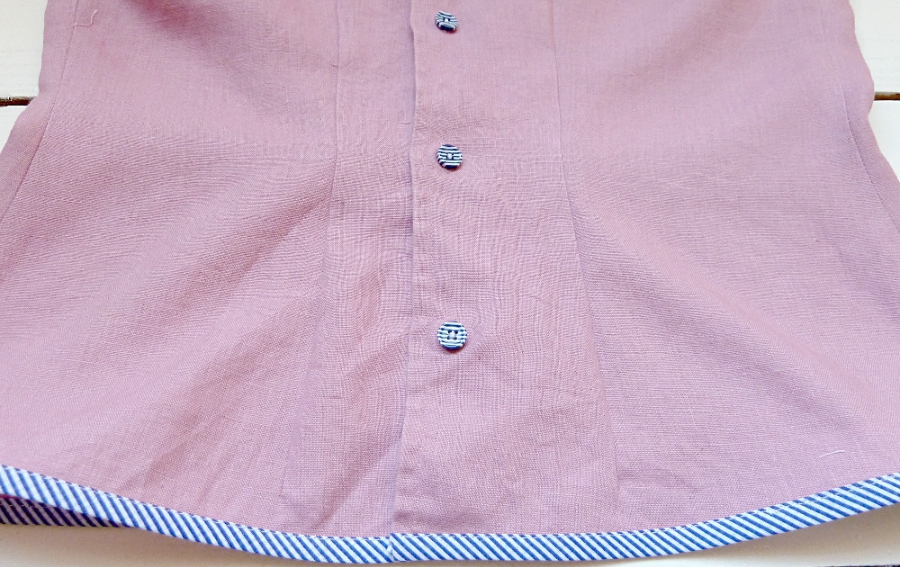
Instead of facings to finish my neckline and armholes, I used stripy bias binding for an extra pop of interest.A STITCH ODYSSEY - MARIE - THE REFASHIONERS 2015


I finished the hemline in the same way and I must say, I really love the result! Pink and navy is such a chic combination and the cherry on top of course, were the matching buttons I stumbled upon on ebay.  A STITCH ODYSSEY - MARIE - THE REFASHIONERS 2015A STITCH ODYSSEY - MARIE - THE REFASHIONERS 2015


Compared to the creativity of my fellow refashioners, my simple blouse may seem a little humble…A STITCH ODYSSEY - MARIE - THE REFASHIONERS 2015

But I’m so happy that I now have a go-to, chic blouse in my wardrobe. Thank you so much again Portia, for encouraging me (and many others) to think outside the box!


Nothing humble about that Marie! Such a feminine silhouette and classically vintage. Can’t you just picture that with one of Marie’s full circle skirts and those killer eyeliner flicks she does?! I’m totally with you on the striped bias and buttons too. In fact, making your own bias tape from stripe shirts will give you some great directional stripe play . And of course finding linen meterage in the charity shop for £4.50? Well….nuff said!

You can find Marie here and here. Marie has also very generously  delved into her own personal pattern stash to add to the prize package!!  Take a look at ALL the amazing prizes to be won as part of The Refashioners 2015 Community Challenge. So get involved for a chance to win!!! Grab a shirt and get refashioning! You have until Sunday 27th Sept to enter! Stay tuned for more inspiration throughout the WHOLE of August!
 

DIY, how to, refashioning, Sewing, the refashioners, the refashioners 2015, Thrifting, Tutorials

The Refashioners 2015 – Elisalex

08/10/15

The way I see it, a refashion can be approached in one of two ways (generally speaking) – 1. Let the existing garment provide the foundation for your inspiration – nip it here, tuck it there and transform the overall shape and style, or, 2. Unpick your garment at the seams and make something entirely new from the fabric you reap. I chose to go down the latter road for this refashion, partly because the surprise shirt Zoe sent me was already so great that I couldn’t see past it, but mostly because I already knew exactly what I wanted to make!By Hand London - Elisalex - The Refashioners 2015

Let me start by saying a huge THANK YOU to Zoe – we had a bit of a post related drama in that the first shirt she sent me never showed up. Time was running out and it had been a good two weeks since she sent it (Brighton to London not exactly a major shipping conundrum) so very much dedicated to the cause, she went out and found me a new shirt and once again, faithfully sent it out into the void that is the Royal Mail.

By Hand London - Elisalex - The Refashioners 2015

Two days later, Shirt No.2 arrived safe and sound, and a day after that, Shirt No.1 sheepishly shows up. Oh, Mr Postman. I now can’t remember if it’s Shirt 1 or 2 that I ended up refashioning, but either way, they were both gems and I already have big plans for the navy check number waiting in the wings…


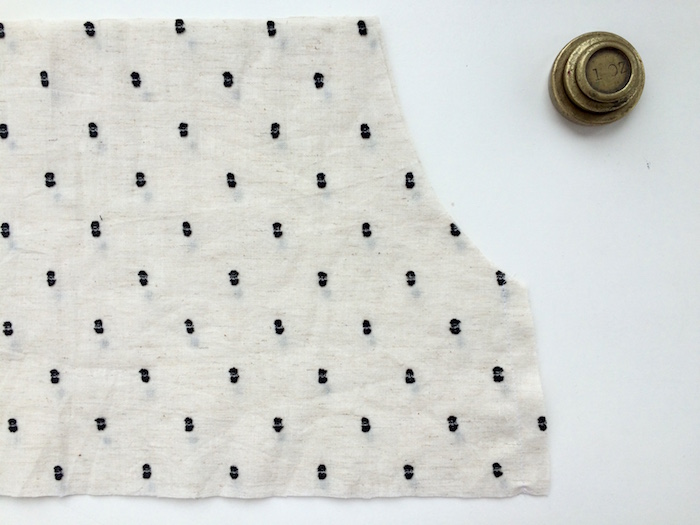
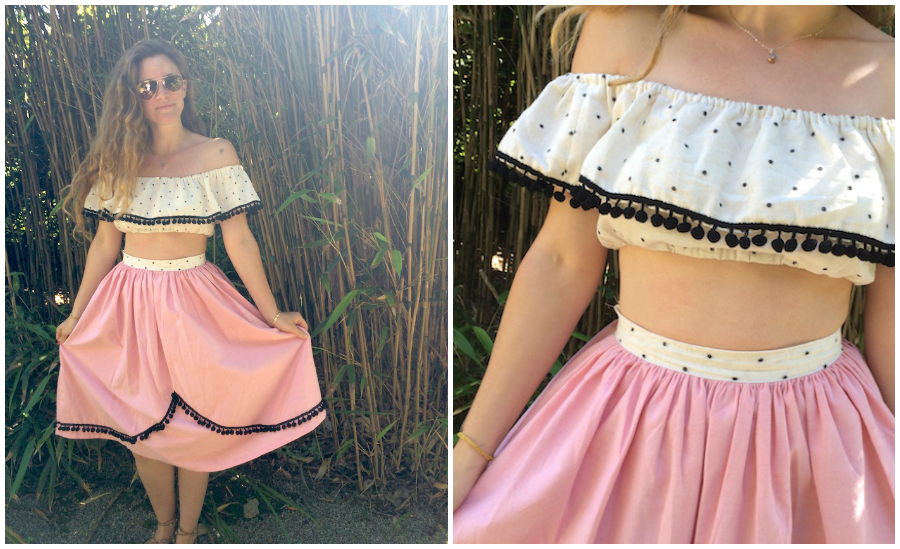
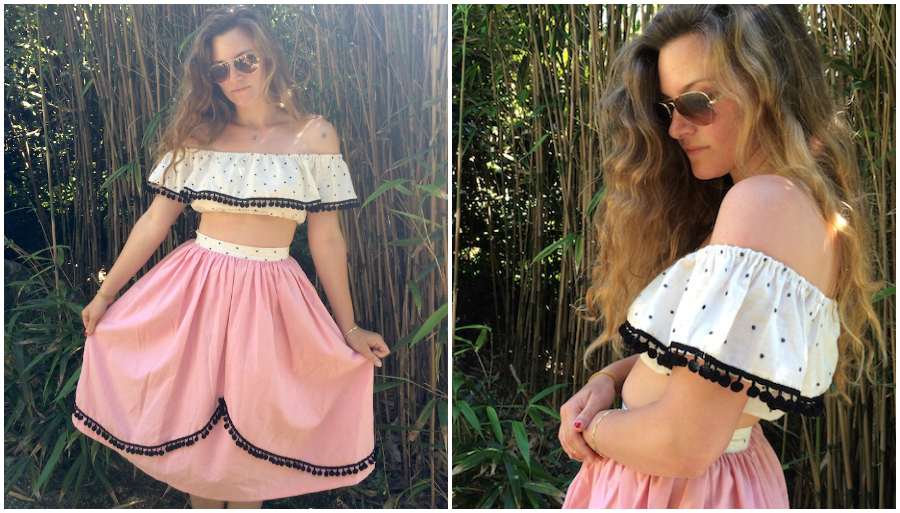
Back to business. With my current obsession with all things Mejicana, one thing high on my to-make list has been a ruffled off the shoulder crop top, something very much inspired by this one at Tara Starlet. As I fondled the soft Swiss dot-esque cotton of my shirt (and it is so soft and fondleable, believe me…) and eyeballed some black pompom trim in my stash, I set about drafting the pattern – all the while fingers tightly crossed that I’d have enough fabric…By Hand London - Elisalex - The Refashioners 2015

So intent was I not to screw this up for fear of wasting this truly lovely fabric, I made a quick muslin from some white dotted Swiss voile. And thank goodness I did! Although pretty and wearable, this first attempt needed a little tweak to the shape of the armhole, and the ruffle wasn’t nearly as ruffly as I was hoping it to be…By Hand London - Elisalex - The Refashioners 2015

For anyone who might like to whip up a few of these pretty tops over the Summer, the pattern is simple to draft-it-yourself, and sews up in under two hours (including cutting). Here’s how I did it…


How to draft a ruffled off the shoulder top

By Hand London - Elisalex - The Refashioners 2015

Take a piece of dot and cross paper or whatever you prefer to make your pattern from – brown paper is great, so is baking paper. Start by drawing a vertical line roughly 10” long. This part doesn’t need to be accurate yet, it’s just our starting point for the rest of the pattern. This vertical line represents the centre front and centre back of the main bodice portion of the top. Both front and back pieces are identical, so we just need to draft one, and cut two.

From the very bottom of the centre front, draw a horizontal line that measures (your bust measurement + 2”) ÷ 4 (shown as a red dashed line in the diagram below).

Now, measure up the centre front line about 3 ½” from the bottom – this will be the depth from hem to just above the fullest part of your bust, so may need to be deeper or shorter depending on your own shape. From this point, draw another horizontal line out measuring (your high bust + 1”) ÷ 4 (shown as a grey dotted line).

To draw the side seam, connect the grey line with the red line.

Now measure a further 4” up the centre front from the grey line and 6” horizontally out from this new point. This is your neckline.

Using a French curve, or your best hand-drawing skills, connect the neckline to the side seam.By Hand London - Elisalex - The Refashioners 2015

Finally, we need to add seam allowances. Please bear in mind that I had to be a little stingy with my seam allowances as I was working within some strict fabric limits! I added ½” along the neckline, side seam and hem, and ¼” at the armhole.


You’ll also need another rectangle that measures 65” x 6½”  for the ruffle.

Sewing it all up

Cut out your pieces – two of the main bodice piece and one of the ruffle.By Hand London - Elisalex - The Refashioners 2015

Close the side seams of your bodice and press open.By Hand London - Elisalex - The Refashioners 2015

Press the scant ¼” seam allowance at the armhole in, press and stitch. Clip carefully into the curves to release the tension. If you have more fabric/time/patience I would recommend finishing the armholes with bias tape instead.By Hand London - Elisalex - The Refashioners 2015


By Hand London - Elisalex - The Refashioners 2015Next, finish the raw edge at the hem, press in by ½” and stitch, leaving an inch or so unstitched at one of the side seams. This is where we’ll be feeding the elastic through.By Hand London - Elisalex - The Refashioners 2015


Now for the ruffle!


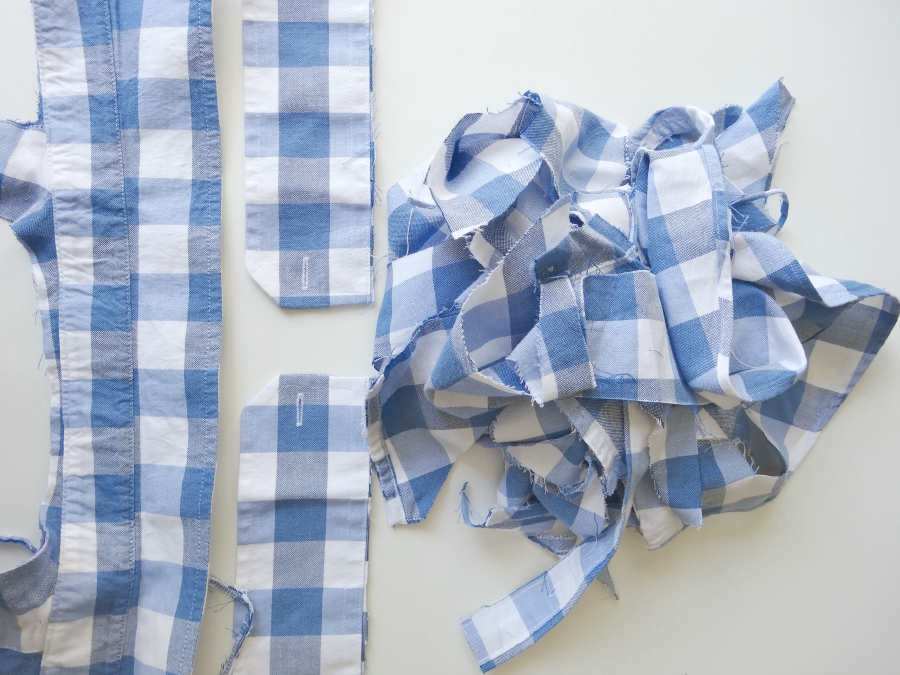
Close the back seam to create a loop and press open. I actually had to make my ruffle from multiple strips pieced together, as the shirt didn’t have sleeves long enough to cut it whole. And in case you were wondering, I cut my bodice front and back from the shirt’s back; and I cut the strips for the ruffle from the sleeves and shirt fronts. After setting aside one final strip for a waistband (for my matching skirt…), all I was left with was a collar, a placket, a pair of cuffs and some serger spew (don’t worry Portia, I took a picture of that too).

We now need to mark the centre front (CF) and centre back (CB) on both the bodice and the ruffle to make sewing the two evenly together a doddle. Do that simply by folding the bodice in half so that the side seams are facing and notch the folds either side. For the ruffle, your CB should be marked by the seam, and the CF can be marked by folding it at the CB seam and notching the fold on the opposite side.

Now place the ruffle over the bodice, right side of the bodice facing the wrong side of the ruffle, and make sure that your CF and CB notches match up too. Pin the ruffle to the bodice along the front and back necklines and baste into place.By Hand London - Elisalex - The Refashioners 2015

Finish the entire neckline and press in by ½”, again leaving an inch or so open at the centre back seam through which to feed the elastic.By Hand London - Elisalex - The Refashioners 2015

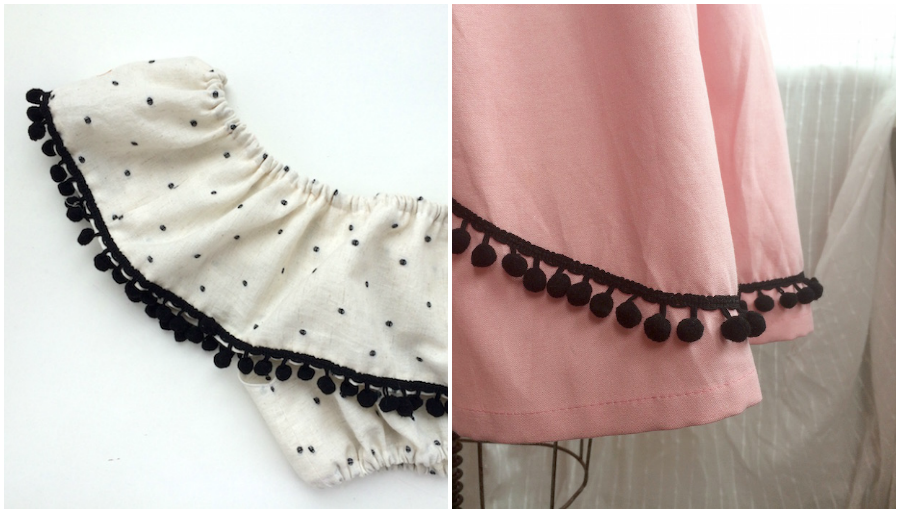
The final thing to do before elasticating the neckline and hem, is to hem the ruffle and add any decorative trim such as pompom trim, lace, ricrac etc whatever rings your bell.  By Hand London - Elisalex - The Refashioners 2015

Finish the ruffle’s hemline and press in by ½”, pinning your trim into place as you go. Stitch the hem and trim in one go from the right side. Or, stitch your hem first, then appliqué your trim over the top.By Hand London - Elisalex - The Refashioners 2015

Nearly done!

Take your elastic (I used regular lingerie elastic as I wanted something narrow with a soft stretch to it, if you know what I mean… I felt like anything too harshly elastic would dig into my skin) and cut two lengths – one that fits snugly under your bust and one that sits securely but comfortably around your shoulders.

Use a safety pin to feed the elastic into the tunnels at the hem and neckline…By Hand London - Elisalex - The Refashioners 2015

…And then either tie the two ends in a secure knot or stitch together when it reemerges. Stitch the tunnel’s opening shut and ¡ay caramba! Your top is done!By Hand London - Elisalex - The Refashioners 2015


This top looks great dressed down with a pair of high waisted jeans or a sarong, but a top like this also needs a proper dancing partner, if you know what I mean, in the form of a matching skirt.By Hand London - Elisalex - The Refashioners 2015

Obviously! I decided to use up some beautiful pink chambray I had knocking about at home to make a gathered skirt, complete with waistband made from the remnants of the spotty shirt to nod to the top, and embellished with the last of that black pompom trim.

Luckily I had my very talented and enthusiastic little brother to take some shots of me in the finished outfit… For the record, he is 10 years old and he art directed every shot. I must say, I think he did a killer job at picking up on the details, making me feel at ease and mixing it up with some interesting locations and compositions. Here are my picks:By Hand London - Elisalex - The Refashioners 2015By Hand London - Elisalex - The Refashioners 2015By Hand London - Elisalex - The Refashioners 2015By Hand London - Elisalex - The Refashioners 2015

And Portia, as a thank you for having me, and because I know how much it turns you on, here’s my official Refashioners 2015 #sergerspew:By Hand London - Elisalex - The Refashioners 2015


¡ay caramba indeed!!!! Bloomin heck Elisalex! You really went and nailed this one and what an awesome shirt find from Zoe too!! Often when you think of shirt refashions you think of  classic pinstripes or solids. But don’t forget back in the 90’s & into the 00’s there was a huge trend for florals and more feminine prints in mens shirts. So keep your eyes peeled for those! Silk and cheesecloth shirts had a phase too and I often come across them in charity shops!  Both great fabrics for a more feminine incarnation. And of course, the addition of some fun trim is never a bad thing! Oh and thanks for the serger porn Elisalex…that’s not just me….right?!

You can find Elisalex here and she and the team at By Hand London are including your choice of three pdf patterns from their range in the prize package!!  Take a look at ALL the amazing prizes to be won as part of The Refashioners 2015 Community Challenge. So get involved for a chance to win!!! Grab a shirt and get refashioning! You have until Sunday 27th Sept to enter! Stay tuned for more inspiration throughout the WHOLE of August!
DIY, how to, refashioning, Restyles, Sewing, the refashioners, the refashioners 2015, Thrifting, Tutorials

The Refashioners 2015 – Oonaballoona

08/07/15

Oonaballoona - The Refashioners 2015

When Portia asked me if I wanted to refashion a man’s shirt, my response was HEEEWWWWWL NO. I can barely bring myself to make a man’s shirt from scratch. Could I actually bring myself to deconstruct and then reconstruct menswear?! And come out sane? I thought not.

But that Portia has a way with words. So flattering was her response to my tepid reply, my psyche would’ve be more bruised by refusing the challenge than by picking up the seam ripper. The clinching sentence on that lovely emaiI: “Shirts are just fabric and you’re awesome with fabric. ‘Nuff said.”

CHARMER! Was my response. And I was in.

Now, there was zero chance that I was going to snag a shirt from Ruggy’s closet for this challenge, seeing as how I’m made him 3 shirts in my 7 years of sewing , only 1 of those being wearable. That’s just bad math. A few short weeks later, this arrived from our fearless leader’s neck of the woods:Oonaballoona - The Refashioners 2015

I did NOT want to rip this up! In fact, I wanted to give it straight to my Dad, a very stylish guy! I was stumped, which began another Portia conversation, involving her Lolita vision of me turning it into a woven Watson bra, then me picturing my dad in a Watson bra, then me needing to go wash my brain.

After a thorough rinsing, I got to ripping. Kiiiiind of. I hacked the sleeves and collar off, then cut it open at the side seams. To be honest, I was all about as little seam rippage as possible on this reboot. Although I am aware that the whole refashion thing is about being green, this was admittedly not my primary concern.  I was more into being happy and not worrying about scraps.The sleeves and collar went into the remnants bin without a thought of reappearing in the reboot. Mea culpa.

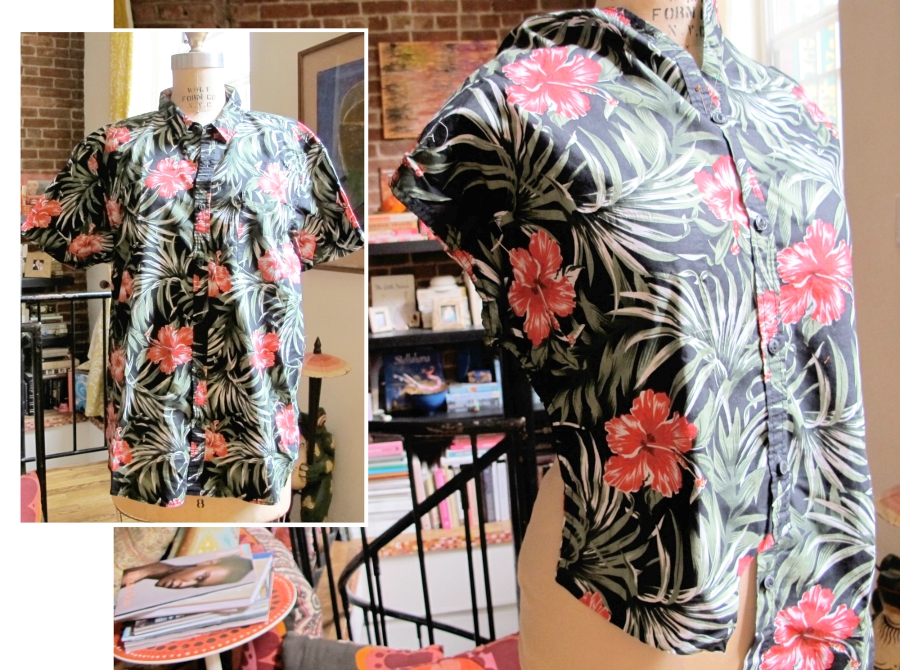
I flipped one front panel upside down and re-buttoned the front pieces, shifting the buttons up by one to get a pleasing print placement. Why did I do that? Hard to say. Maybe I thought there was (*extremely slight and now completely unnoticeable in hindsight*) twinning on the original shirt? Maybe it made me feel like I was really refashioning the shirt?? Maybe the gin and tonic was especially ginny that evening?Oonaballoona - The Refashioners 2015

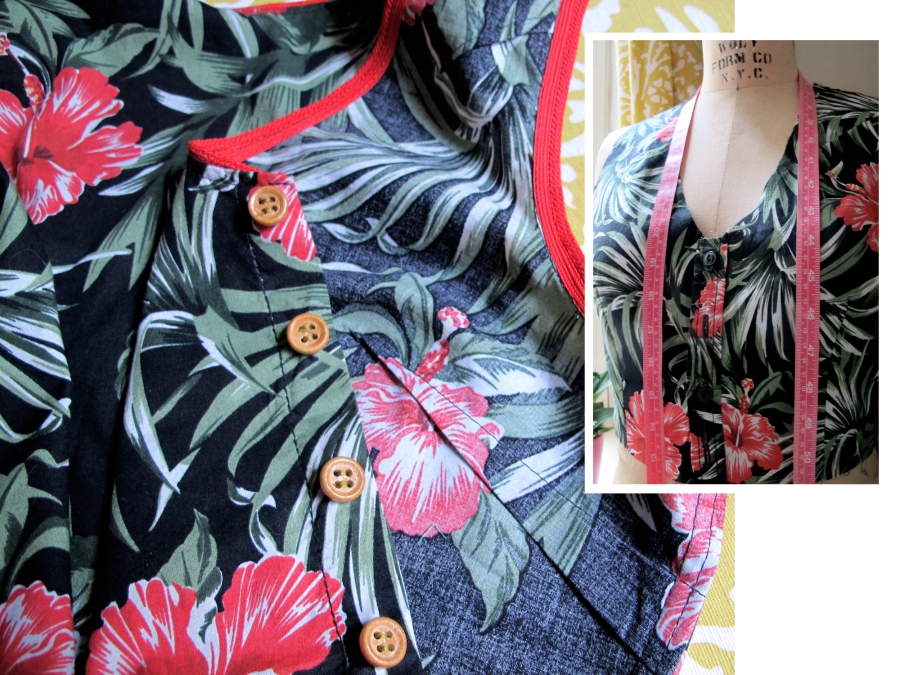
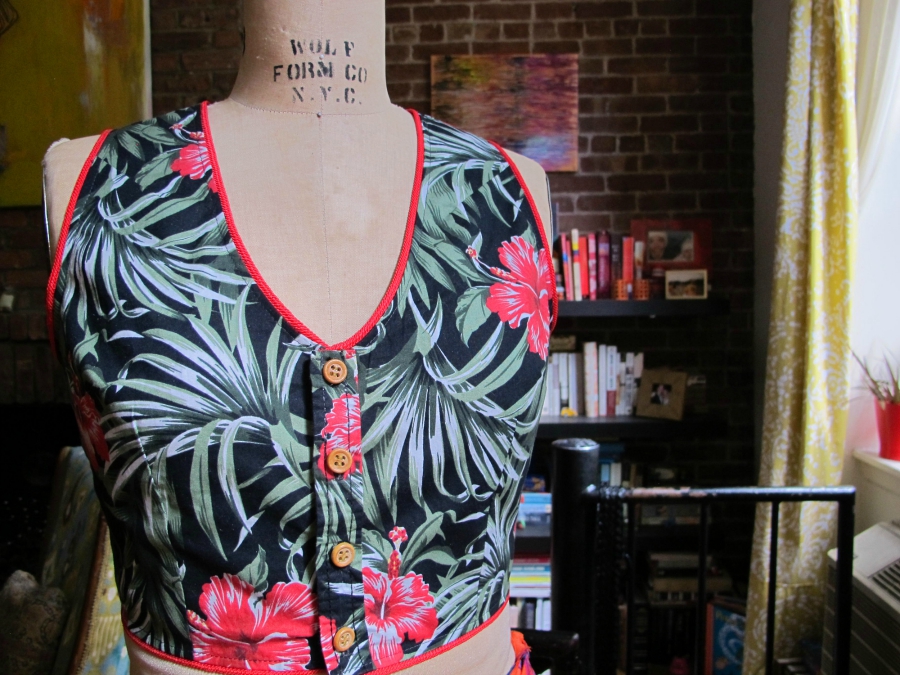
Imma go with ginny. Because my next step was going to be pleating and draping and pulling this into a cute top on my dressform, and I abandoned that route seconds after beginning it. Instead, I reached for my little pile of vintage patterns and came up with Simplicity 6284, a three piece women’s suit. The vest had two simple pattern pieces. BOOM.Oonaballoona - The Refashioners 2015

I used the original placket and changed up the buttons from black plastic to blonde wood, for a bit more tiki vibe, and used red braided piping for my seam finishes. Just stitched and turned under. Less worry, more happy.Oonaballoona - The Refashioners 2015

Though the pattern had a little gapiosis in the front, requiring an extra dart at the neckline, the back fit beautifully. I love the racerback vibe!Oonaballoona - The Refashioners 2015

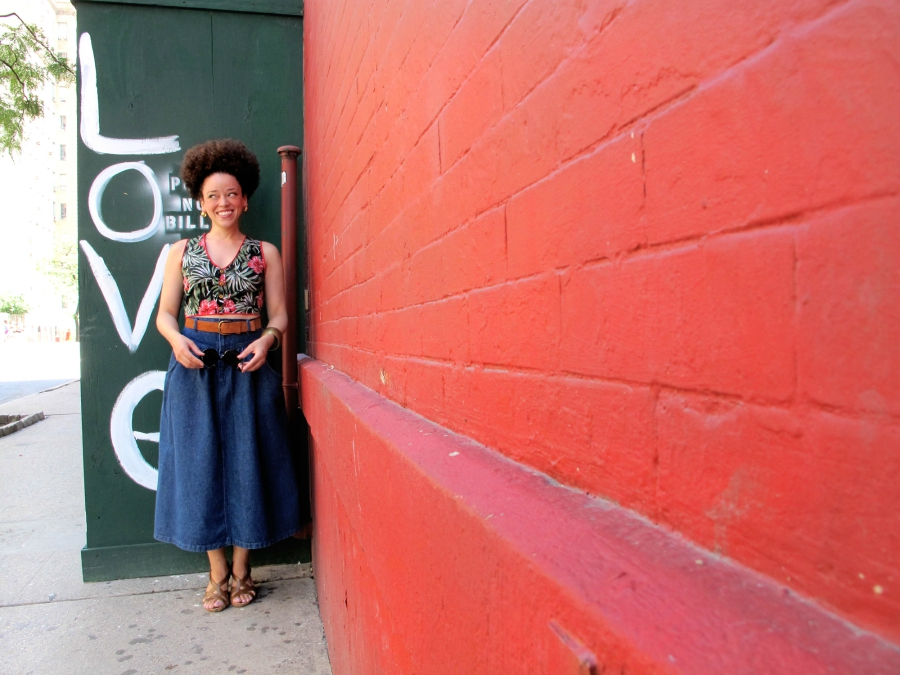
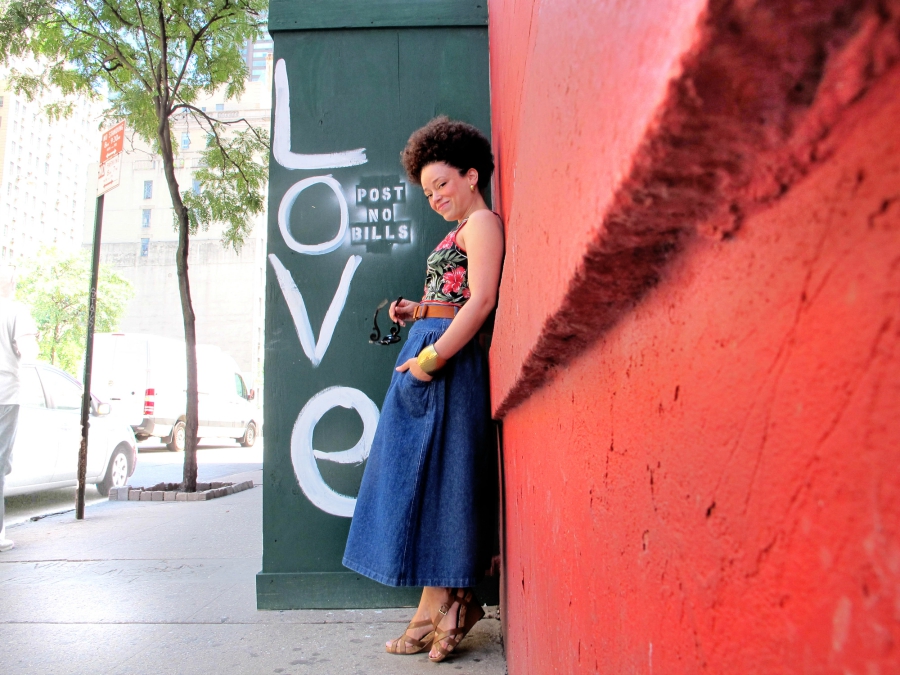
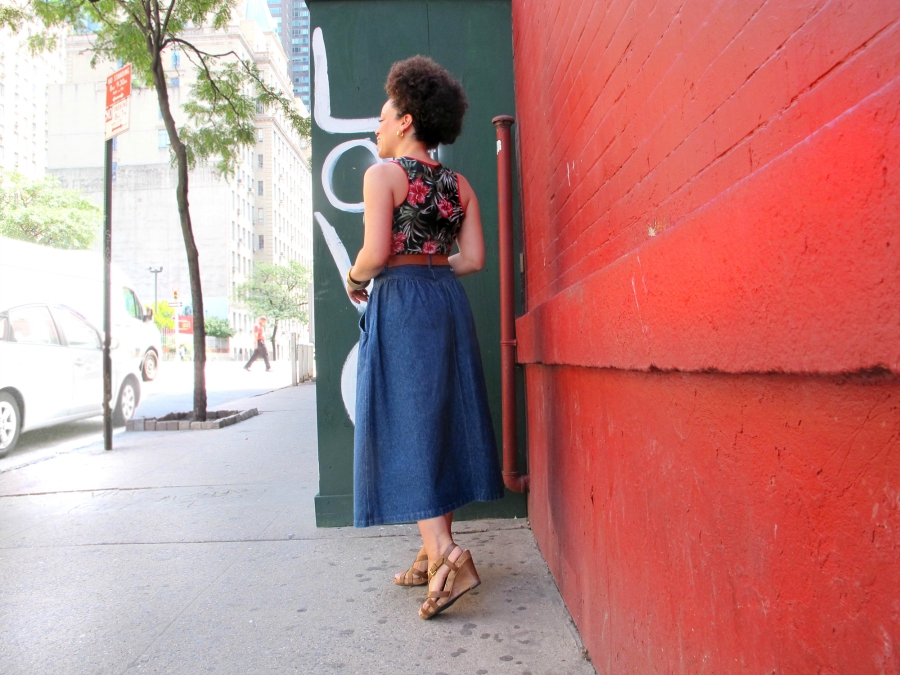
And it gives me enough armsyce coverage, which, guys. I HATE it when my shirts show Texan sized real estate of arm cleavage. What’s that you say, you can’t really tell from these shots? Again, mea culpa. I’ll let you in on a little secret: Ruggy full on ABHORS this vintage denim skirt. But I did think it was the perfect mate for this crop top. I’ve tried to wear this skirt out once on a date night. The look on his face was so pained, I changed immediately. Guys. If you know how I dress, you know that this look said a lot. And then I made him take eighty pictures of it.

I think he had a hard time doing it. To wit, what  is the focal point of this next shot?Oonaballoona - The Refashioners 2015

Mmmm hmmm. What a pretty red wall. But there’s the armscye for ya. Thanks for bearing the vibe, Ruggy.Oonaballoona - The Refashioners 2015

And thanks for nudging me into this, Portia! I love my little top, and since diving into this challenge, I’ve refashioned three RTW tops in my closet into a more pleasing configuration! This refashioning thing is infectious!

Ha ha! As are you my lovely, lol! But you had to go and remind me of that conversation about your Dad in a Lolita style Watson bra didn’t you?! Now I’m picturing it all over again. Sorry Papa Balloona!! ;) So, yes. I selected this shirt. Well I had to pick something a touch “kerching” for Oonaballona didn’t I?! But it’s a case in point in terms of looking at shirts as fabric. Those really crazy 80s print shirts you see but would never wear? They may not be de rigeur as they are but boy do they make awesome sun tops! Look for huge oversized mens shirts in crazy prints and get chopping!

You can find Ooonaballoona here and here. And don’t forget amazing prizes to be won as part of The Refashioners 2015 Community Challenge. So get involved for a chance to win!!! Grab a shirt and get refashioning! You have until Sunday 27th Sept to enter! Stay tuned for more inspiration throughout the WHOLE of August!
DIY, how to, refashioning, Restyles, Sewing, the refashioners, the refashioners 2015, Thrifting, Tutorials

The Refashioners 2015 – Sew Over It (London)

08/06/15

As a huge fan of customising and upcycling, I couldn’t have been happier when Portia asked me to be part of this year’s Refashioners project. I loved reading along in 2013 – so many great transformations! I knew I had to get involved.

The theme this year is shirts, and Portia asked us whether we’d like to be sent one “blind”, or if we’d prefer to source our own.  I got lucky as our Course Coordinator Andrea’s boyfriend was having a clear out, so I scored this lovely blue oxford shirt for my refashion. Very pleased not to have to scour the charity shops of Clapham on a shirt hunt!SEW OVER IT LONDON - LISA COMFORT - THE REFASHIONERS 2015

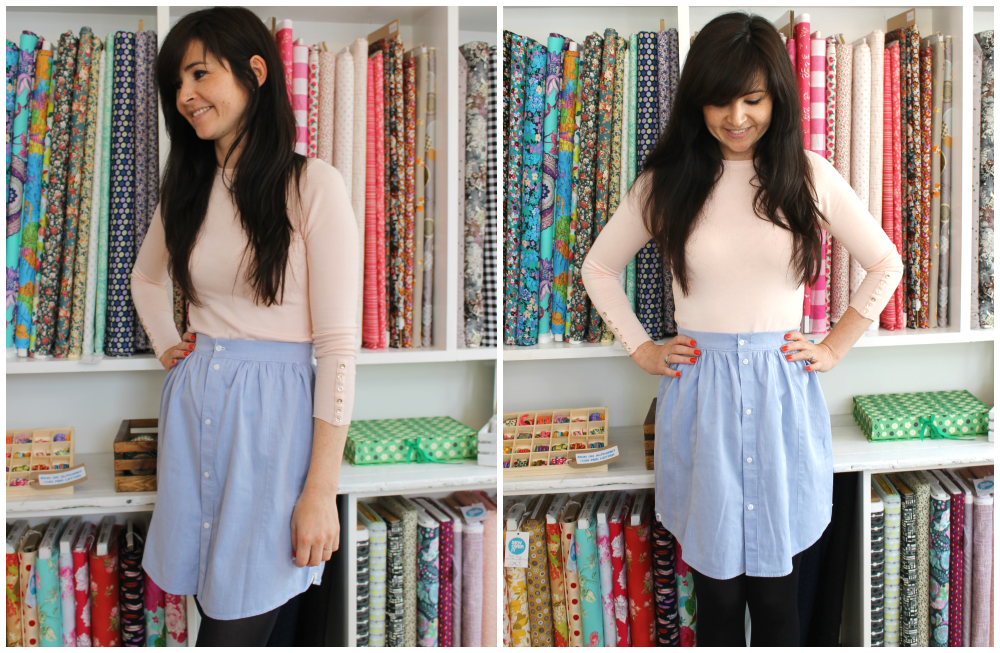
Initially I struggled with what I might make from my new shirt. I wanted it to be classic and wearable – it needed to look like I’d refashioned it with purpose. I wanted it to be able to integrate into my wardrobe so I could mix and match it and get a lot of wear from it. After a quick jolly on Pinterest I went for a good old dependable skirt!

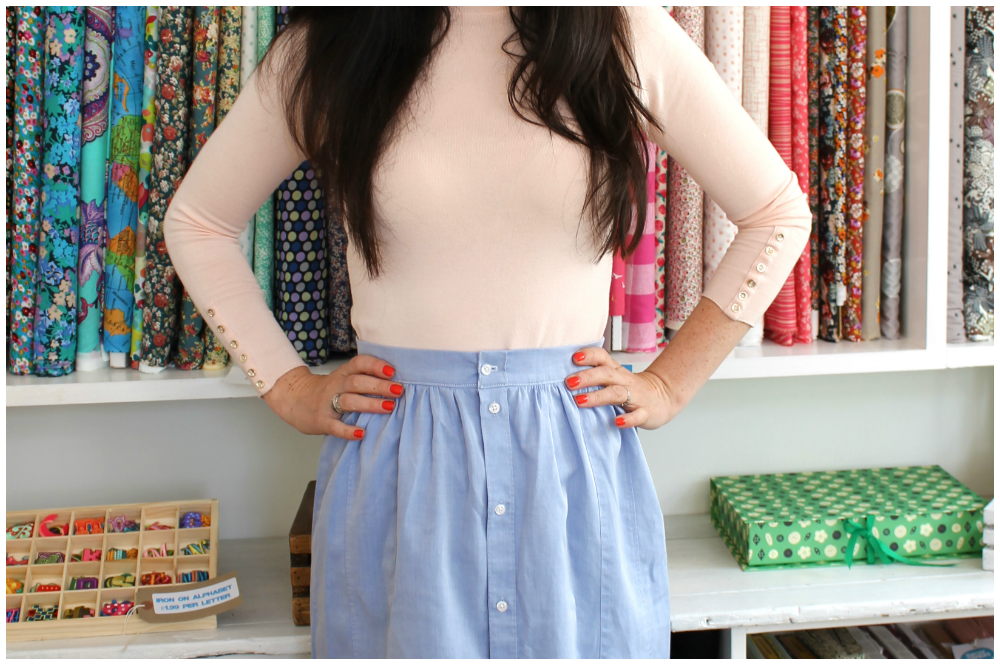
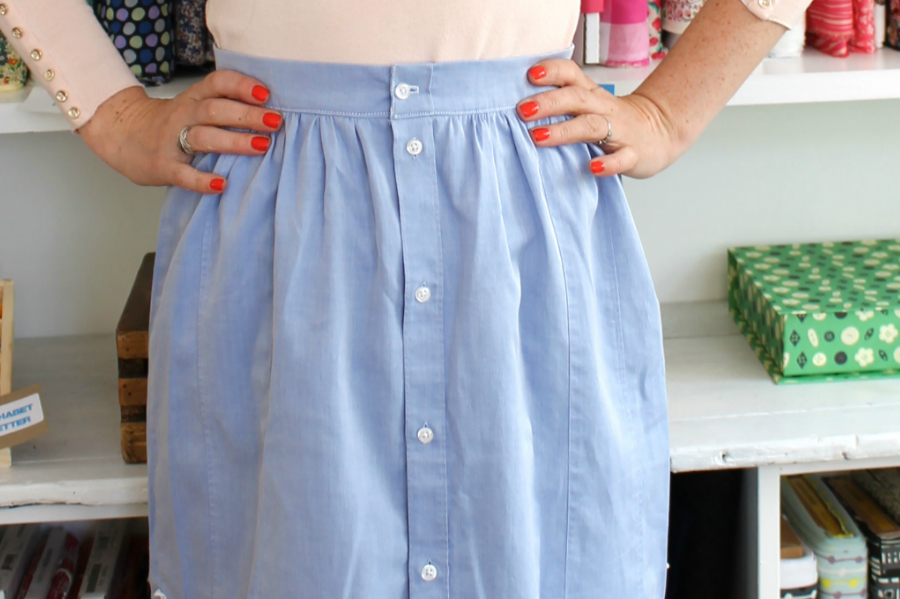
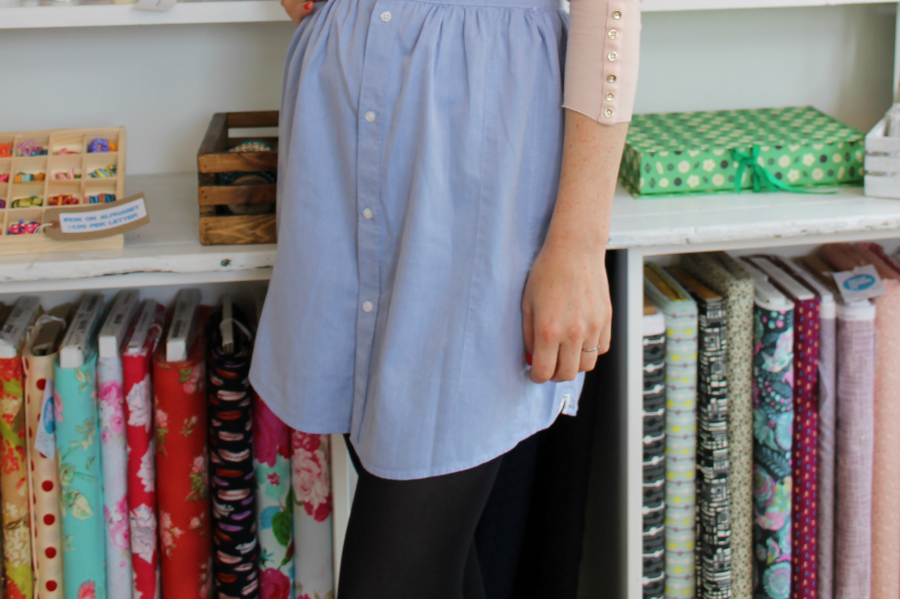
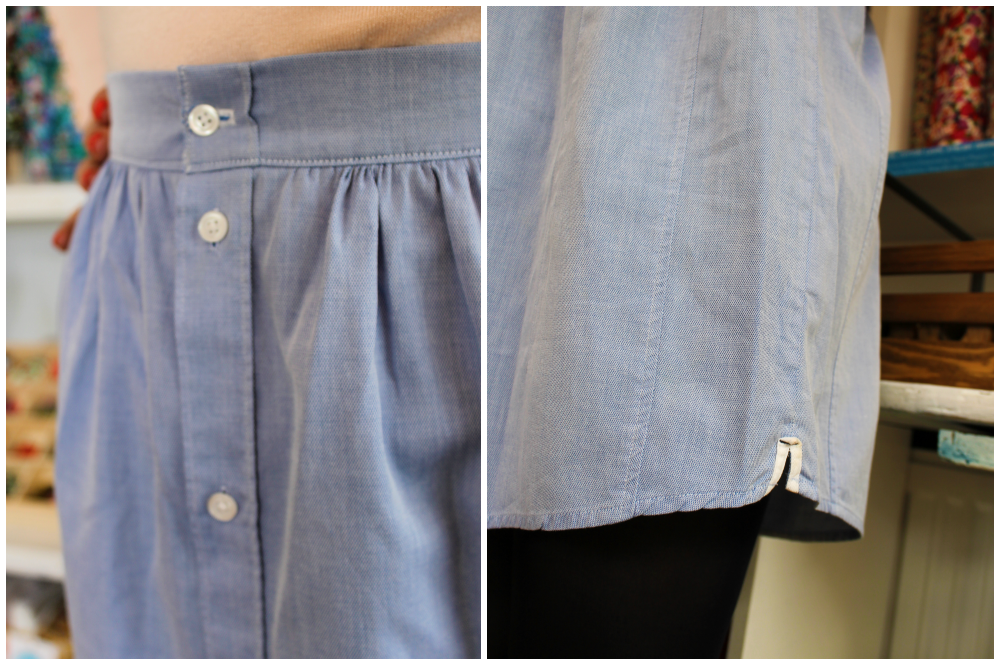
I cut the whole skirt from the body of the shirt, cutting straight across the shoulders and lopping off the arms. With the side seams and the buttonholes already sewn, I fashioned a waistband from the top of the body, measuring around my waist to find the correct size. To give it some stability I interfaced it with a good quality medium-weight interfacing. I then gathered the skirt into the waistband, making sure to match up the side seams, before stitching a buttonhole onto the waistband.SEW OVER IT LONDON - LISA COMFORT - THE REFASHIONERS 2015

Waistband buttonholes take more strain than the rest of the buttonholes, so it’s best to make this one horizontal. I also did a line of decorative topstitching around the waistband as I thought it was in-keeping with the original shirt design.

SEW OVER IT LONDON - LISA COMFORT - THE REFASHIONERS 2015

It was as easy as that! It’s not the most exciting refashion in the world but I love my new skirt, especially as the original features of the shirt are still there.

SEW OVER IT LONDON - LISA COMFORT - THE REFASHIONERS 2015


The hem is slightly curved, and I am really enjoying the cute little tab details at the side seams.SEW OVER IT LONDON - LISA COMFORT - THE REFASHIONERS 2015

If you’re new to refashioning try this project out! If you’ve got a big enough shirt you could even just elasticate the top to make a waistband and leave the buttons as a decorative feature. Or if you’re feeling adventurous why not add some pockets? Easy to make out of the sleeves… Ooh I’m giving myself ideas now.SEW OVER IT LONDON - LISA COMFORT - THE REFASHIONERS 2015

A great big thank you for Portia for having me, long may the refashions continue!

Lisa x

Thank you so much Lisa! Refashioning needn’t be complex and this kind of project is a great starting point if you’re feeling trepidatious! Shirts come in all manner of fabrics. (Some of you may recall Tasha’s plaid flannel version from the last series). I’m thinking denim or corduroy shirts (oh yes they exist. I’ve seen them! So do velvet ones. Just ask Karen!) would be awesome for this too!

You can Sew Over It London here and here. Their Vintage Shirt Dress pattern is just one of the amazing prizes to be won as part of The Refashioners 2015 Community Challenge. So get involved for a chance to win!!! Grab a shirt and get refashioning! You have until Sunday 27th Sept to enter! Stay tuned for more inspiration throughout the WHOLE of August!
 

DIY, how to, refashioning, Restyles, Sewing, the refashioners, the refashioners 2015, Thrifting, Tutorials

The Refashioners 2015 – Marilla

08/05/15

Hello, Marilla here! I’m so excited to be included in this year’s ‘refashioners’ line-up and have totally lapped up the challenge. The practice of refashioning garments is so close to my heart and actually how I started making clothes. The first wearable thing I sewed was a waistcoat made from a pair of my brothers old pyjamas when I was about 13!Marilla Walker - The Refashioners 2015

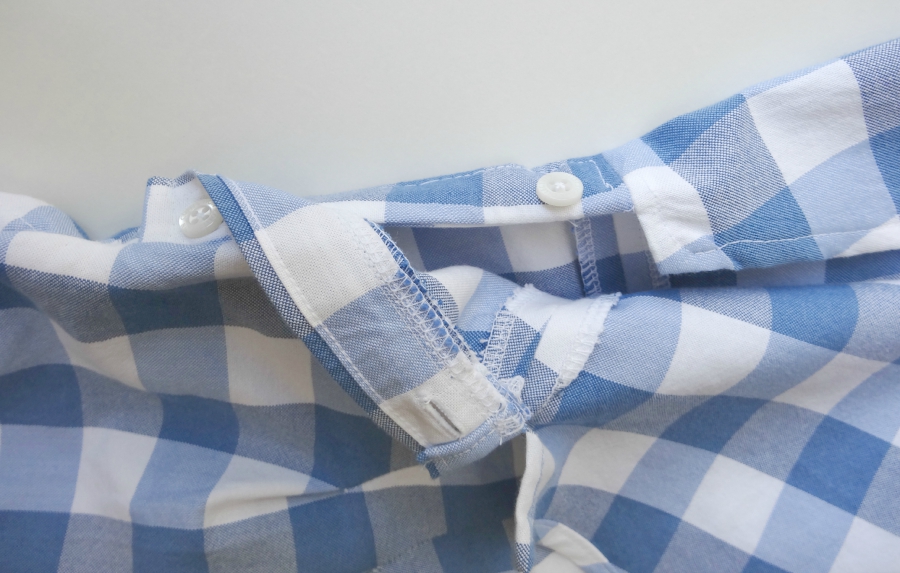
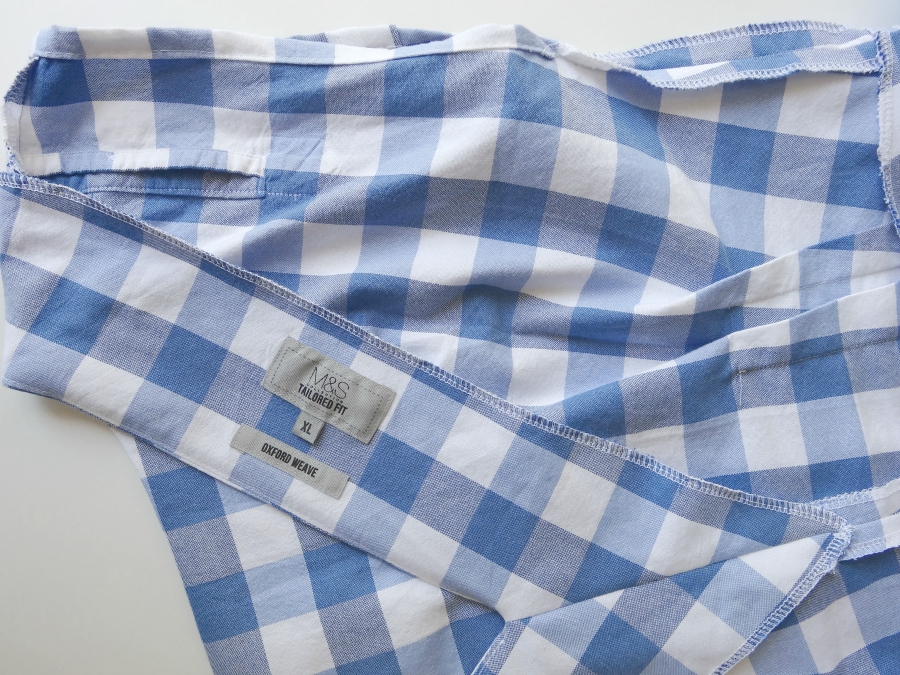
I chose to go and select/buy a shirt of my choosing (Portia also offered to send everyone something blind) and had a clear idea of what I was looking for before I set out. It was either to be a chambray, linen or large check I was looking for and it had to be from the largest size racks to give me maximum fabric. Other than that I was open to what I may find, but I found it helpful to have a guide before setting out. I was able to walk in and out of charity shops very quickly and was lucky to find a good quality (barely worn) large check M&S shirt. As a side note, I expanded my refashion plans after finding the shirt to include an elasticated waist skirt I have had for a while, as they go well together.Marilla Walker - The Refashioners 2015

My first thought was to make something Japanese and simple in style. The fabric reminds me of lovely Japanese check fabrics I have seen online and imagined it looking great as a basic, boxy garment, but ideas are not set in stone and with the recent #internationalannaparty happening over on Instagram, I was lured in a different direction.Marilla Walker - The Refashioners 2015

Refashioning is all about going with the flow in my experience and taking your time to let the garment speak to you. I started by removing the sleeves and cutting up the sleeve seam to open them out and also cut up the shirt side seams to get an idea of the fabric I had to play with. The biggest pieces of fabric were in the sleeves, the main back and the fronts (unsurprisingly). I got my BHL Anna dress pattern out and started to lay the pieces over the shirt. I found the bodice fronts seemed to work best on the sleeves (with a centre front seam added to the pattern)…Marilla Walker - The Refashioners 2015

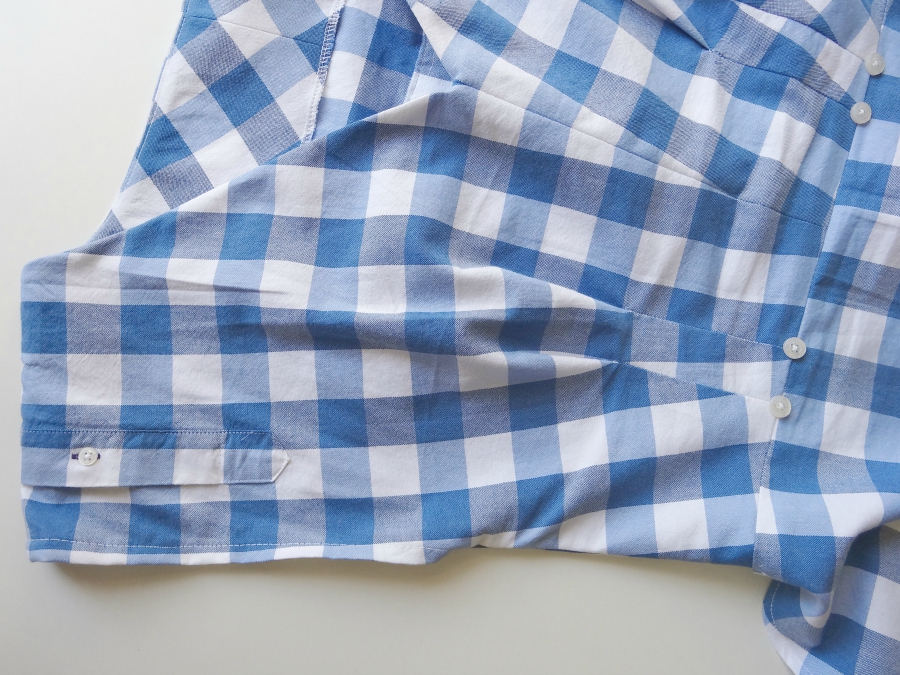
…and was also pretty chuffed to make a feature of the cuff plackets repositioned to the shoulders. They work really well as a kind of epaulette type detail.Marilla Walker - The Refashioners 2015

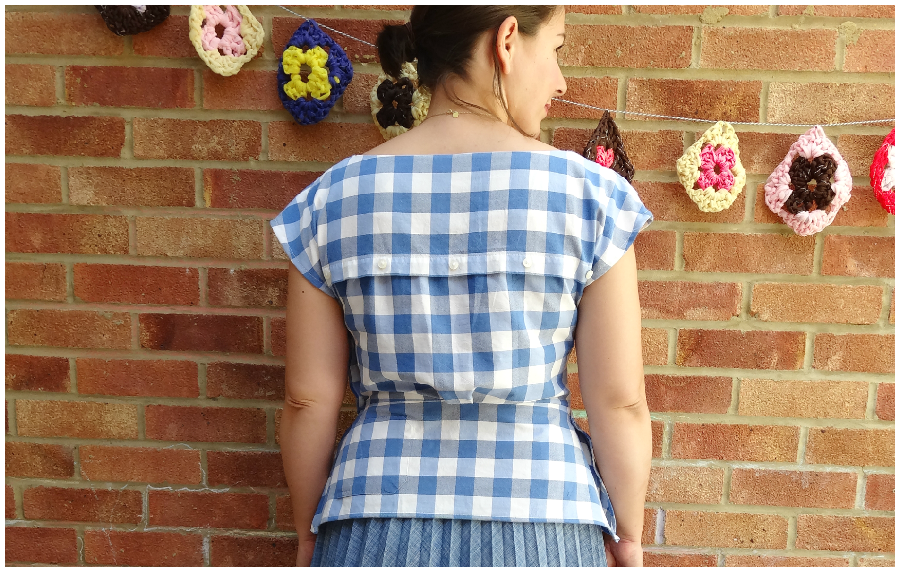
The back was the hardest bit to place really, as the shirt back was not quite wide enough. I wanted to sew the back as one piece and remove the centre back seam (to make life more difficult). I could have made the shoulders narrower on the pattern, but didn’t want to, so after some thought cut the back yoke away from the main back and added the shirt front with the buttons as a yoke instead with the button strip running across the shoulders (if that makes sense).Marilla Walker - The Refashioners 2015

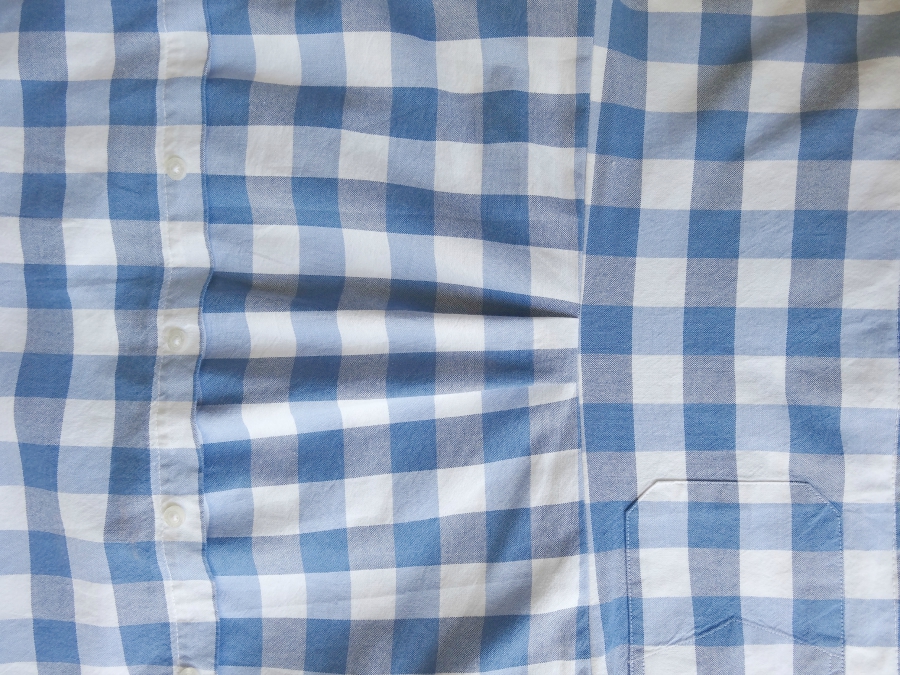
This gave me the extra width I needed at the shoulders and also made a nice feature of all those lovely buttons. There was a nice back pleat at the yoke of the original shirt that was lost in dissecting it, so I put a new pleat at the centre back waist in place of back darts as a shirty design feature/homage.

Other than those considerations, everything else was fairly straight forward. The construction of the Anna bodice is nice and simple, so no worries there.

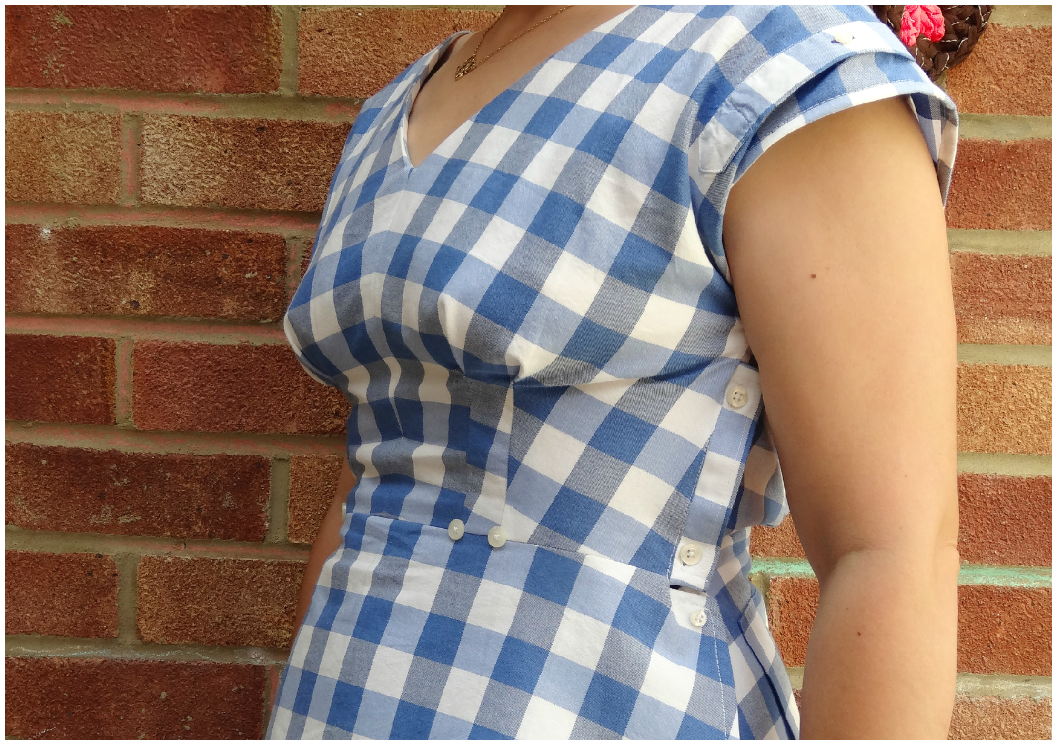
The next stage is where the pleated skirt was going to come in! I thought of cutting off the waistband and simply attaching the sunray pleated skirt to the Anna bodice. This would have looked lovely I’m sure, but I didn’t want pleats going over my tummy. I then planned to make a fabric yoke for the top of the skirt portion from the remaining shirt fabric and went about cutting some panels. I had no choice but to cut with the straight grain and decided to cut extra width, so that I could sew and fit at the same time. After attaching the panels to the bodice I realised that this was not going to look great at all. It may have worked cut on the bias (not an option), but was quite unflattering fitted across my tummy cut on the straight grain. The solution was to keep the side seams of the panels open. It creates a mini and unusual peplum that has a slight wrap either side that is secured by a tiny button. The peplum edges are finished with a double turned hem. The Anna blouse was born!!!Marilla Walker - The Refashioners 2015

The skirt remains untouched, but my new top makes it so much more wearable to me. Win, win, win!!!!

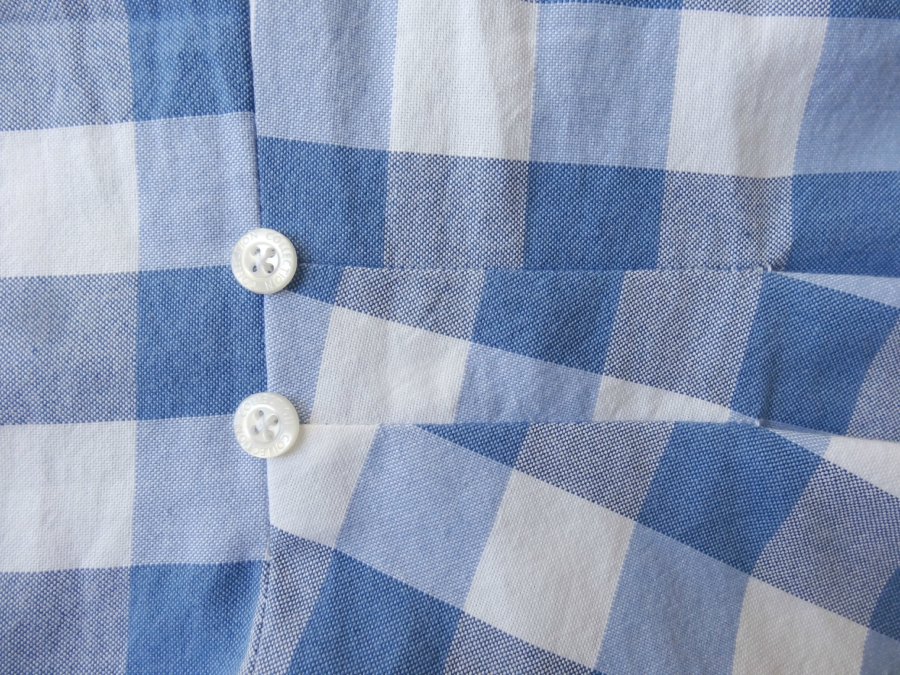
Once the shape was finalised I then added a button fastening to the bodice side seam using the original button placket and set about sewing on all remaining buttons to anything that looked like it could be a feature!Marilla Walker - The Refashioners 2015

This is not my usual ‘everyday’ style of clothing, but certainly something I feel more than comfortable in. It’s kind of got the look of a vintage dress with all the little details you don’t find anywhere else, but without the restriction or discomfort I sometimes get from ‘true’ vintage.

That’s the main construction covered, so now onto a barrage of pictures!

The back is the only part of this that has not quite panned out how I would like. There is a lot of excess fabric there that I really should remove, but I’m just not sure what to do with it. I may release the back pleat and flatten the back out for a looser fit. There is enough peplum width to do this, but I’m just sad to lose the pleat at the moment, so haven’t gotten around to it. I also don’t know if I’m really unhappy about the extra blousy fabric!Marilla Walker - The Refashioners 2015

Look! Here it is laid out flat in all its pleated splendour. Notice the breast pocket is still present on the peplum piece? Love that bit!

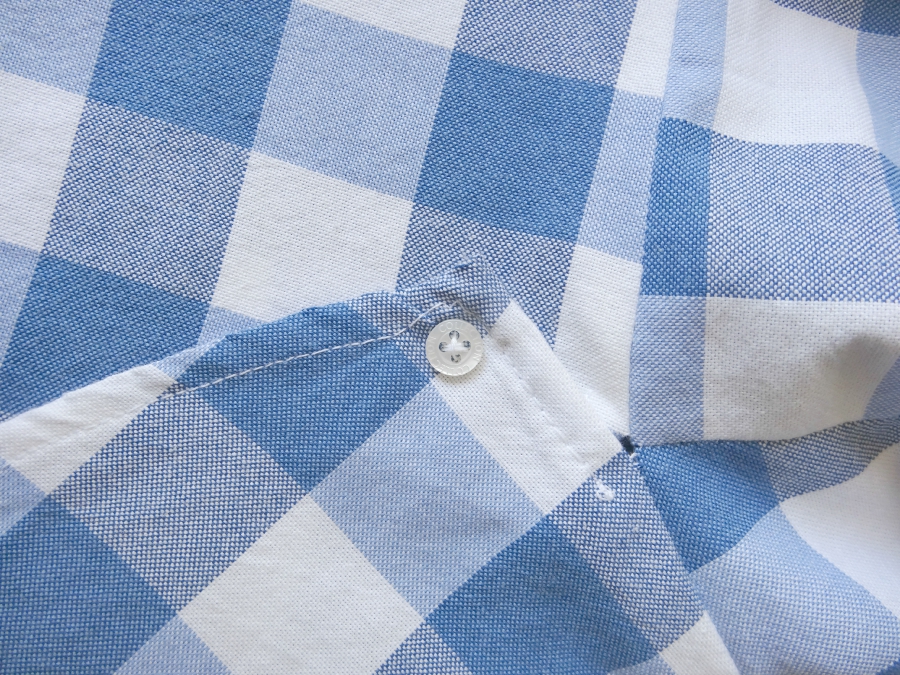
Here’s a close up shot of the side button detail using original button placket. A complete result for not having to sew my own buttonholes!Marilla Walker - The Refashioners 2015

Some of the many buttons dotted around!Marilla Walker - The Refashioners 2015

Marilla Walker - The Refashioners 2015A nice bit of the facing which still has the original labels attached!Marilla Walker - The Refashioners 2015

I tried to use as much of the shirt as possible and actually (unintentionally) made it my mission to use any interesting design element somewhere within my garment. I hope that this comes across as interesting and intricate and not costume like, because this is a very wearable piece. It’s important to me to take as much care as possible when refashioning items of clothing that are otherwise perfectly serviceable. Marilla Walker - The Refashioners 2015

After all, this would have found a good home in some mans wardrobe had I not come along with my scissors. Not that I want to pass on a sense of guilt if you’ve tried a refashion that’s not worked out to plan! 😉

This challenge has been brilliant and really got my creative juices flowing. I hope this inspires you to look at clothes you may no longer wear and unlock any possible potential. Refashioning is a great way of entering the world of sustainable sewing without having to spend a lot of money, plus it’s good fun thinking outside the box from time to time and can lead you to unexpected and wonderful outcomes!Marilla Walker 1 - The Refashioners 2015

Happy refashioning everyone and thanks for reading about my project! xxx

Wow Marilla! ! See?!!…using patterns in refashioning IS NOT cheating, lol!! Shirts can be just a source of fabric from which to cut your pieces. Ultimately you’re still transforming that garment; and using any possible means at your disposal to do so. What a great take on the Anna Pattern and the whole thing looks so authentically vintage and feminine it’s hard to believe it was once a man’s shirt! One of my favourite details is the original button placket running horizontally across the back. Although there are so many great details it’s hard to pick just one! 

You can find Marilla here and here. her Maya Pattern and the Anna Pattern from By Hand London are just some of the amazing prizes to be won as part of The Refashioners 2015 Community Challenge. So grab a shirt and get refashioning! You have until Sunday 27th Sept to enter! Stay tuned for more inspiration throughout August!


DIY, how to, refashioning, Restyles, Sewing, the refashioners, the refashioners 2015, Thrifting, Tutorials

The Refashioners 2015 – Jenny

08/04/15

Jenny of Cashmerette and The Curvy Sewing Collective

Cashmerette - The Refashioners 2015

I’ll confess: as a sewist I mostly stay in my comfort zone. Wrap dresses, tanks, jeans and the occasional coat, and I do just fine with my TNTs! But when Portia invited me to participate in the Refashioners 2015 challenge I took a deep breath and decided to try something new for the first time. Cashmerette - The Refashioners 2015

Unlike lots of people who learned to sew as teenagers, I never went through the “oooh I’ll hack up this old top” stage – no, I just jumped straight into the magical world of fabric shopping! But I’ve always been amazed by people like Portia and Charity Shop Chic, not to mention those refashioning challenges on the GBSB, so I thought I’d give it a go.Cashmerette - The Refashioners 2015

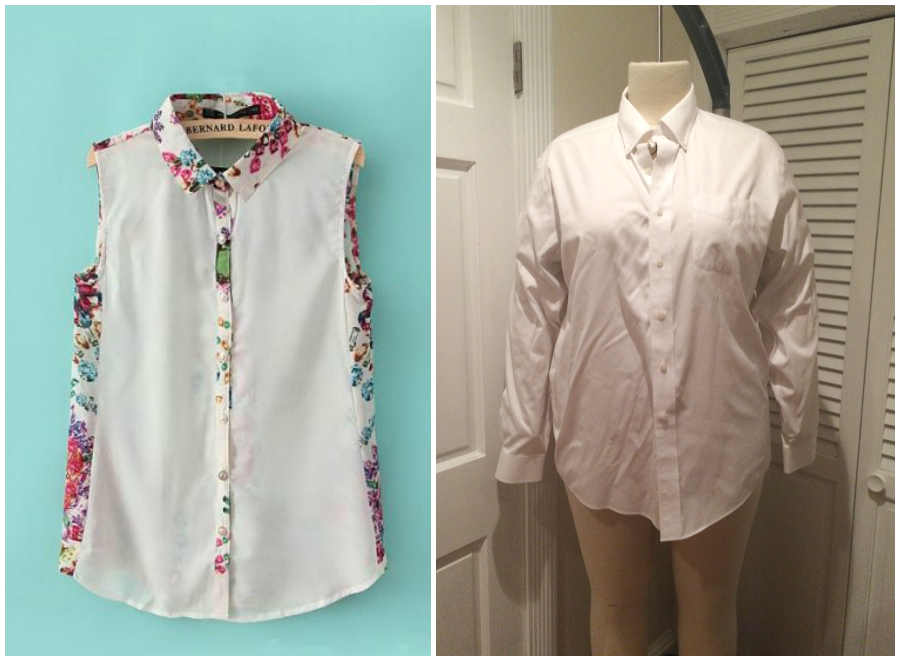
Off to the charity shop I went (Goodwill, in America) and I immediately looked for the biggest men’s shirts I could find – my bust rivals the chest measurement of a large chap, and I wanted as much to go around! I did make a rookie mistake – I bought an LLBean shirt because it looked in great condition.

Turns out, that’s because it’s been treated with something to make it stain resistant and crease resistant – which also means it doesn’t really press… at all! So, please excuse upcoming not-entirely-pressed-looking darts.Cashmerette - The Refashioners 2015

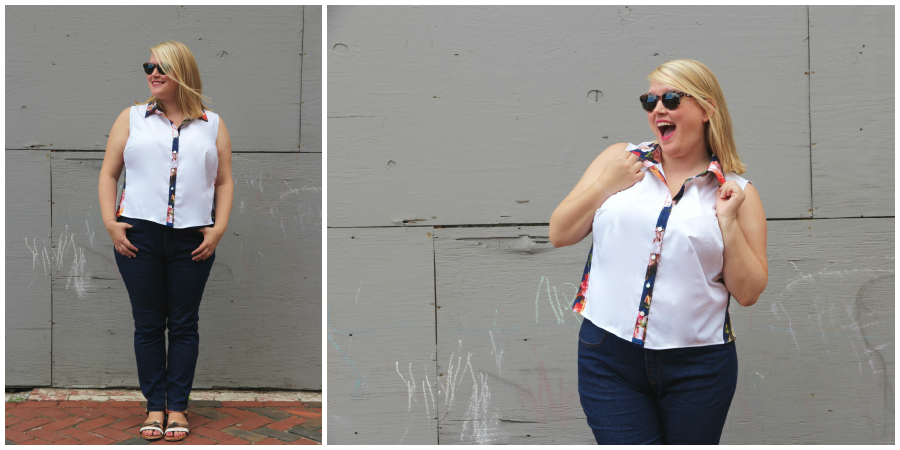
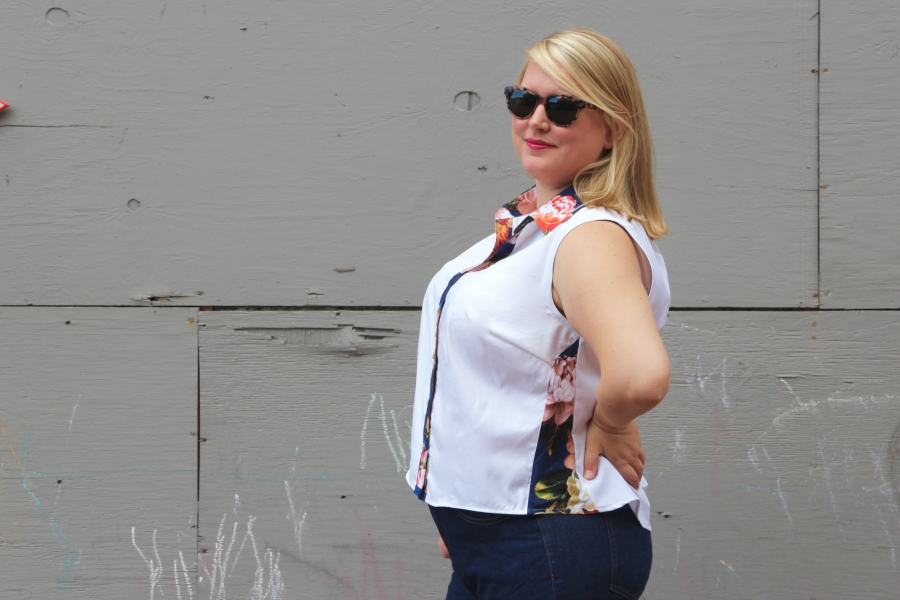
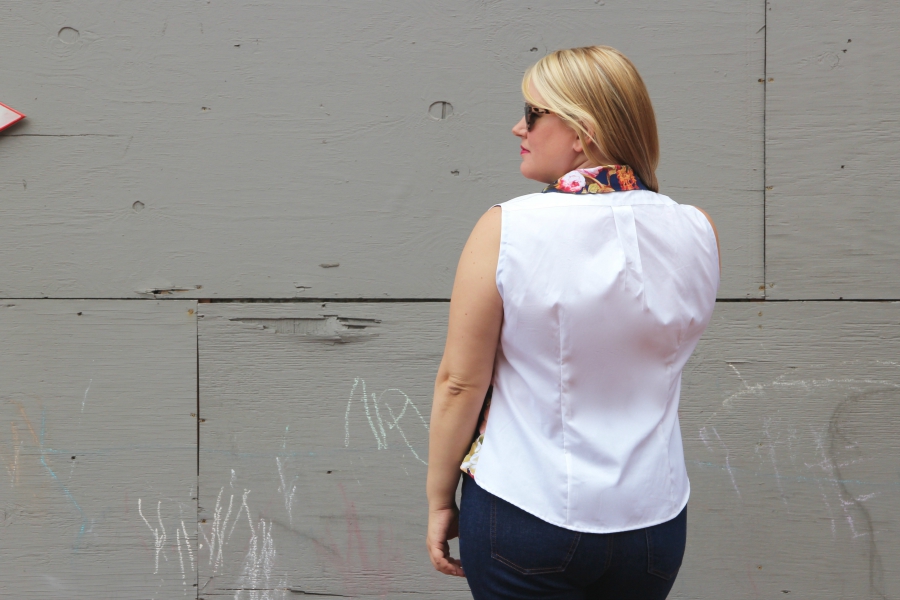
For my inspiration, this shirt from Pinterest popped up and it immediately stole my heart. So chic! I love the use of the floral on the collar, button placket and sporty stripes up the sides. I had remants of a blue floral rayon that sadly didn’t weather well in the wash, but was fine for details, so I dug that out to accompany my shirt.

Here’s how I went about my refashioning:

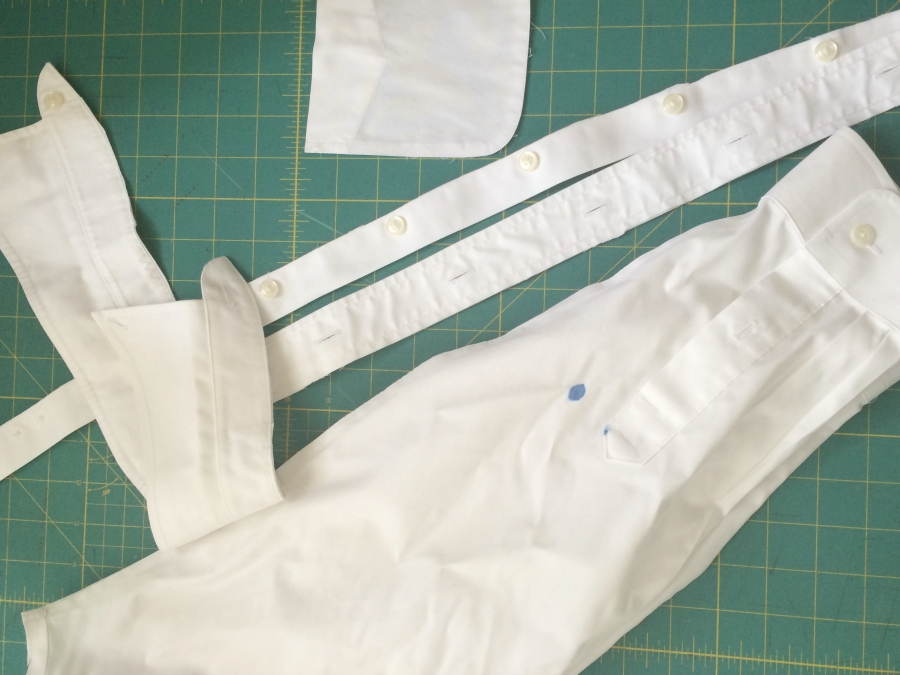
Cut it apart – I removed the collar and stand, button placket and sleeves, and unpicked the breast pocket Cashmerette - The Refashioners 2015

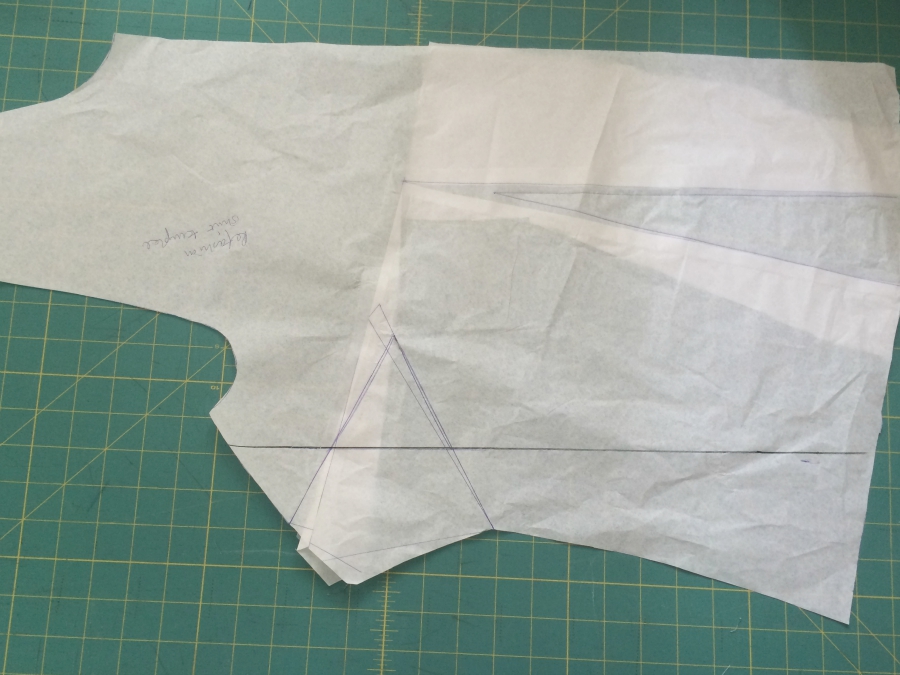
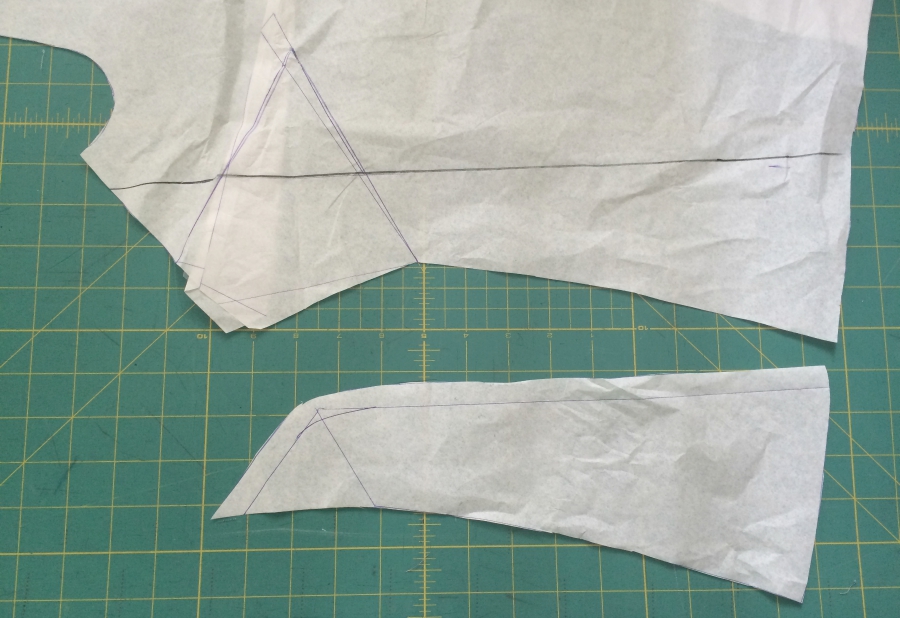
Placed an existing shirt pattern over the pieces, and cut around them – perhaps not entirely in the spirit of refashioning but it worked pretty well! I didn’t have enough width in the front once I put the darts in, but  that was OK because I still needed to add the floral stripes. So, I marked where the existing shirt piece came to on my pattern, folded to remove the dart, and cut a princess seamed side piece.  Cashmerette - The Refashioners 2015

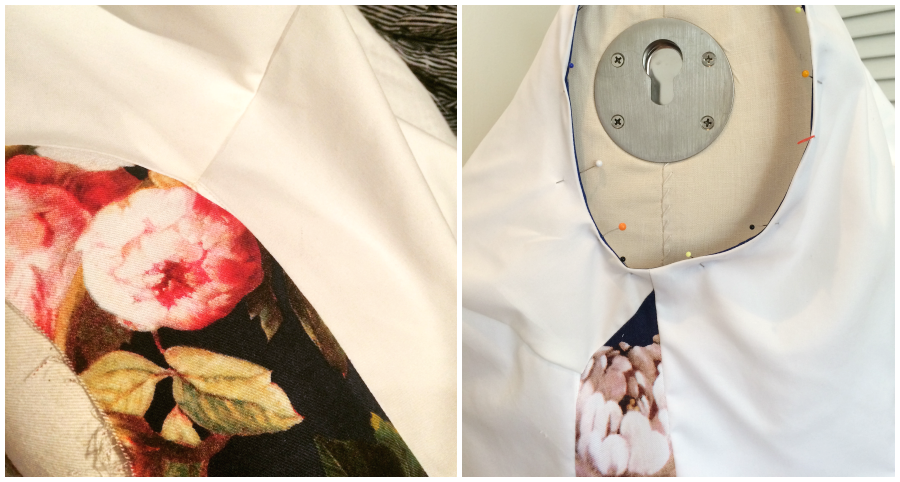
Cashmerette - The Refashioners 2015Cashmerette - The Refashioners 2015I sewed the shirt back together at the shoulders and side seams. For the armholes, I made bias tape from the floral and attached it the usual way. Cashmerette - The Refashioners 2015

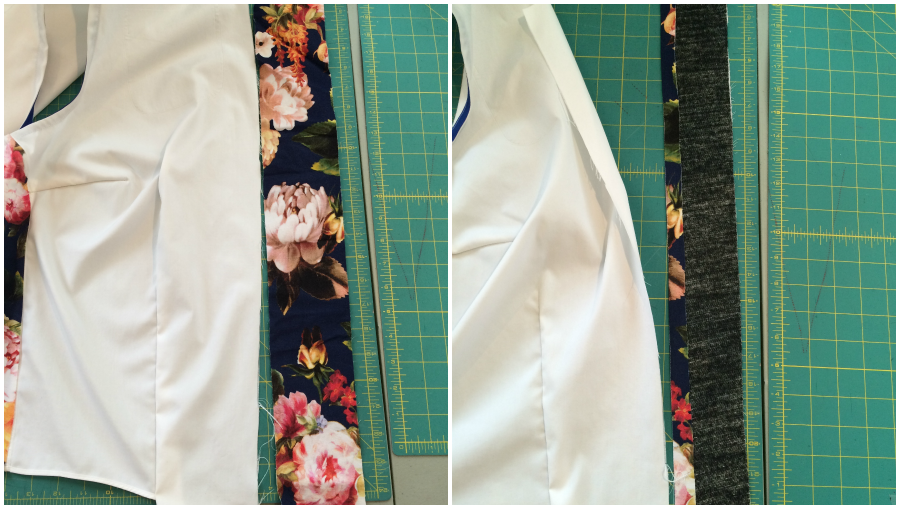
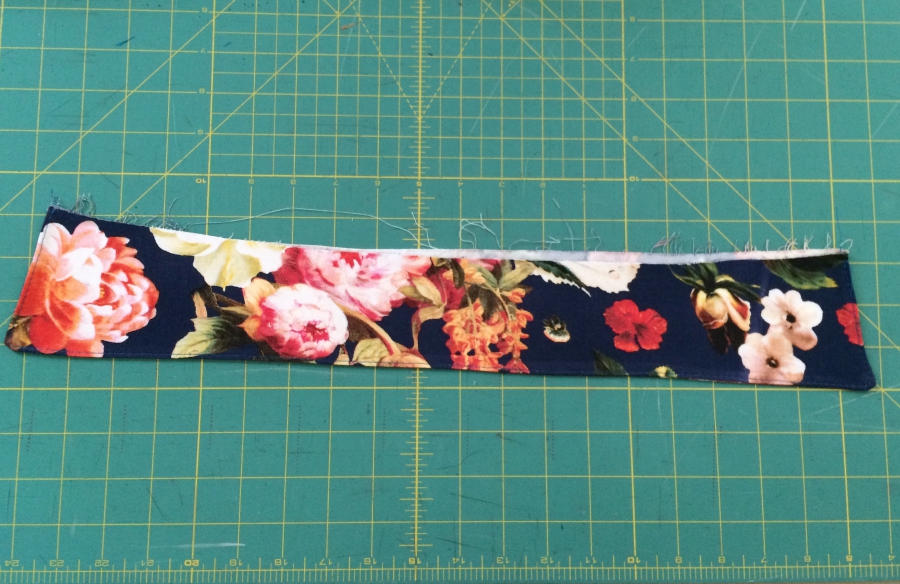
For the button placket, I cut a piece of the floral 3 inches wide by the length of the front, and interfaced it.Cashmerette - The Refashioners 2015

I attached it to the front by pressing over 5/8 to the wrong side, sewing the other raw side to the shirt front, pressing it in half, then topstitching it down.Cashmerette - The Refashioners 2015

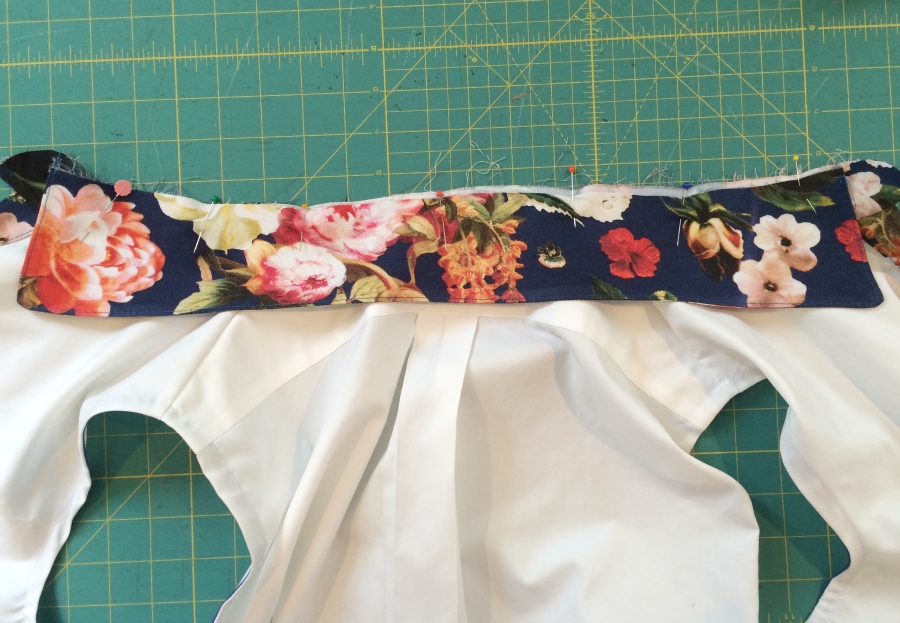
I constructed the collar by sewing the interfaced collar stand to the shirt, making the collar, basting it to the stand, then placing the remaining stand piece on top and sewing around. Cashmerette - The Refashioners 2015

Cashmerette - The Refashioners 2015

Cashmerette - The Refashioners 2015

Cashmerette - The Refashioners 2015

Cashmerette - The Refashioners 2015

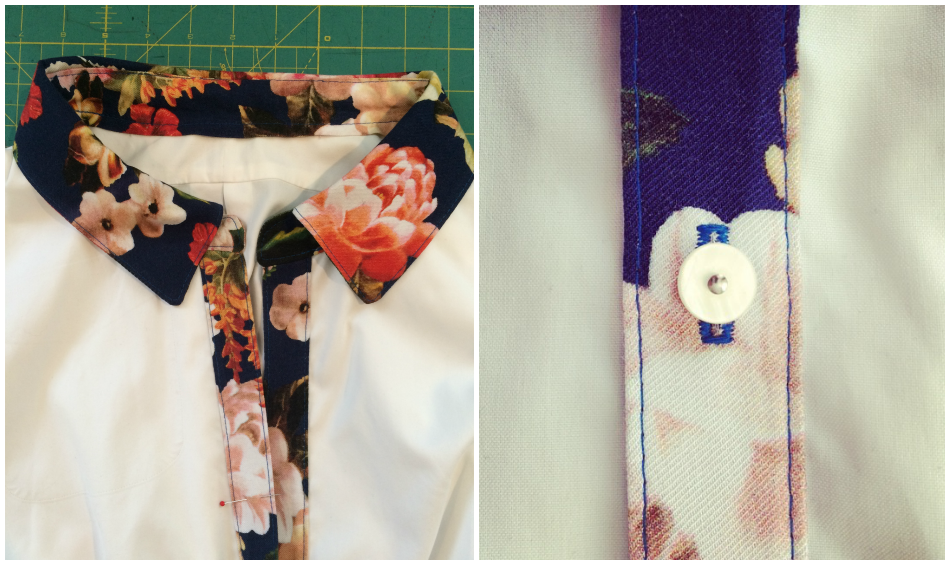
Finally I made the buttonholes in the placket and used my Japanese buttons to finish it off! Cashmerette - The Refashioners 2015

I really like my final shirt! It’s a little boxy for me, and those darned darts won’t lie flat, but it was so fun transforming something mundane into a much more fun garment. Cashmerette - The Refashioners 2015

Next time, I’ll pay more attention to fiber content, and might even try draping instead of using a pattern (which I suspect is “cheat” refashioning!). I’m also excited to find interesting fabrics and use them… I’m a sucker for a big print. All in all, a successful comfort zone challenge!

Thanks Jenny!! LOVE this too! And no…using patterns in refashioning IS NOT cheating, lol!! Nor is the addition of fabric which as you can see here, elevates a plain white shirt from bland to edgy. I think that’s the big take away from this. That beautiful contrast between the floral and white and the substitution of the original collar and placket is something I think I might have to copy! As a side note, (excuse the pun!) the addition of gussets (love that word) in the side seams is a great way to add fullness and/or detail.  I have myself fallen prey to the unpressable fabric of some men’s shirts in the past!! I think they DO actually treat fabric with Teflon right?

You can find Jenny here and here. her Curvy Sketchbook is just one of the amazing prizes to be won as part of The Refashioners 2015 Community Challenge. So grab a shirt and get refashioning! You have until Sunday 27th Sept to enter! Stay tuned for more inspiration throughout August!


DIY, how to, refashioning, Restyles, Sewing, the refashioners, the refashioners 2015, Thrifting, Tutorials

The Refashioners 2015 – Ute

08/03/15

How refashioning a shirt can make you feel awesome

The Refashioners 2015 - Ute

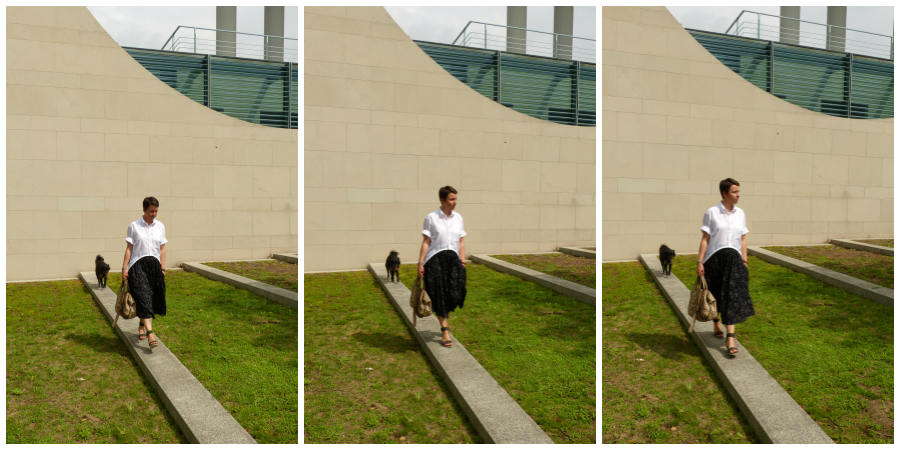
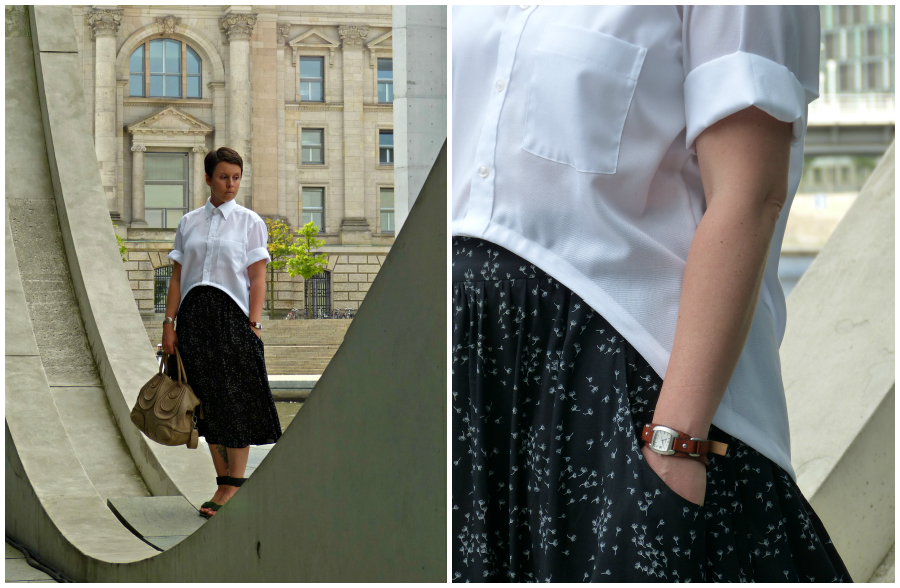
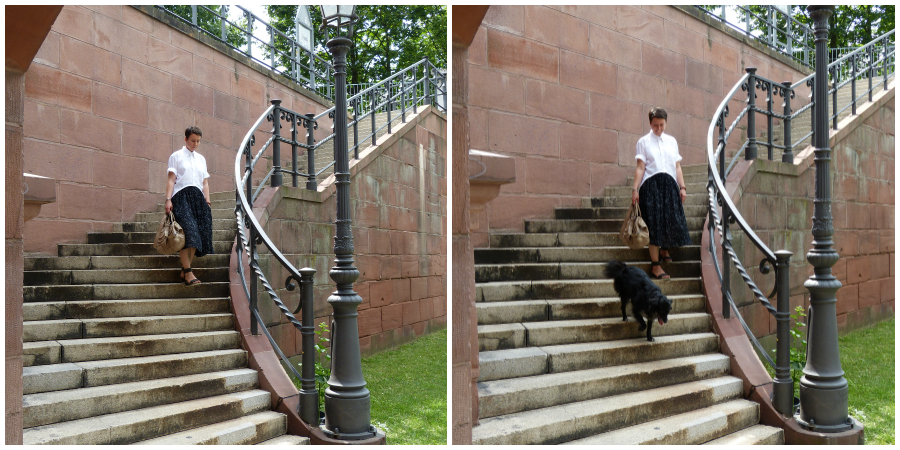
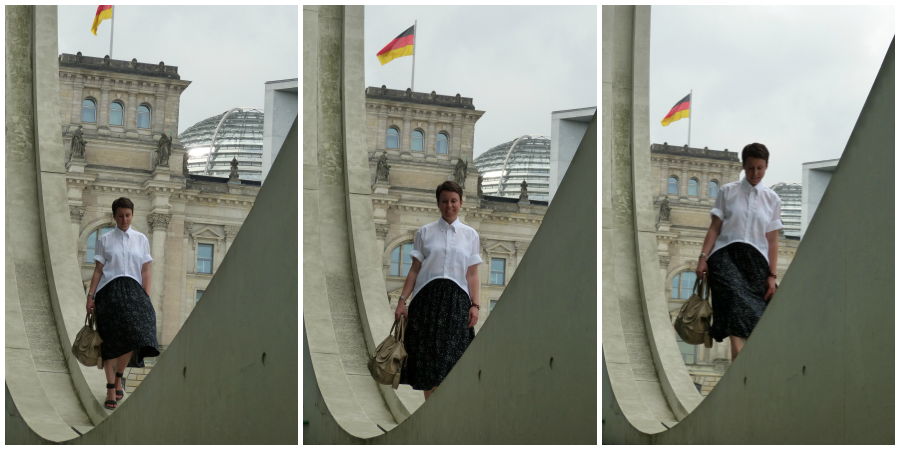
Seriously. I don’t even like wearing shirts. Or skirts. Or having my picture taken. But in this outfit I feel awesome and even cool and fashionable. That does not happen very often. Be prepared to see a lot of pics in this post.

The Refashioners 2015 - Ute

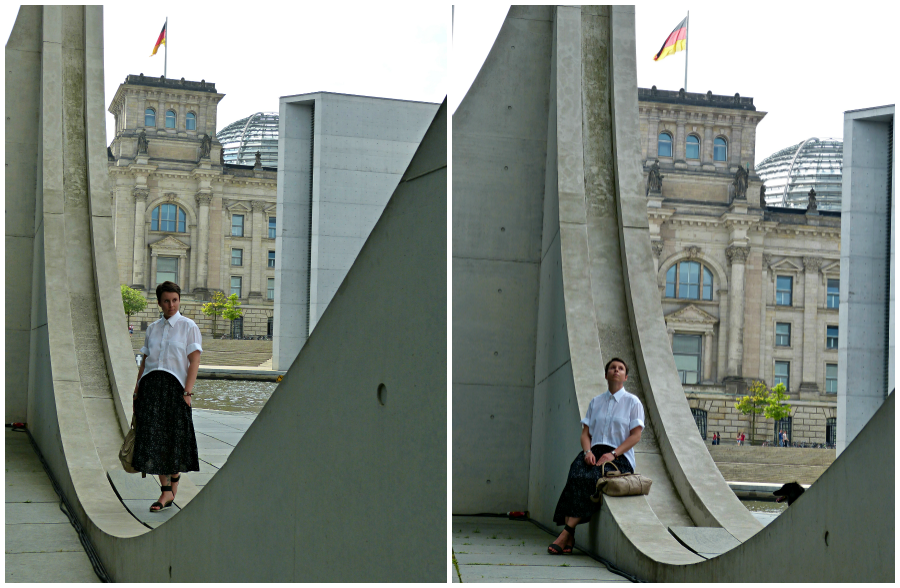
To make it a little less boring we took the photos in different locations in the parliamentary district of Berlin, so you are also getting a little tour of one of my favorite spots in the city.

The Refashioners 2015 - Ute

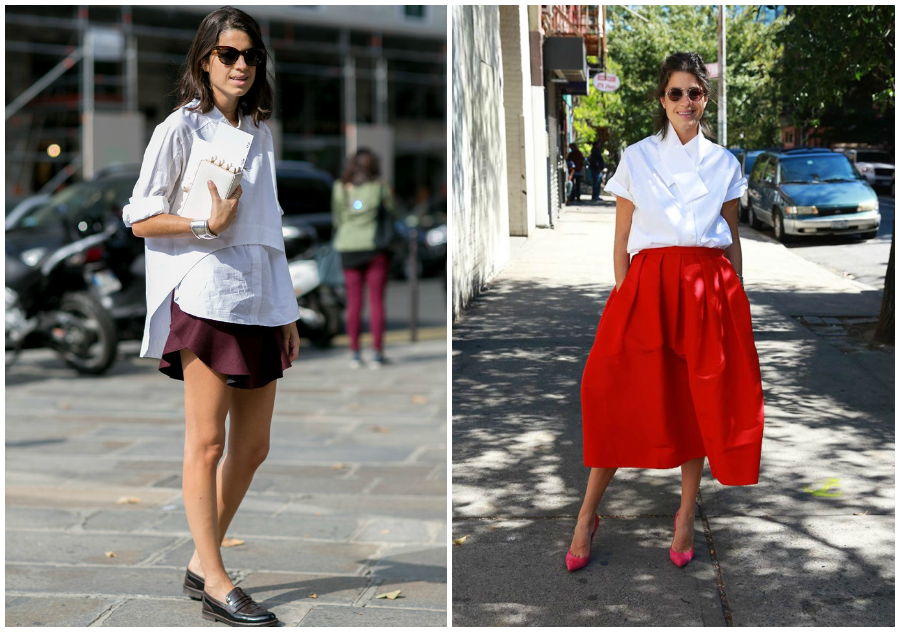
The Refashioners 2015 - UteWhen the lovely Portia invited me to be part of The Refashioners 2015 with a guest post on her blog, I said yes without hesitation. And then I found out who else is part of it this year and nearly fainted. I frantically browsed my “sewing inspiration” pinterest board and surprisingly almost immediately found something I really liked.

The Refashioners 2015 - Ute

source; source
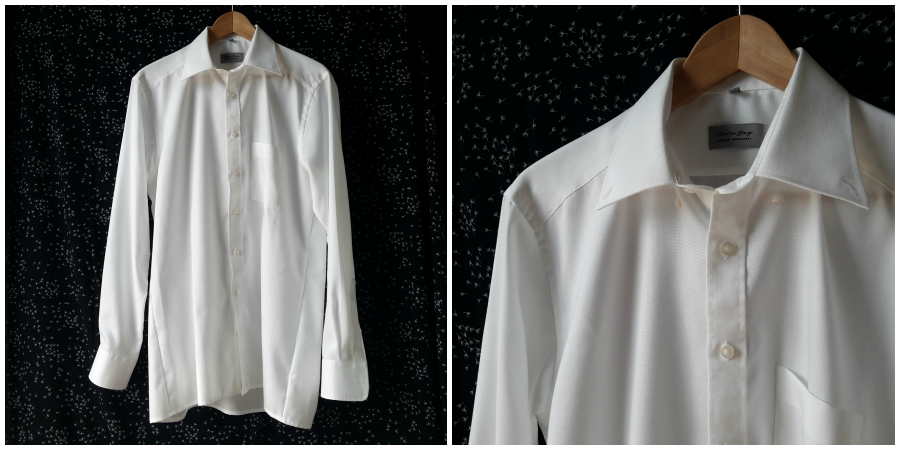
One phone call to my dad later and I even had a white shirt. That actually fit me without any changes and pretty much looked like the perfect white shirt to me. I was very reluctant to cut into it.

The Refashioners 2015 - Ute

As you can see, my modifications were very moderate and at first I was skeptical if it would even classify as a “refashion”.

The Refashioners 2015 - Ute

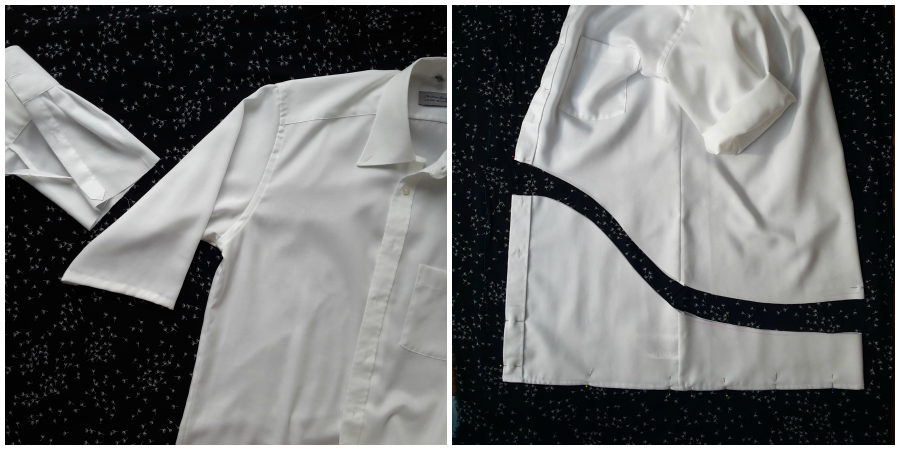
I simply chopped off the sleeves and free handedly drew a new high low hem line. The new hem was bound with wide satin bias binding which gives it a bit more structure and stability similar to the inspiration shirt. I tried to recreate the collar of the shirt on the right, but in the end liked the original collar better.

The Refashioners 2015 - Ute

Like I mentioned above, I don’t really like wearing skirts. But I had started to secretly covet a midi skirt for a while now.
To recreate the look I used the fabulous Brumby Skirt pattern by Megan Nielsen (which is part of the awesome prize package you can win for sewing along!) in the softest viscose ever (from Anna Ka Bazaar)

The Refashioners 2015 - UteThe Refashioners 2015 - Ute

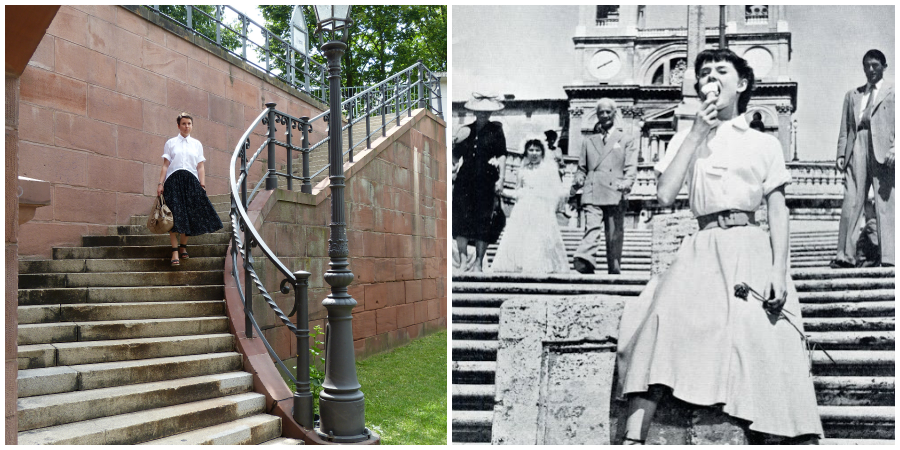
I could be Audrey Hepburn in Roman Holiday, right? (image source)

And that´s it! Now go find a shirt and get shirty with us! I already know what my next refashion will be.The Refashioners 2015 - Ute

ute 2Thank you so much Portia, for asking me to be part of The Refashioners! And since I already feel like I have just received an Oscar – a big thank you to my colleague Michael for taking these pictures and thanks for the shirt, Dad!

Ute, thank you so much! I LOVE this! Just goes to show how a few simple changes can turn a shirt into something that is uniquely you, right?! You can find Ute here and here. As she says, the Brumby Skirt pattern by Megan Nielsen is just one of the amazing prizes to be won as part of The Refashioners 2015 Community Challenge. So grab a shirt and get refashioning! You have until Sunday 27th Sept to enter! Stay tuned for more inspiration throughout August!

DIY, finished garments, grainline, hemlock tee, how to, Sewing, Tips and Tricks, Tutorials, Uncategorized

FO: Double Hemmed Hemlock Tee Hack

07/30/15

Time for some deets on another hemlock tee hack! Man I just can’t leave that pattern alone can I?!! I’d say I’m getting my money’s worth out of this pattern except I can’t say that because it’s free to download here! I bought another pattern from Jen’s collection so my feelings of guilt over getting so much for nothing, feel assuaged for now! You’ll have seen this top in my post about these refashioned trousers. But here’s the lowdown on what I did…DOUBLE HEMMED HEMLOCK TEE HACK

The neckline, cuffs and hemline are all finished using the deconstructed finish I described in this post. But I played with the overall silhouette and proportions of the design as well…

DOUBLE HEMMED HEMLOCK TEE HACK

The hem features a wide double hem band with the edges left raw to curl. The idea came about when I realised this jersey lacked weight and was a little too see through in the muffin top area if you know  what I mean! So a double thickness of fabric added weight and solved the see through part as well.

DOUBLE HEMMED HEMLOCK TEE HACK

In terms of proportions I’m weirdly being drawn to a more cropped and fitted silhouette up top. So the hem and the sleeves got chopped on this incarnation…


DOUBLE HEMMED HEMLOCK TEE HACK

To create the hem band I made the hemlock up as normal, then cut straight across the hem at hip level (yes that is masking tape as a cutting guide)…

DOUBLE HEMMED HEMLOCK TEE HACK

I used the piece I cut off to create the hem band by folding it in half WS together…

DOUBLE HEMMED HEMLOCK TEE HACK

Then serged it around the hem of the shirt. RS together and folded edge of the band aligned with the raw edge of the hem…

DOUBLE HEMMED HEMLOCK TEE HACK

This results in a double layer of fabric with raw edges that will curl with wear and laundering. An effect I personally love. But you could always reverse the process and end up with a clean, folded edge at the bottom if the deconstructed/raw edge look isn’t your bag…

DOUBLE HEMMED HEMLOCK TEE HACK

Sleeve wise, I wanted to echo the cropped proportions of the body so cut them to elbow length…

DOUBLE HEMMED HEMLOCK TEE HACK

I cut strips from my fabric remnants using, you guessed it, masking tape as my guide. (See this post on why masking tape is so useful in the sewing room!)

DOUBLE HEMMED HEMLOCK TEE HACK

(I find a bit of spray starch along the edges of jersey keeps it from curling so much during the cutting/construction process. 😉 )


DOUBLE HEMMED HEMLOCK TEE HACK

Then used those strips to finish the neckline and cuffs with the same raw edge finish. Full  step by step on that can be found here . This is a less trimmed down version of the neckline in that post…

DOUBLE HEMMED HEMLOCK TEE HACK

There are 2 more hemlocks that I haven’t blogged, and I think I now have 6 in total ha! The Hemlock by Grainline Studio  and the Maya by Marilla Walker are fast becoming….scratch that…they ARE my two TNT top patterns. Not because they have show stopping qualities. But because they are well drafted simple wardrobe basics that are ripe for little customisations like this. And Amen to more patterns like that!
DIY, Dressmaking, fabric, finished garments, free pattern download, Freebies, grainline, hemlock tee, how to, knits, minerva, overlocker, serger, Sewing, sewing patterns, Tips and Tricks, tops, Tutorials, Uncategorized

Hemlock Tee: How to Sew a Deconstructed Jersey Neckline Finish

07/24/15

Not really a secret that I love the Hemlock Tee pattern from Grainline Studio. If you follow me on Instagram you’ll have seen a few of these pop up recently that haven’t yet been blogged. One you will have seen in my previous post. This one is just a simple grey jersey…DECONSTRUCTED JERSEY NECKLINE FINISH

This would not be particularly noteworthy apart from the fact I wanted to let you know this jersey from Minerva Crafts is frikkin gorgeous! So soft. So drapey. Not too flimsy. Need more in my life!
I also wanted to share my favourite jersey neckline finish of the moment! I’m not a massive fan of conventional ribbed neck bands . I like my tees to look a little more deconstructed and I really like the raw edge of jersey fabric. The way it curls  when you stretch it! But obviously  a neckline still needs some stability. So recently I’ve been opting for this neckline finish…DECONSTRUCTED JERSEY NECKLINE FINISH

It’s applied in exactly the same way as the pattern describes, with one exception. Instead of the folded edge of the neck band edging your neckline…you flip the band the other way round before applying it,  and have the raw edge exposed instead!

Here’s a quick step by step. If you’ve never applied a jersey neckband before you may also find this useful as it covers the whole process…at least this is how I do it!DECONSTRUCTED JERSEY NECKLINE FINISH

Take your neckband pattern piece and press it with some spray starch (helps stop the edges curling too much as you work); sew together the ends to form a loop then fold in half.

DECONSTRUCTED JERSEY NECKLINE FINISH

Taking the join as your centre back marker, mark your centre front point using a pin. Do this by folding the band in half with the join smack band in the middle. Mark the CF point with a pin on the opposite side.

DECONSTRUCTED JERSEY NECKLINE FINISH

Mark the sides with of the neckband with a pin too..

Have your tee right side out…DECONSTRUCTED JERSEY NECKLINE FINISH

Pin the CF of your neckband to the CF of your neckline. I’m going for that raw edge finish on mine remember. So I’m lining up the folded edge of my neckband with the raw edge of my neckline. If you want the clean/folded edge finish to your neckline, then line up the raw edges of your neck band with the raw edge of your neckline. Savvy?

DECONSTRUCTED JERSEY NECKLINE FINISH

Pin the sides of your neck band to your shoulder seams and the CB of your neck band to the  CB of your neckline. So your neckband is now pinned at both shoulders seams, the BB, and the CF of the right side of your neckline.

DECONSTRUCTED JERSEY NECKLINE FINISH

Serge to join. I work in 1/4 sections at a time. ie from pin to pin. Hold the layers of fabric under just enough tension for the neckband to match the length of the neckline. It will be drafted ever so slightly smaller than the neckline circumference which enables it to naturally want to turn to the inside .  So pull on it juuuust enough as it runs through the serger, but be careful not to stretch it out.

DECONSTRUCTED JERSEY NECKLINE FINISH

Press! Seam allowance/serged edge downwards…

DECONSTRUCTED JERSEY NECKLINE FINISH

Top/Edge stitch around the neckline to secure the seam allowance. So you now have a finished neckline with a raw edge detail (or if you attached the band the other way, a finished neckline with a clean folded edge!). If you want it a bit narrower you can start with a narrower band in the first place OR trim it down at this stage….

DECONSTRUCTED JERSEY NECKLINE FINISH

Make a notch/snip to the depth you want…

DECONSTRUCTED JERSEY NECKLINE FINISH

And trim!

DECONSTRUCTED JERSEY NECKLINE FINISH

I went even narrower on this one and part of me wishes I’d  restrained myself a little, lol! After laundering, the edges will soften, and depending on how long you’ve left them, (ahem) curl a little too.

You might ask what the point is in lining up the folded edge of the band with the raw edge of the neckline in the first place. You could just attach the band as normal, trim, and you still end up with a raw edge. I just prefer to do it this way because I find it easier to line up a folded edge with one raw edge, than it is to align 3 raw edges; and I find the inside finish cleaner this way too. Either way would work and it’s one of those cases of personal preference.

I’ve done a variation with a twist  of this on the hemlock in my previous post. The one I’ve yet to blog about! Then there’s one more that I’ve made; (and two more that I’m about to make). Plus my first stab at Suzy Pants and 3 completed Maya variations that are also unblogged!

I literally have too many blog posts to squeeze in before the launch of The Refashioners 2015.

Oh yeah, and I ought to refashion a shirt too, gasp!!

Newer Posts
Older Posts
Portia
Follow
Sewbox

© Copyright 2026. Portia Lawrie. All Rights Reserved. Managed by WordPress Web Dev Cornwall .