• About
    • Contact
    • Press
    • Sponsor
  • DIY
    • Home & Garden
    • Jewellery & Accessories
    • Yarn Crafts
  • Sewing
    • patternless & self drafted
    • Refashions
    • Commercial Patterns
    • Sewing Tips
    • Overlockers
  • The Refashioners

Portia Lawrie

finished garments, jersey, knits, Sewing

FO x 2: (well 3 technically!) My perfect boxy tee

04/28/17

One might say that this simple boxy tee was nearly 3 years in the making! Why? Because I discovered an abandoned experiment in my stash from that time period. I picked it up…looked at it quizzically….wondered why it had been cast aside because…it looked like just the kind of tee I’d been looking for recently. So I sewed it up in half an hour and what do you know….it was exactly the shape and proportion I had been hankering after in my wardrobe. So I made 2 more!

self drafted box tee (5)

The first being this incarnation in a pique type knit from Stoff & Stil. I love the irregular sketchy arrows and the monochrome makes it a really versatile addition. The top is self drafted….but very simply so. Rectangles for body and sleeves but with a slight curve for the sleeve heads and armholes, and curves cut out for the front and back neckline. My original experimental one was literally just rectangles but I loved the proportions so much that I drafted a pattern and added in those subtle refinements….self drafted box tee (5)self drafted box tee

Then I liked that one so much that I made another! Also in a Stoff & Stil fabric. This is a slightly looser version. But all 3 (the original, which is black, and these two) are in constant rotation. It’s like I had my holy grail of tees sitting in my WIP pile for 3 years! What the heck?!! Revisit your WIPs people! Seriously….you started them for a reason!self drafted box tee self drafted box tee

So needless to say….I will be making a few more of these.

I also want to direct your attention to the neckbands on these babies. Notice they are perfectly turned in and laying flat? Well in the past this has always been a bit touch and go for me. (wavy neckbands anyone? Ack!) But I have been working on a formula for calculating the exact length of neckband you need, for any given neckline circumference….and any given fabric. (You may have read my initial ruminations here!) Because…it seemed to me that I needed to factor in the stretch percentage of the fabric I was using. A fabric with 40% stretch was not going to turn in the same way as a 60% stretch fabric cut to the same length. Well if my last few knit makes are anything to go by…I’ve nailed it! And there will be a post coming your way soon. So if you ever got frustrated at wavy or puckered neckbands….stay tuned!

finished garments, Freebies, Giveaways, Sewing

FO: Vogue 9160 & The Eve Appeal + a Giveaway

03/17/17

VOGUE PATTERNS BLOGGER TOUR FOR THE EVE APPEAL - VOGUE 1960 - PORTIA LAWRIE (3)


Cocktails anyone? A couple of weeks back Vogue Patterns (The McCall Pattern company) launched a year long sewalong in aid of The Eve Appeal. Part of this includes a blogger tour which is where your’s truly comes in today. Yep I’m up….and….well….running a liiiiiitle late this morning. Might be to do with all the champagne and peach schnapps I had to drink last night. (My fave cocktail. Dunno what that’s called, lol!) So why the references to cocktails? Well you may remember I took part in last years event The Big Vintage Sewalong….and well….you gotta have a theme right? And this years theme is cocktails! Yum! They’ve even come up with their own recipe and you can sup it while joining in with sewists nationwide, by sewing up one of the patterns from a selection of 20, and raising money for The Eve Appeal in the process. Savvy? Good…here’s me with an empty glass having drunk the house dry…VOGUE PATTERNS BLOGGER TOUR FOR THE EVE APPEAL - VOGUE 9160 - PORTIA LAWRIE (9)

Soooooo, what did I make then? Not being a cocktail dress kinda gal, (and actually not at ease in any kind of “formal/dressy” attire), this one really pushed me out of my comfort zone. But not one to shy away from a challenge (that would be super hypocritical of me considering what I put you all through every year with The Refashioners , ha!), I duly accepted said challenge and this is what I came up with. You know….if I ever get invited out for cocktails….VOGUE PATTERNS BLOGGER TOUR FOR THE EVE APPEAL - VOGUE 9160 - PORTIA LAWRIE (9)

My Idea of dressing up is heels and a bold lippy, whilst keeping the outfit itself understated. Indeed this make (in a gorgeous grey washed linen from Ditto fabrics that I’m in love with) would look equally at home with a cropped stripey tee and birkies! I love clothes that do double duty don’t you?

The pattern is Vogue 9160….yep…. a jumpsuit pattern….Now I have been admiring the jumpsuit trend from afar since it emerged. But I’ve steered clear as I KNOW it won’t suit me. I’m too conscious of a tubby middle section right now (I’ve gone up a whle dress size recently!) One piece garments rarely do. So my original intention was always to adapt this into a two piece, with the appearance of a jumpsuit, by making it out of the same fabric.VOGUE PATTERNS BLOGGER TOUR FOR THE EVE APPEAL - VOGUE 9160 - PORTIA LAWRIE

I knew I didn’t want the scalloped lace or lining elements of this pattern. I wanted to pare it right down and simplify it by just using one fabric for the whole thing. But I really struggled to find a fabric (in time) that would be substantial enough for the bottoms but not too heavy for the top. Crepe would be a good one I think.  Or a mid weight cupro or sandwashed silk. In the end I decided that the linen was not quite right for the top portion, which led me more towards view C.  A Contrast top and bottom with a tie belt. I swapped out the top portion of the pattern for a looser fitting top in a lurex knit (I’m not a fan of anything too close fitting up top), then set about turning the bottom half of the pattern into trousers by adding a simple narrow waistband and back zip fastening.

But what elevates this make to something dressier I think….is the tie belt. I made a slightly longer version than the pattern so I could wrap it round twice and wear it more Obi style…VOGUE PATTERNS BLOGGER TOUR FOR THE EVE APPEAL - VOGUE 9160 - PORTIA LAWRIE

I like…..NEVER…wear anything tucked in. That’s how conscious I am of my (lack of ) waist. But I do have proportionately narrow hips so from a “glass half full” perspective, I try to focus on those instead. But what I like about this make is what the belt does. Aside from the added interest, it cinches me in at the waist and draws the eye down to hip level where I’m narrowast. The overall effect is actually quite slimming and I don’t feel self conscious at all in these…VOGUE PATTERNS BLOGGER TOUR FOR THE EVE APPEAL - VOGUE 9160 - PORTIA LAWRIE

VOGUE PATTERNS BLOGGER TOUR FOR THE EVE APPEAL - VOGUE 9160 - PORTIA LAWRIE

It even camouflages my Mum/crisp/bloaty/bulge at the front! So the obi style tie belt may be a bit of a revelation for me!

Vogue Patterns  are giving one reader the chance to win a copy of this pattern…VOGUE PATTERNS BLOGGER TOUR FOR THE EVE APPEAL - VOGUE 9160 - PORTIA LAWRIE

To enter,  share this post on social media, then leave me a comment to let me know where you shared. Multiple shares gives multiple entries. Giveaway is open UK only (sorry) and closes at midnight GMT on Friday 24th March! Good luck!

More info on this year long event and the list of patterns can be found here and you can find out more about this fantastic charity and their other awareness and fundraising activities here.

VOGUE PATTERNS BLOGGER TOUR FOR THE EVE APPEAL - VOGUE 9160 - PORTIA LAWRIE


finished garments, Sewing, Uncategorized

FO: Denim Kimono (+ maybe a future pattern?)

05/18/16

So one of the first gaps I noticed in my wardrobe a few days into Me Made May was a Spring jacket that went with everything. When it comes to a versatile little jacket that goes with everything then denim jackets are a classic. However, a classic denim jacket is not quite my style. So I decided to have a play and come up with a slightly different take on the wardrobe staple that is the denim jacket, but a little more aligned with my personal style. And I have to say, this hasn’t been off my back since I finished it!

Enter the denim kimono jacket…denim kimono diy (2)

So we all know I love a kimono as evidenced here, here and here 😉  Originally this was going to be a longer length. But during construction I tweaked and played with the proportions and decided that actually, the cropped proportions of the body and sleeves were exactly what I needed to complement the looser trousers and shorter tops I’m wearing most at the moment. And indeed more of a reference to the proportions of the classic denim jacket that was my starting point….denim kimono diy (7)

There are some fit issues at the back that I need to address. I ended up taking a big tuck out of the CB to get it to hang the way I wanted. The back neckline needs to come in closer to the neck so the kimono band sits a little snugger to the neck, (which will involve a little shaping to the band itself too). Then there’s the width across the back at armhole level. Excess fabric there so I need to have a play with the sleeve and armhole configuration and remove a little of that. BUT, that said, for something that started out as an experiment I am MORE than happy with how this turned out. It’s kinda my perfect jacket! And none of the above is going to stop me from wearing this all Summer. They’re issues that only us sewists would notice. (Although I can’t help myself pointing them out to everyone that says they like my jacket. Sewist or not, lol!)

I wanted to reference the classic denim jacket a little further by adding little details like contrast stitching and jeans hardware…denim kimono diy (8)

Which brings me onto a close up of those pockets. The long rectangular shape was initially to do with what I felt best fit the overall proportions of the jacket. Then it occurred to me that they were almost identical in size and shape to my my mobile phone!! Which of course I have on me at ALL times because I am addicted. So naturally, they are now sized perfectly to accommodate my Samsung Galaxy, ha ha! Well…what is designing your own clothes about if you can’t add in little details like that to perfectly suit your needs ;) (And no, as someone asked me on IG, I don’t have two mobile phones. But one pocket would’ve just looked weird 😉 )denim kimono diy (1)

My other favourite detail on this make are the split cuffs. They echo the kimono band on the jacket opening and kinda unify the style I think…denim kimono diy (9)

The fabric is this denim from Remnant Kings, who incidentally are celebrating their 70th anniversary this week! So basically, they were around the last time that sewing was this popular, and they rode out the dry spell of the intervening years between then and now. Which to me is pretty darn impressive. So I’m taking this opportunity to wish them a very warm and heartfelt Happy Anniversary and a thank you for the way they continue to support this blog 🙂 Mwah to Hazel and the team there!


Now, onto the (hopefully intriguing) subtitle of this post! I’ve had a few people on social media ask if I am thinking of releasing this (and previous self drafted makes) as a pdf pattern. Well….there’s a short answer and a long answer. And being of a slightly verbose disposition I will give you the longish answer! And also because I am AWFUL at keeping secrets, and now that the question has arisen, yes. I HAVE, behind the scenes been working towards the goal of developing a line of sewing pattern designs under the “Makery” brand. And yes, this jacket has now been added to the list of patterns that I want to develop further. There is alot more that I could say on this subject, but that’s kind of another blog post. Which I will write in due course. Suffice to say for now, in all likelihood, I will be releasing a line of sewing patterns in the near (ish) future. But as this is a new avenue for me, with lots to learn, explore and consider, I can’t yet say exactly when that will be. I have not yet figured out how long the process will take.  But essentially I’m gradually building up a stack of “personal” patterns that I think will appeal to some of you out there. It feels like a natural progression for me now, to start working towards the goal of refining and making these available online. So yep. There’s my little bit of news. Watch this space over the coming weeks 😉


finished garments, Sewing, Uncategorized

FO: Ponte Linden (+ thoughts on achieveing the perfect knit neckband!)

05/03/16

Well what do you know? The sun was shining on Sunday (as it is today, hurrah!!) so I ducked out to get a few daylight shots of this new Linden…I’ll preface this post by warning you that I meander into alot of theorising and calculating the length of the perfect neckband based on the stretch percentage of the fabric you use. So if that is likely to make your eyes roll back in your head….look away now, lol!ponte linden

I cut down a size this time round and went for view B. The fit across the upper bust, neckline and shoulders turned out way better. I haven’t quite fathomed why there is so much excess at the hem and under the bust. Although to be fair I haven’t given it a great deal of thought because I’m not overly bothered. I suspect it’s a combination of the need for an FBA and perhaps that the ponte that I used has more drape (and stretch, which I’ll come to in a bit!) than the recommended sweatshirt fabric. No matter. I still love it and it’s worn as soon as it comes out of the drier. (Also, the folds are nowhere near as exaggerated IRL. I think perhaps the photo being taken in full sun ramped up the shadow and contrast somewhat!)

ponte linden

So…the fabric!  It’s this beauuuuutiful ponte from Dragonfly fabrics in the Bark colourway. Now on special so probably won’t be around for long!. So.Freakin.Soft.  What’s more, I was really taken with the contrasting RS and WS of this fabric and decided to play with that on this make…

ponte linden

Construction was as per pattern instructions…except as I said, I reversed the fabric on the front and back pieces so the body contrasted with the sleeves…

ponte linden

Oh…and  I added a split hem band similar to my Maya top here…

ponte linden

Regular readers will perhaps remember that I raised the neckline on my Linden pattern as it sat a little too wide on me. You can read the simple “how to” on that adjustment here. But of course, adjusting the width of the neckline means you need to cut a new neckband piece because the circumference of the neckline has changed. As luck would have it the width of the pattern piece for the neckline band is more or less the same as my 2″ wide roll of masking tape. And you know how I love a bit of a masking tape cheat, lol!

So….all that remained was for me to establish the new circumference of the neckline and cut a new neckband piece to fit. Up until this point I’ve always just cut a neckband approx 2″ smaller than the circumference of the neckline. To varying degrees of success. Sometimes that would work pretty well. Sometimes not. So I decided to delve a little into the maths of the perfect knit neckline. Somewhere, and for the life of me I can’t find that post no, (**update: it’s here! Thanks Gillian!) I read about a slightly different way of measuring the neckline for a knit….ponte linden

Instead of measuring the circumference, you take the total measurement between those 3 points above….and cut the neckband to that size. This made good sense to me so I though I’d give it a go. To give you an idea, the neckline circumference was 61cm. Measuring between those 3 points gave me a measurement of 52.5cm. So a difference of 8.5cm which is a little over 3″ shorter than the actual neckline (I usually cut about 2″ shorter so I was optimistic that shortening the band by that extra inch would yield an improvement)…

ponte linden

So….with my trusty roll of masking tape I marked out a strip 52.5cm long on my fabric (plus a small serger SA)…

ponte linden

Joined it, folded it, then marked the centre and side points…

ponte linden

And lined those up with the corresponding CF/CB and shoulder points on my neckline. So you can see the theory in practice here. The band should stretch to fill in those gaps and therefore turn the neckline in, so it lays flat once sewn. Awesome.

ponte linden

Now, it actually yielded a pretty good neckline! It lays perfectly in the front, but is a teeny bit baggy in the back neckline. Meaning the neckband was probably, among other things, still slightly too long. But seriously it’s miniscule, and doesn’t really  warrant the geek out I’m about to embark on. But sometimes I just fall down a geeky rabbit hole and need to get it straight in my head. So…..I started ruminating on how I needed to tweak my technique and play with the math to establish the correct length of the neckband. I think I made an error on 2 fronts….

ponte linden (6)a

Referring back to that picture of my neckline I’ve now marked in those 3 points as A, B, and C. Now, when I marked the alignment points on the neckline band I just defaulted to CB/CF and crucially, put my shoulder alignment marks midway between those two points. But , (and this is where I think I went wrong) the distance from shoulder point to shoulder point, is different across the back neckline (A to B), than it is at the front neckline (A to C to B). So actually it’s not an even distribution of the neckband around the neckline, but a proportional one….

ponte linden (10)a

So what I’m thinking I should have done (and I’d like to hear your thoughts on this peops), is measure from A to B, and mark my shoulder points along the back neckline according to that measurement. However, moving those points back will mean more neckband length needs to be absorbed into the front neckline. And well….that’s no good because at the moment it’s sitting perfectly. Gah! Which means, actually it’s still too long. Which brings me onto the dreaded stretch percentage…

I actually don’t think there is a hard and fast formula/rule that will work on every project I suspect it’s a combination of factors….and stretch percentage HAS to be factored in. So I needed to work that out in order to try and reverse calculate what my perfect neckband length should have been, with stretch percentage taken into account…ponte linden

What you’re looking at here is my metre rule, laid flat on my cutting table and butted up against a wall so it won’t go anywhere. A folded band of my fabric bulldog clipped to the end of my ruler.

ponte linden

I take hold of the fabric with my thumbnail at the 10cm mark…

ponte linden

Then stretch it along the ruler until I feel it reaching the limits of it’s stretch capacity, and note the number my thumbnail reaches. 15 in this case.

So, to calculate stretch percentage it’s the second measurement (15) divided by the first (10) then minus 1. Which in this instance is 0.5. Which means this fabric has a stretch percentage of 50%.

Now, here’s my theory, that I intend to test out on my next neckline. And again, I’d love your thoughts on this. Using the “triangle measurement” method I cut my neckband at 52.5cm. (Apologies for flitting between metric and imperial peops!) The actual circumference of my neckline was 61 cm. Same calculation as above  (61/52.5)-1= 0.16.  So the neckband that I’m attaching is stretching by 16% to get round the circumference of the neckline.  For a fabric with 50% stretch, that’s less than half the potential stretch available to me on this particular neckline. Now I know, from how the neckband turned out that it’s not quite stretching enough to lay completely flat all the way around.  Which means I’m close, but not quite close enough.

So how about this….if I theorise/guestimate that I want to use half of the stretch percentage available to me, (to get a balance between stretching but not over stretching my neckband), then I would need this band to stretch by 25%….and therefore be 25% smaller than my neckline. So….if I take my original neckline circumference of 61cm and reduce that by 25% as follows 61 x 0.25 = 15.25 then 61 – 15.25 = 45.75cm.

So, if I had cut my neckline at 45.75 cm instead of 52.5cm….would it have laid flat all the way round?  It’s a difference of 6″ to the neckline circumference so it sounds extreme. Hmm…not sure about that one. 6″ seems alot doesn’t it? 3″ shorter than I actually cut it. The finished neckline wasn’t THAT far wrong. Perhaps I should strike the middle ground between the 16% difference the “triangle method” gave me and the 25% figure and opt for a neckband 20% shorter than the neckband circumference. That would make my neckband 4.8″ shorter than my neckline. 1.8″ shorter than I actually cut it. That sounds more feasible to me. Knowing how the back neckline turned out that 1.8″ less in the neckband would probably have done it

In any case, I’m beginning to conclude that using the triangle method of measuring the neckline will get me in the right ball park; but that needs to be counter checked with the stretch percentage of the fabric I’m using. This COULD be the key to getting the right neckband ratio for any given project. (I don’t think it’s as simple as just cutting the neckband 3″ shorter than the neckline every time, when you take into account that some fabrics will need to stretch more in order to sit flat.)  I’m leaning towards calculating the stretch percentage of the fabric, then using somewhere between a third to a half of the stretch potential of the fabric, (so basically 2/5) to calculate the neckband length, based on the neckline circumference. Clear as mud right, lol?!

What say you?? Does the above make sense? Are any of my calculations off? (I’m no maths genius, lol!) Do you have your own method??? Share away peops. Let’s geek out together!


finished garments, Sewing, Uncategorized

FO: Burda 102 “Short Coat”

03/18/16

Whilst I was making this coat I started to worry that by the time I finished it, the weather would have warmed up, and I wouldn’t need to wear it. Most people would make a coat at the start of the winter. Nah! I’m gonna make my coat at the end of the winter and then not be able to wear it! Well I needn’t have worried. The weather remains resolutely chilly, with blustery, bitingly cold winds. Perfect!burda 102 short coat

I could have made this coat months ago. I had the fabric. A beautiful mouflon felt wool from Dragonfly fabrics, like, 4 months ago. Truth be told, the delay was in no small way, down to the fabric being so lush that I was a tad intimidated about cutting into it until I had it clear in my head exactly what I was going  to do with it. I originally had loose plans for a self drafted kimono style coat with big cuffs. And actually that would have been easy enough to do. But the fear got me! I’d never made a lined coat before. (I’ll come onto the delicious lining in a bit!). I knew the lining and shell fabric combo I’d selected had the potential to be super lovely. And I didn’t want to squander that on an experiment. So I played it safe and opted to use a pattern. Enter the snappily titled “Three Quarter Sleeve Coat 08/2014 #102” from Burda. Originally from a 2014 issue of the magazine I believe, but now available in pdf format…burda 102 short coat

I really liked the simplicity of the design and it was very similar to a raft of coat images I’d been pinning for inspiration. The proportions were fun too. Huge oversized pockets and 3/4 length bell sleeves. It’s just about the right side of oversized for me, without feeling like I’m drowning in coat…burda 102 short coat

And yeah…I lined this puppy, and I did a pretty good job!!

So here it is in close up…burda short coat 102

The neckline was one of the things that appealed to me about this coat.  I don’t like fussy collars. And this is the perfect shape to wear as is, or pop a cowl over the top on super cold days without it getting all caught up on a collar. This part did require a little fitting. There was some annoying gaping at the back neckline, which I resolved by adding 2 x 1″  neck darts (about 4″ long) either side of the CB on the shell, then taking the equivalent amount out of the back neck facing at the CB.

I also really liked the clean finish on the outside….

burda short coat 102

Achieved by virtue of these giant snaps in a gunmetal grey!  Not visible when the coat is done up. This is a good time to mention the front overlap on this pattern. I took an inch off the entire length of the opening on either side. The overlap was mightily excessive in my view and I could probably still have gotten away with  a bit more; and shaving that much off also takes the proportions down a notch; as this pattern has much roomier proportions than the photo on the site might suggest. It looks much neater and more compact in the pattern image than it is in reality. burda short coat 102

It’s fine, because I love my new coat! But I had to make a few tweaks to get it there, ya know? The original “straight from the pattern” coat swamped me and I am by no means tiny. The fit in the armhole was right so I knew it wasn’t just a case of cutting it too big. Apart from the fit adjustments at the neck and overlap I also shaved a good 4″ off the length.

burda short coat 102

So the snaps  I used in the end are these gunmetal grey ones. Purchased on Ebay at £5.50 for 10. Which is pretty good value I think.  At 25mm in diameter they are a decent size and fit well with the colour and oversized proportions of the coat. Originally I really, really, REALLY wanted to use these larger poppers (below left and at the back in the image above). At 30mm they are roughly the size of a 50p coin and would have looked crazy in a good way. Sadly for the colour of the coat they just looked a little too shiny and contrasty and I couldn’t get that size in the gunmetal or black. But I’m sure I’ll use them at some point!burda short coat 102

Talking of oversized! Another favourite feature of this coat for me are the huuuuuuge pockets! I didn’t face these as the pattern called for. Nor did I turn the edges under. Reasoning that my machine may struggle with the bulk and that this was a felt wool so wouldn’t fray. So I simply top stitched my pocket in place like so…burda short coat 102

I juuuuust about got away with this. Despite the name of this fabric it’s not quite like felt in the fraying stakes. There is a slight tendency for fraying. You can just about see some “whiskers” at the base of my pocket. Call me weird but this doesn’t bother me one jot. It’s not the kind of fraying that is going to affect the integrity of your seams, I trimmed away the worst offenders and I am a fan of slightly “unfinished” finishes. So I’m good. But worth a mention. Also worth a mention is the pocket placement on the pattern. Just ignore it! It’s waaaaay to low! I placed mine according to where my sleeve finished with my arms at my side; so that the pockets take up the slack of the shorter sleeves and keep my wrists warm!

Also a good opportunity, with this picture and the one above, to talk about the surface texture of this fabric. One side is felt like and softly bristled. The other side (which I think is technically the wrong side, lol) is super hairy and kinda like a sparse mohair, and that is the side that I used. Just because! I figure if it’s already fluffy, then any fluff it picks up will just look like it was meant to be there, right? In any case….look at that texture. Love!

burda short coat 102

So also featured above is a close up of the seaming detail at the neck/shoulder which is another nice feature of this pattern. The shoulder and sleeves are split up into sections and seamed together which gives an interesting point of interest to an otherwise plain coat. I topstitched either side of all of those seams to accentuate and bring them out even more.

In terms of pressing this wool. Some steam and a satisfying “thwack” with a chunky wooden object will give you a satisfactorily crisp edge 😉burda short coat 102

As can be seen below. The bulkiest part where the facing meets the hem and the lining….just gave that a ruddy good bashing and the job was a goodun…burda short coat 102

Which of course brings me nicely onto the lining and how beautifully it goes with the mouflon wool!

burda short coat 102

It’s this dotty black and grey viscose lining from The Splendid Stitch. What I love about it, apart from how silky it feels, is the fact that the dots are random and irregularly placed and shaped. Which lends a kind of cheeky rebelliousness to a traditionally  girly fabric….burda short coat 102

If we can all take a moment to admire that sheen….and that well inserted lining….and the fact that I even took the time to purchase and sew on a hanging loop…


Which might lead you to conclude that I consider this coat to be a success and a keeper…burda 102 short coat

burda 102 short coat

Well, you’d be right! And just for the record when it comes to these photos…I did brush my hair before I left the house….it was just really, REALLY windy that day. But that’s ok. Cos mama’s got a brand new coat 😉

Dressmaking, finished garments, Sewing

The Copycat Crepe Top – (Part 1) + Giveaway!!!

02/19/16

copycat crepe top

So last week heralded a couple of firsts for me.  Actually three to be precise! A week of learning new stuff you could say. Which after a week of battling with fit issues was a welcome change.  Sometimes, if something is getting on your wick, you just gotta park it and switch focus to shake off the fog I think. A change is as good as a rest after all. And after a week of what felt like pulling teeth, the week I spent doing this, went so smoothly I started looking around behind me to see where the sewing demon was hiding. Wondering when it was going to jump out and fluff my make right at the eleventh hour. Said demon must be off in the Bahamas somewhere. (Shedquarters is obviously too cold for that fiery little devil at this time of year 😉  )  Because nothing went wrong on this make and there was so much that could have!

So now you’re possibly wondering what my 3 firsts were? Well this top is actually a direct copy of a top I found in a charity shop. I didn’t like the colour and it was 1-2 sizes too big. But I really liked the style.  A crepe tee with a relaxed fit , simple scoop neck, and shirt tail hem.  I hadn’t seen a pattern exactly like this, so I decided to make a pattern of my own, copying the pattern pieces directly from that ready to wear top on the left (below)  I toiled it (middle below) and what do ya know? It worked.  But, still too big. Then people, I was really pushing my luck. I decided I would have a go at grading my new pattern to the correct size. And blow me, that only went and worked too! (below right)THE COPYCAT CREPE TOP

So that’s two firsts. Producing an exact copy of a rtw top AND grading. I was going to include all of that process in today’s post but there turned out to be waaaaay too much for one post. So next week I’ll be sharing 2 additional posts. One on the copying of the pattern. (now available here) One on the grading of it… (now available here)THE COPYCAT CREPE TOP

And what of my third first this week? Set in sleeves! Of course I’ve sewn set in sleeves before; but I hate them with a passion and I’m pretty rubbish and impatient with the traditional method. So this week I tried the method of inserting them flat (turns out pretty much everyone I know already does this) and oh my! I could have cried with happiness! Look at that sleeve head people! Gorgeous right?! Never again will I avoid sewing stuff with set in sleeves just because it’s a faff! (Yes I am that lazy!)sleeve head

There’s still a few tweaks I think I need to make to the final pattern. Namely some discreet darts in the front,  and, surprise surprise, a sway back adjustment! But on a top like this, designed to be a relaxed, chilled out fit I was more than happy to make it up as is, in some delicious Isobel poly viscose crepe from The Splendid Stitch. As well as the black it’s currently also available in the three colours on the right. (I’m hoping Amy will expand her colour range on this one!) The cream best shows the gorgeous texture. It is SO soft. Super easy to work with. Drapes beautifully and best of all, straight out of the machine and onto the hanger with super minimal creasing. That my friends, is my holy grail of a fabric!Splendid Stitch Isobel Poly Viscose Crepe


Giveaway details: Amy from The Splendid Stitch is offering you guys the chance to win either £30 to spend on fabric from her beautiful range (first prize) or a sewing pattern of your choice (second prize). To enter follow The Splendid Stitch on Facebook, Twitter, Instagram or their blog. Each follow is an additional entry. Just leave me a comment here to let me know how many entries you made. Giveaway is open internationally (The Splendid Stitch is Glasgow based but ships worldwide) and closes midnight GMT on Monday 29th Feb. The winner will be selected at random and contacted directly by email. (Leave that in the comments too if it’s not easily accessible via your profile).

What’s more,  until the end of February, Amy is also offering you an extra 15% off your purchase when you enter the code PORTIA15 at checkout! Thankyou very much Amy!

finished garments, Giveaways

FO: The poshest pyjamas ever (+ a double Giveaway!!)

12/02/15

I don’t think I’m alone in feeling the need to “snuggle down” on winter evenings. And to be fair, on a weekend, I’d rather just lounge around in something comfortable than get properly dressed if I’m not going out anywhere; but equally I don’t want to look a total state when answering the door to take in the inevitable swathe of parcels that are arriving here ready for Christmas wrapping!

Enter the comfiest, most luxurious “pyjama” set I think I have ever owned! In fact they’re a little too luxurious to be called pyjamas. Let’s go all Margot Ledbetter and call them “loungewear”, lol!wendy ward pyjamas

The luxurious element comes in part from the style of these trousers but also the use of this delicious modal and silk mix jersey from Fabric Godmother. I’ve used the slate colourway (also comes in teal, plum & burnt orange) here in combination with a small amount of marl jersey in stone. It’s always tricky to relay the feel of a fabric in a blog post. Both of these jerseys are soft and drapey and similar in weight. But the terms were surely invented for the  modal silk jersey. My oh MY! Gah! SOOOO soft. The picture bottom right shows the underside and you should just be able to make out that it has a slight “fluff” to the underside. Yeah….the side that sits on your skin…I’m in love…fabric godmother jersey

In terms of working with it, it’s very stretchy. Hence the amazing drape. But that also means playing with your serger settings. I upped my differential feed half a notch to combat some slight stretching out under the presser foot (the marl is more stable). My Janome hates stretchy knits. Like crazy hates them. So I didn’t go there. (The tee and trouser hems are left raw on my makes).

Beginners Guide to Dressmaking - T Shirt

The Top and trousers are both from Wendy Ward’s “The Beginner’s Guide to Dressmaking” book. It’s a book that focuses on simple styles that are simple to sew which regular readers will know puts Wendy and I firmly in the same camp. (Except she’s a best selling author, teacher and designer and I totally fangirl her, lol!). For me, the top is not a resounding success. For me, a lover of loose boxy styles, it’s a little snug around my hips/tum. (I suffer with bloating that can make me look pregnant; making snugger fit tops unwearable some days). So next time I may add in a little more fullness there. By contrast I’ll probably reduce the width of the neckline. I wear a bra ALL the time and hate my straps showing. So there’ll be a little adjustment there too. All part of trying out a new pattern for the first time. The neckline construction is actually a pretty neat trick and I observed some subtle shaping in the drafting of this pattern which I found interesting. Subtle curves to the shoulder line and hips…that kinda thing. Nice.

Beginners Guide to Dressmaking -tshirt-page-001


Beginners Guide to Dressmaking - Trousers

The TROUSERS though….were a win straight out of the gate!! I LOOOOOOVE these and am never taking them off! If you want a super quick, easy and comfy pair of pyjama bottoms to sew up for Christmas…stop looking….you’ve found em! The waistband is a folded over band of jersey into which the trousers are gathered to the back, with deep pleats at the front. I cannot overstate how comfy these are. All over but especially the tummy. I would have loved these when I was pregnant, but they’re also perfect for days like yesterday when my tummy was particularly tender.  They’d make the perfect handmade gift too. The only alterations I made were to the waistband and hems. The fabric is super stretchy. So I had to cut the waistband much smaller than the pattern to account for this. The drape and stretch of the fabric also equated to additional length at the hems! I’ve left them long in these pics so you can see that…and how the fabric drapes and pools like liquid….sigh…

Beginners Guide to Dressmaking -trousers-

So….what do you think? Poshest pyjamas ever?


Wendy & Josie have joined forces to offer you a fantastic double giveaway in time for Christmas!!! One lucky winner will receive a signed copy of Wendy’s book. She’ll dedicate it in whatever way you like. So keep it for yourself or gift it to someone else for Christmas. PLUS Josie is offering 2.5m of the Venice Modal & Silk Jersey . Enough to make the trousers! This is a “follow to enter” set up so there are a multitude of ways to enter and each one gives you an additional entry into the draw so an additional chance of winning. You can enter by following:

  • Wendy on Facebook, Instagram, Twitter or Blog
  • Fabric Godmother on Facebook, Instagram, Twitter or Blog
  • Me on Facebook, Instagram, Twitter or Bloglovin


So that’s 12 ways to enter! And a possible 12 entries into the draw. Remember to leave a comment here letting me know which of these you have done so I can tally up how many entries to put in for you! (If you already follow any of these, let me know too as that counts 😉 Giveaway is open until Sunday 13th December Midnight GMT.

Don’t forget…Fabric Godmother has 10% off for my readers when you use the code PORTIAXMAS at checkout until Christmas eve. I’m told there’s a limited amount of the slate left 😉

GIVEAWAY NOW CLOSED

DIY, finished garments, grainline, hemlock tee, how to, Sewing, Tips and Tricks, Tutorials, Uncategorized

FO: Double Hemmed Hemlock Tee Hack

07/30/15

Time for some deets on another hemlock tee hack! Man I just can’t leave that pattern alone can I?!! I’d say I’m getting my money’s worth out of this pattern except I can’t say that because it’s free to download here! I bought another pattern from Jen’s collection so my feelings of guilt over getting so much for nothing, feel assuaged for now! You’ll have seen this top in my post about these refashioned trousers. But here’s the lowdown on what I did…DOUBLE HEMMED HEMLOCK TEE HACK

The neckline, cuffs and hemline are all finished using the deconstructed finish I described in this post. But I played with the overall silhouette and proportions of the design as well…

DOUBLE HEMMED HEMLOCK TEE HACK

The hem features a wide double hem band with the edges left raw to curl. The idea came about when I realised this jersey lacked weight and was a little too see through in the muffin top area if you know  what I mean! So a double thickness of fabric added weight and solved the see through part as well.

DOUBLE HEMMED HEMLOCK TEE HACK

In terms of proportions I’m weirdly being drawn to a more cropped and fitted silhouette up top. So the hem and the sleeves got chopped on this incarnation…


DOUBLE HEMMED HEMLOCK TEE HACK

To create the hem band I made the hemlock up as normal, then cut straight across the hem at hip level (yes that is masking tape as a cutting guide)…

DOUBLE HEMMED HEMLOCK TEE HACK

I used the piece I cut off to create the hem band by folding it in half WS together…

DOUBLE HEMMED HEMLOCK TEE HACK

Then serged it around the hem of the shirt. RS together and folded edge of the band aligned with the raw edge of the hem…

DOUBLE HEMMED HEMLOCK TEE HACK

This results in a double layer of fabric with raw edges that will curl with wear and laundering. An effect I personally love. But you could always reverse the process and end up with a clean, folded edge at the bottom if the deconstructed/raw edge look isn’t your bag…

DOUBLE HEMMED HEMLOCK TEE HACK

Sleeve wise, I wanted to echo the cropped proportions of the body so cut them to elbow length…

DOUBLE HEMMED HEMLOCK TEE HACK

I cut strips from my fabric remnants using, you guessed it, masking tape as my guide. (See this post on why masking tape is so useful in the sewing room!)

DOUBLE HEMMED HEMLOCK TEE HACK

(I find a bit of spray starch along the edges of jersey keeps it from curling so much during the cutting/construction process. 😉 )


DOUBLE HEMMED HEMLOCK TEE HACK

Then used those strips to finish the neckline and cuffs with the same raw edge finish. Full  step by step on that can be found here . This is a less trimmed down version of the neckline in that post…

DOUBLE HEMMED HEMLOCK TEE HACK

There are 2 more hemlocks that I haven’t blogged, and I think I now have 6 in total ha! The Hemlock by Grainline Studio  and the Maya by Marilla Walker are fast becoming….scratch that…they ARE my two TNT top patterns. Not because they have show stopping qualities. But because they are well drafted simple wardrobe basics that are ripe for little customisations like this. And Amen to more patterns like that!

finished garments, marilla walker, Sewing, Uncategorized

FO: Split Hem Maya Woven Tee

07/29/15

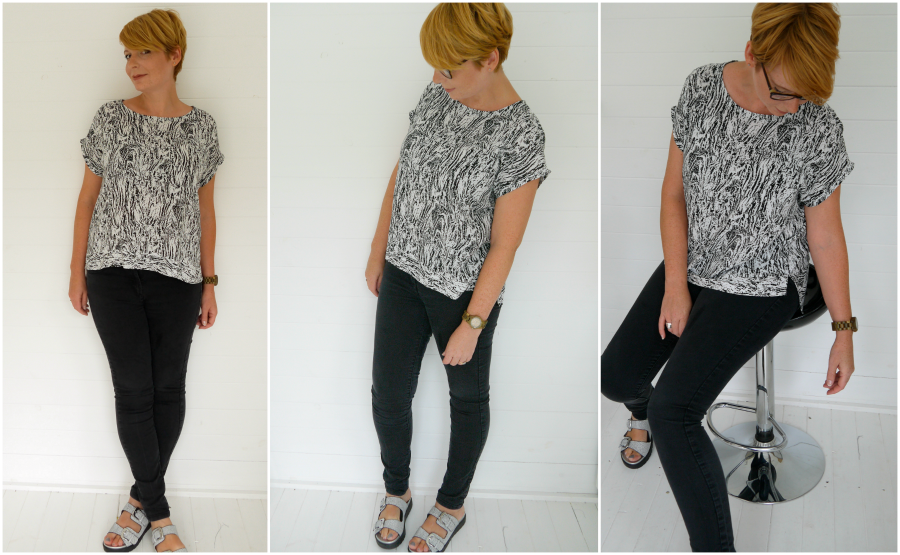
Finally got around to photographing this baby! I DO have a tutorial lined up for this little hack on the Maya Pattern by Marilla Walker but am running out of time before the launch of The Refashioners 2015 on Monday! So for now…here’s a little show and tell… (Do you like my new stool  btw? One of those with the up down lever! You have to play on those don’t you!)SPLIT  HEM MAYA (2)

I was in the process of bulk cutting 3 of these out in time for a holiday to Greece last month. In my haste I ended up cutting them slightly too short! (Time to fess up. I eyeballed them. No…I will never learn!) BUT, as is often the case, it turned out to be a happy accident because it forced me to come up with a solution…

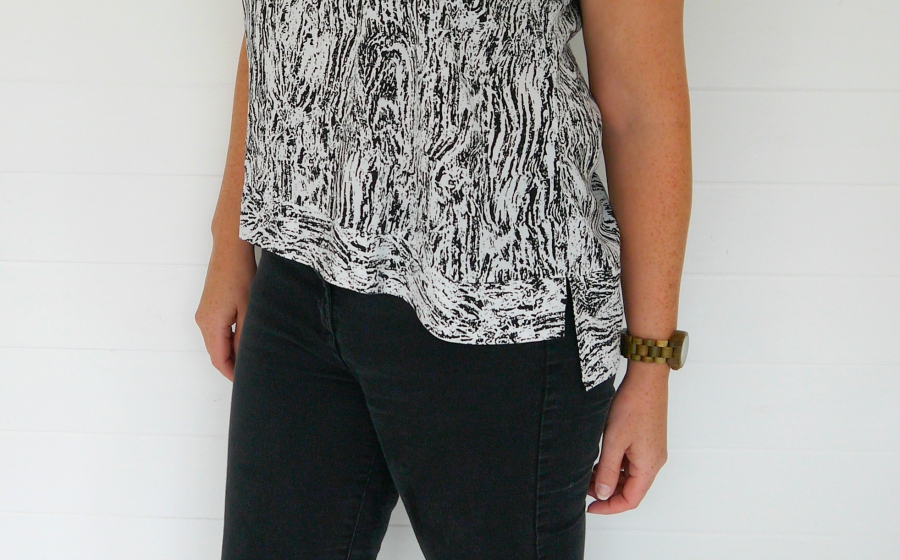
And guess what! I love this little split hem band detail! Not only does it solve the length problem, but it adds a really nice design detail too…SPLIT  HEM MAYA (8) 900


It’s a tricky fabric to show detail on, but hopefully you can make this out! (And as I said, there will be a step by step that will go into more detail. I’ve just got to edit the photos). I opted to add a wider band at the back than the front. For modesty reasons (ahem…nobody needs to see my muffins ya know?) but also because I’m a bit of a fan of high low hem shenanigans 🙂

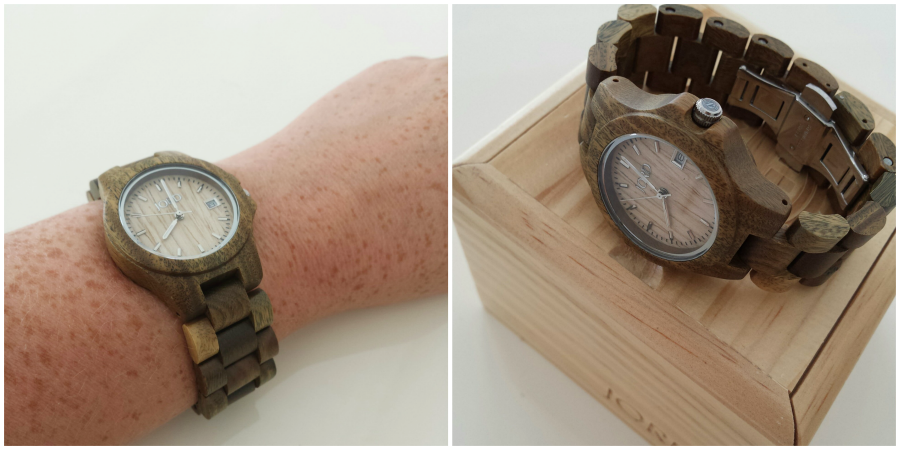
JORD WOOD WATCH

In case you were wondering about my swanky new wristwear….it’s a watch…made from wood!! Now this was sent to me by the sweet people at Jord. I get approached to review stuff like this from time to time. I normally decline, but I was so intrigued by this. I mean…it’s a watch…made from wood! I usually have a problem with watches as my skin reacts to the metal unless it’s a precious metal. So perhaps this is the solution? There’s still the metal on the clasp I guess, but fingers crossed! I hope so because I am rather taken with it actually. The wood makes it super lightweight, tactile, breathable and pretty unique. Cute right?

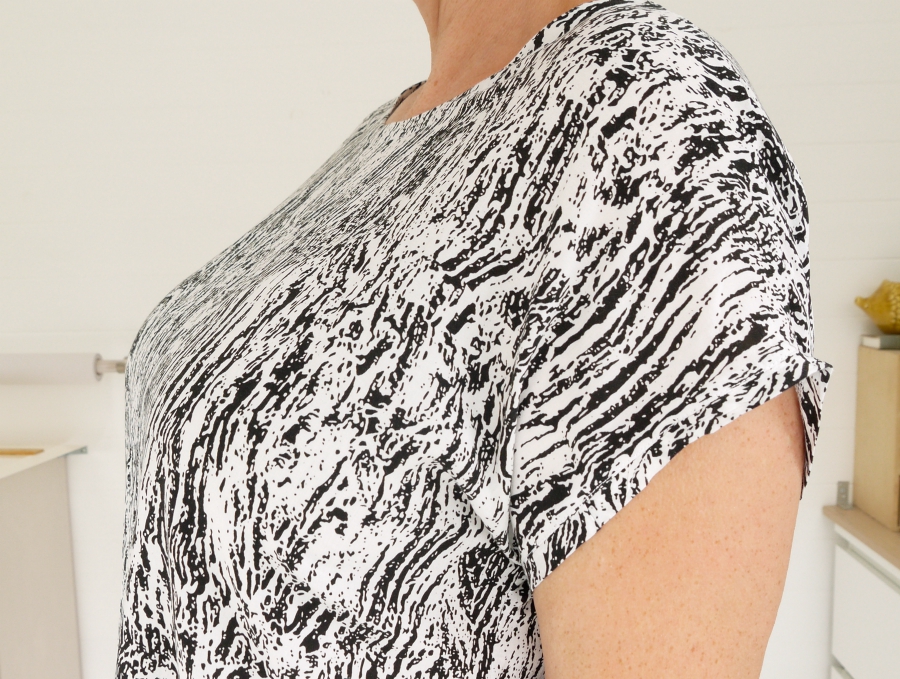
Anyway…back to the top. Something about sewing blogging makes it ok to publish pictures of ones bust, ha ha! But it’s the sleeve detail I wanted to mention and also have a little question about…SPLIT  HEM MAYA (15)

It’s a simple enough thing. A folded over strip of fabric, the same circumference as the sleeve opening. Sewn to the sleeve RS facing then SA turned under and understitched to create a teeny/narrow cuff. No shaping on the sleeve. So here’s the question…WHY does the cuff kink out like that at the top of my arm?? What am I missing here sewing ninjas??

It’s a small thing…but it’s buggin’ me! And I know that one of you out there has the answer. Because you’re awesome.

DIY, Dressmaking, fabric, finished garments, free pattern download, Freebies, grainline, hemlock tee, how to, knits, minerva, overlocker, serger, Sewing, sewing patterns, Tips and Tricks, tops, Tutorials, Uncategorized

Hemlock Tee: How to Sew a Deconstructed Jersey Neckline Finish

07/24/15

Not really a secret that I love the Hemlock Tee pattern from Grainline Studio. If you follow me on Instagram you’ll have seen a few of these pop up recently that haven’t yet been blogged. One you will have seen in my previous post. This one is just a simple grey jersey…DECONSTRUCTED JERSEY NECKLINE FINISH

This would not be particularly noteworthy apart from the fact I wanted to let you know this jersey from Minerva Crafts is frikkin gorgeous! So soft. So drapey. Not too flimsy. Need more in my life!

I also wanted to share my favourite jersey neckline finish of the moment! I’m not a massive fan of conventional ribbed neck bands . I like my tees to look a little more deconstructed and I really like the raw edge of jersey fabric. The way it curls  when you stretch it! But obviously  a neckline still needs some stability. So recently I’ve been opting for this neckline finish…DECONSTRUCTED JERSEY NECKLINE FINISH

It’s applied in exactly the same way as the pattern describes, with one exception. Instead of the folded edge of the neck band edging your neckline…you flip the band the other way round before applying it,  and have the raw edge exposed instead!

Here’s a quick step by step. If you’ve never applied a jersey neckband before you may also find this useful as it covers the whole process…at least this is how I do it!DECONSTRUCTED JERSEY NECKLINE FINISH

Take your neckband pattern piece and press it with some spray starch (helps stop the edges curling too much as you work); sew together the ends to form a loop then fold in half.

DECONSTRUCTED JERSEY NECKLINE FINISH

Taking the join as your centre back marker, mark your centre front point using a pin. Do this by folding the band in half with the join smack band in the middle. Mark the CF point with a pin on the opposite side.

DECONSTRUCTED JERSEY NECKLINE FINISH

Mark the sides with of the neckband with a pin too..

Have your tee right side out…DECONSTRUCTED JERSEY NECKLINE FINISH

Pin the CF of your neckband to the CF of your neckline. I’m going for that raw edge finish on mine remember. So I’m lining up the folded edge of my neckband with the raw edge of my neckline. If you want the clean/folded edge finish to your neckline, then line up the raw edges of your neck band with the raw edge of your neckline. Savvy?

DECONSTRUCTED JERSEY NECKLINE FINISH

Pin the sides of your neck band to your shoulder seams and the CB of your neck band to the  CB of your neckline. So your neckband is now pinned at both shoulders seams, the BB, and the CF of the right side of your neckline.

DECONSTRUCTED JERSEY NECKLINE FINISH

Serge to join. I work in 1/4 sections at a time. ie from pin to pin. Hold the layers of fabric under just enough tension for the neckband to match the length of the neckline. It will be drafted ever so slightly smaller than the neckline circumference which enables it to naturally want to turn to the inside .  So pull on it juuuust enough as it runs through the serger, but be careful not to stretch it out.

DECONSTRUCTED JERSEY NECKLINE FINISH

Press! Seam allowance/serged edge downwards…

DECONSTRUCTED JERSEY NECKLINE FINISH

Top/Edge stitch around the neckline to secure the seam allowance. So you now have a finished neckline with a raw edge detail (or if you attached the band the other way, a finished neckline with a clean folded edge!). If you want it a bit narrower you can start with a narrower band in the first place OR trim it down at this stage….

DECONSTRUCTED JERSEY NECKLINE FINISH

Make a notch/snip to the depth you want…

DECONSTRUCTED JERSEY NECKLINE FINISH

And trim!

DECONSTRUCTED JERSEY NECKLINE FINISH

I went even narrower on this one and part of me wishes I’d  restrained myself a little, lol! After laundering, the edges will soften, and depending on how long you’ve left them, (ahem) curl a little too.

You might ask what the point is in lining up the folded edge of the band with the raw edge of the neckline in the first place. You could just attach the band as normal, trim, and you still end up with a raw edge. I just prefer to do it this way because I find it easier to line up a folded edge with one raw edge, than it is to align 3 raw edges; and I find the inside finish cleaner this way too. Either way would work and it’s one of those cases of personal preference.

I’ve done a variation with a twist  of this on the hemlock in my previous post. The one I’ve yet to blog about! Then there’s one more that I’ve made; (and two more that I’m about to make). Plus my first stab at Suzy Pants and 3 completed Maya variations that are also unblogged!

I literally have too many blog posts to squeeze in before the launch of The Refashioners 2015.

Oh yeah, and I ought to refashion a shirt too, gasp!!

Older Posts
Portia
Follow
Sewbox

© Copyright 2026. Portia Lawrie. All Rights Reserved. Managed by WordPress Web Dev Cornwall .