• About
    • Contact
    • Press
    • Sponsor
  • DIY
    • Home & Garden
    • Jewellery & Accessories
    • Yarn Crafts
  • Sewing
    • patternless & self drafted
    • Refashions
    • Commercial Patterns
    • Sewing Tips
    • Overlockers
  • The Refashioners

Portia Lawrie

DIY, how to, jewelry, Tutorials, Uncategorized

DIY: Multi Way Silk Cord Necklace

04/18/16

silk cord necklace header

I’ve been working on lightening up my colour palette for Spring/Summer.  Winter has seen me migrating to black ALOT and I’m trying to bust out of that a little and have plans on introducing some indigo blue to boost my usual palette of greys and neutrals. (Hey, small steps for a colour phobe, lol!) So when Endless Leather asked me if I’d like to have a play with their silk cord, and then I saw the colour range I decided it was a perfect opportunity to create some simple and tactile jewellery to complement my wardrobe plans.

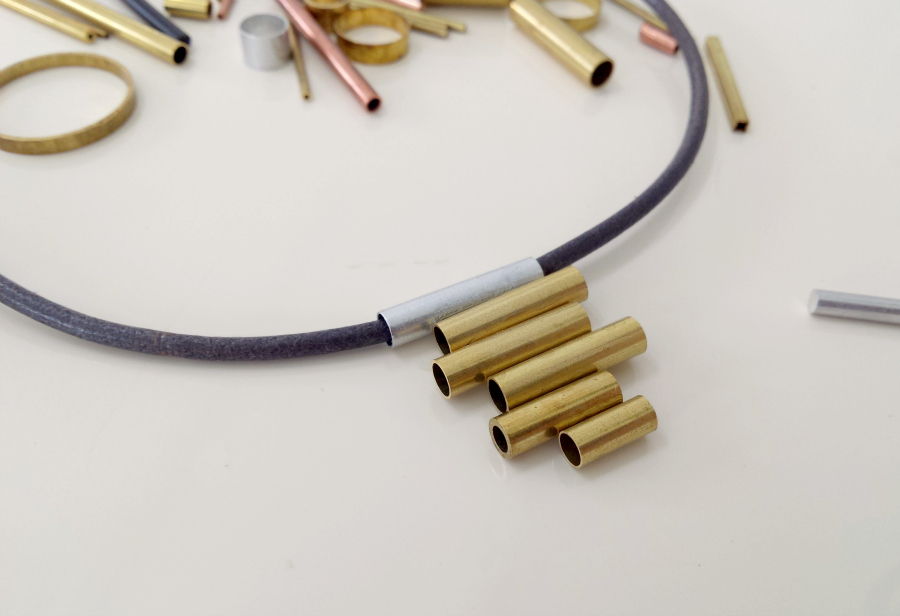
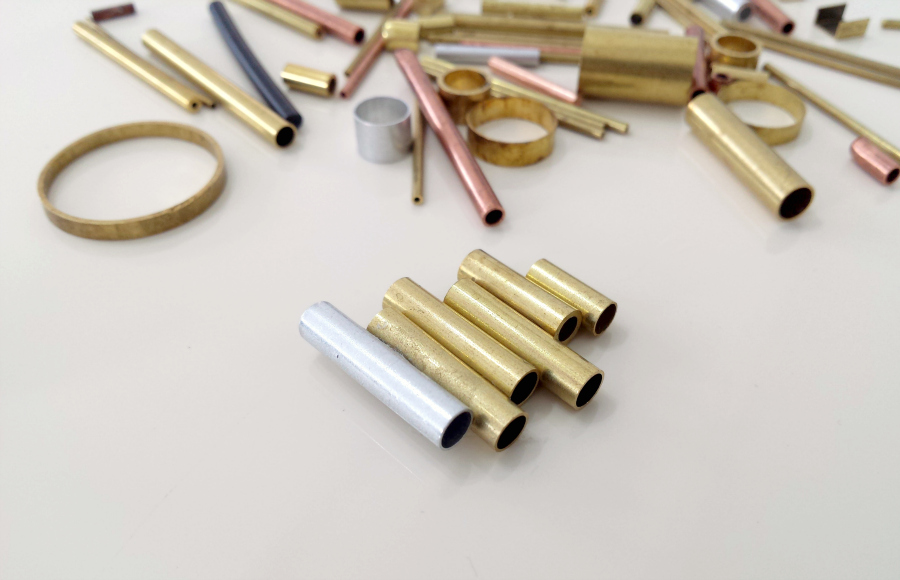
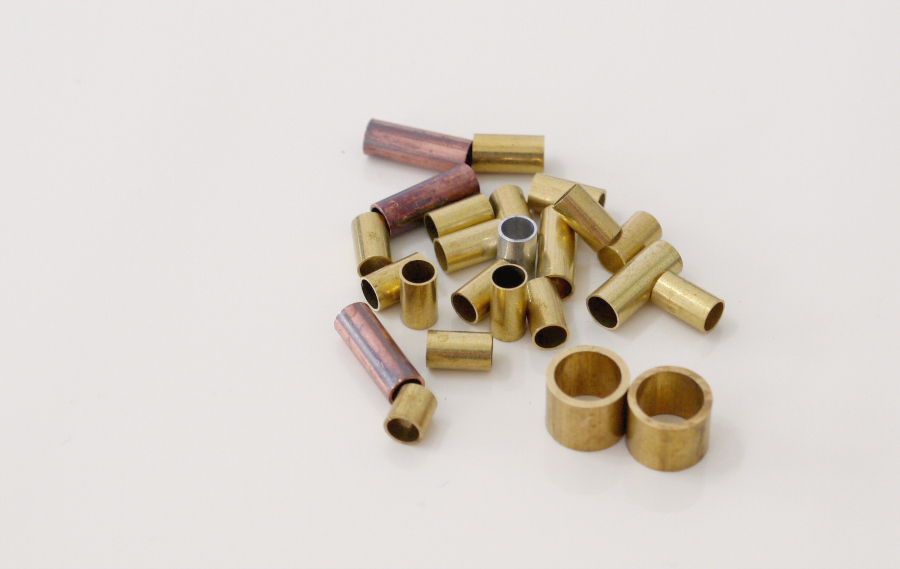
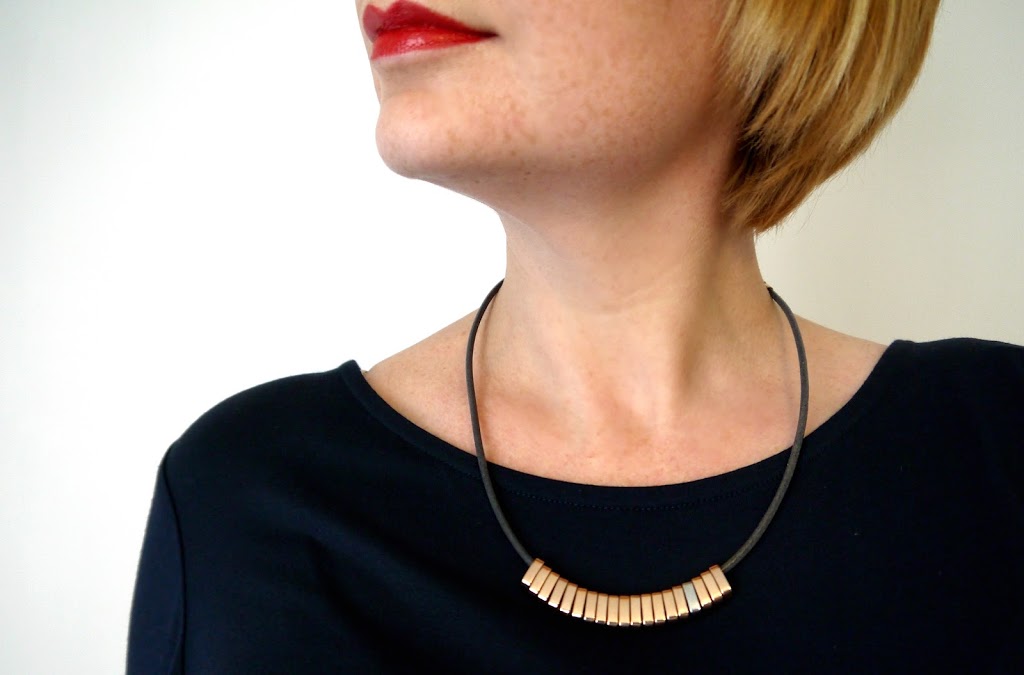
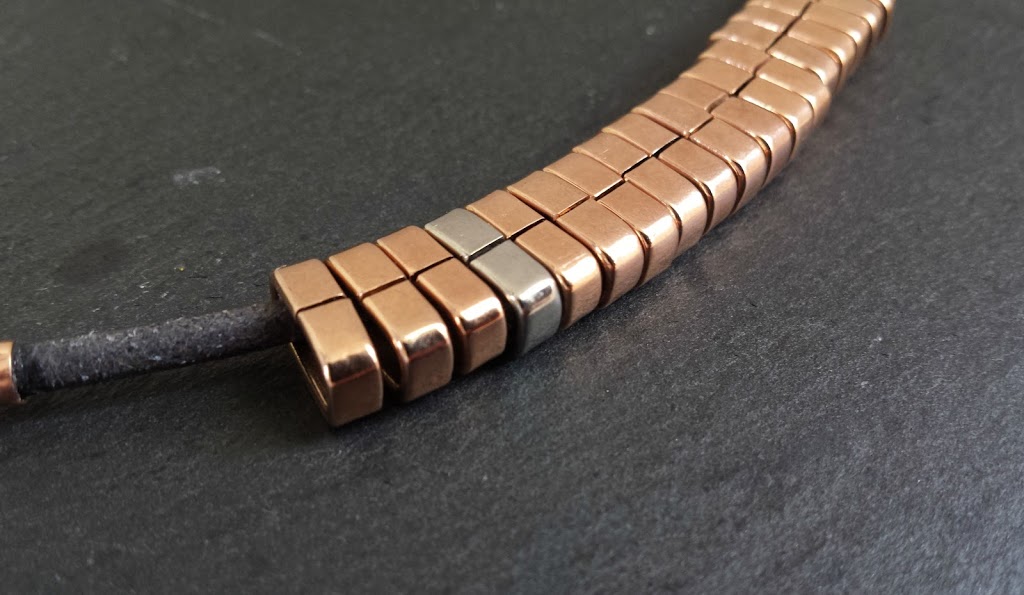
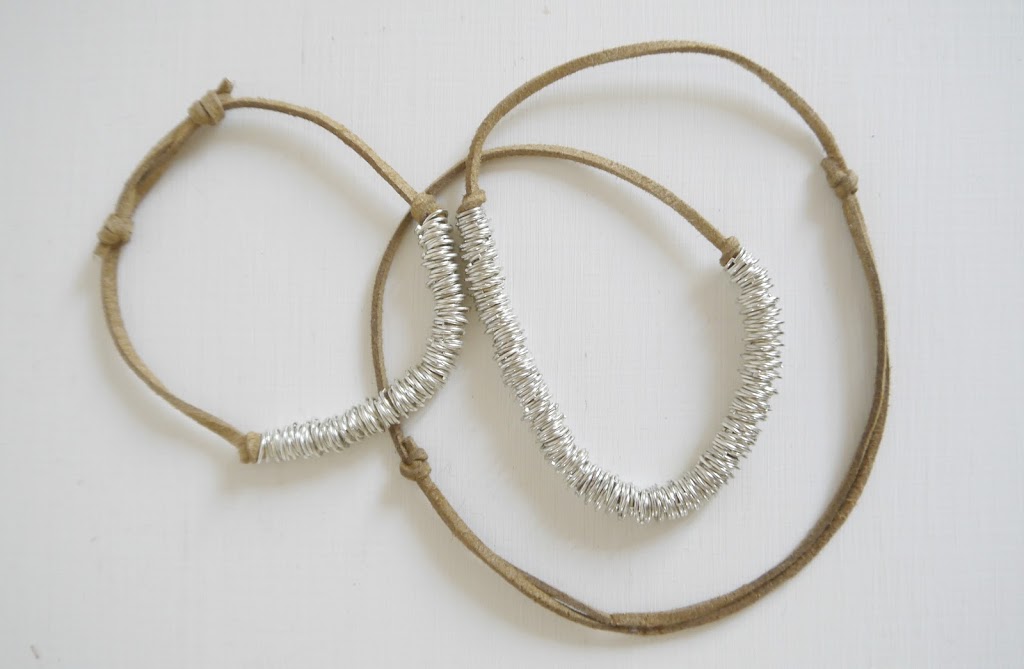
I wanted to create a versatile and simple piece of jewellery where I could play with different colour combinations depending on my outfit. Subtly contrasting the texture and colour of  various silk cords with metallic elements in the form of these slimline magnetic tube clasps…diy multi way silk cord necklace

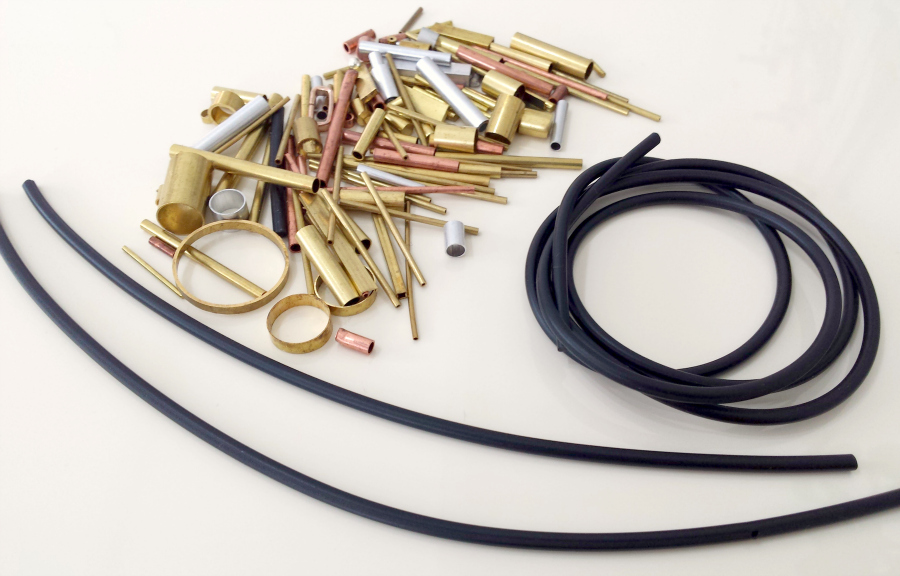
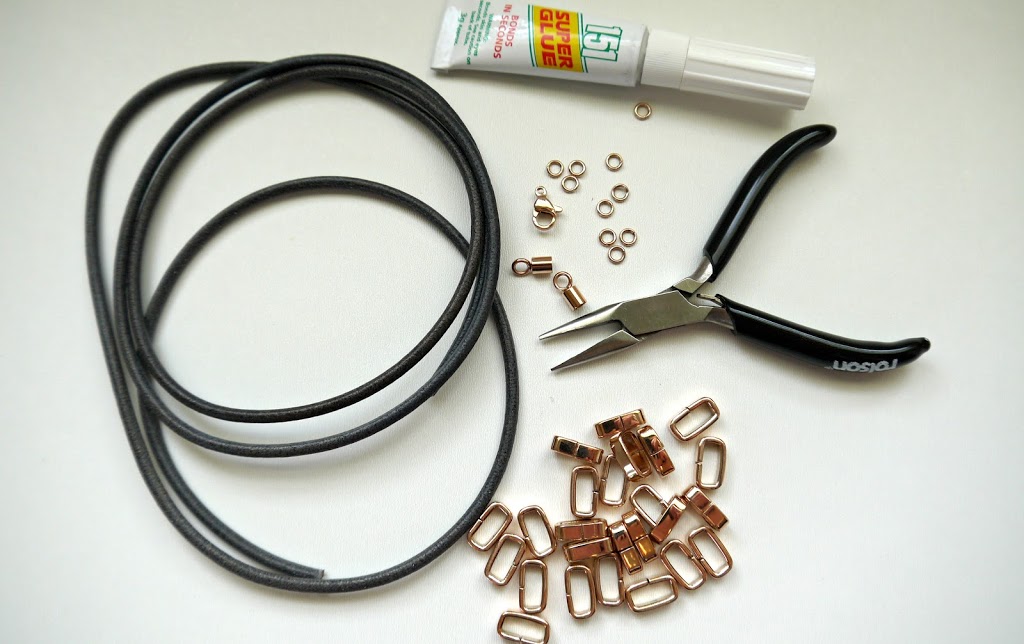
I opted for the 3mm twisted silk cord in 4 colours….night blue, truffle, beige and grey taupe; with magnetic clasps to fit. There are brighter colours available if you’re not a neutrals gal like me, lol!

So, onto the how to part…diy multi way silk cord necklace

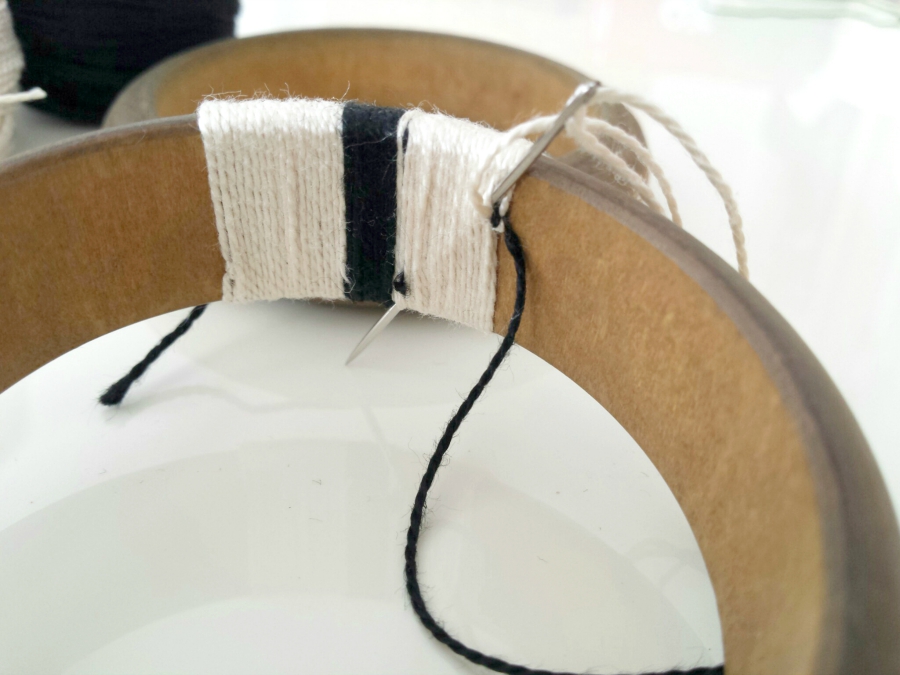
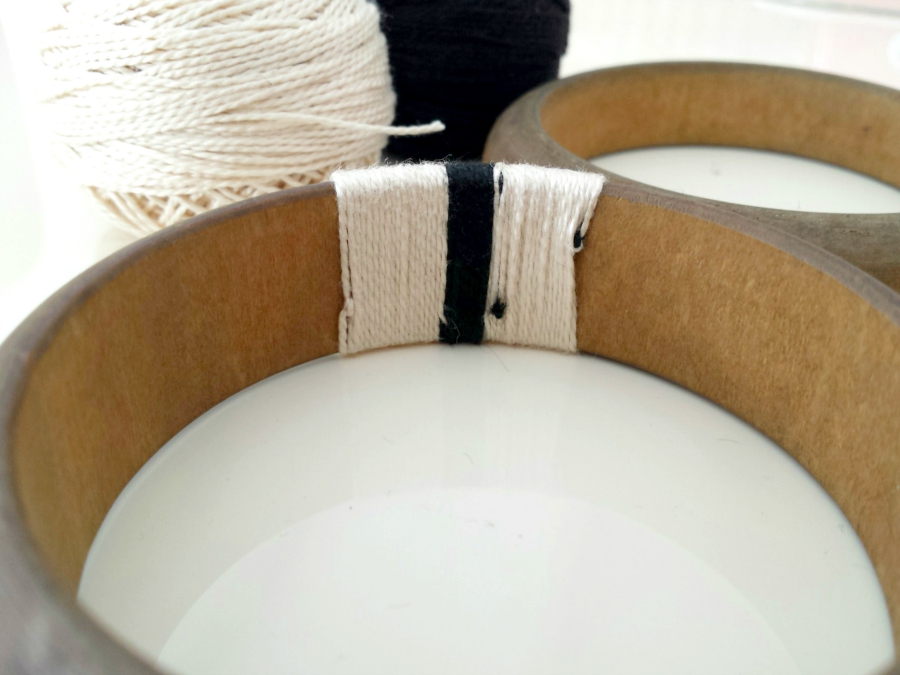
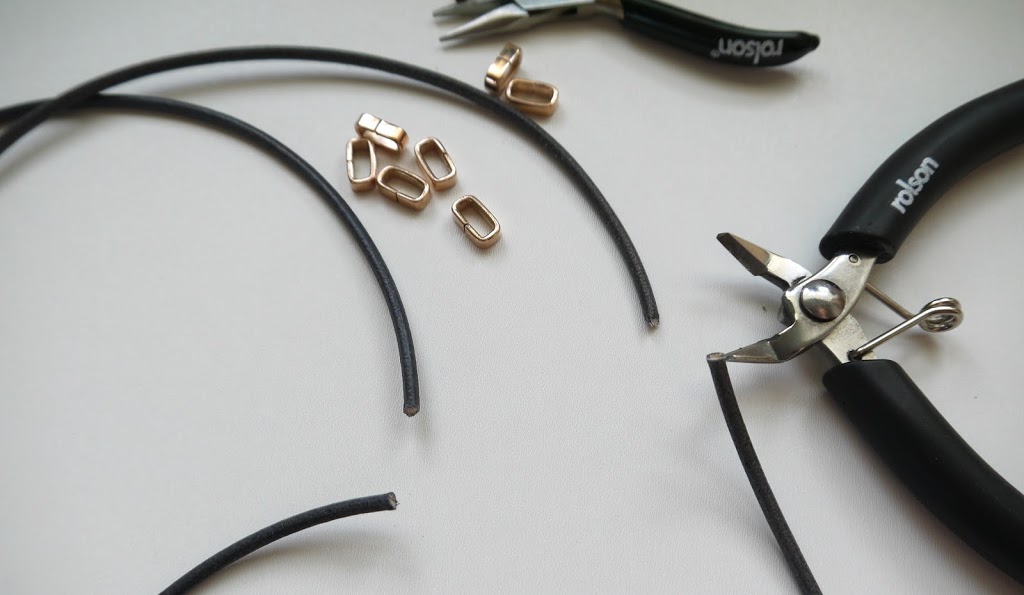
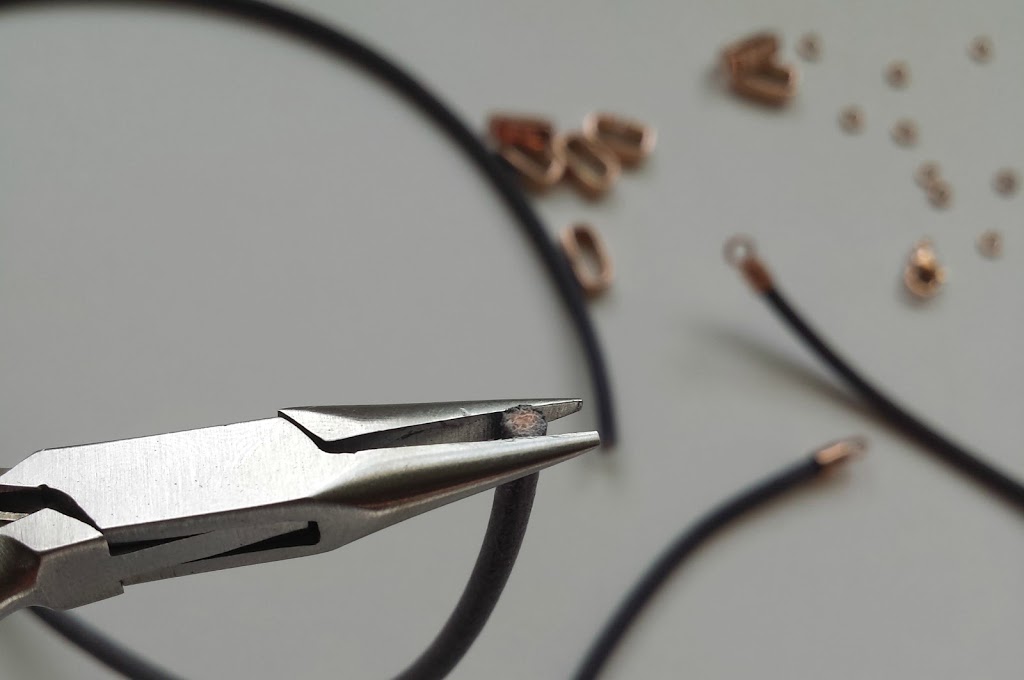
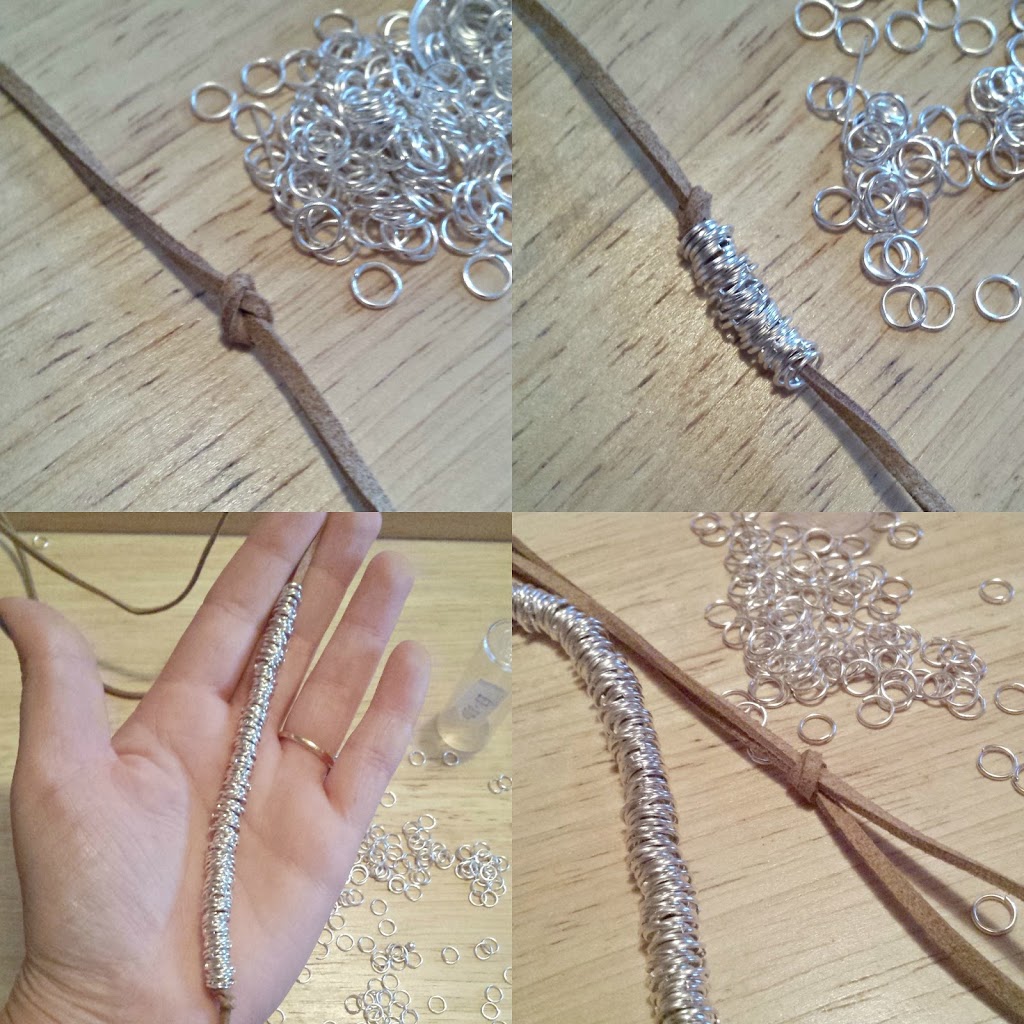
The first thing I should mention is what happens to the cord the moment you cut it! (it arrives with the ends taped, and you can see why!)

diy multi way silk cord necklace

To combat this I just used a bit of magic tape at the point where I wanted to cut, then cut through the tape and the cord in one go. As I was wrapping the tape I was tightening up the twist in the cord too. It’s a 3mm cord that needs to fit in a 3mm hole. So not alot of wiggle room. Tightening up the twist as you tape eeeeeeever so slightly reduces the overall diameter of the rope giving you a bit of wiggle room to get it into the clasp in the next step…

diy multi way silk cord necklace

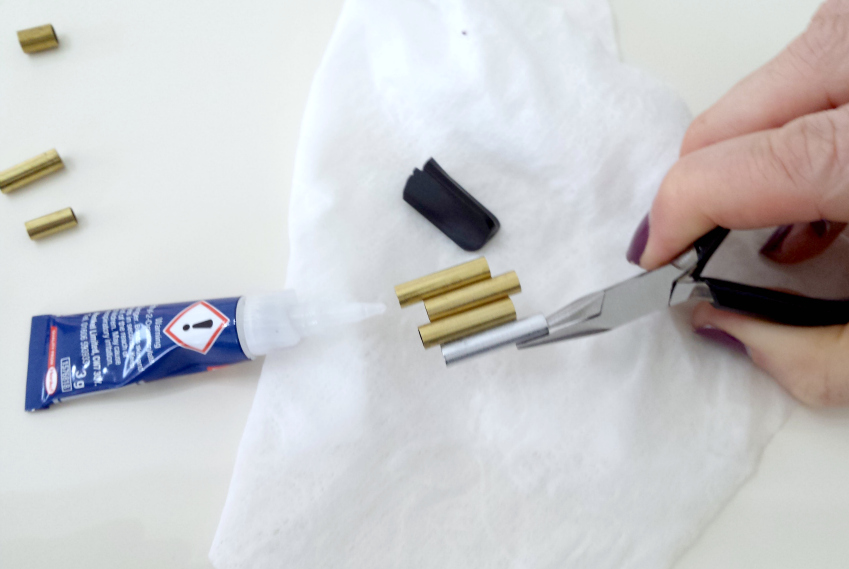
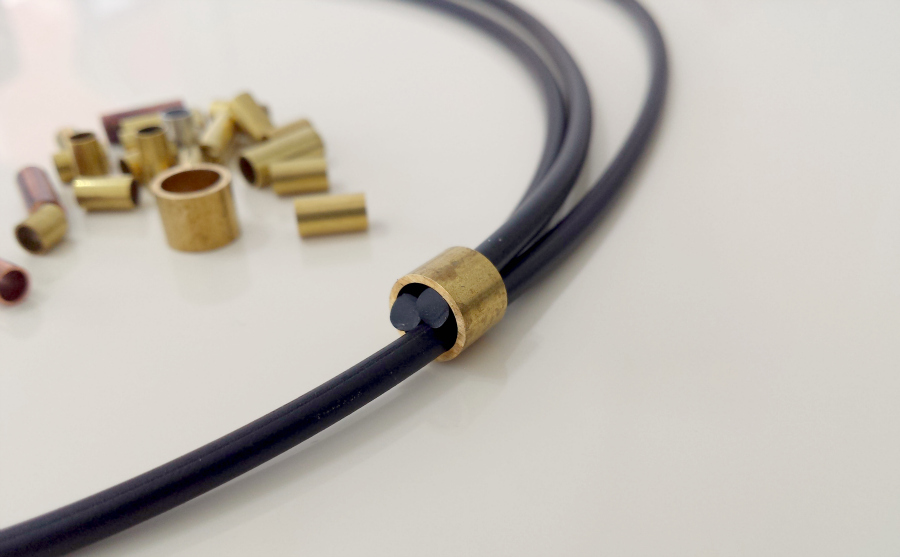
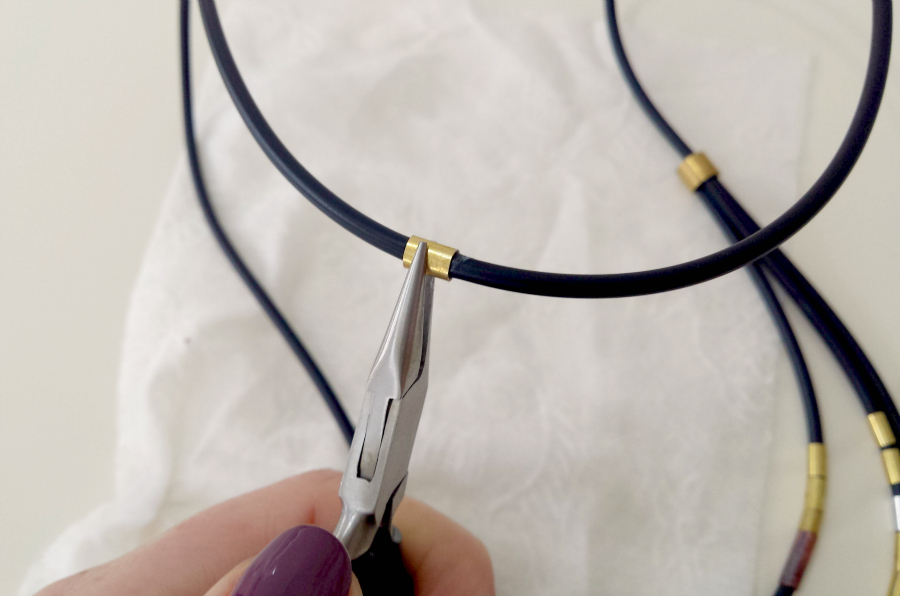
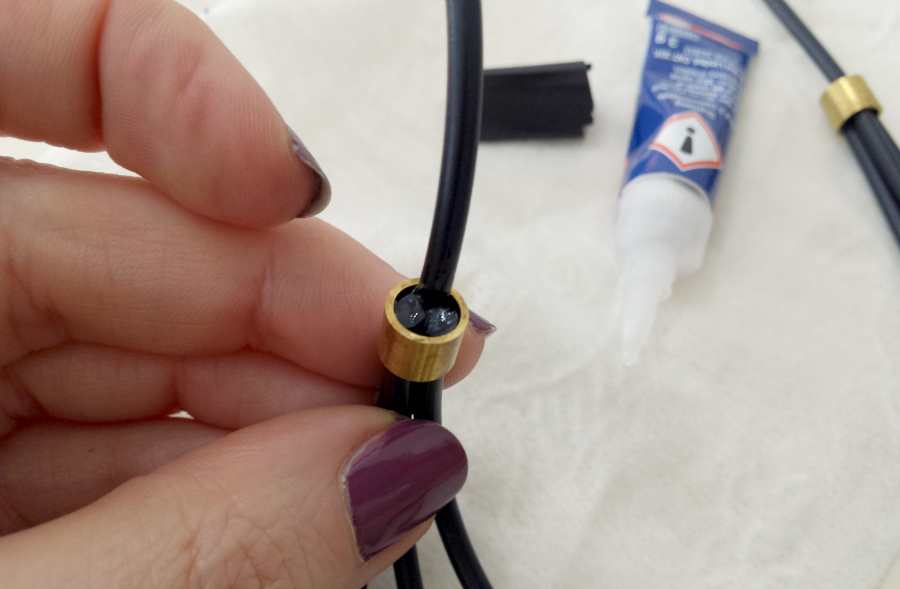
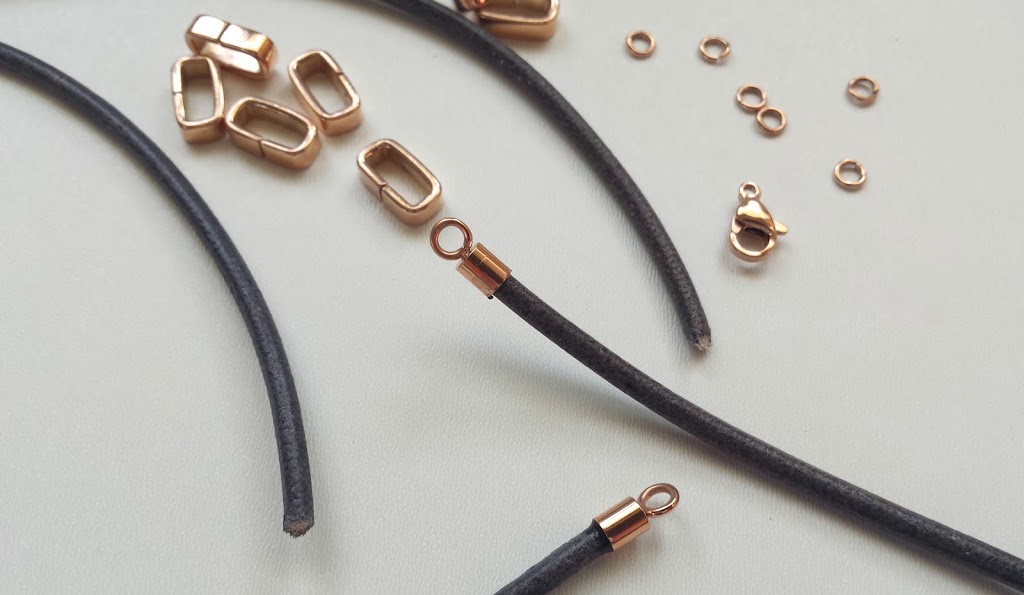
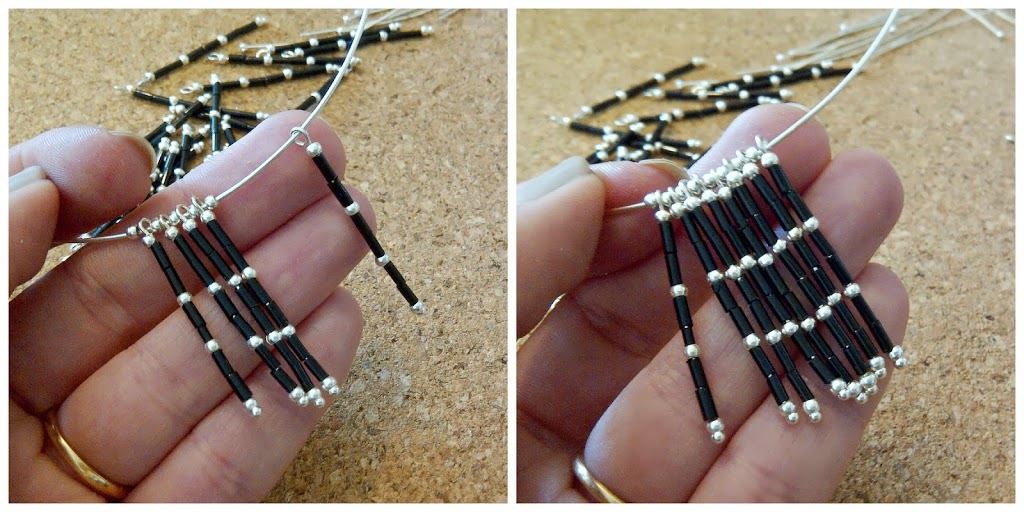
I know it probably sounds really simple to stick the cord in the tube clasp, but there is a little more technique involved. Obvs a very careful drop or two of glue into the hole in the magnetic clasp, where the cord is going to go. Pop the taped end of the cord into the hole. It’s a really snug fit so won’t go all the way in without some encouragement! Twist the tube clasp in the direction of the twist of the cord. (If you twist the other way you’ll be loosening the twist in the cord, which we don’t want).  As you do so, the tape will want to come off.  (There’s really not enough room in the hole for the tape as well!) Carefully peel the tape away (that’s why I used magic tape. It’s low tack and will come away relatively easily). Then continue twisting  the clasp until it has gone as far onto the cord as it will go…

diy multi way silk cord necklace

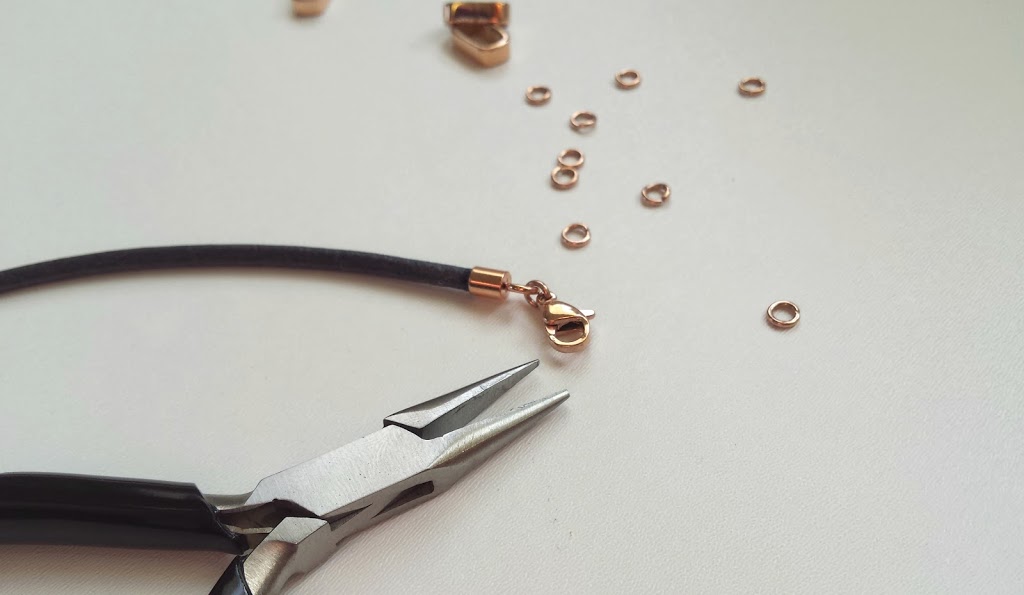
Repeat for the other end and it’s as simple as that….

diy multi way silk cord necklace

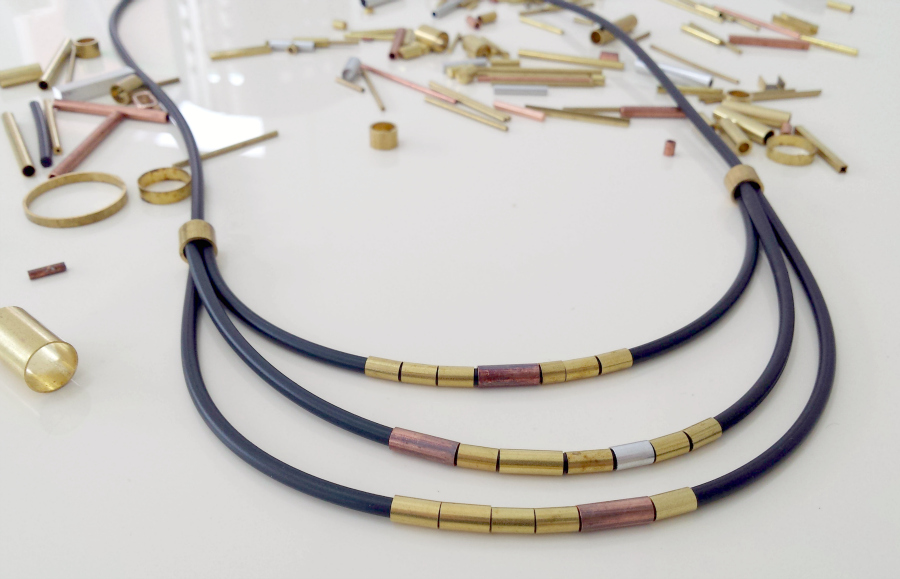
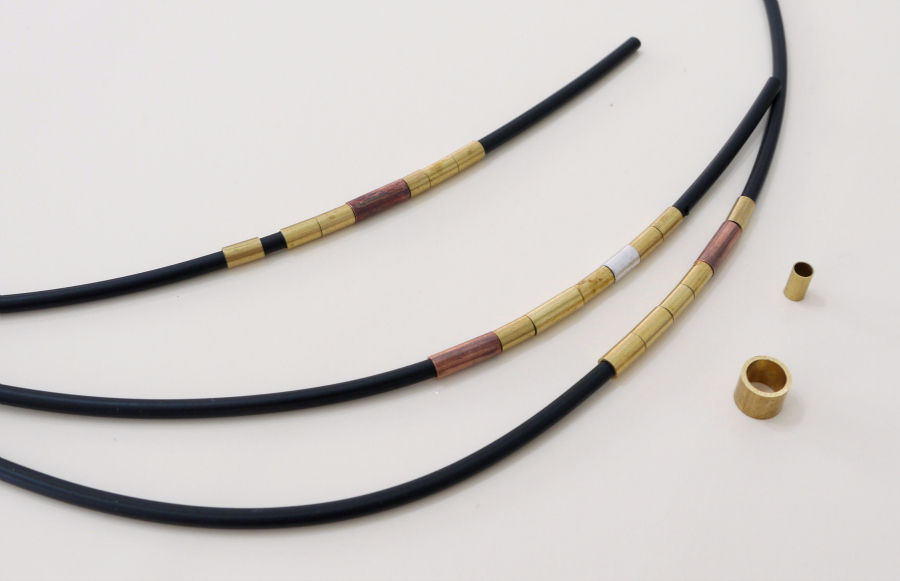
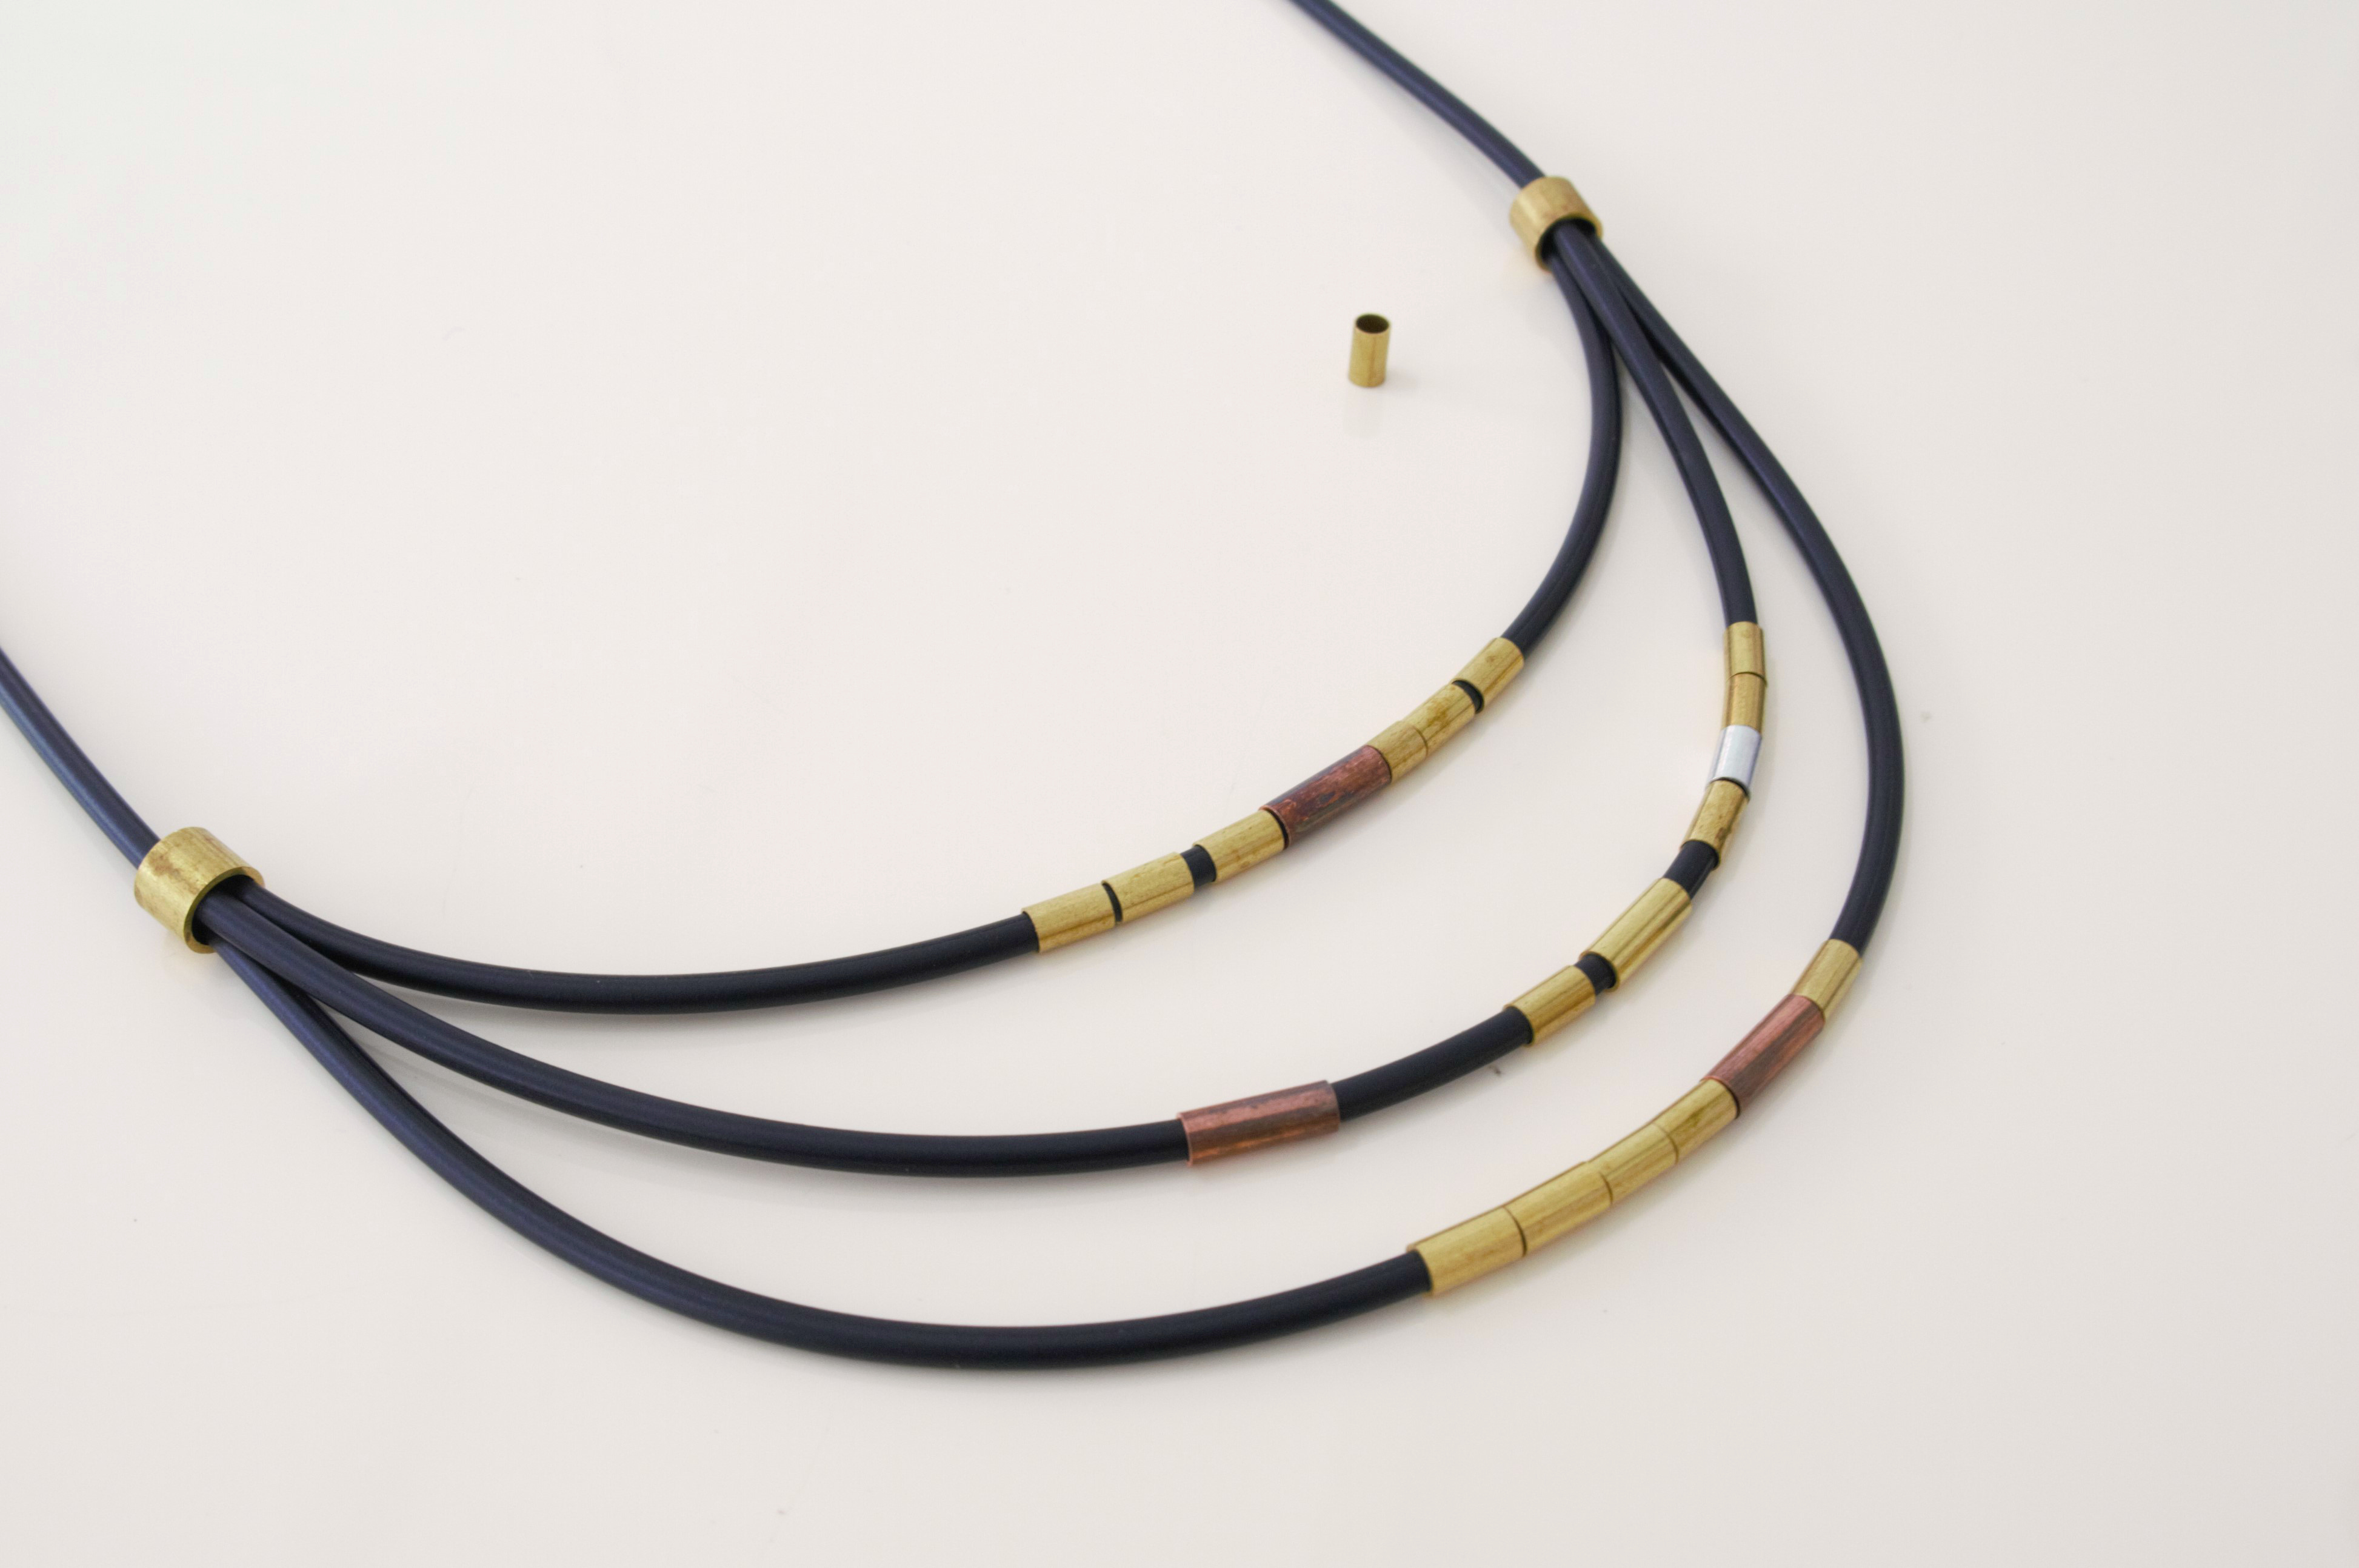
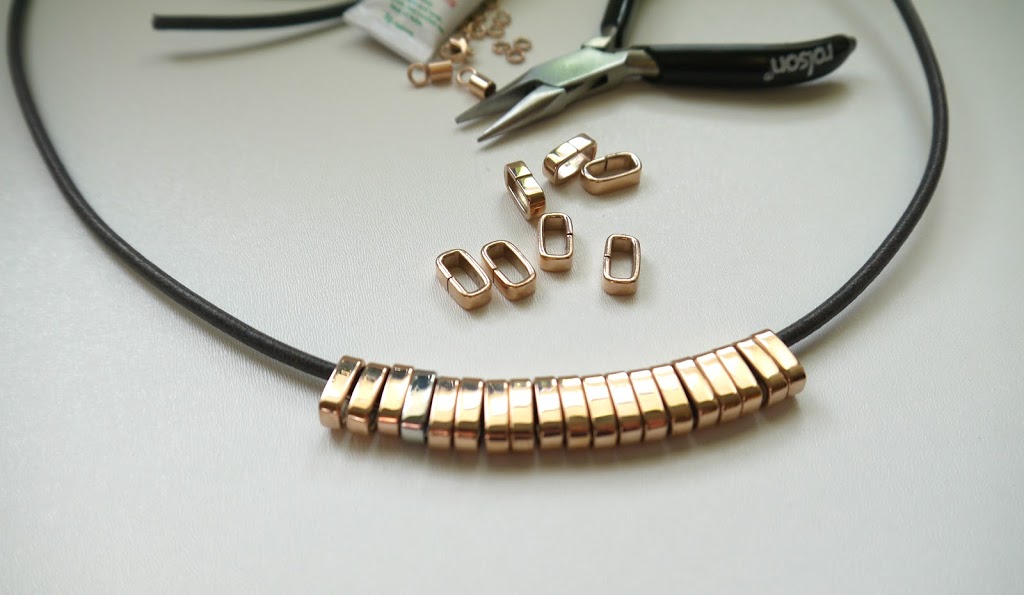
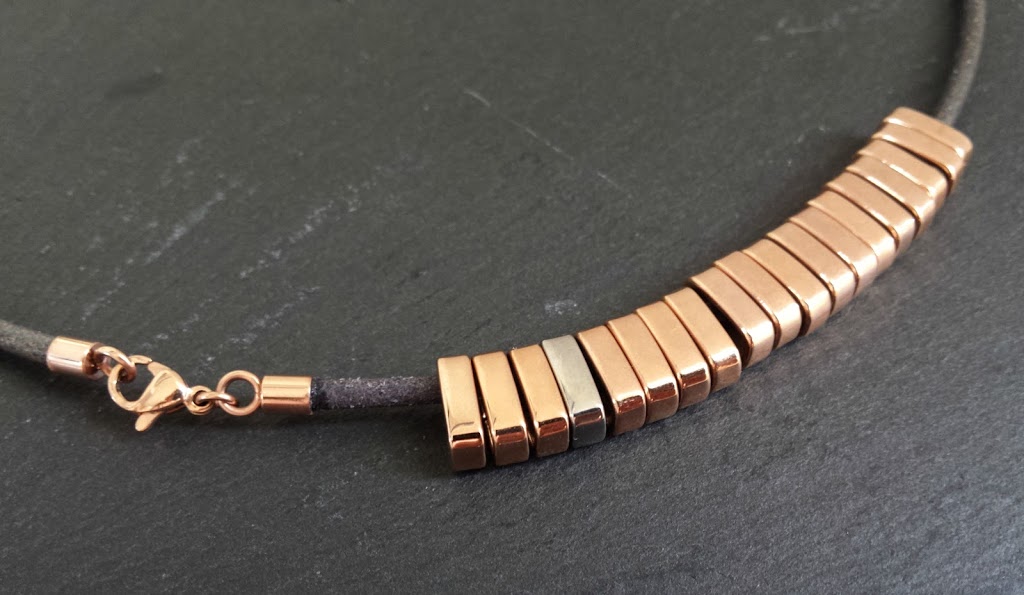
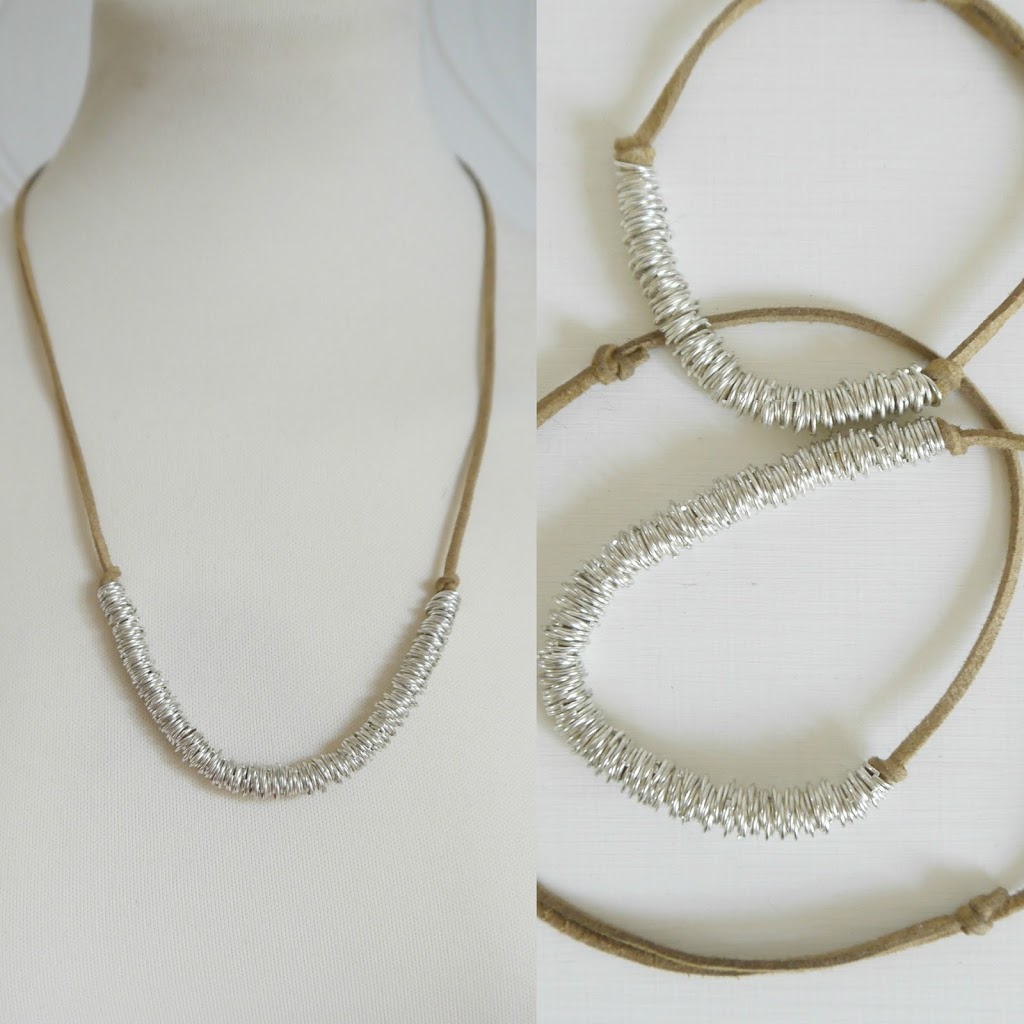
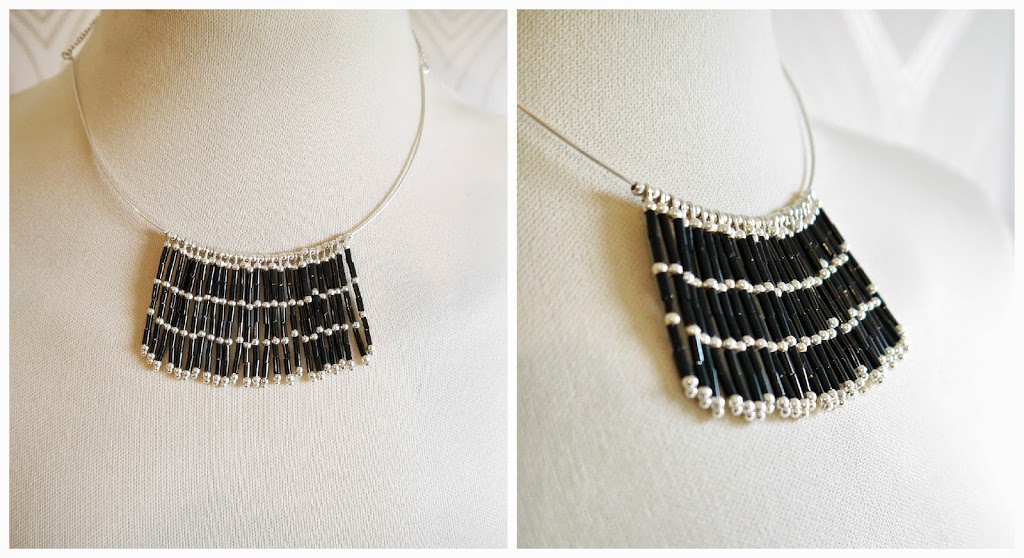
I cut 3 of my cords between 16″ & 17″ and the blue one at bracelet length. You could do them all as bracelets too of course. Or have many more lengths and variety of lengths than I have here. But the simple idea of this is that the clasps act both as decorative and functional elements. Allowing you to combine 2 or more of the cords in an almost infinite number of ways to style your piece however suits your current mood, outfit, or colour palette. Simply by joining the magnetic clasps together in different combinations…diy multi way silk cord necklace

You can knot, twist, tie and get creative with how you want it to look…

diy multi way silk cord necklace

Keep it sleek and simple or pile it up for more impact…

diy multi way silk cord necklace

Perhaps add in some rubber or leather cord in the same thickness to mix up the texture as well as the colour.

The pure silk cord for this project was generously supplied free to me by Endless Leather. They supply all manner of leather and silk cords and jewellery findings, (as well as straps, leashes, belt leather etc) are based in Germany and ship internationally. They have kindly supplied me with materials in the past and I can say without bias, the quality really is fantastic. As well as the service and shipping.

The clasps in this project were bought here. Purely because the design I had mind required the clasps to sit “flush” with the cord and almost appear to be part of it.

Anyways, a SUPER simple make with maximum versatility, no? I plan on including some rubber and leather pieces further down the line. I love the idea of something so luxurious as pure silk contrasting with the industrial feel of rubber or the rustic feel of leather. I may even incorporate a bit of colour? Or maybe I won’t…. 😉

DIY, how to, jewelry, repurposing, Tutorials, Uncategorized

DIY: Pendant from Brass Tube Offcuts

11/16/15

DIY PENDANT FROM BRASS TUBING OFFCUTS

If you thought my rubber and brass tube necklace was simple, this pendant is even more so!

DIY PENDANT FROM BRASS TUBING OFFCUTS

The pieces come from the same batch of tubing offcuts in the previous post. This time  6 pieces of metal tube the same diameter and graduating lengths (approx 1″ and smaller)…

DIY PENDANT FROM BRASS TUBING OFFCUTS

I played around with arranging them and settled on this staggered configuration…

DIY PENDANT FROM BRASS TUBING OFFCUTS

Then grasping one of the tubes with a set of small pliers…I simply super glued each tube in turn along the length, holding in place for about 30 seconds before moving onto the next….(be sure to use a glue suitable for metal)

DIY PENDANT FROM BRASS TUBING OFFCUTS

Leave to dry…

DIY PENDANT FROM BRASS TUBING OFFCUTS

Thread onto a piece of leather, rubber, or your favourite chain!

Doesn’t get easier than that, right?!

DIY, how to, jewelry, repurposing, Tutorials

DIY: Rubber & Brass Tube Necklace

11/10/15

This is what happens when my weekend plans get messed up and I’m forced to stay home with nothing specific to do. I start playing with random materials to see what I can come up with. I love using materials for something other than their intended purpose. This necklace is comprised entirely of “stuff” more at home in the hardware shop. But I find the contrast between the metals and rubber really pleasing….DIY RUBBER AND METAL TUBE NECKLACE

The metal elements of this necklace come from a mixed bag of tubing offcuts I randomly came across on Ebay a few months back. I was looking for something else entirely when I came across this bag of offcuts. I THINK they are used in precision engineering and things like model steam engines/trains etc. But in any case they looked mighty puuuuurty to me! So I bought them thinking I’d have a play and see what happened. The rubber cord is a length of this Nitrile O Ring cord which is used in oil/fuel/water seals for car and lawnmower engines. This one is the 3mm diameter cord but it comes in a variety of different thicknesses and you can buy it by the metre or in premade circles. All of which I am tempted to explore further for jewellery. But enough of my ponderings! Just look how easy this is to make….DIY RUBBER AND METAL TUBE NECKLACE

Cut 3 pieces of the rubber cord measuring approx 33″, 9″ and 7″

DIY RUBBER AND METAL TUBE NECKLACE

Seperate out the tubing offcuts that are the same diameter as the cord (these will be the “beads”) plus 2 larger pieces of tube that will snugly fit all 3 pieces of cord (these are used like cord “crimps” to hold the cords together).

DIY RUBBER AND METAL TUBE NECKLACE

Take one of the larger pieces and thread all 3 lengths of rubber cord through it, with the longest piece extending out about 10″ and the ends of the 2 shorter lengths of cord flush with the top.

DIY RUBBER AND METAL TUBE NECKLACE

Thread  the “beads” onto all 3 of the rubber cords in whatever arrangement pleases you. I have a couple of copper and aluminium elements thrown in there too. Set one of the smaller pieces of metal tubing offcuts to one side.

DIY RUBBER AND METAL TUBE NECKLACE

Slide on the second larger metal tube to clamp it all together, just like you did the first.

DIY RUBBER AND METAL TUBE NECKLACE

You’ll have the two cut ends of the longer length of cord left to join together. Slide that smaller bit of tube on one end. Join the cut ends of the rubber with a dab of super glue and hold in place for a few seconds. While the glue is still tacky, slide the tube offcut over to hide the join and crimp slightly with a pair of pliers.

DIY RUBBER AND METAL TUBE NECKLACE

Pop a few dabs of superglue into the top of the larger metal tubes where the rubber cords all meet too. Just to give an extra bit of hold. Quickly wipe away any excess that may drip through onto the cords below.

DIY RUBBER AND METAL TUBE NECKLACE

Leave to dry and you’re done!

DIY RUBBER AND METAL TUBE NECKLACE

I’m really rather taken with it.  I don’t think it’s obvious at all that these are hardware/engineering materials and the whole thing has a contemporary and minimalist feel with clean, simple lines. And I love the textures and subtle metallic elements.  Awesome with some simple black evening wear or over a plain collared shirt right?


DIY, how to, jewelry, Tutorials, yarn crafts

DIY: Wood and Yarn Bangle

09/08/15

Ingrid recently asked me if I was happy to have my blog back.  I guess it’s a bit like having a house party. You’re glad to clear up and get your house back into shape the next day  but you had such a great time you could’ve carried on partying, lol! (Some of the party goers really like to partaaaay if you know what I mean! Empty gin bottles; and coffee tables with stiletto scratches on them from dancing on said tables. Or am I giving you a little too much insight into my 20’s here, lol??) After the whirlwind that was the blogger challenge for The Refashioners 2015 the dust is still settling here and I’m trying to wrestle myself back into some sort of blogging schedule again! Plus I’m having slight withdrawal from the frenetic and full on activity and inspiration of last month, lol! (No it’s not just you Tasha!) I’m busy behind the scenes putting together the first post showcasing some of YOUR makes for the community challenge element (and that amazing prize package!). But in the meantime I thought I’d share this quick and easy DIY for adding a little extra zing to a plain ole bangle!DIY YARN WRAPPED BANGLE


I’ve been subconsciously buying into the monochrome trend recently. So when I dug up these wooden bangles from the bottom of a drawer, I thought they’d be perfect for a little updating. I wanted to create a nod to monochrome rather than go all out. Plus I really like the look and feel of the wood and the way it contrasted with this delicious pearl cotton yarn. The finished effect is a subtle and stylish nod to one of the season’s hottest trends.DIY YARN WRAPPED BANGLE


Materials: Wooden bangle, DMC Pearl Cotton #5 in Black & Off White, Yarn Needle and Thread Snips/Scissors.DIY YARN WRAPPED BANGLE


Start by tying a slipknot around the bangle using the white and snug it up against the bangle. (You’re not cutting off a length of yarn, but wrapping straight from the ball). Leave a tail of about 2”…DIY YARN WRAPPED BANGLE


Flip the knot around to the inside…DIY YARN WRAPPED BANGLE


Make a few wraps by passing the ball of yarn through the bangle. Keep it under a really firm tension and wrap over the loose tail end of the yarn to secure it as you go…DIY YARN WRAPPED BANGLE


To get a nice even wrap without any gaps like this; stop every 6 or 7 wraps…DIY YARN WRAPPED BANGLE


And snug the wraps up against eachother with your nail…DIY YARN WRAPPED BANGLE


When you get halfway along, pull the yarn tail taught and snip off, then continue wrapping…DIY YARN WRAPPED BANGLE


When you’re ready to add your black, don’t cut off the white! We’re going to carry the white yarn across behind the black so we can use it for the second band of white. So just secure it by tying it off at the back but leave it attached to the yarn ball. Then tie on your black with a slipknot as before. Leave a 2” tail of black…DIY YARN WRAPPED BANGLE


Wrap the black in the same way as you did the white. This time you’re wrapping around the tail of the black AND the white yarn that you’re carrying across. Snip off the black tail about half way through your black band; then continue with your black, with the white yarn running behind it…DIY YARN WRAPPED BANGLE


When you’re done with the black tie off and cut. Pick up your white yarn again and wrap exactly as before. Wrapping over the black tails as before. When you’re done, knot off and cut the white leaving a long tail…DIY YARN WRAPPED BANGLE


Thread the white yarn tail onto a yarn needle and pass under the wraps at the back/inside of the bangle. Pull through tight and snip off…DIY YARN WRAPPED BANGLE


DIY YARN WRAPPED BANGLE

Repeat all that 3 more times at equal intervals around the bangle!DIY YARN WRAPPED BANGLE


I wanted to add just a few subtle touches to my bangle (I also liked the wood so much I didn’t want to obscure it totally).DIY YARN WRAPPED BANGLE

But you could wrap the whole thing. You can use any colour yarn and any type of yarn. As long as it is strong (because you’ll need to wrap tight and keep it under tension!) there’s no limit to the colour combinations here!


decor, DIY, Future projects, home, Inspiration, jersey, jewelry, knits, Knitting, planning, refashion, refashioning, repurposing, Restyles, Uncategorized, Upcycling

DIY: 21 INSPIRATIONAL IDEAS FOR USING T SHIRT YARN

02/20/15

inspirational t shirt yarn ideasOK, so it’s fair to say I’ve developed a bit of an obsession with making T Shirt yarn. The next question of course is what to use it for! I’ve been browsing the interwebs for inspiration and thought I’d share a few ideas with you, just in case, you know, I’m not the only obsessive in the room….

t shirt yarn ideas

These chunky knit cushions are right near the top of my “To do” list.  A simple knit/purl square on chunky needles with a linen backing. What could possibly go wrong, right?! The ubiquitous T Shirt necklace deserves a mention here. This clutch bag, from what I can gather is knitted from lengths of rubber. No reason it couldn’t work in T Shirt yarn instead though…

t shirt yarn ideas

The idea of a cosy blanket knitted on chunky needles appeals to me right now (instructions here); and I can see potential in this tutorial for crocheted cord being used in a jewelery piece or perhaps as handles for a bag? Now I know this rug is not made from t shirt yarn but a) its lush so I just had to share (and there are other delicious yarn art examples in this post) and b) the concept/technique could surely be applied on a smaller scale with T Shirt yarn?

t shirt yarn ideas

I love copper, grey and simplicity. So this necklace tutorial particularly floats my boat. Again there are other tutorials included in this post from Brit +Co. Love this knitted tote pattern from Daily Fix and surely T Shirt yarn lends itself perfectly to macrame hanging plant holders. Several examples in this post from Censational Girl.

t shirt yarn ideas

I mean seriously, how delicious do these knitted floor cushions look? No tute, but the idea would be simple enough to replicate? I can think of a multitude of uses for these crochet baskets (tutorial here from nimi design.com) and this macrame wall hanging has a simple charm. I’m thinking the technique could also be adapted to form a decorative element for a T Shirt refashion (party in the back anyone?)  or maybe to create a cute string grocery bag?

t shirt yarn ideas

Spoiler alert! Rugs are at the forefront of my plans. This spiral rug from A Beautiful Mess, crochet rug from WhollyKao and woven rug from Viva Le Jar, all employ different techniques to equally cool ends…none use T Shirt yarn but….you could, right?

t shirt yarn ideas

This knitted rug pattern from Purl Bee could surely be adapted for T Shirt yarn. This free pattern for a crochet basket from Ravelry calls for 12mm cotton yarn so could be doable and I like the effect of this rope trivet from Design Sponge. I can’t help but think this nautical style of knotting could be fun to try too…

t shirt yarn ideas

Another slightly more simple knitted bag. I think even I could manage this one. I love the effect of this idea from Oleander & Palm. Simple lengths of coloured yarn hung in volume to great effect; and a random woven belt design that I came across that could totally work!

So, I hope that gives you a few ideas of what to do with your squidgy balls of jersey goodness! I’ve started playing around with knitting mine and have a few ideas in the works….watch this space!

DIY, endless leather, how to, jewelry, Tutorials

DIY: Rose Gold & Leather Necklace

02/03/15

I get a little kick out of finding a different use for things that are intended for a particular purpose. Re-imagining. Repurposing. Whatever you like to call it. I do that thing. You know that thing. Where you look at something, tilt your head and think, “what could I use that for?” Do you ever do that?

The decorative rose gold elements of this necklace are actually meant to have a more functional use. But they were way too pretty to be limited to that….

They are actually known as sliders. Intended for use singularly, to secure a loop end in leather cord, like so. They remind me of miniature metal belt hardware 🙂 As is often the case with the simplest of items, when displayed in volume they can take on a much more decorative persona, and the effect can be minimalist, modern, simplistic, edgy…but oh so gorgeous! (I really LOVE this necklace. Can you tell?)

You will need:
1m of leather cord (1m will give you enough for 2 necklaces depending on finished length),
2 x cord end caps
1x matching jumpring
1 x matching lobster clasp
20-25 Sliders
Superglue

Thread the sliders onto the leather cord. I used this grey cord, but it comes in a huge range of colours, and you can probably make out I chucked in a single stainless steel slider to contrast with the rose gold ones…

Cut to desired length…

Squeeze the cut end slightly to compact it a little….

Then dab the inside of the end cap with a teeny amount of super glue and insert the cut end of the cord….set aside and allow to dry completely

Once dry add a lobster clasp….

…and you’re done! You can see the contrasting steel slider more clearly in this pic. Might be quite fun to alternate the two different finishes to create a pattern!

Flipping the sliders the “wrong way round” also gives it an extra little design element…

This necklace looks really cute made in a shorter length and worn over a collared shirt so the metallic elements “peek out” between the collar:)

Full Disclosure: All of the supplies below were supplied to me c/o Endless Leather. The eternally helpful Daniel, dropped me a line and asked me if I would like have a browse and choose some materials for a DIY. I have received no money for this post nor will I receive any kind of commission related to the links herein. The views expressed are entirely my own. Had I not liked these products when they arrived I simply wouldn’t have written this post. Luckily for me I loved them, and would have no hesitation in recommending both the quality of the products AND almost as importantly, the level of service. Poor Daniel must’ve got fed up with me in the end as we went back and forth so many times deciding on materials. But he bent over backwards to be helpful. A rare thing these days. So thankyou Daniel 🙂 If you get a chance, check out their range. Amazing colours, embossing, printed leathers. Literally ALL sorts….;) And even better the prices are wholesale with no minimum  order quantity. So whether you want a few bits for your own personal use, or you want to go into full scale production and buy in volume, they’re well worth a look IMHO. 🙂


DIY, how to, jewelry

DIY: Jump Ring Necklace & Bracelet

08/18/14

Got a spare 20 minutes? That’s all this necklace took to make….

All it takes is a length of leather/suede cord and a tube of silver jump rings…

Start with about a 70cm length of leather. About 30cm down tie a simple knot. Thread on your jump rings for about 10cm. Then tie another knot to secure the jump rings in the centre of the length of leather. Then tie off both loose ends with a sliding knot and trim the excess….simple!

I made a matching little bracelet with the 30cm of leather left over from my 1m length 🙂 Adjustable. Quick. Simple. Understated.

I love the contrast of the silver against the leather…and for someone who doesn’t wear a great deal of jewellery…I’ve been wearing this alot! Planning some in coloured suede/leather or silk cord….go make some…stat! 🙂


DIY, jewelry, refashioning, the refashioners, the refashioners 2013, Tutorials

DIY: Bugle Bead Multistrand Necklace

06/24/13


So here is the 2nd of two jewelry pieces I made as part of The Refashioners 2013. (You can see the tute for the first one here) Again, because of the use of black glass bugle beads in this make, it has an overall 1920’s feel. I love how this one turned out, and although threading all those beads was a little time consuming, it really is very straightforward!

To begin, attach multiple strands of monofilament/beading thread to the looped end of a piece of jewelry wire. I attached 2 lots of 8 strands and used crimper beads to hold them in place. Thread your beads onto each strand in turn (to your desired length), securing the end of each strand with a knot before you move onto the next…

Gather all your loose ends together and secure to an identical piece of looped wire. So now you have two identical “ends”.You can buy “end cones” like these, but I made my end cones by wrapping wire around my round nosed pliers. Slide them over the looped wire ends so they are snug; and finish the ends with a loop to hold in place. Then add your chain!

A great way to showcase simple glass beads which almost always looked most effective when  strung “en masse” like this 🙂


DIY, jewelry, refashioning, the refashioners, the refashioners 2013, Tutorials

DIY: Bugle Bead Fringe Torque/Necklace

06/19/13


This is the first of two necklaces I made as part of The Refashioners 2013. I have shed loads of these black glass bugle beads left so don’t be surprised if a few more makes crop up over time! Bugles lend themselves brilliantly to fringing and are kind of synonymous with the whole 20’s vibe (think flapper dresses and The Great Gatsby) and I really like the contrast of silver and black. I also really like the look of torque necklaces, but always find they sit a bit funny on the collar bone. Of course, I’ve probably got weird collar bones! But in any case, I decided to try making a “1/2 torque” with a chain extender. And hey presto, it sits rather nicely! Here’s what I did…

In addition to the black bugle beads I used some silver ball head pins and tiny silver spacer beads. I threaded the bugle beads and spacer beans onto the head pins and finished with a loop…

Next take a length of medium gauge jewellery wire and shape around a round object….

Thread on your bugle fringe lengths, interspersed with more of the silver spacer beads…

Finish the ends of the torque with loops and add your chain….

And there you have it!

DIY, jewelry, refashioning, the refashioners, the refashioners 2013, Thrifting, Tutorials

The Refashioners 2013 – Me!

06/16/13

Well peops…today is the 11th and final instalment of The Refashioners 2013! I don’t know about you, but the past fortnight of guest posts from some of the blogosphere’s most talented and ingenious stitchers has left me gobsmacked and inspired in equal measure. It’s been an honour to host these ladies here on my little ole blog and I’ve been so gratified by all the hard work that they’ve put in, AND the fantastic response the series has received from all of you out there in blog land.

But just in case any of you were under the illusion that I had managed to side step my own challenge and sit back while the others racked their brains as to what to do with the items I sent them….fear not! Sally very kindly sent me my very own little mystery package to transform; and my jaw kinda hit the floor when I saw what was inside! A rather showy little beaded number! This project was a challenge for me, not least because my “style” (if you can call it that!) has never been particularly showy or embellished. So what to do? How to incorporate all that beading in a slightly more subtle incarnation? Enter the “bumble bead” skirt!

Refashion Inspiration! Don't miss out on the new upcoming series of The Refashioners at www.portialawrie.co.uk

I’ve been inspired recently by colour and texture blocking. So I decided this was the perfect opportunity to try out an idea that’s been buzzing around in my head for a while. This outfit heralds a couple of rarities for me. Legs out, heels on, and much more dressy than my normal uniform. Although I feel a little at odds being “dressed up”, I’m rather pleased with the overall look, and the finished garment. The bugle beads lend themselves rather nicely to what feels like a kind of 20’s vibe with a modern twist…or is that just me??

Refashion Inspiration! Don't miss out on the new upcoming series of The Refashioners at www.portialawrie.co.uk

This garment had it’s technical challenges from the outset. The beads are sewn in a continuous undulating pattern onto a top layer of chiffon. The problem with this kind of embellishment is that once a thread snags/breaks…you’re likely to lose whole lengths of the beading. There were several “bald” patches (like the one below right) around the dress. Add to that the prospect of cutting and sewing across beads, and, well…let’s just say , I was nervous about this one! I wish I could have included audio with this post. So you could hear the sound of the pitter patter of beads hitting my sewing room floor at pretty much every stage of this make….

Refashion Inspiration! Don't miss out on the new upcoming series of The Refashioners at www.portialawrie.co.uk

I decided to make a feature out of the beaded chiffon. So my first step was to deconstruct the dress(below left), remove the lining (set aside for later!) and  figure out what workable pieces of chiffon I had. In the end it was the front panel that gave me the most options because most of the beading was intact and it was the largest piece of beaded fabric uninterrupted by seaming/zips etc (below right)…

Refashion Inspiration! Don't miss out on the new upcoming series of The Refashioners at www.portialawrie.co.uk

While I wanted to make a feature of the sheer fabric…I didn’t want it to be see through. So I nabbed a pair of sandy coloured linen trousers from my refashioning pile to see how it would look as an underlining to the chiffon…that’ll do then!

Refashion Inspiration! Don't miss out on the new upcoming series of The Refashioners at www.portialawrie.co.uk

From one of the trouser legs I set about making my panels. After cutting along all of the side seams I was left with 2 large oblongs. I folded then in half lengthwise and squared off all the edges….

Refashion Inspiration! Don't miss out on the new upcoming series of The Refashioners at www.portialawrie.co.uk

Cut along my squared off lines and then along the fold…

Refashion Inspiration! Don't miss out on the new upcoming series of The Refashioners at www.portialawrie.co.uk

This gave me 4 linen panels…(in the end I only used 3)…

Refashion Inspiration! Don't miss out on the new upcoming series of The Refashioners at www.portialawrie.co.uk

I pinned these to the underside of my beaded chiffon…

Refashion Inspiration! Don't miss out on the new upcoming series of The Refashioners at www.portialawrie.co.uk

Now to stitch the underlining panels to the chiffon. I opted to sew with the beads facing upwards because a) I didn’t want the beads  getting ground up or falling into the feed dogs of my machine, and b) I could better see what I was doing. If the needle hits those beads at the wrong speed/angle then the needle is history and/or you have bits of glass bugle bead shattering everywhere. (Just trust me, ok!) I opted for a long stitch to give the needle a better chance of skipping over the beads rather than through them. For the most part, this strategy works. (Only one broken needle) But, GO SLOW! Very, very, very slow…and watch the needle on every downstroke. If it looks like it’s gonna hit, stop, lift the presser foot and adJust the position of the fabric oh so slightly, then carry on….

Refashion Inspiration! Don't miss out on the new upcoming series of The Refashioners at www.portialawrie.co.uk

Voila, underlining stitched to beaded chiffon…

Refashion Inspiration! Don't miss out on the new upcoming series of The Refashioners at www.portialawrie.co.uk

Trim close to stitching. It was tricky to cut this as every inch or so my lovely (once sharp) dressmaking shears would snag on a bead (man it sets your teeth on edge when stainless steel crunches on glass beads!). So again, it was a slow process, adjusting the angle of the cut ever so slightly to avoid the beads…

Refashion Inspiration! Don't miss out on the new upcoming series of The Refashioners at www.portialawrie.co.uk

My floor is covered in this stuff!

Refashion Inspiration! Don't miss out on the new upcoming series of The Refashioners at www.portialawrie.co.uk

Anyway, finally 3 underlined panels (below left) I then cut contrasting solid black panels from some plain black fabric in my stash….

Refashion Inspiration! Don't miss out on the new upcoming series of The Refashioners at www.portialawrie.co.uk

Then sewed them all together, much as you would a patchwork, again using a long stitch. However a long stitch will not hold this skirt panel together for very long and the seams look all puffy, right? ‘Cos I can’t press those puppies properly because of those pesky beads, you see?! Sooooo…..

Refashion Inspiration! Don't miss out on the new upcoming series of The Refashioners at www.portialawrie.co.uk

I removed all of the beads that fell within the seam allowances on each panel (left), graded the seams (middle) then flipped the seam allowances away from the beaded sections…

Refashion Inspiration! Don't miss out on the new upcoming series of The Refashioners at www.portialawrie.co.ukRefashion Inspiration! Don't miss out on the new upcoming series of The Refashioners at www.portialawrie.co.uk

Becauce there are no beads under the black piece now, I can topstitch with a normal stitch length (below left) which reinforces the seams and allows the edges to sit flat and flush instead of puffing up (below right)….

Refashion Inspiration! Don't miss out on the new upcoming series of The Refashioners at www.portialawrie.co.uk

Phew! I now had what was basically a flat piece of fabric to work with. Enter the Charlotte Skirt pattern. I simply cut my front piece from my panelled piece of fabric. (That’s the reverse you can see, with the linen backing. Looks even more like a bumble bee!) The back pieces I cut from more of the plain black fabric…

Refashion Inspiration! Don't miss out on the new upcoming series of The Refashioners at www.portialawrie.co.uk

One sticking point was that the darts on the panel overlapped onto the beaded section. I wasn’t going to be able to dart the beaded section. B*****ks! Well, as luck would have it the fabric I was using had some stretch. So I just sewed the skirt as normal without the darts in front, then pinned it to fit at the waist/side seams…..worked just fine!

Refashion Inspiration! Don't miss out on the new upcoming series of The Refashioners at www.portialawrie.co.uk

The rest of the construction was as per the pattern apart from the waistband, which I faced with grosgrain ribbon. (Just find a faced waistband more comfy). I used the original zip by shortening it and then hand picked it. (I don’t think I’ll ever machine a zip in since discovering the hand picked method early on in my sewing journey). The side seams received the same topstitch treatment as the panels. I also used the lining from the original dress to line this baby. The eagle eyed might notice that there are only 2 beaded panels in the final skirt as opposed to 3. Well, in the end, when it came to it, the length just looked totally wrong. Like AWFUL. It just hit at the wrong spot on my calf. It was only a matter of an inch or so to make it right. But if I had just taken up the bottom black band by that, then the panelling effect would have been completelyout of balance. Taking it up to the next panel would’ve meant hemming over beads! Ack!.So I just lopped the bottom 2 panels off, et voila!

Refashion Inspiration! Don't miss out on the new upcoming series of The Refashioners at www.portialawrie.co.uk

Essentially I created the blocked front section using patchwork techniques; just in straight panels instead of squares/triangles etc. This technique can be employed to create your own unique piece of flat fabric using scraps/sections from any number of garments. Once you have your flat piece of fabric you can just go ahead and cut your pattern piece as if it were any other piece of fabric. When it comes to incorporating colour blocking into a commercial pattern, it seems to me to be a much more straightforward route to do it this way;  (make your colour blocked fabric first, then cut your pattern piece from it) as opposed to slicing your commercial pattern up into various pieces then tracing them and adding seam allowances, cutting all the fabric seperately then having to stitch it back together again. Don’t you think??

Anyways, I didn’t stop there. Some of you might be wondering about the rest of the dress? Well yes. Actually I did sit there and unpick all those beads over 2 evenings. Sad? Moi? Yup! What did I do with them? Ooooohhhhh…..

Refashion Inspiration! Don't miss out on the new upcoming series of The Refashioners at www.portialawrie.co.uk

I made these too….

Refashion Inspiration! Don't miss out on the new upcoming series of The Refashioners at www.portialawrie.co.uk

There are far too many photos in this post already, so I have some separate DIY posts lined up for these.

But in the meantime a MASSIVE MASSIVE THANKYOU to all the ladies that took part this year!! Has it inspired you to get out there and raid the charity shops (or plunder the depths of your wardrobes) for unloved items to lavish a bit of refashioning love on? I do hope so 🙂

Older Posts
Portia
Follow
Sewbox

© Copyright 2026. Portia Lawrie. All Rights Reserved. Managed by WordPress Web Dev Cornwall .