• About
    • Contact
    • Press
    • Sponsor
  • DIY
    • Home & Garden
    • Jewellery & Accessories
    • Yarn Crafts
  • Sewing
    • patternless & self drafted
    • Refashions
    • Commercial Patterns
    • Sewing Tips
    • Overlockers
  • The Refashioners

Portia Lawrie

DIY, Sewing, Sewing Basics, Tutorials

Sewing Basics # 15 – Using a Bias Tape Maker

10/19/11

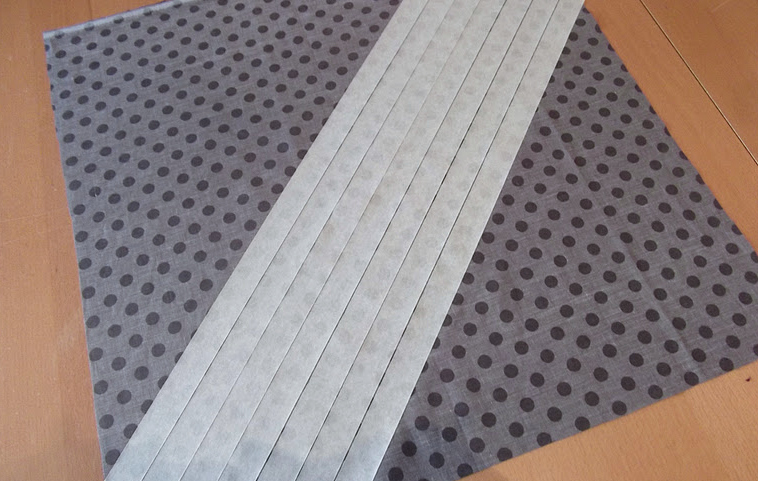
I’m sure that there are many good tutorials of how to use this little super gadget out there on the web. But since we have been on the subject of bias strips I thought I may as well follow up with a brief explanation of my own to round things off nicely on this particular subject….

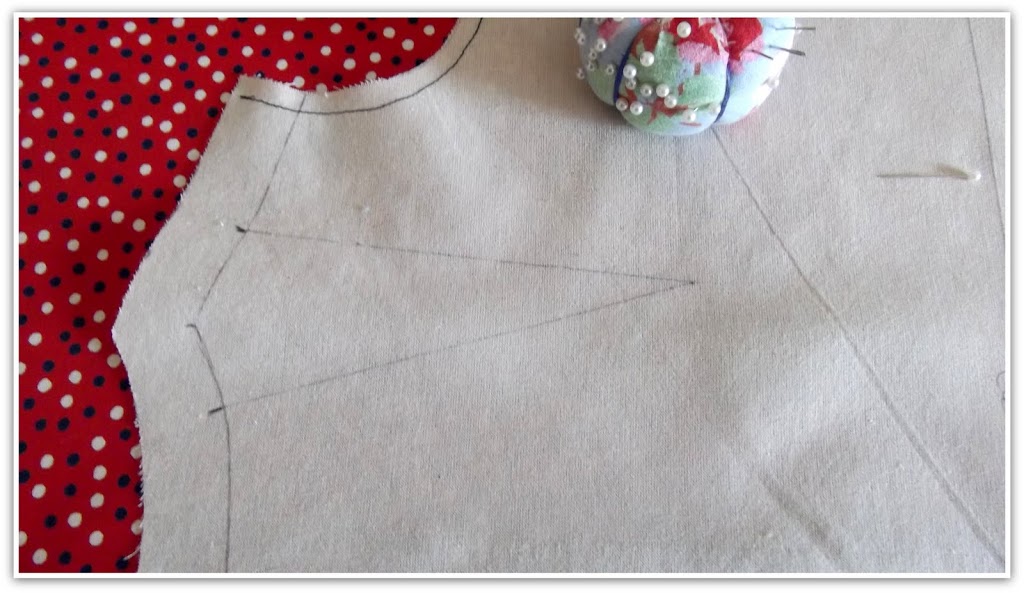
Placing RS together with the top strip perpendicular to the one underneath, pin like so….

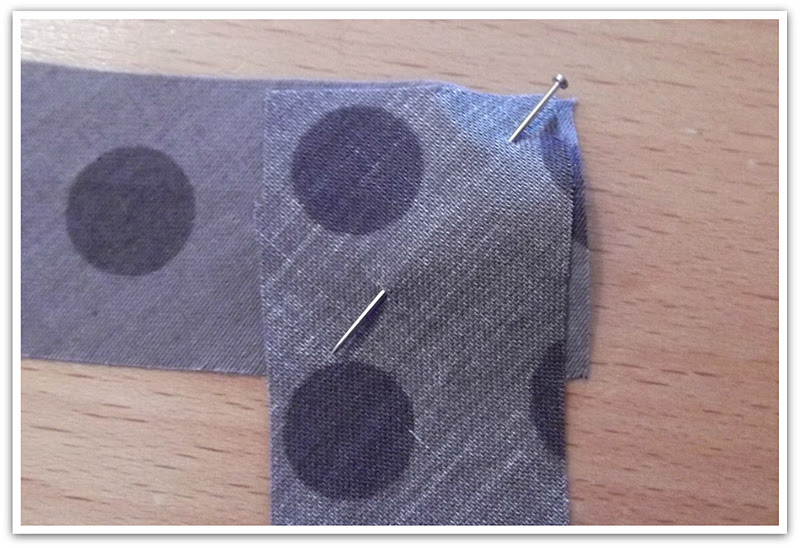
Sew diagonally left to right, (corner to corner if you imagine as a square, the area where the two strips overlap) at a 45 degree angle…

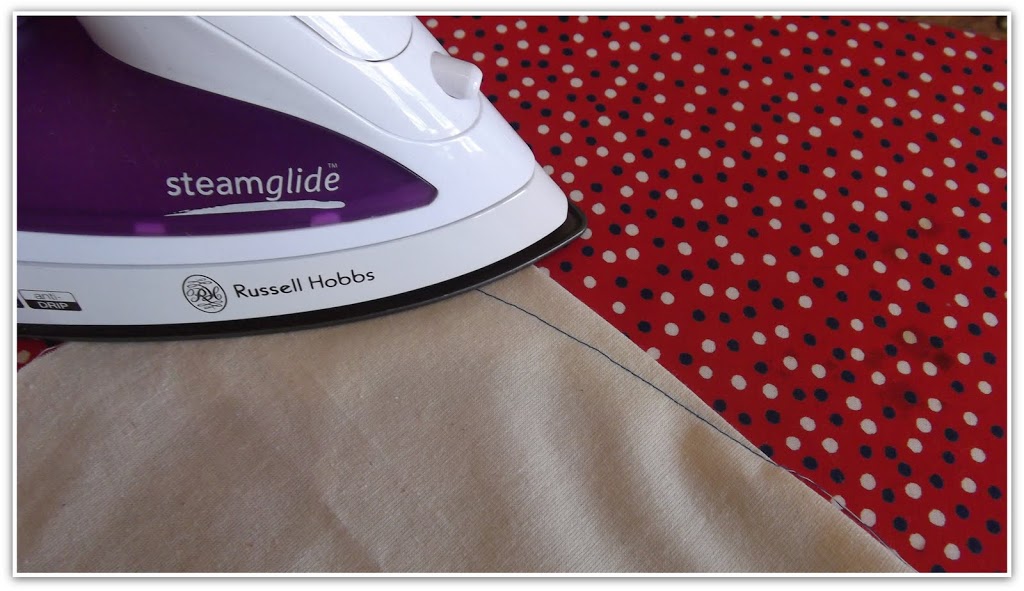
Press the stitching line, then press the seam allowance open, then press the seam on the RS too…

Trim seam allowance close to the stitching….

The RS……

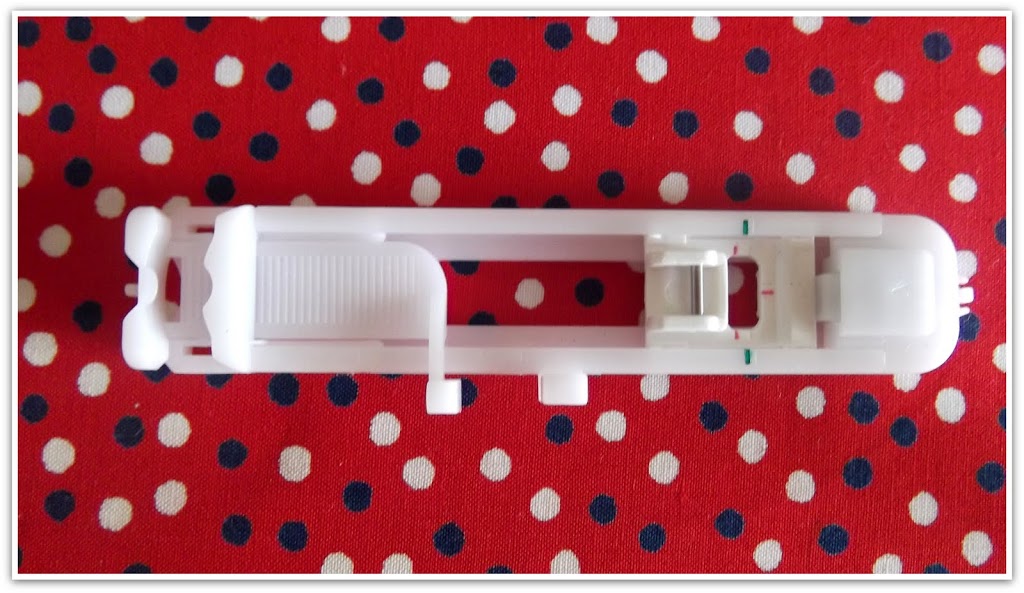
RS down/WS facing up, insert one end of the strip into the widest end of the bias gadget ensuring the fabric strip is as central as possible…..

Gradually feed the fabric strip along until it pokes it’s little nose out the other end of the gadget (I found that the strip would sometimes get stuck a little way along so I gently poked the tips of my thread snips through the gap along the centre of the bias gadget to help move it along)…

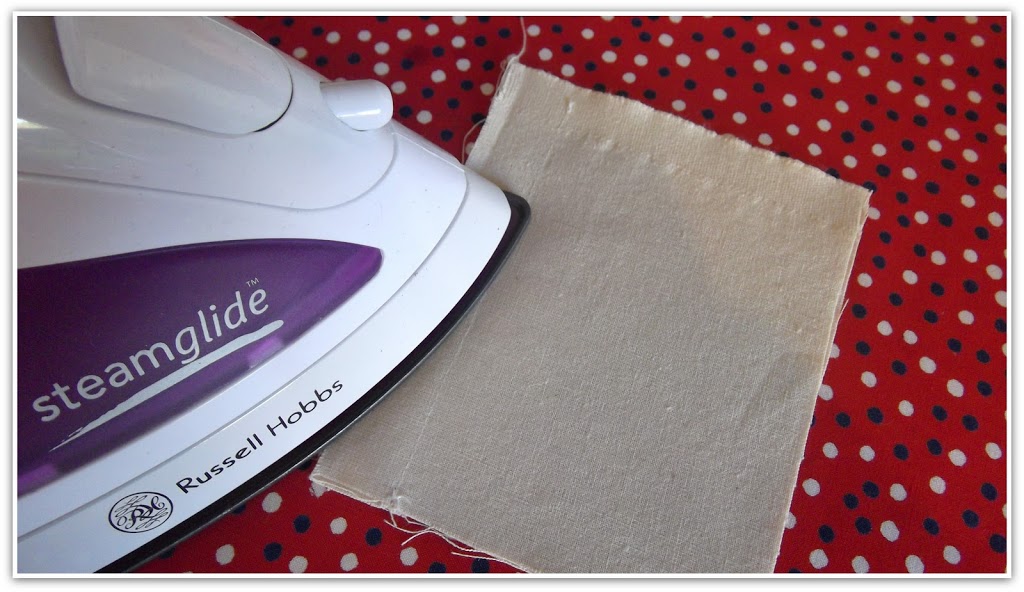
Press the tip of the strip as it pokes through…

Then pin in place on the ironing board…

Take hold of the handle of the gadget and gently slide it along the fabric strip…

…bit by bit, pressing as you go….the first bit is the trickiest….

Keep going all the way to the end of the strip. Depending on how long it is you may have to shift it along the ironing board and re-pin it several times along the length of the strip…and there you have it…nice neat bias tape ready to use on your next sewing project 🙂

Toodle pip!
Px

DIY, Sewing Basics, Tips and Tricks, Tutorials

Sewing Basics # 14 – Easy Peasy Bias Strips

10/17/11

I don’t know about you, but the prospect of accurately marking out and cutting narrow strips of fabric on the bias seemed a bit too fiddly and a bit too much like hard work for my liking. So for ages I relied on my stash of ready made bias tape for projects. Then I had a minor brainwave and tried out the basic idea here. What d’ya know…it worked! Alot of you seemed to think it was a pretty neat idea, so I thought I’d share my  bias strip technique in a little more detail in case, like me, you can’t be arsed to faff about 😉

I used one of these bias tape makers to make my bias binding.  This particular size requires strips of fabric 1″ wide. So I got me some 1″ wide low tack masking tape (masking tape comes in several widths in our local hardware shop. If I need 2″ wide bias strips I just use 2″ wide masking tape)…

The easy way to make bias strips at www.portialawrie.co.uk

The fabric pictured is cut in a perfect square. (See here for an easy way to do this. The technique applies the same way to fabric as it does for paper!)  Now for a little geometry. Bias tape needs to be cut at a 45 degree angle to the grainline. On a perfect square, from point to point diagonally across the square, is exactly 45 degrees. So the strip of masking tape below, marks out a 1″ wide strip of fabric at a 45 degree angle…

The easy way to make bias strips at www.portialawrie.co.uk

Every subsequent piece of tape lined up against it will therefore be at the perfect 45 degree angle too. I just kept adding strips of tape either side until they became too short to be of reasonable use. (For zero waste, the resulting corners/trianges left over at the end.could go in your scrap pile until you’ve enough to make some bunting)….

The easy way to make bias strips at www.portialawrie.co.uk

Leaving just enough gap between each strip of tape for your scissor blades…

The easy way to make bias strips at www.portialawrie.co.uk

…provides a super accurate cutting guide and stabilises the fabric whilst you are cutting (bias by it’s nature is prone to stretching) this is especially useful on fine and/or slippery fabrics….

The easy way to make bias strips at www.portialawrie.co.uk

You end up with a load of strips backed with masking tape. Exactly the right size, with poker straight edges and cut precisely on the bias….

The easy way to make bias strips at www.portialawrie.co.uk

Square off the ends….

The easy way to make bias strips at www.portialawrie.co.uk

…and there you have them. Lovely neat bias strips. Ready to use to make your own bias tape. (I’ve been making up more than I need, then peeling off the masking tape as and when I need the make some bias tape up. Otherwise I leave the masking tape in place to keep them stabilised and store them for future use)

The easy way to make bias strips at www.portialawrie.co.uk

Easy peasy lemon squeezy!

Ponderings, Sewing, Sewing Basics

The Seven Deadly Sins of Sewing……

08/11/11

When pondering recently, just what I have learnt since I began my sewing adventures a couple of years ago, it occurred to me that there are certain things that I do now, that I was clueless of at the start,  but have now become my sewing fundamentals.  They are the steps that I wouldn’t dream of skipping or the situations that I will avoid like the plague. Because I know in all certainty, that if I do (or if I don’t), I have sounded the death knell on my project’s success. As I become aware of the little details that combine to make a professionally finished garment, these are my unwritten (until now!) rules, that I would be committing sewing sacrilage if I failed to adhere to. These are my Seven Deadly Sins of Sewing…

Skimping on the Pressing – I hadn’t a clue as a beginner that my iron would be just as important as my sewing machine.

Skipping the Toile – In my eagerness to sew a finished garment, in the past I have dived straight in and cut straight from my fashion fabric and regretted it every single time. It’s good to have a practice run when you’re using a pattern for the first time

Rushing – This is a big one for me! I can be an impatient sort. I’ve taught myself to enjoy the process of making a garment as much as the finished article, and take time over the little details, done well,  that I know will make me smile each time I look at them

Neglecting needles – Using a new needle each time I start a new project has become a bit of a ritual for me. And using the right needle for the type of fabric was a lesson learnt the hard way too!

Sewing on Empty – Sewing when I’m tired is also a big no no for me.  My  patience is low, I get easily frustrated  and I make stupid mistakes. (Hence the lack of sewing on this blog of late!) Some things are best left for another day when you’re in the right frame of mind

Fabric Faux Pas’ – If something is worth my time sewing, then it’s worth sewing with a decent quality fabric and decent quality notions. I’ve learnt to be patient in sourcing my fabrics because I can’t afford to buy metres and metres of fabric from High Street retailers. My stash is comprised almost entirely of thrifted supplies and I’ve had some great scores from Freecycle and fabric swaps too.

Thinking you can’t – This one, out of all of them has held me back the most in the past. Here’s what I’ve learnt – Don’t be afraid to tackle a project because you think it’s beyond you. Ok you may have to tackle it bit by bit. Break it down into smaller parts, surf the net for tutorials. read blogs. Practice on a scrap of fabric. But you’ll get there, and you’ll learn so much on the way

This list is by no means set in stone and there are many other things that I could add. I’m sure as I continue my sewing adventures I’ll find still more. But because of my heavily illiterated title, I’ve limited myself to just 7 for the purposes of this post! I’m interested though….what are your big no no’s when it comes to sewing? What are the massive faux pas’that you would simply never commit?
Px

Sewing, Sewing Basics, Tips and Tricks

Sewing Basic # 13 – Tailor’s Knot

06/20/11

This is another one of the plethora (OMG it’s only Monday and I’m using words like plethora!) of little tips and techniques that can contribute massively to the quality of your finish. I was shown this method for “burying” the thread end on a dart. I now use it with all my handsewing and where backstitching to secure thread ends just isn’t appropriate or desireable.
As always, begin by pressing the stitching line…

Then form a loop with your thread tail…

Put a pin through the centre of the loop with the tip in the end of the stitching line…

Pull the thread tail so the loop begins to tighten around the pin…

Keep pulling until the knot is formed tightly around the tip of the pin…

Carefully slide the knot off the tip of the pin with your thumbnail, tightening as you go and getting it as close to the base of the thread tail as possible…(you can probably do better than I have here!)

Then thread the tail onto a needle and insert into the base of the dart within the stitching line….

 Push the needle along the inside of the “tube” formed by the dart (or seam) and emerge about an inch along…

Pull the thread through, keep it taut and snip at the point at which it emerges..

The thread end is now enclosed within the dart and hidden from view. Neat!

Next Top Draftalong post to follow shortly. 🙂
Px

Sewing, Sewing Basics

Sewing Basic # 12 – Sewing a dart

06/17/11

Wonky darts anyone? I’ve sewn a few, I’ll be honest. However, that is what tutors are for, no?  My tutor has passed on a couple of tips for sewing darts that have really helped me improve mine. So here goes….imagine this is your dart, on the RS of the fabric…

Stick a pin through one of the dart legs and the dart point, from the WS of the fabric…

Join the two points at the base of the dart together by pushing the pin through the second point….
Then flip over, and use the pin to secure the base of the dart (A). Use the head of the pin you put through the dart point (B) to centre the dart fold and pin in place. “A” becomes the start point for your stitching line (or just before actually, a bit into the seam allowance) and “B” the point at which you want to run the stitching off the edge…. 

Now for my favourite little trick! A strip of masking tape stuck down on your sewing machine,in line with the needle position, like so….(sorry you’ll have to tilt your head to the side as the pic is the wrong way round!)

When you sew, you use the head of the pin you stuck in the dart point (A) as a marker and keep it in line with the edge of the masking tape as you sew. This will ensure a straight stitching line! Clever huh?! The gap that opens up at “B” is the exact mitrror image of the dart you are sewing….

Don’t forget to remove the pin just before it goes under the presser foot….then run the stitching off the fabric at the point where the pin mark is….and you’re done..

You should end up with an accurate, straight stitching line. All that remains then is to finish your thread ends and press.
Px

Sewing, Sewing Basics

Sewing Basics # 11 – Machine Buttonhole

06/06/11

I spent a long time avoiding sewing button holes. For some reason I’d built them up in my head to be really scary. I have since discovered they are easy as pie. I was required to sample some of the buttonhole stitches from my sewing machine for my college portfolio. So thought I’d share some photos for anyone else who may be a bit of a scaredy cat like I was….

Here’s my buttonhole machine foot….probably much like yours..

Slide open the bit on the left….

Pop the button in…

Slide it closed again…

Remove usual presser foot….(no time to paint my nails, sorry!)

Attach buttonhole foot like so….

Pull down buttonhole guide so it sits behind the first buttonhole spacer on the foot…

Hold top thread tail out to side, and sew…just hold the foot pedal down and the machine will do the rest and will stop automatically when the buttonhole is complete….

These are samples of the buttonholes on my machine. Using the one on the right as the example,stick a pin through JUST below the group of stitches at the top of the buttonhole. This is to protect these stitches from being cut when you cut the buttonhole open in the next step…(just ignore the bottom pin in the picture)

Inserting a seam ripper in the base of the button hole, gently and carefully cut the button hole open up to the pin you inserted in the top…

And there you have it. Snip the scruffy bits and finish the thread ends, and you have a functional basic buttonhole…

I hope to try my hand at some variations and hand sewn styles too at some point soon, so I’ll be sure to record my efforts stage by stage on here….
Px

Sewing, Sewing Basics

Sewing Basics # 11 – The Hong Kong Seam

04/10/11

Another seam finish we tried at college this week was the Hong Kong seam. This is slightly different to the bias bound seams over on the Colette Patterns blog recently. I really like this one, but it is a little trickier than other seam finishes I’ve tried. I had to slow my machine right down for this and really concentrate on the sewing part. But well worth it as it’s a truly classy finish. As ever(!), press the stitching line…

then press seams open…

Cut a strip of very lightweight silky fabric on the bias. This is a lining type fabric. Opaque but floaty like silk (not very technical that, ha ha! Sorry. I just nabbed it out of the remnants bin at college so don’t know the exact fabric content)….

Lay one edge of this bias strip along the raw edge of your seam allowance. If your bias strip has a definite RS  (mine doesn’t) then lay it RS down…..

Straight stitch along the edge a few mm in from the edge…

“Roll” the bias strip to the back creating a kind of narrow tube around the raw edge. Do not press….

Stitch “in the ditch” gently pulling the bias to one side as you go so you don’t catch it with the needle (this is where I had to slow my machine right down as I still find stitching in the ditch really tricky!)….

This is where the stitching should end up, without catching any of the bias strip….

Trim the excess bias strip close to the stitching on the WS….

So you now have this narrow little silky tube around the raw edge of your seam allowance…

which when you press it flat, totally covers the row of “in the ditch” stitching…

This shows the RS and WS of the seam allowance. The WS would ultimately be tacked down so you wouldn’t see it anyway. But still pretty neat, huh?

Not sure why this is called a Hong Kong seam. (It may in fact have other names) but I’m guessing it either originated there or was very widely used on tailoring in that area. Anyone know?

I’m very much enjoying “playing” with different seam finishes. Do you have a favourite? Is it ease and speed that dictates this or is it the aesthetic? Or maybe durability?
Would love to hear your views!
Pxxx

NB: For anyone not familiar with the term “stitch in the ditch” it’s used alot in quilting. But it basically means stitching in the crease of a seam. In this case the seam crease created by the bias strip and the raw edge of the seam allowance, once the bias had been rolled back on itself.

Sewing, Sewing Basics

Sewing Basics # 10 – The Strap Seam

04/09/11

Here’s a nifty little seam finish I learnt at college this week. Press the stitching line….

Press seam allowances open…

Trim seam allowances to within about 5mm of seam ….

Repeat on both sides and press open again…

Lay hemming/cotton tape or similar along the seam, covering the seam and the allowances. Make sure it’s central over the seam line by folding the tape in half lengthwise, placing the fold line of the tape along the seam line of the garment. Allow the tape to fall open and pin in place….

Sew a straight stitch close to the edge of the tape along both sides….

This is the finish on the inside….

and on the right side…

I really like this seam finish. It seems to me to have alot of scope for variation. In terms of colour you could have everything matching for a subtle finish. You could have contrasting tape (as in this example) or contrasting thread so the double row of stitching on the outside becomes a design detail. I like the idea of using velvet or satin ribbon. A friend of mine has scarring on her hips that is often aggravated by seams rubbing on them. This would remedy that for her! My tutor tells me that ribbon is not designed for lots of wear though so worth bearing in mind. Perhaps I could use it on a more special occasion garment. The whole finish could also be flipped to the outside by sewing the garment seams WS together and having the ribbon/tape as a design feature on the outside.(As seen on my tutor in class the other week)
Oops, sorry, I’m rambling. I keep thinking of the design possibilities of this one, so just thought I’d share!

Pxxx

Sewing, Sewing Basics

Sewing Basics # 9 – Pressing the stitching line

04/08/11

Just a very very quick tip. I was doing some seam samples for college today and I remembered this little nugget of sewing wisdom. As a beginner I would read the instructions “press seam allowances open” or “press seam allowances to one side” and do just that. What they usually fail to tell you is to press the stitching line first….

Then press seams open (or to one side, whichever) ….

The first press, I was informed,”sets” the stitching smoothly, uniformly and flat. This creates a cleaner and sharper seam when you press the seam allowances open. It’s all these “little” details, that you only pick up over time, that make a difference to your finish. Who knew?? Back then, I sure as heck didn’t!

DIY, Sewing Basics, Tutorials

Sewing Basics # 7 – How to make a Pressing Mitt

02/05/11

Following on from the tailor’s ham tutorial… here’s another handy little pressing aid that’s quick and easy to make. Start off with a paper template like this. Roughly the size of your hand (with fingers spread) and a 1cm seam allowance added on…

Then use it to cut one piece of thermal/heat resistant wadding…
3 pieces in calico and one in a pure wool…
Cut 2 mini versions of the main pattern pieces (in either fabric it doesn’t matter) and attach to 2 of the main calico pieces to create little pockets. (These will prevent you from accidentally sliding your fingers right to the tip of the mitt where the seam will make it less heat resistant)

Hem the straight edge of the wool piece and the remaining calico piece…

Sandwich and pin all the pieces together as follows:
1. Calico with pocket – Face/Right Side Down
2. Thermal wadding
3. Calico with pocket – Face/Right side Up
4. Hemmed Wool Piece – Face/Right side up
5. Hemmed Calico Piece – Face/Right side down
Then sew all around leaving the straight edge open…

Trim the seam allowance close to the stitching and whip stitch all the way round…

Then turn inside out so the hemmed wool is on one side and the hemmed calico is on the other…
The centre should be the thermal wadding sandwiched between the 2 pieces of calico with the pockets on them…

Turn in the raw edges and hand stitch the opening closed, attaching a hanging loop if you see fit…

Et Voila!  A pressing mitt…

 Next up, a sleeve roll…

Newer Posts
Older Posts
Portia
Follow
Sewbox

© Copyright 2026. Portia Lawrie. All Rights Reserved. Managed by WordPress Web Dev Cornwall .