• About
    • Contact
    • Press
    • Sponsor
  • DIY
    • Home & Garden
    • Jewellery & Accessories
    • Yarn Crafts
  • Sewing
    • patternless & self drafted
    • Refashions
    • Commercial Patterns
    • Sewing Tips
    • Overlockers
  • The Refashioners

Portia Lawrie

Inspiration, sweatshirt, Uncategorized

Inspo: Sweatshirts

02/05/16

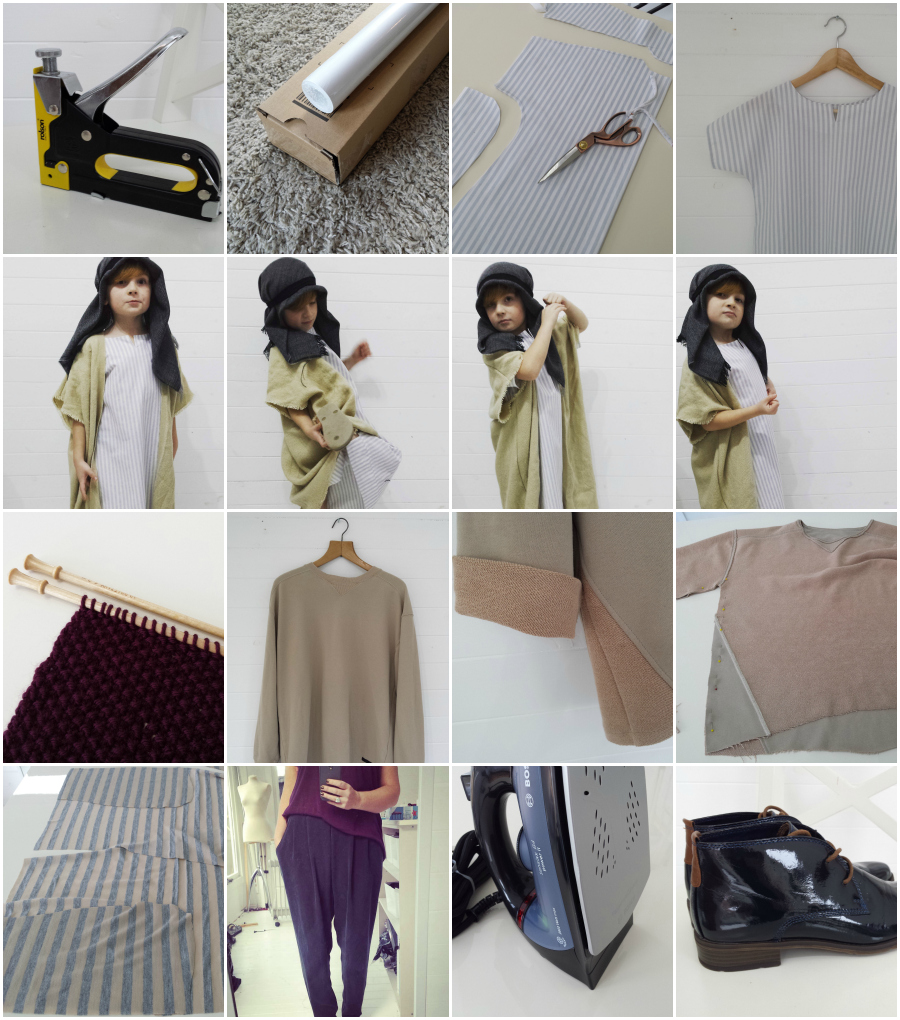
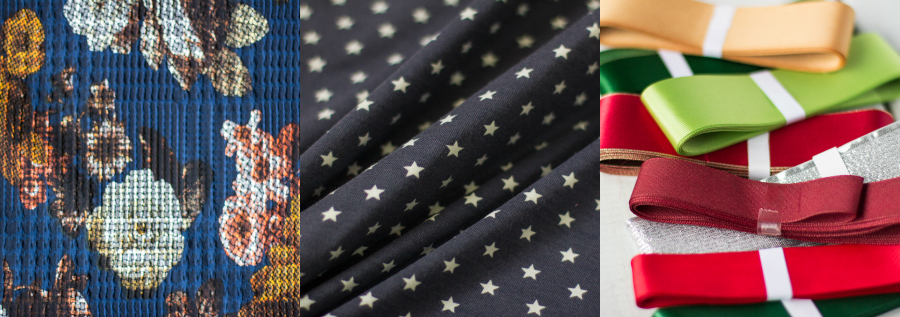
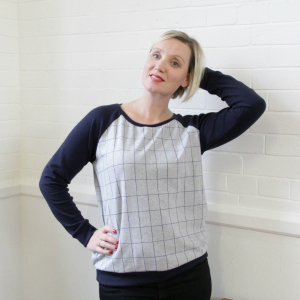
Do you ever get slightly obsessed with a particular garment? For me I never thought it would be the humble sweatshirt. But as soon as I made my black biker Linden I decided I needed more in my life. But a sweatshirt can be boring right? So I started looking around Pinterest for inspiration and ideas to elevate the simple sweatshirt into something a bit more edgy and interesting. Rabbit hole!! Hours lost!  BUT just LOOK at this little feast of inspiration….Linden inspo 1linden inspo 2linden inspo 3linden inspo 4

linden inspo 5linden inspo 6Zips, quilting, applique, textural contrast, alternative fabrics and trims, length and proportions, neckline shapes….from the likes of Phillip Lim , Isabel Marant, Asos, Madewell and Garance Dore to name but a few. The only problem here is deciding which details to use! After all….I don’t need 18 sweatshirts in my wardrobe…or do I? (For original sources you can find all of these pins and more here…)

Sweatshirts are such a quick and satisfying make and there are a proliferation of sewing patterns out there;. You’d think a sweatshirt pattern is just a sweatshirt pattern. But there are subtle differences between all of these.  Raglan, set in, or drop shoulder sleeves. Boxy, slim fit, loose fit or shaped in the body. Cropped, standard or longline. Here are just a few if you haven’t already jumped on this particular bandwagon…linden - sloane - fraser - sweatshirt patterns

Grainline’s Linden, Sloane by Named, Fraser by Sewaholic.

burda - capital chic - mcalls - sweatshirt sewing patterns

A longline plus size one from Burda, Capital Chic’s White Russian (I’ve made this. Nice pattern this, with quilting/embellishment elements included. Sally was way ahead of the curve on the quilted sweatshirt front). Mcalls M6992.

angela kane - 512 sweatshirt pattern

I also came across this one on Angela Kane’s site. Her site is a new discovery for me and it will probably turn out that I’ve been loving under a rock…but anyone familiar with her site and subscribed? Interested to hear from you on that one! I’m intrigued!

So, how about it? Feeling inspired to make a sweatshirt??


Uncategorized

Sponsor Spotlight: Inspo for Keepin’ it cosy!

02/04/16

I just can’t seem to warm up these past few weeks so it’s no surprise that I’m mildly obsessed with warm cosy layering right now. Having made my first Linden it’s pretty clear from how much I’m wearing it that my wardrobe would benefit from a few more! Seriously crushing on the idea of a Linden in this Cotton Nicky Velour in Blackberry from Dragonfly fabrics. Like, SERIOUS love. I’m thinking view B as opposed to view A though; to stop it looking a bit too Juicy Couture, or maybe using it as a contrast texture along with a standard sweatshirting….that could work right?dragonfly fabrics velour linden

I also have a length of this French Terry in Heather Grey from Girl Charlee in my stash. It’s actually quite lightweight. More like a thicker jersey as opposed to a sweatshirt fabric. So I’m thinking another Hemlock (just can’t go wrong with a Hemlock) but cuffing the sleeves so they can roll back and show off the contrasting loopy underside for a bit of textural contrast. Maybe adding a huge patch pocket….girl charlee french terry

I’ve been pondering the Lark Tee. I mean as a layering basic it’s a no brainer right? I worry a little that it might be too fitted for my liking though. Any of you made it? Any thoughts or feedback on that element? I can’t help but think it would be a versatile underlayer in something like this thick olive jersey. It comes in a range of colours but this one is a rarity.  I REALLY love olive green and it’s a colour I really really really want to incorporate into my wardrobe more. (I have zero me mades in this colour right now!) But for some reason there just doesn’t seem to be a huge amount of it about, as a colour, in any type of fabric. Am I alone in my olive green love? Is there a proliferation of olive green fabrics out there that I am just missing?White Tree Fabrics

If you prefer a set in sleeve to a raglan on your sweatshirts then there’s always Sewaholic’s more sporty offering, the Fraser. When these images first popped up in my feed I really liked the quilted fabric. I’m loving quilted sweatshirts right now (been pinning them like mad; more on that tomorrow) but quilting on that tiny scale is beyond the limits of my patience to do myself. But the fabric in the right hand pic bears more than a passing resemblance though, right!?dragonfly fabrics

The Fraser also has some rather interesting contrast elements included using punched pleather . This is another element I’ve been pondering. Using small amounts of leather /pleather trim. I even thrifted a leatherette jacket from the charity shop that I have since cut up to harvest the fabric. So something “pleather” (that word makes me chuckle.) related will be happening here soon! I  also stumbled on this (identical?) leatherette from Remnant Kings while I was having a mooch on their site. Spooky right?!Remnant Kings Leatherette

Cardi’s are another favourite of mine. Do love a nice cardi! Wendy’s Longley Cardi and  Brightside Shrug is a super fast and easy makes. I keep thinking I should try a pattern hack on the shrug and have the back section extend right down to the back of the knees in a kind of oversized cocoon stylee. That would work right? I haven’t sat down and worked out what that would look like  as a pattern piece yet.  If anyone does that hack before I get round to it….or if you’ve already done it…let me know pleeeease!!greyshrug_1024x1024

I am intrigued by this maxi cardi pattern by Jaimie Christine.  I can picture a maxi cardi in this stripe knit from Fabric Godmother. Looks supersoft right. If you hop over to Josie’s blog you can see the kimono cardi she made from it. Nice right? If you don’t have a pattern and need a tutorial to make your own...try this  😉fabric godmother

So where are we up to now? 3 layers? Lol! Tee, sweatshirt, cardi, ha ha! I’m STILL cold! Trouble is with layering up…it’s usually tricky to get your coat over?! On some school runs I have literally looked like the michelin man, ha ha! I’m not normally a cape kind of gal….and yes, I know Sewaholic’s cape pattern is kinda meant for sportswear. And yes, I know it’s meant to be like, a showerproof type fabric. Lightweight and all that. But for some reason I can really see it adapted for everyday wear in  an indigo corduroy (deep inky blues are really floating my boat right now.) or even a wool.  With a silky lining. I do get random ideas from time to time and sometimes they are so off the wall they are unworkable. But that could work couldn’t it??eimh

I’m kind of a bit of a print and colour phobe. But every now and then I surprise myself by REALLY liking a colourful print. And this Liberty print is a case in point. There’s no obvious rhyme or reason to it, apart from maybe, that growing obsession with deep inky blue….and the fact that the print is the right side of quirky. But hey….it would make a GREAT Rigel Bomber right??sewbox

Why oh why oh why are pattern envelope images so naff?? This is not the worst offender by far, lol! But that camo fabric?? But looking past that, to the shape of View A of Simplicity 1281…how PERFECT would that be for chucking on over multiple layers? In a camel wool?!!  It’s actually a really lovely, modern, on trend shape (shame about the camo) and would look amazing in felted or boiled wool. I may actually have to purchase this pattern….sew crafty camel blanket coat

I have plans to make a coat!  I don’t think my skill level is quite up to Heather’s gorgeous Clare Coat, (my plans are a tad more simple) but one can lust right? Again, unusually bold for me, but really liking the thought of a coat like this in a bold monochrome pattern like this tweed…splendid stitch clare coat


Everything above is available from my lovely sponsors. Whilst this post is designed to support those sponsors, I do genuinely sit there and work out my own wishlist. Keep an eye out for some of these ideas appearing here at some point. Also keep an eye on the sponsor banners in the side bar. Any special offers/discounts will be in there. And last but not least, mustn’t forget the lovely Clare from Swedish Tracing Paper.SWEDISH TRACING PAPER

If you follow me on IG you’ll know that I have been having a massive fitting marathon (sway back, forward shoulder, fba sigh…) on a Colette Laurel. And that stuff is sooooo useful for toiles and pattern adjustment. Especially folding out darts! There’ll be a post (or two) giving you the lowdown on my fitting traumas/ victories(!) next week some time. So if you have similar fitting woes….look out for that!

But for now…layer up….stay warm…it’s BITTER out there today!

DIY, how to, pattern adjustments, Pattern Drafting, Sewing, Tips and Tricks, Tutorials, Uncategorized

Top Tip: How to raise a “too wide” Raglan Neckline

01/28/16

… Read The Post

sponsor, Uncategorized

Happy New Year!! Sales, Deals and Discounts from my lovely sponsors!

12/31/15

As 2015 draws to a close, it’s inevitable to reflect on the past 12 months and begin to look forward to the year ahead. For me, 2015 has been a year of growth and milestones. I made the leap to full time blogging (well, full time in between mummy duties and household stuff!). I got my long awaited for Shedquarters. I took on my first freelance work with Simply Sewing magazine. The Refashioners 2015 was much more successful than I could ever have dreamed and this blog has gone from strength to strength. All in all, 2015 was a pretty good year. None of this would have happened without the continued support, encouragement and positivity of you lovely lot, my co conspirators/collaborators AND the wonderful people and businesses that have been supporting this blog over the past year. So by way of a thankyou, (as you’re likely forming sewing plans for 2016 already!) here’s a little run down of deals, sales and special offers from my lovely sponsors…

[catablog_gallery id=”5657″ template=”gallery” limit=”50″]

Just click on the thumbnail to be directed to the relevant site and be sure to make use of those discount codes!

As for 2016….plans are in motion peops! I’ll be continuing to work with Simply Sewing; collaborating with my sponsors to continue to bring you tutorials, ideas and giveaways; there will most definitely be another series of The Refashioners….and then there’s some other stuff….but I can’t tell you about that just yet 😉

So for now, let me wish you every bit of happiness, love, peace and joy that you can squeeze out of 2016. May the sewing gods smile on your every endeavour and when they don’t, may your seam ripper be your saviour!

See you in 2016 you gorgeous lot, and thank you for everything!

DIY, how to, refashioning, Restyles, Sewing, Thrifting, Tutorials, Uncategorized

Refashion: Contrast Texture Sweatshirt

12/18/15

This sweatshirt has been sitting in my refashion pile for several weeks. I have a preference for raglan sleeve sweatshirts as I find the fit more flattering. But this sweatshirt was so soft I nabbed it from the charity shop anyway. What’s more the underside of the fabric was really interesting to me (loopy terry texture and a pinkier colour than the right side) and even as I was lifting it off the rack in the shop, I knew I wanted to play with contrasting the wrong side of the fabric with the right side…sweatshirt refashion (1)

Whilst I am not overly sold on the final fit of this garment, I am in love with the contrast elements of it. I think it’s a really effective way of adding some interest to a plain sweatshirt and has applications for both refashioning and “from scratch” dressmaking. I’m sure it’s not just me that looks at the “wrong” side of the fabric and thinks….well that’s just as interesting as the intended right side. In fact I often spend time deciding which side of the fabric I prefer and want to use. The answer could be…..use both sides!sweatshirt refashion - contrast texture detail

The sleeves were a simple case of removing the ribbing cuffs and creating a turn up to display the underside of the fabric.

The triangular panels are also pretty simple. I did wing this a bit as it was an experiment. So there’s a couple of areas where I’ll tell you what I should have done to make things easier. But hey, the outcome is pretty much the same!sweatshirt refashion (14)

I began by opening the whole thing out. I knew I was going to need to reshape it at the side seams anyway. So began by cutting it open along the side seams and underarm seams…from the hem all the way to the cuff. Both Sides.

In this pic the whole thing is opened out (like a big cross) and then folded along the length, lining up sleeves and side seams so it lays flat and I could deal with the front and back of the sweatshirt separately. This is the front. I marked out and cut a wedge from the side. From the underarm to the hem. Cutting through both layers at once…sweatshirt refashion (15)

With hindsight, I’d actually advise removing the hem and any other bulkiness like it (I had those bulky hem vents) before marking and cutting the wedge. And actually I would measure and mark each side separately rather than cutting through two layers at once. The bulk of those seams and the double layers of thick sweatshirt fabric skewed my scissors resulting in slightly “non-identical” wedges. We need them to be identical for the next step.

Flip those wedges over and apply them to the opposite side of the sweatshirt (with a scant seam allowance) from which they were cut. Essentially reconstructing the shape of the sweatshirt. But now you have those contrasting wedges either side! sweatshirt refashion (16)

Press SA towards centre and top stitch.

Then repeat that process on the back…sweatshirt refashion (17)

…and reconstruct the sweatshirt by placing RS together and sewing together from cuff to hem on both sides…

I wanted to continue the “contrast triangle” element onto the neckline and swap out the ribbed triangle …sweatshirt refashion (3)

Plus I prefer a slightly deconstructed look as opposed to a thick band of ribbing…19

Pretty simple to do this using reverse applique.

First of all I made a snip up to the stitching line on the neckline ribbing…sweatshirt refashion (4)

sweatshirt refashion (5)

…and cut that ribbing away right next to the stitching line.

I’d shortened the sweatshirt at this stage so had some scraps left over…sweatshirt refashion (6)

I cut a square large enough to cover the triangle detail I was looking to reverse applique…

…and pinned it behind the triangle with the textured side facing outward…sweatshirt refashion (7)

Make sure it is smooth and flat.

Over at the sewing machine, line up your needle with the existing top stitching around the outside of the triangle…sweatshirt refashion (8)

sweatshirt refashion (9)

Then stitch right on top of that line of stitching to secure the new scrap of fabric in place…

This is how it looks on the reverse….sweatshirt refashion (10)

sweatshirt refashion (11)

Trim away the excess on the inside close to the line of stitching.

On the outside…make a snip into the “old” ribbed fabric that you want to remove being careful not to cut the new fabric behind!sweatshirt refashion (12)

sweatshirt refashion (13)

Then with small sharp scissors cut away the old ribbed fabric close to the stitching, to reveal the new fabric behind!

Hem…and that’s that!sweatshirt refashion (2)

I’m planning on revisiting this concept with my preferred raglan sleeve sweatshirt shape as I don’t feel 100% comfy in this shape. As I said, the fit part of this I’m not entirely content with. The contrast element concept though??sweatshirt refashion - contrast texture detail

Well, I think I should call that part a win don’t you??

DIY, how to, Knitting, Tutorials, Uncategorized, yarn crafts

DIY: Moss Stitch Infinity Scarf

12/14/15

My knitting “career” is littered with unfinished projects. I don’t think my attention span lends itself to long term projects. I know how to knit. But projects that involve alot of concentration, counting and keeping track are destined to fail in my hands. Period.

DIY MOSS STITCH INFINITY SCARF

So this simple infinity scarf in moss stitch was the perfect project for me. I was finally kicked into action when I saw Tamsin’s gorgeous scarf. She used the Gaptastic Cowl pattern; but this one was just done on the fly by counting and measuring. The completion of this marks my first EVER wearable knitted project! It’s as simple as knitting a super long rectangle (it’s knitted flat rather than on circulars) then joining the  two ends with a simple slip stitch. The moss stitch is super easy and provides a gorgeous texture and ANYONE that can cast on, knit and purl can make this scarf. All in it took me about 5 nights in front of the telly to complete. I really enjoy the repetition and mundanity of moss stitch. It’s like chewing gum for the brain if that makes sense. Very little concentration required and after a while it just becomes a “muscle memory” type thing. A stitch you can do without thinking, whilst binge watching a box set on Netflix 😉

The yarn is Debbie Bliss Cashmerino Aran weight yarn in plum. Super difficult to get a consistent colour representation in the images, I’m sorry! The image above is the closest to the actual colour (if a teeny bit more purpley). Really soft and easy to knit with and this make took 4 x 50g balls. Massive array of colours.DIY MOSS STITCH INFINITY SCARF

The gauge calls for 5mm needles. I wanted a slightly looser/drapier texture so opted for 6mm. These Brittany birchwood needles are so lush to knit with I have to say. I scored them in a charity shop a couple of years back for, like, £1 or something silly! (Charity shops are great places to stock up on knitting needles and crochet hooks ). These are a bit spesh though. They feel wonderful in the hands and stitches just slide along them. £1 well spent!

So…onto the deets. I’ll start by saying this is NOT a knitting pattern per se. I’ve written this so that anyone not familiar with pattern terminology can easily follow it and get the gist. And I don’t want anyone thinking I’m some kind of knitting guru because I am SO not. BUT, I did want to share this because I hear people say so often, that they can’t knit. Seriously, you can knit this. Start by casting on an odd number of stitches. The reason it’s on odd number is that it keeps it simple when knitting each row. Each row is exactly the same. Nothing to remember when you turn your work. Every row starts and ends with a knit stitch. Simple! Great video here for casting on.

DIY MOSS STITCH INFINITY SCARF

I cast on 43 stitches. This gave me a width of about 11″ for my finished scarf in this yarn; which works well for doubling over the scarf when wearing. If you want it wider, cast on a few more stitches. Narrower, cast on a few less. If you’re using a different weight of yarn, simply cast on until the row of stitches on your needles measures the desired width of your finished scarf. Just make sure it’s an odd number.

But let’s work on the basis of this scarf and this yarn for now. Seriously simple. Moss stitch is a beautiful stitch that alternates knit and purl stitches. (K1, P1, K1,P1 etc) Great video for knit here and purl here. This scarf is knit as follows:

  • Cast on 43 stitches
  • Knit the first stitch
  • Bring the yarn between the needles so it’s at the front
  • Purl the next stitch
  • Bring the yarn between the needles so it’s at the back
  • Knit the next stitch
  • Repeat that process to end of row
  • Every row identical

DIY MOSS STITCH INFINITY SCARF


Keep going until the whole piece measures approx 50-54″ (Make sure you have a small ball of yarn left for finishing) then cast off and join the two ends together with a slip stitch. Weave in ends and you’re done!!

If you’re like me and you’ve never finished a knitting project before…this could just be it! And a great handmade gift too :

Uncategorized

My Instaweek

12/11/15

I spend alot of time on IG and sometimes I forget to pop over here and update with what’s been occurring and what’s coming up. It’s been a relatively successful and productive week or two. I’ve dug out my staple gun and am recovering some dining chair seats for one of the mums at school. All the Christmas shopping is done and the wrapping paper has arrived! I’ve gone for kraft paper in gold, silver and white (Had a little row with Amazon over the packaging of the other two rolls!) so that is my colour scheme for wrapping this year. I have plans for some simple embellishment to the packages and if that works out, then look out for a post on that next week. Elliott’s Nativity is next week and this year, unusually for him, he was right into the idea of dressing up. Came to me with sketches of what he wanted and everything, lol! Well, who am I to deny him his vision! The tunic is whipped up from the same fabric as my ironing board cover, the robe is a cheapo ikea throw cut into panels and sewn together and he has the waistband of an old pair of tights holding his headress on! But judging by how keen he was to pose for photos he’s happy. Looking forward to seeing that on Wednesday (nativity plays make me cry every time!)Instaweek Dec

I knit my first ever thing that I actually wear too!! it’s a simple moss stitch infinity scarf and there’ll be a post on that next week; as well as a sweatshirt refashion that I am really rather pleased with! It plays with contrasting the RS and WS of the fabric. I often find the underside of a fabric as pretty as the intended right side. I think you’re gonna like this one 😉 It wasn’t all plain sailing. I tried to replicate my harem pants in a stripe jersey as pyjamas. Total fail peops. Total fail! I did however have more success with some different trousers. I actually finished these pleat front trousers with slant pockets a few weeks back but have yet to photograph them for the blog. So that’ll be  coming up soon too. They’re a hack on Tessuti Patterns Suzy Pant…although hacked so much there’s only a vague resemblance left, lol! Birthday presents have started to roll in too!!! (Tuesday and 41 in case you were wondering). J got me an iron. Now to most of the female population that would draw consternation and likely a short sharp slap and the cold shoulder for the next month. But to a sewist??? Chuffed to bits. The boy did good. It’s a good one too and can recommend 🙂 But I think the feature J likes the most is the auto cut off if it’s left standing for 8 minutes without being used. He’s always moaning at me about the iron being left on. Oh….and I got some new boots which I’ve worn every day for the past week I love them so! Navy patent and seriously comfy. Happy birthday to me!

So that’s what has been and will be occurring here. How about you? Ready for Christmas or leaving it late?!!

DIY, gift ideas, how to, Tutorials, Uncategorized

DIY: Message Mugs

12/09/15

You can never have too many mugs. Especially when you drink as much coffee as we do in this house! Here’s a cute and simple way to personalise a plain mug as a last minute gift!diy sharpie message mug

These would be great wrapped in clear cellophane and filled with treats like fudge, marshmallow and such for gift giving.

diy sharpie message mug

You’ll need a plain mug. (The cheaper the better in this instance as the glaze will likely be less resistant when you come to heat it) Some vinyl stickers (letters, shapes, whatever you want. But vinyl…NOT paper as the ink will bleed through paper) and an oil based sharpie or a ceramic pen. Categorically, do not use a normal sharpie pen as they are water based and the marks will start to come off as soon as you wash it. If you follow me on IG you might remember a version of this pop up on my feed almost a year ago. It didn’t make it onto the blog because I used a normal sharpie and it DID NOT WORK. Learn from my mistakes people…learn from my mistakes 😉

diy sharpie message mug

Make sure your mug is clean and dry before you start. Clean the surface with white spirit/rubbing alcohol/nail polish remover to remove any residual grease before you start. Use the stickers to spell out your message taking care to keep the letters evenly spaced and level AND making sure they are firmly smoothed down all over but especially at the edges.

diy sharpie message mug

Take your pen and overlap “polka dots” all the way around the outline of the letters including any spaces inside the letters. Don’t overload the nib of the pen at this stage as it may lead to some of the paint seeping under the edge of the stickers and we want a nice clean edge.

diy sharpie message mug

Then fill in the area all around and inbetween the letters with more dots. Keep the dots dense in and around the letters then as you work outwards from the letters, have the dots become less dense and further apart.

diy sharpie message mug

Allow to dry. I left mine for at least an hour; before carefully removing the stickers. Use nail polish remover, cotton buds and a small scraping tool of some kind to clean up any ink that has “bled” under the stitckers. There shouldn’t be much if you firmed the edges down and didn’t overload the paint.

diy sharpie message mug

Once the stickers were removed I then went back and added more dots to even out the graduated effect. Elliott decided he wanted one too! So I grabbed a little espresso cup and monogrammed it for him, lol!  Et voila! Leave to “cure” for a day or so then bake in the oven. For a sharpie one place the mug in the oven then heat up to 220 celsius. Bake for 30-45 mins. Switch the oven off and allow to cool completely before removing from the oven. If you use a ceramic pen, follow the manufacturers instructions for setting/fixing the paint. For both pens the finished mugs will be handwash only for best durability.

diy sharpie message mug

I played around with some alternative marking techniques. I quite like them all! May have to make some more!!

Uncategorized

November Sponsor Spotlight: What would you make if you could make anything!

11/30/15

Have you ever wondered, if you could choose from a whole shop/storeroom full of supplies…what would choose and what would you make?  That’s exactly the position these crafty business owners are in. So… for this month’s sponsor spotlight I thought I’d get nosy…I asked this lot what they were making, what their personal favourite products were and their top tips for last minute gift making! I also managed to get pics from MOST of them….so you can see the people behind the scenes…like little elves they are…getting all those orders ready for all you ambitious gift sewers out there…oh and a few discount codes in here too…so keep your eyes peeled for those!

Amy from A Splendid Stitch: 

Amy from Splendid StitchI’m just about to start sewing McCall’s 6885, which was our ‘Outfit of the Week’ for the week of 2 November.  It’s a fantastic shirt dress pattern, and I’m going to make view D in our burgundy Madeleine poplin.  I’m really loving shirt dresses at the moment – so comfortable and easy-to-wear!  I find I can wear them both for work and for going out, which makes them really versatile. Well, right now, it’s McCall’s 6885.  :-)  For fabric, I currently have a big crush on our Atelier Brunette viscose challises: I love their weight, drape and silky feel.  They’re really unusual: very different than other viscose challises.  I’ll be expanding our selection soon: can’t wait!  With the cooler temperatures, I’m also really loving our French terrys and ponte di romas.  I’m thinking of making a sweatshirt dress next using our black Steffi French terry. Is 30 November last minute?  I don’t usually start thinking about Christmas gifts until mid-December!  LOL  I’ve been loving the ‘Handmade Holidays’ series on ‘Sew Mama Sew’: there are so many fabulous gift ideas here!  If I had time to sew Christmas gifts (and I don’t think I will this year!), I would probably veer towards making aprons, pot-holders, makeup bags, makeup brush cases, and tote bags: they’re pretty easy to sew, and I can see my family and friends really loving these.  🙂Amys Picks

Current Discounts: 10% off with PORTIA10  plus  Black Friday sale is running until 11:59 pm on Monday ie TONIGHT! (20% off all patterns and fabric with the BLACKFRIDAY20 code).


Dorte & Simon from Dragonfly Fabrics
Simon & DorteI’m working on the Kanerva Blouse from Named Patterns and using our lovely mustard silk blend, I’m hoping to get it ready for the party season. I am also sewing up a few quick Grainline- Lark Tees in gorgeously soft warm cotton jersey, perfect for winter layering and the Lourdes cropped jacket in boiled wool.
My favourites at the moment are the Ponte Romas as they are so easy to sew and they are a great quality. Also the boiled wool of course, the beautiful new velveteen in teal and the herringbone pure wool for skirts and winter garments such as jackets, coats or pinafores.  We have just created a DIY-kit to sew your own cosy mittens with boiled wool. It’s a fantastic way to make your own presents or it’s perfect as a gift for someone who likes sewing and making.dortes picks

Current Discounts: 15% off with DRESSMAKING until 20th Dec


Wendy Ward

Wendy-JulianWardRight now I’m making samples for my new book! Sorry, I’m not telling you what they are just yet. Currently on my “to sew” list If I ever have the time are: an idea I’ve had kicking around in my head for ages for a cosy oversized sweatshirt and a coat version of the zip jacket in my current book Beginner’s Guide to Dressmaking. My Fulwood dress is a constant favourite with students and MIY Collection customers and I must admit to having made a fair few myself – there are just so many ways you can make that pattern. I’m also loving my new kits – what’s not to like about just opening a lovely box of everything you need to just get sewing without wondering what will be the best fabric to use?!  A little heads up…..the Fulwood dress will also be available as a kit soon!!PJ trousers, definitely, every time are a handmade Christmas gift winner.  Quick to make and cosy to wear so you know they’re going to be well used.  Win win.  I made 3 pairs last year and have a sell-out master class of students making them in early December.Wendys Picks


Sammy from Sew Crafty

Sam-CalridgeI am deep in to Christmas stocking making for my friends new little ones and trying to decide if it is a good idea to re-visit tartan trousers after 15 years. I love this Floral jacquard because it reminds me of Dior and this Slate star jersey which I have just made in to comfy PJ bottoms. Monograms or initials on gifts are a great way to personalise a gift and can make the simplest make look gorgeous. Try adding beads, embroidery or iron or ready made motifs to purses or make up bags for the girls, and camera straps or coffee mug cosies for the boys.Sammys Picks

Current Discounts: 20% off with portia20


Clare – Swedish Tracing Paper

Clare from Swedish Tracing PaperMy focus at the moment is the Makers Workbook, created by moi! It’s been quite a journey! But I’m really pleased with the result and (if I may say so) I think it’d make a rather lovely Christmas present. There’s a load of descriptive text about its features, and photos at www.makersworkbook.com. The 10% off code MAKERY is still in action and can be applied to both STP and the workbook.  I’m making  the slowest Moss skirt ever! I’m blaming the dark evenings, but I’ve had success putting in my first ever zip fly, and just need to knock up a waistband. I’ve used a wool mix (impossible to press – gah!), but I’m telling myself it’ll look fab with thick tights and boots. My favourite product at the moment is the Workbook. I’ve started using my copy and, it’s made me just think that bit more carefully as I’m going along. I’ve already looked back at the record of a shirt I made my Boyfriend (it was a bit too small) to see what changes I would need to make to a second version. A last minute gift. No one could resist a little Narwhal for their tree could they?!

Clares Picks

Current Discounts: 10% off with MAKERY


Susan from Sewbox

01 01 01_0238 - CopyWell I could say I was progressing well with a short straight skirt ready to wear with thick tights and flats for the xmas season but in reality I Am actually in the very early stages!!  Am making in liberty cord which in my opinion lends itself well to this style and the prints are vibrant so plain top and coordinating tights sets them off. Must get a move on and get it finished. Following on from above my personal favourites at the moment are the liberty needle cords. So right for the season and again the prints are rich, vibrant and worn with a plain coordinating colour really shows them off to their best potential. I am making felt hearts with a bit of liberty cord on the front to attach to special Christmas presents easy to do and quite therapeutic. Am adding a bit of lavender and trecipient can keep the heart and hopefully knows the present has been packaged with a bit more of an effort involved!Susans Picks

Current Discounts: 10% off all Liberty cords 1 December to 14 December  Code: PORTIA10 Sale now on


Josie from Fabric Godmother

IMG_9874aMy last make was a linden sweatshirt that I adore. (Pictured left.) It’s one of my all time favourites that I can “knock up in 45 minutes” patterns, made here in our checked jersey and navy roma. Currently I am making a Cypress cape from Sewaholic in Cassie technical fabric.  I am hoping that it will keep the drizzle off when I cycle to nursery (also planning to make a matching one for my daughter to wear on the back of the bike to keep her dry). I am also making a pencil skirt out of faux leather in gold, it is going to be my Xmas party skirt!My current favourites change between these…Alexia (for a pencil skirt), Pixy (some kind of shift dress), Ramone (A kimono). Top tip for a last minute handmade christmas present is a luxurious kimono, they are quick to make and do not need too much fitting so easy to make as a surprise gift!Josies Picks

Current discount:  PORTIAXMAS will give you 10% off till Xmas eve!!


Lisa from White Tree Fabrics

I’m currently making up one the ingenious UHandbag kits, namely the Sugar Loaf Pouch. I love the fabric in this pack! It reminds me of a Cath Kidston print. I’m desperate for a new make-up bag so I thought rather than pay Cath Kidston for a new one, I’d have a crack at the Sugar Load pouch. I’m taking photos and making notes as I go so I can create a WhiteTree blog post from it. The notions and fabrics are all fab and the instructions are crystal clear and easy to follow. Right now, I keep hanging my nose over all of the Art Gallery Fabric jerseys. There are some fantastic designs, my personal favourite just happens to be called Maker Make! 😉 Although they do have some florals, there are plenty of abstract designs. These fabrics are currently flying out the door as fast as I can get them in. For quick gifts, the Sew Over It complete kits can be whipped up in an afternoon. There’s the tie kit, the knickers kit, the lampshade kit and now the matchbox kits which are the perfect crafting project for any age….you can make them yourself or sit and help your young ones create gifts to give to friends and teachers.

Lisas Picks

Current Discounts: 20% off with MAKERY


Hazel from Remnant Kings

170915_RemnantKingGlasgow_12I’ve just finished making Republique du Chiffon’s Raymond jacket with our gorgeous ex-designer wool , lined in silk for a little extra luxury touch.  I’ve kept the buttons minimal to let the fabric do the work on the relaxed shape and fit of the jacket.  I’m pretty sure it’s going to be my winter staple!  My favourite products at the moment are our new boiled wools (which landed in store this week and will be online asap) which are the perfect weight for coats and jackets.   I’m all about outerwear this year as I love the detail and techniques you get to use in these kinds of projects.  So much so have been planning lots of jackets and coats to give to people as gifts this year which is probably a little ambitious!  But for a simple Christmas make, you could use some of our Christmas print cottons and make a bottle bag and pop a bottle of the recipients favourite drink.  A really easy and quick make that adds a personal touch.Hazels Picks

Current Discounts: 10% off with MAKERY10


The Team at Girl Charlee

gcukcrewWe’re currently making Christmas stockings and gift bags (well Jen is bless her!)  with our “Fairisle Deer” (more of the red/green stock coming 10th December) and “Love” fabrics  We’re also making a start on the Girl Charlee Blog - so keep an eye out for our first post soon! Our current favourites are a classic stripe ponte, this arrow on blue cotton jersey is perfect for festive makes; and we’re also crushing on this modern air prairie stripe and buffalo plaid. Top tip for a last minute handmade/diy christmas gift?? How about a free pattern for a baby onesie -  or for an adult version… we love this Kigurumi tutorial from Helen P you can use any Girl Charlee cotton jersey knits or sweatshirt fleeces.girl charlee picks

Current Discounts: 10% off with MAKERY


Stephanie from Elephant in My Handbag

Stephanie BrushfieldMermen are flying out of the door at the moment – Fantastic alternative gift or Christmas decoration. Lampshade kits are proving very popular too; OR Finally ….Star Wars fabric is flying out (excuse the pun eh Steph?) ! Perfect for Christmas crafting for the Sci Fi fans in your life! Elephant in my Handbag is a family owned craft and fabric business based in Hawkhurst in Kent in the south east of the United Kingdom.We make it our mission is to find interesting and exciting things for you to use to create unique projects. Why the name?! Well, when the kids can’t think of a word we always go… “Elephant? Gazelle? Giraffe?”, so elephants hold a special place in our hearts.   And I do love a handbag ! – Mine is a little on the heavy side (although there aren’t any elephants in it !)

Stephanies Picks

Current discount:  10% off your first order with  MAKERY

Phew! So there’s a few more ideas (and discounts!) to be going on with!!

DIY, Freebies, Giveaways, how to, Sewing, Tutorials, Uncategorized

FO: Cable Ponte Coatigan (+ Dragonfly Fabrics Giveaway!)

11/23/15

This is a hack I’ve been wanting to test out for a while. A simple raglan sleeve sweatshirt pattern, to my mind, had potential to be hacked into coatigan. And what do you know…RAGLAN SLEEVE COATIGAN

I’d been eyeing this cable knit jacquard ponte from Dragonfly Fabrics. When it arrived I wasn’t disappointed. Yes it is as soft, squishy and bouncy as it looks. The only unexpected thing for me was the reverse of the fabric wasn’t grey but a black synthetic mesh type affair. The best way I can describe it is a sandwich of layers. I’d been flippy flopping between a skirt, dress or jacket for this fabric. Once I saw the reverse I decided on the coatigan. Because of the warmth of this fabric and the underside, imho, lends itself well to outer garments as opposed to sitting in direct contact with the skin…RAGLAN SLEEVE COATIGAN

To work with…it’s delicious. My serger and standard machined uttered not the slightest resistance. It’s very stable and cuts and sews like a dream. No stretching, wavy seams, curling or skipped stitches. Up the stitch length on your standard machine and use universal or jersey 80/12 needles would be my advice. But the speciality needles are in no way necessary as this fabric isn’t the least bit tempermental

You can use any “loose/easy fit” sweatshirt or raglan sleeve pattern for this hack. The Linden would be a good choice. I happened to have the 2 Hour Top Pattern from Sew Different cut out so that’s what I used.  I simply  lengthened the front and back pieces, and the sleeves; then made up to this stage…RAGLAN SLEEVE COATIGAN

Sliced up the middle…RAGLAN SLEEVE COATIGAN

Drafted a facing for the neckline and opening…RAGLAN SLEEVE COATIGAN

Applied the facing RS together, turned through to the inside, pressed and top stitched down. The sleeve hems were simply turned and stitched. The main hem was finished in combination with the bottom of the facing in the same way as my shirt kimono for The Refashioners.

RAGLAN SLEEVE COATIGAN

This make was very much me testing an idea out. So what I might do differently next time revolves mainly around the neckline. Sometimes when I’m experimenting I get carried away and don’t consider all the elements! For me the neckline is a little wide and a little low (at the back in particular) for this. Don’t get me wrong. It’s fine and I’ve worn it plenty since I made it. It’s just one of those “even better if” kinda things you know? And POCKETS! Why the hell didn’t I put in seam pockets in?? I have a little fabric left so I may go back this week and add on some oversized patch pockets.RAGLAN SLEEVE COATIGAN

In terms of variations, I’m thinking a gold zip right down the front would look ace. Add a hood…make a cropped version…anyway…I digress!

Back to the giveaway.  Simon and Dorte at Dragonfly Fabrics are generously offering the following: First Prize: £25 to spend in their online store. Second Prize: A sewing pattern of your choice from their extensive range. To enter all you need to do is complete a super short survey then leave a comment here to let me know you’ve entered. (It’s really quick, I promise). What’s more, while the giveaway is running there’s 15% off all orders when you use the code DRESSMAKING at checkout. 

Giveaway (and code) expire Sunday 29th November at Midnight GMT. Winners will be selected at random and notified by email.

GIVEAWAY IS NOW CLOSED. Code has been extended to 20th December.

Newer Posts
Older Posts
Portia
Follow
Sewbox

© Copyright 2026. Portia Lawrie. All Rights Reserved. Managed by WordPress Web Dev Cornwall .