• About
    • Contact
    • Press
    • Sponsor
  • DIY
    • Home & Garden
    • Jewellery & Accessories
    • Yarn Crafts
  • Sewing
    • patternless & self drafted
    • Refashions
    • Commercial Patterns
    • Sewing Tips
    • Overlockers
  • The Refashioners

Portia Lawrie

DIY, gift ideas, how to, Tutorials, Uncategorized

DIY: Message Mugs

12/09/15

You can never have too many mugs. Especially when you drink as much coffee as we do in this house! Here’s a cute and simple way to personalise a plain mug as a last minute gift!diy sharpie message mug

These would be great wrapped in clear cellophane and filled with treats like fudge, marshmallow and such for gift giving.
diy sharpie message mug

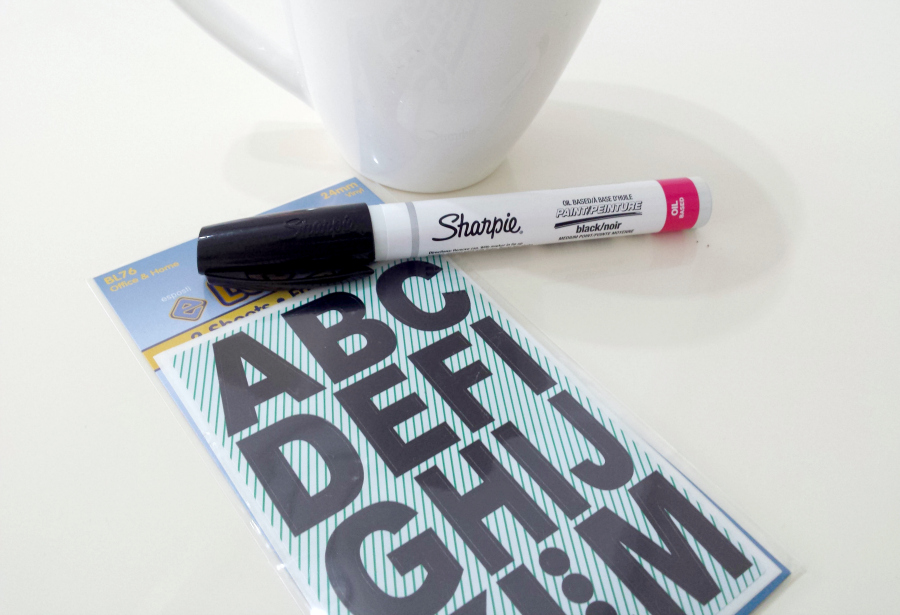
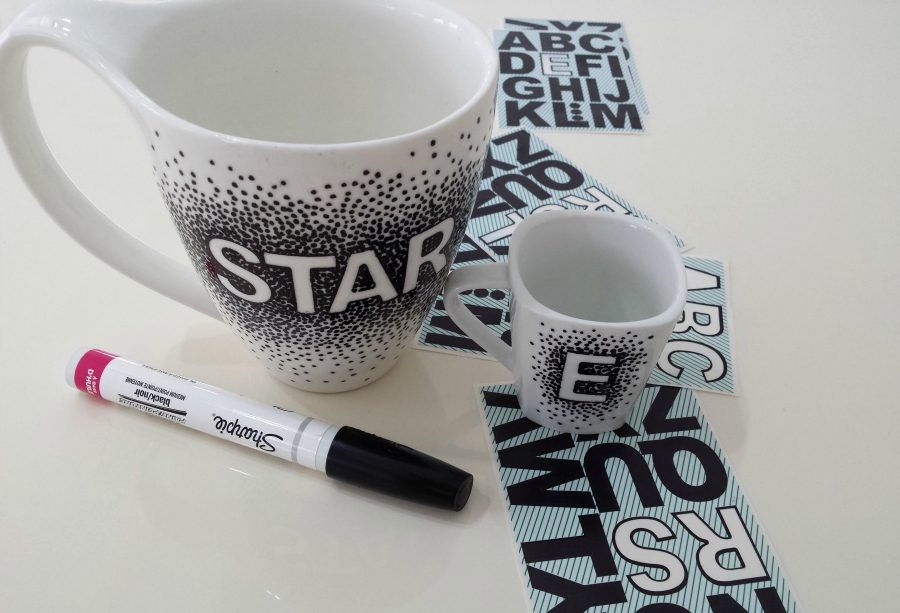
You’ll need a plain mug. (The cheaper the better in this instance as the glaze will likely be less resistant when you come to heat it) Some vinyl stickers (letters, shapes, whatever you want. But vinyl…NOT paper as the ink will bleed through paper) and an oil based sharpie or a ceramic pen. Categorically, do not use a normal sharpie pen as they are water based and the marks will start to come off as soon as you wash it. If you follow me on IG you might remember a version of this pop up on my feed almost a year ago. It didn’t make it onto the blog because I used a normal sharpie and it DID NOT WORK. Learn from my mistakes people…learn from my mistakes 😉
diy sharpie message mug

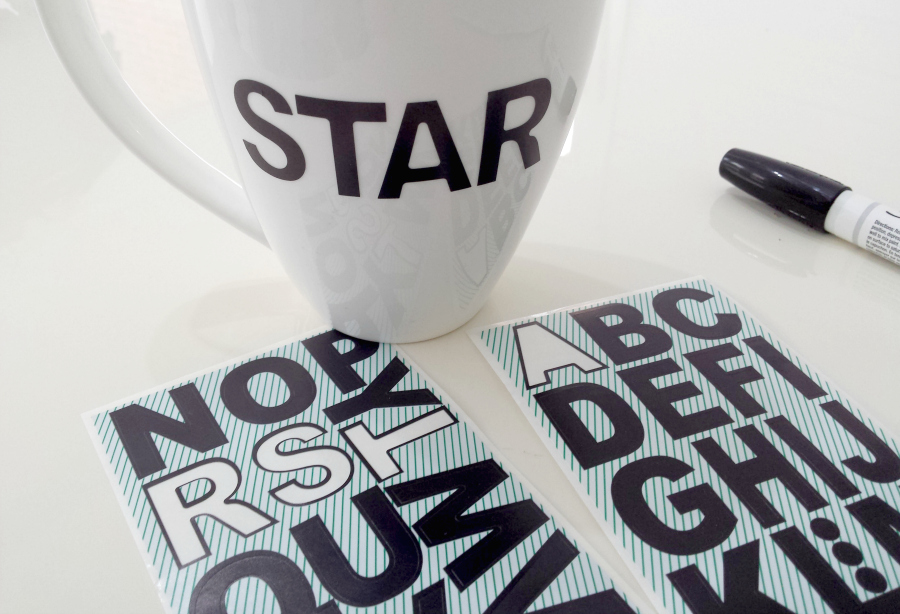
Make sure your mug is clean and dry before you start. Clean the surface with white spirit/rubbing alcohol/nail polish remover to remove any residual grease before you start. Use the stickers to spell out your message taking care to keep the letters evenly spaced and level AND making sure they are firmly smoothed down all over but especially at the edges.
diy sharpie message mug

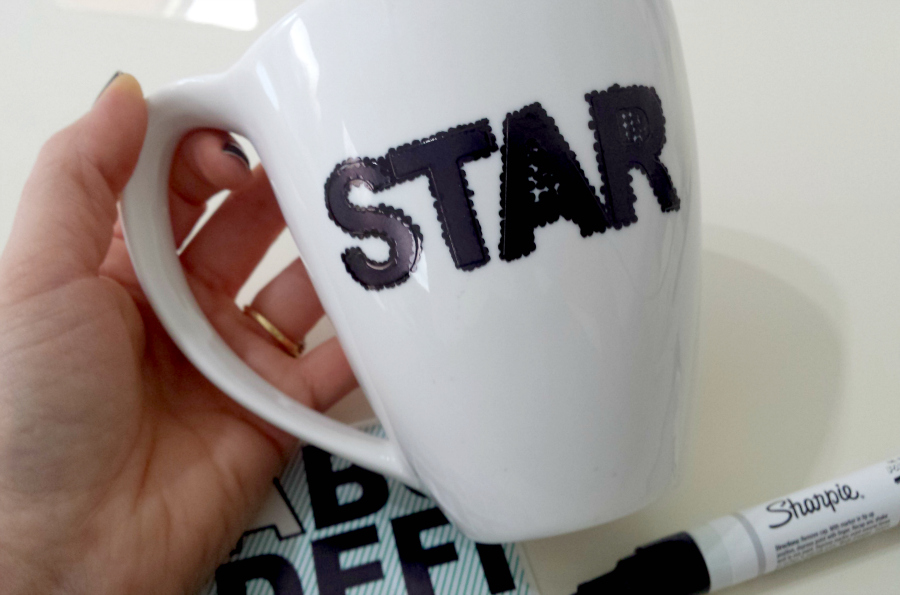
Take your pen and overlap “polka dots” all the way around the outline of the letters including any spaces inside the letters. Don’t overload the nib of the pen at this stage as it may lead to some of the paint seeping under the edge of the stickers and we want a nice clean edge.
diy sharpie message mug

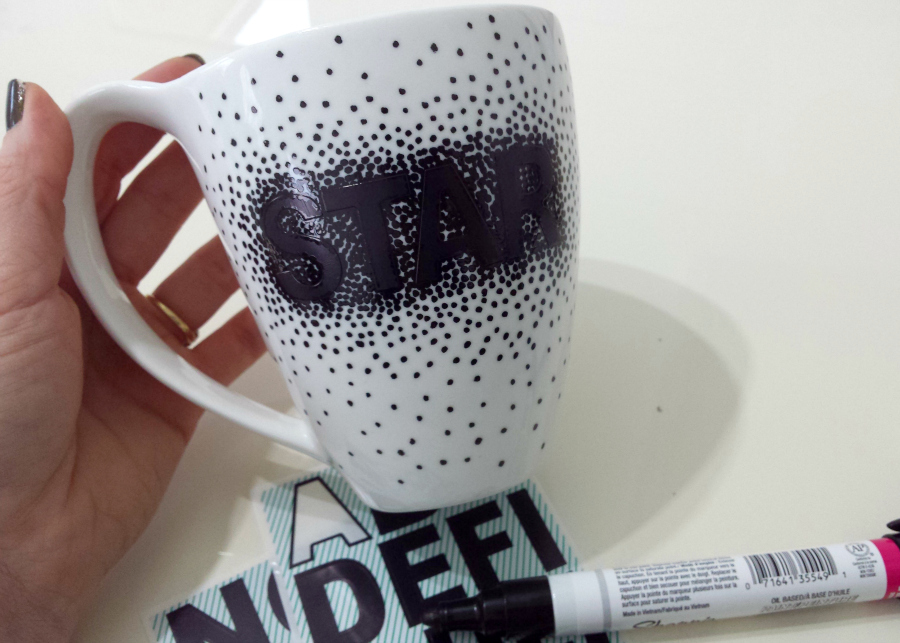
Then fill in the area all around and inbetween the letters with more dots. Keep the dots dense in and around the letters then as you work outwards from the letters, have the dots become less dense and further apart.
diy sharpie message mug

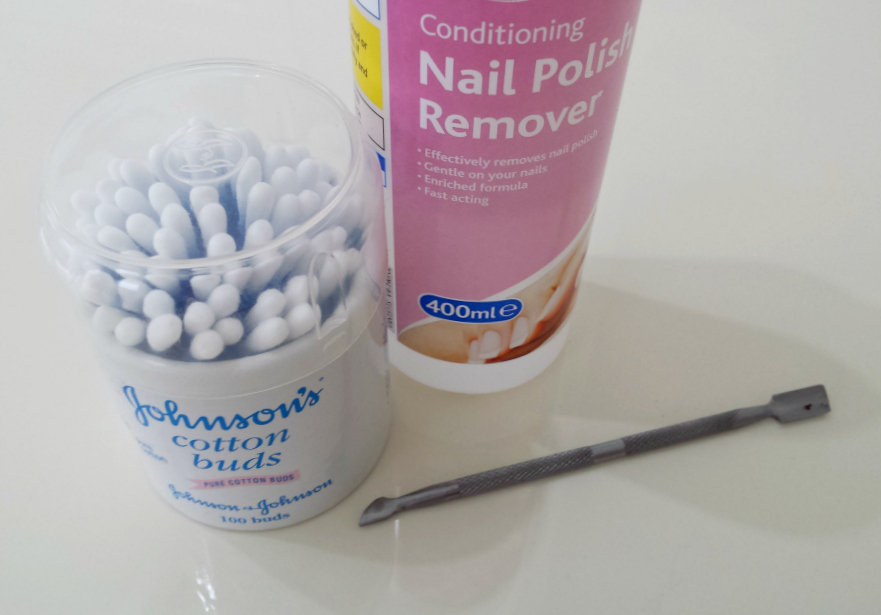
Allow to dry. I left mine for at least an hour; before carefully removing the stickers. Use nail polish remover, cotton buds and a small scraping tool of some kind to clean up any ink that has “bled” under the stitckers. There shouldn’t be much if you firmed the edges down and didn’t overload the paint.
diy sharpie message mug

Once the stickers were removed I then went back and added more dots to even out the graduated effect. Elliott decided he wanted one too! So I grabbed a little espresso cup and monogrammed it for him, lol!  Et voila! Leave to “cure” for a day or so then bake in the oven. For a sharpie one place the mug in the oven then heat up to 220 celsius. Bake for 30-45 mins. Switch the oven off and allow to cool completely before removing from the oven. If you use a ceramic pen, follow the manufacturers instructions for setting/fixing the paint. For both pens the finished mugs will be handwash only for best durability.
diy sharpie message mug

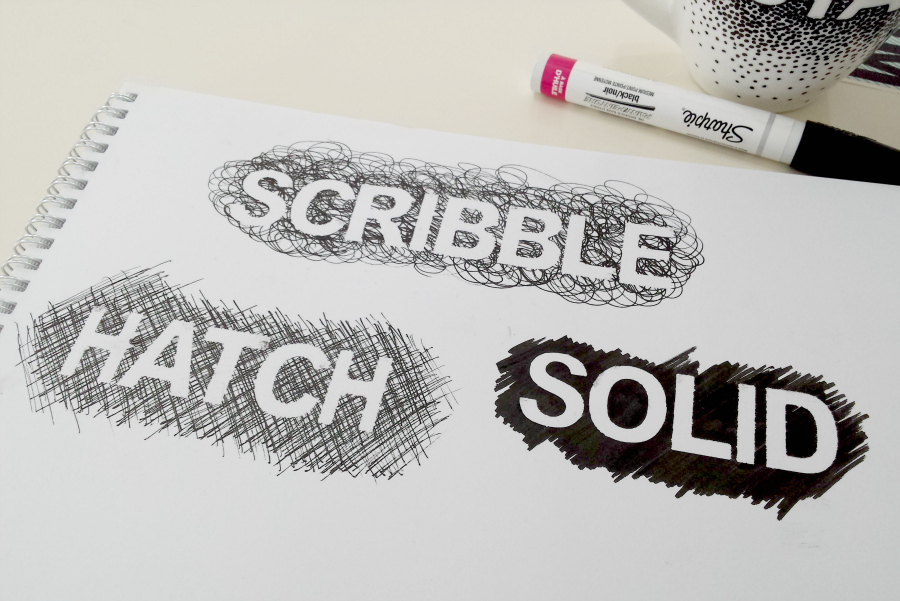
I played around with some alternative marking techniques. I quite like them all! May have to make some more!!

Crafting, decor, DIY, gift ideas, home, how to, interiors, Tutorials

DIY: Torn Clay Bowls

03/19/15

DIY Torn clay bowls from air dry clay at www.portialawrie.co.uk

Staying with air dry clay for now, these bowls were actually the first thing I made, and the clay and copper magnets the last. While I smoothed and sanded the fridge magnets, there was also something that appealed to me about the texture of this clay in it’s unrefined state. I had planned on making simple circular bowls cut out with a knife, but I liked the uncut edge so much I thought I’d make it a feature….

DIY Torn clay bowls from air dry clay at www.portialawrie.co.uk DIY Torn clay bowls from air dry clay at www.portialawrie.co.uk

I think it gives them a lovely delicate organic feel!

DIY Torn clay bowls from air dry clay at www.portialawrie.co.uk

To make, you’ll need air dry clay, bowls (to use as molds) rolling pin, and a palette knife…

DIY Torn clay bowls from air dry clay at www.portialawrie.co.uk

Knead the clay until soft and pliable then roll out flat. The edges will take on that “torn” appearance naturally as it’s rolled. About 3-5mm in thickness depending on how delicate you want it. The thinner it is the more fragile it will be. The edges of my bowls are pretty thin because I’ve never been great at rolling with an even pressure. So my bowls are pretty delicate around the edges and thicker around the base. But hey, I’m embracing the uneveness!


DIY Torn clay bowls from air dry clay at www.portialawrie.co.uk

Drape over a bowl and gently coax into shape…you can see there are some faint cracks around the base….


DIY Torn clay bowls from air dry clay at www.portialawrie.co.uk

I recalled from pottery at school (don’t ask me how because that was some time ago!) using tepid water to smooth the surface of the clay. Just a little on your hands and smoothed gently over the surface of the clay in a circular motion will smooth out any unwanted cracks, lumps and bumps…then leave to dry for a couple of hours on the bowl but not for the full drying time as the clay will gradually tighten on the bowl as it dries and shrinks and is liable to get stuck!

DIY Torn clay bowls from air dry clay at www.portialawrie.co.uk

After a couple of hours veeeeery gently use a palette knife, slipped between the clay and the bowl,  and gently work around the circumference until it pops off. Place on a rack on a sunny ledge and leave to fully cure for a couple of days…

DIY Torn clay bowls from air dry clay at www.portialawrie.co.uk DIY Torn clay bowls from air dry clay at www.portialawrie.co.uk

This stuff dries a beautiful natural white. You could choose to decorate or leave it au natural like I did. When dried it has a very lightweight almost unglazed porcelain feel to it.

Gorgeous!

I have another project to share with you shortly. But considering how much I’m crushing on this material at the moment there may well be more!

DIY, endless leather, gift ideas, how to, Tutorials, Uncategorized

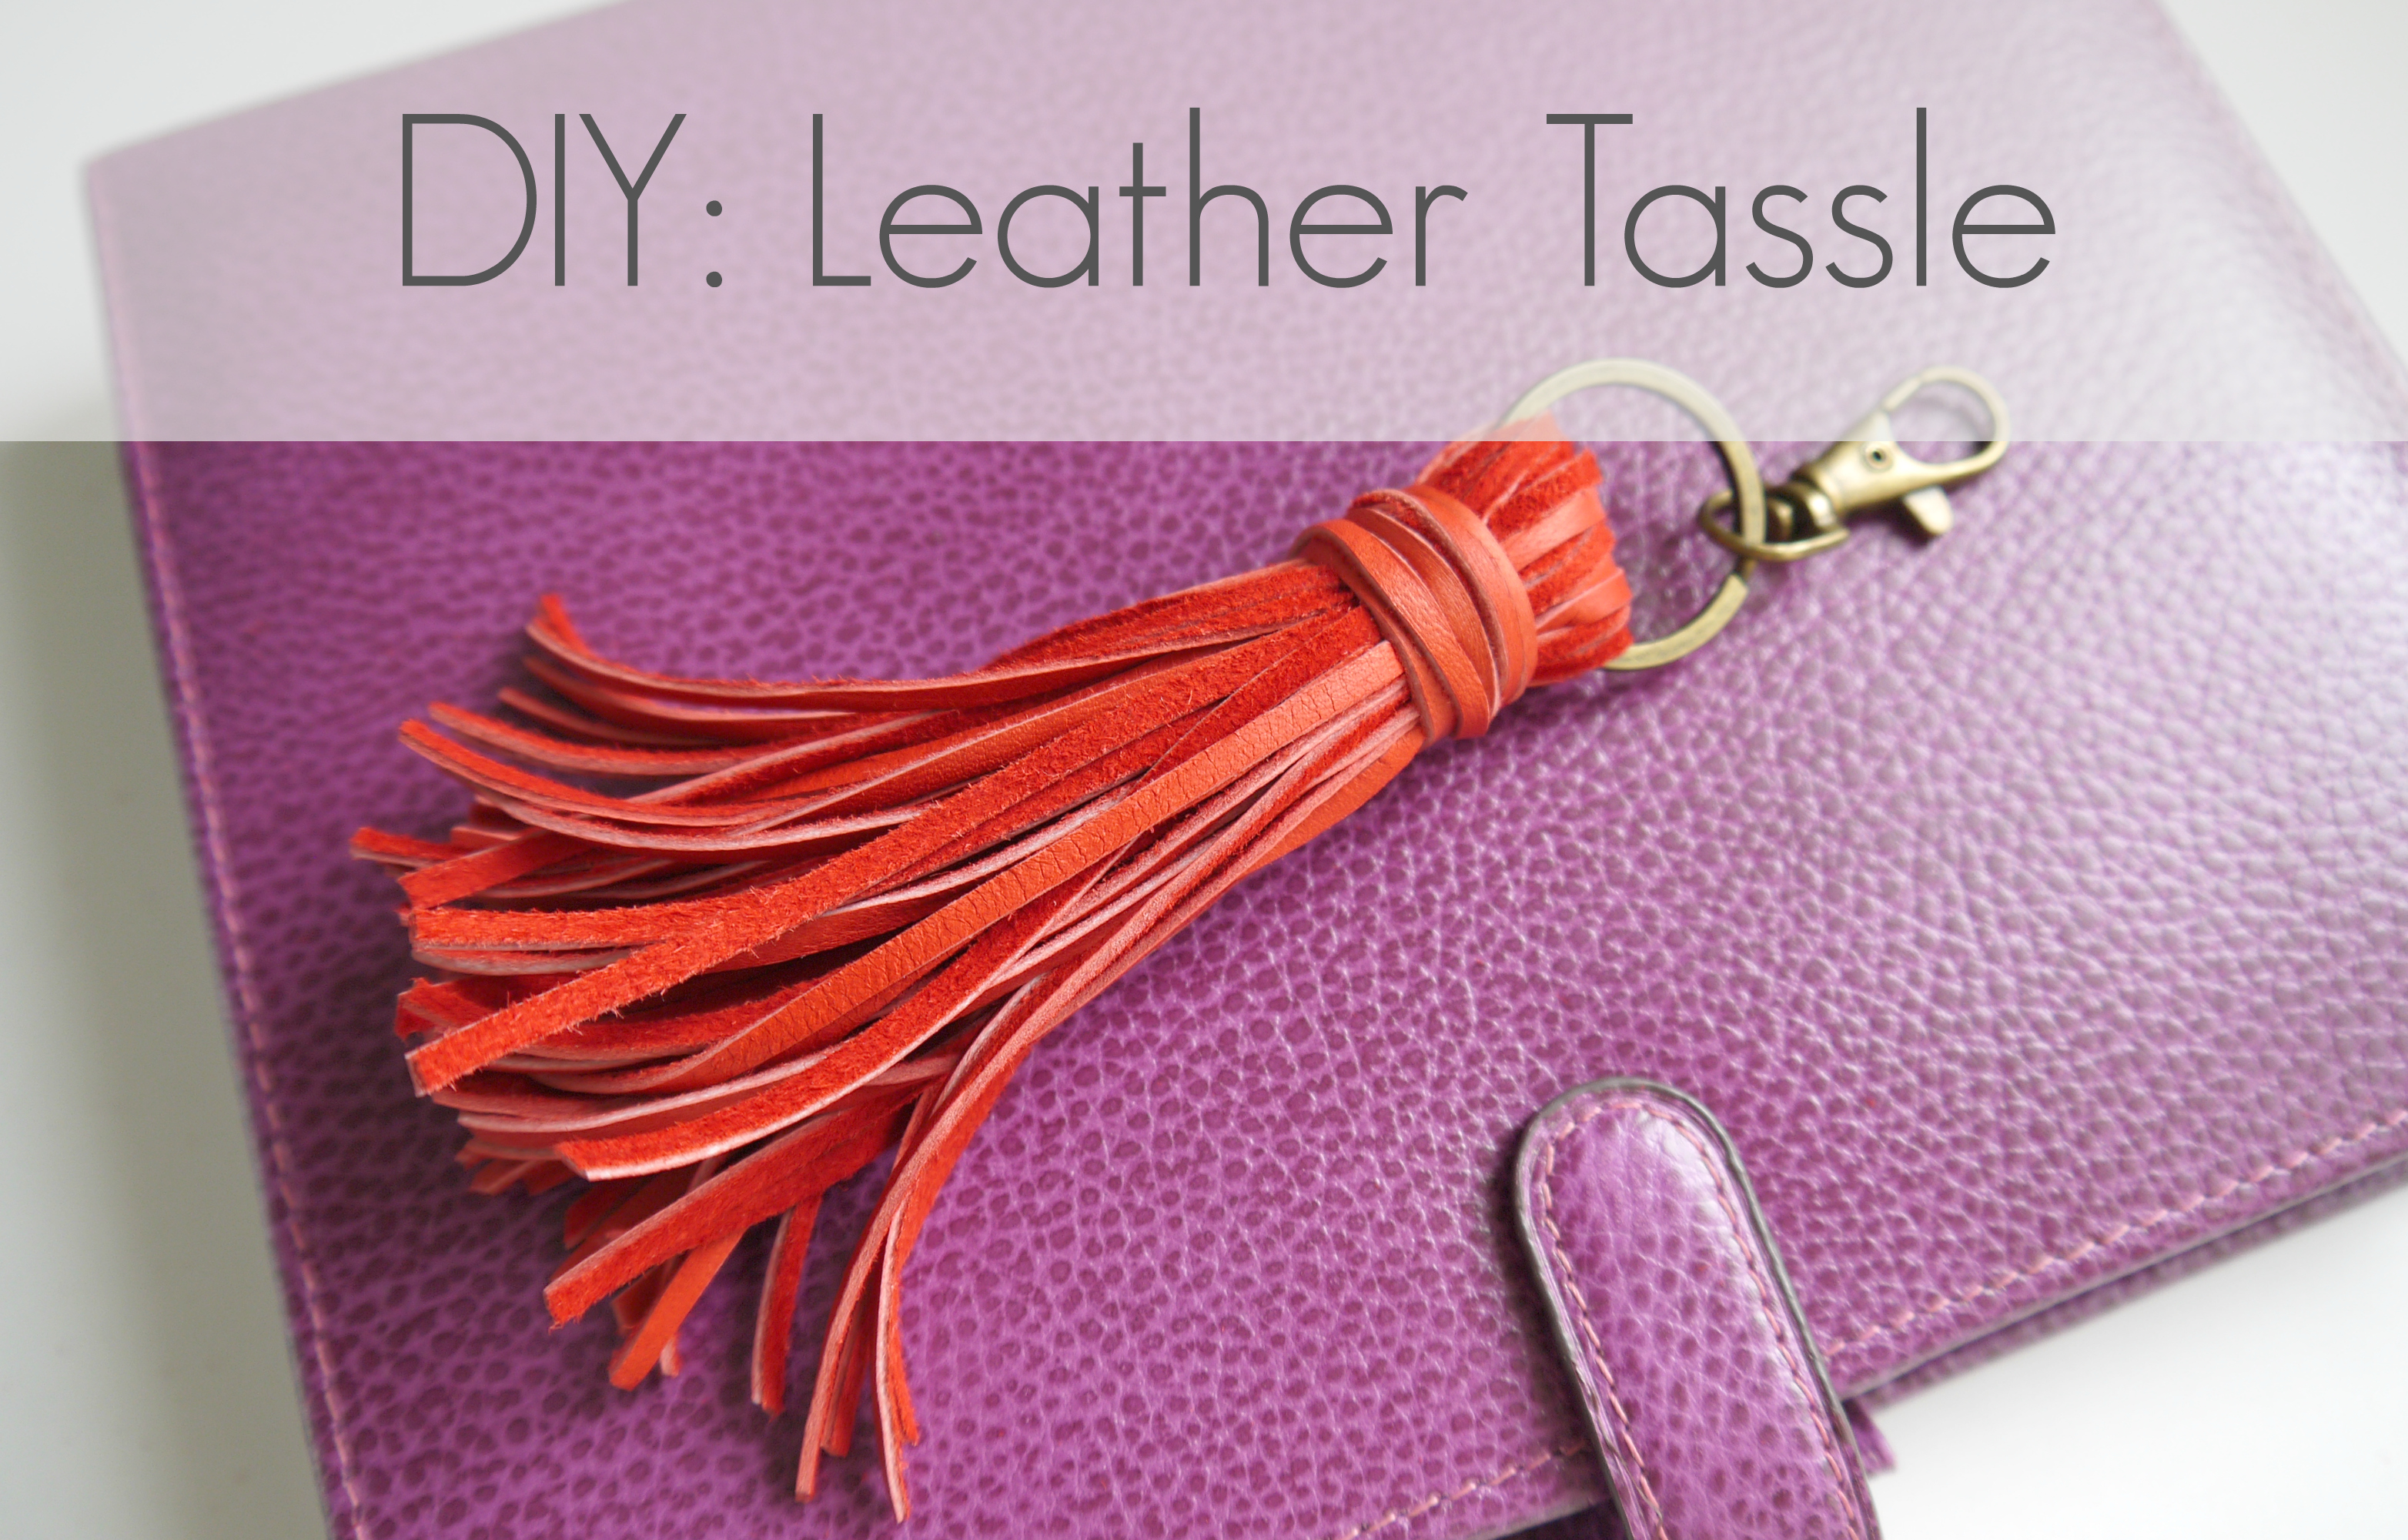
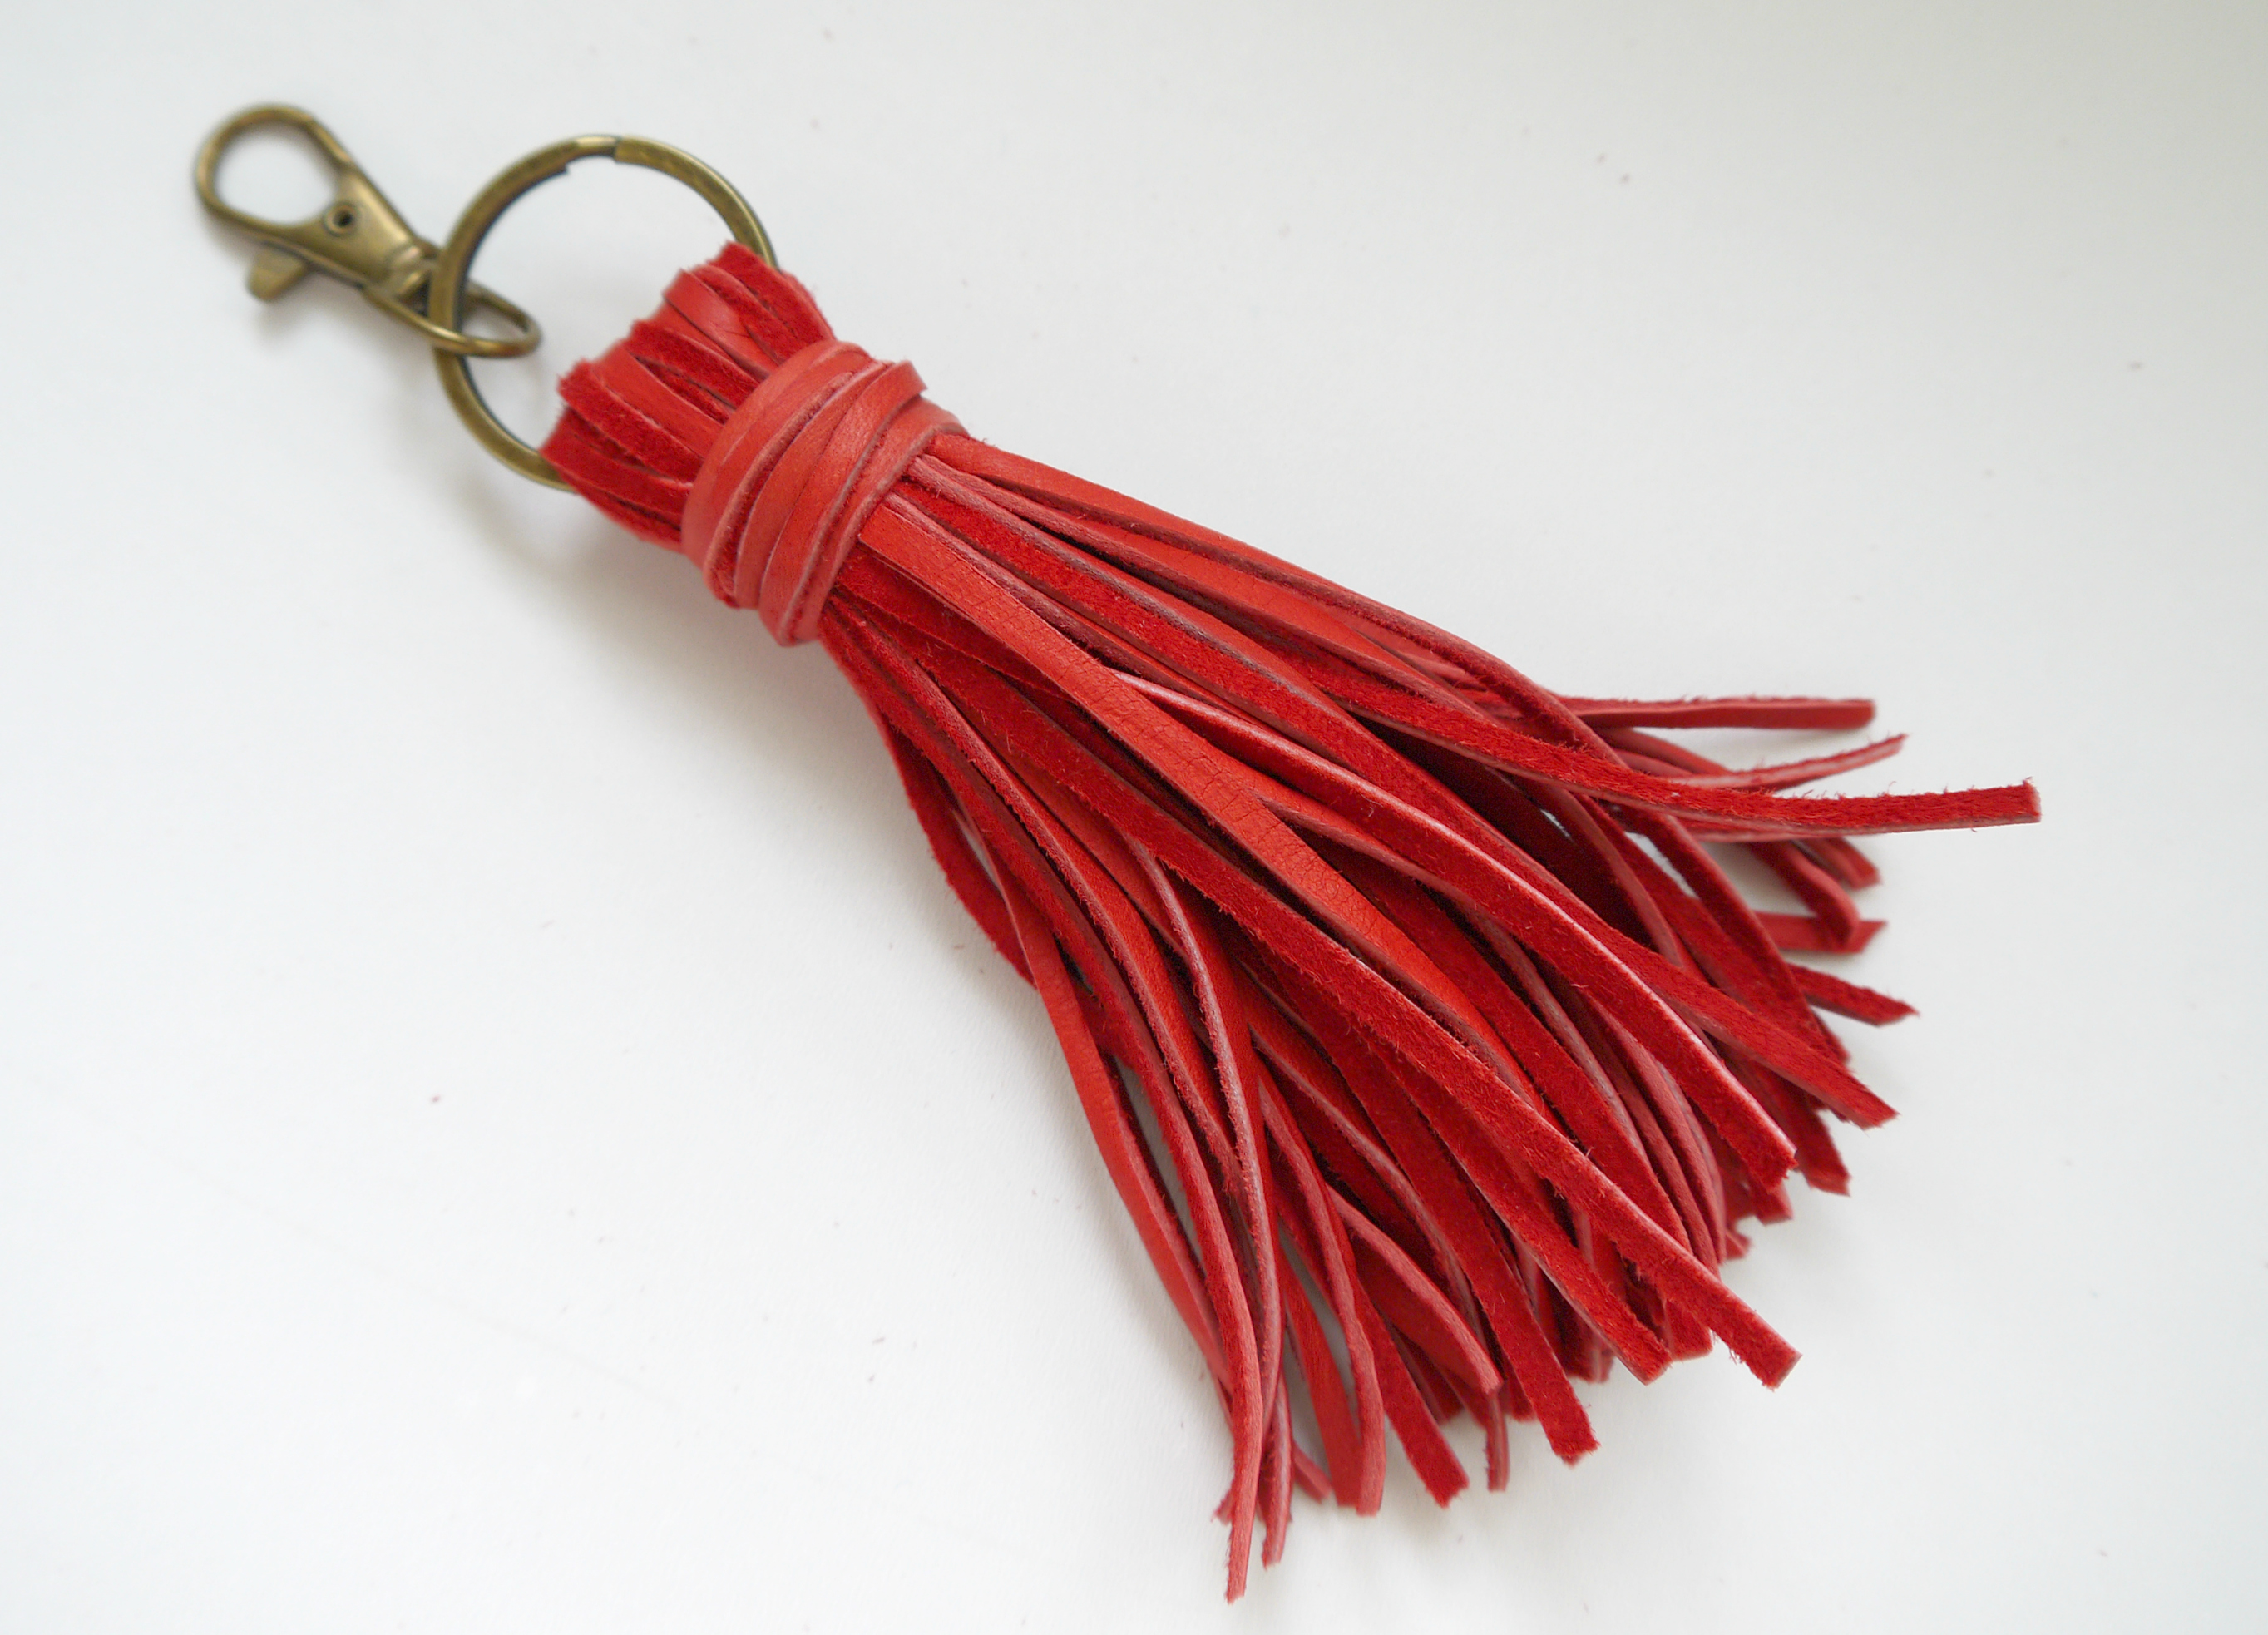
DIY: Leather Tassle Key Fob/Bag Charm

02/16/15

diy leather tassle header

Today is a teeny bit momentous. My first post from my new home. I finally completed my migration from Blogger to this here self hosted WordPress site. What do you think of the new pad? I’m still tweaking. (Please let me know if you see anything amiss!)  Lord knows it is not as straightforward as I’d hoped BUT it is doable and so far the pros are far outweighing the cons. (If there’s an appetite for it I thought I might do a post to explain the process and share the resources I found useful. What d’ya think?) With the last couple of weeks being a blur of html, file transfers, 301 redirects and  a few headaches, I’ve been itching to get back to some DIY therapy. So today I thought I’d kick off with a quick and satisfying DIY. This leather key fob/bag charm…

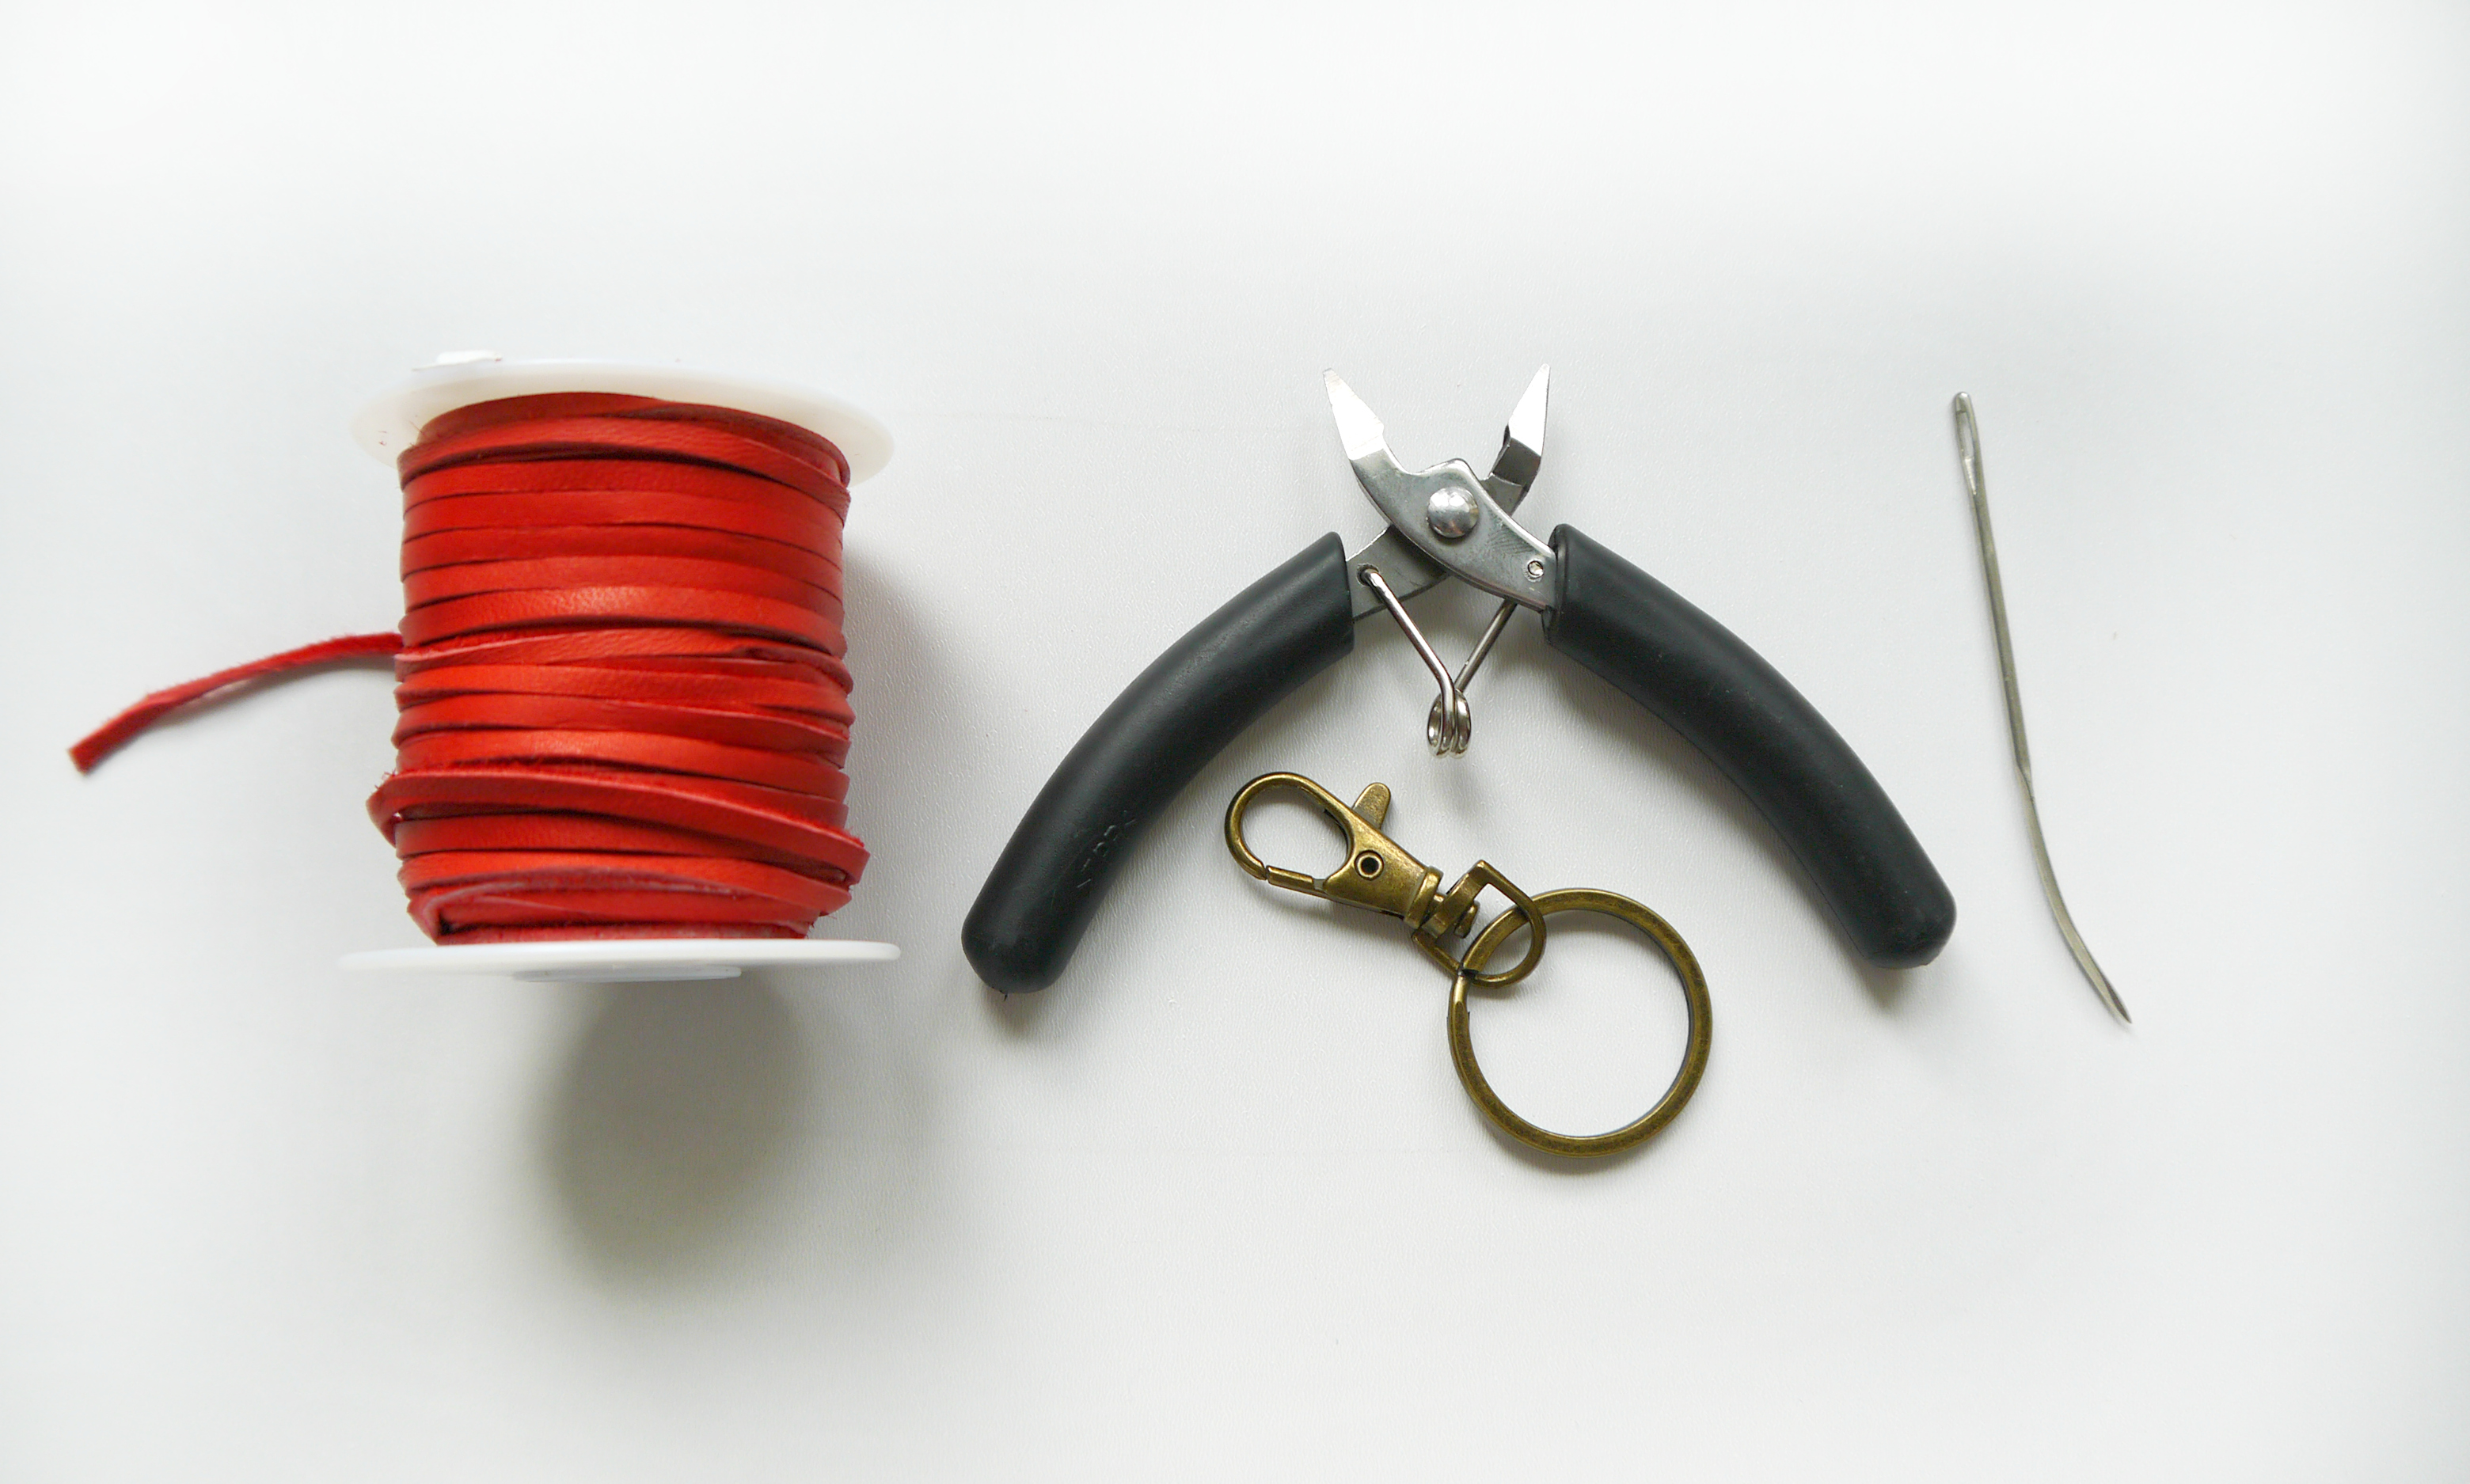
You’ll Need:

Approx 12m of leather lace. (Mine is from Endless Leather)

1.2″ Diameter Split Ring with Lobster Clasp (I got this one and removed the bits I didn’t need)

Side cutters (or Scissors)

Leather Needle (or one with a wide enough eye to fit your leather through)

LEATHER TASSLE - MATERIALS

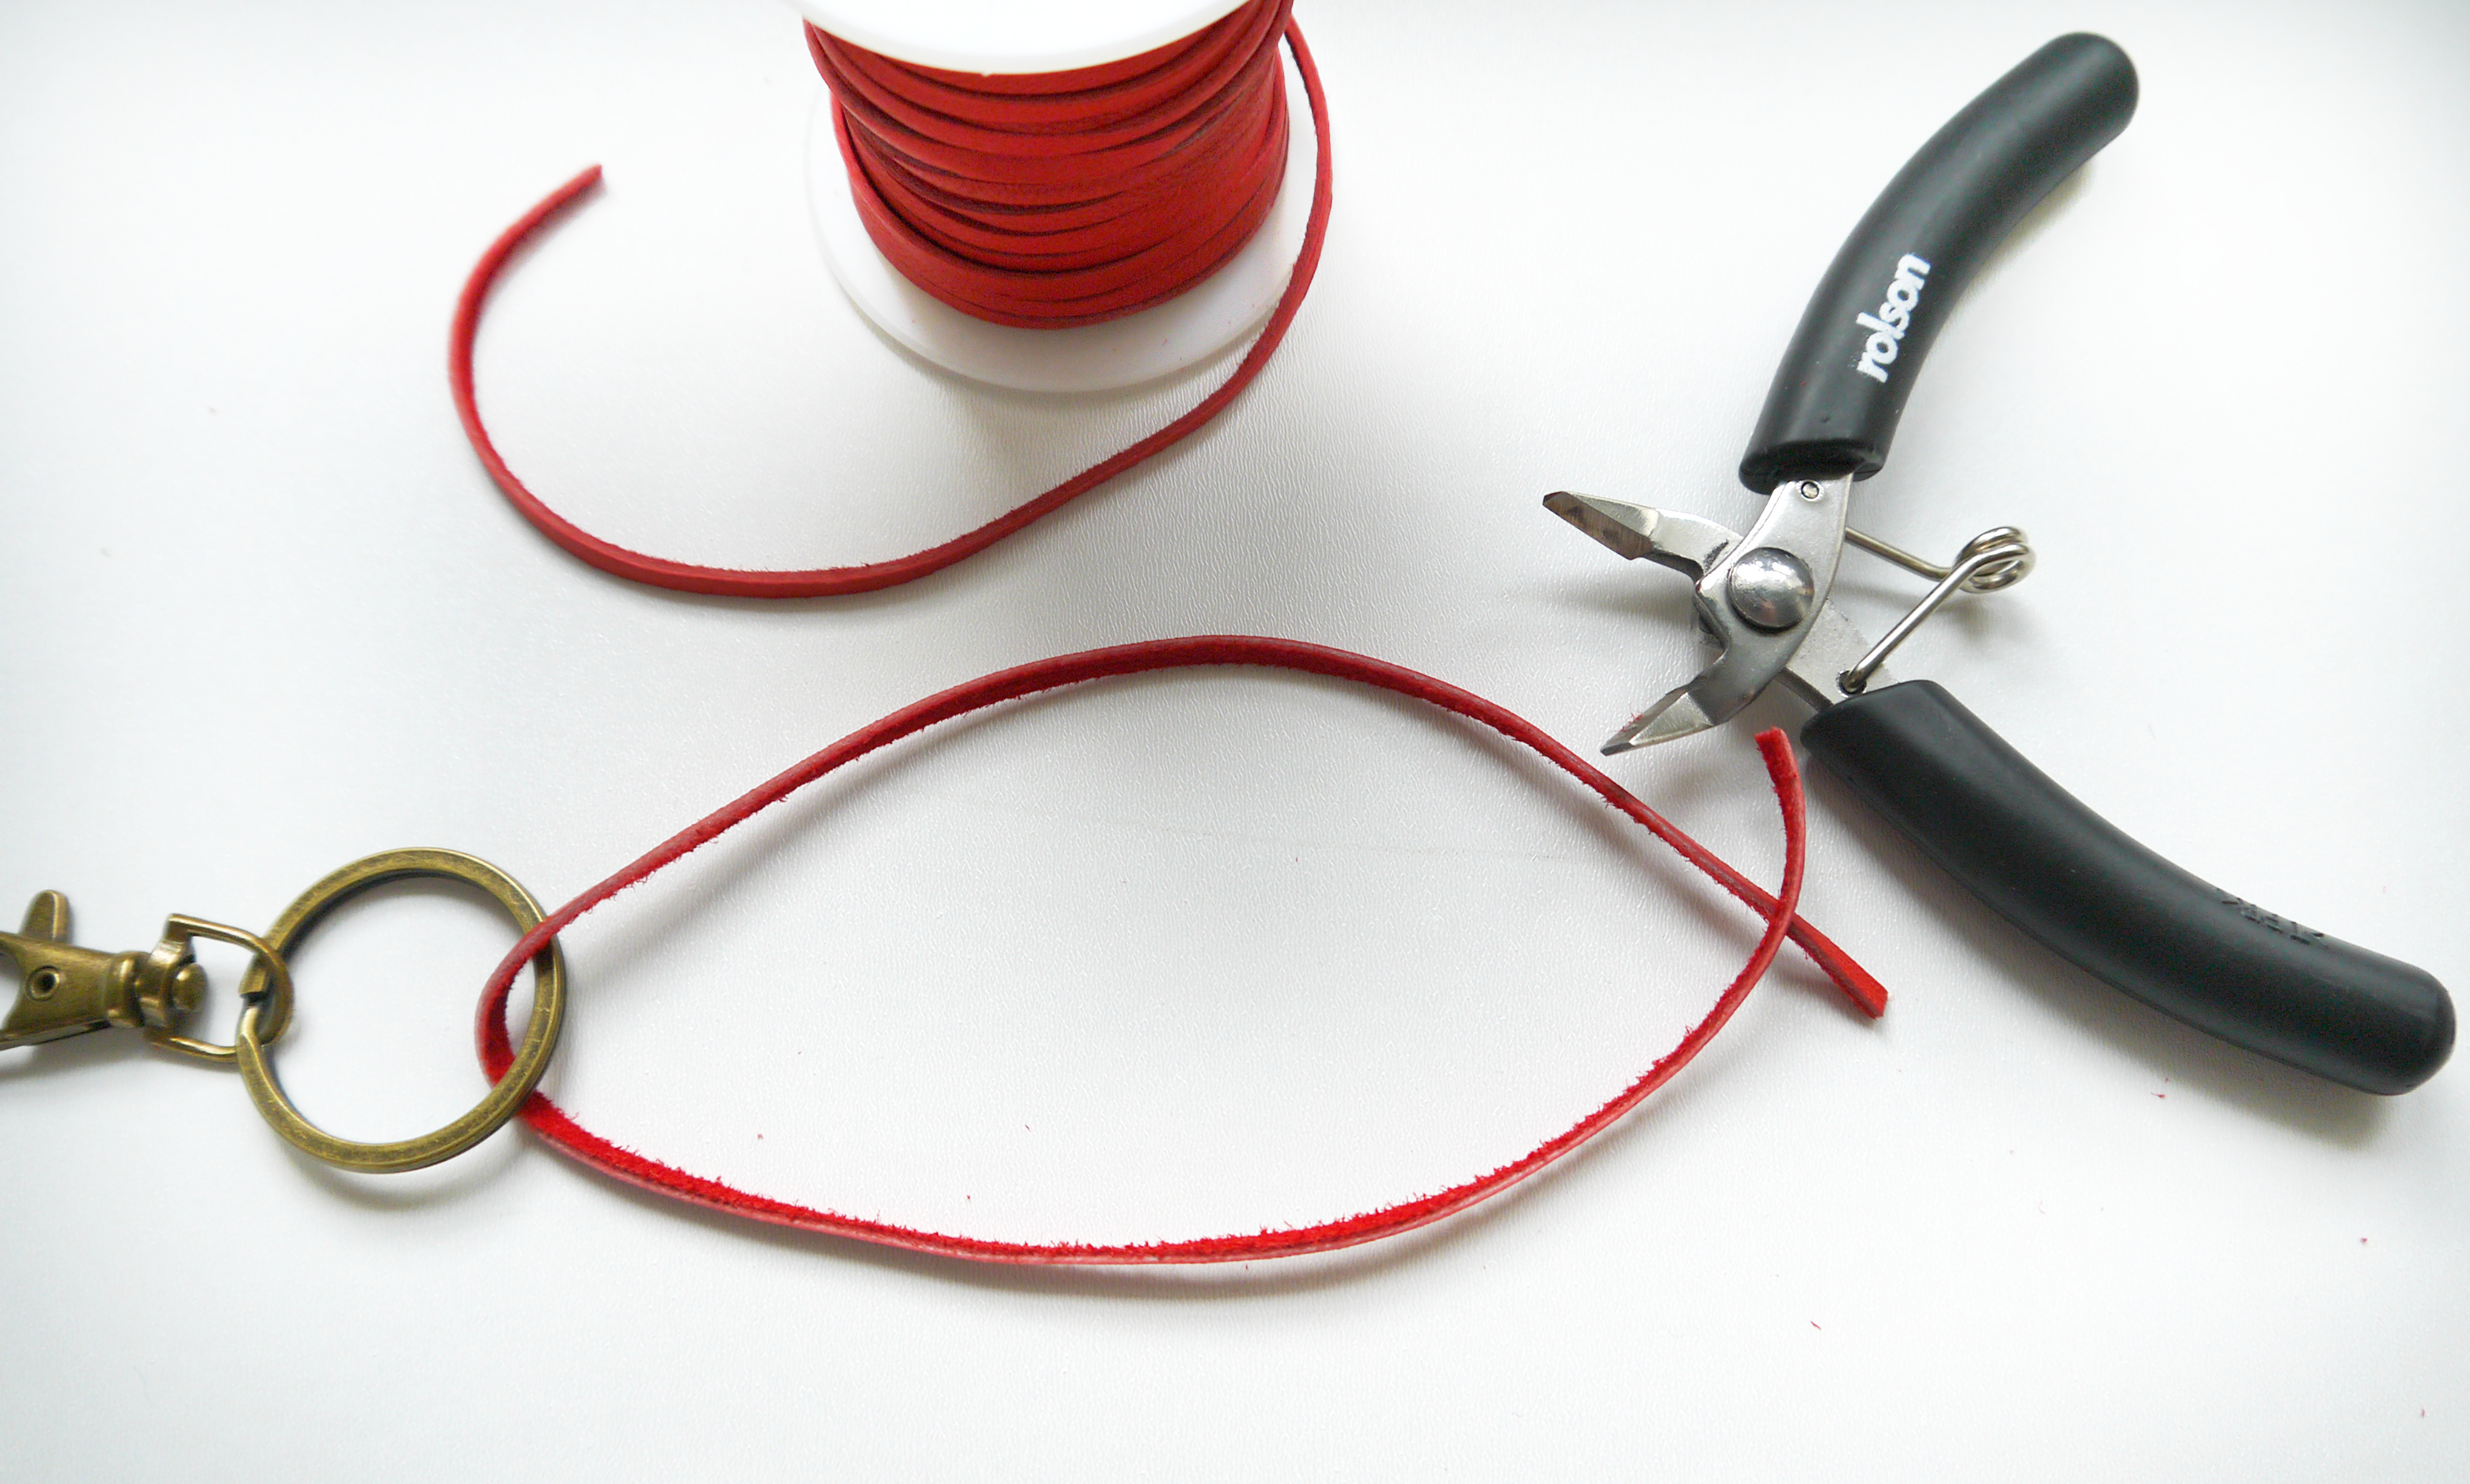
Set a 30″ length of leather aside. Then establish how long you want each strip of leather to be by cutting a strip and testing it out in your keyring. Once you’re happy, measure the length…

LEATHER TASSLE - STEP 1

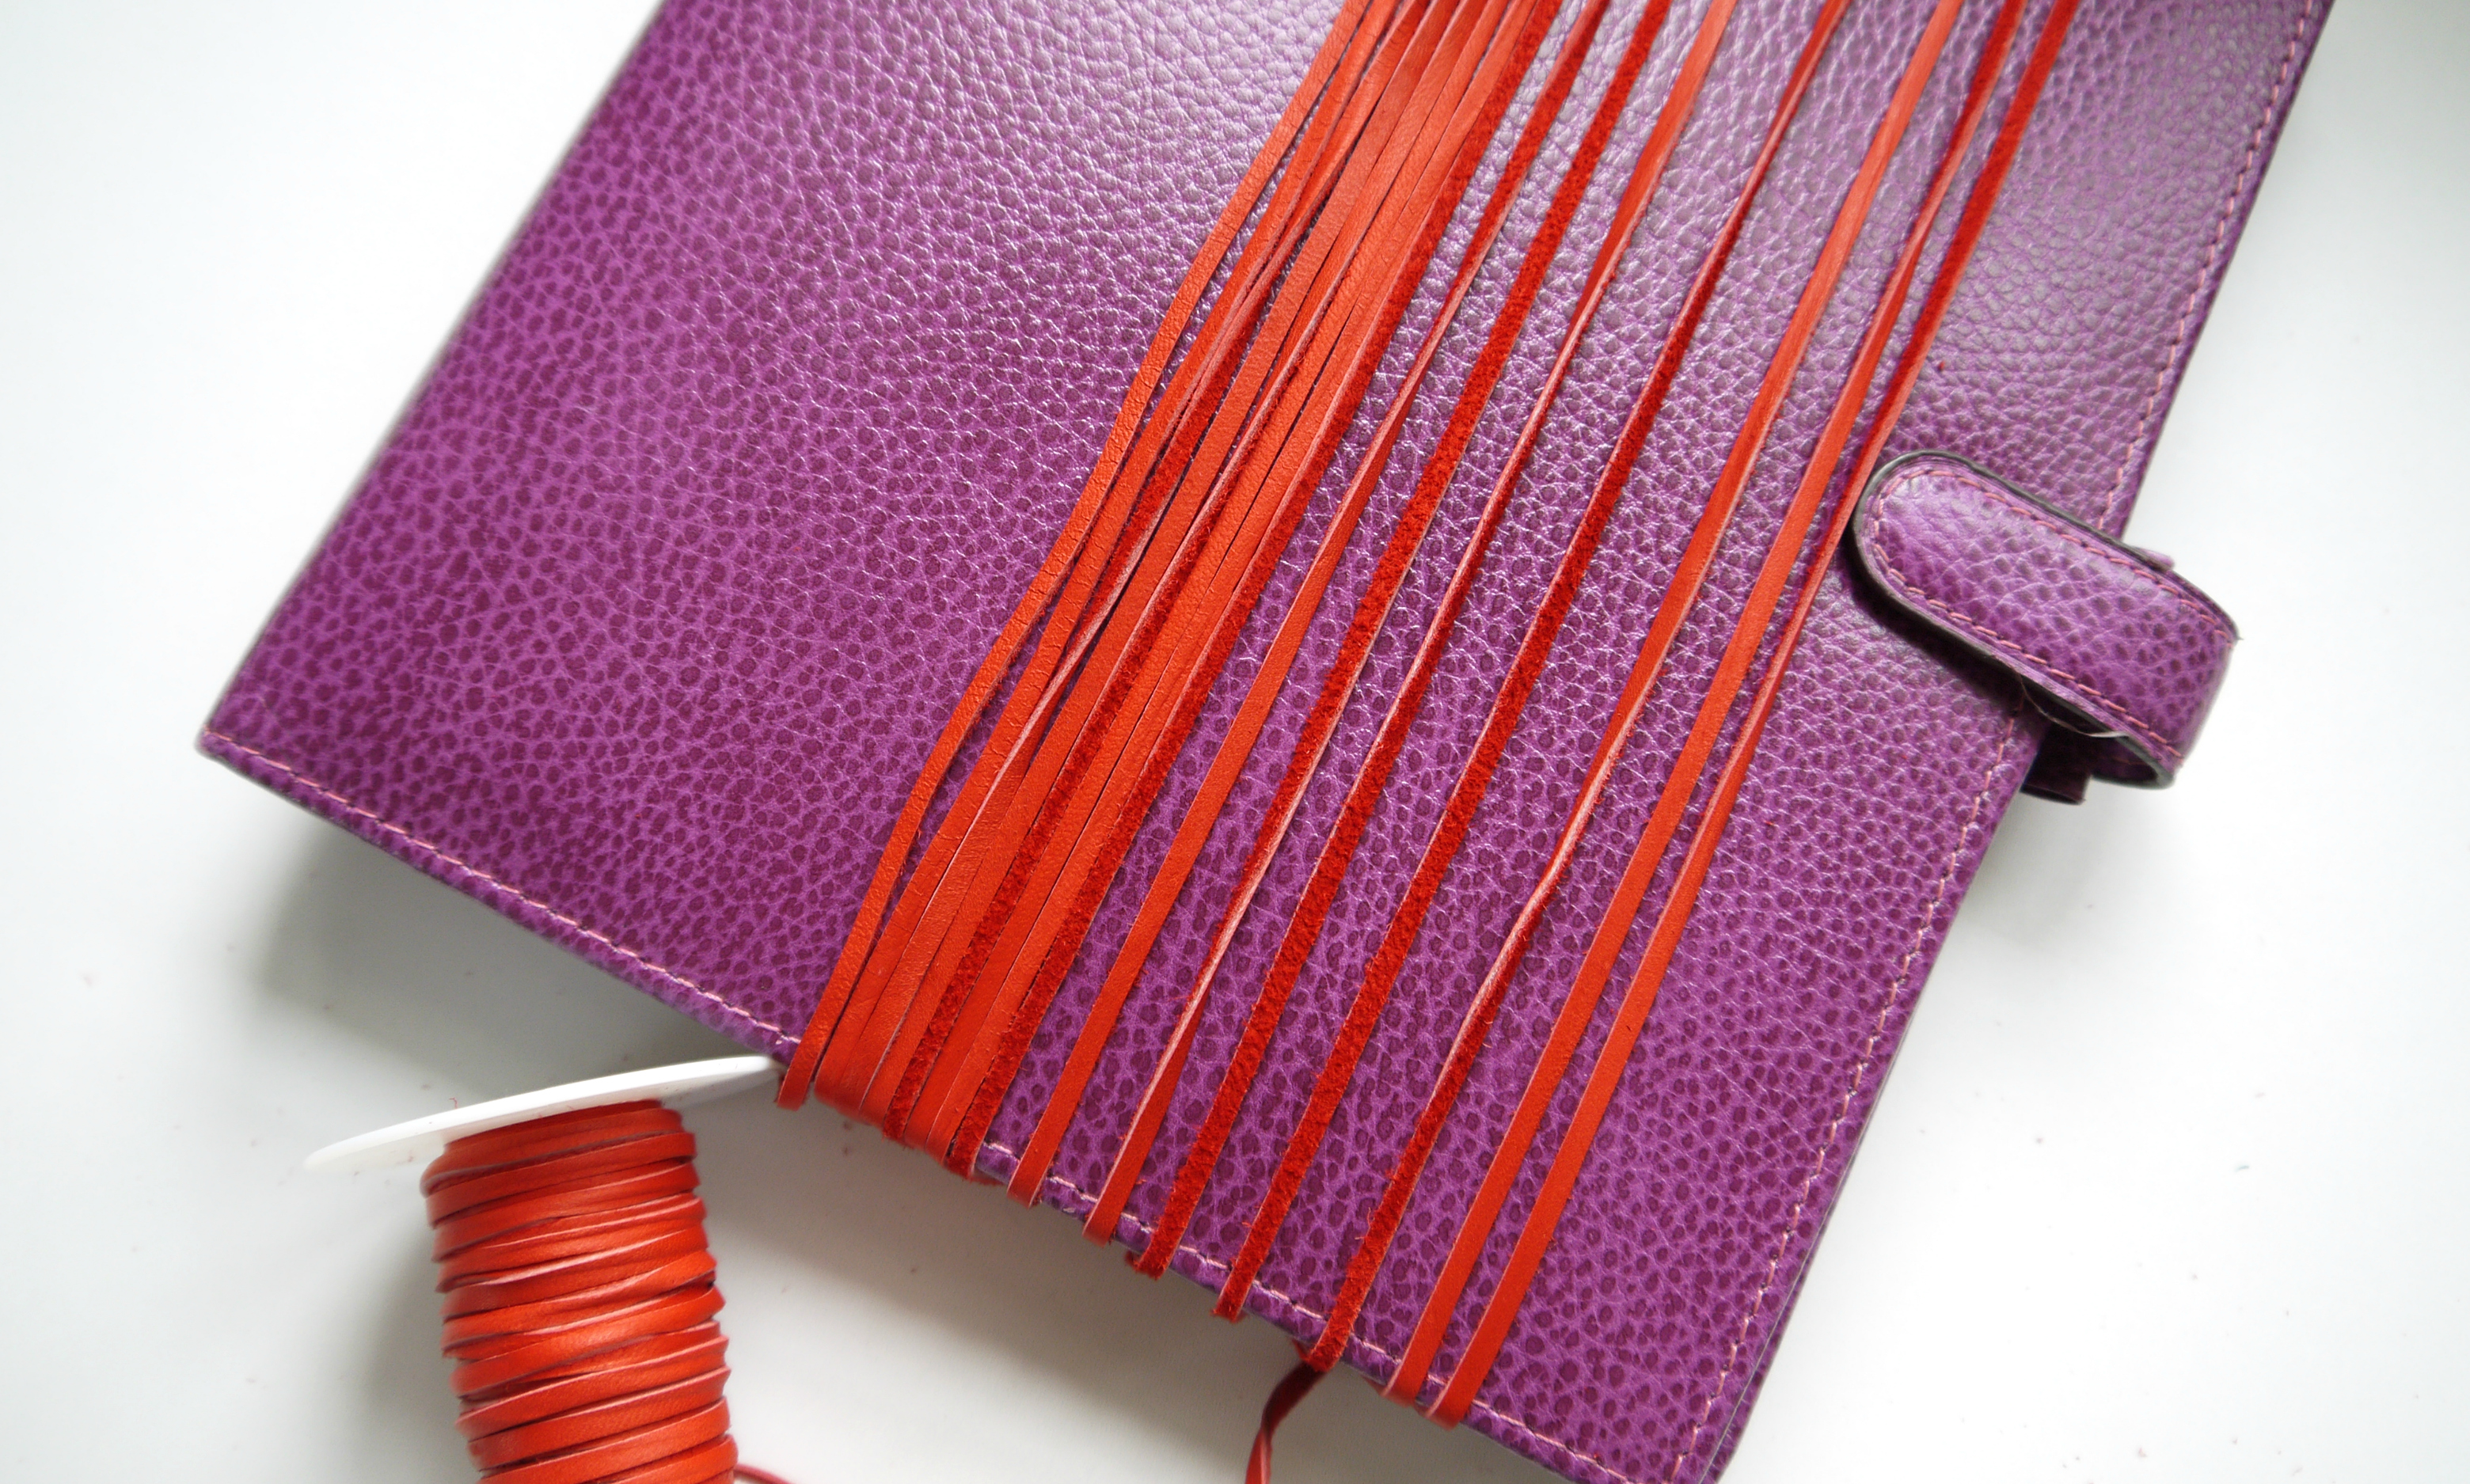
Find a book (or similar) who’s circumference is roughly double the length that you want and wrap the remainder of the leather repeatedly and snugly around it…

LEATHER TASSLE - STEP 2

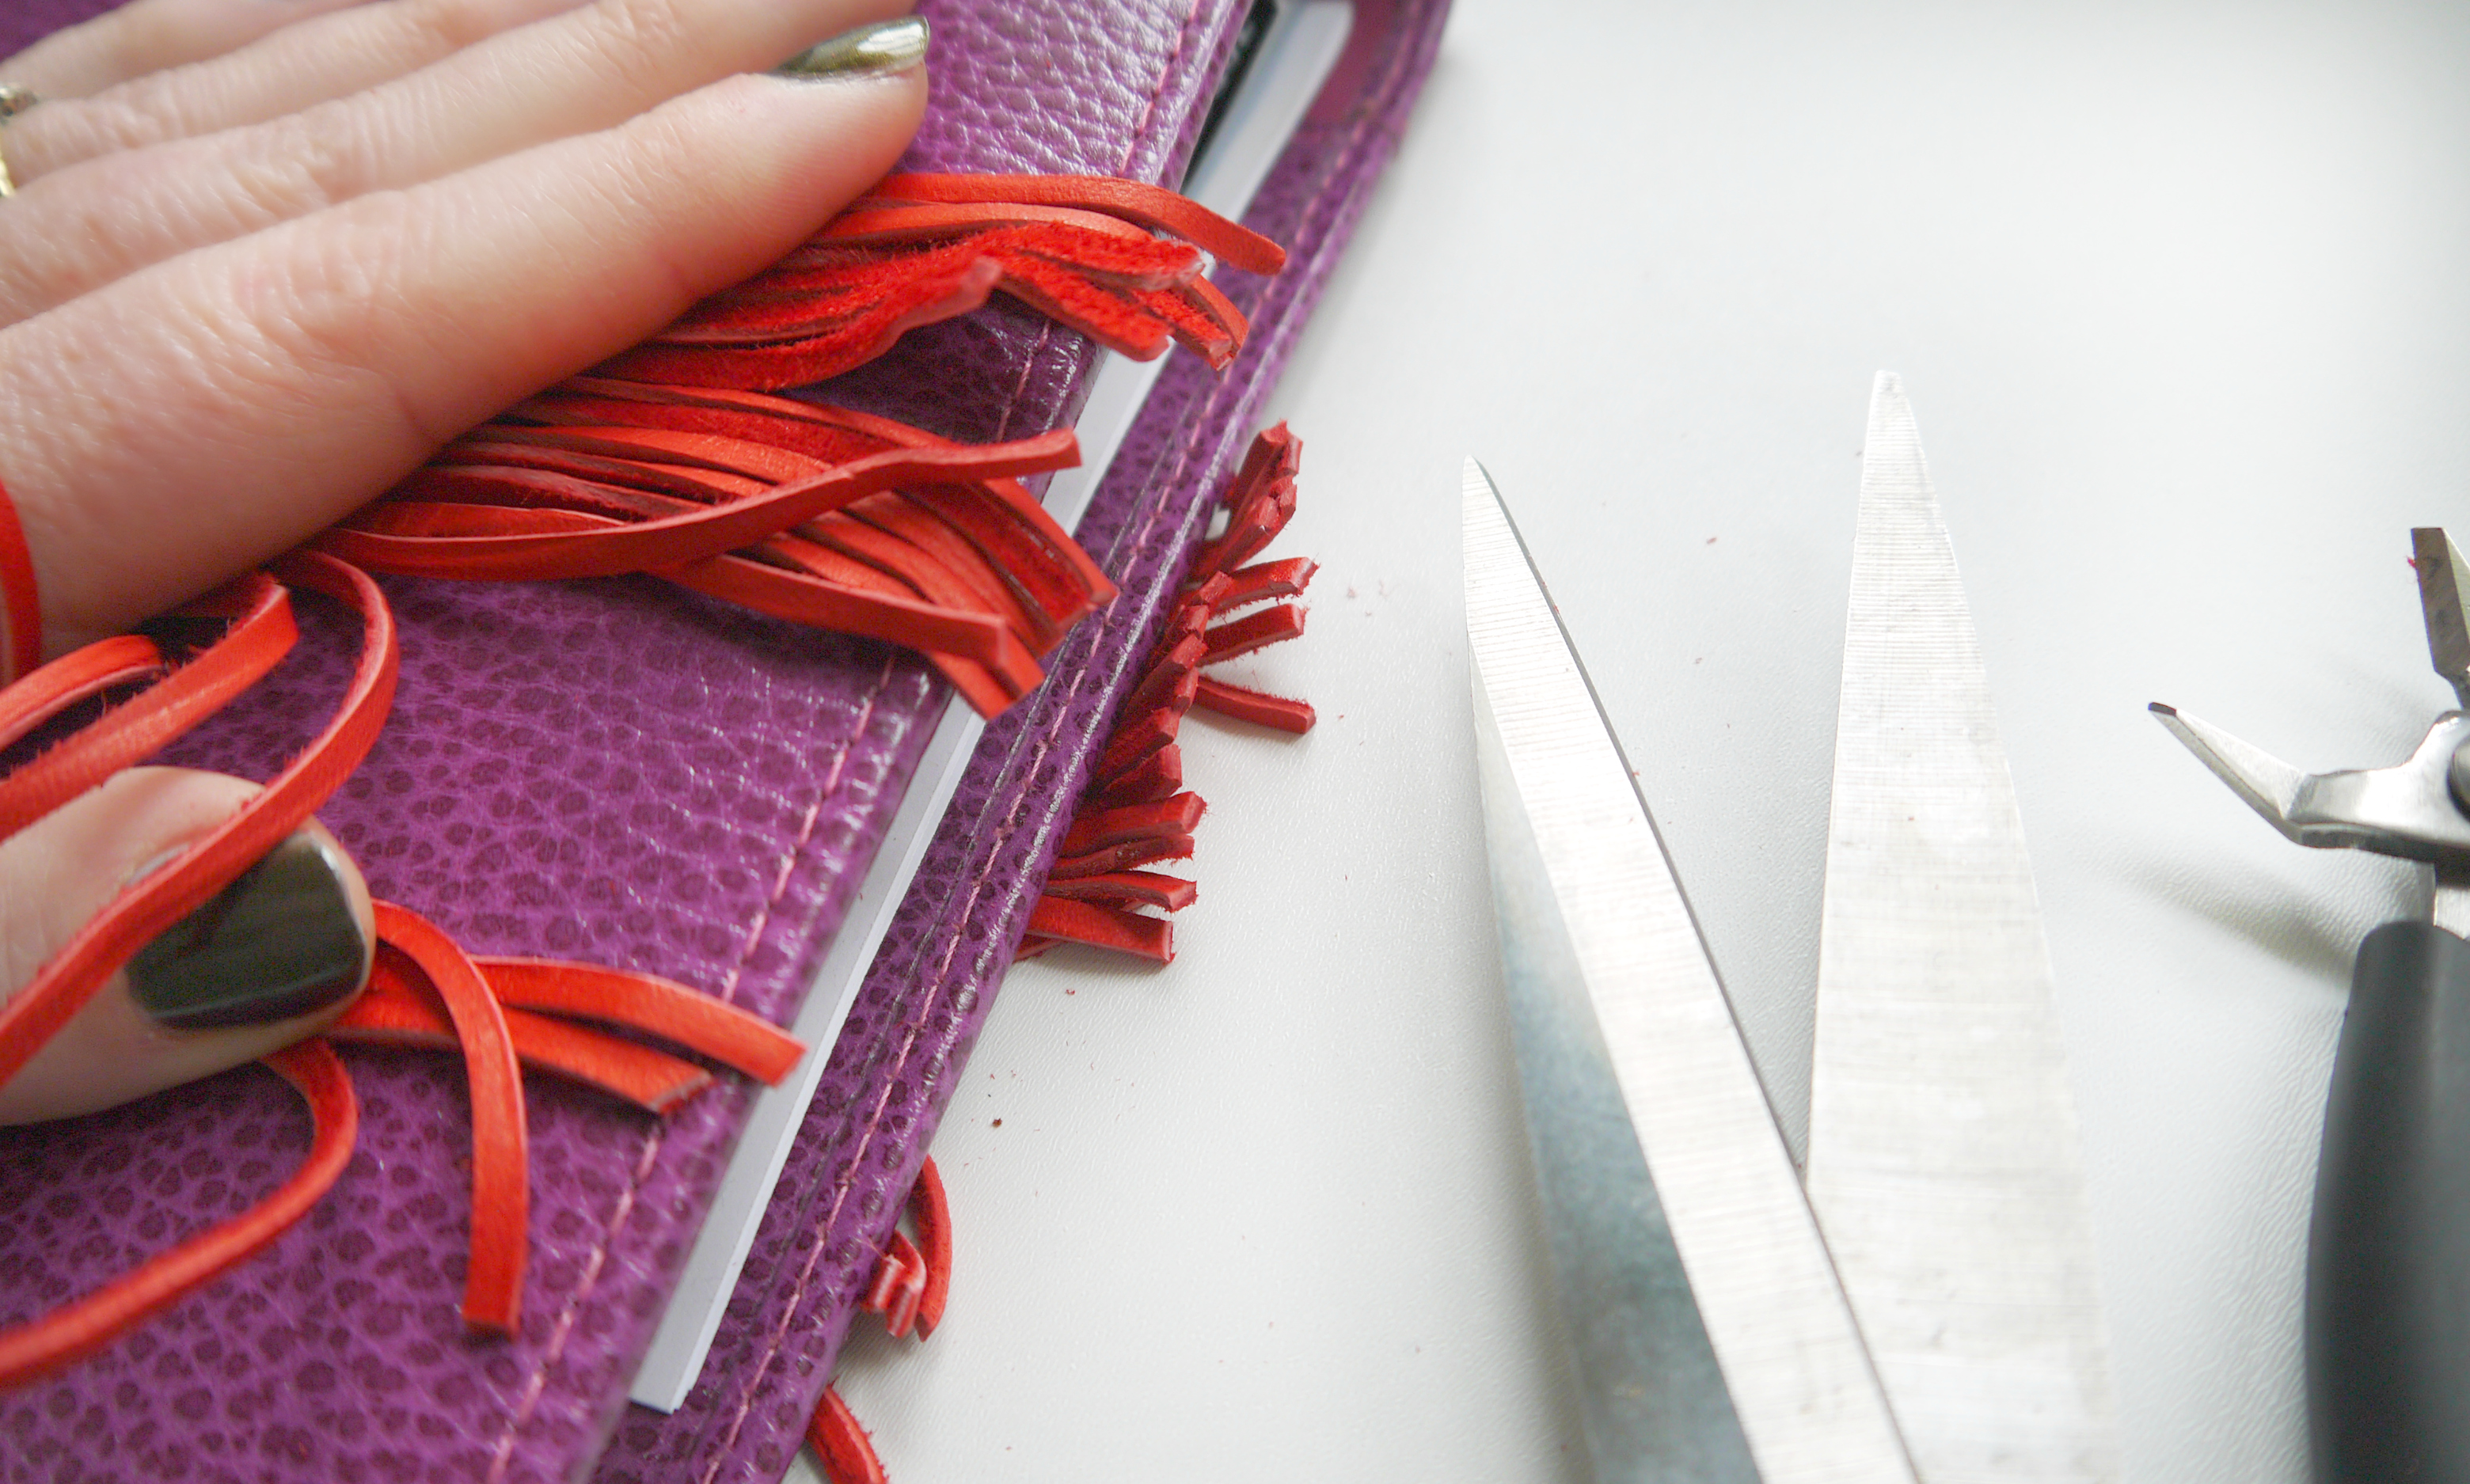
Cut the loops at either end and you’ll have a whole batch of leather pieces approximately the length you want them…

LEATHER TASSLE - STEP 3

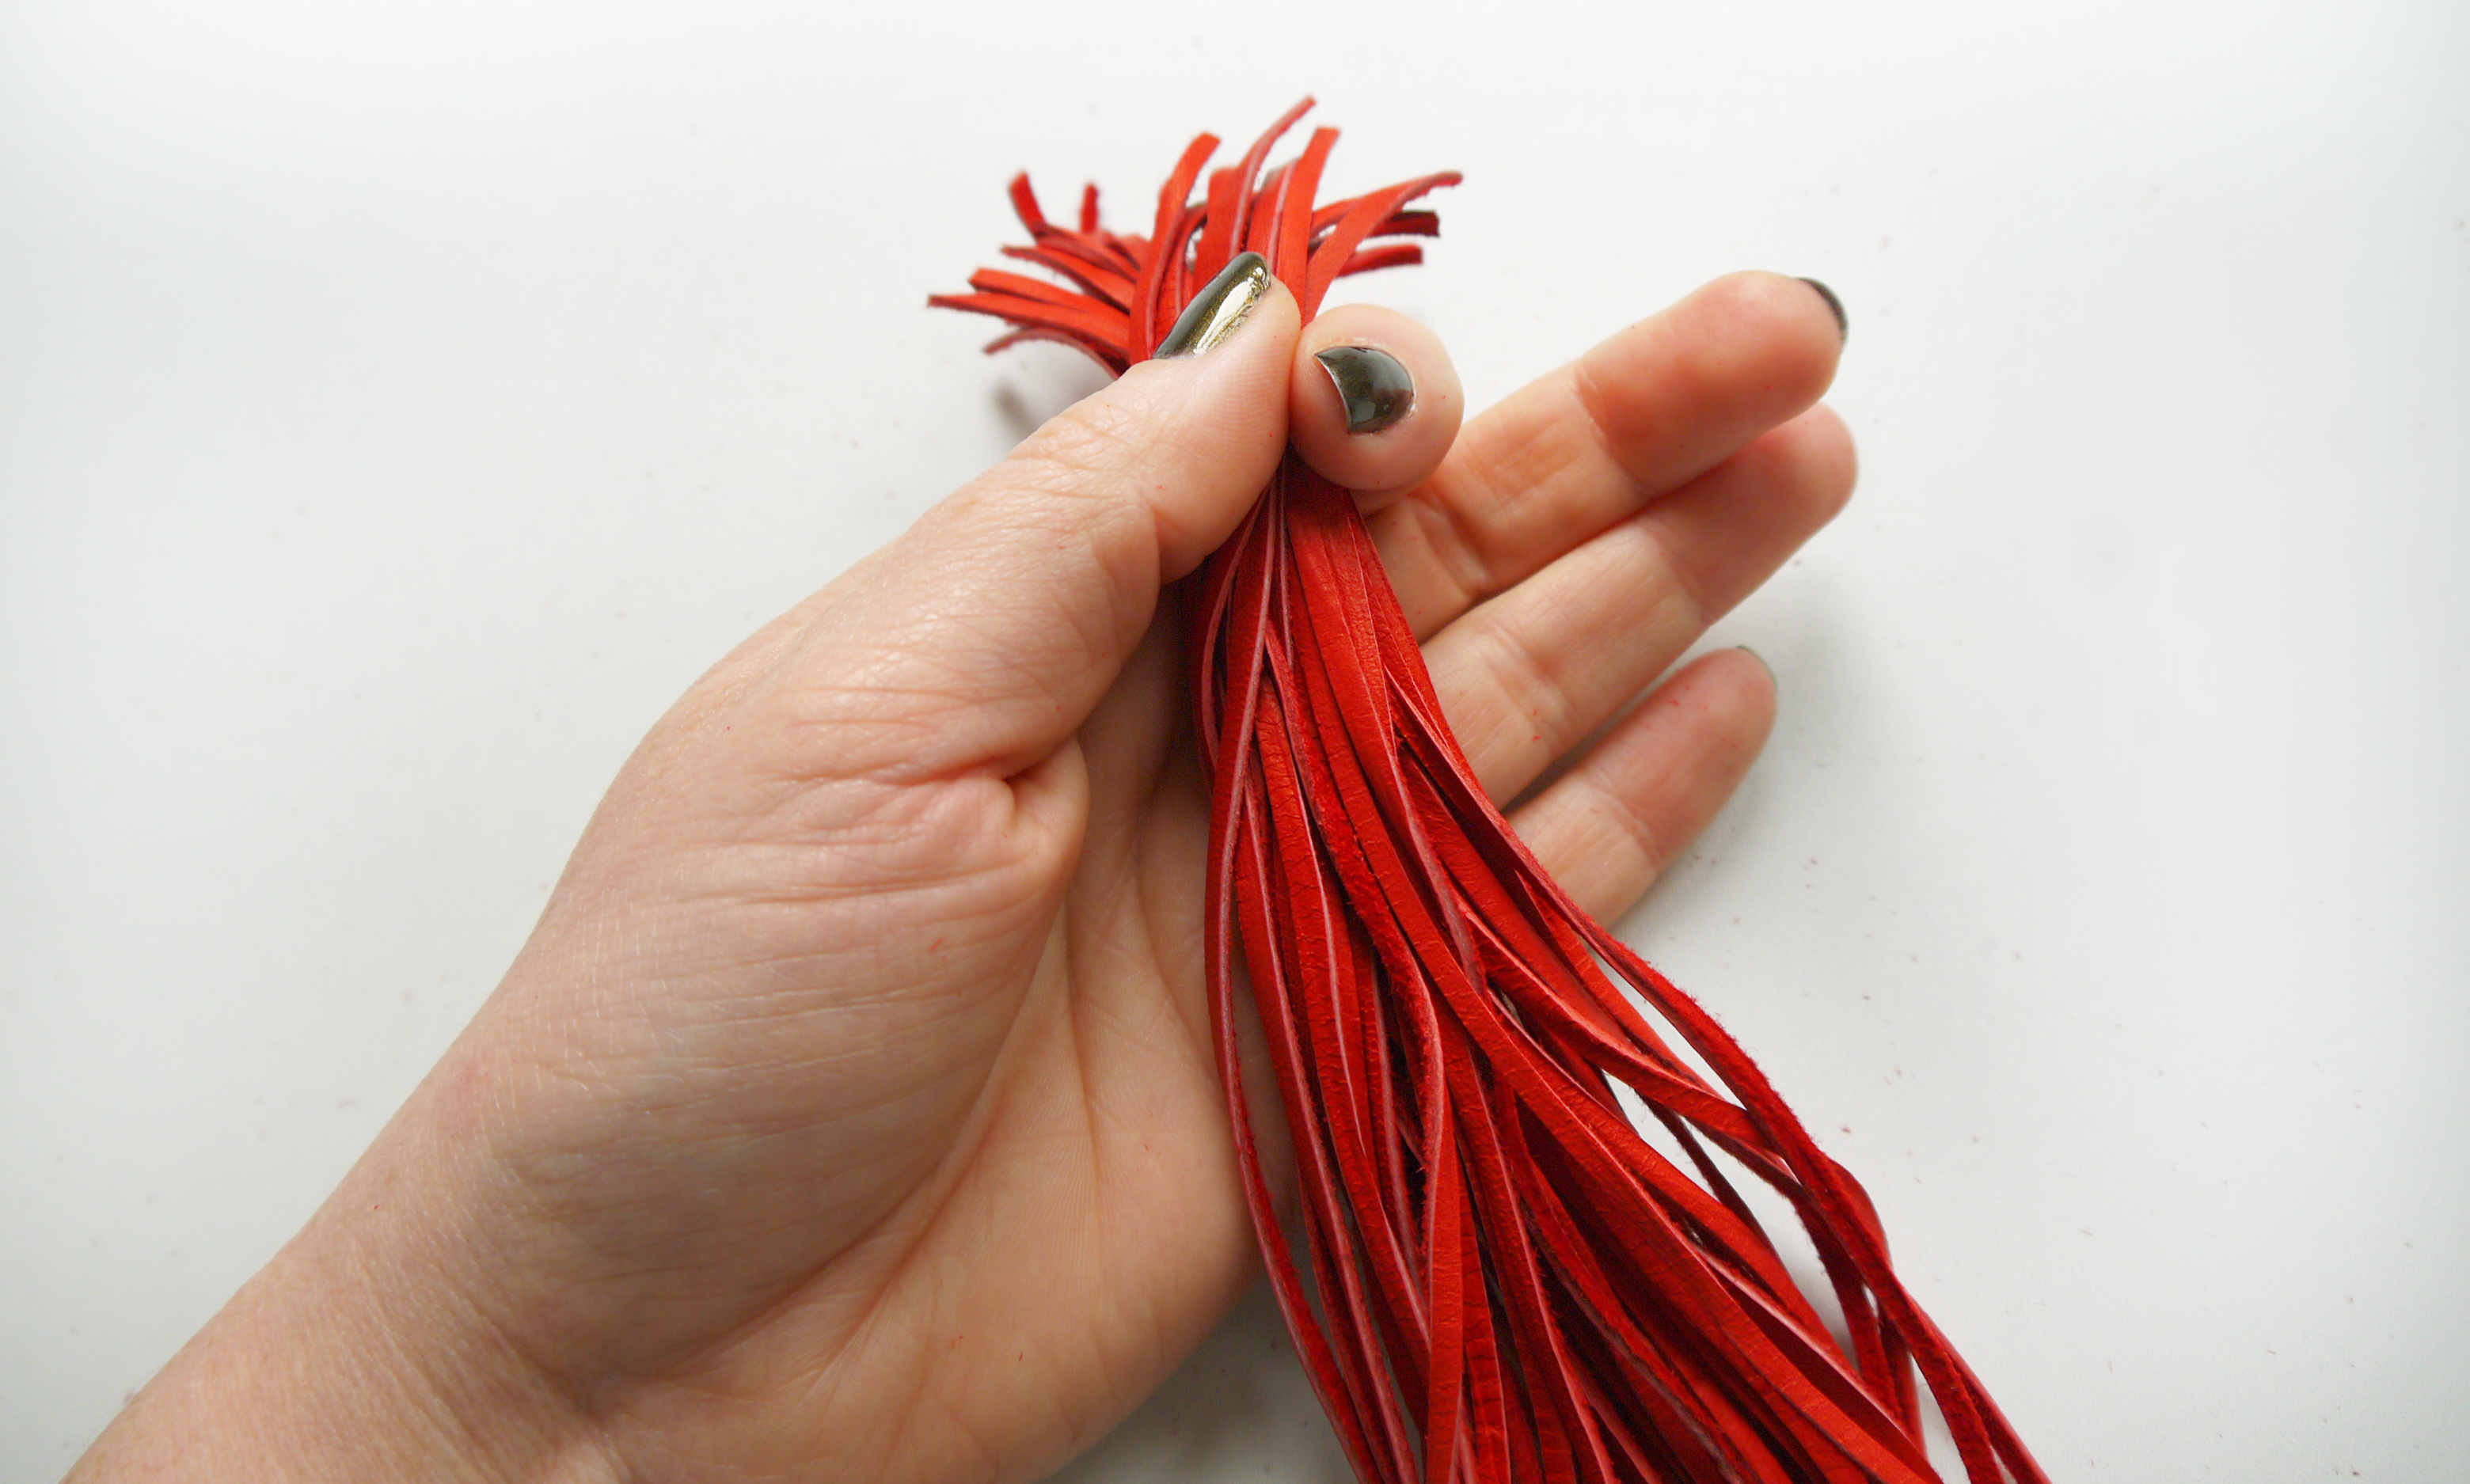
Gather them all together (I used approx 40 x 12″ lengths)…

LEATHER TASSLE - STEP 4

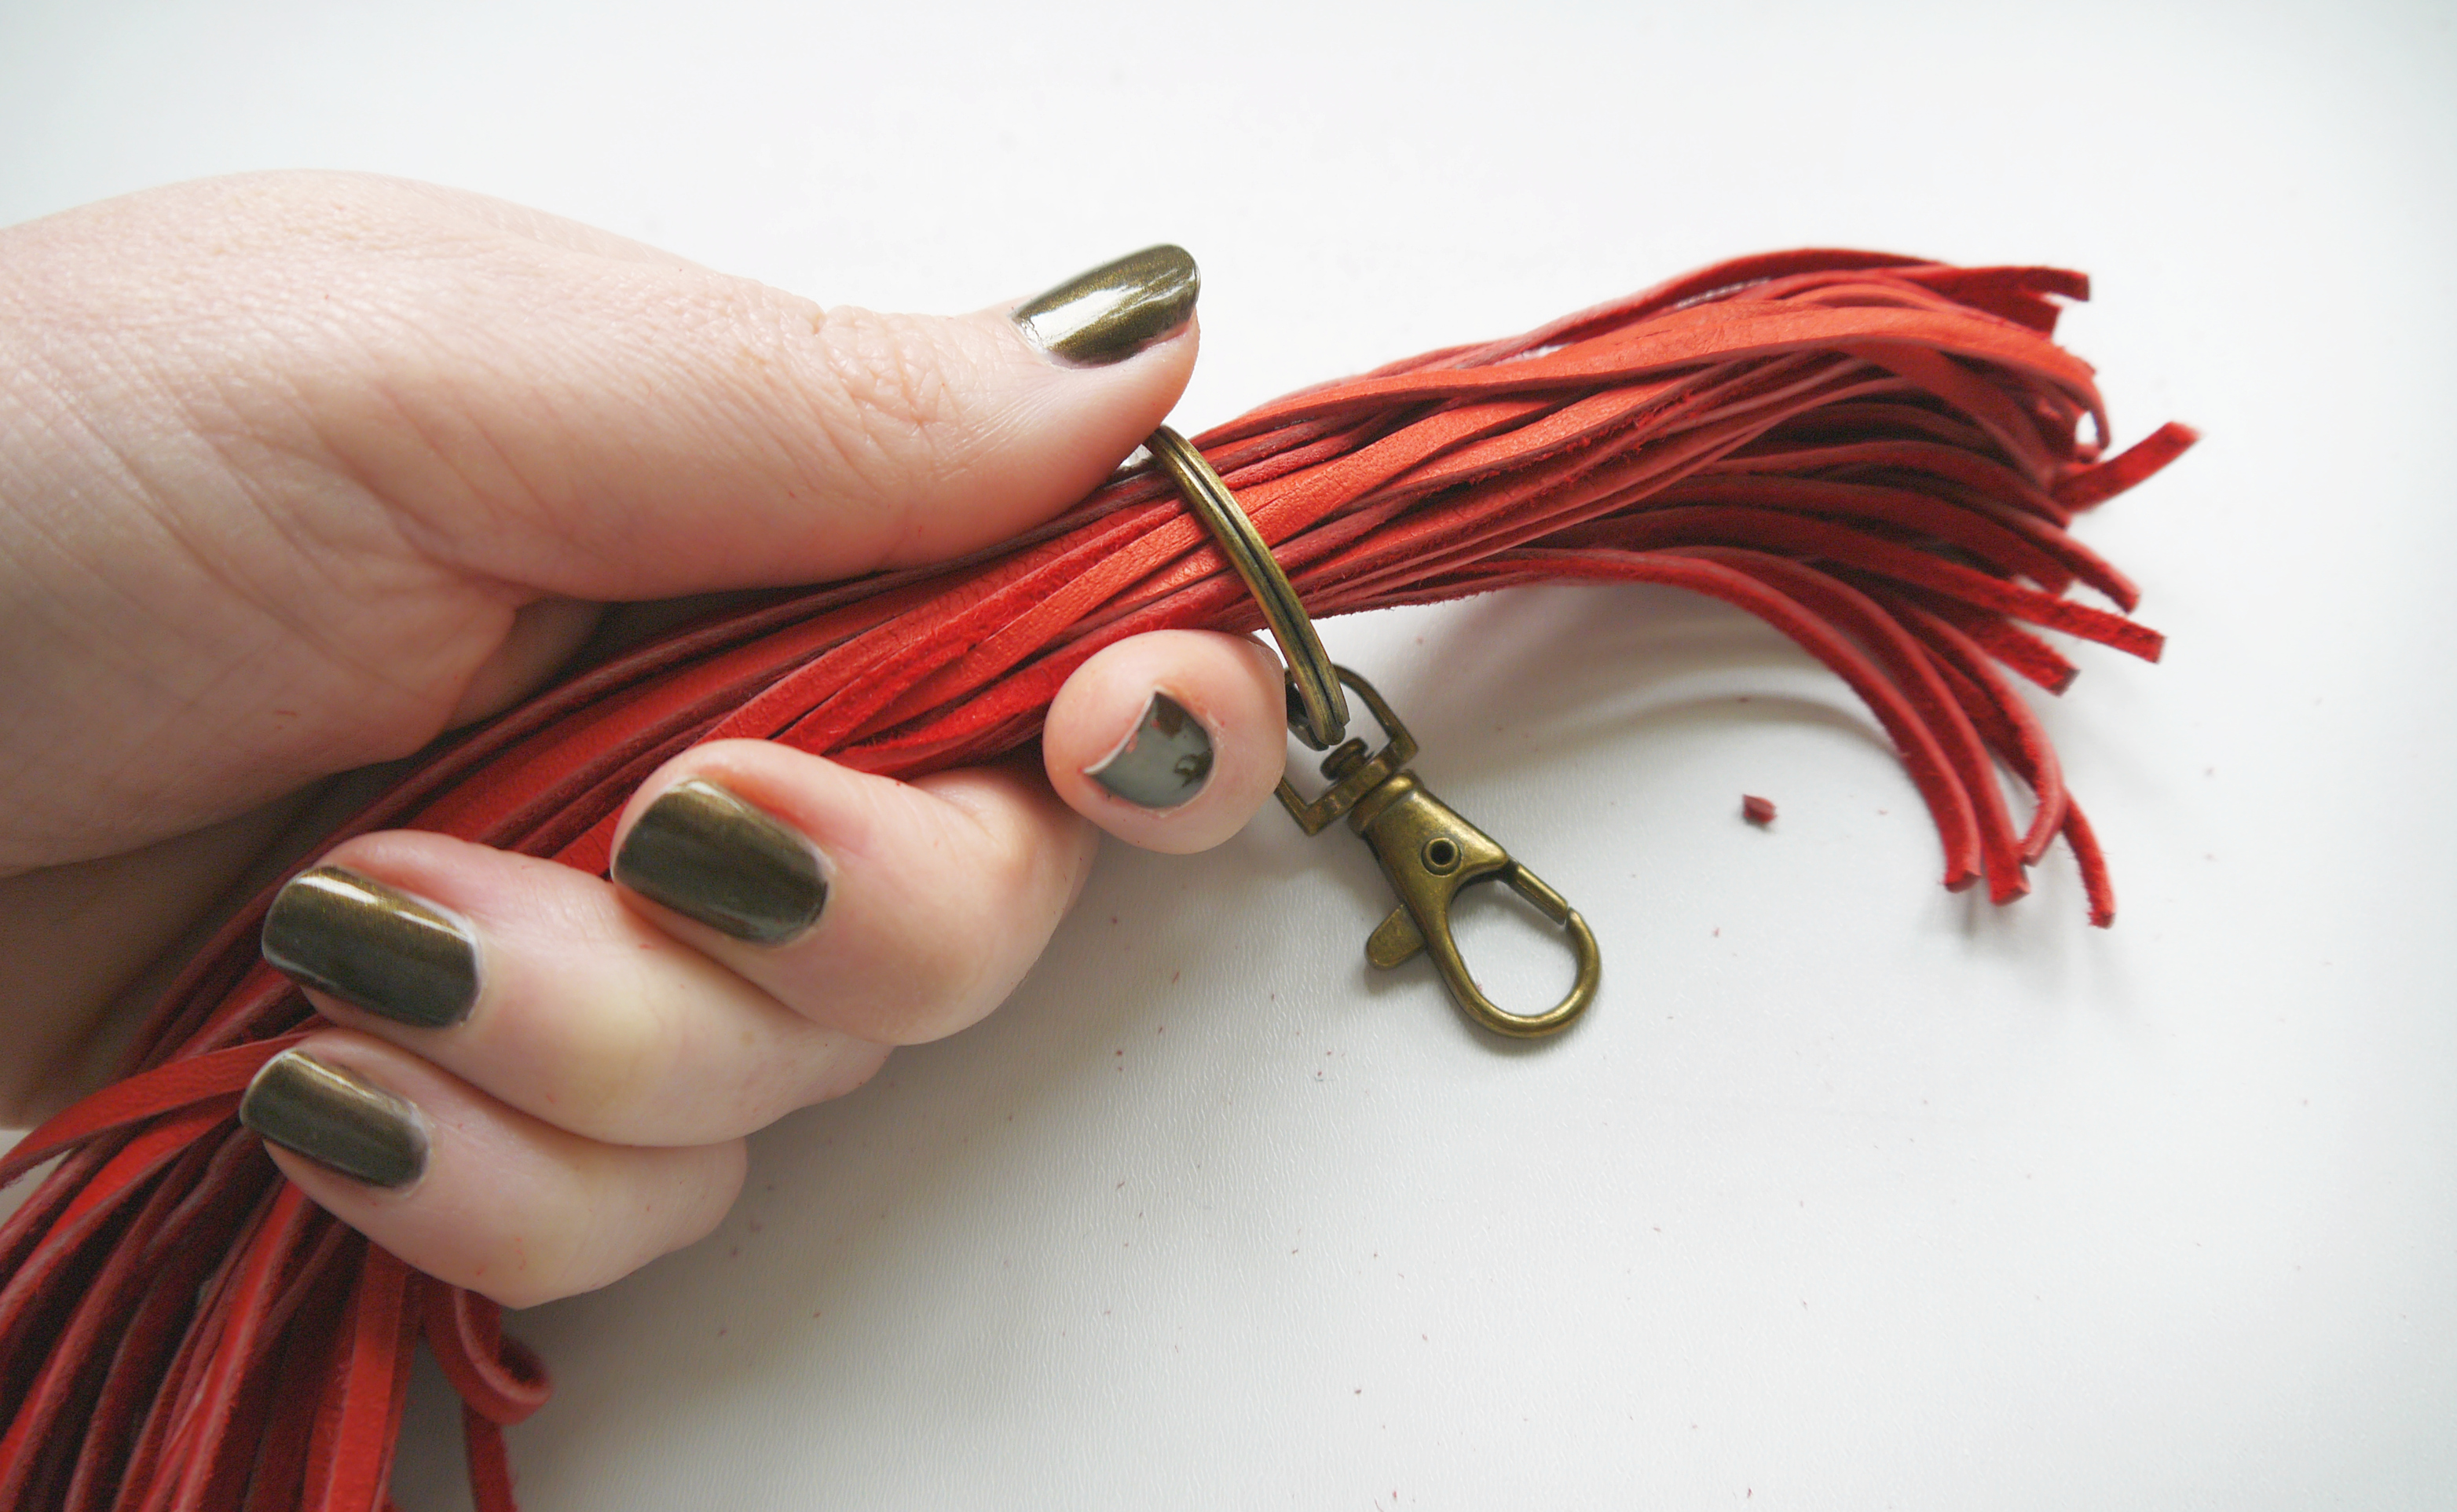
…and thread through the split ring…

LEATHER TASSLE - STEP 5

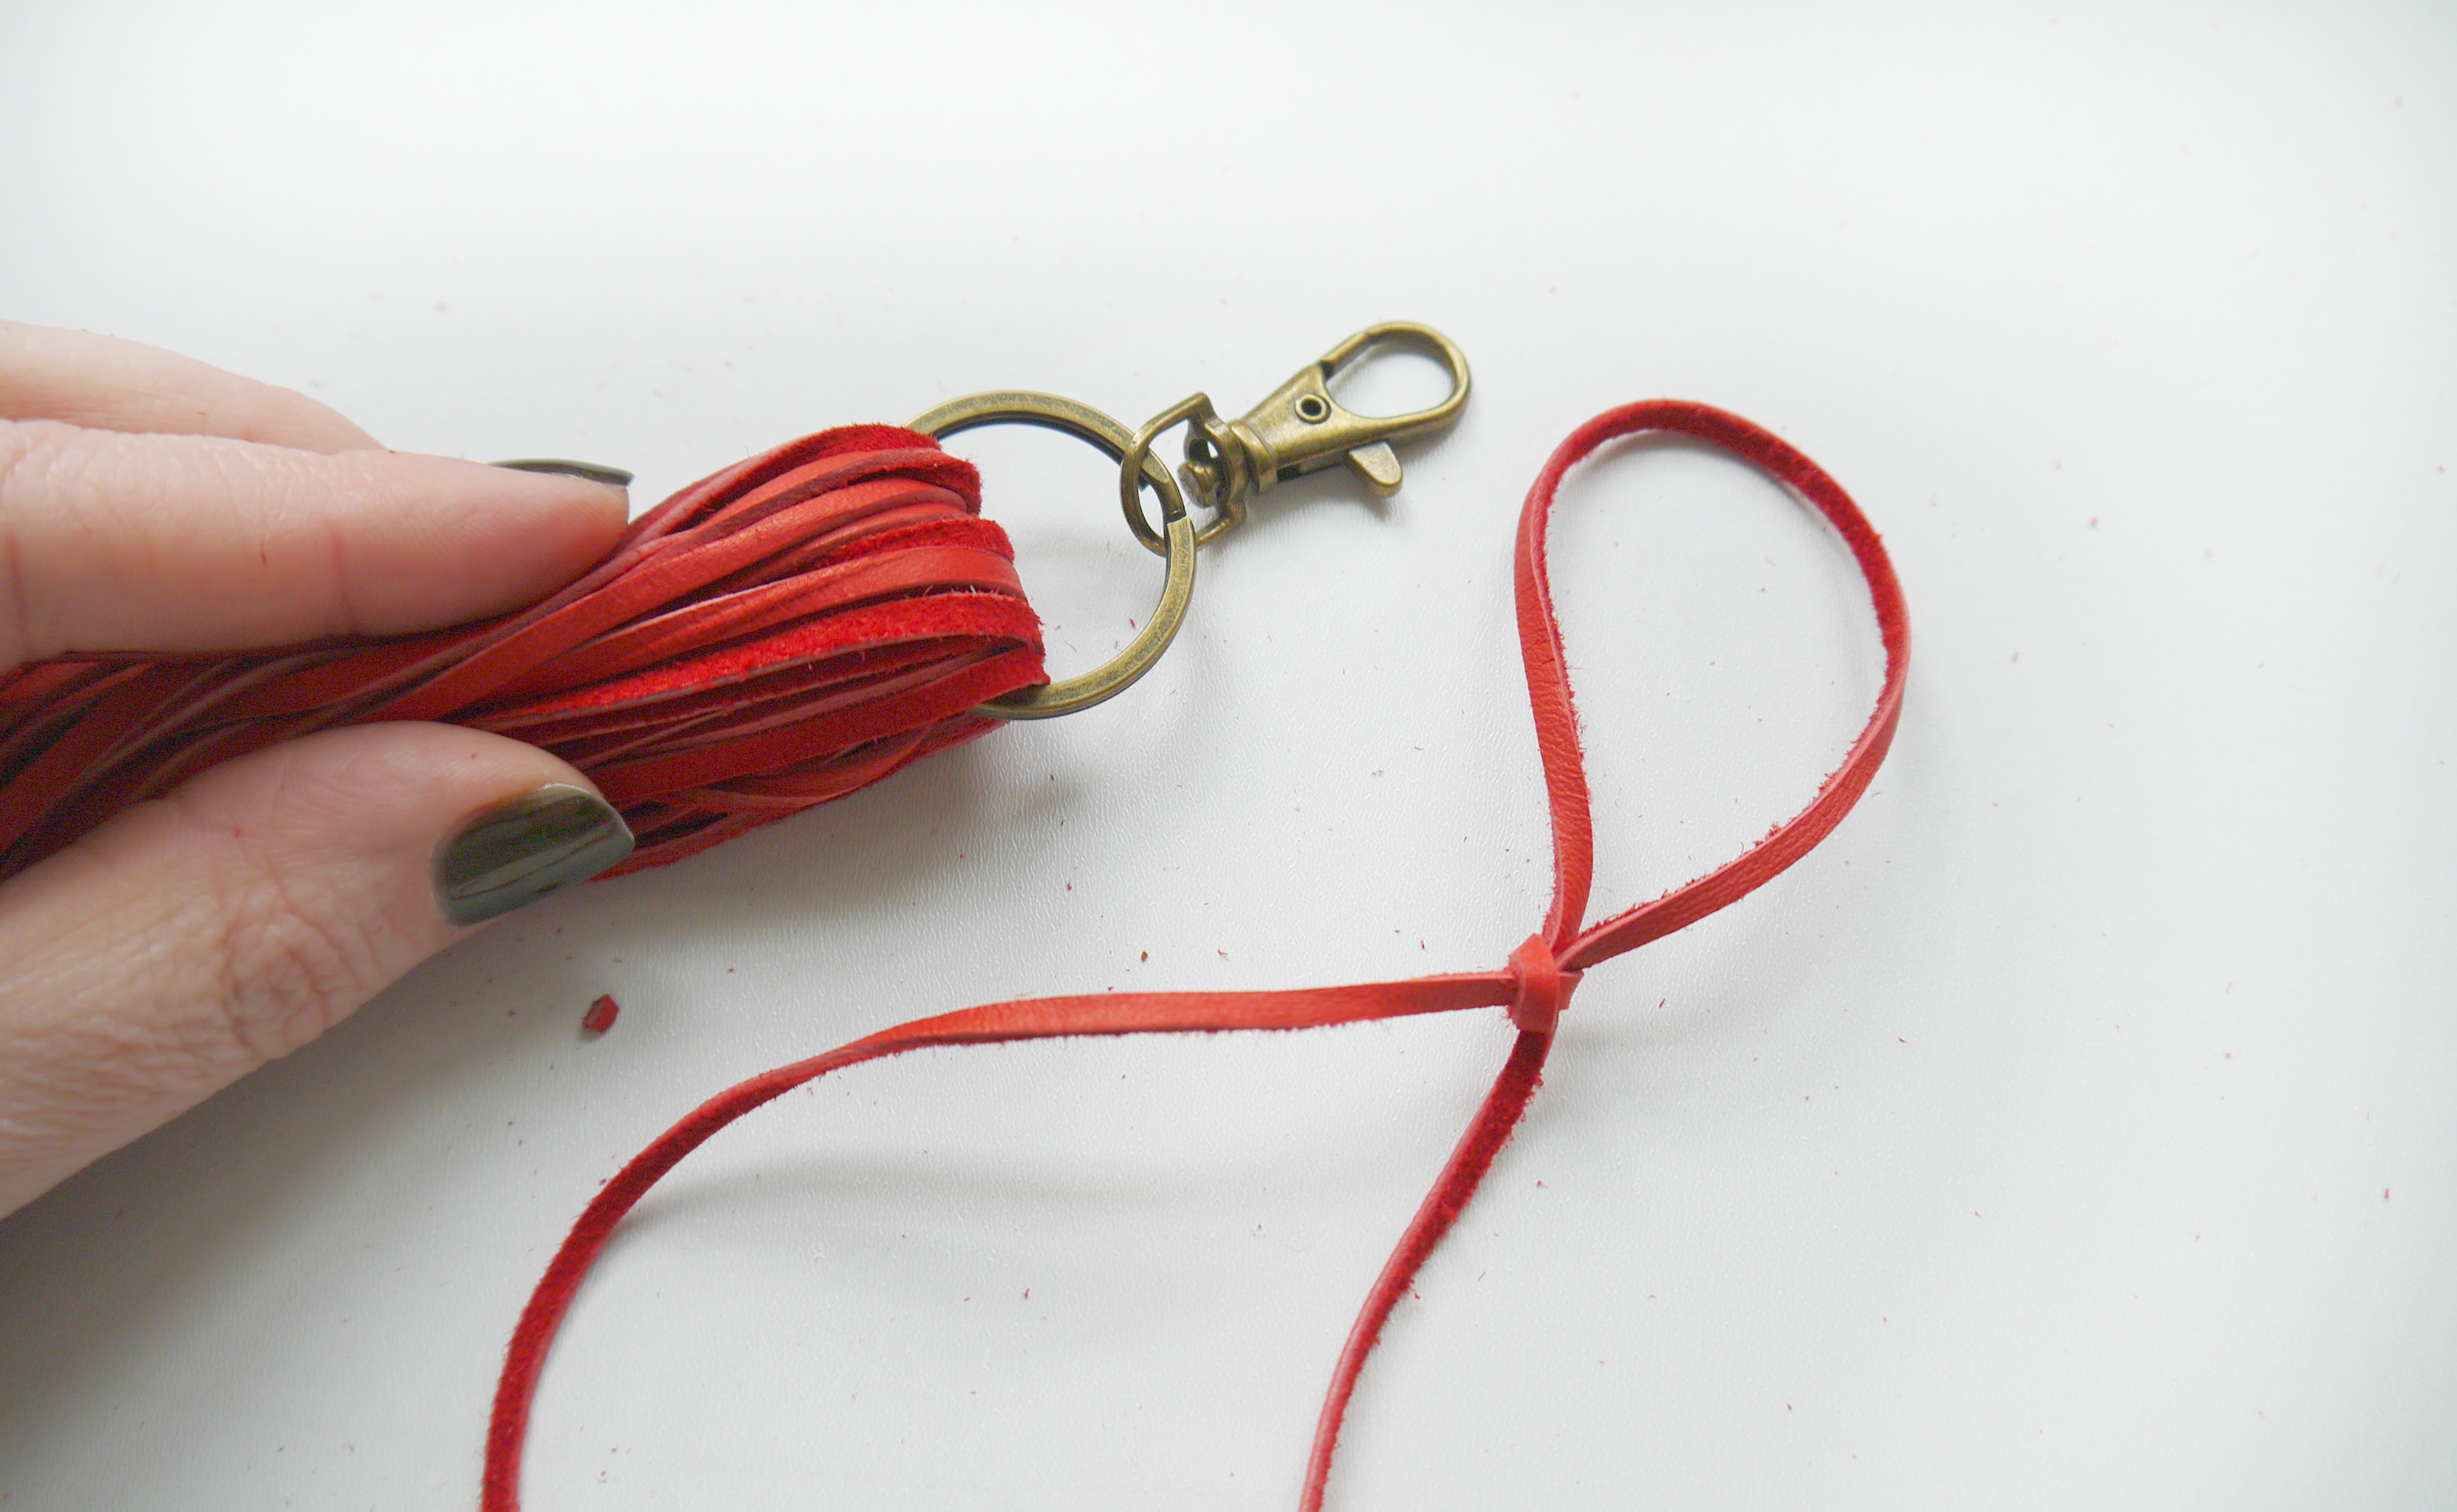
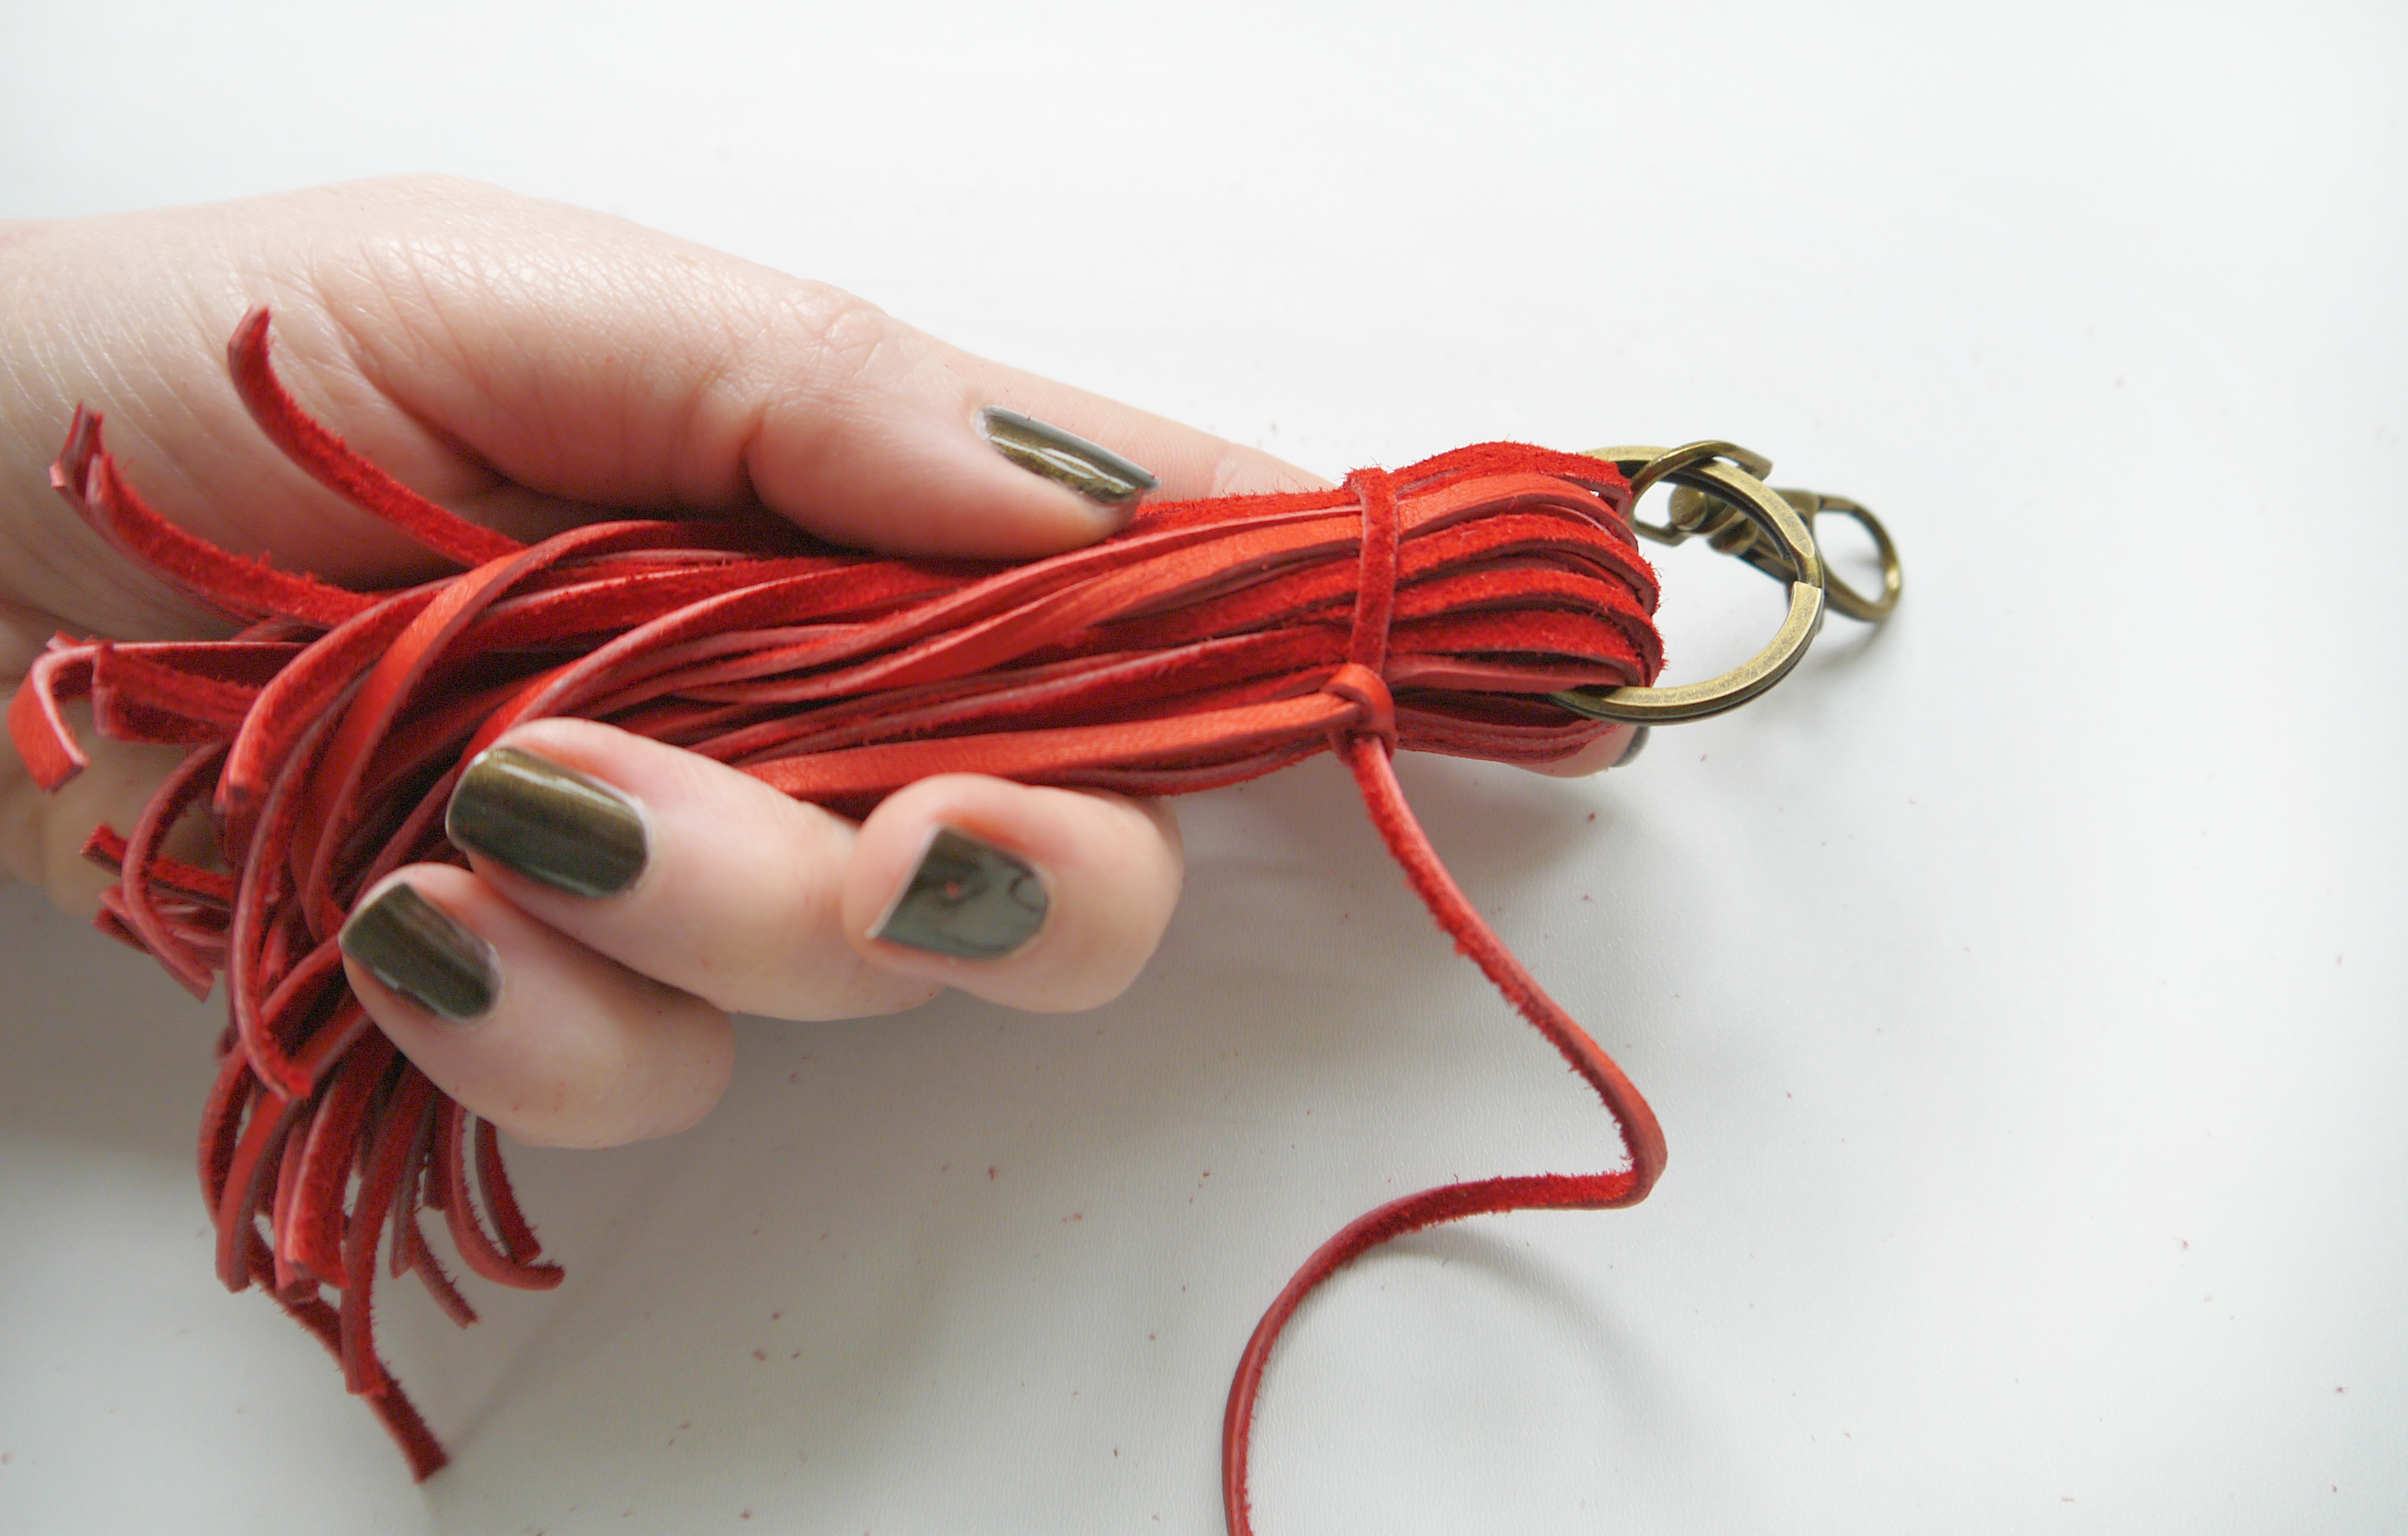
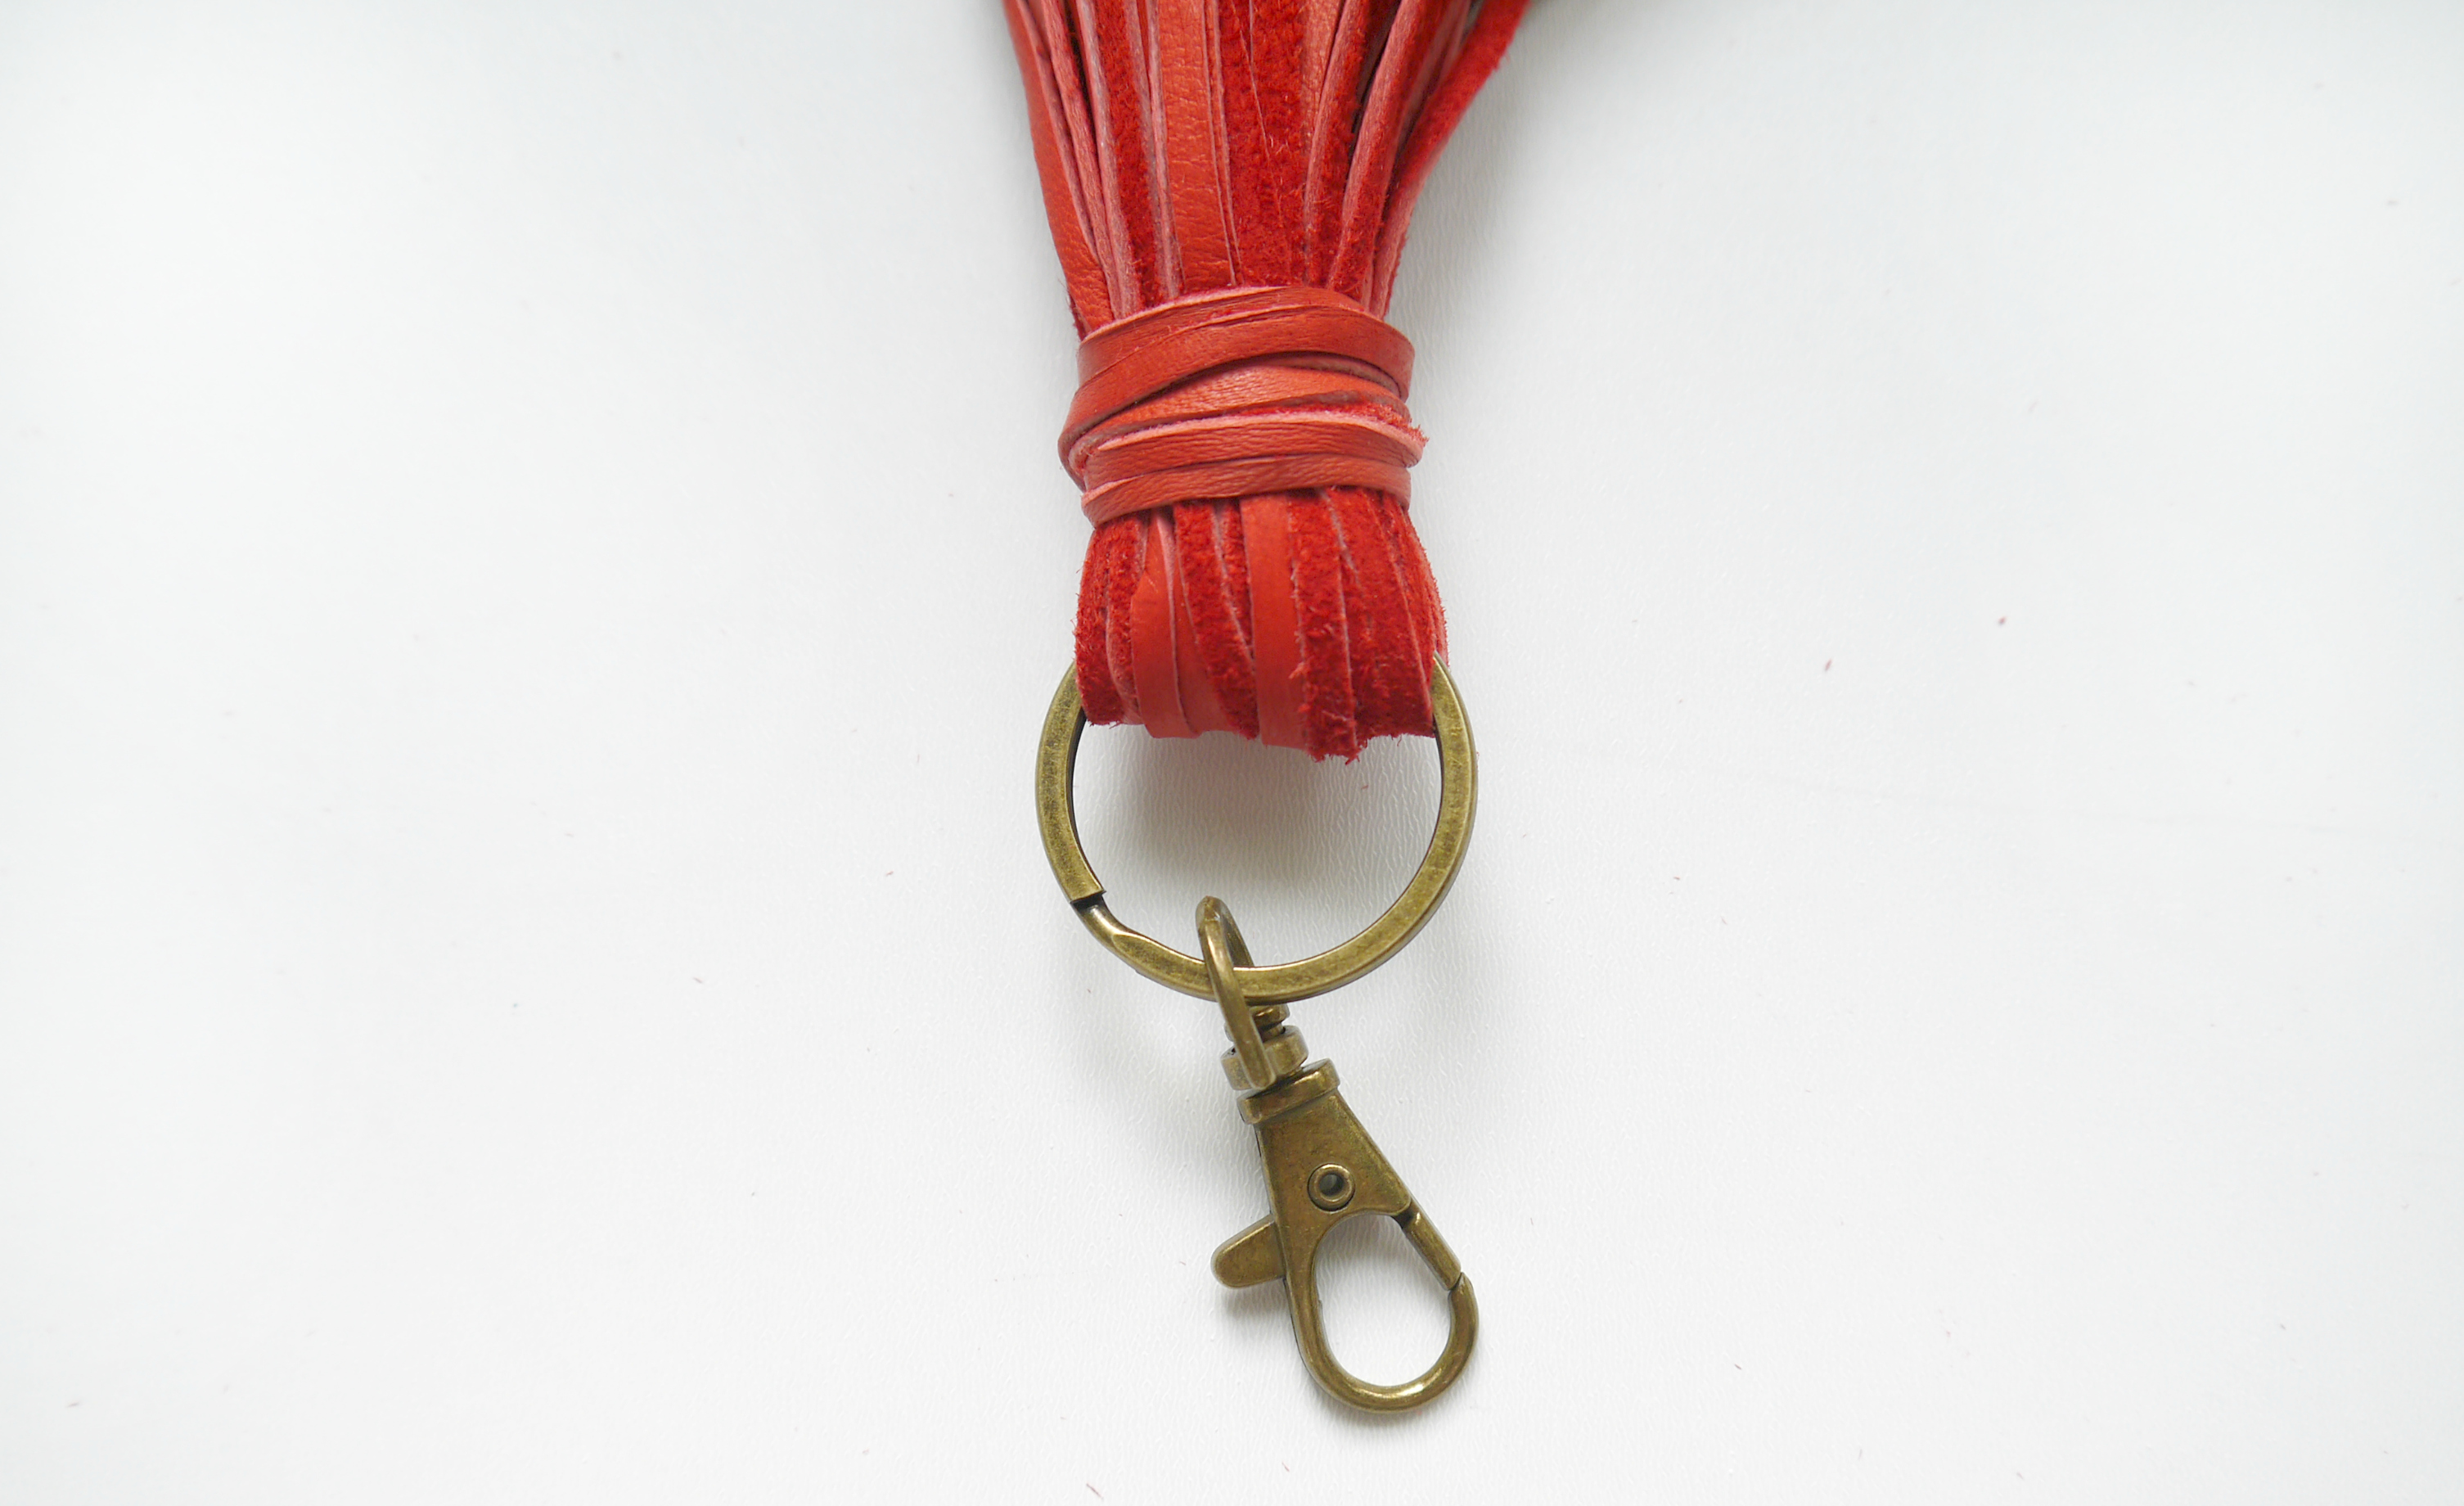
…with the split ring in the middle or your strips of leather, fold them in half. Enclosing the split ring in the fold. Grab the 30″ length you set aside and tie a slip knot. Leave a short tail end that is the same length as your folded tassle.

LEATHER TASSLE - STEP 6

Slip the loop of your slip knot over the top of your tassle and slide it snugly closed like so, with the short tail pointing downwards towards the end of the tassle.

LEATHER TASSLE - STEP 7

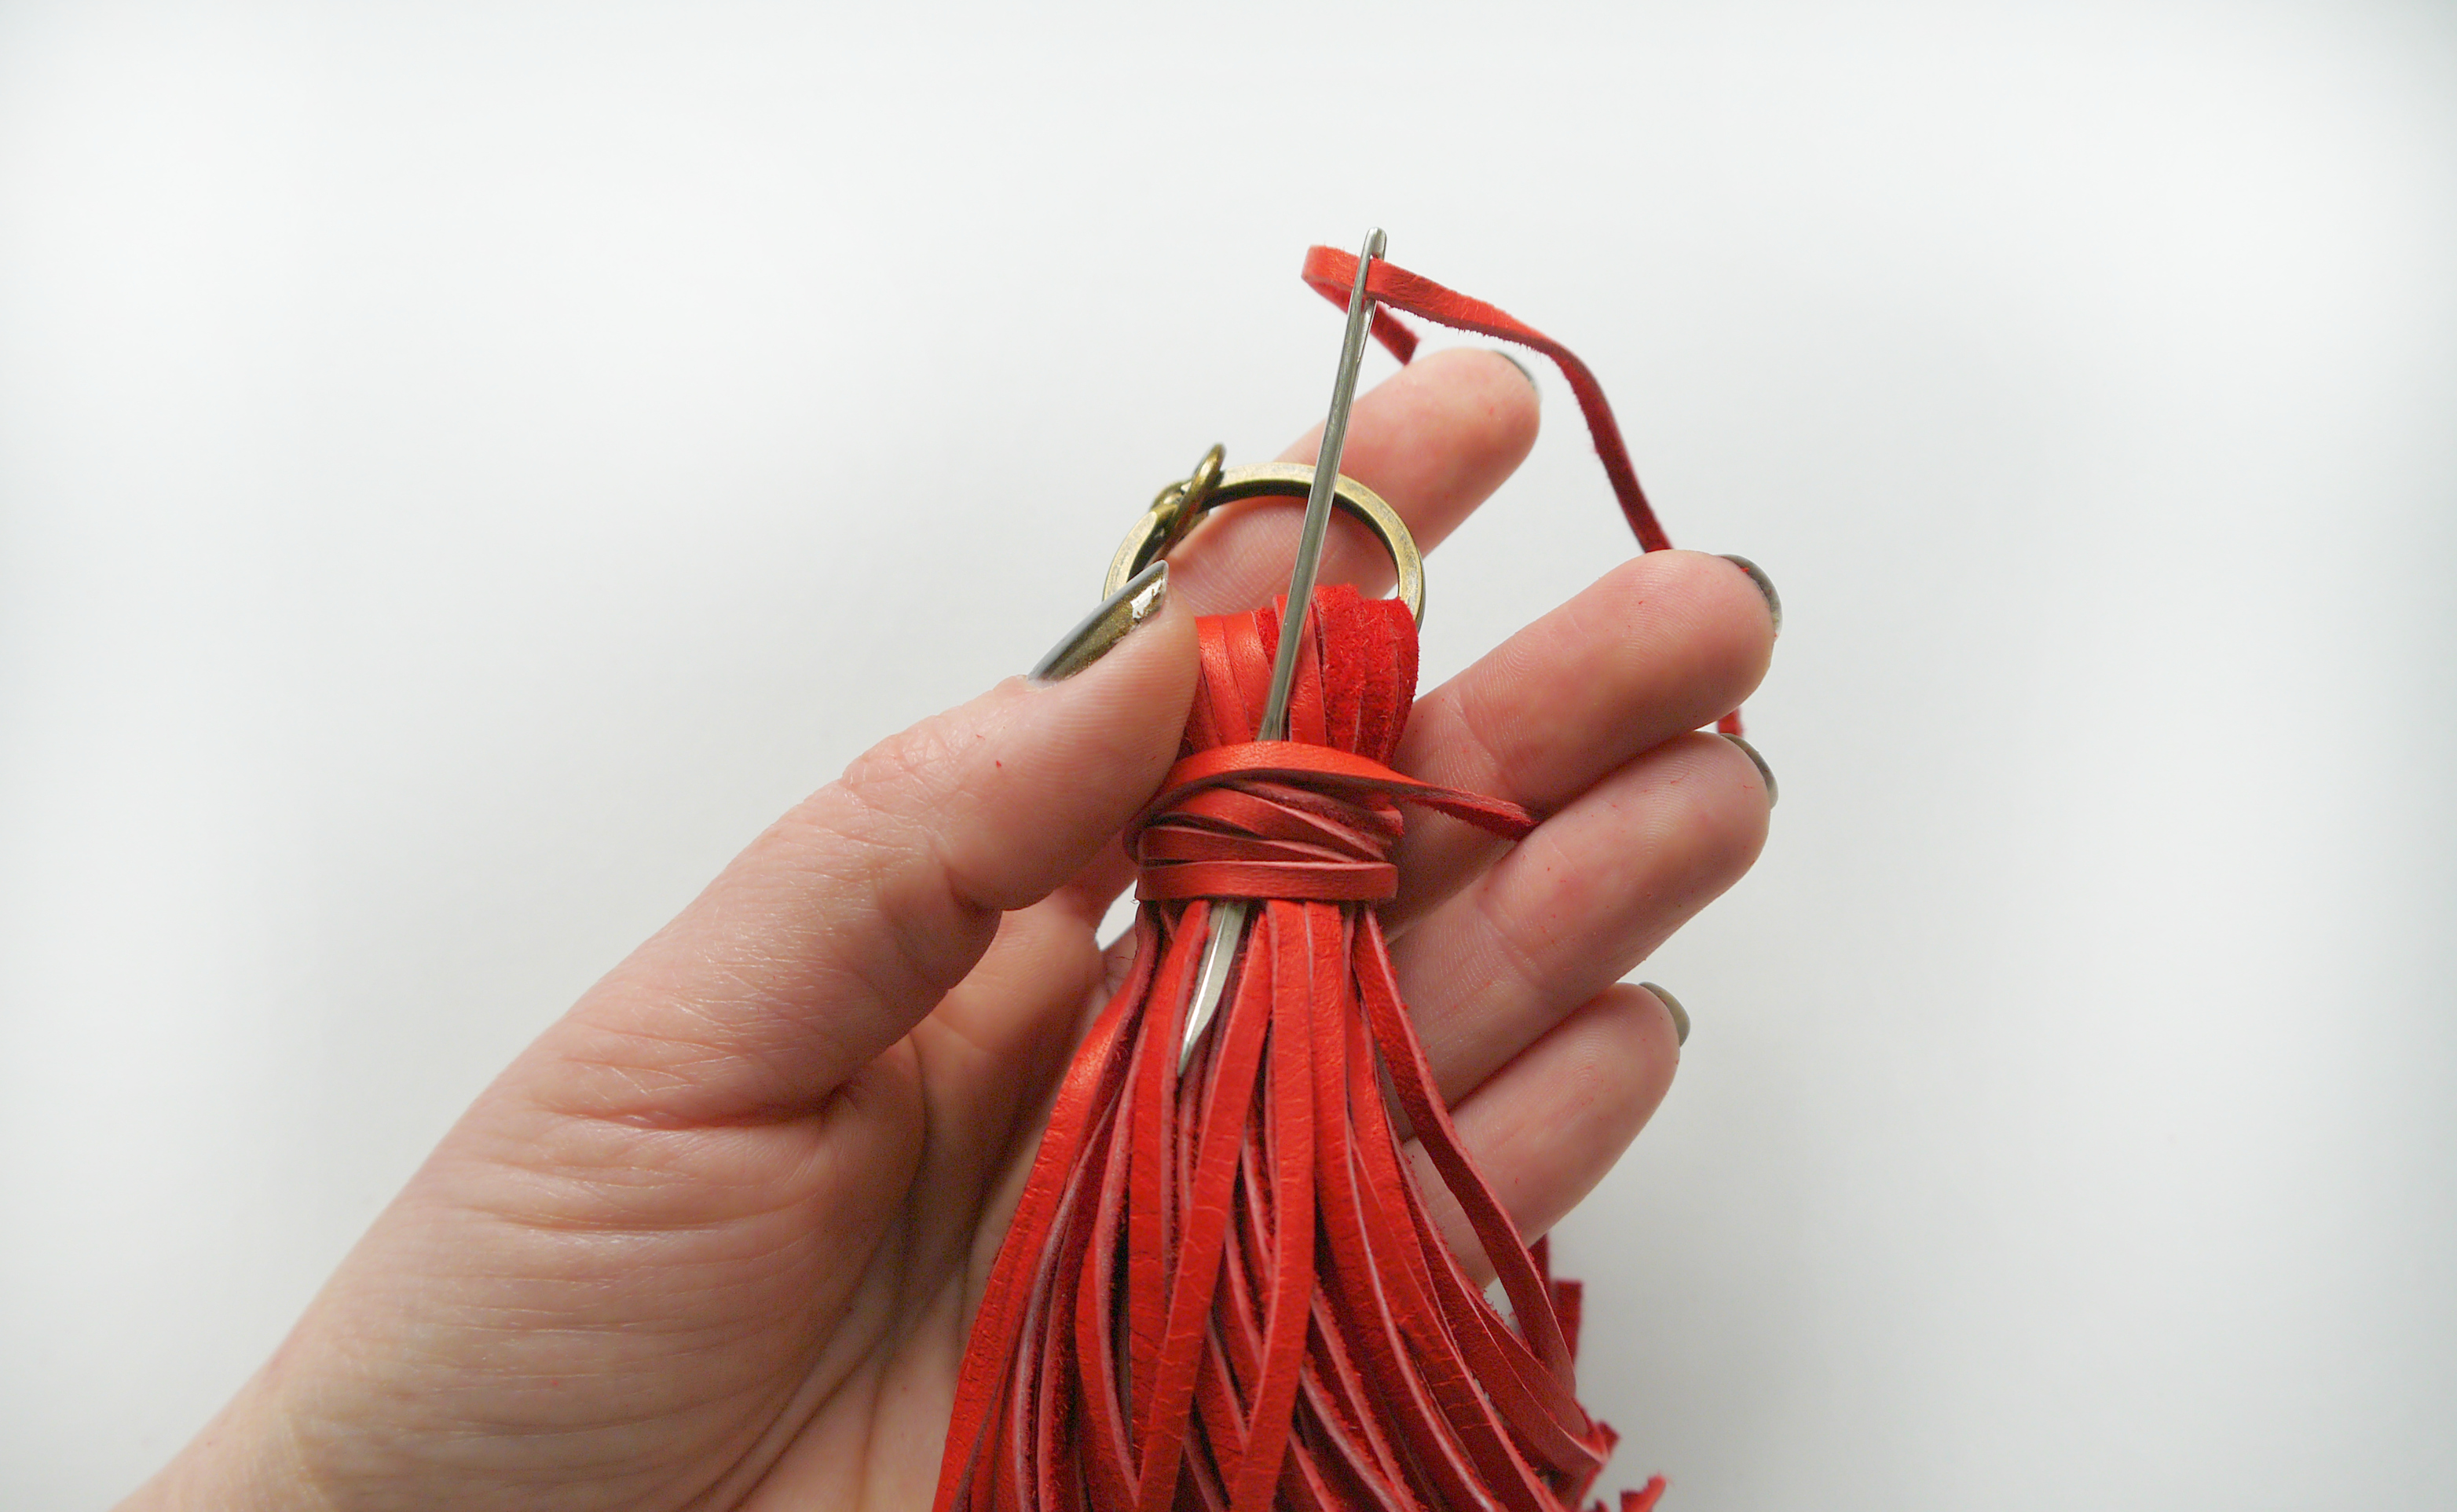
Then take the long tail and wrap it tightly around the neck of your tassle covering the slip knot as you go. When you have all but run out of tail, thread the end into a needle and pass it through/behind the wrapped part. Pull tightly to secure.

LEATHER TASSLE - STEP 8

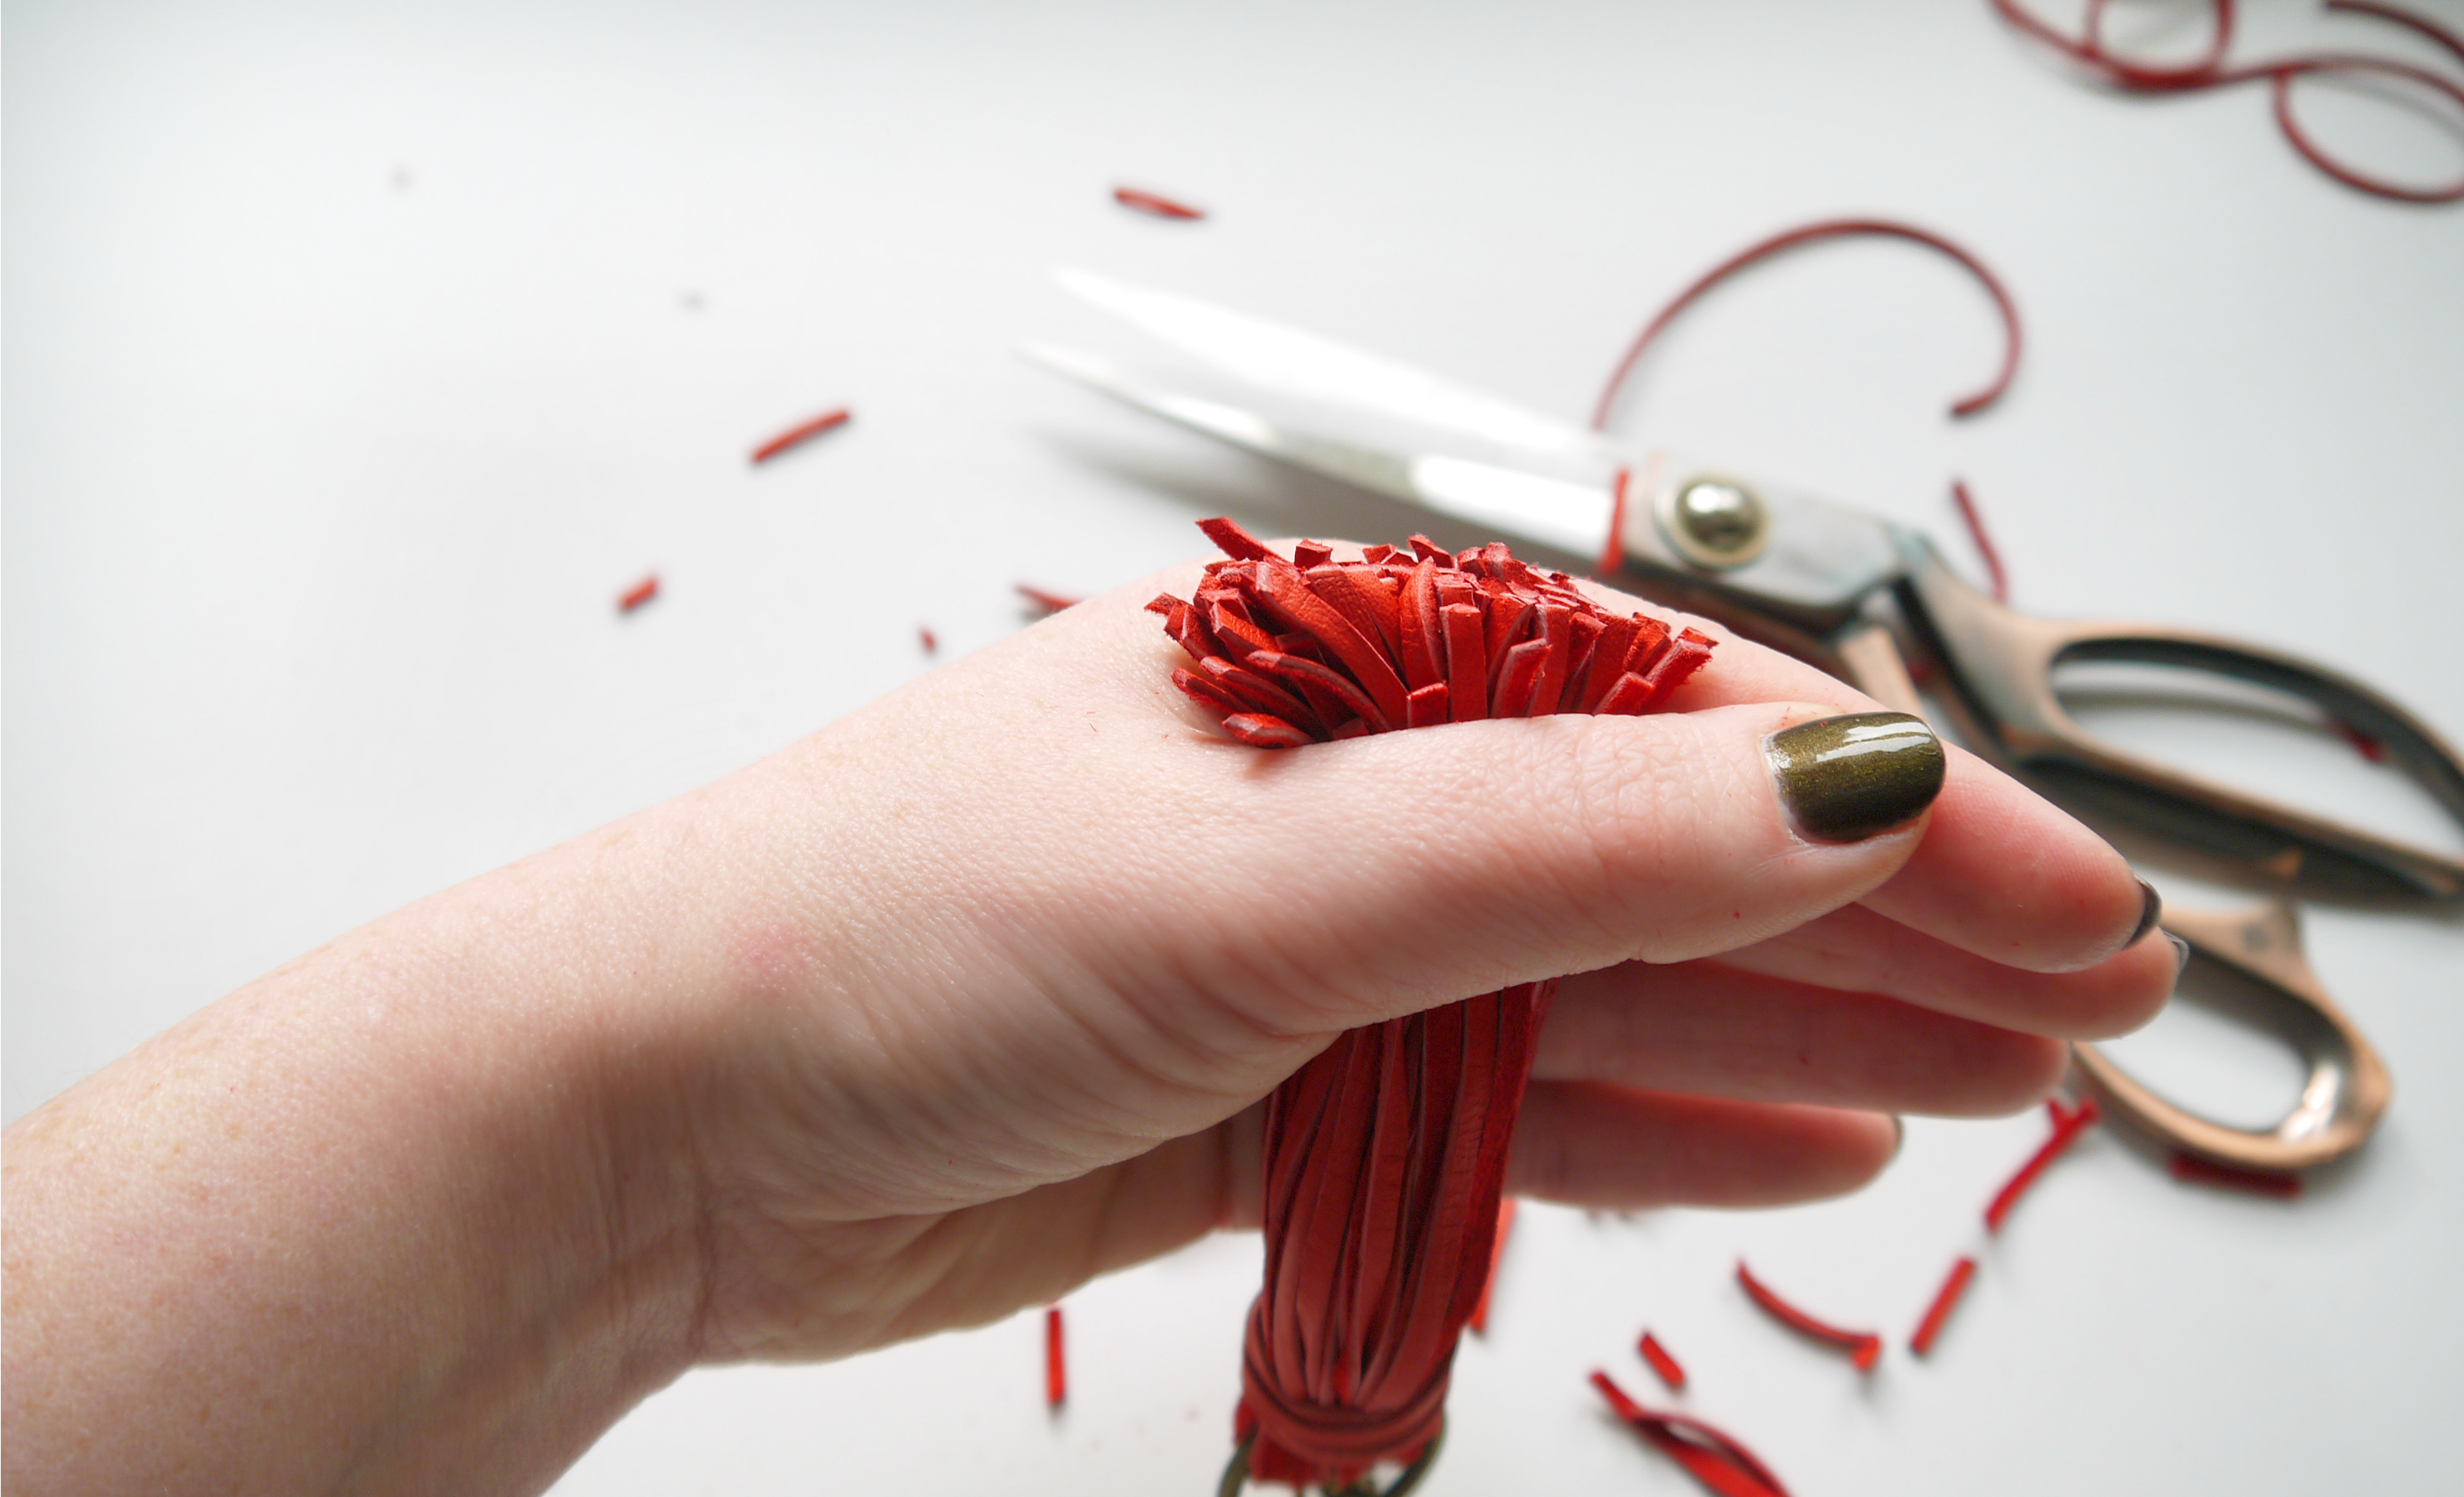
Bunch the end of your tassle together and trim the ends to even them out..

LEATHER TASSLE - STEP 9

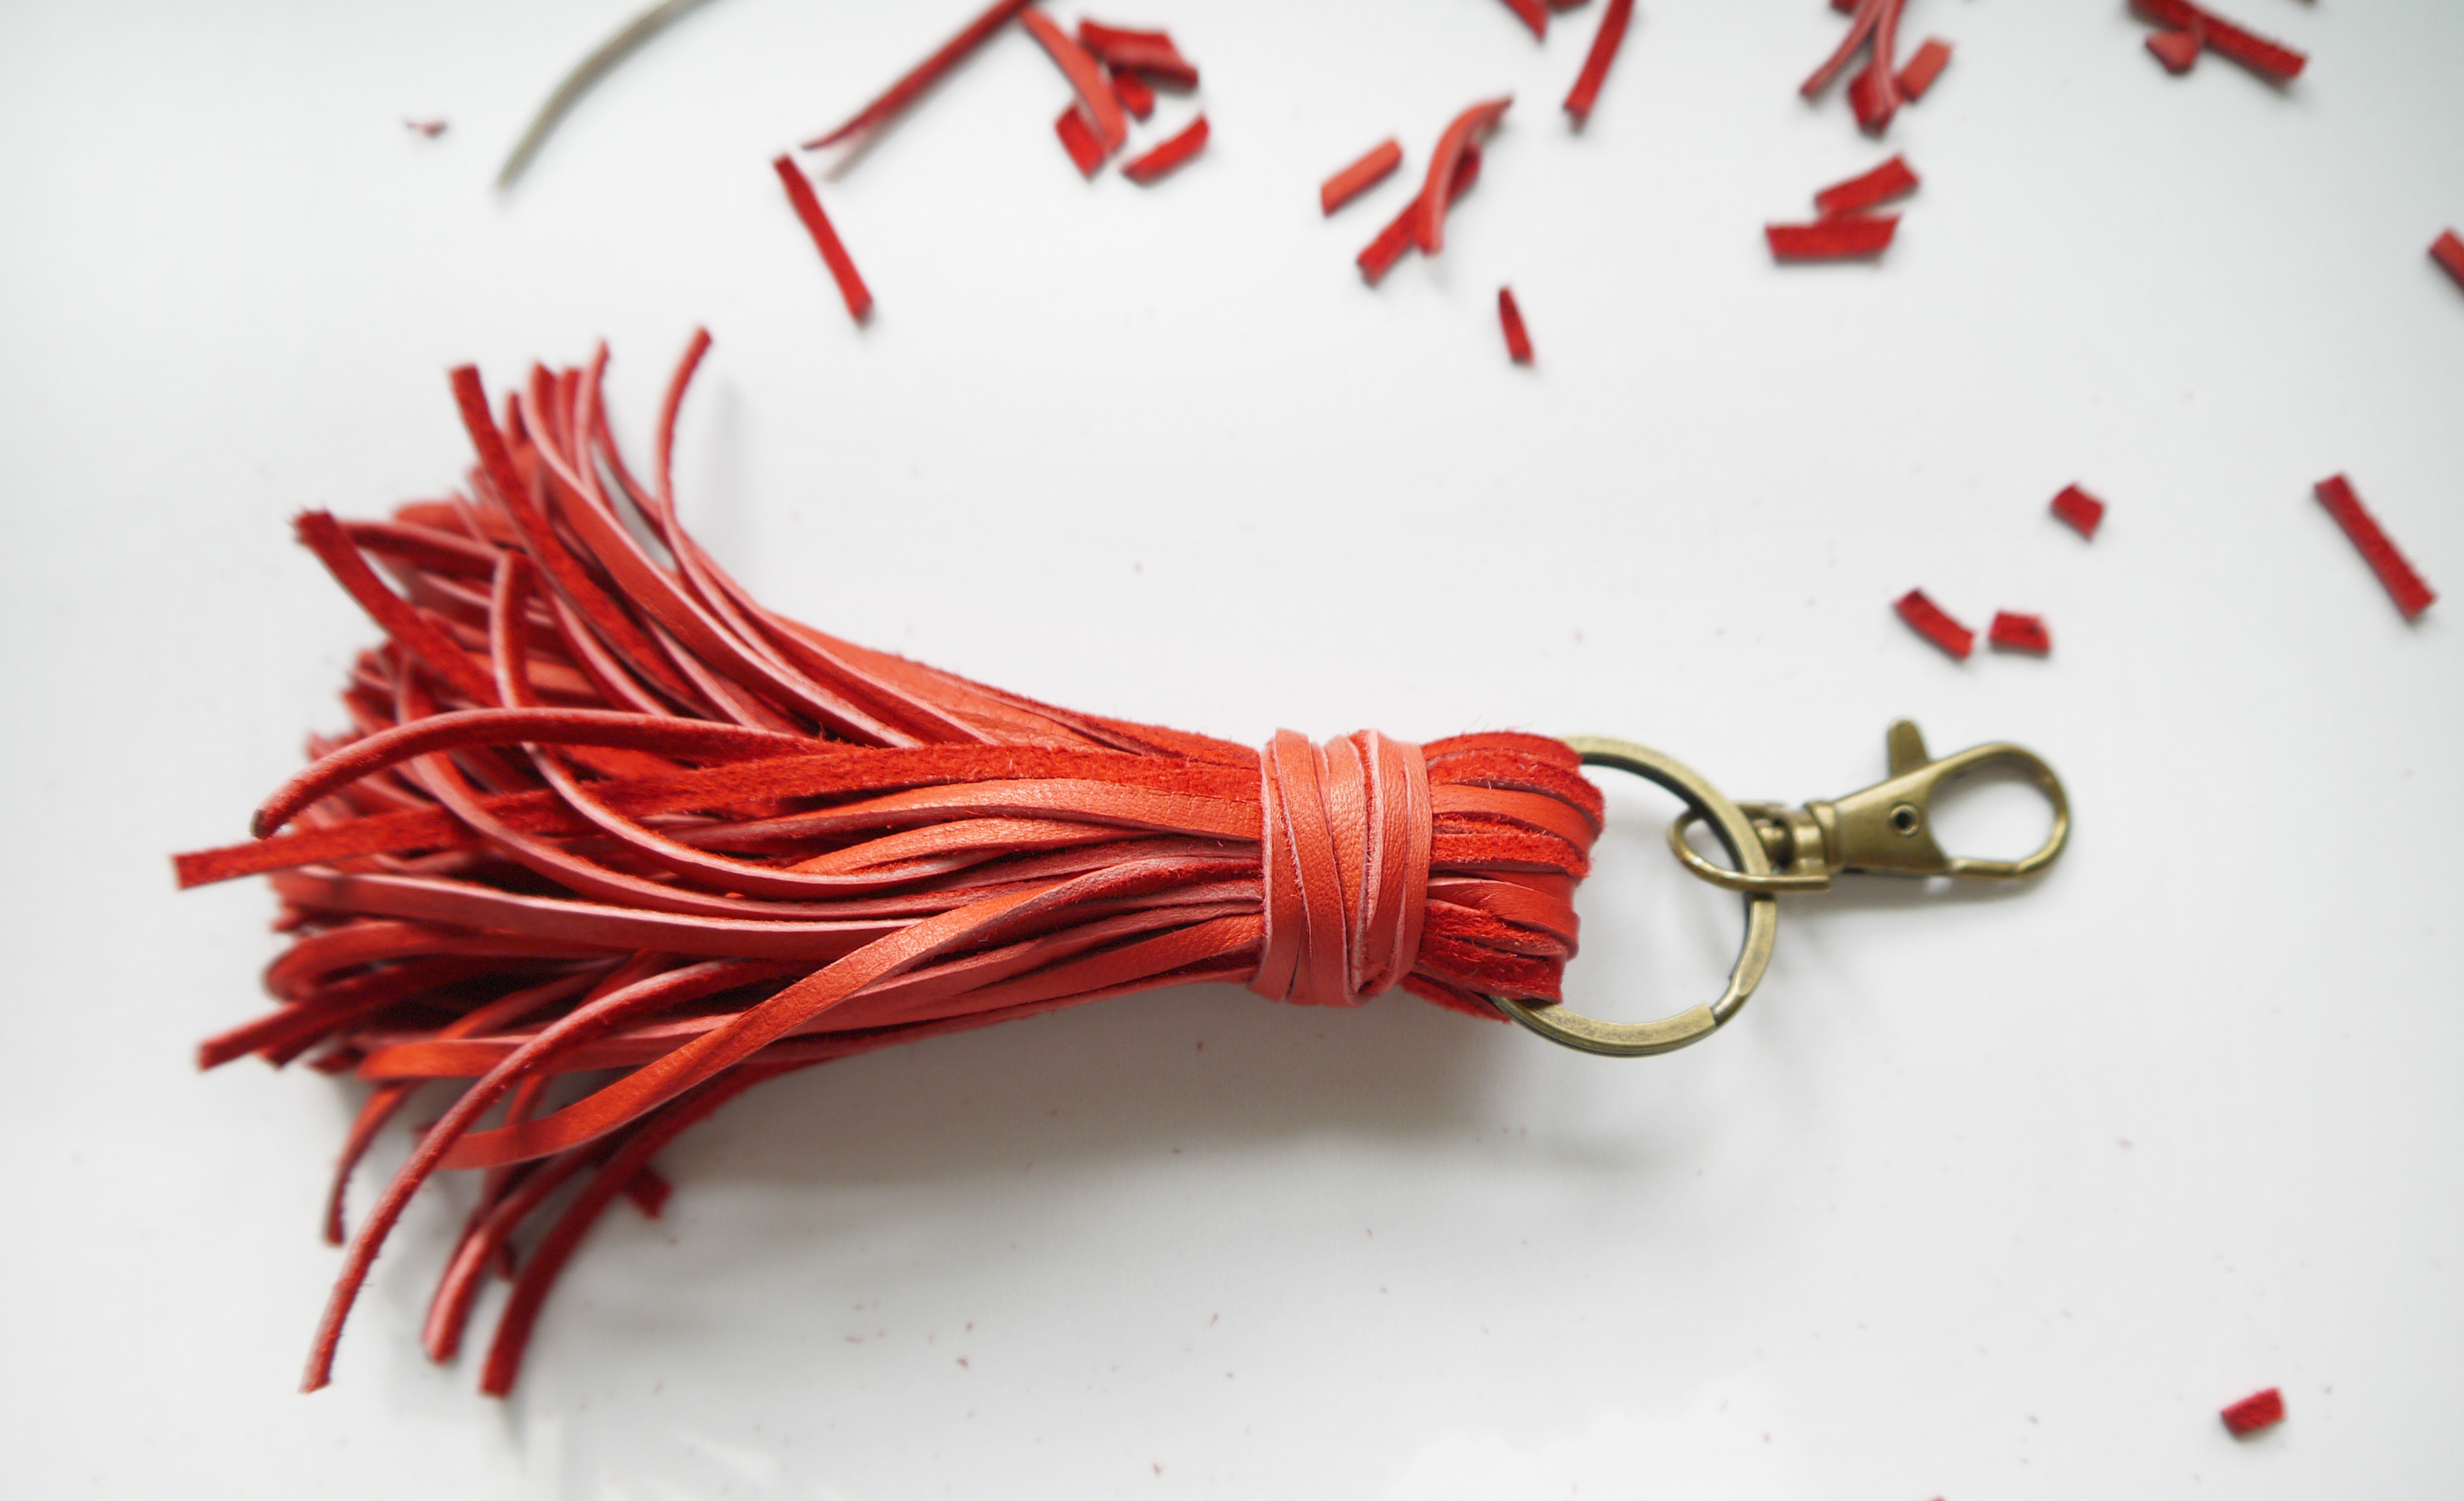
Aaaaand you’re done!

LEATHER TASSLE 1


LEATHER TASSLE 2


LEATHER TASSLE 3

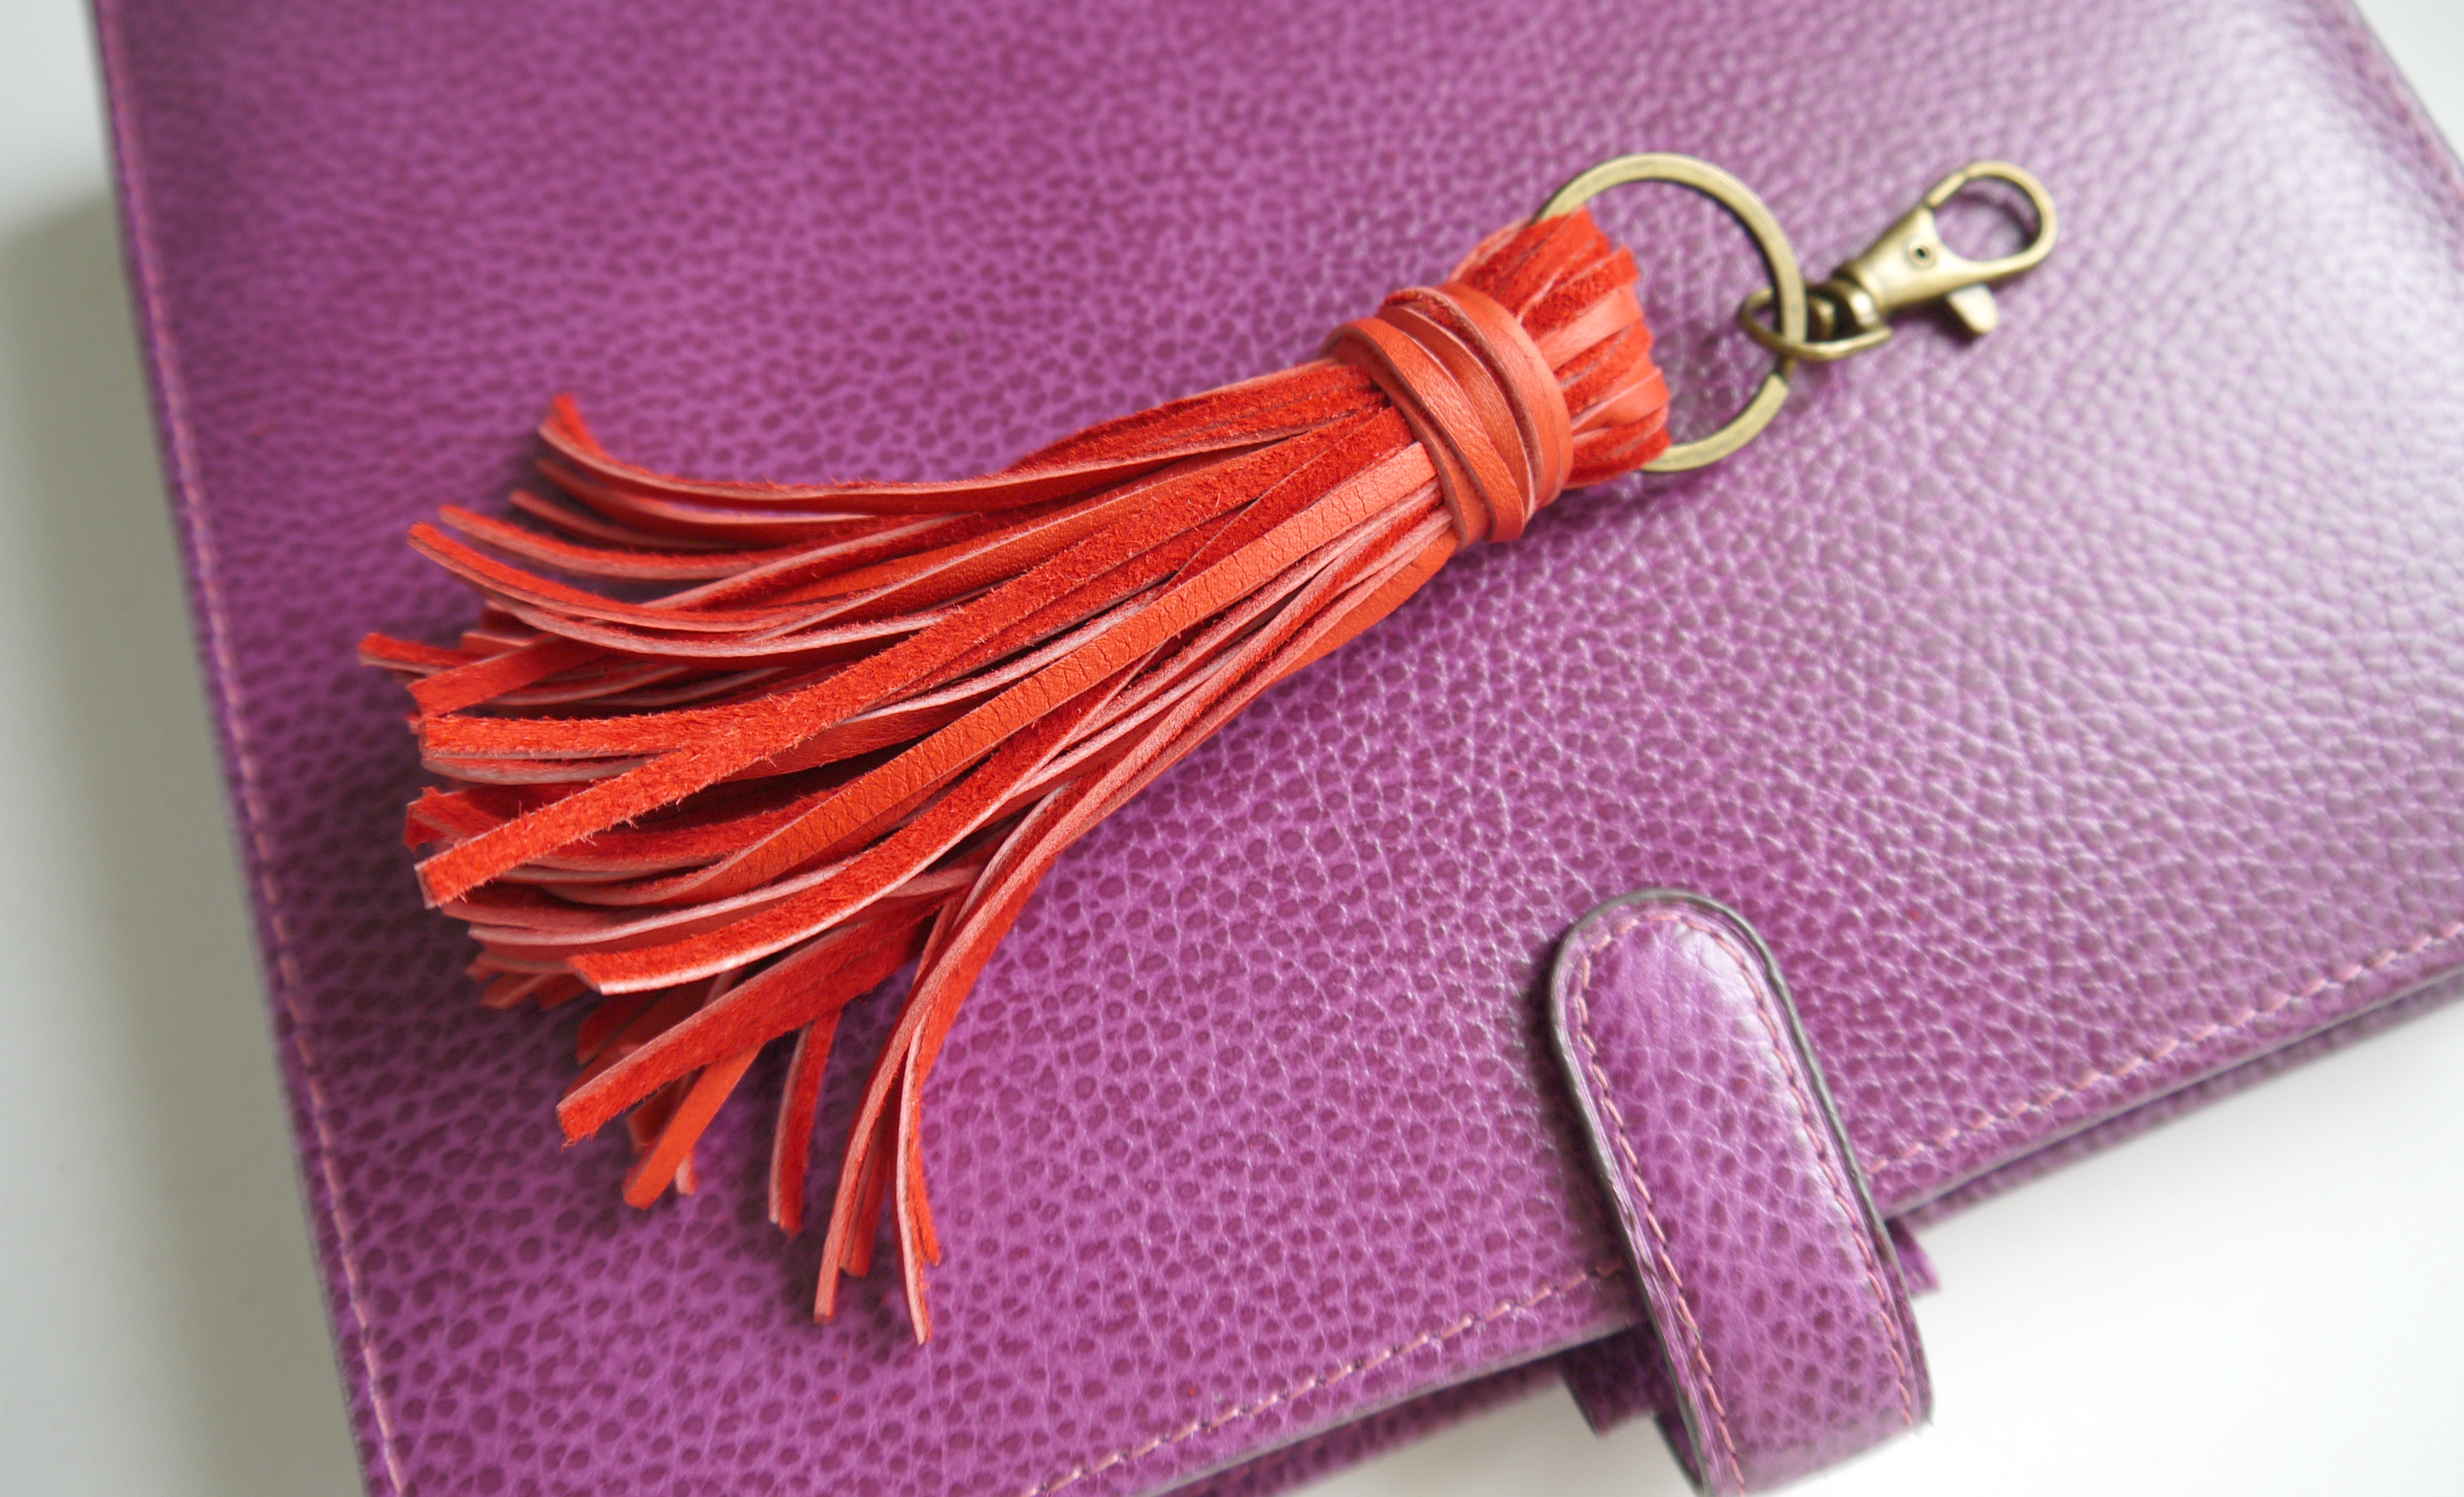
Your leather tassle is ready for some keys…or simply to add a pop of colour to a leather bag …

LEATHER TASSLE 4


Have a great day! And don’t forget to let me know of any little gremlins you find in the new site! I would sooooo appreciate your eagle eyes on this! If you’re interested in finding out about the Blogger to WordPress migration, perhaps you’re considering the move yourself but you’re not sure, then let me know, and I’ll put a summary post together so you can see what it involves!

DIY, gift ideas, repurposing, Sewing, Thrifting, toy making

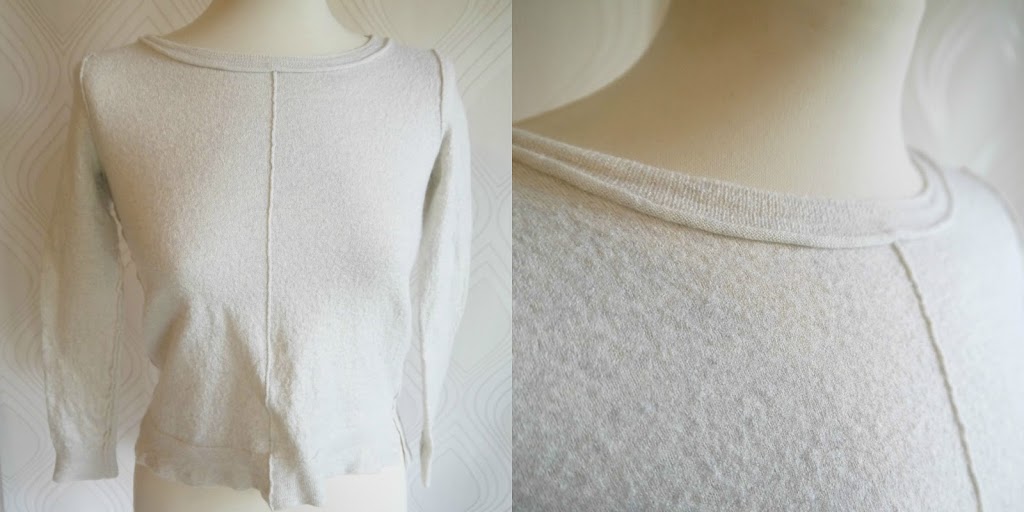
Recycled Merino Bunny….from a shrunken jumper…

05/28/14

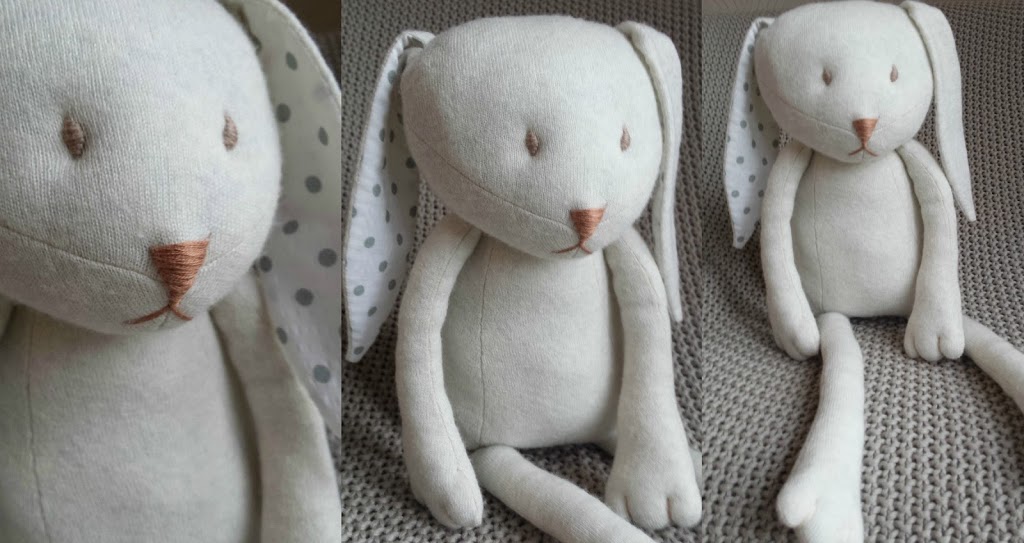
A little unselfish sewing is good for the soul! My oldest friend recently gave birth to a gorgeous baby boy and I wanted to mark little Zavier’s arrival with something handmade. Enter the Merino Bunny….

This is my first foray into toy making and actually, I found it hugely satisfying and I’m really happy with how he turned out…

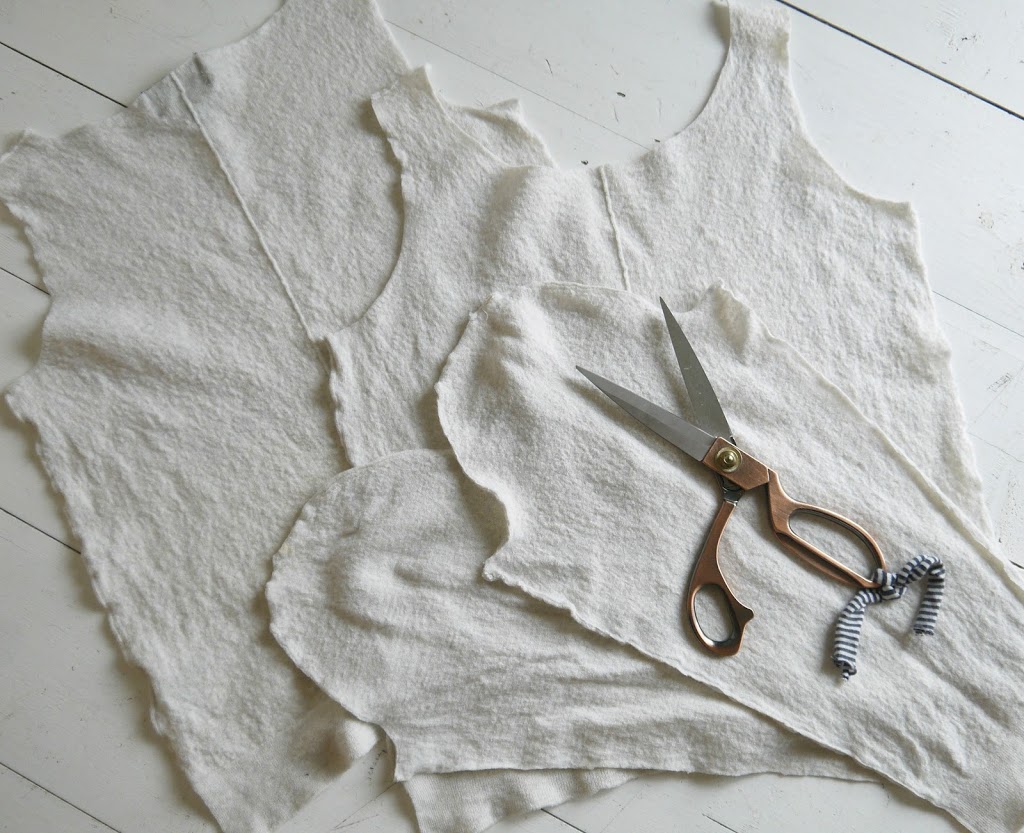
What’s even better is that this little bunny’s eco credentials are solid 🙂 He’s made from a merino jumper that I loved but after it’s first wear,,,,got seriously felted when put in the tumble dryer by mistake! (We’ve all done it!)….in fact all the elements of Merino Bunny, (despite being natural/luxury materials like merino, silk and cotton), are reused/thrifted/recycled…(apart from the filling which is new!)

Essentially I just deconstructed the garment by cutting around the seams…

Then cut my pieces using a free online pattern. The pattern can be downloaded here and there are ample clear instructions to follow there, so I won’t go into that here….

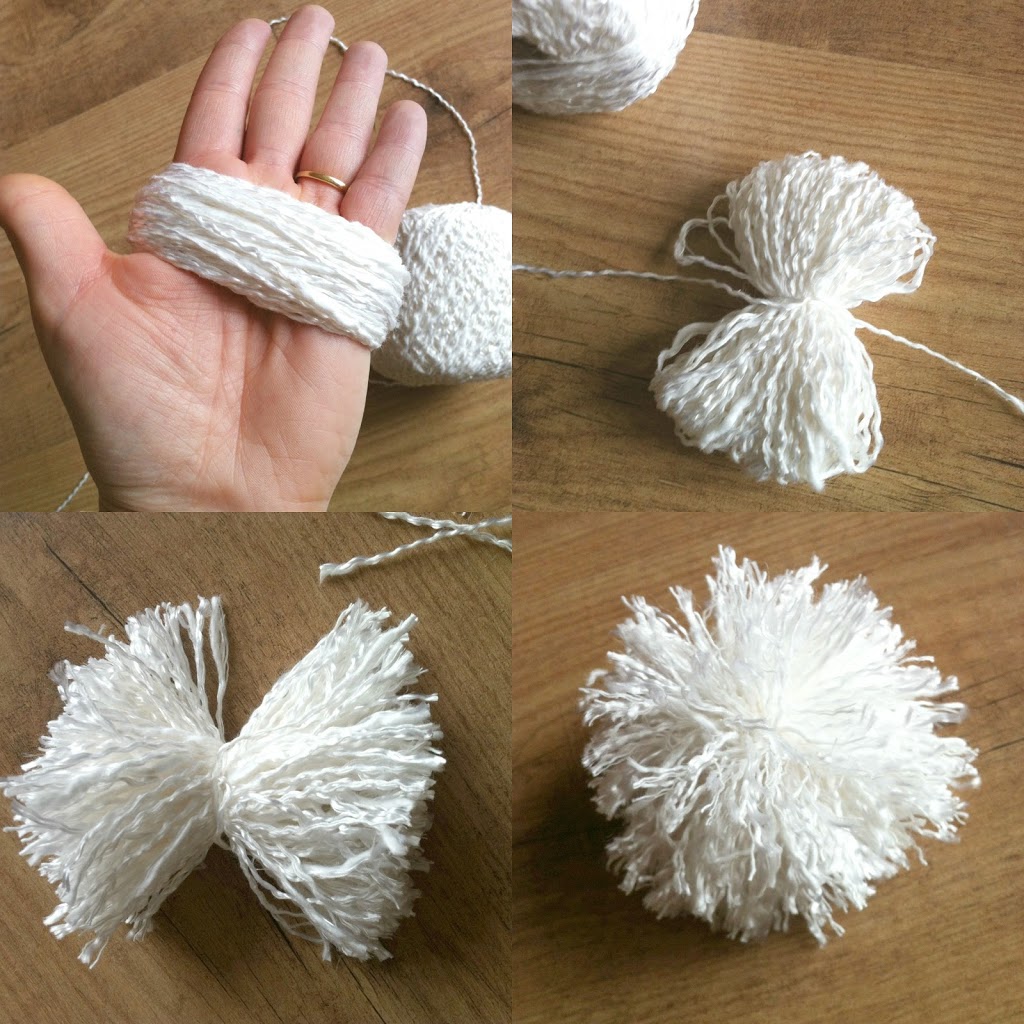
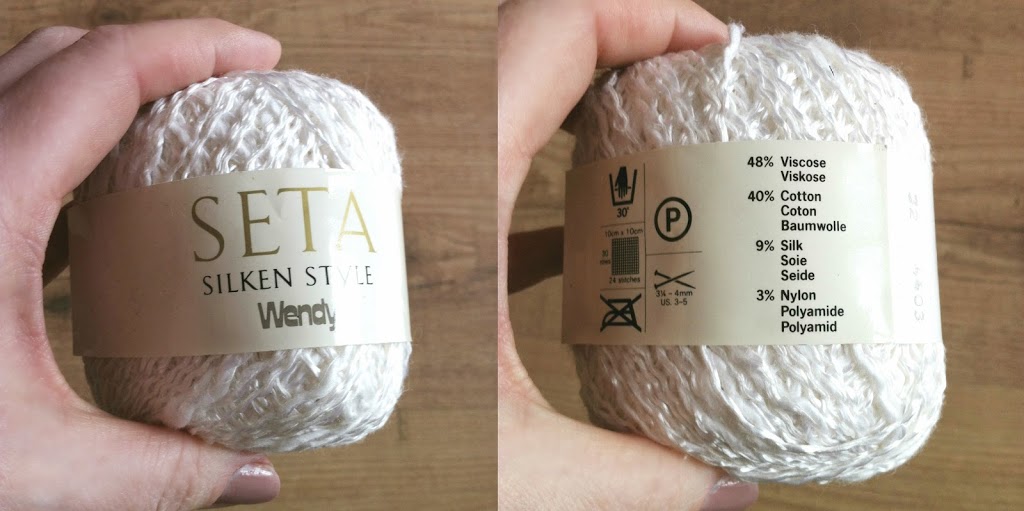
His ears are lined with scraps of cotton seersucker (thrifted) and I embroidered his facial features using vintage silk embroidery thread that I thrifted aaaaages ago. His pom pom tail is also made from a vintage thrifted silk/cotton mix yarn….(this is one thrifty bunny!)

Never really seen the point in pom pom makers. This is how I make mine. Wrapped around the hand (not tooo tight or your fingers will start to go blue!)…slip the skien off the hand and tie securely in the centre….snip the loops….then fluff out the pom pom, and trim to shape…

This is the yarn in question. I think it was in production in the 80’s. But a quick google or ebay search should be able to bag you some. It does pop up on ebay from time to time and I recently saw some on Etsy too.

I departed from the pattern a little when it came to bunny’s arms and legs. The pattern suggests having them unstuffed and floppy. But I stuffed mine and gave his “fingers” and “toes” a more three dimensional effect using large stitches inbetween…using the same silk thread I used on his features….

He’s actually as big as baby Zavier…..

But hey….he’ll grow into it 🙂

All together now…..awwwww!


Crafting, crochet, DIY, gift ideas, Tutorials

How To: DIY Crochet Needle Roll

12/11/12

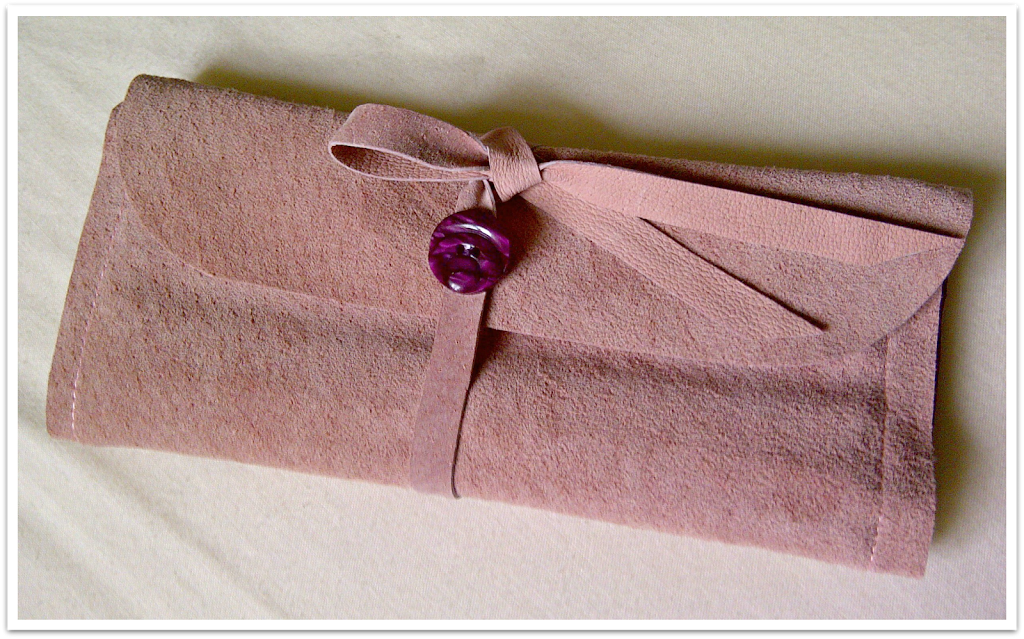
As promised, here’s the “how to” for the crochet hook roll I shared yesterday. This make is easily doable in 1 hour AND is adaptable to any number of uses. Knitting needles, make up brushes, artist pencils/brushes. All you’d need to change are the dimensions. So it’s great as a last minute gift if you’re pushed for time but want to give something handmade…

I made mine to fit this set of bamboo crochet hooks. I spaced them out roughly as I would envisage them in the finished roll; then measured the length of the hooks and took a rough width measurement across the bottom of the hooks…

I cut my lining piece as follows:
Fabric length = Length of hooks x 2 – 1″
Fabric Width = Rough width measurement + 2-3″ extra (I only gave myself 1″ extra and barely scraped it! You can trim any excess in a later step. So give yourself enough width to play with)
Fold fabric in half to create a kind of open sided envelope/pouch. (Top right pic) You want the back poking up by about a 1″. If you’re happy that it looks about the right size against your hooks, use bias to finish the top and bottom raw edges (bottom right pic)…


To sew the compartments:
Sew your first line about 1/2″ from one side. Starting from the base of the “envelope”, and using your first stitching line as a guide, backstitch at the start of your stitching line; then sew a straight line all the way up and onto your bias bound edge but NOT past it. Backstitch to finish (first pic). Repeat this process until you have enough compartments (To gauge the width of each compartment, I started with the smallest hook(s). I knew each consecutive compartment would need to be incrementally bigger as the size of the hooks increased. So using the previous stitching line as a guide, I just made each compartment slightly bigger than the last; until I had enough for every hook. Middle pic) Then trim any excess along the side to within 1/2″ of your last stitching line.
Now bind the raw edges of the sides with bias (last pic)…

Cut your leather/suede to the desired size. You want it to be 2-3″  wider either side of your “envelope” for flaps; and about 1/4″ wider top and bottom so the envelope fits neatly in the centre as pictured.
I rounded off the corners of mine (bottom 3 pics)…

Stitch the “envelope” to the wrong side of your suede/leather by cathcing the edge of the bias tape all the way around. If you don’t want your stitches to be too obvious on the right side,  make sure your bobbin thread matches the colour of your sued and your top thread matches the colour of your bias tape.
Then cut yourself a tie from your suede/leather; and secure to the right side of one of the flaps with a yummy button…

And there you have it….

It’s absolutely worth noting that the suede I used was clothing weight (harvested from a thrifted pair of suede trousers) and therefore buttery soft and easy to work with. When working with suede or leather makes sure you use the right  needles and that your machine can take the increased workload. If in doubt, test on scraps first. I had to adjust my tension to stop the bobbin thread from skipping and making ugly stitches on the right side of the suede. Even sewing the button on was trickier and required a leather needle plus the very rare use (on my part) of a thimble to encourage the needle through the suede. But apart from this, it’s a super quick and satisfying make, and I’m super excited to see the recipients’ reaction when she opens it!
So why not get thee to a charity shop, find an old leather/suede skirt/jacket/trousers (delete as appropriate) and have a go yourself? Be sure to let me know if you do. Id love to see the results!

christmas, christmas 2012, Crafting, crochet, DIY, gift ideas

DIY Gift Idea: Leather /Suede Crochet Hook Roll

12/10/12

Stop Press! Over a week into December, and I’ve just got my first handmade gift finished! (Someone needs to get a serious wriggle on!) This little suede crochet hook roll (step by step to follow tomorrow) made to house a set of bamboo crochet hooks I found on eBay. (Superfast delievery too if you’re interested!) You may recognise the suede from a previous project….

Kerry may recognise the button. It’s from the ONLY giveaway I’ve ever won…

The inner “pocket” is made from a remnant of some thrifted curtains….

So essentially this neat little needle roll cost me zero to make!

If you fancy making one, there’ll be a step by step up here tomorrow.

How’s your gift making going? Any handmade gift ideas/tutorials to recommend? I’m all ears!

DIY, gift ideas, leather, Tutorials

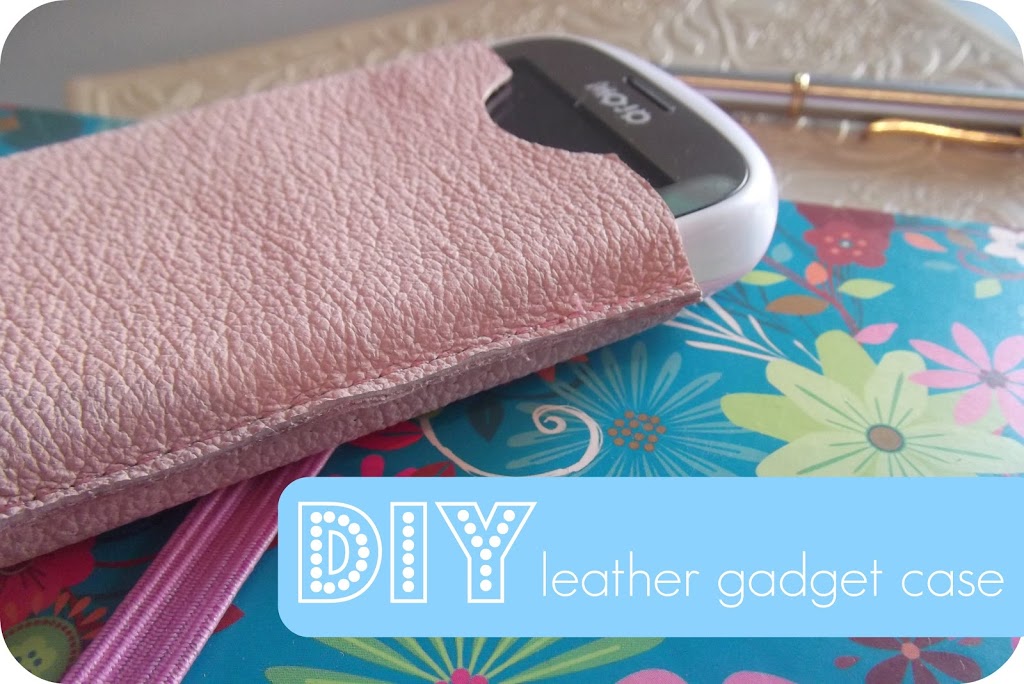
DIY – Leather Gadget Case

03/26/12

Recently I’ve been playing around with some leather and suede scraps and thought I’d share this super quick project with you.  This method could be applied to any slimline tech gadget such as ipads/phones, kindles, tablets etc. (or my cheap and cheerful mobile!) The leather I’m using was harvested from a pair of 80’s pink suede trousers that I picked up from the £1 rail in my local charity shop. So you could either keep an eye out in charity shops for old leather jackets, bags etc OR leather scraps are readily available online from auction sites and craft suppliers….

The first thing I did was make a template/pattern as follows:

  1. Draw around your phone/gadget on paper
  2. Smooth out the lines using a ruler/curve so they’re nice and even and symmetrical
  3. Add on a seam allowance to the sides and bottom
  4. I used a cotton reel to draw in a little half circle in the middle of the top line to enable me to access my phone once it was in the case

Then to cut out:

  • I didn’t want to use pins to fix my template to my leather scrap in case it left holes. So I stuck it down with masking tape. I seem to recall that freezer paper (?) will temporarily adhere to a surface so I guess you could make a template out of this to solve that problem.
  • I then cut one piece for the back and one for the front. I left the back piece with a straight top edge and cut my little semi circle from the front piece only
  • I made sure I had the right needles for the job!
  • Again, I didn’t want to pin my front and back pieces so I used these mini pegs I had in my stash. Paper clips or bulldog clips would work just as well too. I pieced mine so the soft sude part was on the inside and the leather on the outside

To construct:

  • Then with a longer machine stitch (test on scraps first to establish what works best) stitch all the way around the sides and the bottom. Backstitch either side of the opening to reinforce. I used a walking foot on my machine to help feed the leather through evenly. I stitched only half way into the seam allowance to allow for the depth/thickness of my phone. (If I were really accurate I would have measured the width of my phone at the start, divided by 2 and added this to the template at the start before adding the seam allowance. But I was winging it a bit!)
  • Then trim close to the stitching line

Next time I make one of these, I’ll probably stay stitch the top edges to reinforce, and maybe try out a bit of embellishment…..but otherwise I’m super happy with my new phone case!

Happy Monday to you! The sun is shining and I’m a happy gal today 🙂 What are you up to?

DIY, gift ideas, Restyles, the refashioners, Tutorials

Revealed!

09/09/11

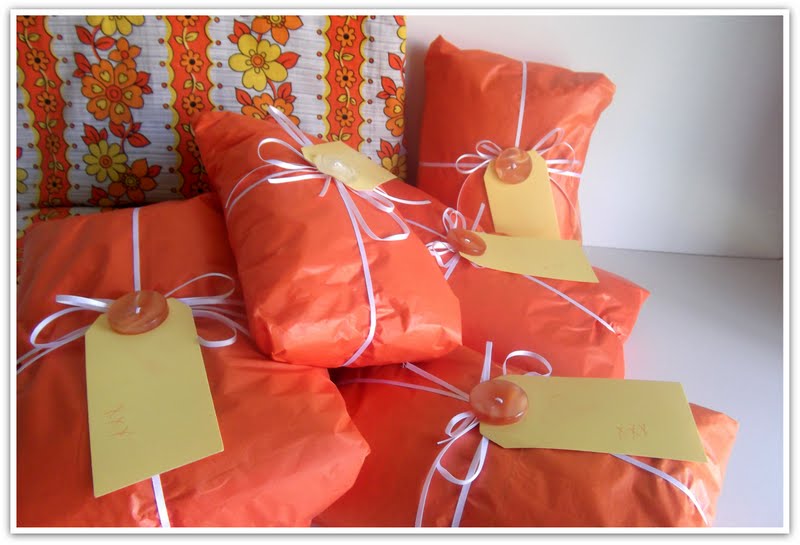
Ok, time to let the cat out of the bag! Remeber these suspect little packages from a previous post….?

THE REFASHIONERS 2011 (2)

Well it is with no small degree of excitment that I announce “The Refashioners” challenge…

THE REFASHIONERS 2011 (1)

Starting on Monday, and running all next week this blog will play host to a series of guest bloggers sharing their refashioning take (and tutorials) on the mystery packages I have sent them. I can’t wait to share these projects from some awesome women who just happen to be inspiring bloggers, crafters and sew-ers!!! So without futher jabbering on like an excited toddler, here’s the line up:

The “too cool for school” Zoe of So Zo…
The inimitable Karen of Did you Make That?
The very talented Dixie of Dixie DIY
The ever inspiring Casey of Elegant Musings
and
The gorgeous Tilly of Tilly and the Buttons

NOW, can you see why I was so excited!! Feel free to grab the button HTML and spread the word 🙂

Miss P
<div align="center"><a href="http://portialawrie.blogspot.com/" title="Miss P"><img src="http://portiatest.devulous.com/wp-content/uploads/2011/09/6123219092_5d348943ed_m.jpg" alt="Miss P" style="border:none;" /></a></div>

Have a great weekend and don’t forget to check back on Monday for the first post in the series!

chutney, DIY, gift ideas, Recipes

Autumn Marrow Chutney – Recipe inc

09/09/11

Morning friends. You’ll be happy to know I’m sure, that I have decided to embrace the changing of the seasons in a positive manner; and focus on all the lovely things this time of year has to offer. Namely chutney making! I’ve tried my hand at it before when we’ve had gluts of tomatoes. The chutney was pretty successful but I managed to demolish two of our best pans in the process. Well, as luck would have it, I managed to bag myself a proper jam making pan (large, deep, aluminium, 2 handles) on Freecycle the other week. I was beyond excited at the prospects of making some more chutney…and try my hand at jam..then it dawned on me. We’d already eaten all our homegrown tomatoes and all the fruit trees in our local area had long been plundered by birds and passers by alike…so what was I going to make it with? It was only when I was looking for ideas for what to do with this marrow (now now!! It’s a beast isn’t it? It was a gift from the staff at Elliott’s pre-school for helping to dig out and plant the new garden area during the holidays) that I stumbled upon this site and put two and two together. I can only imagine what this is going to taste like after some maturing, because let me tell you, straight from the pan, this stuff is seriously DELICIOUS!

I combined two of the recipes I found on the site (apparently you can make chutney out of pretty much anything!) and came out with this:

  • 3 lb (1.4 kg) marrow flesh
  • Salt
  • 4 small apples
  • ½ lb (225 g) sultanas (optional)
  • 1 pint (570 ml) vinegar 
  • 2 medium onions
  • 8 oz brown sugar
  • 3 tsp lazy(!) ginger
  • 2 tsp powdered paprika
  • 2tsp powdered turmeric
  • 1 tsp lazy(!) chillies

6 whole cloves

Method:
  1. Peel and cut the marrow into quarter inch cubes, removing all the seeds. Layer with salt in a bowl. Then mix well.

There’s loads!

Transfer to a colander placed over a bowl. Place a plate/pan lid or similar on top and weight down. Leave overnight.
Discard the water that comes out. (It’s mad how much actually comes out!)
Rinse thoroughly under cold running water to remove the majority of the salt
Heat vinegar, sugar and spices in a large saucepan and once simmering add the marrow, chopped onions and peeled/diced apples and sultanas if using (I didn’t add my sultanas in the end)
Bring to the boil very slowly and then simmer gently until cooked and thick. Mine took a good hour to get to this point. Then there was probably another 20 mins of constant stirring to make sure it didn’t stick as the remainder of the liquid cooked off and it looked ready for jars…
Pour into hot, clean, sterilized jars and seal at once. Label with contents when fully cooled.
Makes about 6 jars of chutney. Nom nom nom….;)
Px
DIY, gift ideas, quilting, Sewing, Tutorials

My first ickle quilt…..

06/22/11

Hello!!!  I finally finished up the quilted baby matt I mentioned recently….

This is where we left off in the last post….

You may recall that I had everything bagged up, in order, (sad!) ready for each of us at college to sew a strip and therefore all have a hand in making the gift…

Here it is pieced together and basted to a fleece inner and yummy Egyptian cotton backing. (Basting quilt sandwiches is a beast!!)…

I saw this trick ages ago on Martha Stewart’s site and thought it was super clever. You run a strip of masking tape from corner to corner…..

Sew either side of it (I loooooove this walking foot!! Borrowed it from college. Really helps stop the layers moving about)…..

Peel away the tape and hey presto…straighter and more even quilting lines than I could ever hope to achieve by eyeballing it….

Then lay a strip of tape along each of your newly stitched lines and repeat the process….

Keep repeating this step working your from the middle outwards…..

I then repeated the whole process crossways as well….

Trimmed the piece….

Quick shot of the back….erm…

Ooops! This quilting malarkey is trickier than it looks!

I used some of my thrifted bias binding for the edging…

along with some gorgeous toggles I found recently, and created loop ties from bias tape…

So that it can be rolled up…..

and fastened, ready to pop into baby’s bag!!

Overall I’m really pleased with the end product and really like this colour palette. There are a few little wobbles here and there that I have resolved (after reading this)  NOT to keep pointing out, and focus instead on what I like about it, and the fact that for a first try, it’s not bad!!
As an interesting observation..it’s funny that 6 people using the same machine and working to the same seam allowance, can sew so differently! I suppose it’s a bit like asking 6 different people to knit one garment. You’ll get very slight ariances in tension. Perhaps it’s the same with sewing seams…but this was tricky to line up when piecing everything together because each strip had been sewn by a different person. Weird huh??
Anyway, I have another of these to make for my cousin. If it turns out like this one, or better, than I shall be a very happy bunny indeed
What have you been up to? Elliott isnow napping soI am away to dosome work on the draftalong…..finally!
Px

Portia
Follow
Sewbox

© Copyright 2026. Portia Lawrie. All Rights Reserved. Managed by WordPress Web Dev Cornwall .