• About
    • Contact
    • Press
    • Sponsor
  • DIY
    • Home & Garden
    • Jewellery & Accessories
    • Yarn Crafts
  • Sewing
    • patternless & self drafted
    • Refashions
    • Commercial Patterns
    • Sewing Tips
    • Overlockers
  • The Refashioners

Portia Lawrie

DIY, grainline, how to, quilting, Sewing, Tips and Tricks, Tutorials

FO: Linden Sweatshirt (with biker’esque quilting hack)

02/02/16

I am VERY late on the Linden bandwagon I know. But up until I swapped out my serger for a more powerful one at Christmas (Santa did good!) my old serger couldn’t cope with thicker fabric and I really didn’t fancy sewing this on my standard machine. So this was one of the first things I made on my new serger. (A Brother 4234D in case you were wondering!) It’s taken a while to get this post up because I’ve really struggled to get decent pics. It’s black for a start. It’s winter for seconds and the details of the quilting hack are quite subtle from a distance. So these are the best of the bunch, but hopefully you can get the gist from these pics. I mean you all know what a Linden looks like by now, lol! So it’s the deets of the hack I’m focusing on here…LINDEN BIKER QUILTED SWEATSHIRT

I opted for  View B, lengthened by 1″ with the sleeves from View A. Fabric is a black cotton jersey sweatshirting from Girl Charlee with a supersoft fleece backing. Super easy to sew and lovely and soft.  This Licorice colourway is a teeny bit of a fluff magnet which for day to day wear I can live with, but involved alot of masking tape to get it ship shape for photographing, lol 🙂 But there’s loads more colours if that’s likely to bug you. Doesn’t bother me too much.LINDEN BIKER QUILTED SWEATSHIRT

But the crux of this post is the quilting detail I applied in bands to the cuffs and hem. I mean. A black sweatshirt. That’s a bit minimal even for me! I wanted to elevate it in some way and give it a bit of personality and edge and I think this works beautifully in that respect; and also in the sense that it’s extra warm in those areas due to the double thickness of fabric I used for the quilting element. I’m so pleased with the overall effect. The bands are reminiscent of the detailing on biker jackets and inspired by the proliferation of quilted detailing emerging all over the interwebs…LINDEN BIKER QUILTED SWEATSHIRT

For the neckline I opted for my favourite deconstructed “finish”. It has been through the wash several times at the point this pic was taken (I wear it alot!) and the raw edge of the neckband has “roughed up” just the way I like it. The raw edge of this fabric does fray ever so slightly if left unfinished. Which is worth bearing in mind if you like a clean finish inside your garments, then it’s definitely a candidate for the serger.

I also raised/narrowed the neckline on the pattern. The necklines on this and the Hemlock pattern are marginally too wide for me as I’m not a fan of things hanging off my shoulders or revealing my bra straps. It’s an easy fix if you have the same issue. (See previous post).LINDEN BIKER QUILTED SWEATSHIRT

So. Onto the quilting part! The fabric is was not quite thick enough for quilting lines to be as prominent as I had in mind. So I created super wide facings for the cuffs and hem band to add body and “puff” for the quilting element. First step, before any construction begins, is to quilt the cuffs. I first measured how deep I wanted my quilted section to be then transferred this to my paper pattern….LINDEN BIKER QUILTED SWEATSHIRT

Marked out the entire section on my pattern…LINDEN BIKER QUILTED SWEATSHIRT

Then traced that off as a separate pattern piece…. For the cuffs I had to apply the facing and quilt the cuffs BEFORE construction (ie while they were still flat) as the cuff circumference was too narrow once constructed, to fit around the free arm on my sewing machine.LINDEN BIKER QUILTED SWEATSHIRT

For the hem band I aligned the front and back pattern pieces at the side seams, overlapping the seam allowances; and did exactly the same thing. Note:  THIS piece though, (once marked out and traced off) will need seam allowance added at one side then be cut on the fold. Once the cuffs are quilted I constructed everything as normal until I had just the hem left to do…LINDEN BIKER QUILTED SWEATSHIRT

For the hem facing band, once cut from the fabric, join the two ends to create a loop and then apply to the hem as a facing, turning to the inside. You can see here I’ve rolled the seam along the edge slightly to the inside…then simply quilt in paralell lines (or crazy random ones if you like!).LINDEN BIKER QUILTED SWEATSHIRT

Here’s a better angle to show the quilting on the cuffs (and some masking tape in the background for defluffing, lol  😉LINDEN BIKER QUILTED SWEATSHIRT

I’m definitely feeling the Linden love and can absolutely see why it’s SUCH a popular pattern.  Quick, easy, comfy.  I can see me making a few of these! I’ve also come to realise that I’m not necessarily “pattern averse”. I’m just not a lover of print. I like pattern and texture and interest on my clothes and am really feeling inspired to explore fabric manipulation, texture and embellishment further this year; as a means of adding this interest to my makes in a really subtle way. I usually opt for plain fabrics, but even I can find those a bit dull at times. So quilting is obviously one good way of adding a little subtle interest. I think this year, I’m going to look at ways of adding interest to my favoured simple silouhettes and plain fabrics, with construction, design and textural details; and see where that leads. What about you? Are you plain? Pattern? Or like me….a little somewhere in between?


DIY, how to, pattern adjustments, Pattern Drafting, Sewing, Tips and Tricks, Tutorials, Uncategorized

Top Tip: How to raise a “too wide” Raglan Neckline

01/28/16

… Read The Post

DIY, how to, refashioning, Restyles, Sewing, Thrifting, Tutorials

Refashion: Fleece Sweatshirt to Minimalist Cropped Jacket

01/25/16

refashion a fleece sweatshirt into a cropped jacket

It’s been all about the cozy around here. Temperatures as we know have been less than balmy and Shedquarters has been a little chilly to say the least. So an extra layer (or two) has been a prerequisite recently. Enter this oatmeal coloured “blah” fleece!

turn a aweatshirt into a cropped cardigan (1)

“Blah” because of the shape. But the fleece itself is super soft and has the appearance of felted wool….except way way softer! So I set about chopping it up….and this is what I ended up with!turn a aweatshirt into a cropped cardigan

A cute little cropped cardi/jacket with simple lines, that sits just on the hip at the front and dips down at the back. Couldn’t be simpler really. No raw edge finishing required as the fabric doesn’t fray. Just a few cut’s and minimal sewing. You can apply this to any similar fleece or sweatshirt. Here’s what I did…turn a aweatshirt into a cropped cardigan

Trimmed away the neckband close to the stitching and rounded off that V shape a little (optional)…

turn a aweatshirt into a cropped cardigan

Cut straight up the middle to create the opening….

turn a aweatshirt into a cropped cardigan

Cut a dipped/curved hem, removing the hem band in the process…

turn a aweatshirt into a cropped cardigan

Cut the sleeves down to my preferred “bracelet” length, leaving a little extra for turning…

turn a aweatshirt into a cropped cardigan

Turn and hem the cuffs and bottom hem…

turn a aweatshirt into a cropped cardigan

Turn and stitch a narrow hem arround the neckline. This would normally be a no no but as this fabric had a degree of stretch (and I didn’t have any fabric left for a facing) I went with it and it worked fine 🙂

turn a aweatshirt into a cropped cardigan

Then turn under and stitch either side of the opening….

turn a aweatshirt into a cropped cardigan

In all instances stitch as close to the raw edge as poss. This will give you a super clean finish and as you can see, that rule breaking I did with turning rather than facing the neckline? Not a problem 😉 Still a nice clean corner there . You can also see a double row of stitching along the vertical edge of the opening. (Partly decorative. Partly functional)

turn a aweatshirt into a cropped cardigan

And that’s that! It’s a perfect little extra layer to chuck on and much much less blah than the original! Even better, it takes about 30 mins. Gotta love fleece/sweatshirt fabric! More sweatshirt stuff coming up this week. Watch this space!

DIY, how to, refashion, refashioning, Restyles, Sewing, Thrifting, Tips and Tricks, trousers, Tutorials

Top Tips: For “Skinnifying” Jeans & Trousers

01/11/16

tips for skinnifying jeans and trousers

When looking for jeans or trousers I have the relatively common problem (especially when you’ve had kids!) of trousers that fit me in the waist/tum/bum area being waaaaay to big in the legs for my liking. Luckily I sew 🙂 So for years I’ve been addressing this minor annoyance by buying (usually thrifting) jeans than are super comfy in the waist/tum/bum area and simply reshaping the legs to fit my style. “Skinnifying” them if you like. I’ve been asked a few times if I am going to do a tutorial on the subject. Well, yes and no. This is a tutorial of sorts. But I hold your intelligence in high enough esteem to know that you probably get the gist that narrowing trousers means pinning the legs. Sewing a new seam and cutting away the excess. So while this post touches on that obvs, I wanted to focus on some of the other considerations you might want to take into account….

Fabric & Stretch: The “jeans” predominantly featured here are not jeans in the truest sense. They are not constructed in quite the same way as “traditional” jeans. (I’ll touch on that a bit further down) But they are made from a stretch denim. In my experience, denim with stretch is by far the most forgiving and easiest to work with when refitting the legs on jeans. And lets’s face it, the most comfortable to wear too! It’s also not a heavy denim. Another consideration when you’re using a home sewing machine which simply won’t have the power of the industrial machines that would have been used for heavy denim when they were originally produced…tips for skinnifying jeans and trousers (2)

Seam Construction: Both the inner and outer leg seams of this particular pair of jeans were constructed using standard straight seams. These are your friends when it comes to reshaping the legs on jeans or trousers; because it means you can easily narrow the leg evenly on both sides. Traditional construction uses a flat fell seam, usually on the inside leg, which is tougher and harder wearing. If you can avoid those….do.  I’ll touch on that a bit further down…tips for skinnifying jeans and trousers

tips for skinnifying jeans and trousers

Prep: To prepare the legs for reshaping it’s easier to completely unpick the hems then press the hems and the sides seams completely smooth and flat. Put on inside out, then pin to your desired fit. Take them off and even out the row of pins. Watch out here that you don’t narrow soooo much that you can’t get your foot through the ankle. Yep….done that. 😉

At the ankle, where you are going to hem, the pins should be at right angles to the original hem fold for the whole hem section. That section needs to be the same width above and below the hem fold in order to allow for proper hemming….tips for skinnifying jeans and trousers

Blending: In order to make the new and old seams blend seamlessly (so you don’t get an obvious dimple or tuck on the outside once you’re done) pin then start sewing within the original seam allowance and gradually cross over the original seamline to your new line of stitching…tips for skinnifying jeans and trousers (4)

Back & Front Leg Ratio: The back leg of a pair of jeans/trousers in general, will be wider than the front to allow for the calf muscle. You’ll want to retain this ratio in order to keep the side seams completely vertical when wearing. So when you press and pin make sure that this excess fabric remains distributed at the back leg…tips for skinnifying jeans and trousers

Ensuring Even alteration: You’ll want to ensure that you take away the fabric evenly on both legs. To do this I pin one leg to my desired fit. Then I line up both legs along all seams and use those pins to pin through both legs at the same time…tips for skinnifying jeans and trousers

So essentially you have both legs pinned together with the pins on top marking an identical line on the other leg underneath. Make sense?  You can also see in this pic the additional fabric of the back leg all bunched up in the middle…tips for skinnifying jeans and trousers

Marking: Obviously I can’t sew it like that! So I mark on top and between the pins on both sides to mark my new seam line…I have a set of pastel pencils that make an awesom alternative to tailor’s chalk btw!tips for skinnifying jeans and trousers

tips for skinnifying jeans and trousers

Sewing: Then simply remove the pins, sew on top of my chalk line, zig zag close to that line, then trim off the excess and hem…tips for skinnifying jeans and trousers

tips for skinnifying jeans and trousers

Considerations for “traditional” Jeans: So I mentioned flat fell seams.  Traditional jeans will generally have a standard seam on the outside (your friend) and a flat fell seam on the inside leg (not your friend!). You can see below the amount of stitching involved in a flat fell seam. This makes it super sturdy which is fantastic for the longevity of your jeans but not so great if you want to take it in at that seam. It is not possible to smoothly narrow  and blend that seam without unpicking all that stitching first. Even then you have that point wher the crotch and inside leg seams intersect to contend with. I have tried in the past and I will never bother again! So to my mind, and in my humblest of all humble opinions, it just isn’t worth it. I prefer to accept the limitations of traditionally constructed jeans and only narrow the leg on one side…tips for skinnifying jeans and trousers (15)

This does of course limit the amount you can narrow the legs by before it starts looking uneven; and that is just a matter of trial and error and personal taste. When narrowing just one side of a pair of jeans I will always use a long stitch to baste my new seam line and test the fit first before committing to cutting away the excess fabric.

If you are altering traditional denim then another consideration is the thickness of the fabric; especially at the hem. To retain the original hem you’ll likely be sewing through 3 layers of denim (see the pic below) plus an additional 3-4 layers when you sew across the intersection of the flat fell seam! tips for skinnifying jeans and trousers (14)

My machine is not powerful enough to do that on sturdier denim. So I reduce the strain by removing that bottom section of hem…tips for skinnifying jeans and trousers

And opting instead for a single fold hem with the raw edge zig zagged or overlocked…tips for skinnifying jeans and trousers

Another area where it can get pretty bulky is up in the hip pocket area. If you are beginning your blended seam as high up at that then there will be studs, pocket bags and top stitching to navigate. Which is why when I select jeans to refashion…I opt for those that don’t need taking in at the hips (these were the other half’s jeans)…tips for skinnifying jeans and trousers

Tools/Equipment: I thoroughly recommend using the right tools for the job. In my opinion and for my machine, denim needles make a difference in the ease of sewing and the quality of the resulting stitch. For an authentic looking hem, then top stitching thread matched to the original colour will give a professional finish. For sewing over the bulkiest part of the hem, placing a shim at the back of the presser foot will keep your presser foot horizontal and help avoid the skipped stitches that occur when sewing over bulky seams and the presser foot has to “climb” at an angle over the bulkiness of it all. You can buy shims. But a folded piece of card does the job for me. Also, machine needle cases are almost the perfect thickness to do the job; and if you’re lucky your presser foot may have a little button on the side that locks it into the horizontal position.tips for skinnifying jeans and trousers


So that’s that. My top tips for skinnifying jeans and trousers. Anything you want to add?? Please feel free to share!!!

Happy refashioning!

DIY, how to, overlocker, overlockers, serger, Sewing, Tips and Tricks, Tutorials

Top Tip: Transfer thread from large cones to small spools

01/06/16

how to decant thread from an overlocker cone to standard spools (1)

Picture the scene. It was New Years Day. (Happy 2016 everyone!) A rare opportunity over the holidays to duck into Shedquarters and sneak some sewing in. All ready to rock and roll and then……aaargh! Not enough thread spools in the right colour for my overlocker!

I can be a bit blasé about gathering supplies/notions for a project. I’ve developed quite a stash and kinda just assumed I would have enough standard spools in the general vicinity of this colour to cobble together a workable overlock stitch. (‘cos I use this colour all the time! Not! Doh!). But no. I had one cone in the colour I needed. Loads of it. But all on one cone. Hmmmm….how to decant thread from an overlocker cone to standard spools (9)

But as always with me, necessity is the mother of invention. Some of my favourite ideas emerge when I’m facing a (probably self imposed) hurdle and am scratching my head trying to figure out a work around. Plus, since this little solution means you need only buy one cone of overlocker thread (in that obscure colour that you need but will never use up in a million years) this one saves money and what better way to start off a cash strapped January than with a money saving hack right?how to decant thread from an overlocker cone to standard spools (2)

If you’re like me and hold on to empty thread spools because they are “bound to come in handy for something” at some point; then this would be the moment you are vindicated in your hoardiness! You’ll need 4 empty thread spools (These guttermann ones are particulary perfect as explained in a moment). Some double sided sticky tape. A spare bobbin from your sewing machine. how to decant thread from an overlocker cone to standard spools (3)

Stick a piece of the tape on the flat end of the thread spool….

Remove the backing and firmly press your empty bobbin on top,,,how to decant thread from an overlocker cone to standard spools (4)

how to decant thread from an overlocker cone to standard spools (5)

Pop the thread cone in a mug/cup in front of your standard sewing machine.  We are essentially going to treat the empty spool as a bobbin. Which is why I said these particular thread spools are quite useful. On the opposite end of the spool to where you stuck the bobbin, there are holes that you can use in the same way as the hole you would normally use in the top of the bobbin. Pop your thread through one of those holes just as you would on a bobbin…how to decant thread from an overlocker cone to standard spools (6)

Then attach the whole assembly to the bobbin winder on your standard machine just as if you were going to wind a normal bobbin…how to decant thread from an overlocker cone to standard spools (7)

Then start winding! Hold the thread at slight tension with your hands and feed it onto the thread spool in an even manner by gently moving the thread up and down as it winds so that it distributes along the full length of the spool in an even manner. how to decant thread from an overlocker cone to standard spools

And that’s that! Repeat for all the other spools, using the same bobbin. It’s removable because you only used double sided tape. But you may not want to use it in your sewing machine after due to a sticky residue. So I’ve just set mine aside and reserved it for this purpose; because I am so going to want to do this again at some point!how to decant thread from an overlocker cone to standard spools

There are other methods out there for doing this but this one suits me because it’s simple, quick and straightforward. The main morals of this story?

  • Don’t throw away empty spools!
  • Standard spools do work on an overlocker
  • If you HAVE to buy a overlocker thread in an obscure colour that you’ll only use once…just buy ONE and do this!
DIY, how to, refashioning, Restyles, Sewing, Thrifting, Tutorials, Uncategorized

Refashion: Contrast Texture Sweatshirt

12/18/15

This sweatshirt has been sitting in my refashion pile for several weeks. I have a preference for raglan sleeve sweatshirts as I find the fit more flattering. But this sweatshirt was so soft I nabbed it from the charity shop anyway. What’s more the underside of the fabric was really interesting to me (loopy terry texture and a pinkier colour than the right side) and even as I was lifting it off the rack in the shop, I knew I wanted to play with contrasting the wrong side of the fabric with the right side…sweatshirt refashion (1)

Whilst I am not overly sold on the final fit of this garment, I am in love with the contrast elements of it. I think it’s a really effective way of adding some interest to a plain sweatshirt and has applications for both refashioning and “from scratch” dressmaking. I’m sure it’s not just me that looks at the “wrong” side of the fabric and thinks….well that’s just as interesting as the intended right side. In fact I often spend time deciding which side of the fabric I prefer and want to use. The answer could be…..use both sides!sweatshirt refashion - contrast texture detail

The sleeves were a simple case of removing the ribbing cuffs and creating a turn up to display the underside of the fabric.

The triangular panels are also pretty simple. I did wing this a bit as it was an experiment. So there’s a couple of areas where I’ll tell you what I should have done to make things easier. But hey, the outcome is pretty much the same!sweatshirt refashion (14)

I began by opening the whole thing out. I knew I was going to need to reshape it at the side seams anyway. So began by cutting it open along the side seams and underarm seams…from the hem all the way to the cuff. Both Sides.

In this pic the whole thing is opened out (like a big cross) and then folded along the length, lining up sleeves and side seams so it lays flat and I could deal with the front and back of the sweatshirt separately. This is the front. I marked out and cut a wedge from the side. From the underarm to the hem. Cutting through both layers at once…sweatshirt refashion (15)

With hindsight, I’d actually advise removing the hem and any other bulkiness like it (I had those bulky hem vents) before marking and cutting the wedge. And actually I would measure and mark each side separately rather than cutting through two layers at once. The bulk of those seams and the double layers of thick sweatshirt fabric skewed my scissors resulting in slightly “non-identical” wedges. We need them to be identical for the next step.

Flip those wedges over and apply them to the opposite side of the sweatshirt (with a scant seam allowance) from which they were cut. Essentially reconstructing the shape of the sweatshirt. But now you have those contrasting wedges either side! sweatshirt refashion (16)

Press SA towards centre and top stitch.

Then repeat that process on the back…sweatshirt refashion (17)

…and reconstruct the sweatshirt by placing RS together and sewing together from cuff to hem on both sides…

I wanted to continue the “contrast triangle” element onto the neckline and swap out the ribbed triangle …sweatshirt refashion (3)

Plus I prefer a slightly deconstructed look as opposed to a thick band of ribbing…19

Pretty simple to do this using reverse applique.

First of all I made a snip up to the stitching line on the neckline ribbing…sweatshirt refashion (4)

sweatshirt refashion (5)

…and cut that ribbing away right next to the stitching line.

I’d shortened the sweatshirt at this stage so had some scraps left over…sweatshirt refashion (6)

I cut a square large enough to cover the triangle detail I was looking to reverse applique…

…and pinned it behind the triangle with the textured side facing outward…sweatshirt refashion (7)

Make sure it is smooth and flat.

Over at the sewing machine, line up your needle with the existing top stitching around the outside of the triangle…sweatshirt refashion (8)

sweatshirt refashion (9)

Then stitch right on top of that line of stitching to secure the new scrap of fabric in place…

This is how it looks on the reverse….sweatshirt refashion (10)

sweatshirt refashion (11)

Trim away the excess on the inside close to the line of stitching.

On the outside…make a snip into the “old” ribbed fabric that you want to remove being careful not to cut the new fabric behind!sweatshirt refashion (12)

sweatshirt refashion (13)

Then with small sharp scissors cut away the old ribbed fabric close to the stitching, to reveal the new fabric behind!

Hem…and that’s that!sweatshirt refashion (2)

I’m planning on revisiting this concept with my preferred raglan sleeve sweatshirt shape as I don’t feel 100% comfy in this shape. As I said, the fit part of this I’m not entirely content with. The contrast element concept though??sweatshirt refashion - contrast texture detail

Well, I think I should call that part a win don’t you??

DIY, how to, Sewing, Tutorials

FO: DIY Harem Pants (Drop Crotch Trousers)

12/07/15

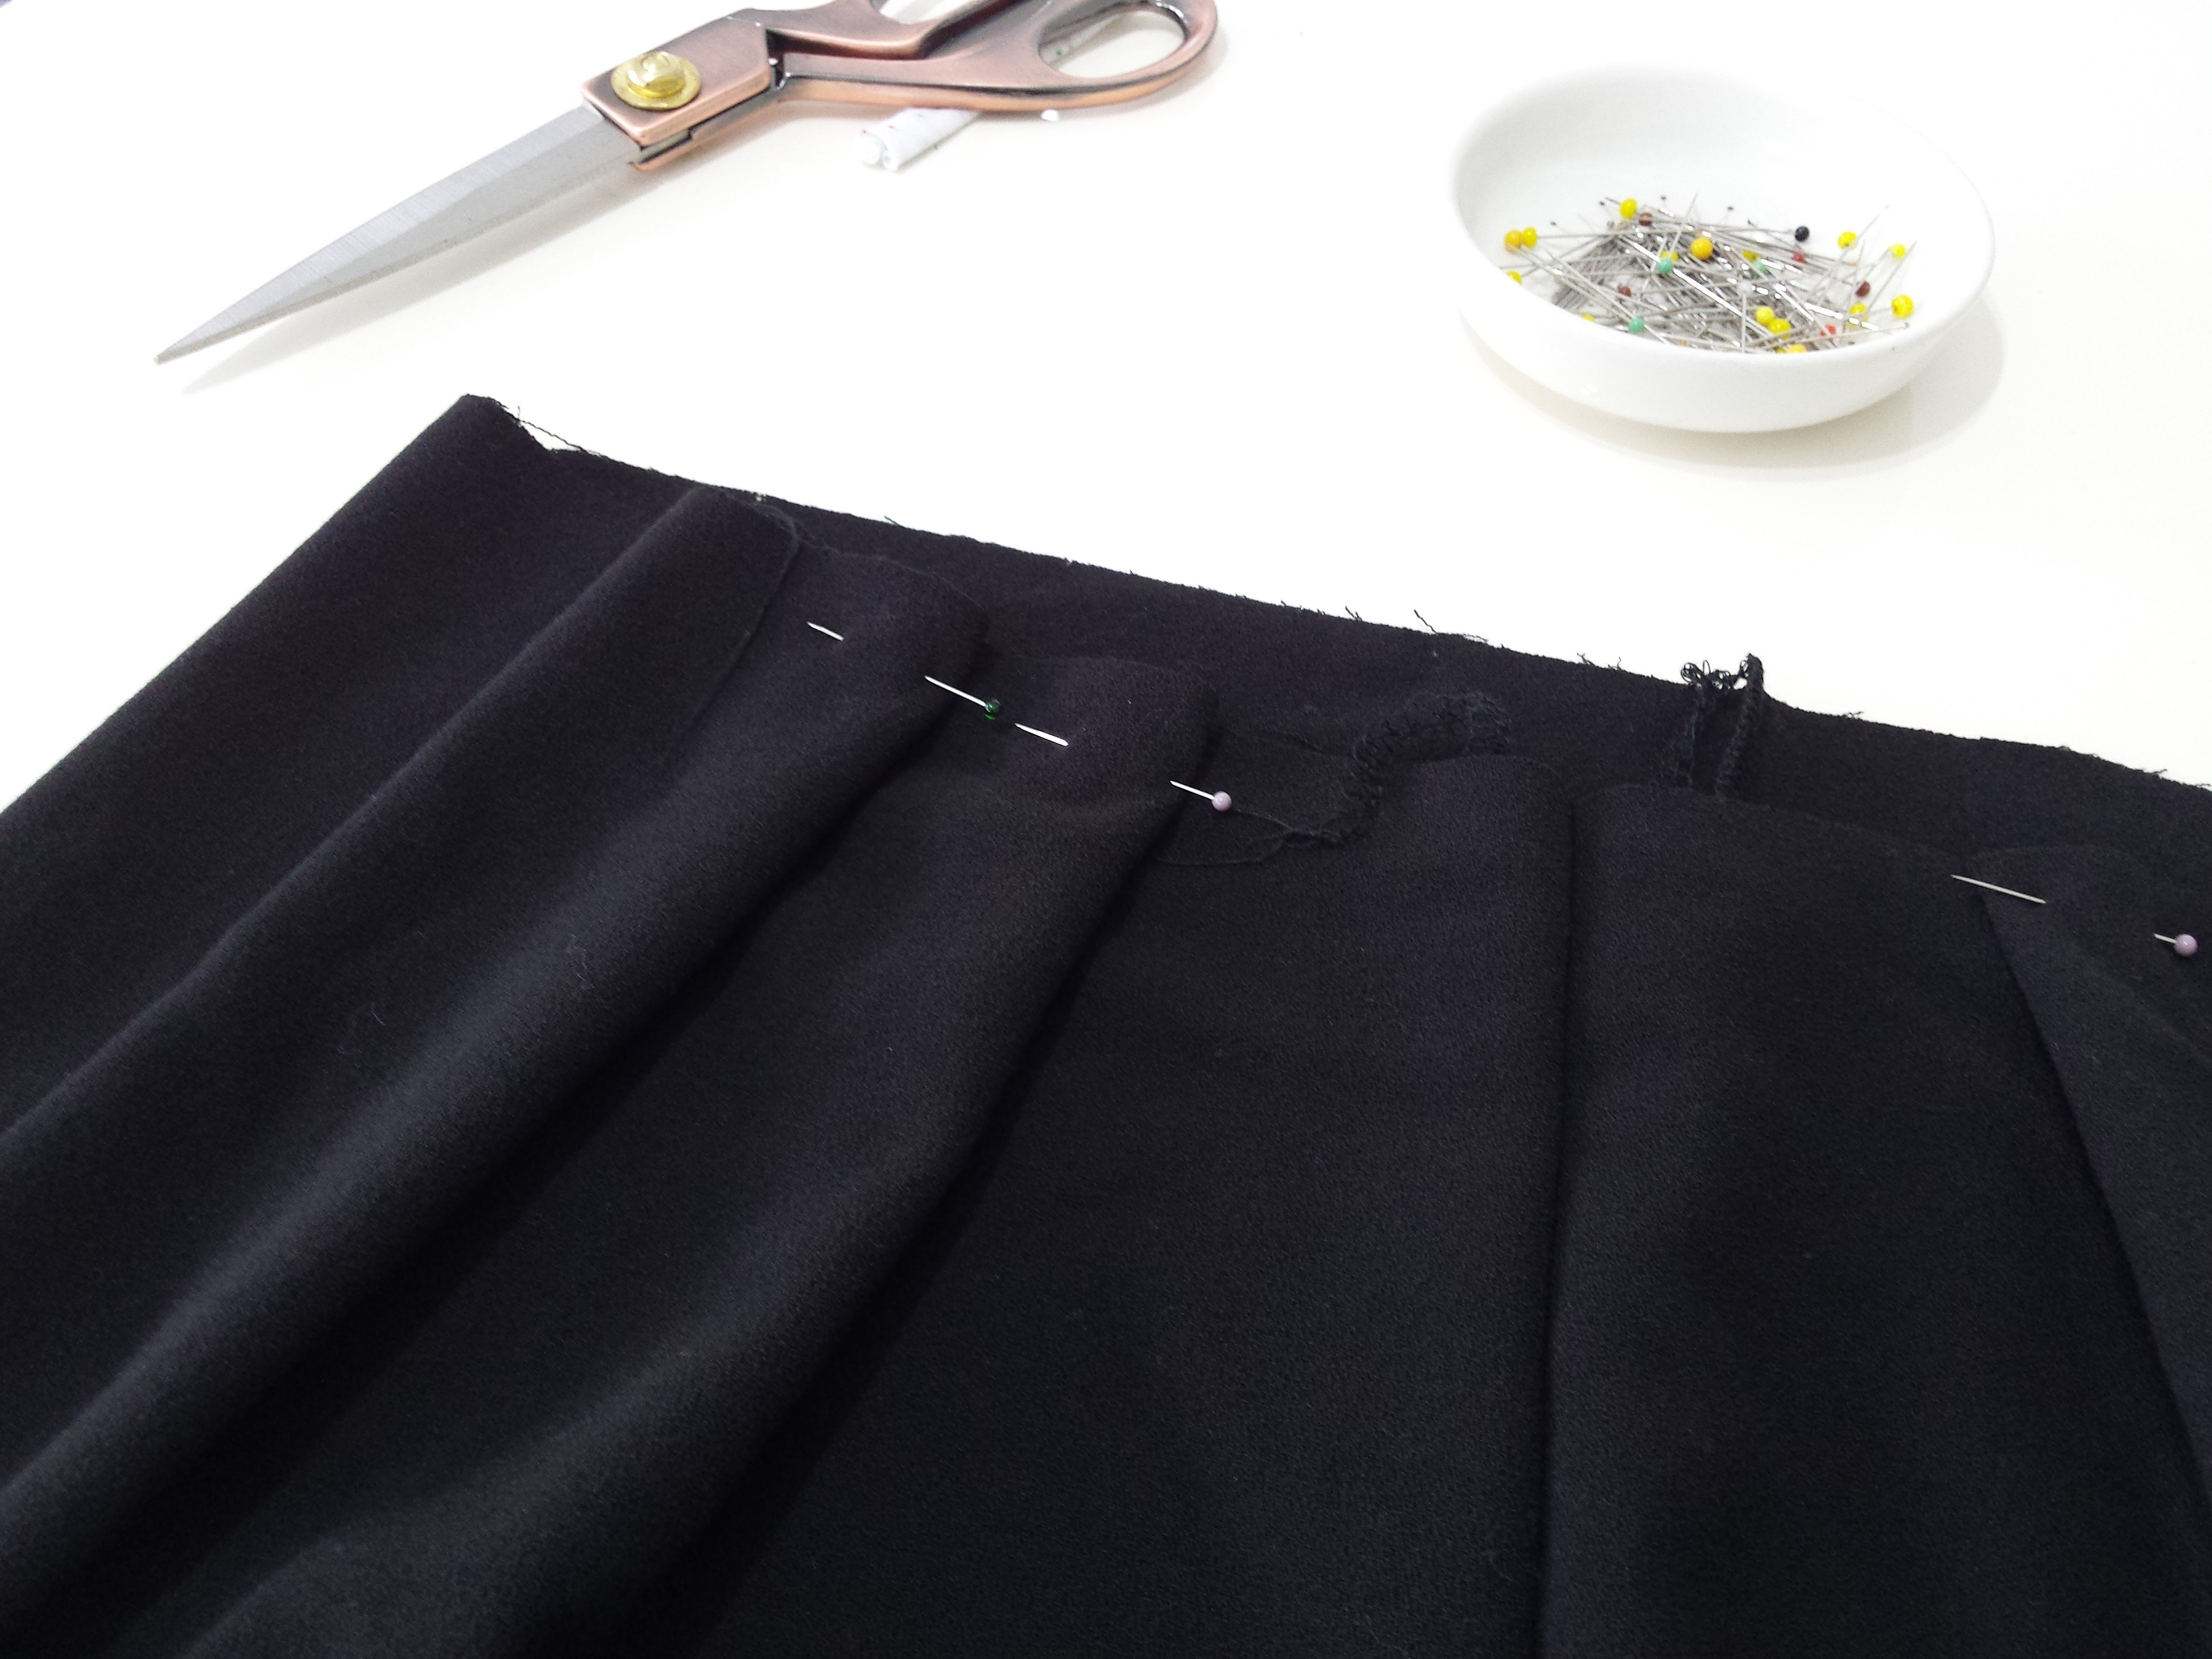
An area of garment sewing that I haven’t massively explored is trousers. Like alot of people I find the potentially complex fitting and pattern adjustments involved a little off putting. (It’s probably one of those situations where the reality is nowhere near as bad as the anticipation of it!) I HAVE been sewing up some trousers on the quiet in Shedquarters in a bid to start cutting my teeth on trouser sewing AND develop a self drafted pattern for my ideal pair of trousers. Apart from my beloved skinnies (I have no intention at this stage to venture into jeans sewing!) my preferred trouser silhouette is slouchy and comfy…DIY HAREM PANTS

These drop crotch trousers (harem pants, “hammer” pants, call them what you will!) have been in constant rotation since I made them.  They’re a reincarnation of a jersey pair I made a couple of years ago to test the idea out. That pair has been in constant use ever since but since they were a test pair I didn’t take the time to achieve a decent finish (and the jersey attracts every last bit of fluff in a 5 mile radius) so I tend to wear them around the house; and I’ve been wanting to revisit the idea and make a more “grown up pair” suitable for being out in public (!) for a couple of years now! (These are made from a lovely black crepe from Dragonfly Fabrics. Get 15% off with code “DRESSMAKING” at checkout).

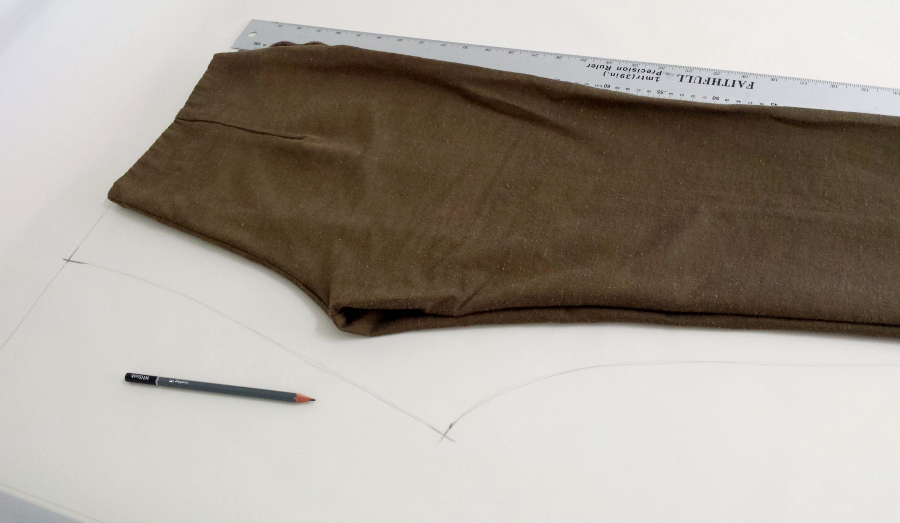
One of the awesome things about these trousers is they don’t require any traditional fitting as dropping the crotch kinda makes it redundant in terms of fitting to the body. Drafting a pattern for your own is a pretty easy undertaking too. I simply used a pair of existing trousers as a template. I made the waist wider as I wanted to incorporate some pleating and give some drape…DIY HAREM PANTS

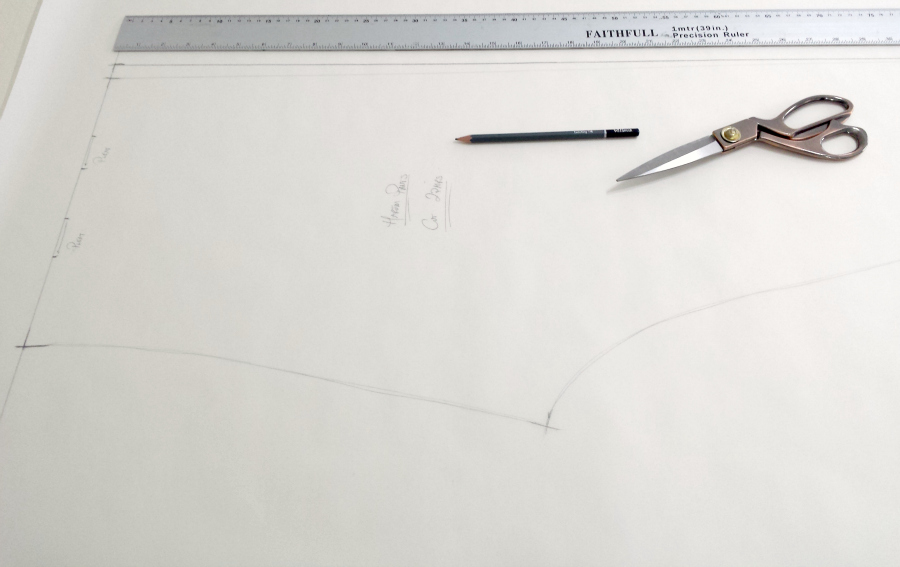
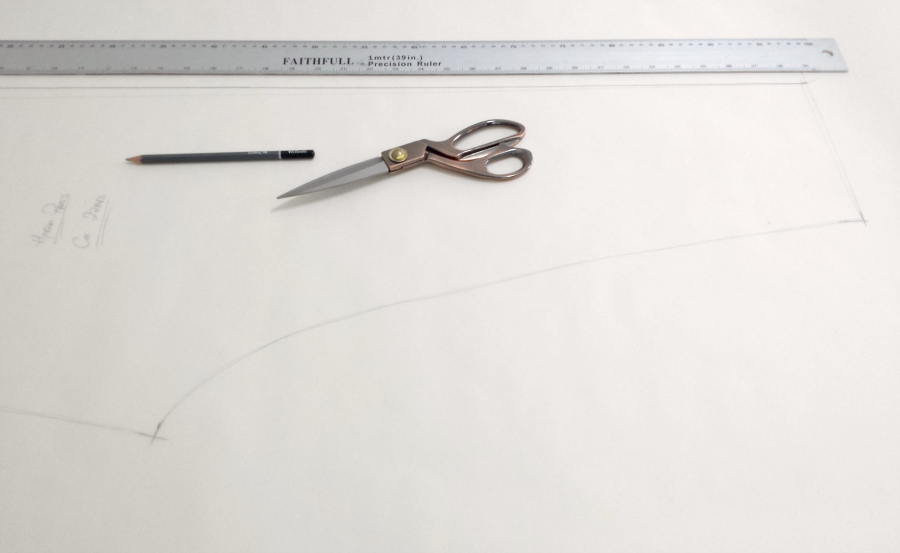
Then I traced the approximate shape of the trouser outline with the exception that the crotch is dropped to 16″ from the waist. The crotch point (is that the term?) is much lower and  deeper. If you’re going to drop the crotch, it has to be wider to allow for the width of your stride when you walk. The lower you drop the crotch, the wider the crotch will have to be to allow for your stride (does that make sense? If you stand in a pretend walking position then consider the distance between your legs. They’ll be further apart at the ankle than they are at the thighs. That distance has to be factored in when you decide on your crotch width)

I subtracted my waist measurement from the final width of the pattern piece and marked in pleats to take up the excess…DIY HAREM PANTS

Then narrowed to the ankle taking account of the measurements around my knees, calves and ankles. The whole thing was drafted to include SA as I went. It’s such a loose style that you can get away with it!DIY HAREM PANTS

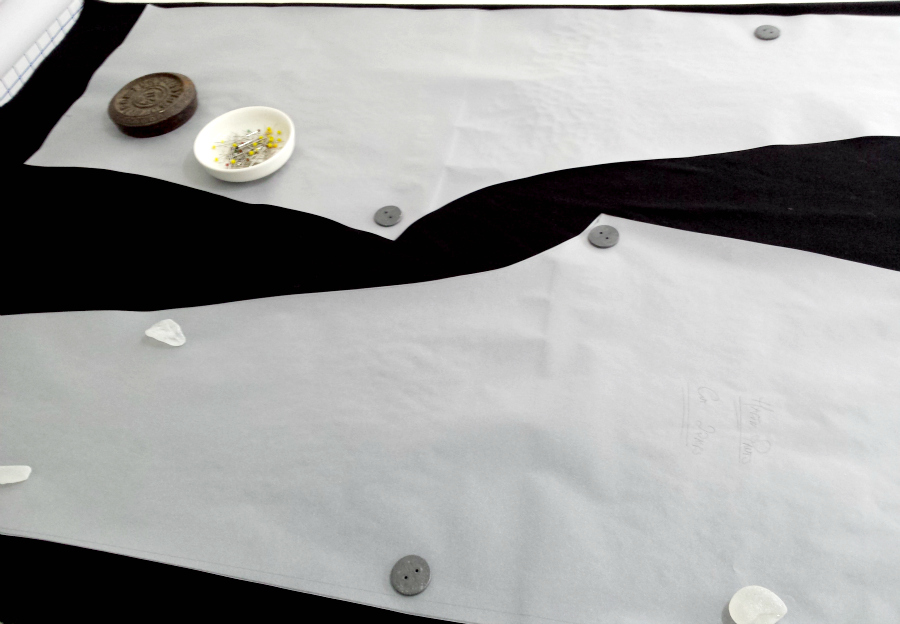
There is just one pattern piece from which I cut 2 pairs…DIY HAREM PANTS

Construction as follows:

  1. Sew the front and back pieces together at the side seams
  2. Sew the front and back pieces together at the inner leg seam up to the crotch point
  3. Turn one leg the right way out
  4. Place inside the other leg
  5. Line up the crotch seams matching at waist and crotch
  6. Sew the crotch curve all in one go

DIY HAREM PANTS (7)

That’s your basic trouser! Add the pleats and baste those. Then add a simple elasticated waistband (Mine is a simple band of fabric applied to the waist and then folded over, with elastic inserted) and you’re done!

I’ll likely be making more of these and may well do a more detailed tutorial at some stage. I’m afraid light levels & the fact that I chose black for this project made it impossible, with my meagre photography skills, to photograph this one in more detail. But I think you’ll get the gist from this!

Such a super simple and comfy pair of trousers! If you fancy cutting your teeth on some trouser sewing without the fitting fears…give this a try!!

DIY, Freebies, Giveaways, how to, Sewing, Tutorials, Uncategorized

FO: Cable Ponte Coatigan (+ Dragonfly Fabrics Giveaway!)

11/23/15

This is a hack I’ve been wanting to test out for a while. A simple raglan sleeve sweatshirt pattern, to my mind, had potential to be hacked into coatigan. And what do you know…RAGLAN SLEEVE COATIGAN

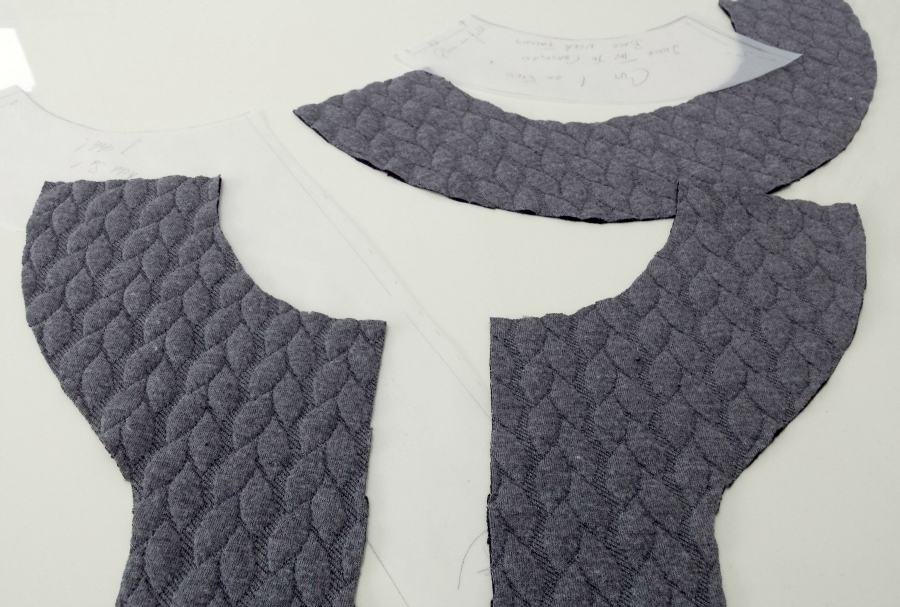
I’d been eyeing this cable knit jacquard ponte from Dragonfly Fabrics. When it arrived I wasn’t disappointed. Yes it is as soft, squishy and bouncy as it looks. The only unexpected thing for me was the reverse of the fabric wasn’t grey but a black synthetic mesh type affair. The best way I can describe it is a sandwich of layers. I’d been flippy flopping between a skirt, dress or jacket for this fabric. Once I saw the reverse I decided on the coatigan. Because of the warmth of this fabric and the underside, imho, lends itself well to outer garments as opposed to sitting in direct contact with the skin…RAGLAN SLEEVE COATIGAN

To work with…it’s delicious. My serger and standard machined uttered not the slightest resistance. It’s very stable and cuts and sews like a dream. No stretching, wavy seams, curling or skipped stitches. Up the stitch length on your standard machine and use universal or jersey 80/12 needles would be my advice. But the speciality needles are in no way necessary as this fabric isn’t the least bit tempermental

You can use any “loose/easy fit” sweatshirt or raglan sleeve pattern for this hack. The Linden would be a good choice. I happened to have the 2 Hour Top Pattern from Sew Different cut out so that’s what I used.  I simply  lengthened the front and back pieces, and the sleeves; then made up to this stage…RAGLAN SLEEVE COATIGAN

Sliced up the middle…RAGLAN SLEEVE COATIGAN

Drafted a facing for the neckline and opening…RAGLAN SLEEVE COATIGAN

Applied the facing RS together, turned through to the inside, pressed and top stitched down. The sleeve hems were simply turned and stitched. The main hem was finished in combination with the bottom of the facing in the same way as my shirt kimono for The Refashioners.

RAGLAN SLEEVE COATIGAN

This make was very much me testing an idea out. So what I might do differently next time revolves mainly around the neckline. Sometimes when I’m experimenting I get carried away and don’t consider all the elements! For me the neckline is a little wide and a little low (at the back in particular) for this. Don’t get me wrong. It’s fine and I’ve worn it plenty since I made it. It’s just one of those “even better if” kinda things you know? And POCKETS! Why the hell didn’t I put in seam pockets in?? I have a little fabric left so I may go back this week and add on some oversized patch pockets.RAGLAN SLEEVE COATIGAN

In terms of variations, I’m thinking a gold zip right down the front would look ace. Add a hood…make a cropped version…anyway…I digress!

Back to the giveaway.  Simon and Dorte at Dragonfly Fabrics are generously offering the following: First Prize: £25 to spend in their online store. Second Prize: A sewing pattern of your choice from their extensive range. To enter all you need to do is complete a super short survey then leave a comment here to let me know you’ve entered. (It’s really quick, I promise). What’s more, while the giveaway is running there’s 15% off all orders when you use the code DRESSMAKING at checkout. 

Giveaway (and code) expire Sunday 29th November at Midnight GMT. Winners will be selected at random and notified by email.

GIVEAWAY IS NOW CLOSED. Code has been extended to 20th December.

DIY, how to, refashioning, Restyles, Sewing, Thrifting, Tutorials

Refashion: The Wonky Top

11/02/15

So, yeah! This is a top that on paper…shouldn’t work…but absolutely does! It’s made from this thrifted crepe jersey skirt and was a bit of an experiment that kinda really worked out!THE WONKY TOP SKIRT TO TOP REFASHION - TUTORIAL

The skirt itself is a quarter circle construction so everything is kinda on the bias. The resulting top therefore drapes in a really interesting way. The side seams are not actually horizontal but twist slightly around the body and it drapes differently on one side than it does on the other. Hence the “wonky” moniker! But hey…if Levi can get away with twisted denim…I think I can call it a design element on this top right??THE WONKY TOP SKIRT TO TOP REFASHION - TUTORIAL

You can see in the images above the difference in drape. It’s fairly standard on the left (middle pic). But the circle element is really apparent on the right; giving the whole thing a really interesting asymmetric feel.

The skirt was really simply made…THE WONKY TOP SKIRT TO TOP REFASHION - TUTORIAL

You can just about see in this pic how the grain runs on the diagonal…it’s a relatively heavy weight crepe jersey…THE WONKY TOP SKIRT TO TOP REFASHION - TUTORIAL

VERY simple steps in this refashion. I wanted to retain the original curved hem. So I folded the top portion over…THE WONKY TOP SKIRT TO TOP REFASHION - TUTORIAL

Then cut along the fold. This will become my neckline for the top…THE WONKY TOP SKIRT TO TOP REFASHION - TUTORIAL

I sloped the shoulders and cut out a neckline curve…THE WONKY TOP SKIRT TO TOP REFASHION - TUTORIAL

After sewing along the shoulders I lined up the side seams and cut out a short kimono sleeve and curved that into a new side seam…THE WONKY TOP SKIRT TO TOP REFASHION - TUTORIAL

Worth noting that the armhole is still sealed at this stage as that was the original side seam…so that had to be trimmed off to open up the armhole/sleeve…THE WONKY TOP SKIRT TO TOP REFASHION - TUTORIAL

After that I just sewed up the side seams (plain ole narrow zig zag on a standard machine with jersey needles). The hem was already finished so all that was left after that was to turn and stitch a simple narrow hem on the sleeves and neckline and that was it!THE WONKY TOP SKIRT TO TOP REFASHION - TUTORIAL

This was one of those makes that took no time at all and worked out even better than I had envisaged. Don’t you just love it when the sewing gods smile on you like that?

DIY, how to, Sewing, Tutorials

FO: Boxy Cuffed Tee + Tutorial

10/26/15

I’ll begin by apologising for the image quality in this post. I am having some serious photography woes at the moment. Doesn’t seem to matter what I do. Winter light levels have kicked in and I have some work to do to try and counteract this. I have a total mental block when it comes to the technicalities of camera settings but am TRYING to get my head around compensating for low light conditions. Right now…it just ain’t happening. And short of discontinuing blog posts until I sort it (not an option) I’m having to suck it up and make do with what I can muster photography wise for now. So basically….sorry for the s*** photos…

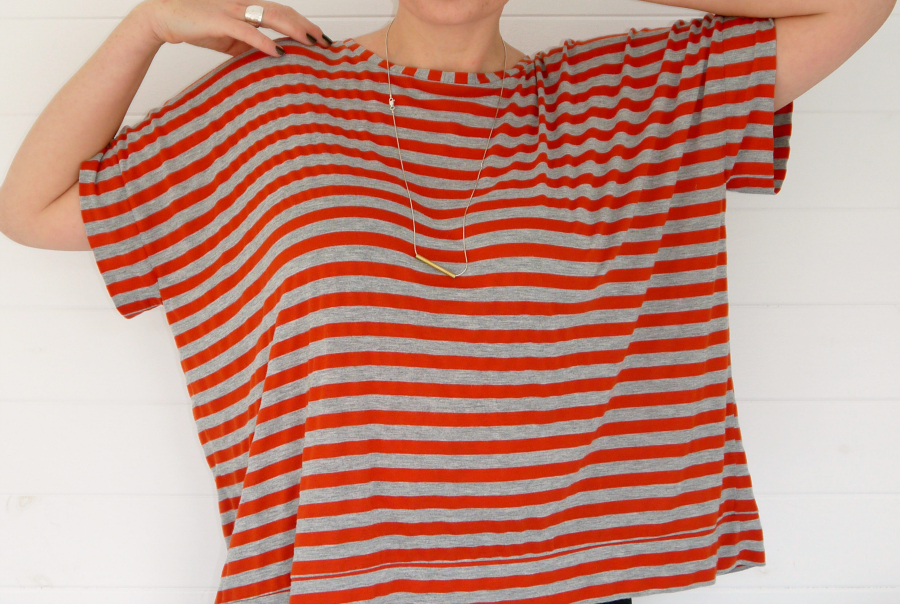
That said…I am pretty pleased with this top…BOXY CUFFED TEE (2)


Still exploring the boxy loose shape which, when combined with a decent drape,  is becoming a favourite of mine…BOXY CUFFED TEE

This one is comprised of 2 squares of fabric with cuffed bands applied to the sleeves and hem and a standard neckband finish to the neckline…

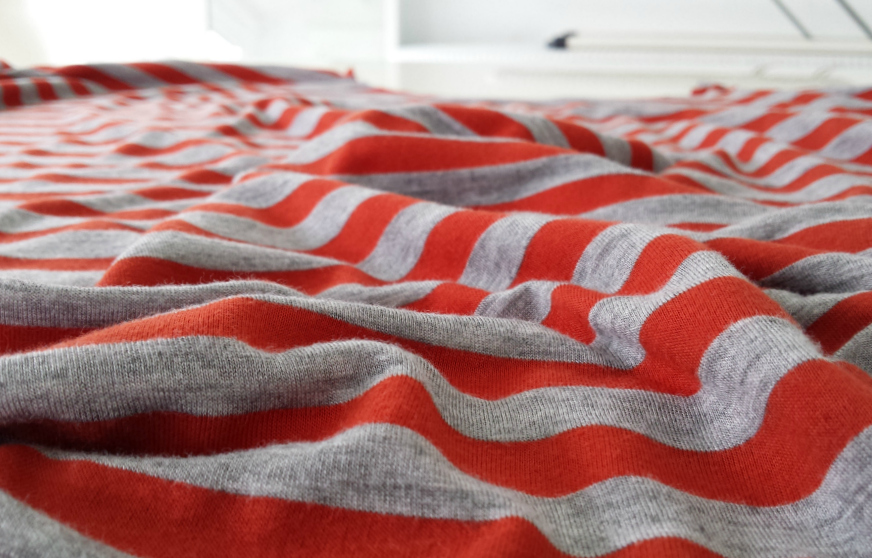
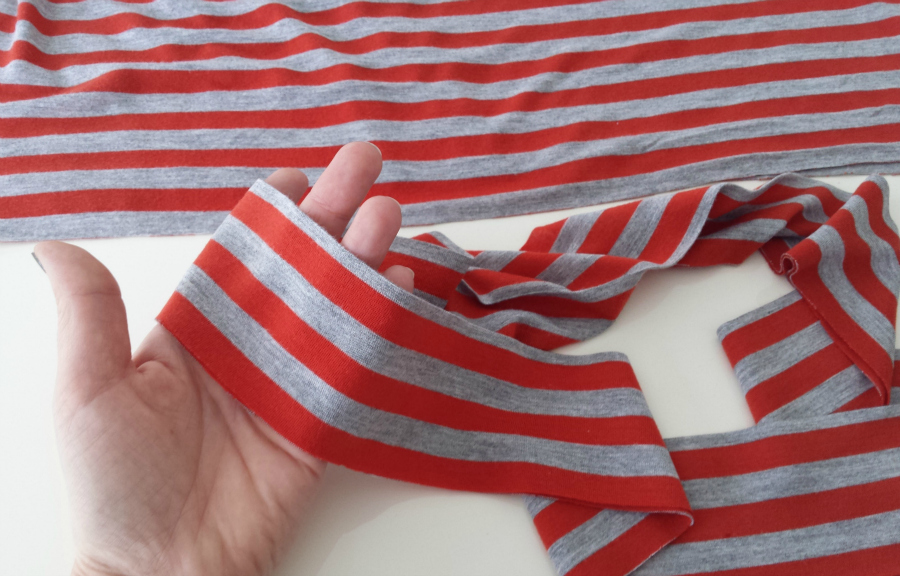
The fabric is from Girl Charlee. It’s the red orange and heather grey colourway. Lovely drape and softness against the skin and easy to work with.  I prewashed the fabric as I would be doing during normal use. Then again after I made the top at which time there was further shrinkage. Not massive amounts, but enough to slightly skew my sleeve and hem bands. SO…prewash…at least twice IMHO. 30 degrees and hang to dry rather than tumble…BOXY CUFFED TEE TUTORIAL (1)

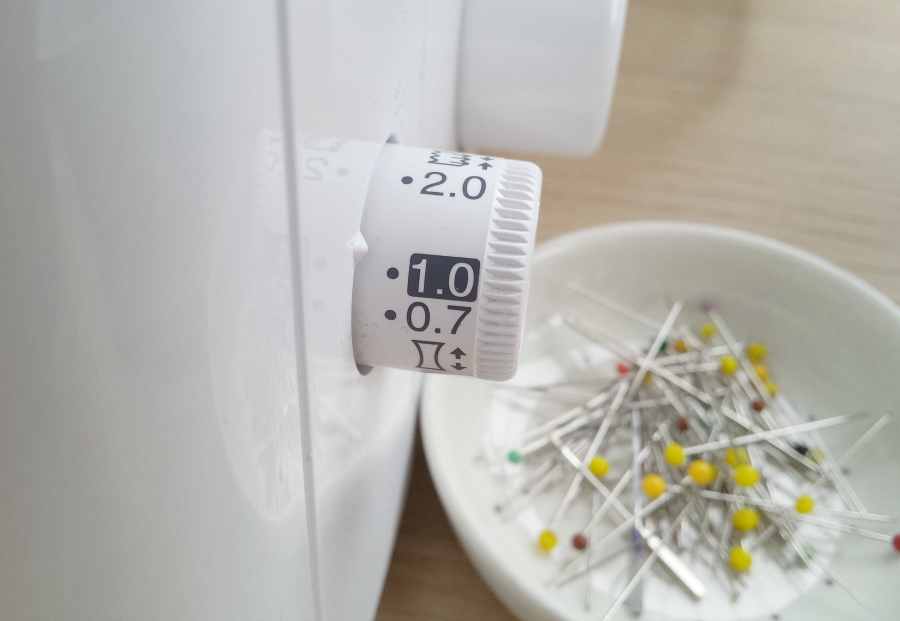
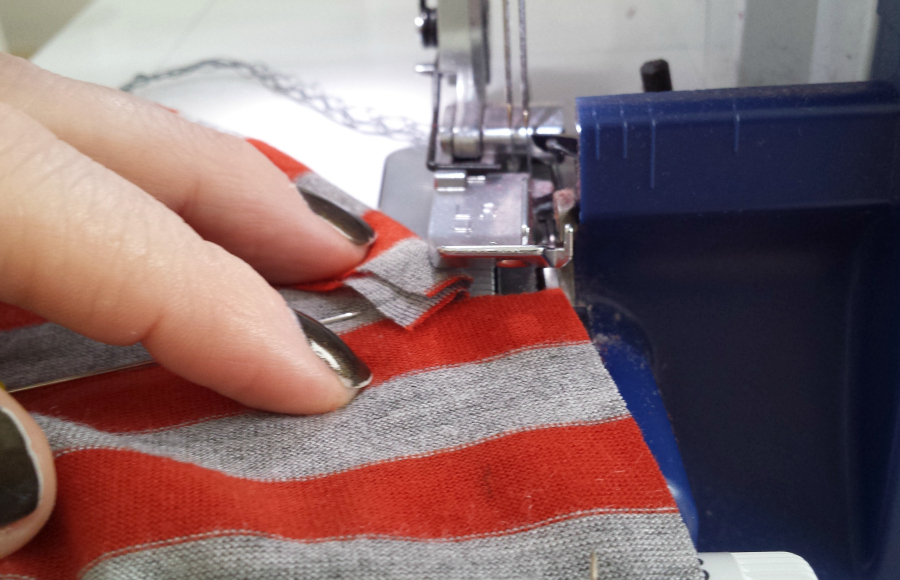
BOXY CUFFED TEE TUTORIAL (7)I had to employ the differential feed on this too. Only a teeny bit. But worth swatching first with this one to limit stretching or shifting of layers whilst serging.

The top I made is 2 squares of fabric 28″ by 28″….BOXY CUFFED TEE

Pin along the outside edges to keep the stripes aligned….

Then serge straight across the top (where the neckline will be)…BOXY CUFFED TEE

We’ll come back to the neckline in a moment…

Measure approx 8″ down and snip a notch into the side seam…BOXY CUFFED TEE

This marks the armhole opening and provides a starting point for the serger…

Simply peel back the layers above the notch and line the innermost part of the cut/notch up with your needles…BOXY CUFFED TEE

Serge the side seams together.

Create a band to fit the armhole opening…BOXY CUFFED TEE TUTORIAL (8)

Pin that the the opening RS together and raw edges aligned…

Serge together…BOXY CUFFED TEE

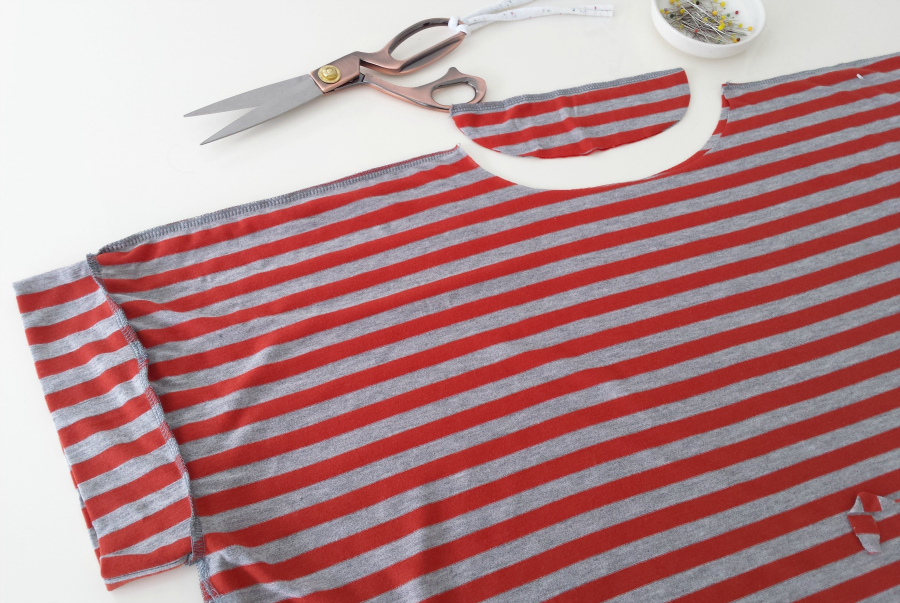
Then cut out a neck opening your desired width…

Measure the opening …BOXY CUFFED TEE

Then cut a band from your remaining fabric to fit. Cutting the neckband marginally smaller than the measurement of the neckline opening  (about 5/8″) helps the neckband to turn inwards and sit flat once it’s applied.

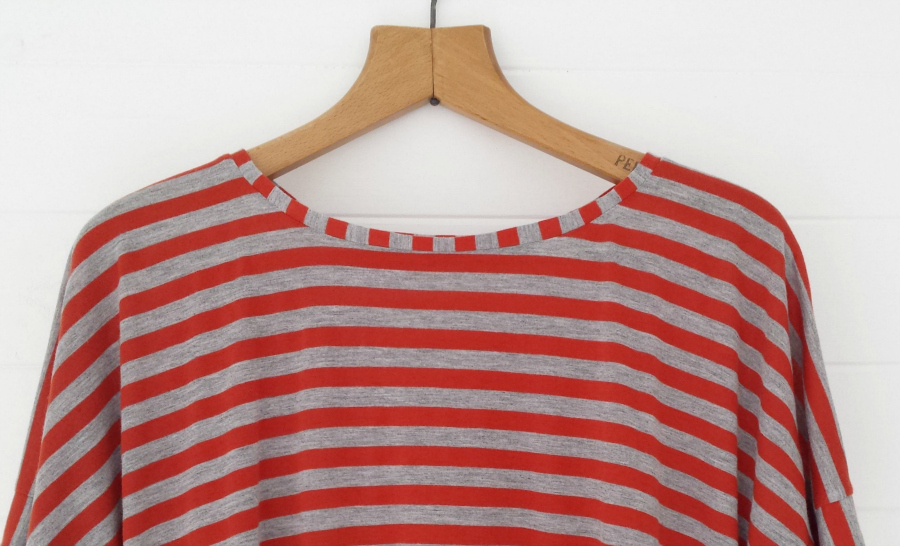
Apply the band to the neck opening…BOXY CUFFED TEE

Press seam allowance down and top stitch if desired.

For the bottom hem the treatment is pretty much the same as the sleeves…BOXY CUFFED TEE

I cut off the bottom 6″ of the hem…

And folded it in half to create a band…BOXY CUFFED TEE

Then simply applied that to the hem.

Done!BOXY CUFFED TEE (2)

Super easy. Super quick. Super comfy. 🙂


Newer Posts
Older Posts
Portia
Follow
Sewbox

© Copyright 2026. Portia Lawrie. All Rights Reserved. Managed by WordPress Web Dev Cornwall .