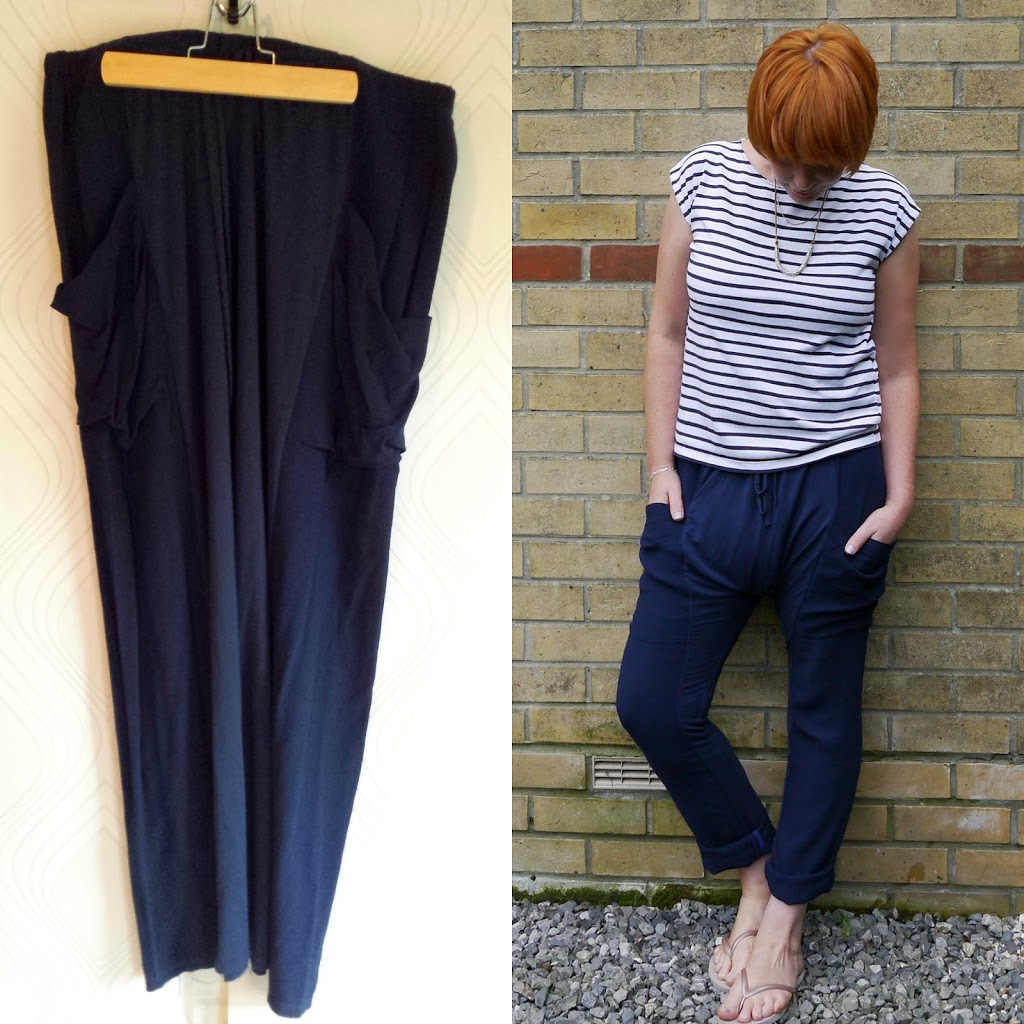
When looking for jeans or trousers I have the relatively common problem (especially when you’ve had kids!) of trousers that fit me in the waist/tum/bum area being waaaaay to big in the legs for my liking. Luckily I sew 🙂 So for years I’ve been addressing this minor annoyance by buying (usually thrifting) jeans than are super comfy in the waist/tum/bum area and simply reshaping the legs to fit my style. “Skinnifying” them if you like. I’ve been asked a few times if I am going to do a tutorial on the subject. Well, yes and no. This is a tutorial of sorts. But I hold your intelligence in high enough esteem to know that you probably get the gist that narrowing trousers means pinning the legs. Sewing a new seam and cutting away the excess. So while this post touches on that obvs, I wanted to focus on some of the other considerations you might want to take into account….
Fabric & Stretch: The “jeans” predominantly featured here are not jeans in the truest sense. They are not constructed in quite the same way as “traditional” jeans. (I’ll touch on that a bit further down) But they are made from a stretch denim. In my experience, denim with stretch is by far the most forgiving and easiest to work with when refitting the legs on jeans. And lets’s face it, the most comfortable to wear too! It’s also not a heavy denim. Another consideration when you’re using a home sewing machine which simply won’t have the power of the industrial machines that would have been used for heavy denim when they were originally produced…
Seam Construction: Both the inner and outer leg seams of this particular pair of jeans were constructed using standard straight seams. These are your friends when it comes to reshaping the legs on jeans or trousers; because it means you can easily narrow the leg evenly on both sides. Traditional construction uses a flat fell seam, usually on the inside leg, which is tougher and harder wearing. If you can avoid those….do. Â I’ll touch on that a bit further down…

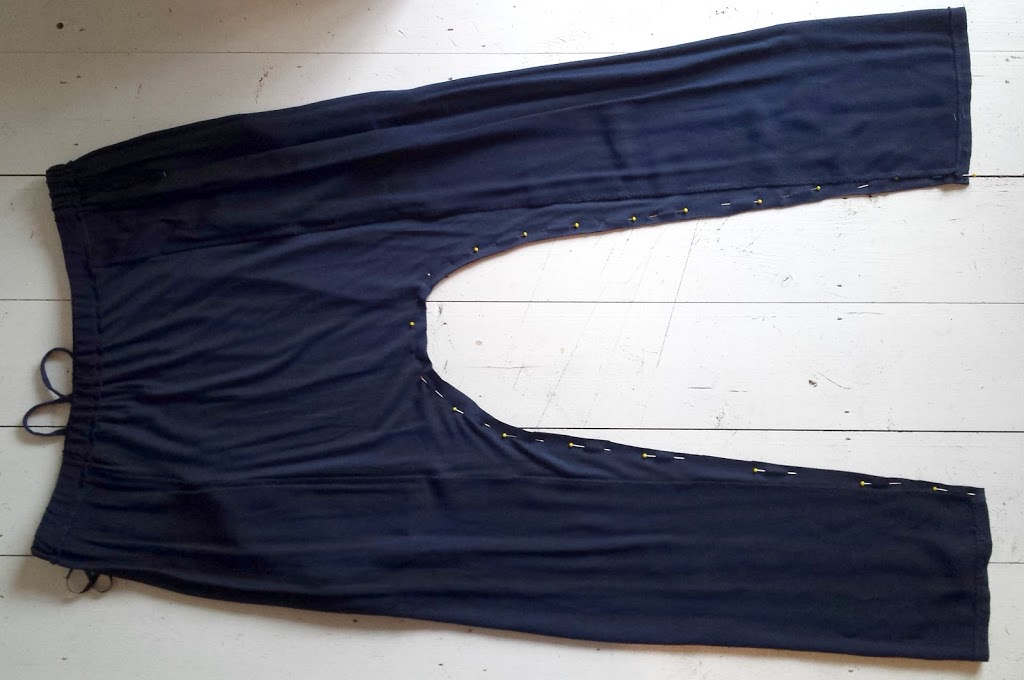
Prep: To prepare the legs for reshaping it’s easier to completely unpick the hems then press the hems and the sides seams completely smooth and flat. Put on inside out, then pin to your desired fit. Take them off and even out the row of pins. Watch out here that you don’t narrow soooo much that you can’t get your foot through the ankle. Yep….done that. 😉
At the ankle, where you are going to hem, the pins should be at right angles to the original hem fold for the whole hem section. That section needs to be the same width above and below the hem fold in order to allow for proper hemming….
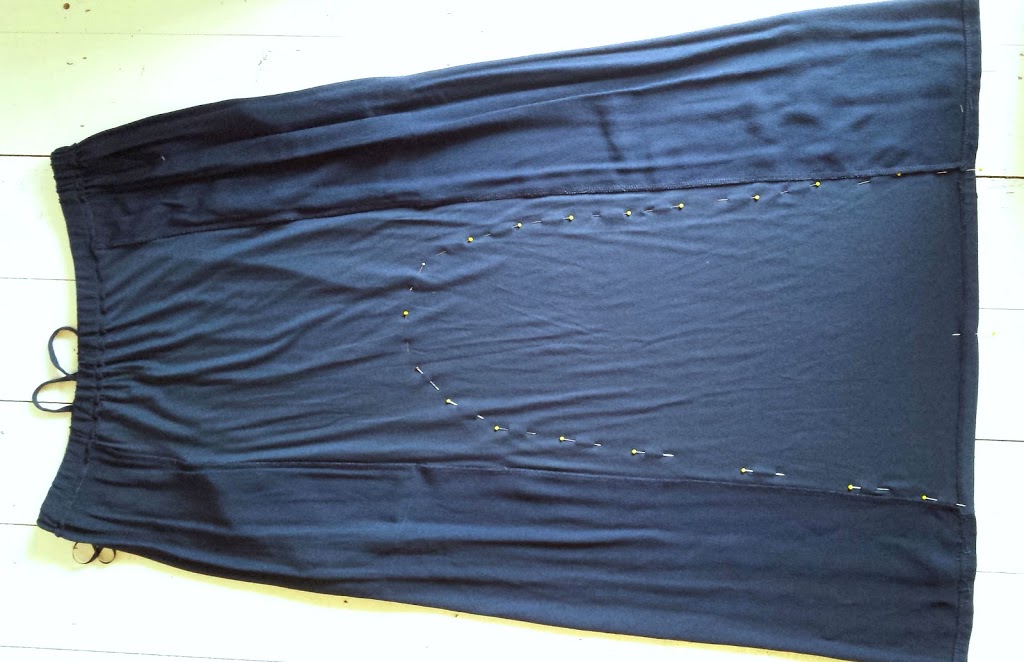
Blending: In order to make the new and old seams blend seamlessly (so you don’t get an obvious dimple or tuck on the outside once you’re done) pin then start sewing within the original seam allowance and gradually cross over the original seamline to your new line of stitching…
Back & Front Leg Ratio: The back leg of a pair of jeans/trousers in general, will be wider than the front to allow for the calf muscle. You’ll want to retain this ratio in order to keep the side seams completely vertical when wearing. So when you press and pin make sure that this excess fabric remains distributed at the back leg…
Ensuring Even alteration: You’ll want to ensure that you take away the fabric evenly on both legs. To do this I pin one leg to my desired fit. Then I line up both legs along all seams and use those pins to pin through both legs at the same time…
So essentially you have both legs pinned together with the pins on top marking an identical line on the other leg underneath. Make sense? Â You can also see in this pic the additional fabric of the back leg all bunched up in the middle…
Marking: Obviously I can’t sew it like that! So I mark on top and between the pins on both sides to mark my new seam line…I have a set of pastel pencils that make an awesom alternative to tailor’s chalk btw!

Sewing: Then simply remove the pins, sew on top of my chalk line, zig zag close to that line, then trim off the excess and hem…

Considerations for “traditional” Jeans: So I mentioned flat fell seams.  Traditional jeans will generally have a standard seam on the outside (your friend) and a flat fell seam on the inside leg (not your friend!). You can see below the amount of stitching involved in a flat fell seam. This makes it super sturdy which is fantastic for the longevity of your jeans but not so great if you want to take it in at that seam. It is not possible to smoothly narrow  and blend that seam without unpicking all that stitching first. Even then you have that point wher the crotch and inside leg seams intersect to contend with. I have tried in the past and I will never bother again! So to my mind, and in my humblest of all humble opinions, it just isn’t worth it. I prefer to accept the limitations of traditionally constructed jeans and only narrow the leg on one side…
This does of course limit the amount you can narrow the legs by before it starts looking uneven; and that is just a matter of trial and error and personal taste. When narrowing just one side of a pair of jeans I will always use a long stitch to baste my new seam line and test the fit first before committing to cutting away the excess fabric.
If you are altering traditional denim then another consideration is the thickness of the fabric; especially at the hem. To retain the original hem you’ll likely be sewing through 3 layers of denim (see the pic below) plus an additional 3-4 layers when you sew across the intersection of the flat fell seam! 
My machine is not powerful enough to do that on sturdier denim. So I reduce the strain by removing that bottom section of hem…
And opting instead for a single fold hem with the raw edge zig zagged or overlocked…
Another area where it can get pretty bulky is up in the hip pocket area. If you are beginning your blended seam as high up at that then there will be studs, pocket bags and top stitching to navigate. Which is why when I select jeans to refashion…I opt for those that don’t need taking in at the hips (these were the other half’s jeans)…
Tools/Equipment: I thoroughly recommend using the right tools for the job. In my opinion and for my machine, denim needles make a difference in the ease of sewing and the quality of the resulting stitch. For an authentic looking hem, then top stitching thread matched to the original colour will give a professional finish. For sewing over the bulkiest part of the hem, placing a shim at the back of the presser foot will keep your presser foot horizontal and help avoid the skipped stitches that occur when sewing over bulky seams and the presser foot has to “climb” at an angle over the bulkiness of it all. You can buy shims. But a folded piece of card does the job for me. Also, machine needle cases are almost the perfect thickness to do the job; and if you’re lucky your presser foot may have a little button on the side that locks it into the horizontal position.
So that’s that. My top tips for skinnifying jeans and trousers. Anything you want to add?? Please feel free to share!!!
Happy refashioning!