• About
    • Contact
    • Press
    • Sponsor
  • DIY
    • Home & Garden
    • Jewellery & Accessories
    • Yarn Crafts
  • Sewing
    • patternless & self drafted
    • Refashions
    • Commercial Patterns
    • Sewing Tips
    • Overlockers
  • The Refashioners

Portia Lawrie

my sewing space, shedquarters, Uncategorized

Shedquarters: Part 1 – The Build

09/22/15

SHEDQUARTERS - THE BUILD

I spent alot of time in these wellies in the Spring and Summer of this year. If you follow me on Social Media you’l know why. If you don’t, then you may not be aware that I finally got the sewing space of my dreams or, as I like to call it #shedqurters 😉

This is the log cabin in question (although it looks a little different now but more on that in later posts!). It’s a 4m x 3m kit form construction. 38mm thick “logs” and double glazed. It’s an upgrade from the summerhouse that I had to leave behind when we moved last year. And overall we lavished much more time, money and thought on this one than the last. Largely because having worked in one before I had a better idea of what I needed from this one; but also as a kind of compensation that I had to wait a year to get my sewing space back! And man am I in love with my new space. There’ll be a full tour of the finished space of course but the process was a long one with alot to share. So I’ve split it up into 2 posts. This is the nitty gritty part!SHEDQUARTERS - THE BUILD

The cabin itself is a Mercia 4m x 3m Home Office Director Log Cabin. It’s JUST under the point where building/planning regulations for our size of garden kick in. So if you’re thinking of doing something similar it’s worth bearing in mind. It’s a little complicated in so much as it’s not a straightforward “formula”. It has to do with what percentage of your overall outdoor space the building will take up, the clearance around the structure and it’s proximity to the house/neighbours, whether it has electric etc. More info on regs can be found here for the UK. For other parts of the world I guess local authority websites will hold the answer. We ordered direct from the manufacturer and paid the extra to have it erected. It’s totally doable yourself but  soooo much quicker when you have someone that knows what they’re doing.

This is the spot we had earmarked for Shedquarters. There was quite alot of work to be done ahead of the installation date! First we had to clear that space and lay a concrete base…SHEDQUARTERS - THE BUILD

First step was to get the garden in order, dig borders and paint fences, then prepare a new base for the shed which needed to be moved to the opposite end of the garden…about a fortnight’s work there believe it or not!SHEDQUARTERS - THE BUILD

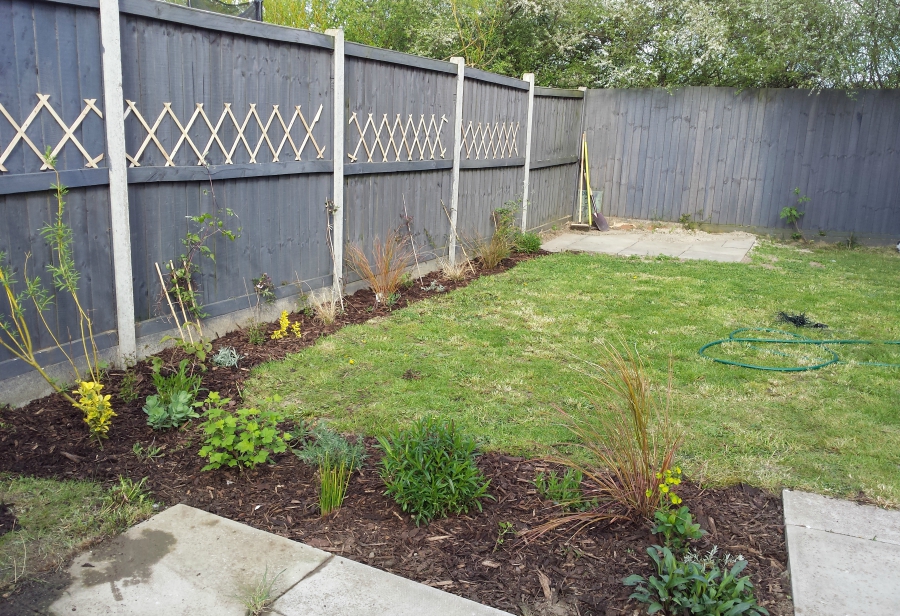
While I took care of the garden and fences, the teen did the base pretty much all by himself. Colour me impressed! (We did pay him, we’re not slave drivers, lol!) He lifted some of the paving slabs from the area that we were clearing  for Shedquarters and used them to make the base you see here, then filled in with a sand mix. I think he did a pretty good job!SHEDQUARTERS - THE BUILD

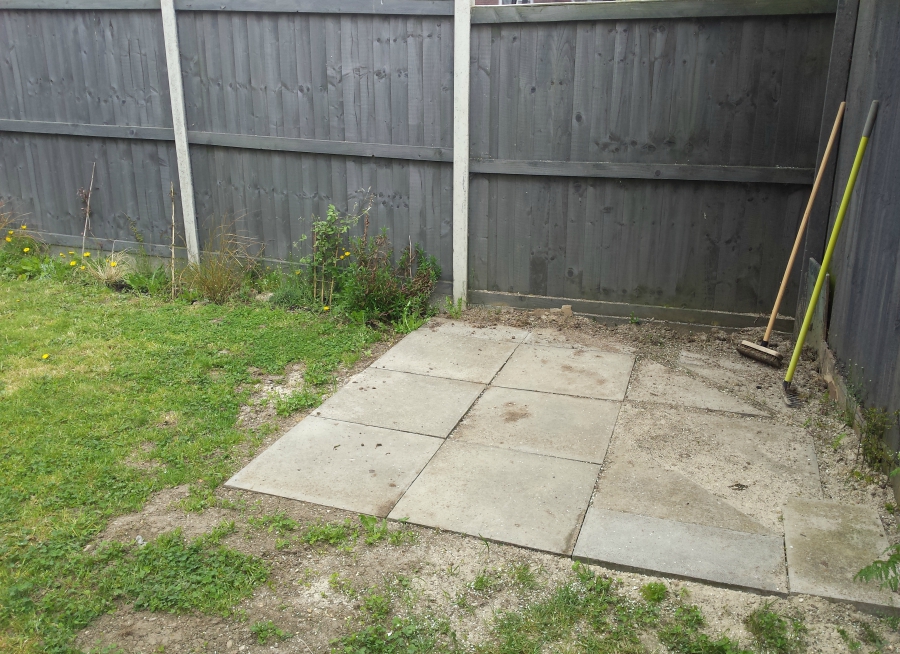
We got some help in to move the shed. It involved detaching the carcass from the base. Moving the shed base into position on the new concrete base, and then with four of us (one in each corner) we lifted the carcass into position on top of that. They’re heavier than they look!SHEDQUARTERS - THE BUILD

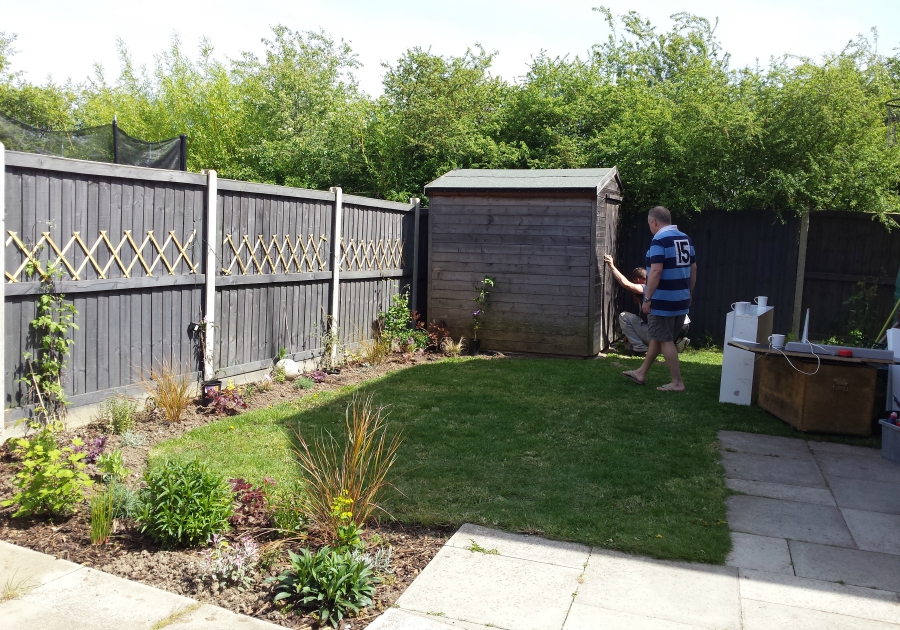
Of course I had to empty the contents of the shed before we moved anything which left me with this chaos to reorganise….which took me several hours because I took the opportunity to clean and organise everything at the same time before putting everything back…SHEDQUARTERS - THE BUILD

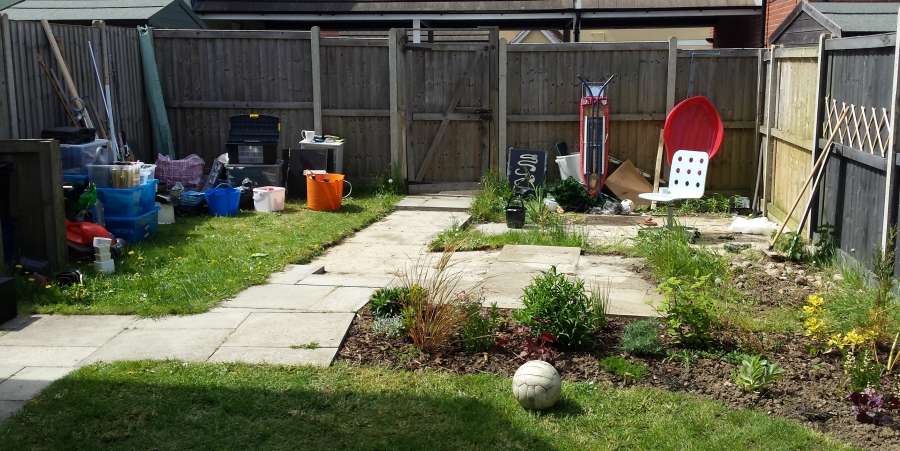
I kept myself motivated by picturing where my new sewing spot would be, ha ha! (It takes some imagination at this point I know!SHEDQUARTERS - THE BUILD

Still, earphones in and with a steady supply of caffeine, by the end of the afternoon we had a well organised shed and this area was ready for the next day….SHEDQUARTERS - THE BUILD

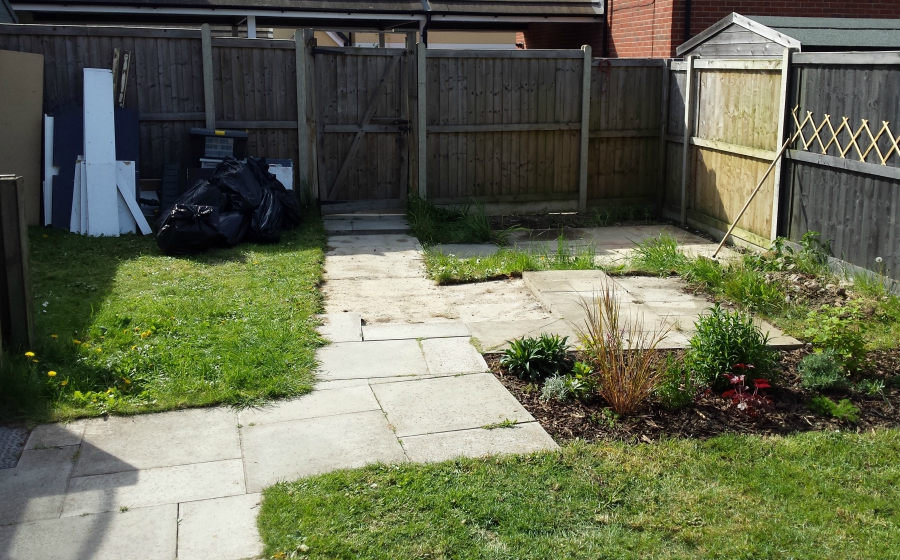
…when THIS happened! Last time I did all of this groundwork, pegging out and laying down the hardcore ALL BY MYSELF! I swore blind then, that I would never do it again. It is back breaking. (although I will forever remain proud of that achievement!) So this time we paid a local tradesman to come in and do this part…SHEDQUARTERS - THE BUILD

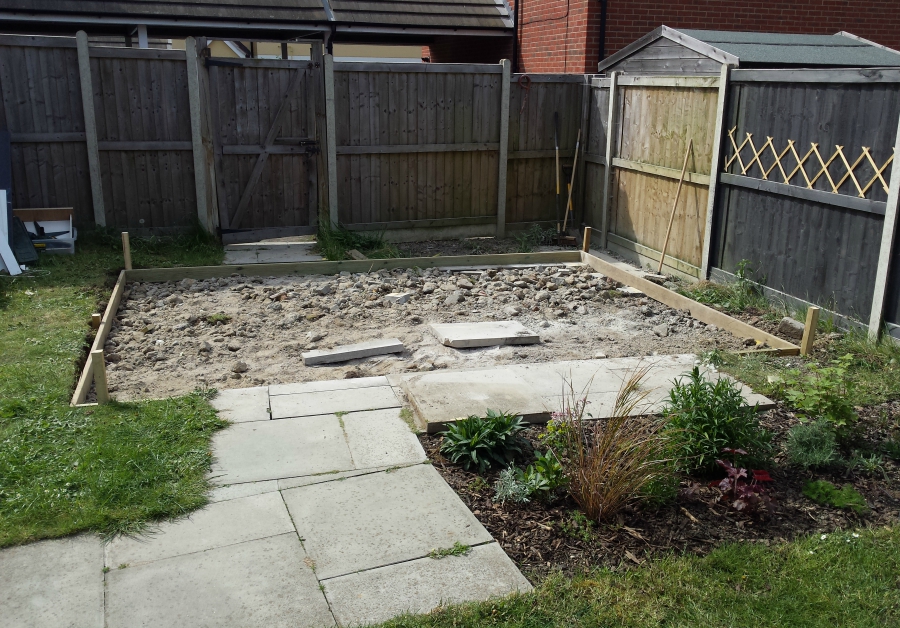
The size of the base will be specified by the cabin supplier and is obviously proportionate to the size of the cabin itself. You can buy ready made bases or pay your cabin supplier as part of the package. But it does start to get pricey when you add in the extras and we were already paying for installation of the cabin itself (an additional £500 ish on top of the cost of the building itself).SHEDQUARTERS - THE BUILD

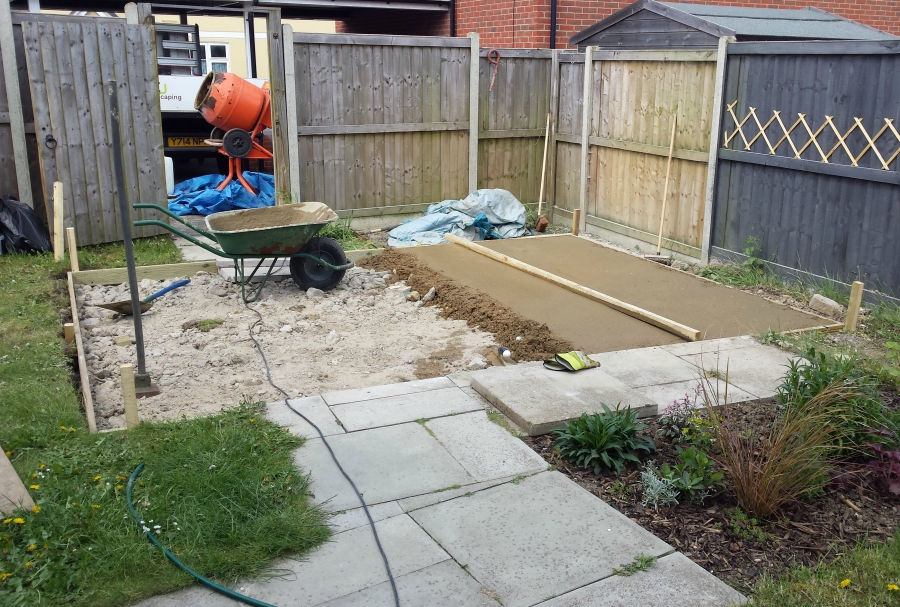
The following day saw our tradesman laying the handmixed concrete. (Which I ended up helping with since he was on his own and “tamping” concrete is really a two person job!) On the last build (my previous summerhouse at the old place) we paid to have ready mixed concrete pumped into the base I built. And I have to say I think it’s preferable to the method above. It’s wetter for a start and finds it’s level more naturally with minimal tamping. The consistency is better because it’s all mixed in one go. And it’s quicker too…

SHEDQUARTERS - THE BUILD

On a personal note Elliott was quite poorly and ended up being hospitalised during this time. When it came to laying the concrete we decided he could bury the nasty medicine bottle in the concrete base, lol! I love that he understands about “closure” on a horrible experience at his age. (He’s fine now. Fully recovered). I honestly think it made him feel better to get his own back on that nasty medicine bottle, lol! So anyway….somewhere under my feet when I sew…is a plastic medicine bottle with his name on it!

The base had it’s hiccups which meant additional cost and work for us. We suddenly realised a week before the building was due that it was off square and not quite level; and started panicking that the team would refuse to install it if the base wasn’t up to spec…1

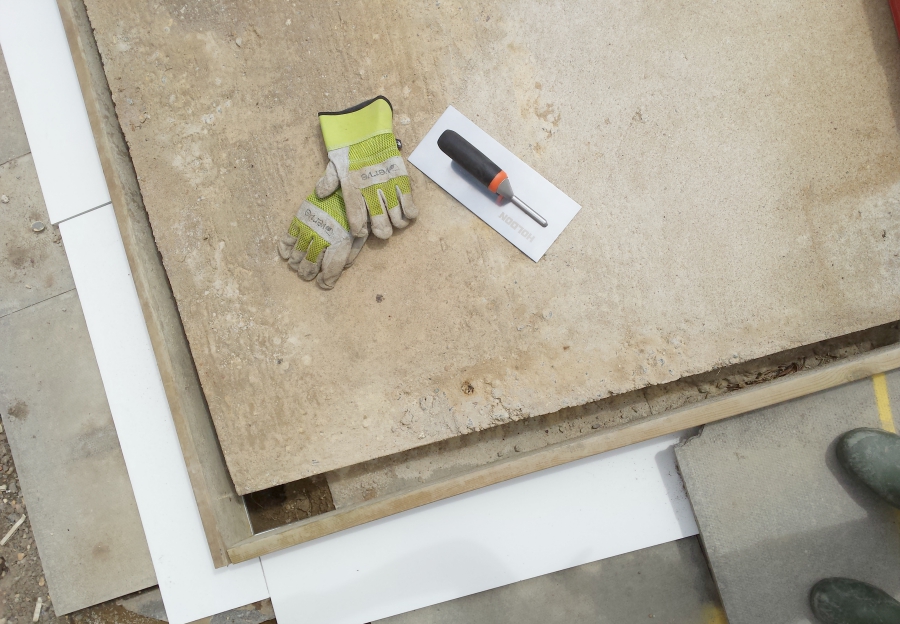
In reality it was probably ok. (And to be fair to our tradesman the whole garden is on the wonk so lining anything up is tricky) But we didn’t want to leave that to chance. So J and I spent the next week mixing concrete and self levelling screed and trying to get everything level and square…2

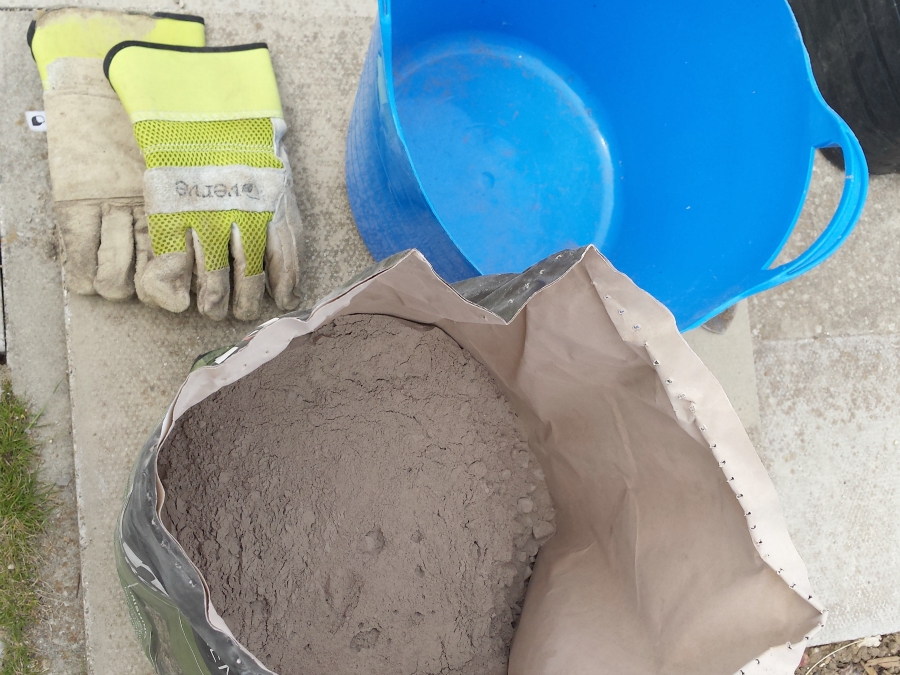
That was a hard back breaking week. (25kg bags are not for the light hearted!) Lots of coffee. Lots of swearing.  Lot’s of head scratching. Lot’s of measuring and remeasuring; but we got there…SHEDQUARTERS - THE BUILD

The night before installation of Shedquarters…we had our base ready…SHEDQUARTERS - THE BUILD

Luckily from that point on we left it to the professionals and just supplied coffee and tea!

The “building” arrived the next day. The day of the big build!!!! This is how it turns up on the back of a low loader and carried by hand…piece by piece into the garden. I did help with that part. I was keen to see it start going up.  I was on tenter hooks that day and if you follow me on IG you would have seen a blow by blow account of this in real time. Let me tell you….seriously impressive how quick this goes up. SHEDQUARTERS - THE BUILD

SHEDQUARTERS - THE BUILD


One Guy. Geordie Alan. Bless him! If you ever order from this company ask for him. SHEDQUARTERS - THE BUILD

The floor bearers go down first. Vital that this bit is super accurate in terms of right angles as any wonkiness gets accentuated with each subsequent log that gets placed on top….

SHEDQUARTERS - THE BUILD

Floor boards!

SHEDQUARTERS - THE BUILD

The beginnings of the walls! Eeeep! Just looking at these pics, I can remember how excited I was…

SHEDQUARTERS - THE BUILD

How the logs interlock to form the structure….

SHEDQUARTERS - THE BUILD

They stack up on top of eachother and then get knocked into place with a rubber mallet…

SHEDQUARTERS - THE BUILD

Windows slot in in one pre-made unit…

SHEDQUARTERS - THE BUILD
2 either side and 2 to the front. Lots of light!!!SHEDQUARTERS - THE BUILD

SHEDQUARTERS - THE BUILD

Right at the eleventh hour reinforcements arrived to help with the roof. But Alan was the real hero of this build. At this point we are 5 hours in from when he laid the first floor bearers. And up until this point it had just been him! Impressive right?? (Took 2 of us 3 days to do this last time!)

SHEDQUARTERS - THE BUILD

And there we have it! I could have cried with joy seeing it finally installed. I hadn’t realised just HOW much it meant to me to have my sanctuary back until I saw it standing there in front of me. I’m even welling up a little thinking about it as I type! Shucks!

Shedquarters makes my heart sing every time I “go to work”. But we’re a long way yet from the finished article. I have much more to show you. Much more work to be done at this stage. Little did I know how long it would take me to make it my own. Or how much paint! But I’ll save that for the next post!!SHEDQUARTERS - THE BUILD


Uncategorized

Bargain Sewing Machine Alert

09/19/15

Just a quickie! A comment from Susie about when Aldi/Lidl might be having another sewing event and/or stocking that bargain overlocker I got a couple of years ago prompted me to check out their website. Nothing from Aldi and no overlocker to be seen from either of them. But thought you guys might appreciate a heads up regarding a Lidl special offer THIS MONDAY 21st Sept 2015….

Lidl Sewing Machine Special Offer

They’ll be carrying limited stock of this  bit of kit. I think it’s their own brand. Looks like a basic model but having said that it’ll probably do everything you’d need it to do because it has more than just your basic stitches; and could be worth a look if you’re looking for a low cost machine to get you started or as an additional/backup machine. Maybe as a first machine for a teen etc. Here it is in close up…

Lidl Sewing Machine Special Offer

More event/offer details here; product details here; and search results for reviews/forum comments on it’s capabilities here.

If it’s anything like the overlocker offer then there’ll be a handful of these per store and they’ll go quick. So get there before they open would be my advice! I’d also sign up for their newsletters. Aldi here. Lidl here. Because who knows when that overlocker is going to surface again!

This is not a Lidl sponsored post btw, lol! I just love me a bargain and I thought some of you might too!

DIY, how to, refashioning, Restyles, Sewing, Tutorials, Uncategorized

Refashion: Colour Block Tee

09/17/15

I’m not sure refashions can get much simpler than this! This one first appeared in Issue 2 of Simply Sewing Magazine way back at the start of the year (hence the older pic!)…The licence for the content I create for Simply Sewing reverts back to me after 6 months. So I am reproducing it here for my records and your reference 🙂 Enjoy!!Colour Block Tee Refashion - portialawrie.co.uk

It’s a super quick and easy way to lengthen a jersey tee or just combine two plain tees for a bit of colour blocking interest.

One of the things I find with T Shirts is that, over time and many machine cycles, they shrink. Now I’m quite particular about the length of my tee as I hate flashing my midriff when I raise my arms, sit down lean over etc. So once a top sits a little too short on me, it ends up languishing unworn in my wardrobe. This quick and simple refashion solves the problem of a too short top AND nails the colour blocking trend, all in one fell swoop. What’s more, because we’re using the top of one tee and the bottom of the other, all the neck, sleeve and hemline finishing is already done! Colour Block Tee Refashion - portialawrie.co.uk

Cut your main tee (the light grey one in my case because I like the shape and fit of it) straight across from side seam to side seam, at the point you want the colour blocking to start, plus a little seam allowance. Retain the top portion.Colour Block Tee Refashion - portialawrie.co.uk

Cut the bottom half off your “donor” tee. (The dark grey one in my case. Ideally you want this one to be the same width or slightly wider than your main tee. I call it the “donor tee because it’s very kindly donating fabric to it’s  cousin, the light grey tee ;)) Colour Block Tee Refashion - portialawrie.co.uk

How much you cut off will depend on how deep you want your colour block band to be. For example, if you want a 12″ band, then measure 12″ up from the hem, plus a little seam allowance, and cut straight across at that point.Colour Block Tee Refashion - portialawrie.co.uk

Then, mark with a pin, how much you need to trim off to have your colour block band, be the same width as the top portion of your main tee…Colour Block Tee Refashion - portialawrie.co.uk

Sew, and trim the excess off the colour band to resize it. You need the side seams of the colour band to line up perfectly with the side seams of the main tee.Colour Block Tee Refashion - portialawrie.co.uk

Lay the two portions like so. The tee part right way out and the band part inside out, with the neckline of the tee facing the raw edge of the band…Colour Block Tee Refashion - portialawrie.co.uk

: Slide the tee all the way inside the band so that the two pieces are right sides together, and the raw edges of the tee line up with the raw edges of the band…Colour Block Tee Refashion - portialawrie.co.uk

Lining up the side seams first, and keeping raw edges even, pin and then sew all the way around.

Flip right side out, press the seam, and you’re done!Colour Block Tee Refashion - makery (9)


Tips:

T Shirt fabric can be a little tricky to work with. The raw edges can curl over and stretch out on jersey fabrics even if handled with care. To help with this, use a little spray starch on your fabric during construction, (especially along the cut edges) then launder it out afterwards

I used an overlocker for this project. But I happily sewed jersey fabric on my standard sewing machine before I was lucky enough to get an overlocker. They are fantastic for sewing with jersey but by no means essential, particularly on looser styles. A lot of modern sewing machines have a stretch stitch for exactly that reason. Failing that, use a straight stitch and hold the fabric under very slight tension/stretch as you feed it through the machine

Consider colour blocking skirts, jumpers and non jersey tops. Combine different textures and patterns. Combining different garments is a great way to rejuvenate and get more use out of old clothes as well as putting your own individual stamp on what you wear.


Me Elsewhere, refashion, refashioning, the refashioners, the refashioners 2015, Uncategorized

Simply Sewing: Issue 8

09/11/15

I’m a little more excited than usual about this month’s issue of Simply Sewing Magazine! Not only because I was quite pleased with the way these little neon details elevated this plain sweater for my regular refashion piece…

Press - Simply Sewing - Issue 8


But also because there’s a full on 4 page feature on The Refashioners in this issue!!! (A little sneak peak of my new sewing #shedquarters in the background there too 😉 (I will be blogging that eventually but if you follow me on IG you’ll have seen ALOT about the process already!)Simply Sewing Refashioners FeatureSimply Sewing Refashioners Feature

They’ve also featured Erin’s project for The Refashioners and you’ll find a few of our refashioners in the article, contents and contributors pages and a little call to arms for refashioners everywhere on the front cover! Cool right?! Refashioning world dominaton is but a step away, ha ha!!

Apart from us there’s a load of cool stuff in this issue in particular so well worth a look.

Serious gratitude to Simply Sewing for all the support they’ve shown for this series.  Feeling humbly proud today.

Issue 8 on sale now 🙂 Print and digital subscriptions also available.


Uncategorized

Get Shirty: White Out

09/09/15

Garments don’t come much more classic than a simple white shirt, right? In this, the first of several posts this month sharing what YOU’VE been been making, here are a just a few of the white shirt refashions popping up on IG and Pinterest (you guys are getting shirty f’real!!)…The Refashioners 2015 - your makes

If you know my style then you’ll know Kate’s refashion is right up my street. Simple shape. Comfy fit. But there’s a little more to this refashion than meets the eye both in terms of the base garment and the little details and finishes. The devil is in the detail right?

The Refashioners 2015 - your makes

La Petite Josette reworks a man’s white shirt using the free Sorbetto pattern as a base. Very cute!

The Refashioners 2015 - your makes

Ah Casey! I begged Casey to tag this make for The Refashioners 2015. She’s been refashioning for years (long before I learnt to sew) and was one of the first participants in the first ever series of The Refashioners. I LOVE the simplicity of this white top. A simple idea but as ever, well conceived and perfectly executed. (I totally just fan girled you then Casey, sorry, lol!) There’s a full tute too…It’s not actually made from a men’s shirt (and hence not submitted for the prize package before anyone yelps) BUT I wanted to share it here because it totally could be a method for dealing with too large armholes on those shirts right??!

The Refashioners 2015 - your makes

Cristina hadn’t been on my radar. (That’s the thing about challenges like this! You get to find all kinds of new peops!) Well she’s firmly on my radar now after this amazing bit of refashioning. It seems the lady has some mad draping and drafting skills. You should check out some of her tutorials! Plus no sooner am I writing this she’s just posted another white shirt refashion….

The Refashioners 2015 - your makes

Men’s formal evening shirts DO have the most awesome detailing on the bib. And when you’re gifted something like that in a garment then showcasing that is only right! And it’s done beautifully in this refashion by Lara…

The Refashioners 2015 - your makes

There are not enough superlatives to describe how awesome I think this is. I mean….a bee keeping outfit!!!! I absolutely did not see this one coming!!

Grab a shirt, get refashioning, share it, and be in with a chance of winning that awesome prize. Now worth just under £700!! Jaw dropping right?! We’ll be sharing a selection of your refashions right here throughout Sept and there’ll be inspiration posts to give you even more ideas and directions in which to go with your shirt refashioning. You have until 27th Sept to submit yours. 

refashioning, the refashioners, Uncategorized

The Refashioners 2015 – Round Up & over to YOU!!!

09/03/15

Doesn’t seem like that long ago I was hitting “publish” on the first post in this series; and now here we are! At the end of the blogger element of The Refashioners 2015. August has been crazy behind the scenes here and to be honest I’m feeling a bit pooped. But in a very very happy way. Because man, just look at the inspiring ideas for shirt refashions these awesome ladies have come up with! Such ingenuity and variety here. (You can view each individual post via The Refashioners gallery in the menu bar)…THE REFASHIONERS 2015 - ROUND UP COLLAGE

So how about it? Are you feeling inspired to raid the charity shops or the wardrobes of your menfolk yet? Good. Because we are passing over the #getshirty baton to YOU now; and for the rest of September. And one lucky refashioner stands to win a HUGE prize package of sewing goodies now worth just under £700!!!!

The Refashioners 2015 Awesome Prize Package

NOTE: To clear up some confusion and/or questions. The refashions above are not entered into the community challenge element. They are purely for your inspiration and the prize package is purely for the community challenge element. ie JUST. FOR. YOU. 🙂

How will the final winner of said prize package be chosen? In the first instance we’ll be scouring through your submissions on Instagram and Pinterest (we being myself and the bloggers above) and sharing our favourites here throughout September. Taking into account reader response to those we’ll select a winner after 27th Sept and share that with you here shortly afterwards. And then my friends, The Refashioners 2015 will close it’s doors for another year! (Full prize package deets here. Entry deets here)

But WAIT! Don’t cry yet! (Just me then? Sniff). There is so much to be done between now and then! YOU lot have got so much to share (I know because you’ve already started sharing and it looks AWESOME!). And  I know increasing numbers of you have acquired your shirts and are ready to dive in (keep tagging me on IG peops I love seeing the progress shots too!). So, as a little bonus inspiration treat for you….. I’ll let you into a little secret….We had a secret pinterest board….The Refashioners 2015 - Getting Shirty Pinboard

It goes back to the early part of this year and it’s where myself and some of the other bloggers above pinned inspiration and ideas while WE were trying to work out what to do with OUR shirts. I thought you would likey alot. Since all our refashions are now “out of the bag” I made it “un-secret” so you guys can take a look at some more awesome shirt refashioning inspiration all in one space. Well, apart from here of course…keep coming back here, lol 😉


Uncategorized

The Refashioners 2015 – Starts Tomorrow!!!

08/02/15

starts tomorrow

DIY, finished garments, grainline, hemlock tee, how to, Sewing, Tips and Tricks, Tutorials, Uncategorized

FO: Double Hemmed Hemlock Tee Hack

07/30/15

Time for some deets on another hemlock tee hack! Man I just can’t leave that pattern alone can I?!! I’d say I’m getting my money’s worth out of this pattern except I can’t say that because it’s free to download here! I bought another pattern from Jen’s collection so my feelings of guilt over getting so much for nothing, feel assuaged for now! You’ll have seen this top in my post about these refashioned trousers. But here’s the lowdown on what I did…DOUBLE HEMMED HEMLOCK TEE HACK

The neckline, cuffs and hemline are all finished using the deconstructed finish I described in this post. But I played with the overall silhouette and proportions of the design as well…

DOUBLE HEMMED HEMLOCK TEE HACK

The hem features a wide double hem band with the edges left raw to curl. The idea came about when I realised this jersey lacked weight and was a little too see through in the muffin top area if you know  what I mean! So a double thickness of fabric added weight and solved the see through part as well.

DOUBLE HEMMED HEMLOCK TEE HACK

In terms of proportions I’m weirdly being drawn to a more cropped and fitted silhouette up top. So the hem and the sleeves got chopped on this incarnation…


DOUBLE HEMMED HEMLOCK TEE HACK

To create the hem band I made the hemlock up as normal, then cut straight across the hem at hip level (yes that is masking tape as a cutting guide)…

DOUBLE HEMMED HEMLOCK TEE HACK

I used the piece I cut off to create the hem band by folding it in half WS together…

DOUBLE HEMMED HEMLOCK TEE HACK

Then serged it around the hem of the shirt. RS together and folded edge of the band aligned with the raw edge of the hem…

DOUBLE HEMMED HEMLOCK TEE HACK

This results in a double layer of fabric with raw edges that will curl with wear and laundering. An effect I personally love. But you could always reverse the process and end up with a clean, folded edge at the bottom if the deconstructed/raw edge look isn’t your bag…

DOUBLE HEMMED HEMLOCK TEE HACK

Sleeve wise, I wanted to echo the cropped proportions of the body so cut them to elbow length…

DOUBLE HEMMED HEMLOCK TEE HACK

I cut strips from my fabric remnants using, you guessed it, masking tape as my guide. (See this post on why masking tape is so useful in the sewing room!)

DOUBLE HEMMED HEMLOCK TEE HACK

(I find a bit of spray starch along the edges of jersey keeps it from curling so much during the cutting/construction process. 😉 )


DOUBLE HEMMED HEMLOCK TEE HACK

Then used those strips to finish the neckline and cuffs with the same raw edge finish. Full  step by step on that can be found here . This is a less trimmed down version of the neckline in that post…

DOUBLE HEMMED HEMLOCK TEE HACK

There are 2 more hemlocks that I haven’t blogged, and I think I now have 6 in total ha! The Hemlock by Grainline Studio  and the Maya by Marilla Walker are fast becoming….scratch that…they ARE my two TNT top patterns. Not because they have show stopping qualities. But because they are well drafted simple wardrobe basics that are ripe for little customisations like this. And Amen to more patterns like that!

finished garments, marilla walker, Sewing, Uncategorized

FO: Split Hem Maya Woven Tee

07/29/15

Finally got around to photographing this baby! I DO have a tutorial lined up for this little hack on the Maya Pattern by Marilla Walker but am running out of time before the launch of The Refashioners 2015 on Monday! So for now…here’s a little show and tell… (Do you like my new stool  btw? One of those with the up down lever! You have to play on those don’t you!)SPLIT  HEM MAYA (2)

I was in the process of bulk cutting 3 of these out in time for a holiday to Greece last month. In my haste I ended up cutting them slightly too short! (Time to fess up. I eyeballed them. No…I will never learn!) BUT, as is often the case, it turned out to be a happy accident because it forced me to come up with a solution…

And guess what! I love this little split hem band detail! Not only does it solve the length problem, but it adds a really nice design detail too…SPLIT  HEM MAYA (8) 900


It’s a tricky fabric to show detail on, but hopefully you can make this out! (And as I said, there will be a step by step that will go into more detail. I’ve just got to edit the photos). I opted to add a wider band at the back than the front. For modesty reasons (ahem…nobody needs to see my muffins ya know?) but also because I’m a bit of a fan of high low hem shenanigans 🙂

JORD WOOD WATCH

In case you were wondering about my swanky new wristwear….it’s a watch…made from wood!! Now this was sent to me by the sweet people at Jord. I get approached to review stuff like this from time to time. I normally decline, but I was so intrigued by this. I mean…it’s a watch…made from wood! I usually have a problem with watches as my skin reacts to the metal unless it’s a precious metal. So perhaps this is the solution? There’s still the metal on the clasp I guess, but fingers crossed! I hope so because I am rather taken with it actually. The wood makes it super lightweight, tactile, breathable and pretty unique. Cute right?

Anyway…back to the top. Something about sewing blogging makes it ok to publish pictures of ones bust, ha ha! But it’s the sleeve detail I wanted to mention and also have a little question about…SPLIT  HEM MAYA (15)

It’s a simple enough thing. A folded over strip of fabric, the same circumference as the sleeve opening. Sewn to the sleeve RS facing then SA turned under and understitched to create a teeny/narrow cuff. No shaping on the sleeve. So here’s the question…WHY does the cuff kink out like that at the top of my arm?? What am I missing here sewing ninjas??

It’s a small thing…but it’s buggin’ me! And I know that one of you out there has the answer. Because you’re awesome.

DIY, Dressmaking, fabric, finished garments, free pattern download, Freebies, grainline, hemlock tee, how to, knits, minerva, overlocker, serger, Sewing, sewing patterns, Tips and Tricks, tops, Tutorials, Uncategorized

Hemlock Tee: How to Sew a Deconstructed Jersey Neckline Finish

07/24/15

Not really a secret that I love the Hemlock Tee pattern from Grainline Studio. If you follow me on Instagram you’ll have seen a few of these pop up recently that haven’t yet been blogged. One you will have seen in my previous post. This one is just a simple grey jersey…DECONSTRUCTED JERSEY NECKLINE FINISH

This would not be particularly noteworthy apart from the fact I wanted to let you know this jersey from Minerva Crafts is frikkin gorgeous! So soft. So drapey. Not too flimsy. Need more in my life!

I also wanted to share my favourite jersey neckline finish of the moment! I’m not a massive fan of conventional ribbed neck bands . I like my tees to look a little more deconstructed and I really like the raw edge of jersey fabric. The way it curls  when you stretch it! But obviously  a neckline still needs some stability. So recently I’ve been opting for this neckline finish…DECONSTRUCTED JERSEY NECKLINE FINISH

It’s applied in exactly the same way as the pattern describes, with one exception. Instead of the folded edge of the neck band edging your neckline…you flip the band the other way round before applying it,  and have the raw edge exposed instead!

Here’s a quick step by step. If you’ve never applied a jersey neckband before you may also find this useful as it covers the whole process…at least this is how I do it!DECONSTRUCTED JERSEY NECKLINE FINISH

Take your neckband pattern piece and press it with some spray starch (helps stop the edges curling too much as you work); sew together the ends to form a loop then fold in half.

DECONSTRUCTED JERSEY NECKLINE FINISH

Taking the join as your centre back marker, mark your centre front point using a pin. Do this by folding the band in half with the join smack band in the middle. Mark the CF point with a pin on the opposite side.

DECONSTRUCTED JERSEY NECKLINE FINISH

Mark the sides with of the neckband with a pin too..

Have your tee right side out…DECONSTRUCTED JERSEY NECKLINE FINISH

Pin the CF of your neckband to the CF of your neckline. I’m going for that raw edge finish on mine remember. So I’m lining up the folded edge of my neckband with the raw edge of my neckline. If you want the clean/folded edge finish to your neckline, then line up the raw edges of your neck band with the raw edge of your neckline. Savvy?

DECONSTRUCTED JERSEY NECKLINE FINISH

Pin the sides of your neck band to your shoulder seams and the CB of your neck band to the  CB of your neckline. So your neckband is now pinned at both shoulders seams, the BB, and the CF of the right side of your neckline.

DECONSTRUCTED JERSEY NECKLINE FINISH

Serge to join. I work in 1/4 sections at a time. ie from pin to pin. Hold the layers of fabric under just enough tension for the neckband to match the length of the neckline. It will be drafted ever so slightly smaller than the neckline circumference which enables it to naturally want to turn to the inside .  So pull on it juuuust enough as it runs through the serger, but be careful not to stretch it out.

DECONSTRUCTED JERSEY NECKLINE FINISH

Press! Seam allowance/serged edge downwards…

DECONSTRUCTED JERSEY NECKLINE FINISH

Top/Edge stitch around the neckline to secure the seam allowance. So you now have a finished neckline with a raw edge detail (or if you attached the band the other way, a finished neckline with a clean folded edge!). If you want it a bit narrower you can start with a narrower band in the first place OR trim it down at this stage….

DECONSTRUCTED JERSEY NECKLINE FINISH

Make a notch/snip to the depth you want…

DECONSTRUCTED JERSEY NECKLINE FINISH

And trim!

DECONSTRUCTED JERSEY NECKLINE FINISH

I went even narrower on this one and part of me wishes I’d  restrained myself a little, lol! After laundering, the edges will soften, and depending on how long you’ve left them, (ahem) curl a little too.

You might ask what the point is in lining up the folded edge of the band with the raw edge of the neckline in the first place. You could just attach the band as normal, trim, and you still end up with a raw edge. I just prefer to do it this way because I find it easier to line up a folded edge with one raw edge, than it is to align 3 raw edges; and I find the inside finish cleaner this way too. Either way would work and it’s one of those cases of personal preference.

I’ve done a variation with a twist  of this on the hemlock in my previous post. The one I’ve yet to blog about! Then there’s one more that I’ve made; (and two more that I’m about to make). Plus my first stab at Suzy Pants and 3 completed Maya variations that are also unblogged!

I literally have too many blog posts to squeeze in before the launch of The Refashioners 2015.

Oh yeah, and I ought to refashion a shirt too, gasp!!

Newer Posts
Older Posts
Portia
Follow
Sewbox

© Copyright 2026. Portia Lawrie. All Rights Reserved. Managed by WordPress Web Dev Cornwall .