• About
    • Contact
    • Press
    • Sponsor
  • DIY
    • Home & Garden
    • Jewellery & Accessories
    • Yarn Crafts
  • Sewing
    • patternless & self drafted
    • Refashions
    • Commercial Patterns
    • Sewing Tips
    • Overlockers
  • The Refashioners

Portia Lawrie

Dressmaking, Me Made May 12, Pattern Drafting, refashioning

MMM ’12 – Weeks 3 – 4

06/03/12

To be honest, the last week and a half of Me Made May saw me running around like a blue arsed fly with no inclination whatsoever to take any photographs. So I struck on the idea of using the previous couple of week’s photos as my own personal gallery of outfit options. Each day I would flick through, pick an outfit I’d already photographed and wear that for the day. Thereby dispensing with the necessity to take further photos! Ha! Take that you pesky self photography demon!! Of course, I have had my hair cut and coloured since the start of May so it looks as if my hair has miraculously grown back overnight, but you get the gist!

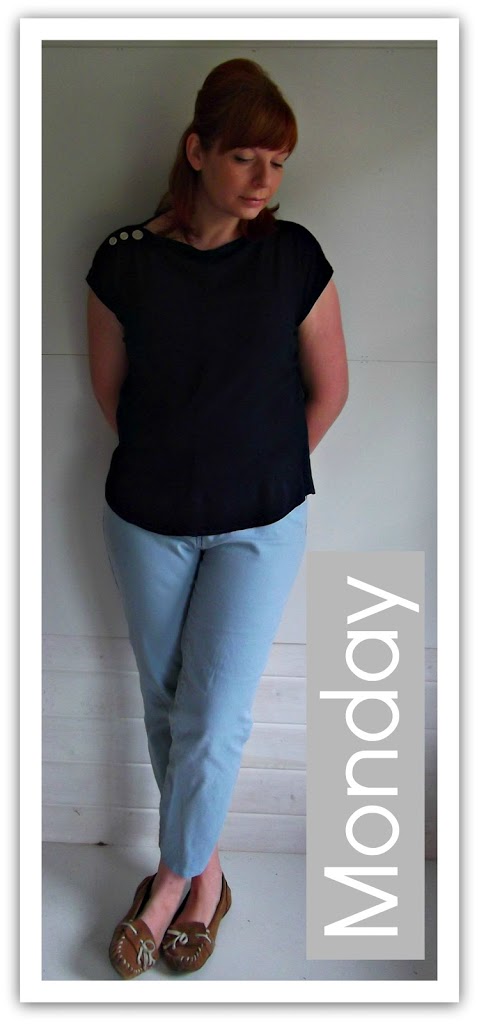
Monday: Navy refashioned top and blue refashioned trousers
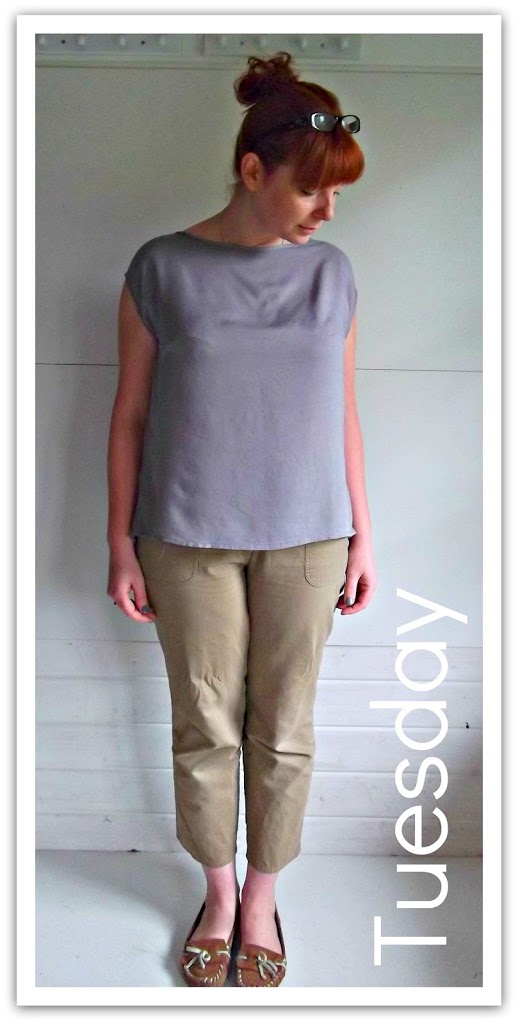
Tuesday: Self drafted Geometric top  Trousers – Thrifted
Wednesday: Thrifted stripe top  and Cropped Jeans

Monday tuesday wednesday

Thursday: Denim Shirt – Thrifted (99p) and refashioned Trousers
Friday: Self Drafted Coral Top and  Cropped Jeans
Saturday:  Grey Polka top – Self drafted thrifted Flared Jeans

thursday friday saturday

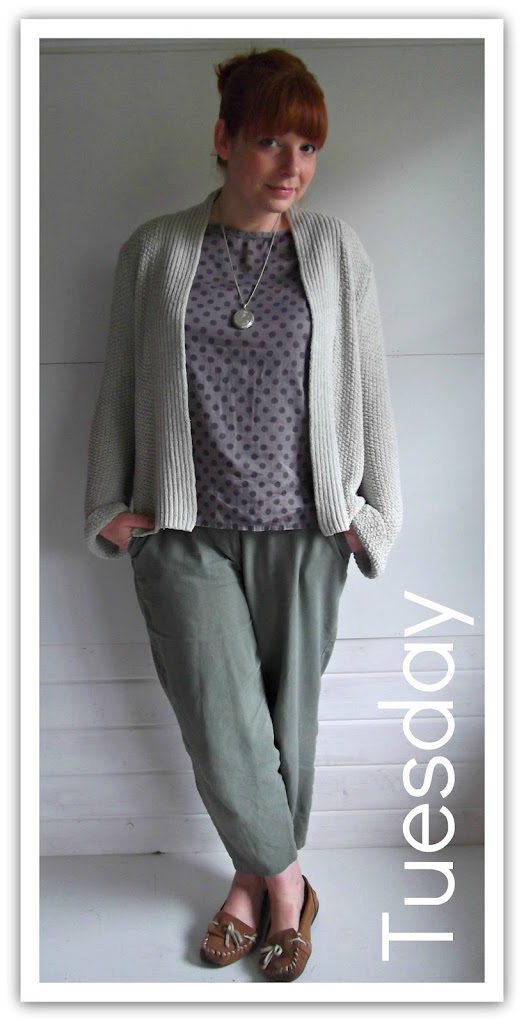
Monday: (Freshly dyed hair!) Thrifted Cashmere Sweater and Blue Trousers
Tuesday: Self drafted Coral Top and  Bleached Jeans (not blogged)
Wednesday: (no photo) Plaid Shirt and Cropped Tan Jeans
Thursday: (no photo) Geometric Self Drafted Top and thrifted Navy Trousers
Friday: No photo and can’t remember!!
Saturday: Newly thrifted Polka Dot Blouse (£1.50) and refashioned Trousers (and the obligatory summer bob cut)

Monday tuesday saturday

Sunday: (Hot day! Yay!!!) Newly thrifted Silk Jersey Top (£1.50) and refashioned Cropped Jeans
Monday: Refashioned Top and Refashioned Trousers
Tuesday: Can’t remember!
Wednesday: Thrifted Top and refashioned Cropped Jeans
Thursday: This outfit

sunday monday saturday

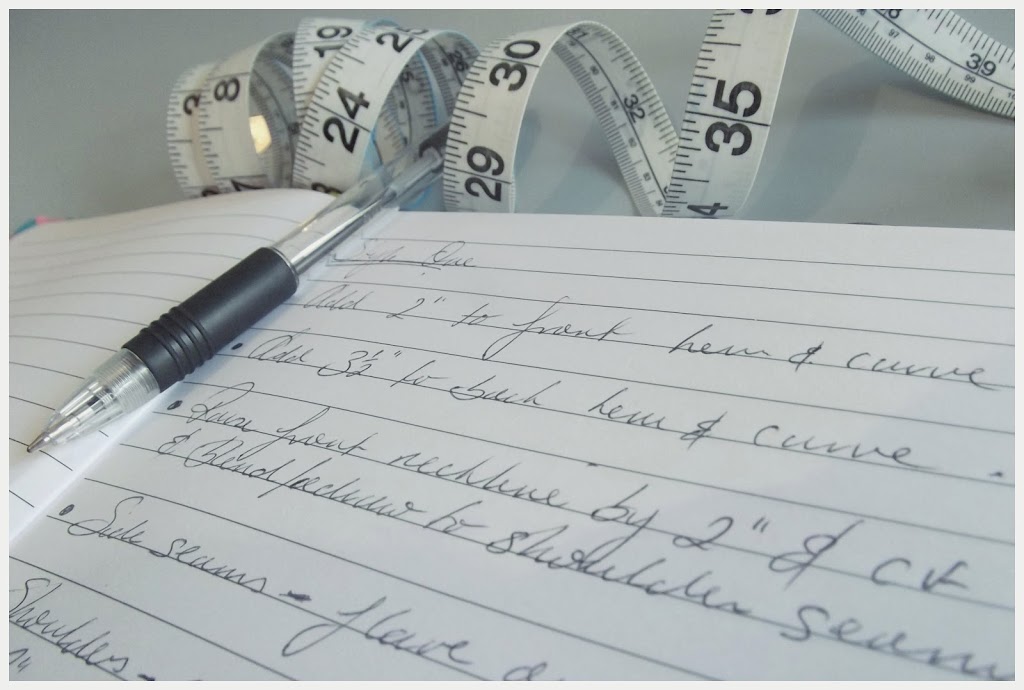
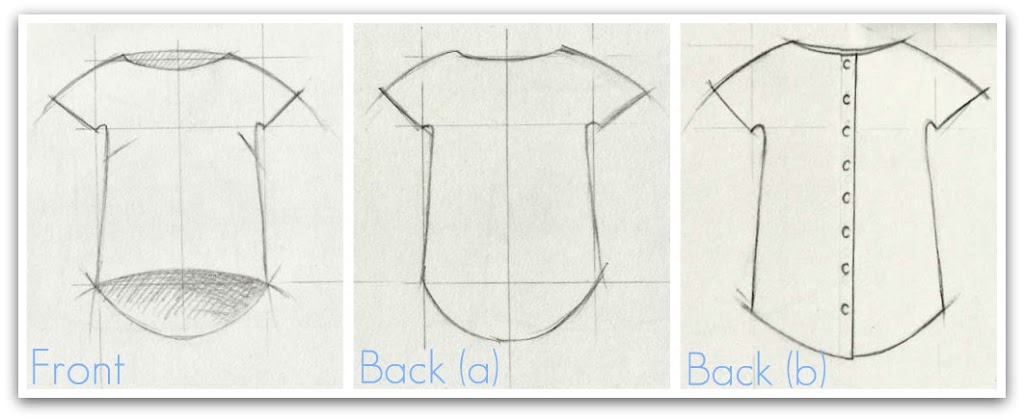
So that was that! I managed to wear MM garments every day and at least half of those were entirely MM. Yay!! I did it! What I’ve noticed is that I rely heavily on cropped narrow leg trousers. Thoe tan cropped jeans being used in HEAVY rotation. I need a couple more pairs in different colours. I have a purple pair lined up for refashioning and a white pair that I intend to refashion and dye a dove grey colour, or maybe lavender if I’m feeling brave!! I’d forgotten how much I like that navy refashioned top. So I’m on the lookout for more skirts to refashion into tops and hopefully replicate  it in a few more colours/patterns. It really is so easy to throw on and feel instantly fab in. My geometric and grey polka tops are good wardrobe staples too. Both made from the same SUPER simple self drafted pattern. So a couple more of those wouldn’t go amiss. Of course, my button back top still needs some tweaking and once I’ve done that, hopefully I’ll be able to add a raft of those to my Me Made arsenal too. Overall, this challenge was my easiest to date (apart from the photography part!!). A sure sign that MM items are gradually taking over my wardrobe!

How about you? Has MMM 12 left you with a long list of projects? Has it helped you realise how far you’ve come? Hope so!

Me Made May 12, Pattern Drafting, refashioning, Sewing

MMM ’12 – Week 2!

05/14/12

So another week down! I must admit, the last couple of Me Made challenges I’ve participated in were a struggle. Being relatively new to sewing I had only a handful of “wearable” MM items to choose from which made putting together outfitsVERY tricky; and often resulted in somewhat bizarre combinations that certainly didn’t reflect my personal style very much. This time around, it’s proving easier. Namely because I have a growing number of MM items to play with AND, more and more of them are reflective of my personal style. I’ve never really had a “personal style aesthetic” before. It really was a bit incoherent, mismatched and I had alot of “stuff” that just didn’t go with other “stuff” or just didn’t suit me! But the ability to sew and adapt my own clothes seems to have opened the door for me to experiment with different shapes/styles and I can definately see a few patterns emerging in how I dress….

Monday (no photo): Grey top– Self drafted (fabric £4/m),  Flared Jeans – thrifted (£4)
Tuesday: Grey Polka top – Self drafted (fabric £4/m),  Trousers – Thrifted (£2) and refashioned
Wednesday: Thrifted top and cardi, Trousers – Thrifted (£1.50) and refashioned (not blogged)
Thursday: Striped Tee- Thrifted (99p) and refashioned (not blogged), Thrifted (£1.50) and refashioned (not blogged)

Tuesday wednesday thursday

Friday: Navy Top – Thrifted (99p) and refashioned, Trousers – Thrifted (£3)
Saturday: White Blouse – Thrifted (99p)   Cropped Jeans – Thrifted (£3) and refashioned.
Sunday:  Grey Polka top – Self drafted (fabric £4/m), Flared Jeans – thrifted (£4)

friday saturday sunday

Friday’s trousers have been banished from my wardrobe. Saturday, the shape is good but the combo is a bit “mumsy” in hindsight. Sunday is a failsafe of mine. I wear this combo alot and really like it. I’d love to hunt down some more of that polka fabric, (as I fudged the construction of this top a little) but I couldn’t see it on my last trip to Goldhawk Road. The navy trousers (Weds/Thurs) I cropped and narrowed ages ago but never wore them because I’d put on a little weight. Well somehow I must’ve lost some because they now fit, yay! I liked the sailor style button details on the hips but the original length and leg width wasn’t quite right. Both legs really are the same length I promise. When I stand like that in a photo, one knee bent, it make the perspective a little odd! The navy top (Fri) has sat in my repair pile for AGES. (I wore it to “the” blogger meetup in Goldhawk Road last year) It took MMM to give me the kick up the arse I needed to sort it out. I was in a rush to finish it and I, well erm, I didn’t finish it. That is to say, I didn’t finish the raw edges inside before I wore, and then washed it (several times!). I received a few compliments on the “ingenuity” of this top that day. Little did Zoe, Karen et al know the guilty secret that was on the inside! No matter, because it has all been sorted now! Amazing what a zig zag stitch can do in 5 minutes 😉
Oh, and we had some sun too!

Me Made May 12, Pattern Drafting, refashioning, Restyles

Me Made May – 1 Week down!

05/07/12

So, Me Made May 2012 is well under way and I’ve been enjoying seeing everyones outfits. Both on their blogs and in the Flickr group. I sympathise wholly with lighting woes expressed by fellow Brit bloggers due the relentlessly grey and wet weather AND I totally relate to those that find “self photography” the only part of the MM challenge that isn’t fun! You’ll notice in my pics I generally can’t bring myself to look at the camera. Heck, on Wednesday I look like a sulky teenager avoiding eye contact whilst being told off. The weird thing is, anyone that knows me IRL, will tell you I’m a pretty direct  and seemingly confident person. I’ll always maintain eye contact when I’m speaking to someone. I just hate having my picture taken. Always have. It’s the one aspect of writing a sewing related blog that I’m not entirely comfortable with. But I try! (on Sunday I gave myself a day off from photos, as I already had a photo of the exact outfit I was wearing, ha ha!) Anyway, I felt some explanation, nay, apology (!) was in order for the plonkeresque nature of my “poses” before getting on with the business of  outfits…

Tuesday: Grey top- Self drafted (fabric £4/m),  Cropped Jeans – Thrifted (£3) and refashioned.
Wednesday: Striped Tee- Refashioned (not blogged), Trousers – Thrifted (£1.50) and refashioned.
Thursday: Vintage plaid shirt – Thrifted (99p), Trousers – Thrifted (£1.50) and refashioned.

Tuesday wednesday thursday

Friday: White Blouse – Thrifted (99p), Trousers – Thrifted (£2) and refashioned
Saturday – Geometric Print Top – Self drafted (fabric £2), Flared Jeans – thrifted (£4)
Sunday– Denim Shirt – Thrifted (£1.50) and refashioned, Cropped Jeans – thrifted (£3) and refashioned

friday saturday sunday

So, what have I gleaned so far? The last 3 outfits I like. Saturday and Sunday being the most flattering on me shape wise. Tuesday’s is ok. The shapes are good I think, but the fabric of the top looks too drapey. Not something I noticed whilst wearing it so self photography has it’s benefits! I’m feeling a wee bit ho hum about my sky blue cropped trousers (Weds/Thurs) I LOVE my blue cropped trousers but they look odd in both photos. Possibly I narrowed them too much at the ankle. I’m hoping it’s just the camera angle. Usually I only wear my plaid shirt (Thurs) with my flared jeans (Saturday) which is a combo that I think works well enough. But worn with those blue trousers? Well it’s not a combo I shall be repeating!
So onwards and upwards. I desperately need to do some laundry (or some speedy sewing)!!!
Take care

Dressmaking, Giveaways, Pattern Drafting

Drafting sneaky peek…

04/24/12

I’m finally getting my house in order, and this weekend was able to squeeze in some drafting for the Top Draftalong. I started by making a list of the adjustments I needed to make to the basic block, took a deep breath, and dived in…

The drafting I’ve done so far is for this style, without the button back at this stage as I wanted to test my drafting with a (hopefully) wearable toile, before diving into drafting button plackets and facings….

I was weirdly nervous when I cut into my fabric. You kind of assume a commercial pattern is gonna work out because “they” know what they’re doing. But this is the first test of my drafting from a block so I had a familiar twinge of self doubt (despite the simple design and the fact that everything looks perfectly alright!). But, feel the fear and do it anyway, right?! Hopefully should have my toile all finished up before the weekend 🙂

Oh and while I remember, don’t forget, you have until Friday (Midnight GMT) to enter the giveaway 🙂

Fitting, Pattern Drafting, Top Draftalong

Top Draftalong # 32 – Sway Back Part 2

12/09/11

This post has been in draft for some time. Seriously….weeks.  Day to day life and family matters have been pretty hectic to say the least. In any case, FINALLY I have a toile that I can turn into a block with which to begin drafting some designs! Hurrah!! That aspect of things I will now have to put on hold until the new year, due to Christmas gift sewing. I’m guessing though that anyone who may be following these posts will be in the same position, so it seems to me that starting the drafting process fresh in January is the best option. So this will be the last Draftalong post until the New Year.
When I last posted, I had adapted my pattern to take out a big tuck as part 1 of a sway back alteration, but had yet to test the results on my final toile. Well, here it is….(I’m not quite sure why I look like I’m striking a body builder pose on the right,btw! Heurgh!!))

See the difference?! Excess fabric gone and the additional ease at the side seams is alowing it to fall comfortably over my hips. The image on the left shows the excess fabric pinned out in a horizontal tuck in the small of my back on the original toile, and the very slight snugness on my hips.  The one on the right is the final toile, cut using the newly altered pattern . No more fabric pooling…….

and from the side……

Apart from the tuck itself, there were a couple of other elements to finalising my toile. In my previous post, I incorrectly assumed that I needn’t square off the hem after I had taken the tuck out of the pattern. I assumed the “distorted” hem was all part of the “optical illusion”  to correct the sway back. Hmmmm. Not so apparently. I did indeed need to square off the hem from the CB to the side seam. You can see the distorting effect of the tuck on the hem in the left hand picture; and the “wedge” added on below the dotted line in the right hand picture….

In addition, I added a CB seam to this toile on the advice of my tutor. “Just in case” further alterations were needed. Good job too, because the tuck on it’s own wasn’t quite sufficient. In order to get the back to sit just right,  I ended up taking out a tapered vertical “tuck” along the CB seam of the toile,to remove the last bit of excess fabric. It tapers to nothing at the neckline, with it’s widest point at the hem. Essentially, taking in the CB seam at an angle. Were I being truly conscientious or aiming for a totally accurate fitted toile, then the new CB seam would be curved inward at the small of my back. But I was happy to keep it simple and opted for a straight tapered CB seam as opposed to a curved one.

The overall shape of this toile is exactly what I’d envisaged as a basis for future designs. I will never want to make a top more fitted than this. It just wouldn’t suit my shape. So for me, a simple, semi fitted, boxy shape that I can add some design details to, and manipulate shape wise, is just perfect.

One final tweak I’ll make is to lengthen the bust darts. I shortened them a bit tooooo much on this toile, trying to avoid the pointy bust look. But where they are now, they’re not providing quite the right amount of fullness. (Ohhhhh, NIPPLES to it!) I’m pretty sure just lengthening them will sort out any remaining drag lines on the bust….

Sooo, here is my block. Traced onto card from my final pattern. Without seam allowances. Ready to start playing with designs in the New Year. Here’s a round up of the main adjustments I’ve made to my toile to get it to this point:

  • Assessing the initial fit issues
  • Moved the bust dart
  • Enlarging the bust dart Pt 1
  • Enlarging the bust dart Pt 2 
  • Sway Back Adjustment Part 1
  • and finally this post….

I’ve been sketching out some ideas as well as perusing the ones in the book that got me started on this draftalong in the first place. (Epic journey that it has become! 32 posts so far! What planet was I on, thinking I could have this done and dusted withing a few weeks??!)
I fancy starting off with experimenting with collars (Peter Pan, Sailor?) and maybe some pintucks, pleats, gathers etc. How about you? What design details would you try first if you were drafting a pattern to your own design?
Px

DIY, kimono tee pattern, Pattern Drafting, Tutorials

Draft your own simple top……A Simple Tutorial

10/21/11

Firstly, forgive the top of my head being lopped off in this photo. I’ve been experimenting with pin curls and hadn’t got round to taking them out when I took this picture. Secondly, yes Karen, you do recognise this fabric! Purchased at the Fabric Fandango, and mindful of Karen’s warning about how much it creases (oooooh how it creases!!) I thought it would be perfect for a simple project like this so as to keep future ironing as easy as possible!
Now, back to the subject in hand….pattern drafting. My toile for the Top Draftalong is FINALLY finished!!!! (More on that to follow) Which means that the design drafting element of the draftalong is imminent, and not a moment too soon in my view. ( Have I mentioned how much I detest fitting…?) Anyway, I thought I’d limber up my drafting muscles with a fun and, yes, easy peasy lemon squeezy, quick and simple “freestyle” drafting project that anyone could do. Seriously. You could draft AND make this top within a couple of hours. Faster if you’re not a slow coach sewer like me. Even if you have never put pencil to paper and drafted anything before in your life. Don’t believe me? Here’s how….

Start with a rectangle and calculate the length of the sides as follows:
A = Bust or Hip Measurement (whichever is the larger) + 2-3″ (ease) divide by  4 and + 3″
B = Required length of top + desired hemming allowance
Mark which is your side seam and which is your centre back/front line….

A = Mark a point approx 8″ down the side seam from what will be the top of your pattern. (This will be your armhole. I made mine 8″. Your’s may be slightly more or less depending on how big you want your armhole opening to be).
B = Along the bottom edge mark a point 3″ in from the side seam

Join these two points up creating a curve for the underarm…this will become your actual stitching line/side seam…

Now for the neckline:
A = Mark a point approx 2″down the CB/CF seam from the top (depending on how low you want your neckline to scoop this could be more but wouldn’t advise it being any less. As you can see from my top, 2″ has it sitting just at the base of my throat)
B = Mark a point along the top edge where you want your neck opening to finish. I used my bra strap as a guide as I don’t like to flash them!

Draw in your neckline curve either freehand or using a French Curve. Where the neckline curve hits the CB/CF seam needs to be at a 90 degree angle so as to avoid “peaking” when you come to cut out the pattern piece on the fold. I’d also advise a slightly less acute angle where it hits the top edge/shoulder seam too. I cut mine as shown here and it’s resulted in a very slight pulling at the point where the neckline hits the shoulder seam of my top.

Add a seam alowance to the underarm/ side seam AND the shoulder seam…

Cut out your new pattern piece. Then cut 2 on the fold out of your fashion fabric and with RS together sew together the shoulder seams and then the side seams. Finish seam allowances.  I also put 2″ slits in the side seams for a little extra ease at the hips, finished the neckline with self fabric bias tape,(see posts here and here) and just hemmed the bottom and sleeves with a narrow hem. Voila! Simple top perfect for layering under a cardi for the winter months. Go on! Give it a go! ( I’d love it if you’d let me know if you do!)
Px

Fitting, Pattern Drafting, Top Draftalong

Top Draftalong # 29 – Bust Dart Enlargement

08/25/11

Ok so here goes. This is a LONG post peops. I racked my brains trying to seperate this into more bitesize individual posts but each stage of this is so interlinked with the next that I decided to just keep it all together in one place. Recommend sorting yourself out a glass of wine/coffee/tea/beer (delete as appropriate) and put your feet up. Ready?
Okey dokey. Firstly I should mention that I have decided to ditch the block pattern from the book. (Eeeep! Yes the one that I’ve spent all that time on!) in favour of the Sorbetto from Colette patterns. The issue I’m addressing in this post was exactly the same on both patterns, but the Sorbetto just seems to suit me better overall and I just think for me it would make a better block/sloper pattern in the long run. You may recall the stage I was at here.  I had pinned out some excess fabric at the armhole and needed to transfer those markings on the toile to the paper pattern so that I could rotate this unsightly dart in the armhole and add it into the bust dart instead…(the first few photos were taken at night so apologies for the poor lighting)

Here’s my toile (I used no sew interfacing to make it. Top tip. It works brilliantly!) with the armhole dart marked out where I’d had it pinned…

I layed my tissue pattern on top…

and traced the armhole dart onto it…here’s the toile and the tissue pattern side by side…

I then extended a line through the centre of each dart until they crossed….

I cut along the lines at the centre of each dart, stopping just short of the crossover point to creat a hinge/pivot point…

I closed off the armhole dart by lining up the bottom dart leg on top of the top dart leg. This results in the bust dart enlarging by the exact same amount….

I then secured with masking tape (easier to reposition than sellotape and you can iron and draw over it too. Win win win!) I called it a night at this point and spent the night tossing and turning and muttering about armholes and bust darts in my sleep…apparently!

Next day (!) I secured a slip of paper with masking tape on the underside of the new dart…

This was a tricky one to do (and photograph) but I eventually managed to fold out the dart with the side seams above and below the dart lined up as they would be if I were constructing the dart on the garment (they are lined up honestly! It’s the camera angle in this photo that makes it look wonky)…

Then cut along the side seam…

and open the dart out again…ta dah!! New “boobalicious” bust dart…

Of course, now the armhole is all wonky! Closing up the armhole dart has raised the bottom of the armhole too high and at a funny angle. Place a piece of paper behind the armhole and tape in place as before…

I held the pattern piece against myself to get a rough idea of where the new armhole curve should start on the side seam and marked it on the pattern. Back on the cutting table I drew in the new armhole shape starting at the point I had marked on the side seam,(make sure the first 2-3mm of the armscye is at a right angle to the side seam or you’ll get a “peak” when the side seams are sewn together) drawing a smooth curve and blending it into the upper part of the armhole curve. You can use a French curve (visible in picture) but in the end I printed off a copy of the front armhole section of the original PDF pattern and used this as a template to get the curve just right

A quick snip later…armhole curve sorted. That looks better! 

Here’s my new pattern piece. Unsightly armhole dart rotated into bust dart and the armhole curve reshaped. So we’re done right?

Nope! One final adjustment. This is the original pattern lined up at the armhole. See how the front piece is marginally longer than the back? Well this is where my pattern cutting classes kicked in. Somewhere in the deep dark recesses of my befuddled brain, I remembered….

The width of the dart…

Is directly proportional to the “extra” length at the hem of the front pattern piece…because of course, when the dart is closed, this extra length is taken up…

Applying the same principle to my newly adjusted pattern….
I measured the width of the new dart…

and worked out how much extra to add to the hem to compensate for the extra length that would be taken up by the wider dart…(does this make any sense??)

So here is my new pattern….

I’m happy to report that everything lined up perfectly when I made my toile (that post to follow) so I was super chuffed with myself and this process has marked a bit of a Eureka moment for me. Both in fitting and the pattern manipulation process. It’s a case in point that “every action has an equal and opposite reaction”.  Each alteration will impact on another part of the pattern and generally require a compensatory alteration elsewhere to get everything to line up again. It’s this emerging awareness of the “bigger picture” that feeds the slight addiction I have to pattern drafting. It’s a bit of a love hate relationship because it has me swearing and tearing my hair out as much as it has  me jumping for joy at a new principle understood!

I tell you what though…I never thought I’d be referencing Newton and Archimedes to in a blog post about how to make a top that fits me!! Hilarious! Hmmm. Professor P…has a nice ring to it…;)
Px

Fitting, Pattern Drafting, Top Draftalong

Top Draftalong # 28 – Bust Adjustments

08/24/11

Ahhh, finally! I am soooooo sorry if I’ve kept anyone waiting with these posts. But I have managed to squeeze some time out of the last few days to make some progress on the Top Draftalong. I have lot’s to share with you, but first things first. This is the last of the “mini posts” detailing the fitting issues covered in the book. Bust Adjustments. (Bleurgh!!) As luck would have it though,  there are a number of decent tutorials out there to reference for this particular area of fitting.; a roundup of which can be found at the end of this post.  Here’s what the book has to say on the subject of bust adjustments:

“With a larger than average bustline, your toile will appear very stretched across the bust and the darts will not be providing enough fullness. Mark your bust point with a dot on the toile then transfer this position to the paper pattern. Draw a line through the centre of the dart to the bust point. Draw another line beginning at the middle of the shoulder, down through the bust point to the hem, passing through the middle point of the waist. Cut through the dart, leaving a 3mm hinge at the bust point, then cut from the shoulder to the hem, leaving a hinge at each end. Place a piece of paper underneath the pattern, then spread out the vertical opening by the required amount at the bust point. The dart will automatically be enlarged. Pin in place and then reshape the side seam. (diagram far right of image)”

“A smaller than average bust forms folds of excess fabric over the bust which must be dispensed with. draw the lines and cut your pattern as before, but this time overlap the vertical opening at the bust point to remove the excess fabric. This of course, decreases the bust dart. Reshape the side seam”

Gertie has a roundup of great tutorials here. There’s an example of the FBA  in action here and here and a well illustrated example of the SBA here (in fact the first stages are applicable to the FBA too).
Px

Newer Posts
Portia
Follow
Sewbox

© Copyright 2026. Portia Lawrie. All Rights Reserved. Managed by WordPress Web Dev Cornwall .