• About
    • Contact
    • Press
    • Sponsor
  • DIY
    • Home & Garden
    • Jewellery & Accessories
    • Yarn Crafts
  • Sewing
    • patternless & self drafted
    • Refashions
    • Commercial Patterns
    • Sewing Tips
    • Overlockers
  • The Refashioners

Portia Lawrie

DIY, organising, refashioning, Tutorials

DIY Planner: (Part 1) The Leather Binder

04/30/13


Materials:

  • A piece of leather (I cut mine from a pair of leather trousers)
  • Lining fabric (mine is a scrap of cotton/linen curtain)
  • Leather thong (Approx 1m depending on how many times you want it to wrap round)
  • A large button
  • Wonder Under/ Bondaweb
  • Stiff Interfacing
  • Machine needles specifically for leather
  • A walking foot (recommended because the leather can slip under a standard foot)
  • A ring binder attatchment
  • Strong machine thread

The first thing you need to do is draw out a template for the shape of your binder. This will of course depend on the individual dimensions of your planner. Mine’s A5 and quite thick; yours might be A4 and alot thicker or even thinner. (The pages I’m gonna share with you later in the week can be printed A4 or A5) So I’d advise spending some time putting your planner pages together  (that’s all of your pages together and inserted into the ring binder fixing. One like this that comes in a little kit) so you know what dimensions you’re working with, before you attempt to make a binder to fit it. However, that part is quite tedious so I thought I’d show you the fun and satisfying part first…then you can decide whether or not it’s worth the effort to print, guillotine and punch all those planner pages like I have below!

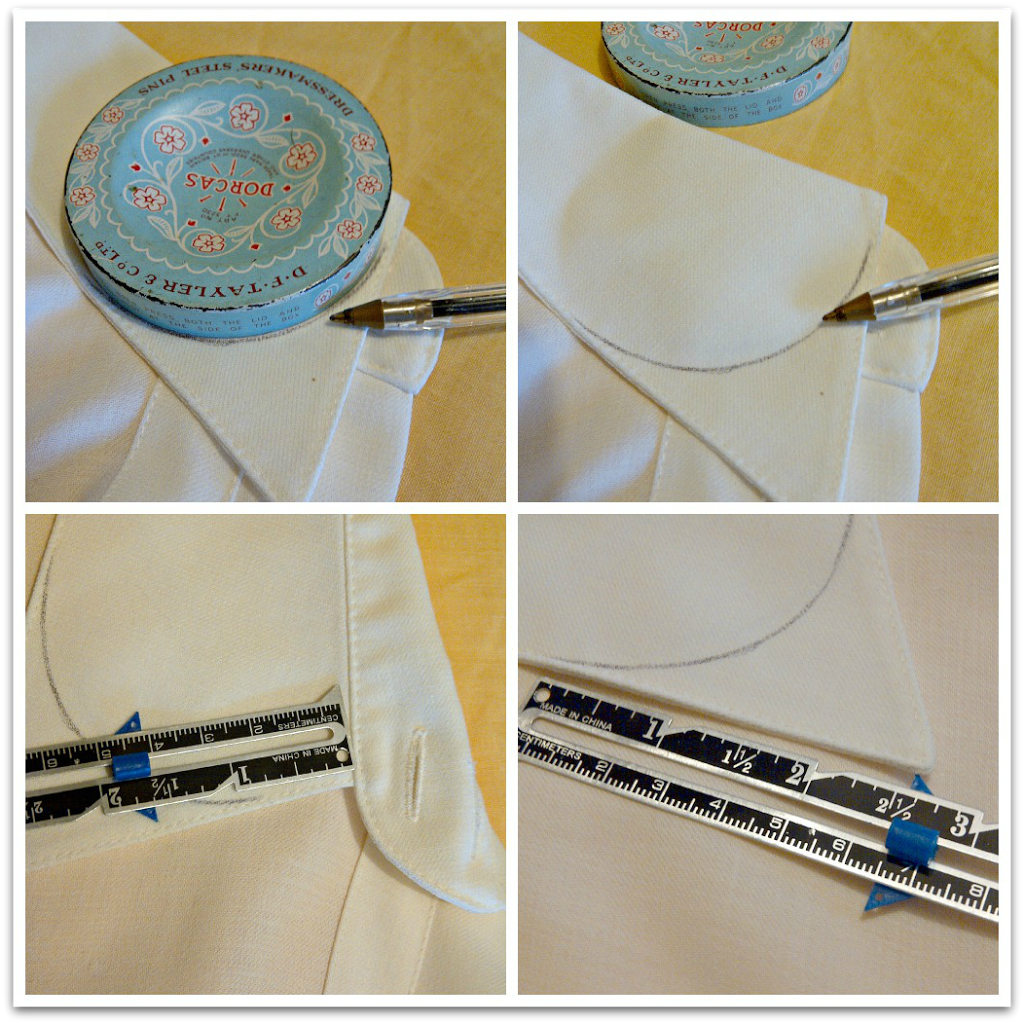
Essentially it has to be big enough to wrap around your planner, with however much overlap you require on the front, and an extra 2-3mm top and bottom to allow for trimming and to make sure your pages are protected around the exposed edges. I rounded off the corners on mine just because I thought it looked nice…

This can take a bit of trial and error. I cut a couple of templates out of old wallpaper and tested the fit around my planner (with all the pages inserted into the ring binder fixing) before I was happy with the fit. IMPORTANT: Make sure you mark the “spine” of your binder on your template, so when it comes to fixing the ring binder mechanism, you know where to fix it. Then once your’e happy with your template……

1) Cut one from Wonder Under and affix to the reverse side of your leather; and one from stiff (ish) interfacing and affix to the reverse of your lining fabric
2) Trim away the excess
3) Peel away the paper backing from the Wonder Under on your leather piece, then place wrong sides together with your lining fabric (the thong should be inserted between the 2 layers at this stage. See Step 4). Then press under a cloth, until evenly adhered together. (The Wonder Under adheres everything together temporarily. So no need for pins, which would damage the leather. Along with the interfacing it also acts to stiffen and stabilise the binder). Don’t worry if there’s a bit of excess lining poking out along the edges as you can see in the far right pic. We’ll trim this later

3) Edge stitch all the way around the outside. I’d advise practicing on some scraps first. I had to use quite a high tension setting on mine to get the bobbin thread to sit flush on the underside. I also used a walking foot as the surface of the leather is quite slippery for a standard foot.
4) When you get to the tip of the envelope part, this is where the thong should be. I SHOULD have inserted this between the leather and the lining fabric before I adhered them together. But I’m a numpty sometimes. So I had to peel the 2 layers apart slightly (Wonder Under is not a permanent adhesive), insert them between the two layers, and carry on stitching all the way round.
5) Trim close to the stitching all the way around for a nice clean edge

6) Then it’s just a question of attaching your ring binder (I got mine from Amazon but they’re available on Ebay too) according to the manufacturers instructions. Use your template to line it up where it needs to go and mark where the holes are; punch out the holes, fix in the rivets/screws and you’re almost done….

All that remains is to add a button to the front and fill it with your customised planner pages!

So if all of that doesn’t sound like too much hassle…then stay tuned for a Free Download of the planner pages themselves 🙂

DIY, organising, refashioning, Upcycling

Refashion: Dodgy Trousers to Handmade Leather Planner!

04/29/13

I’ve been in organising mode recently. It happens every now and then when I feel I’m losing my grip on some of the things I’m juggling. I have to stop, take stock, reorganise everything and then start afresh. The only way I’ve found that I can do that is with an old fashioned diary/planner. I’ve tried Outlook, calendars on my phone, calendars on the wall….to no avail. I have resigned myself to the fact that I am a jotter…a list maker…and that the only way I will get stuff done is if I plan it or make a list. Because the list then just taunts me until I can get through it and tick everything off! That’s the most satisfying part of a list don’t you think? Smugly putting a line through a task once it’s done. Then looking back at the end of the day at a whole page of scribbled out tasks and feeling just a teeny bit self congratulatory 😉

I thrifted this “well dodge” pair of leather trousers off the £1 rail. Just check out those press studs! 90’s in a bad way I think we can all agree 😉 The Italian leather however, was soft, supple and a beautiful buttery colour. I’d been hankering after a new leather organiser (er, pricey isn’t the word!) but buying what I wanted wasn’t an option financially. So, well I made one…..

 The leather thong (I love that word…is “thonging” a verb? It should be.) wraps twice around the envelope style binder then a couple of times around a vintage button to secure it…..

Now your gonna think I’m REALLY sad…I even designed and printed my own planner pages (Weekly, Monthly and Yearly plus Notes and Ideas pages) and attached a ring binder fixing to hold them all in….

So it actually looks (and functions) just like a proper shop bought planner….except it’s handmade!
(For a little under £15 including printer paper and ink!)…..

What’s more, it’s actually working. I’m way ahead on planning and preparing my blog posts, which in turn is freeing up my time for more making (oh and some housework and gardening occasionally gets done too;) which in turn means I’m a calmer and happier puppy 🙂 Being organised officially rocks; and because I like my new planner so much AND the layout of the pages really fits with how I work,  I’m more likely to keep it up! I’ve had 3 different diaries/planners this year already; but haven’t stuck with them because the layouts have just been all wrong for how I work. You know…daft stuff like the lines are too narrow for my writing…there’s no section for notes…or there’s not enough space to write more than one thing under each day…just niggly stuff that means I gradually stop using it.  Do you find that? A planner or diary has to really fit with how YOU work…..and it has to be pleasant to look at and use in order for you to keep on using it?

If that describes you too, then stay tuned for step by step photos and details of how you can make one of your own, PLUS a Free (editable) Download for the planner pages themselves so you can get them just how you want them 🙂

MMM'13, refashioning

Refashion: Nautical Outfit Refashion

04/24/13

Sometimes all you need to do to give oversized and shapeless clothes a bit more “ta dah!”…..

….is take them in a bit and/or change the length….!!  So if you’re panicking that you haven’t got enough handmade/refashioned items for MMM’13, why not raid your local charity shop or thrift store (or, shhhhh, the OTHER side of your wardrobe. You know who’s side I mean right?  😉 and give it a try. This outfit took me under 2 hours to reshape. Small changes make a dramatic difference! The trousers fit me already in the waist; so I just had to take them in at the hips and down the outside of each leg. I also took them in the entire length of the inseam, then cropped and hemmed. The tee was a simple taking in along the side seams and sleeves, then chopping some of the sleeve off to a length that was comfy. Peasy!

DIY, refashioning, Sewing, sweatshirt, Tutorials

DIY: Deconstructed Sweatshirt Refashion

04/22/13

If you follow my facebook page you’ll know that I found this thrifted (£1.50) sweatshirt a while ago. I’d been looking for a suitable specimen for ages so when I came across this little minty green number (don’t ask me what happened in the photo on the left. It’s definately not turquoise) I thought it would make the perfect piece for a chilly Spring (which let’s face it, we’re stuck with!); and the other day I finally got around to giving it a new look…

One of the things that appealed to me about trying out a sweatshirt refashion was that the fabric doesn’t fray. No need for seam finishes or any of that hemming malarkey. Yay for that! So I decided to take full advantage of this fabric’s properties, and see how little sewing it would take to transform it (Lazy? Moi? Occasionally ;). I went for a slightly “de-constructed” look and let me tell you…it took under 10 minutes of actual sewing….kaBOOOM! So if that complete lack of effort appeals to you and you want to give this a go…here’s what I did:

1) Cut off the neckband ribbing
2) Cut off the hemline ribbing
3) Cut off the sleeves, then put on inside out and pin to fit on both sides.
4) Stitch new side seams and cut away excess close to the stitching line

I cut a slightly scooped hem too:

1) Establish the centre front line and use a pin to mark where you want the highest point of your hem to be
2) Fold the sweatshirt in half along the centre front, matching up the side seams (if you have them, but mine didn’t) and the hem line.
3) Using a curve if you need to, mark your new scooped hemline and cut. Make sure the first and last 3-4mm at least, are at right angles to the Centre Front and Centre Back respectively. This makes for a smooth curve with no peaks or indents on the centre lines.

When I tried it on at this stage I didn’t like the sleeve length. The original garment had a dropped shoulder (ie where the armhole extends past the shoulder slightly). Looking at the original shoulder seam, it occurred to me, that it was kinda where I like my shorter kimono style sleeves to sit anyway. So I literally just cut along that seamline to remove the excess sleeve…

That left me with enough fabric to add a little patch pocket detail to the front. Leaving the edges unfinished tied it in with the overall finish….

So…5-10 minutes of cutting, 5 minutes of fitting, under 10 minutes of sewing makes…..YEP!!!….a 30 minute project! Whip one of these up while the dinners cooking OR while your other half is hogging the bathroom/you are on hold with some crappy call centre/your little one is deciding which DVD he wants on/ (Delete as appropriate/relevant. Does that give you an insight into my day. lol? Yep, ALL of these things took 30 mins! And we wonder where the day goes! 😉

DIY, how to, jeans, refashioning, Restyles, Tutorials

DIY: Bleach Polka Dot jeans

03/18/13

Ok so following on from my previous post, here’s how to polka dot the life out of your jeans! This is my favourite kind of DIY as it utilises stuff that you’ll likely already have in your cupboards (yay!) or can pick up for very little at your local shop…

You will need:

  • Cotton buds
  • Thick household bleach
  • Greaseproof paper

To begin, line your jeans inside with greaseproof paper….

Dip your cotton bud in your bleach and start adding your polka dots. (Be careful to dab off any excess before you put your cotton bud anywhere near your jeans, or you end up with fine trails of bleach landing on your jeans) I had a couple of queries on facebook regarding how to get even spacing between the dots. So for those of you that asked…I eyeballed mine BUT there was a degree of method to it. Essentially I worked in rows. Lay down the 1st row of dots in a straight line along the hem. Then moving up about an inch, stagger the 2nd row so the dots are centred above the spaces inbetween the dots in the 1st row. Then move up another inch and place the dots in the 3rd row, directly in line with the dots in the 1st row. Make sense?

Repeat this process for the front and back…

Work as quickly (and carefully!) as you can. This process is quick and your first dots will be bleaching lighter and lighter while you are working on the next side. You can see what I mean in the picture below. I started at the bottom of the right side then by the time I got to the top of the left side, the dots on the right were really bright, whilst the dots on the left were still developing. Keep an eye on the last lot of dots and as soon as they all reach a similar intensity to the rest….

Plunge them into a bath of cold water to halt the “developing” process. Then launder and dry as normal and you’re done!

A Word on Colour:
My polka dots ended up pale pink because the original dye used on these jeans would have contained a pinkish pigment. If you bleach dot jeans of another colour, then the resulting polka dots will also be a different colour, depending on the pigments used in the original dye on your jeans.

TIP: Test a spot on the inside waistband with a teeny bit of bleach to gauge the final colour of your polka dots, if you want to be sure about going ahead. If you don’t mind a bit of unpredictability, just go ahead and see what happens!

IDEA: Cotton buds work really well for polka dots. But if cutesy polka dots aren’t your “thang” then consider using other “stamps” to get larger polka dots or different shapes all together. You can buy stamps from craft stores or experiment with making your own. Cutting shapes out of sponges, felt etc or just look around your home for something semi absorbent that would make an interesting shape/stamp.

I also had a couple of queries about how I resized these jeans down 2 sizes. Let me tell you, I wouldn’t normally recommend sizing jeans down by that much. It was only because this started out as an experiment on an old pair of jeans that I’d out grown. But it turned into something that I really wanted to wear. Yes I have sized these down 2 sizes but the inside of the waistband is a bit of a mess if I’m honest. However, clearly it IS possible to do. There are alot of variables when it comes to how easy a pair of jeans are to resize. There are a few different places to apply any resizing.  It also depends on the level of finish that you can live with on the inside. I’ve been thinking for a while that I could probably explain my techniques for altering jeans a little more clearly than I have in the past. So maybe that’s an idea for a future post…

refashioning, Restyles

Refashion: Polka Dot Jeans

03/14/13

Today I finished up a little spring themed refashion. Spring because of the pastel tones and polka dots; and spring themed because I insisted on wearing this in the freezing cold today in a bid to tempt spring from it’s hiding hole. Dress for the weather you want, not the weather you have, is my new mantra 🙂 I am SO over this winter malarkey it’s not even funny! Anyhow, I took a plain pair of jeans, and polka dotted the life out ot them and took them in two sizes…what d’ya think?

If you follow my facebook page then you’ll know right away how I did this 😉 Heck, you can probably work it out by looking at the photos.  But for those of you who want a more in depth “how to”; bear with me while I sort through my photos! I have a new camera and am trying to get to grips with that AND a new editing suite. Gah! (I have been cussing ALOT today! Lauren would be proud ;). So my usual step by step will follow shortly. But for now, just wanted to share the after pics, as I’m a wee bit chuffed with this one….

UPDATE: TUTORIAL IS HERE

DIY, how to, jewelry, refashioning, repurposing, Tutorials

DIY: Crochet Chain Necklaces

02/25/13

I’m a bit in love with this technique. It’s popping up all over the internet and I really love the contrast of hard metallic chain with soft yarn. You could make a whole bunch of these to complement or contrast with your wardrobe colour palette. (Do you have a wardrobe palette?! Colours that tend to creep into your wardrobe time and time again?) The customization options are endless….

Anyhow, all you need here is an old chain necklace, a crochet hook that fits through the links in your chain, and some yarn of some description. I used embroidery cotton because it suited the size of my chain and I already had some in my stash. But you could use silk for a bit of luxury; and on chunkier chains you could use delicious merino knitting yarn. Yum! All we’re going to use here is a single crochet stitch. But you could experiment with double/treble crochet or even some of the more decorative crochet stitches… If you’ve never crocheted before, (although I know alot of you do!) trust me, it’s easy to learn; and you’ll be totally hooked (excuse the gratuitous pun, totally intended!!)

1. Start as with any basic crochet; with a slipknot/loop on your hook. Then pass the hook through the first link in your chain.
2. Yarn over the end over your hook as pictured
3. Pull through the chain link so you have 2 loops on your hook
4. Yarn over your hook again and pull through the 2 loops you had on your hook. First single crochet done!
5. Repeat in all links of the chain, right to the end.
6. Cut the yarn so you have a short tail. Open up the loop you have left on your crochet hook and pass the end of the yarn tail through it.
7. Remove your hook and pull the yarn tail  tight so the “knot” sits snug against your chain.
8. At both ends of your chain you’ll have a yarn tail. Put a small blob of superglue on both knotted ends. You want it to run a little bit onto the yarn tail too.
9. Once the glue is set hard, snip off the yarn tail, et voila!

My chain didn’t have any clasps so I added a little extender chain, a clasp, and a little drop at the back. But if you’re working with a necklace that you already have, of course you don’t need to worry about that part.  I also decorated my necklaces with some little bead drops that I made by threading the beads onto jewellery head pins and making a little loop at the top. Great little tute here for making beaded drops…

As you can see, you can create loads of different variations. I was limited to using the materials and colours that were in the pile of jewelery I was challenged to remake. But imagine these with turquoise, cerise, red ; chunkier chain in matt black, pewter, gold; and any manner of drops. Basically, just let your imagination go mad!

If you do end up making these, PLEASE let me know! I would LOVE to see what you come up with!

Me Elsewhere, refashioning, So Zo..., Zoe

Hop over to So Zo…..

02/17/13

I am a weeee bit late putting this post up because I’ve been a little busy this weekend filming for the TV Pilot. (I’ll have a little more info and sneak peaks on that for you this week. But shhhhh! Don’t tell anyone!) Plus I need to pick a winner for the Elisalex Dress Giveaway. Dammit, you lot are interesting, and quirky, and funny, and cool! (If you want to know what I mean then check out the comments section in the giveaway post. I had so much fun receiving all those interesting bits of info!). It’s making it super hard to pick a winner. But I promise I will sort that out this week too; now that the bulk of the TV stuff is done and dusted.

In the meantime I was totally flattered to be invited by Zoe (darn that girl is too cool for school!) to take part in an interview over on her blog as part of her fab Refashion Friday series….

If you haven’t seen it yet and are at all interested on reading my ramblings on charity shops, recycling and refashioning in general (plus a little peak into the chaos that is my thought process), then hop over to Zoe’s blog and say Hi!

I’ll be back tomorrow with the results of the giveaway and some more on the whole TV thing 😉

DIY, dyeing, refashioning, Thrifting, Tutorials

DIY: Tea Dyeing Silk

01/16/13

On the £1 rail outside our local charity shop, I spotted this bright orange silk top with a kind of Swiss dot texture to it. I was smitten with the silk and the style, but a little dubious on the colour. The before photo doesn’t quite capture how bright it was. It was REALLY bright. Since my freshly dyed hair can sometimes be on the bright side of ginger (depending if I’m in a red or ginger mood when I buy my hair dye 😉 I thought a bright orange top could potentially be a bit “clashy”! I prefer more earthy tones anyway so I needed to “mute” the orange. Luckily Marie’s post had reminded me of the ageing properties of tea on lace. (Thanks Marie!) Not too much of a leap then, to wonder what it’s effect would be on silk…..

I’d had a box of loose tea at the back of the cupboard for months. (I’d bought it by mistake instead of teabags.) I quickly whipped up a giant teabag using a J Cloth and let it steep for 10 minutes in 5-6 pints of hot water. Submersing the silk blouse in the tea solution, I let it simmer in a big pan on the hob, on a low heat, for about 40 mins, stirring every few minues. Then rinsed in cold water until the water ran clear and hung to dry….

To say I’m impressed with the result is an understatement. The resulting colour is right up my street. Really Autumnal. But beyond that, the even colour result is immaculate! Not a streak, blotch or tide line in sight. Compared to commercial hand dyes I’ve tried in the past it’s massively superior; and it’s just humble old tea!!
Rit and Dylon hand dyes have always turned out uneven for me no matter how much I stir it and keep it moving. When you consider the price of a commercial hand dye is £4-6, and that a pack of 80 Tesco Everyday Value teabags is 27p, well, nuff said! Plus, it’s non toxic so environmentally friendly AND gentle on the fabric.
Of course tea provides a limited colour palette of varying shades of, erm, tea colour, when using it on white/light coloured cloth. But if the garment has a strong base colour, like mine, it’s a great way of achieving a more muted shade and changing up the look a bit.
This process will work on any natural fibre. Silk, cotton, wool etc. I’d imagine with wool though, you’d have to be careful to let the solution cool a little as too much sudden heat on pure wool can cause it to felt.
Totally in love with tea dyeing now though AND it’s inspired me to experiment with a few more “store cupboard dyes” on some other garments. Coming soon!

DIY, refashioning, Restyles, Tutorials

Refashion a Peter Pan Collar

12/06/12

Hi everybody peops! Following on from my recent monochrome refashion, here’s a quick run down on what I did to that boring pointy collar….

Below: Use something round. Position it so that the drawn line will blend seamlessly with the stitched line around your collar edge. I used a biro on mine. The edges will be bound in the final step so it doesn’t matter that it’s visible; and it helps to have clear marking to follow too.

Above: In order to make sure I drew my curve in exactly the same place on the opposite collar, I took note of where my pen line hit my stitching line on both sides of my new curve. I marked the exact same measurements onto the opposite collar, and used the marks to help me line up my “circular object” (that’ll be my pin tin lid 😉 in exactly the right place. No-one wants a wonky collar, no matter how cool geek chic is!

Below: Begin stitching on top of the existing edge stitching of the collar, about a quarter inch before your pen line/curve starts. The idea is to seamlessly blend the old edge stitching with your new curve. Continue stitching all the way around, on top of your pen line/curve, and blend into the original edge stitching again at the other end.

Above: The purpose of the stitching is really to kep all the layers of the collar together and prevent the from fraying or flapping about while you’re working on them. Trim super close to the stitching and check the “balance” of your new collar. At this stage you could change the curve slightly, make the whole collar narrower etc. Just follow the same process (mark it, stitch it, cut it) again until you’re happy with the shape.

Below: When you’re happy with the shape, finish with bias binding in either a matching, coordinating or contrasting colour…

Newer Posts
Older Posts
Portia
Follow
Sewbox

© Copyright 2026. Portia Lawrie. All Rights Reserved. Managed by WordPress Web Dev Cornwall .