• About
    • Contact
    • Press
    • Sponsor
  • DIY
    • Home & Garden
    • Jewellery & Accessories
    • Yarn Crafts
  • Sewing
    • patternless & self drafted
    • Refashions
    • Commercial Patterns
    • Sewing Tips
    • Overlockers
  • The Refashioners

Portia Lawrie

DIY, how to, pashminas, refashioning, Restyles, Tutorials

DIY Pashmina Refashion – Number 2

09/18/13

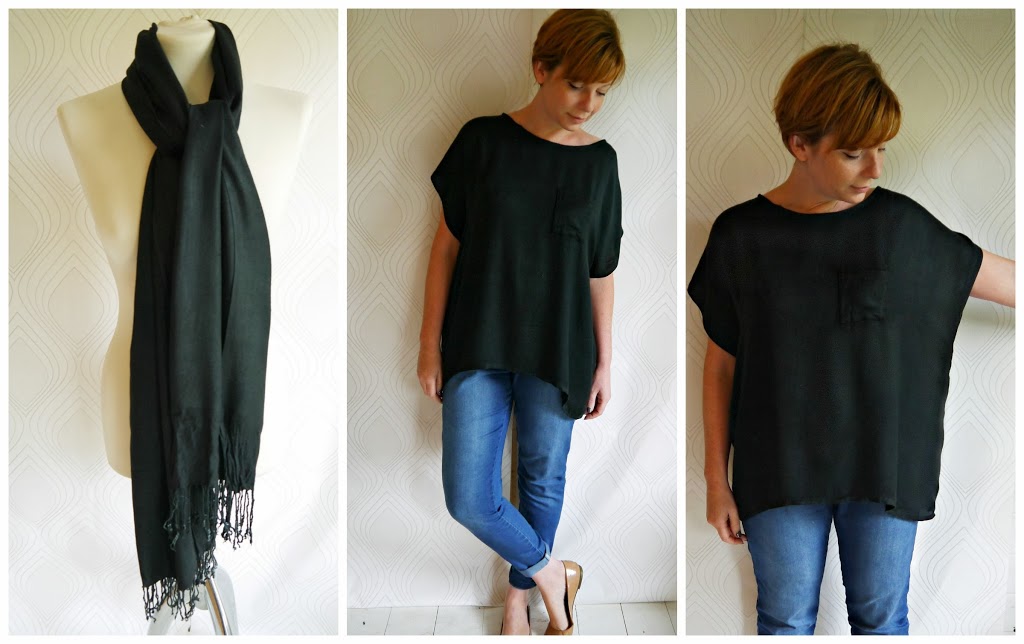
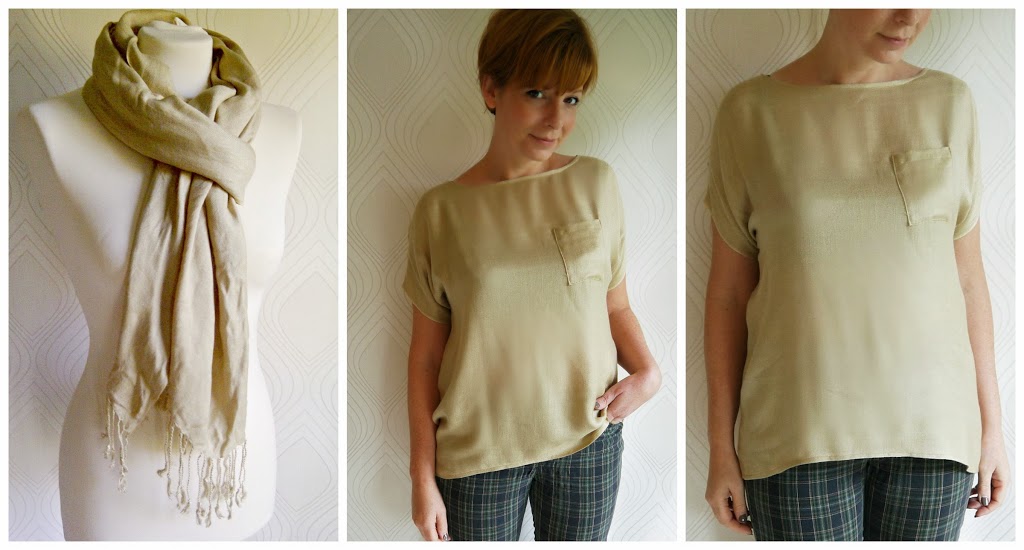
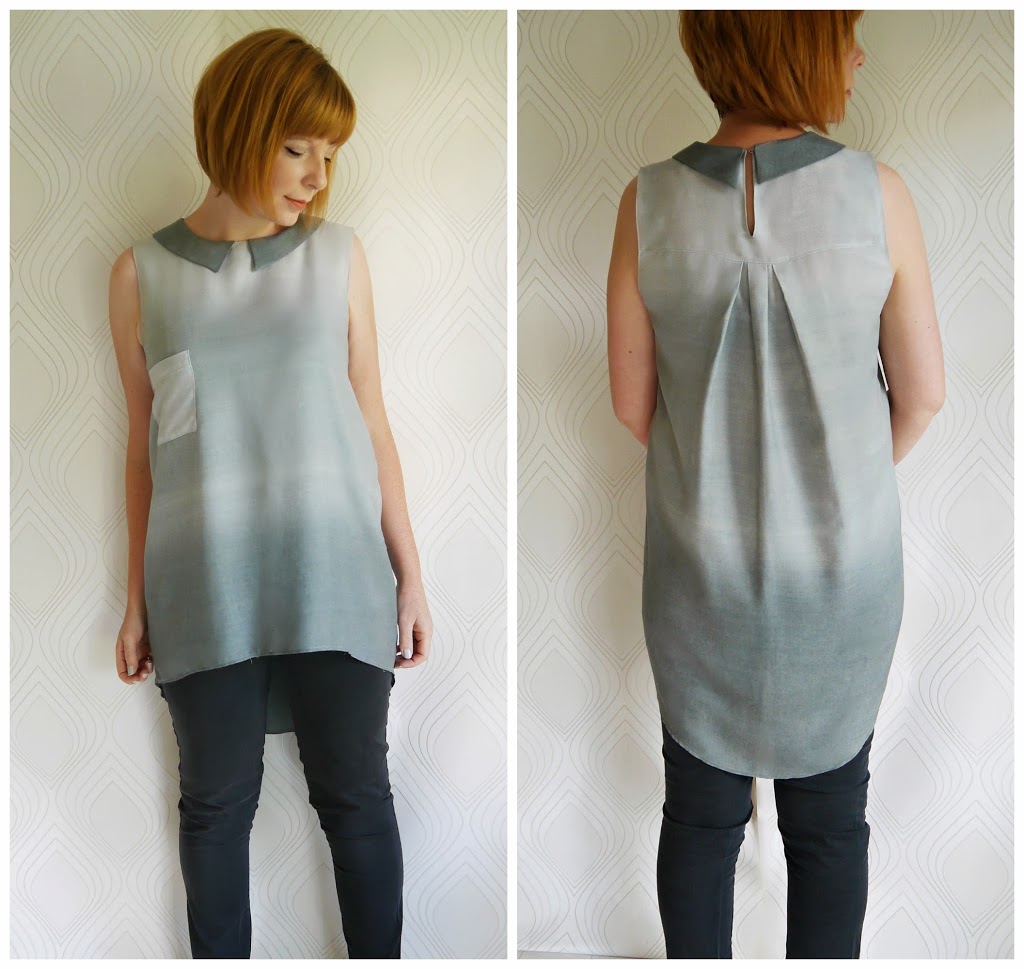
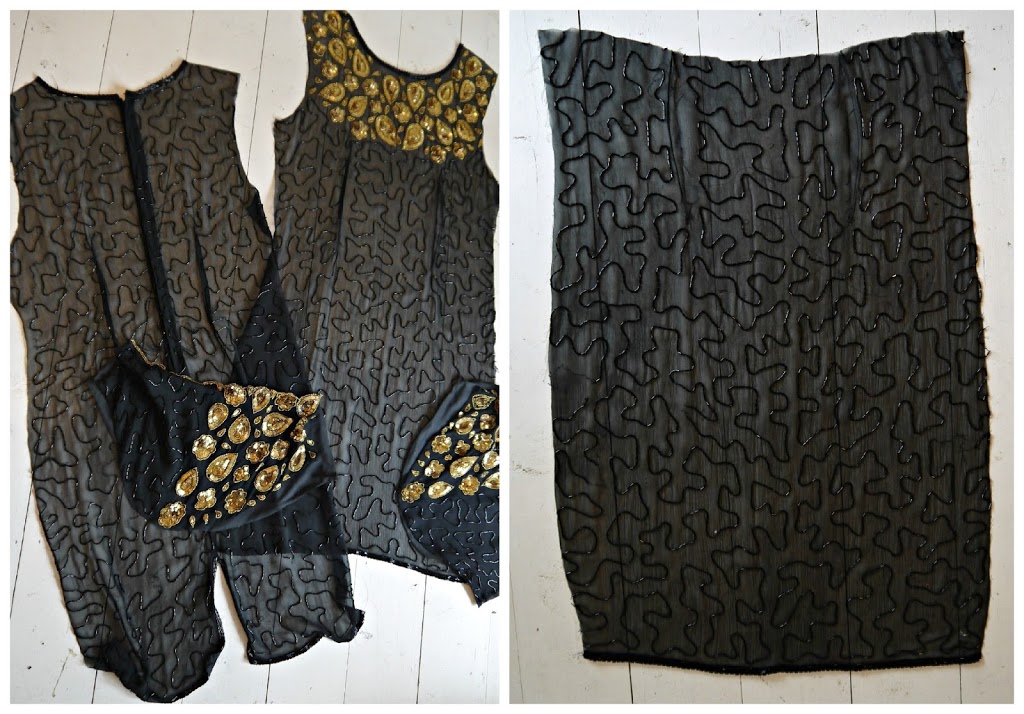
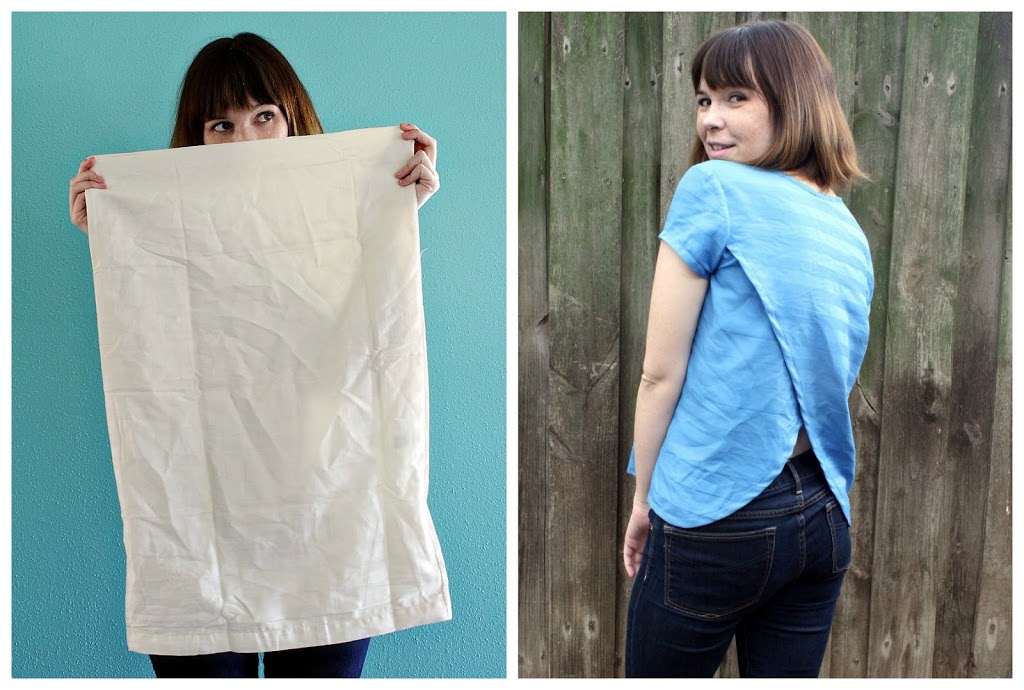
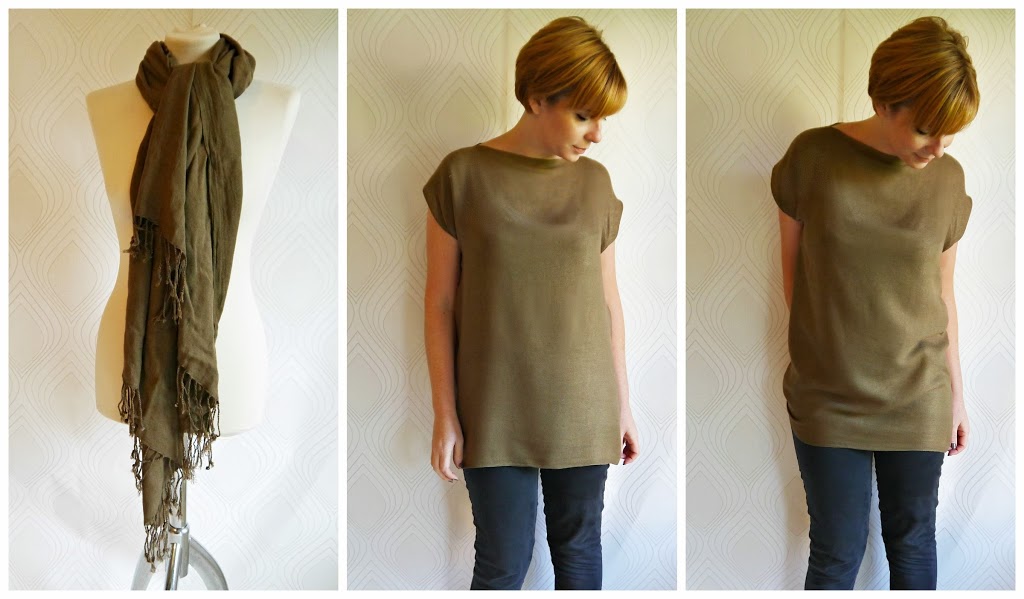
Ok, so onto the second of my 3 pashmina refashions! This one is similar to the black one in technique; except that instead of having the selvedges running down the side seams, the whole thing is rotated 90 degrees. So the selvedges on this tunic style top, run horizontally across the neckline and hem. So the only “finishing required on this make, are hemming the sleeves and finishing the side seam allowances…

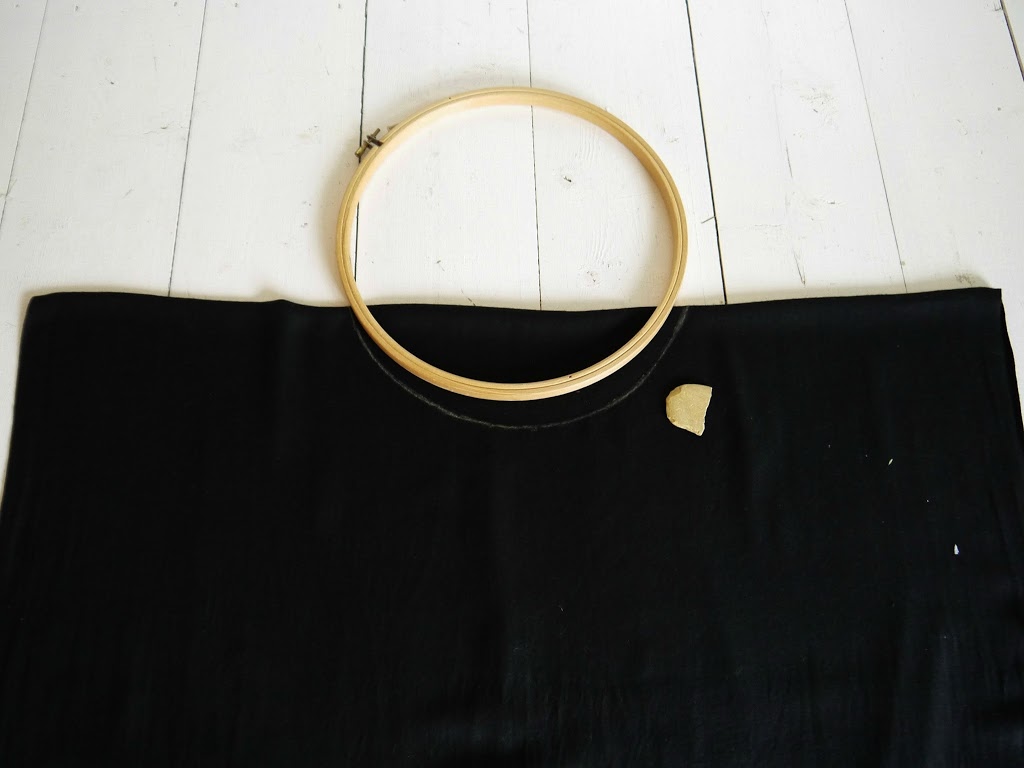
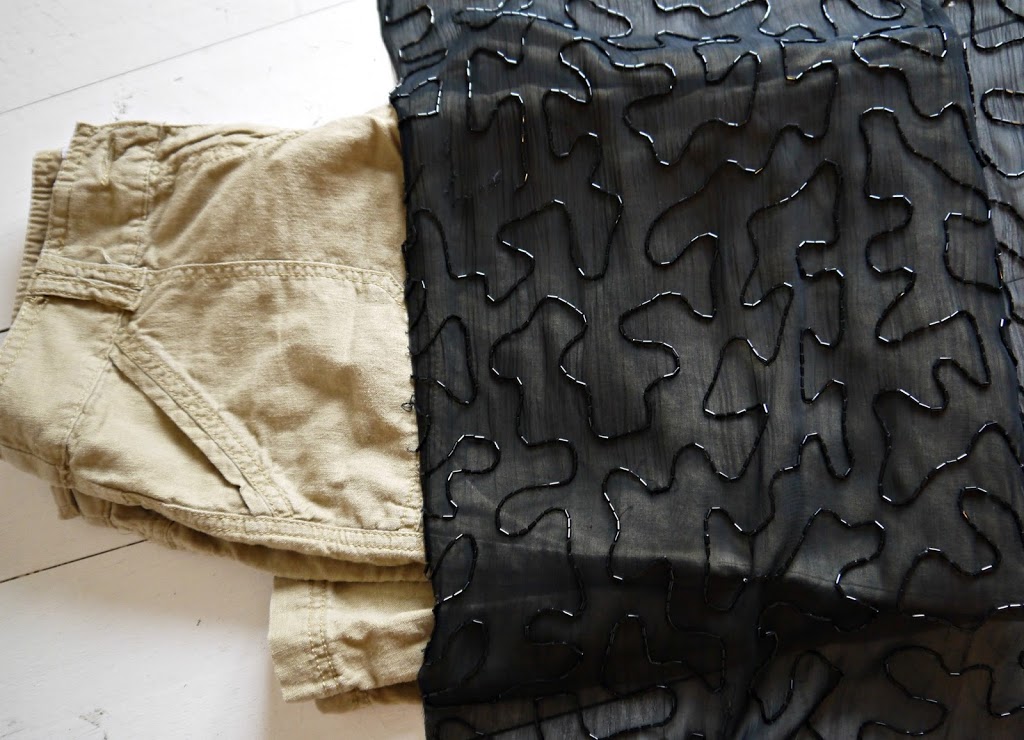
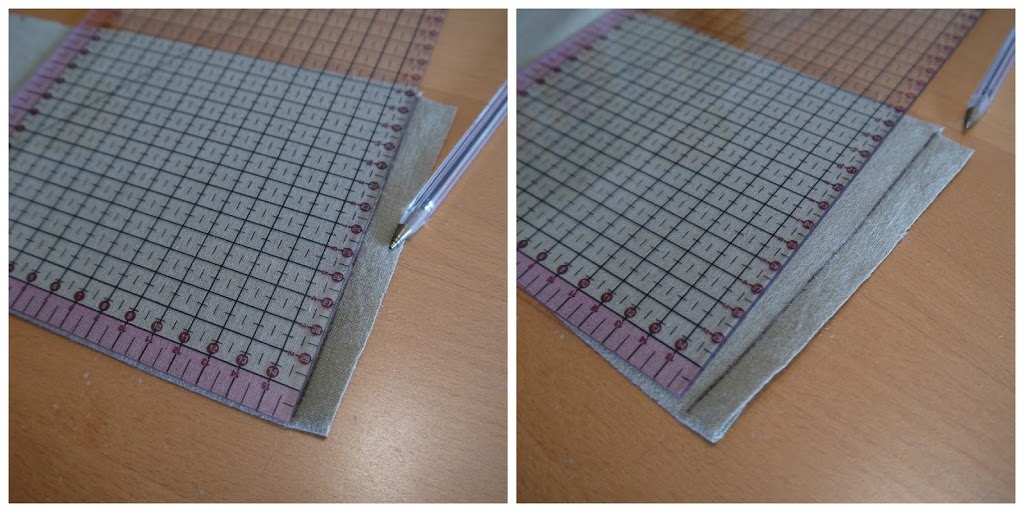
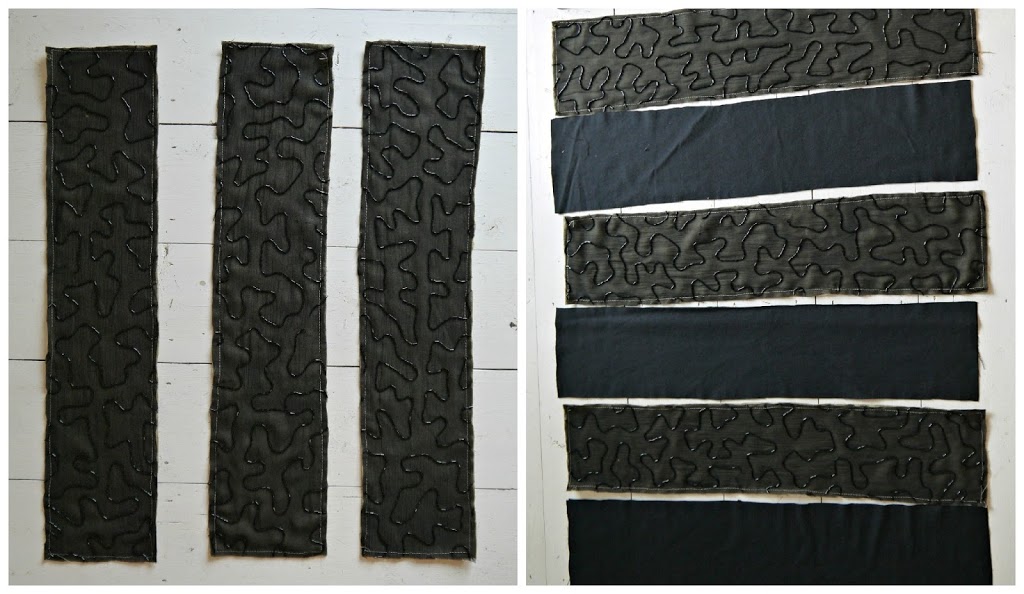
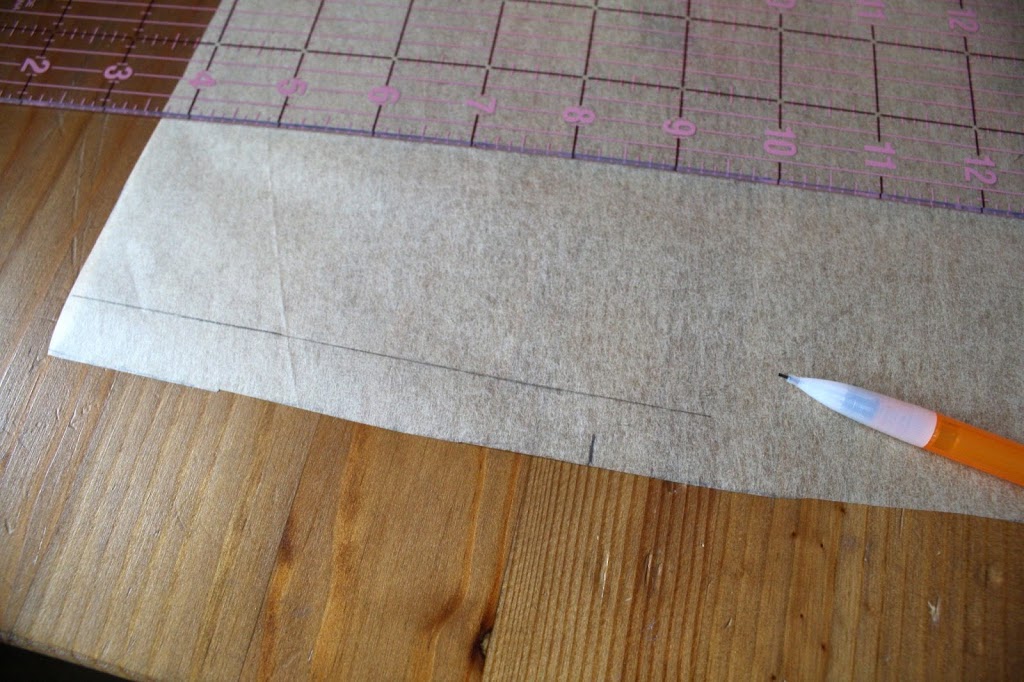
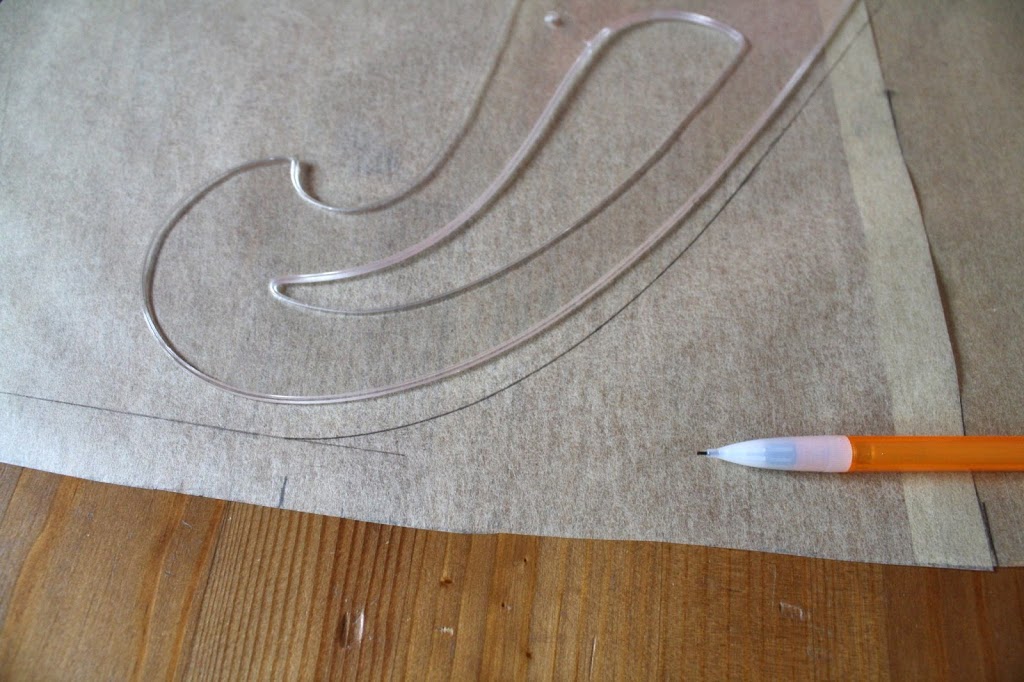
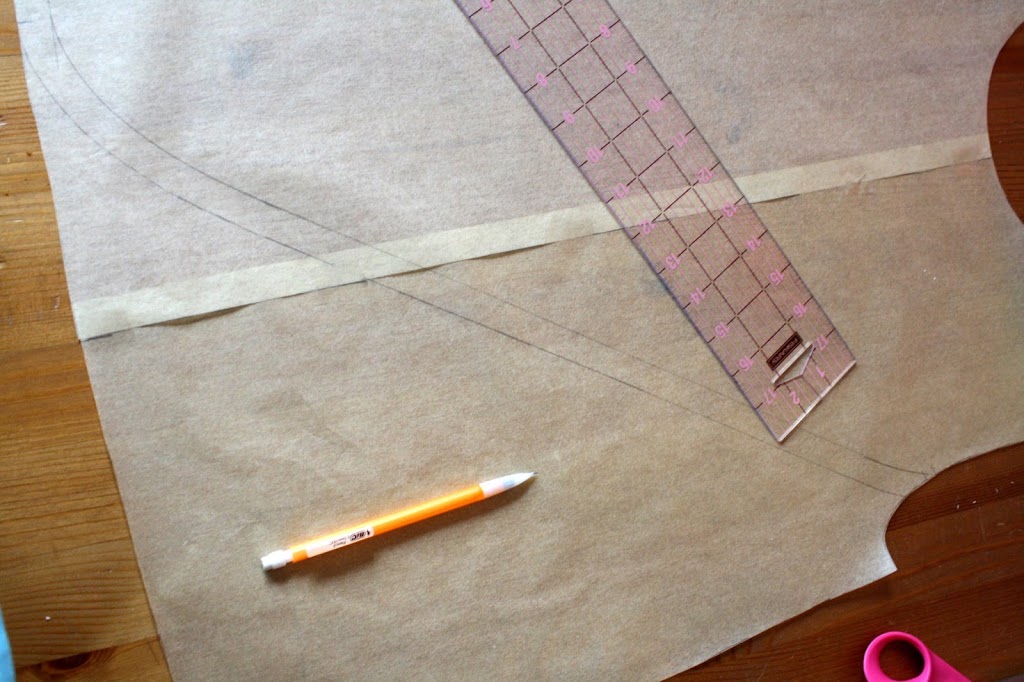
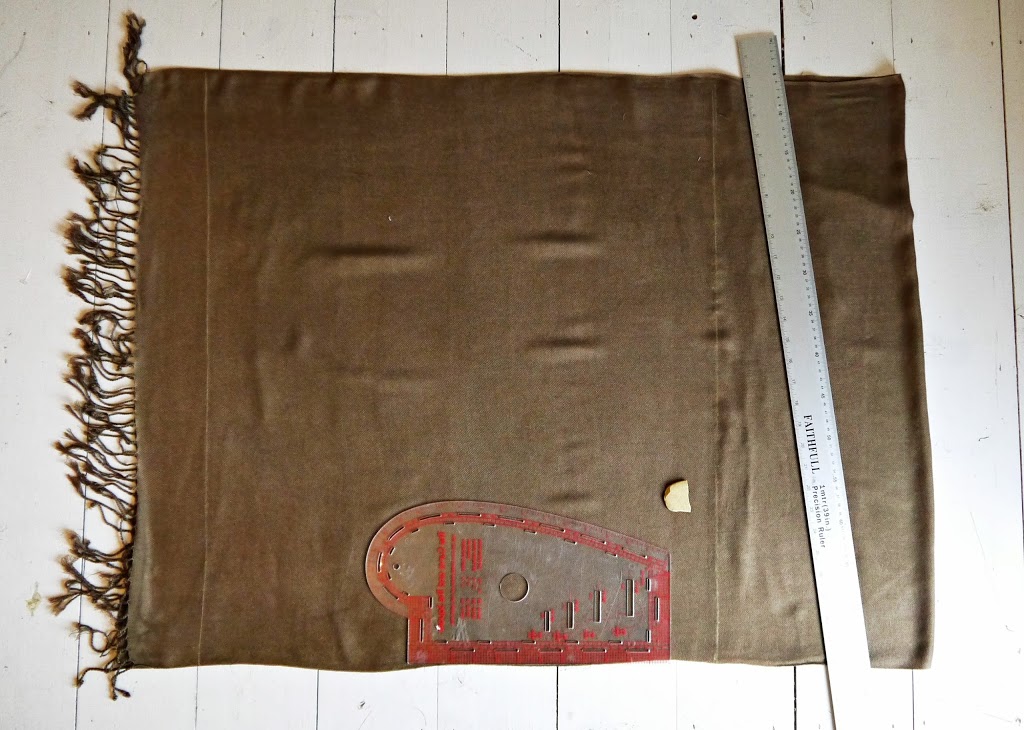
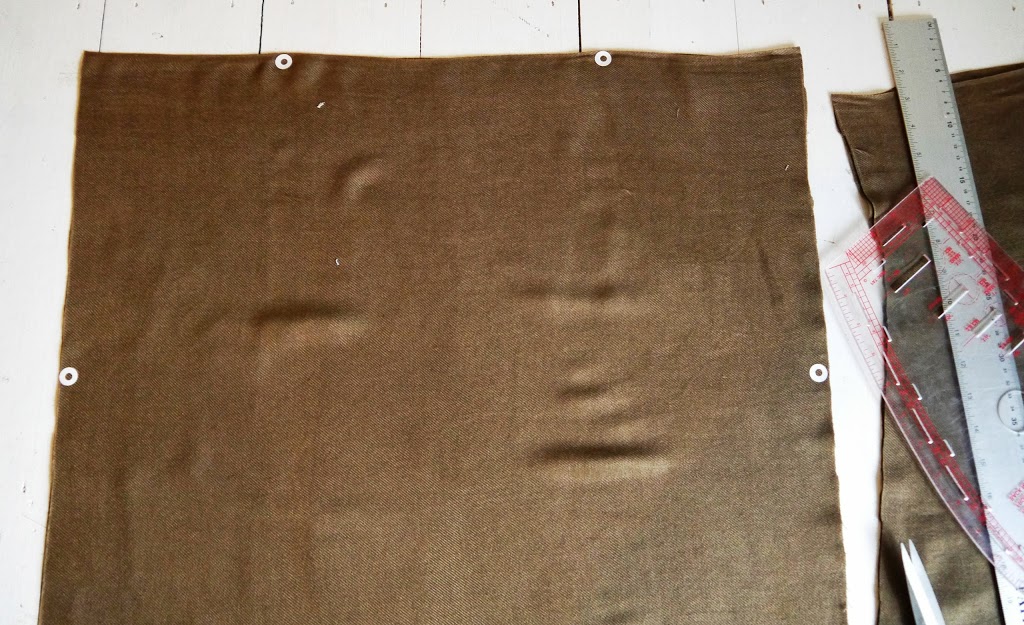
The length of this top was dictated by the width of the pashmina, selvedge to selvedge. The width was a calculation of my bust measurement + 3″ of ease + seam allowance. I divided this measurement by 2 and, with the pashmina folded in half (the folded edge is on the left of the pic and the selvedges run across the top & bottom of the pic) marked out the resulting square with chalk on my pashmina….

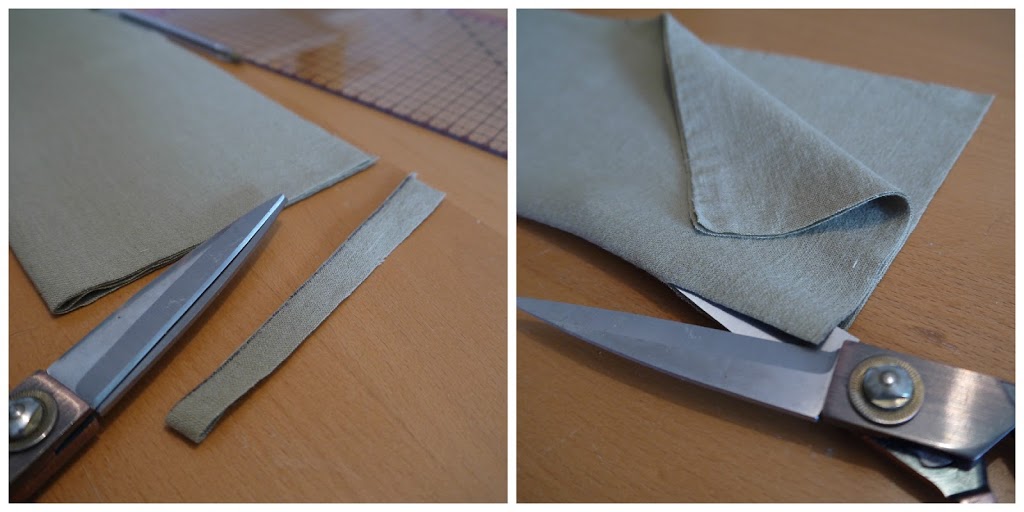
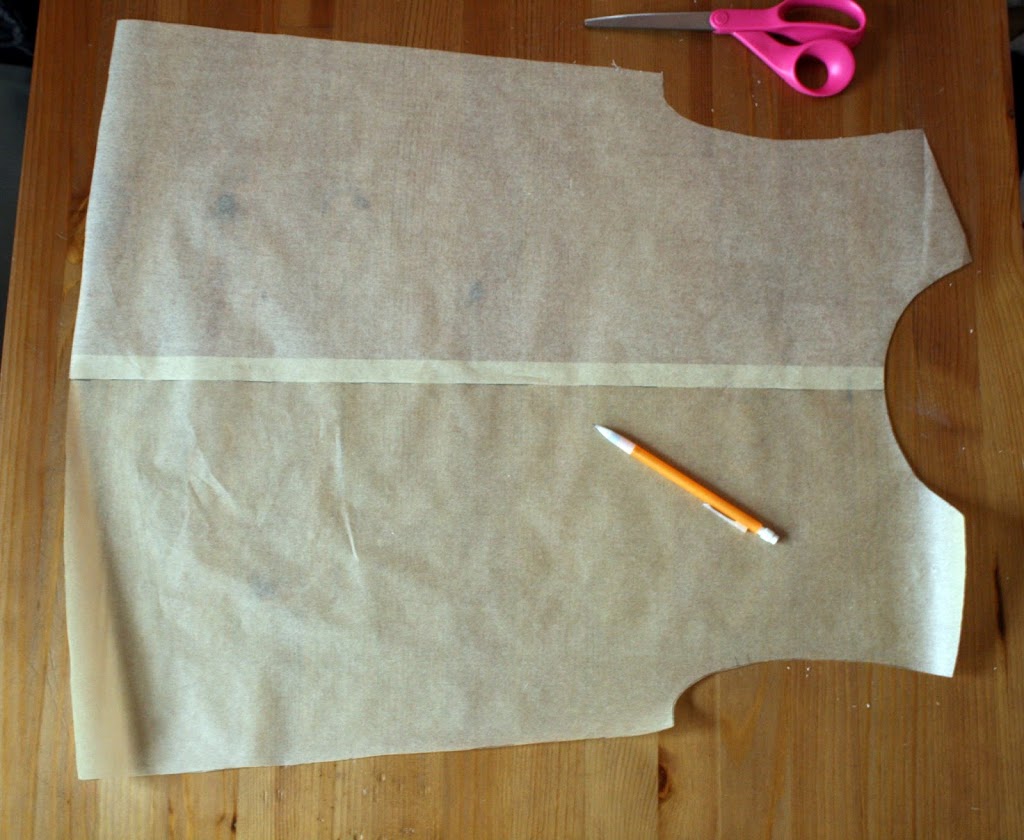
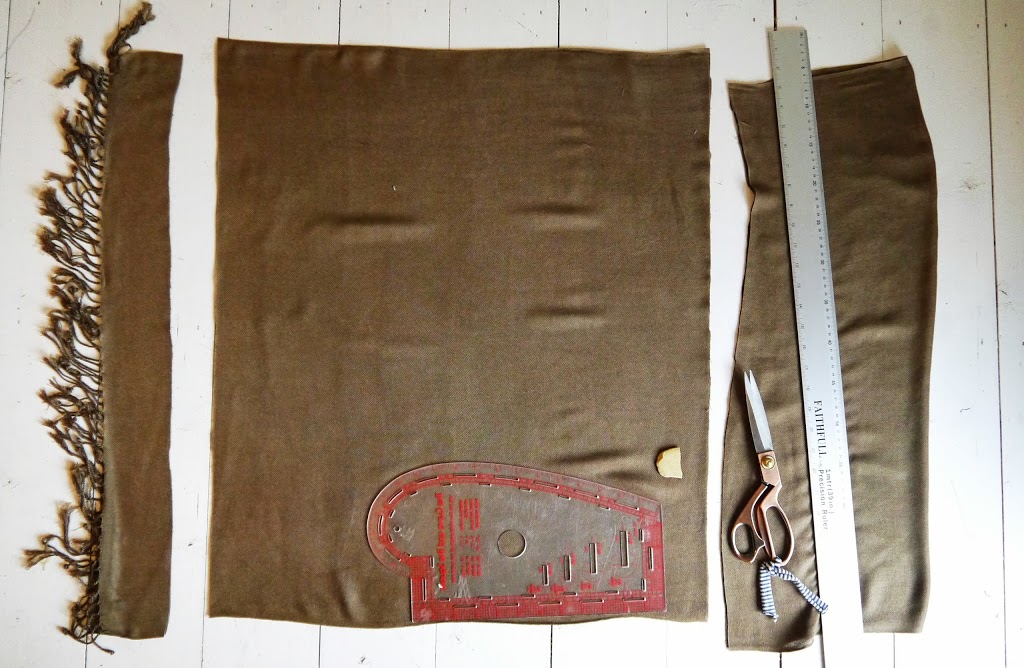
Cutting along the chalk lines I was left with 2 squares laying right sides together….
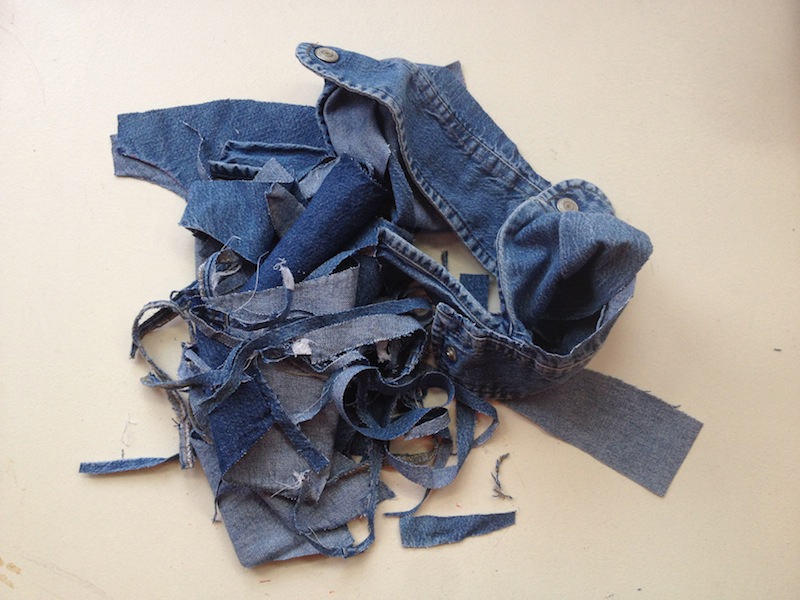
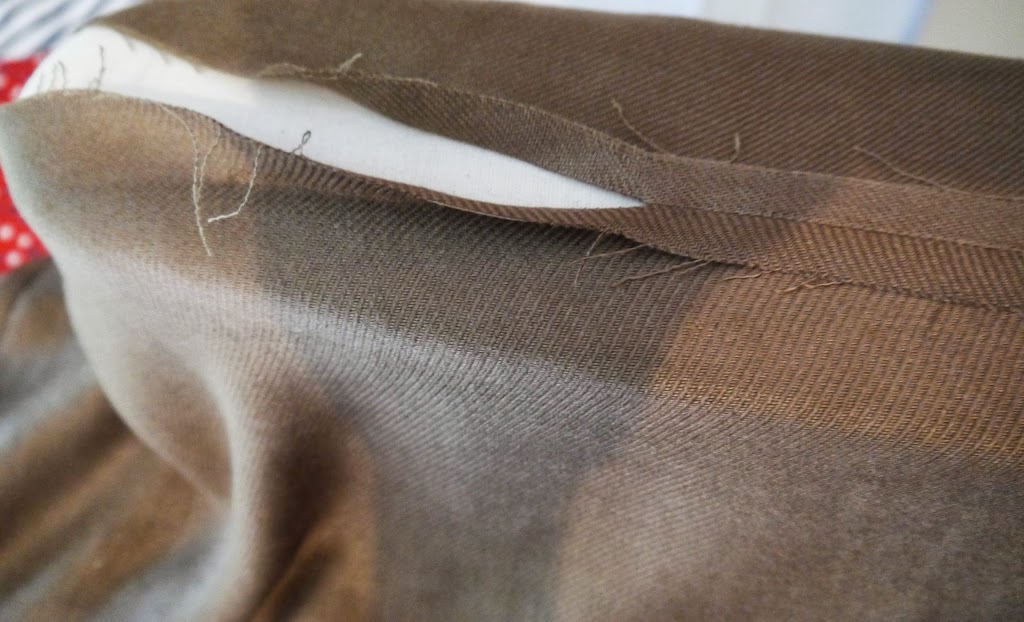
At this point I would urge you to learn from my mistakes and finish your side seams before beginning construction because it’s a bit of a pig to do it afterwards!

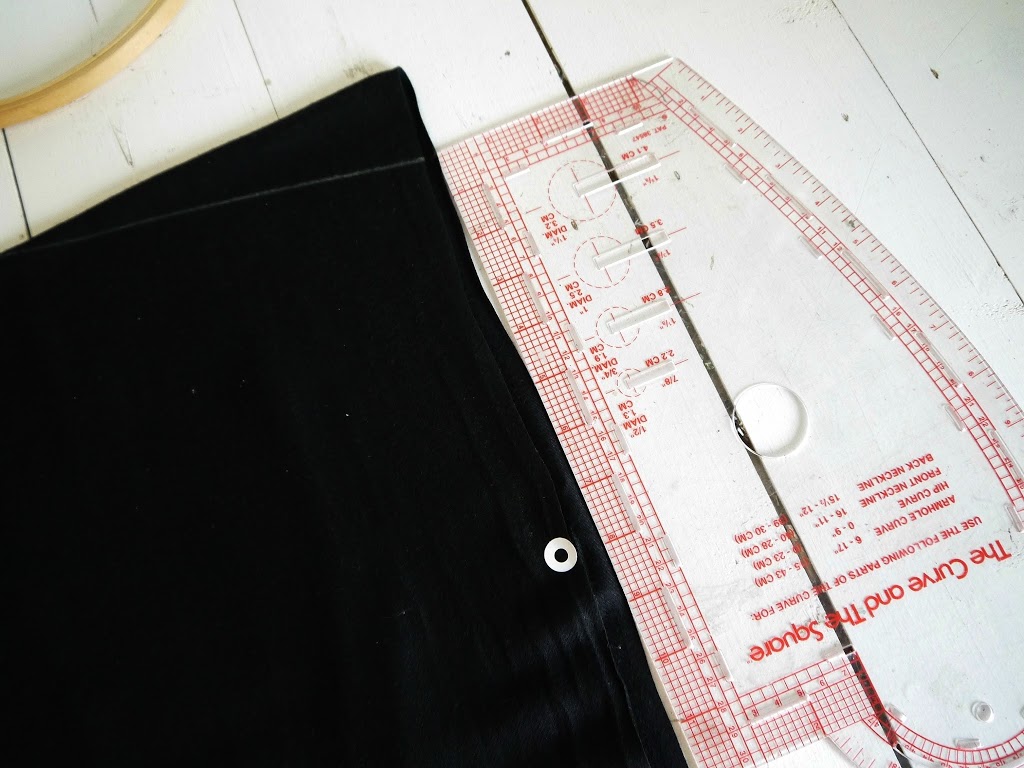
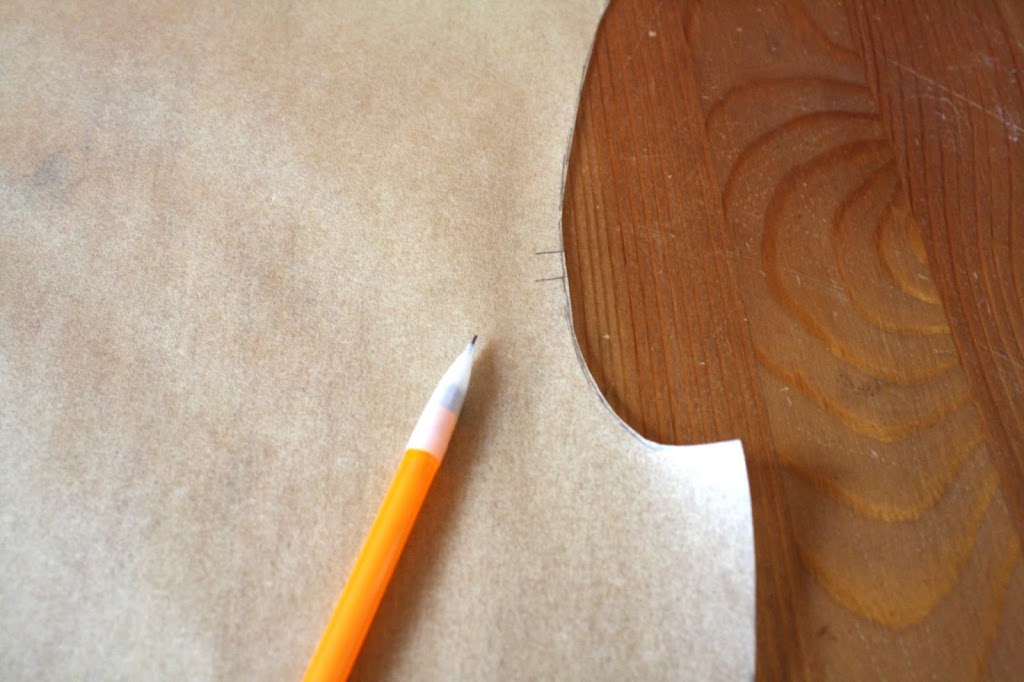
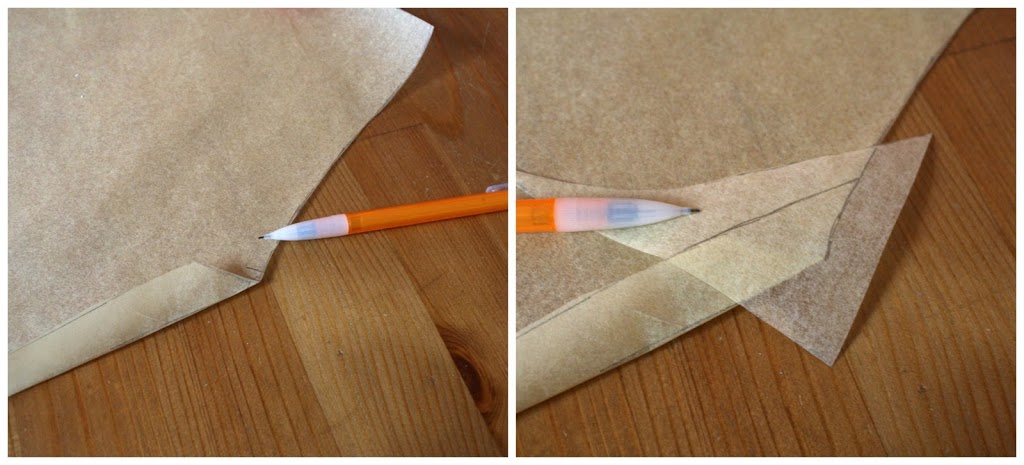
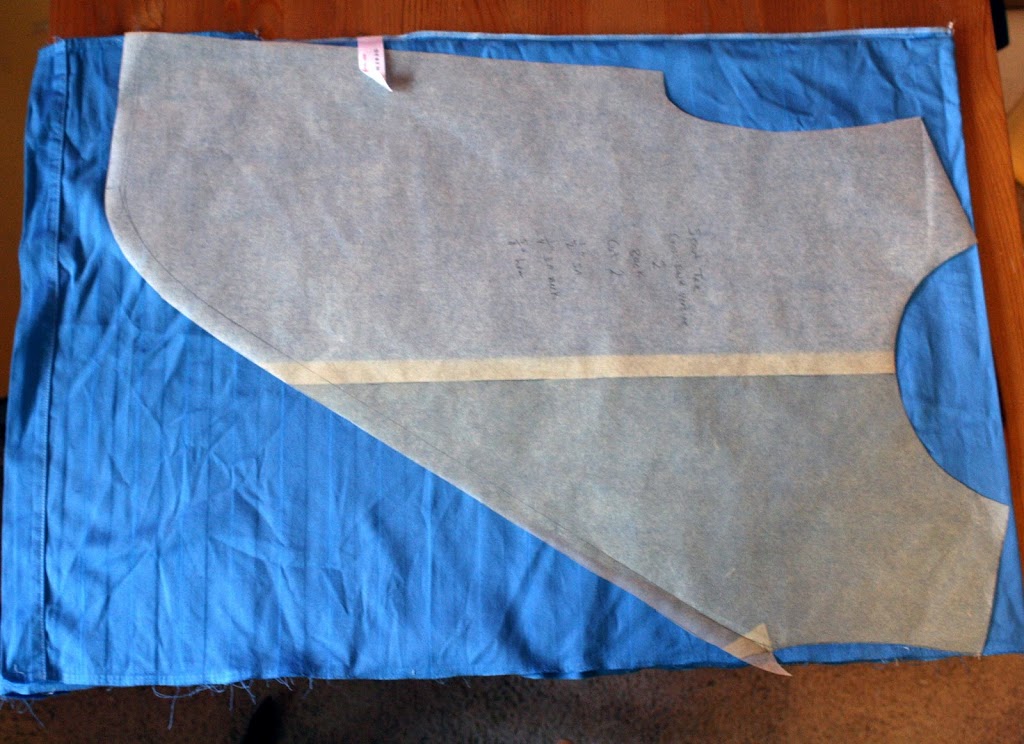
Using hole reinforcers I marked the positions of the neck and armhole openings (as per the black one)….

Construction is as follows:

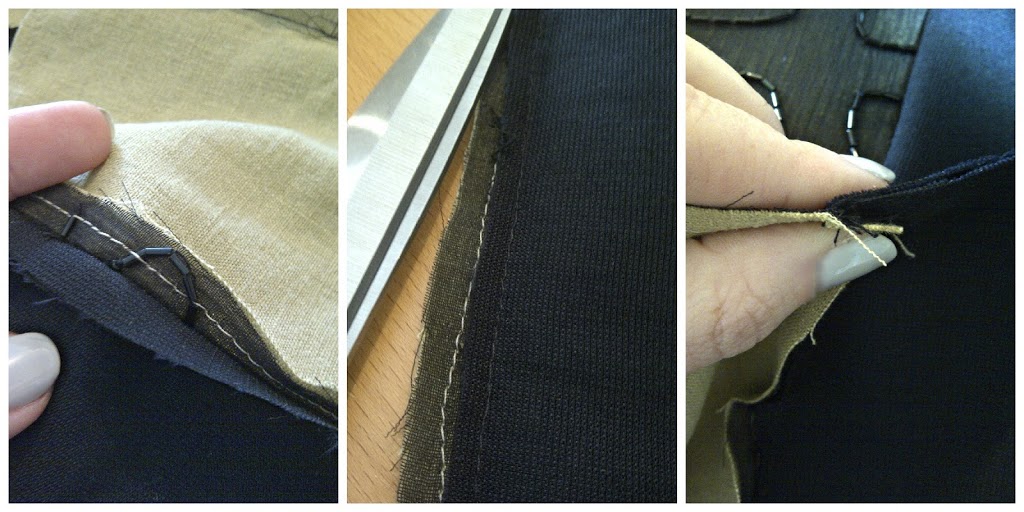
1) Sew shoulder seams and press seam allowances open (no need to finish seam allowances as this part is the selvedge)
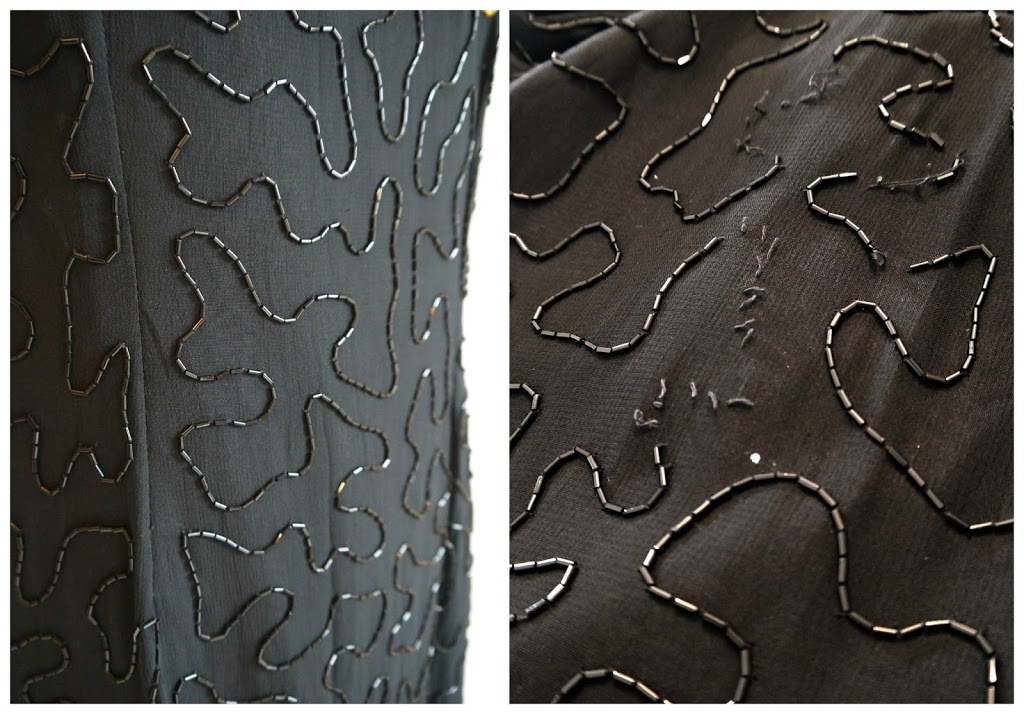
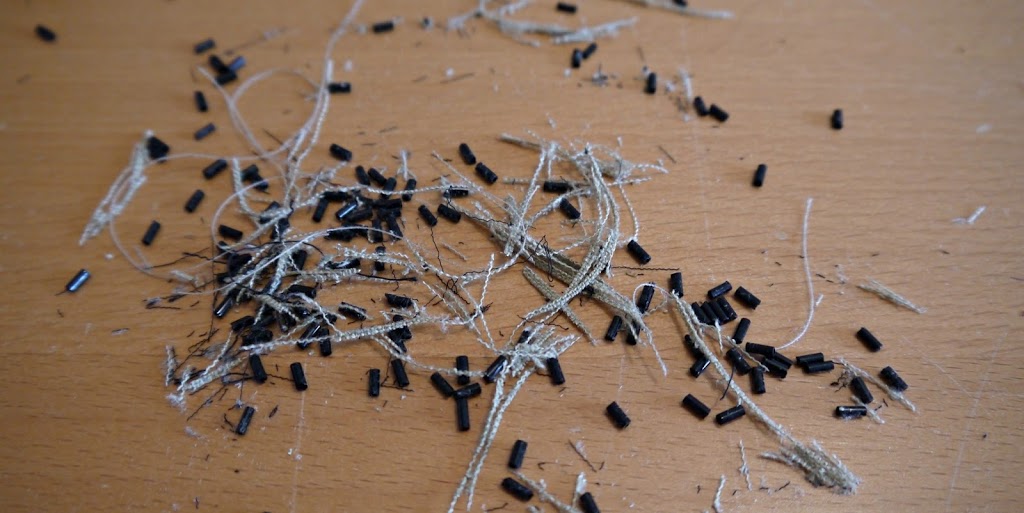
2) Sew side seams from armhole opening down to hem and press open (hopefully you’ll have already finished the seam allowances! Check out the fraying below!))
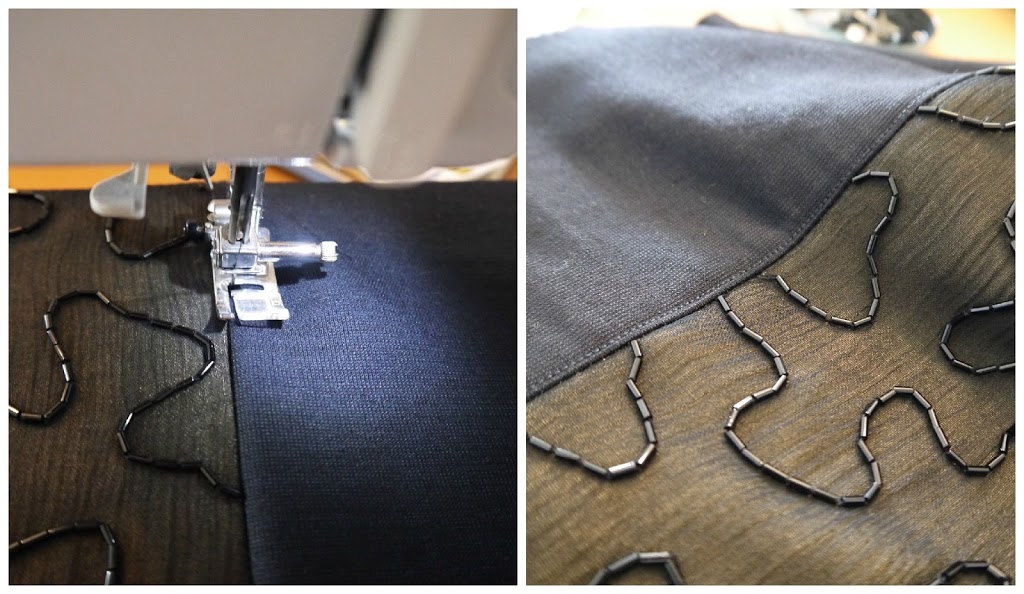
3) As you press the side seam allowances open the sleeve hems will naturally follow as they are an extension of the side seams. Press sleeve hems over all the way around and topstitch down.
4) You don’t need to finish the hem because it’s a selvedge. But you could turn it under and topstitch down for a neater finish.

Done!

DIY, how to, pashminas, refashioning, Restyles, Thrifting, Tutorials

DIY Pashmina Refashion – Number 1!

09/16/13

I think of the 3 pashmina refashions I posted about last week, THIS is my favourite! In a less drapey fabric, making a top that is essentially a huge square, could run the risk of swamping me and making me look huge. But because pashmina fabrics are generally so soft and drapey they fall really nicely and, unless you walk around with your arms held out to the side, you wouldn’t know it was just a simple square shape….

Essentially, I started by folding the pashmina in half, tassled ends together and folded edge at the top. (This photo is actually sideways on. So the folded edge is to your left) I’m using the full width of the pashmina to give me that really slouchy/drapey feel. So the selvedges of the pashmina will become my side seams. Because they are selvedges, I won’t need to hem the sleeves or finish the edges of the side seams. (Less work! Yay for that!) From the folded edge, I marked out the length I wanted + 3″ and cut the excess off from the tassled bottom end. (on the right in this photo). So I had basically, a rectangle of pashmina fabric, folded in half to make a square….

Ok, so now we’re looking at this the right way up. The folded edge along the top. I used an embroidery hoop centred on the folded edge, to trace my neck hole. (You could use an existing garment also, or anything round of the right size. Plate, bowl etc). The shape and size of your neck hole is basically down to personal preference and/or the size of your head! I’d suggest measuring a top you already have to get a rough idea of the dimensions….

Mark a point 1.5″ –  2″ down (depending on how much of a slope you want in your shoulder) from the folded edge on each side/selvedge. Then join each side point to the edge of the neck hole you just marked to create your shoulder lines….

Mark down from your new shoulder line, where you want your armhole opening to finish. (I used my trusty hole reinforcers to avoid marking this part with chalk). Again, measure an existing garment to get an idea of the size armhole you need. My finished armhole is about 8″. Don’t forget to take account of seam allowances. I moved this dot down another inch after this photo was taken because I forgot to add SA initially…You can always err on the side of caution and mark them quite large, then sew up the side seams a bit more if you want the openings a bit smaller after you’ve tried it on…

Cut along the shoulder and neck lines you marked. You now have 2 pattern pieces,with selvedges running down the side….

Construction is as follows:

1. Sew shoulder seams, press open, finish raw edges.
2. Finish neckline using bias tape as a facing. Good tute here or here.
3. Sew side seams from the armhole dots, down to the hem. (no need to finish any raw edges as they’re selvedges!)
4. Hem, and you’re done!

Oh, and I added a patch pocket from my Roxanne pattern just as a finishing touch….

Because of the way this particular make hangs when it’s worn, (mostly due to my “ladies”!) it naturally forms a high/low hem…..

TIP: Pashmina  fabric frays like hell. So work quickly and finish any raw edges quickly and securely. Possibly even before you begin constructing.

TIP: Check  fabric content/label.  Pashminas often contain wool/cashmere etc and may shrink in a tumble dryer. This black one did shrink a little in length after the first wash.

TIP: Use the correct needle for the weight of fabric. Pashmina fabric is suprisingly fine when laid out flat. I used a “sharps 60”

TIP: Use a walking foot. Pashmina fabric is not only surprisingly fine, it also has a relatively loose weave. The walking foot ensures the layers are pulled through at an even rate and not distorted.

So, what do you think? Are you gonna give this a try? I’d love to see them if you do! I shall certainly be on the lookout for some more pashminas to make some more of these! Soooooooo comfy….


finished garments, refashioning, Restyles, Thrifting

Refashioned: Pashminas 3 Ways

09/12/13

In my previous post I mentioned I had completed 4 garments in pursuit of some slouchy tops for Autumn. Inspired by the images in this post. Well, 3 of them are refashioned from simple pashminas!

All 3 involved slightly different approaches to cutting, shaping and finishing. I’ll be sharing details of each one in separate posts next week….which should give you time to grab some pashminas either from your local charity shop (if you don’t already have some lurking that is!). These 3 cost me between 50p – £1 each. Bargainous huh?!

finished garments, Giveaways, refashioning, roxanne, Thrifting, victory patterns

FO: Ombre Roxanne (+ Giveaway!!)

08/08/13

So actually this is a refashion AND an FO in one. I found the ombre dyed sarong in a charity shop for 50p and immediately thought of the Roxanne pattern (from Victory patterns) that was sat in my sewing queue…

I had to make a few adjustments. The thrifted sarong didn’t afford me as much fabric as I needed for a completely faithful version of this pattern. The fun triple pleat collar became a more simple and classic single collar. Which I like. The deep folds eminating from the back yoke became much much shallower AND I had to remove some of the flare to fit the pattern pieces onto the fabric I had. Whilst Ideally I could have done with a bit more fullness across the back pleats, it juuuuuust about works. (Just!). Of course this pattern also sports my personal fave, the asymmetric hem….

Without the alterations this pattern has ALOT of volume. So think drape, drape, and more drape when selecting a fabric for this make. Also of note, I am a D cup and from the side this is borderline “bust shelf” territory for me.  I love the neckline detail in this pattern in particular and whilst I was initially disappointed I couldn’t squeeze out the pieces for a triple pleat collar, I actually rather like the simplicity of how this turned out. This comes together really easily, and apart from the collar is very beginner friendly. Attaching the collar had me scratching my head to begin with. It’s a slightly different technique to standard collar insertion. But actually VERY clever and makes for a super neat finish inside and out. Nicely drafted with some clever little finishing and construction techniques across both versions…I LIKE!

Oh and guess what? If you like the look of Roxanne, (This is how she should look) then read on….

The lovely Kristiann, (founder of Victory patterns, my first ever sponsor and all round gorgeous gal) is offering one of you the chance to win your own copy of Roxanne + one other pattern of your choice from their range! Shazam! Simply hop on over to Victory Patterns and have a mooch; then leave a comment below stating which of their patterns floats your boat the most. Simples!

The giveaway is open worldwide and closes midnight GMT on Sunday 18th August with the winner announced on Monday 19th August 🙂

**Now Closed**
Have a great weekend!

finished garments, refashioning, Sewing, Thrifting

FO x 2: Polka Blouse & Jeans Outfit Refashion

07/18/13

One of the things I like about refashioning a whole outfit at one time, is that it avoids wardrobe orphans! Having said that, these two will make versatile basics interchangeable with any number of seperates. This top is so light and cool. Perfect for the gorgeous hot weather we’re FINALLY experiencing here in the UK. Woo Hoooooooo!! The berry coloured skinnies? Well I can see these being in heavy rotation during the Autumn & Winter months…

polka-blouse-2526-jeans-refashion

The jeans got skinnified in my usual way. The top is pretty self explanatory I guess. But just in case it’s not clear from the pics; I removed the sleeves completely; sliced up the side seams and repinned them under the armholes to counteract the fact that the front armhole had become the back armhole.(Simply turning a top around and wearing it back to front can make for the armholes sitting weirdly at the front) I then restitched the side seams, recut the neckline and finished with bias binding made from the sleeves. Simples! Elliott was very insistent the other day that Mummy had her top on the wrong way round, lol!

DIY, jewelry, refashioning, the refashioners, the refashioners 2013, Tutorials

DIY: Bugle Bead Multistrand Necklace

06/24/13


So here is the 2nd of two jewelry pieces I made as part of The Refashioners 2013. (You can see the tute for the first one here) Again, because of the use of black glass bugle beads in this make, it has an overall 1920’s feel. I love how this one turned out, and although threading all those beads was a little time consuming, it really is very straightforward!

To begin, attach multiple strands of monofilament/beading thread to the looped end of a piece of jewelry wire. I attached 2 lots of 8 strands and used crimper beads to hold them in place. Thread your beads onto each strand in turn (to your desired length), securing the end of each strand with a knot before you move onto the next…

Gather all your loose ends together and secure to an identical piece of looped wire. So now you have two identical “ends”.You can buy “end cones” like these, but I made my end cones by wrapping wire around my round nosed pliers. Slide them over the looped wire ends so they are snug; and finish the ends with a loop to hold in place. Then add your chain!

A great way to showcase simple glass beads which almost always looked most effective when  strung “en masse” like this 🙂


DIY, jewelry, refashioning, the refashioners, the refashioners 2013, Tutorials

DIY: Bugle Bead Fringe Torque/Necklace

06/19/13


This is the first of two necklaces I made as part of The Refashioners 2013. I have shed loads of these black glass bugle beads left so don’t be surprised if a few more makes crop up over time! Bugles lend themselves brilliantly to fringing and are kind of synonymous with the whole 20’s vibe (think flapper dresses and The Great Gatsby) and I really like the contrast of silver and black. I also really like the look of torque necklaces, but always find they sit a bit funny on the collar bone. Of course, I’ve probably got weird collar bones! But in any case, I decided to try making a “1/2 torque” with a chain extender. And hey presto, it sits rather nicely! Here’s what I did…

In addition to the black bugle beads I used some silver ball head pins and tiny silver spacer beads. I threaded the bugle beads and spacer beans onto the head pins and finished with a loop…

Next take a length of medium gauge jewellery wire and shape around a round object….

Thread on your bugle fringe lengths, interspersed with more of the silver spacer beads…

Finish the ends of the torque with loops and add your chain….

And there you have it!

DIY, jewelry, refashioning, the refashioners, the refashioners 2013, Thrifting, Tutorials

The Refashioners 2013 – Me!

06/16/13

Well peops…today is the 11th and final instalment of The Refashioners 2013! I don’t know about you, but the past fortnight of guest posts from some of the blogosphere’s most talented and ingenious stitchers has left me gobsmacked and inspired in equal measure. It’s been an honour to host these ladies here on my little ole blog and I’ve been so gratified by all the hard work that they’ve put in, AND the fantastic response the series has received from all of you out there in blog land.

But just in case any of you were under the illusion that I had managed to side step my own challenge and sit back while the others racked their brains as to what to do with the items I sent them….fear not! Sally very kindly sent me my very own little mystery package to transform; and my jaw kinda hit the floor when I saw what was inside! A rather showy little beaded number! This project was a challenge for me, not least because my “style” (if you can call it that!) has never been particularly showy or embellished. So what to do? How to incorporate all that beading in a slightly more subtle incarnation? Enter the “bumble bead” skirt!

Refashion Inspiration! Don't miss out on the new upcoming series of The Refashioners at www.portialawrie.co.uk

I’ve been inspired recently by colour and texture blocking. So I decided this was the perfect opportunity to try out an idea that’s been buzzing around in my head for a while. This outfit heralds a couple of rarities for me. Legs out, heels on, and much more dressy than my normal uniform. Although I feel a little at odds being “dressed up”, I’m rather pleased with the overall look, and the finished garment. The bugle beads lend themselves rather nicely to what feels like a kind of 20’s vibe with a modern twist…or is that just me??

Refashion Inspiration! Don't miss out on the new upcoming series of The Refashioners at www.portialawrie.co.uk

This garment had it’s technical challenges from the outset. The beads are sewn in a continuous undulating pattern onto a top layer of chiffon. The problem with this kind of embellishment is that once a thread snags/breaks…you’re likely to lose whole lengths of the beading. There were several “bald” patches (like the one below right) around the dress. Add to that the prospect of cutting and sewing across beads, and, well…let’s just say , I was nervous about this one! I wish I could have included audio with this post. So you could hear the sound of the pitter patter of beads hitting my sewing room floor at pretty much every stage of this make….

Refashion Inspiration! Don't miss out on the new upcoming series of The Refashioners at www.portialawrie.co.uk

I decided to make a feature out of the beaded chiffon. So my first step was to deconstruct the dress(below left), remove the lining (set aside for later!) and  figure out what workable pieces of chiffon I had. In the end it was the front panel that gave me the most options because most of the beading was intact and it was the largest piece of beaded fabric uninterrupted by seaming/zips etc (below right)…

Refashion Inspiration! Don't miss out on the new upcoming series of The Refashioners at www.portialawrie.co.uk

While I wanted to make a feature of the sheer fabric…I didn’t want it to be see through. So I nabbed a pair of sandy coloured linen trousers from my refashioning pile to see how it would look as an underlining to the chiffon…that’ll do then!

Refashion Inspiration! Don't miss out on the new upcoming series of The Refashioners at www.portialawrie.co.uk

From one of the trouser legs I set about making my panels. After cutting along all of the side seams I was left with 2 large oblongs. I folded then in half lengthwise and squared off all the edges….

Refashion Inspiration! Don't miss out on the new upcoming series of The Refashioners at www.portialawrie.co.uk

Cut along my squared off lines and then along the fold…

Refashion Inspiration! Don't miss out on the new upcoming series of The Refashioners at www.portialawrie.co.uk

This gave me 4 linen panels…(in the end I only used 3)…

Refashion Inspiration! Don't miss out on the new upcoming series of The Refashioners at www.portialawrie.co.uk

I pinned these to the underside of my beaded chiffon…

Refashion Inspiration! Don't miss out on the new upcoming series of The Refashioners at www.portialawrie.co.uk

Now to stitch the underlining panels to the chiffon. I opted to sew with the beads facing upwards because a) I didn’t want the beads  getting ground up or falling into the feed dogs of my machine, and b) I could better see what I was doing. If the needle hits those beads at the wrong speed/angle then the needle is history and/or you have bits of glass bugle bead shattering everywhere. (Just trust me, ok!) I opted for a long stitch to give the needle a better chance of skipping over the beads rather than through them. For the most part, this strategy works. (Only one broken needle) But, GO SLOW! Very, very, very slow…and watch the needle on every downstroke. If it looks like it’s gonna hit, stop, lift the presser foot and adJust the position of the fabric oh so slightly, then carry on….

Refashion Inspiration! Don't miss out on the new upcoming series of The Refashioners at www.portialawrie.co.uk

Voila, underlining stitched to beaded chiffon…

Refashion Inspiration! Don't miss out on the new upcoming series of The Refashioners at www.portialawrie.co.uk

Trim close to stitching. It was tricky to cut this as every inch or so my lovely (once sharp) dressmaking shears would snag on a bead (man it sets your teeth on edge when stainless steel crunches on glass beads!). So again, it was a slow process, adjusting the angle of the cut ever so slightly to avoid the beads…

Refashion Inspiration! Don't miss out on the new upcoming series of The Refashioners at www.portialawrie.co.uk

My floor is covered in this stuff!

Refashion Inspiration! Don't miss out on the new upcoming series of The Refashioners at www.portialawrie.co.uk

Anyway, finally 3 underlined panels (below left) I then cut contrasting solid black panels from some plain black fabric in my stash….

Refashion Inspiration! Don't miss out on the new upcoming series of The Refashioners at www.portialawrie.co.uk

Then sewed them all together, much as you would a patchwork, again using a long stitch. However a long stitch will not hold this skirt panel together for very long and the seams look all puffy, right? ‘Cos I can’t press those puppies properly because of those pesky beads, you see?! Sooooo…..

Refashion Inspiration! Don't miss out on the new upcoming series of The Refashioners at www.portialawrie.co.uk

I removed all of the beads that fell within the seam allowances on each panel (left), graded the seams (middle) then flipped the seam allowances away from the beaded sections…

Refashion Inspiration! Don't miss out on the new upcoming series of The Refashioners at www.portialawrie.co.ukRefashion Inspiration! Don't miss out on the new upcoming series of The Refashioners at www.portialawrie.co.uk

Becauce there are no beads under the black piece now, I can topstitch with a normal stitch length (below left) which reinforces the seams and allows the edges to sit flat and flush instead of puffing up (below right)….

Refashion Inspiration! Don't miss out on the new upcoming series of The Refashioners at www.portialawrie.co.uk

Phew! I now had what was basically a flat piece of fabric to work with. Enter the Charlotte Skirt pattern. I simply cut my front piece from my panelled piece of fabric. (That’s the reverse you can see, with the linen backing. Looks even more like a bumble bee!) The back pieces I cut from more of the plain black fabric…

Refashion Inspiration! Don't miss out on the new upcoming series of The Refashioners at www.portialawrie.co.uk

One sticking point was that the darts on the panel overlapped onto the beaded section. I wasn’t going to be able to dart the beaded section. B*****ks! Well, as luck would have it the fabric I was using had some stretch. So I just sewed the skirt as normal without the darts in front, then pinned it to fit at the waist/side seams…..worked just fine!

Refashion Inspiration! Don't miss out on the new upcoming series of The Refashioners at www.portialawrie.co.uk

The rest of the construction was as per the pattern apart from the waistband, which I faced with grosgrain ribbon. (Just find a faced waistband more comfy). I used the original zip by shortening it and then hand picked it. (I don’t think I’ll ever machine a zip in since discovering the hand picked method early on in my sewing journey). The side seams received the same topstitch treatment as the panels. I also used the lining from the original dress to line this baby. The eagle eyed might notice that there are only 2 beaded panels in the final skirt as opposed to 3. Well, in the end, when it came to it, the length just looked totally wrong. Like AWFUL. It just hit at the wrong spot on my calf. It was only a matter of an inch or so to make it right. But if I had just taken up the bottom black band by that, then the panelling effect would have been completelyout of balance. Taking it up to the next panel would’ve meant hemming over beads! Ack!.So I just lopped the bottom 2 panels off, et voila!

Refashion Inspiration! Don't miss out on the new upcoming series of The Refashioners at www.portialawrie.co.uk

Essentially I created the blocked front section using patchwork techniques; just in straight panels instead of squares/triangles etc. This technique can be employed to create your own unique piece of flat fabric using scraps/sections from any number of garments. Once you have your flat piece of fabric you can just go ahead and cut your pattern piece as if it were any other piece of fabric. When it comes to incorporating colour blocking into a commercial pattern, it seems to me to be a much more straightforward route to do it this way;  (make your colour blocked fabric first, then cut your pattern piece from it) as opposed to slicing your commercial pattern up into various pieces then tracing them and adding seam allowances, cutting all the fabric seperately then having to stitch it back together again. Don’t you think??

Anyways, I didn’t stop there. Some of you might be wondering about the rest of the dress? Well yes. Actually I did sit there and unpick all those beads over 2 evenings. Sad? Moi? Yup! What did I do with them? Ooooohhhhh…..

Refashion Inspiration! Don't miss out on the new upcoming series of The Refashioners at www.portialawrie.co.uk

I made these too….

Refashion Inspiration! Don't miss out on the new upcoming series of The Refashioners at www.portialawrie.co.uk

There are far too many photos in this post already, so I have some separate DIY posts lined up for these.

But in the meantime a MASSIVE MASSIVE THANKYOU to all the ladies that took part this year!! Has it inspired you to get out there and raid the charity shops (or plunder the depths of your wardrobes) for unloved items to lavish a bit of refashioning love on? I do hope so 🙂

By Hand London, DIY, Elisalex Dress, refashioning, the refashioners, the refashioners 2013, Thrifting, Tutorials

The Refashioners 2013 – Elisalex of By Hand – London

06/14/13

Is it shameful to admit that I actually really liked the mystery item that Portia sent me to refashion…? I was even lacking a good denim shirt in my life… But that’s not what this is about. I’m sure Portia didn’t sign us up to The Refashioners just to send us thrifted freebies!

Refashion Inspiration! Don't miss out on the new upcoming series of The Refashioners at www.portialawrie.co.uk

So, slightly reluctantly, I set about envisioning this shirt as something else. First thoughts were a button down mini skirt with a bandeau top made from a sleeve – but seeing as the shirt already fit me perfectly, there wasn’t going to be nowhere near enough fabric to fit around my backside, so that wasn’t going to work at all.  With a trip to the Deep South coming up, I eventually decided to use the denim combined with some white Broderie Anglaise cotton to make myself a dress worthy of the Grand Ole Opry (any old country lovers here? No? Hmmm just me then…). 
Refashion Inspiration! Don't miss out on the new upcoming series of The Refashioners at www.portialawrie.co.uk


Shamelessly I went for my own namesake pattern, the Elisalex Dress, and only just managed to squeeze out the front and back bodice pieces from the sleeves and back panel of the shirt.

Refashion Inspiration! Don't miss out on the new upcoming series of The Refashioners at www.portialawrie.co.uk

Refashion Inspiration! Don't miss out on the new upcoming series of The Refashioners at www.portialawrie.co.uk

The rest of the dress came together super easily and quickly – I’ve made about a squillion of these babies by now so you know I can do that sh*t in my sleep! – and I decided on a pretty gathered skirt as opposed to the main tulip variation. With some of the sleeve’s leftovers I made a pair of little bows which I handstitched to the shoulders. I absolutely LOVE the resulting dress – and it’s right up my street with just the right amount vintage white trash country singer! Just need to get me some cowboy boots and a matching hat…
Refashion Inspiration! Don't miss out on the new upcoming series of The Refashioners at www.portialawrie.co.uk


But what about the rest of the shirt, I hear you cry! Fear not ladies, I’m definitely not one to advocate waste of any kind so you can be sure that the rest of the shirt went to very good use.

Refashion Inspiration! Don't miss out on the new upcoming series of The Refashioners at www.portialawrie.co.uk

 I simply traced over the missing back panel and replaced it with the last of the white cotton Broderie, and hey presto! A sufficiently white trash sleeveless shirt – not quite to my taste but immediately snapped up by our very own Victoria:

Refashion Inspiration! Don't miss out on the new upcoming series of The Refashioners at www.portialawrie.co.uk

 So there you have it folks, one denim shirt becomes one entirely new dress and one refashioned shirt (and just a tiny pile of scraps for the bin). Now all we need is a flight back to Nashville… Anyone?

Refashion Inspiration! Don't miss out on the new upcoming series of The Refashioners at www.portialawrie.co.uk

 Portia, I can’t even begin to thank you for inviting me to be a part of the second (and hopefully annual?!) Refashioners! I am beyond flattered that you thought of me and humbled to be among such prestigious company.


Elisalex of By Hand – London (and Stitch Me Softly)

Oh, my, bloomin’ word! Back of the net Elisalex! Denim and broderie…a classic combo AND two new garments from one teensy denim shirt! Actually I concur. The denim shirt was actually quite nice to start off with and I’d toyed with the idea if embellishing the front and back yokes myself. Which was another option. But my refashioning pile was large enough as it was and I knew this would be in good hands. Love the substitution of the tulip skirt of the Elisalex dress, with a simple gathered one. Totally changes the vibe of the original pattern. “Pieced” patterns like this, where the garment element (ie bodice in this case) is assembled from several smaller pattern pieces, are a great way to use small bits of fabric harvested from garments. Especially when you opt for the contrasting fabrics route as Elisalex has done here.  And you needn’t run off and buy a length of fabric to emulate the skirt section in this refashion either. Bag yourself a denim shirt from the clothing rail of your local charity shop…..then go off and peruse the linens section for some pure cotton (vintage floral??) bedlinens/vintage tablecloths…

Dixie DIY, DIY, refashioning, the refashioners, the refashioners 2013, Thrifting, Tutorials

The Refashioners 2013 – Dixie of Dixie DIY

06/13/13

Hey readers and refashioners! I’m so excited to be included again in this challenge. Last time I played along I got a matching button down top and shirt and others received clothing as well. This year I expected similar garments but Portia had something up her sleeve. Pillowcases! Two standard sateen pillowcases with subtle stripes.
At first I thought – well this’ll be easy. It’s basically just fabric. I can do whatever I want, but as I worked on it I realized that these pillowcases presented their own challenges. When I looked at these pillowcases I thought it was quite enough fabric for a project but I really had to be efficient with my fabric.
I knew immediately what I wanted to do. I decided to make a variation on the Grainline Scout Woven Tee and add a cross-over layered back.
 Refashion Inspiration! Don't miss out on the new upcoming series of The Refashioners at www.portialawrie.co.uk
First I dyed both pillowcases in my washing machine with iDye. They came out a nice shade of blue.
Next I worked on my pattern pieces. My front and sleeve pieces will remain the same I just need to adjust the back piece. I traced the back piece and created a full size piece.
Refashion Inspiration! Don't miss out on the new upcoming series of The Refashioners at www.portialawrie.co.uk
Then I measured about 5″ in from the side seam, made a mark and drew in the stitching line.
 Refashion Inspiration! Don't miss out on the new upcoming series of The Refashioners at www.portialawrie.co.uk
After that I decided I wanted my overlapping pieces to connect at the armcye. The sleeve cap markings make an easy match point.
Refashion Inspiration! Don't miss out on the new upcoming series of The Refashioners at www.portialawrie.co.uk
Now I connect the point at the hem to the armcye point using a french curve. This will be my stitching line.
 Refashion Inspiration! Don't miss out on the new upcoming series of The Refashioners at www.portialawrie.co.uk
From there I measured and drew new seam allowances.
 Refashion Inspiration! Don't miss out on the new upcoming series of The Refashioners at www.portialawrie.co.uk
After I cut off the excess from the pattern piece I folded the seam allowance under. At the top I noticed there’s a gap from the armscye edge and the seam allowance so I used a scrap piece of paper that I taped to the seam allowance and drew a connecting section.
Refashion Inspiration! Don't miss out on the new upcoming series of The Refashioners at www.portialawrie.co.uk
Now I’m ready to cut. This new larger back piece justbarelyfit on one pillow case. I squeezed out as much room as I could.
 Refashion Inspiration! Don't miss out on the new upcoming series of The Refashioners at www.portialawrie.co.uk
For the sleeves there was just enough room down where the pillowcase opened to cut out a piece. I cut the second sleeve from the other pillowcase.
The other pillowcase was too narrow to fit a full size front piece so I cut the front with a center seam, making sure to match the side seam stripes. Unfortunately whoever sewed these pillowcases wasn’t so careful. I had to seam-rip and re-sew the front seam to match the stripes. Even so, I accidentally sewed the stripes off by one. Oops. But it’s nothing that normal people would notice. These stripes are made by alternating the weave, they’re not printed so they’re not very noticeable.
To assemble I sewed the bodice side seams then stitched the hem. You have to hem it before you attach the sleeves. I matched the back armcyes and basted the layers together.
The rest is easy. I just assembled everything following the normal pattern instructions.
Refashion Inspiration! Don't miss out on the new upcoming series of The Refashioners at www.portialawrie.co.uk
The look is pretty cool and it’s a simple pattern alteration if you want to try it at home – so long as you have enough fabric. 😉
Thanks Portia so much for including me again! I loved receiving my package wondering what was going to be inside. I often refashion clothes in my own wardrobe but I tend to get overwhelmed going to thrift shops so having someone else do the dirty work for me and I just get to be creative is pretty fun. 😉
Dixie of Dixie DIY
I am sooooo doing this! I’ve been pondering the Scout Woven Tee for a while but I think this has just sealed the deal for me! Who’d have thought you could turn 2 standard pillowcases into a cute, edgy top like this? I sent Joanne and Dixie a pair of pillowcases each; and as a result we have 2 very different takes from the same starting point. Interesting, no?! 
Just the act of dyeing these pillowcases has transformed them and brought out the woven stripe, which is a great touch. I love garments where the “business” is all going on at the back and plain in front. It gives an unexpected twist 😉
Brilliant Dixie!!
Newer Posts
Older Posts
Portia
Follow
Sewbox

© Copyright 2026. Portia Lawrie. All Rights Reserved. Managed by WordPress Web Dev Cornwall .