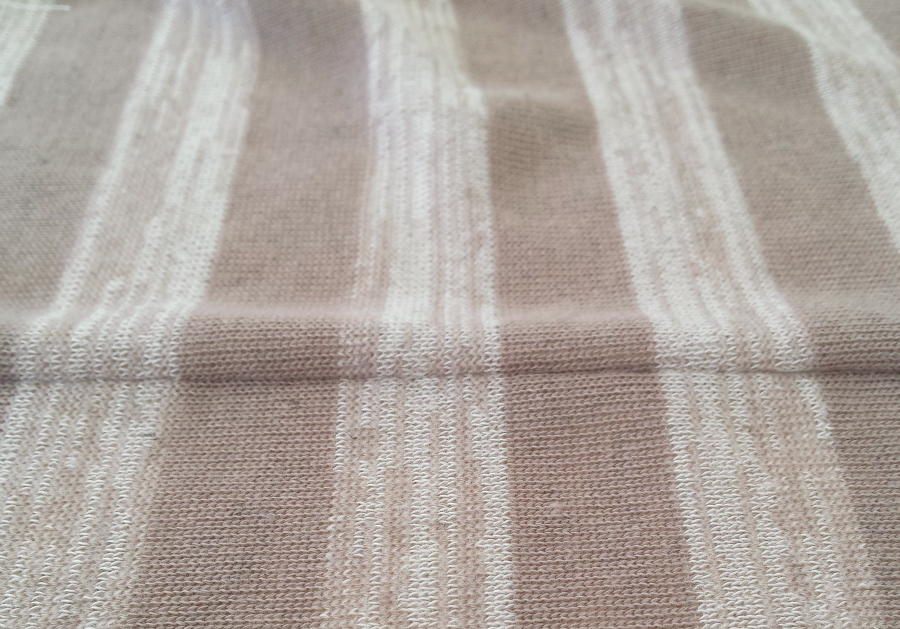
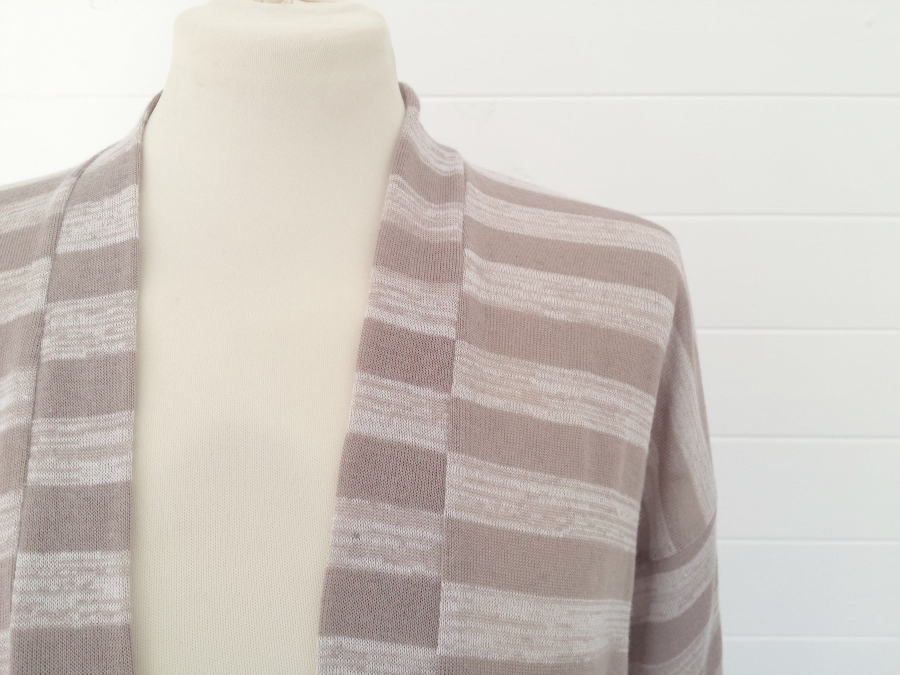
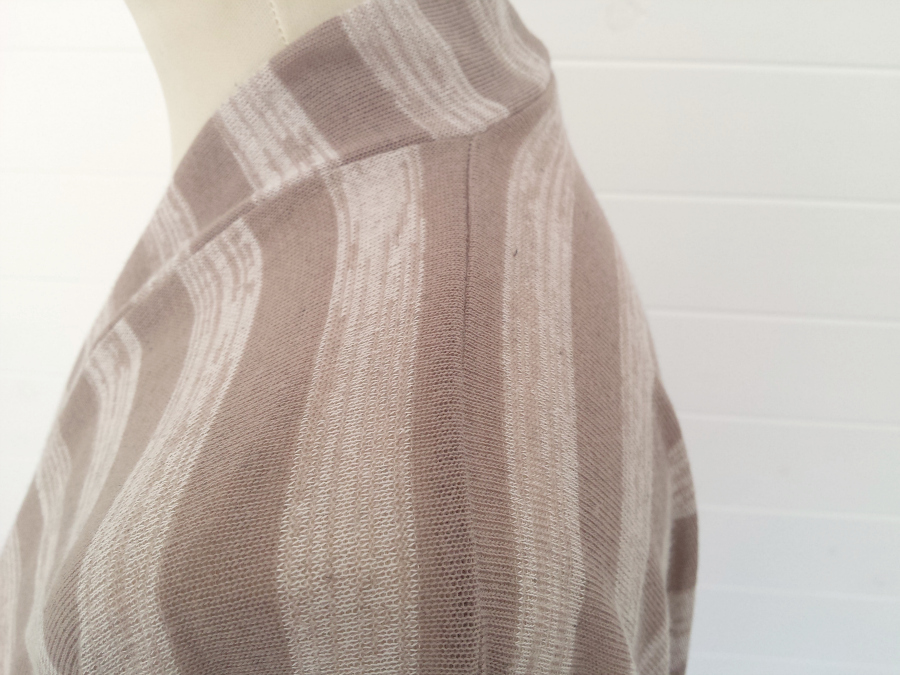
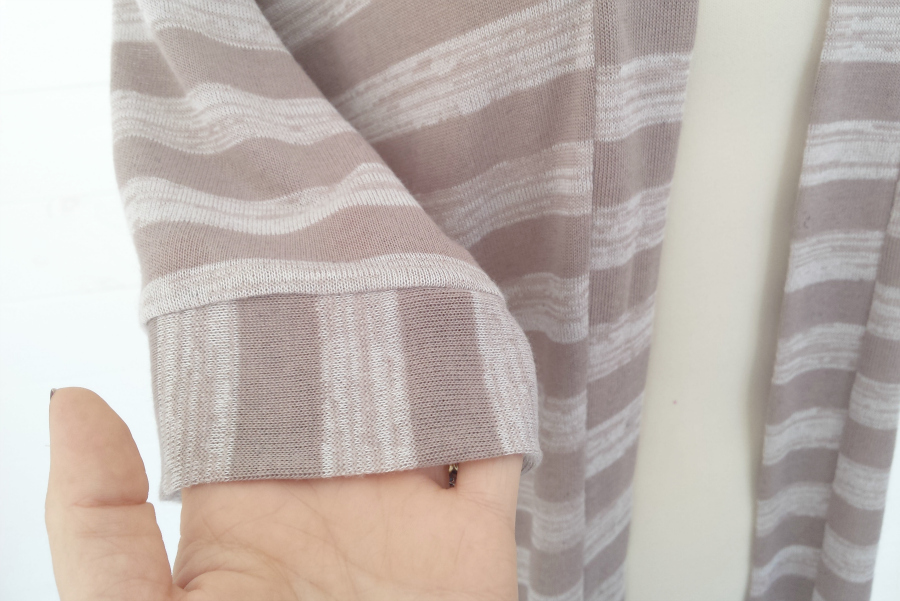
• About
    • Contact
    • Press
    • Sponsor
  • DIY
    • Home & Garden
    • Jewellery & Accessories
    • Yarn Crafts
  • Sewing
    • patternless & self drafted
    • Refashions
    • Commercial Patterns
    • Sewing Tips
    • Overlockers
  • The Refashioners

Portia Lawrie

DIY, how to, Sewing, Tutorials

FO: Boxy Cuffed Tee + Tutorial

10/26/15

I’ll begin by apologising for the image quality in this post. I am having some serious photography woes at the moment. Doesn’t seem to matter what I do. Winter light levels have kicked in and I have some work to do to try and counteract this. I have a total mental block when it comes to the technicalities of camera settings but am TRYING to get my head around compensating for low light conditions. Right now…it just ain’t happening. And short of discontinuing blog posts until I sort it (not an option) I’m having to suck it up and make do with what I can muster photography wise for now. So basically….sorry for the s*** photos…

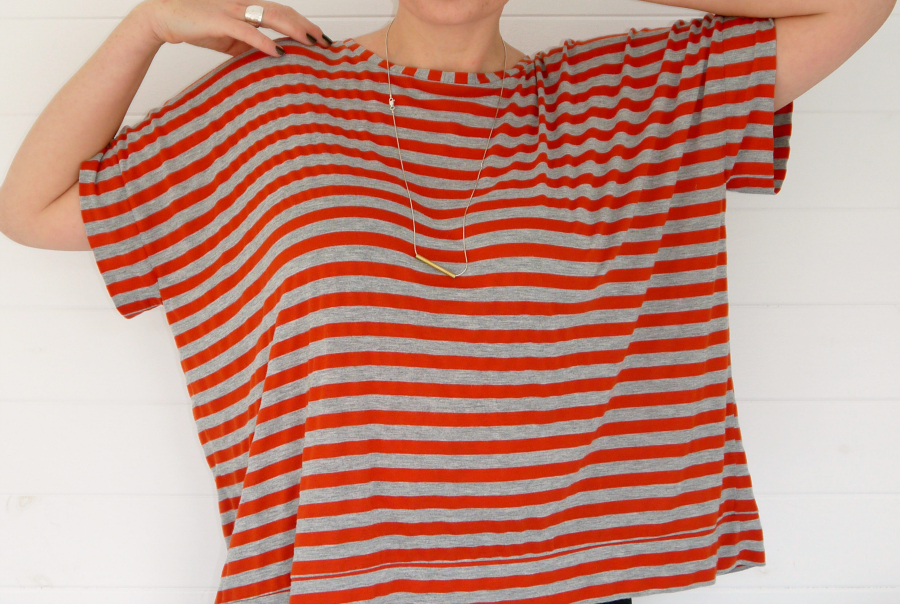
That said…I am pretty pleased with this top…BOXY CUFFED TEE (2)


Still exploring the boxy loose shape which, when combined with a decent drape,  is becoming a favourite of mine…BOXY CUFFED TEE

This one is comprised of 2 squares of fabric with cuffed bands applied to the sleeves and hem and a standard neckband finish to the neckline…

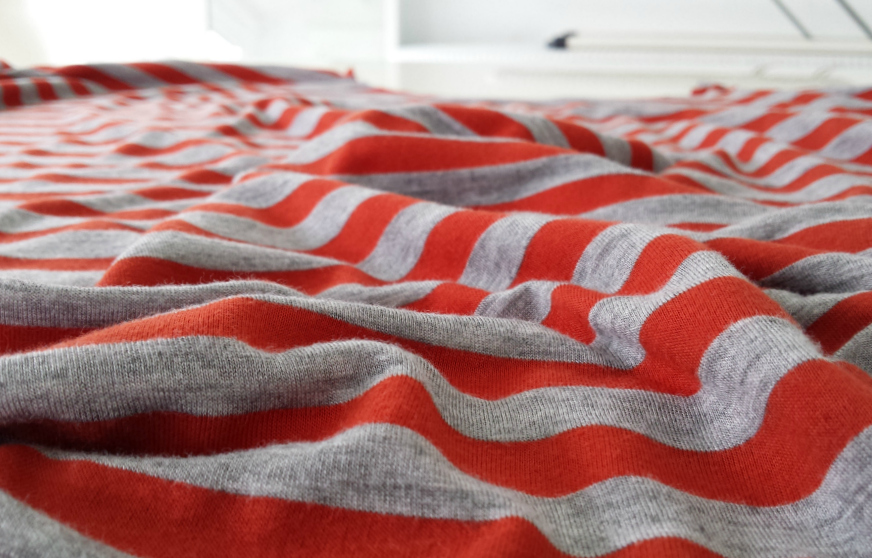
The fabric is from Girl Charlee. It’s the red orange and heather grey colourway. Lovely drape and softness against the skin and easy to work with.  I prewashed the fabric as I would be doing during normal use. Then again after I made the top at which time there was further shrinkage. Not massive amounts, but enough to slightly skew my sleeve and hem bands. SO…prewash…at least twice IMHO. 30 degrees and hang to dry rather than tumble…BOXY CUFFED TEE TUTORIAL (1)
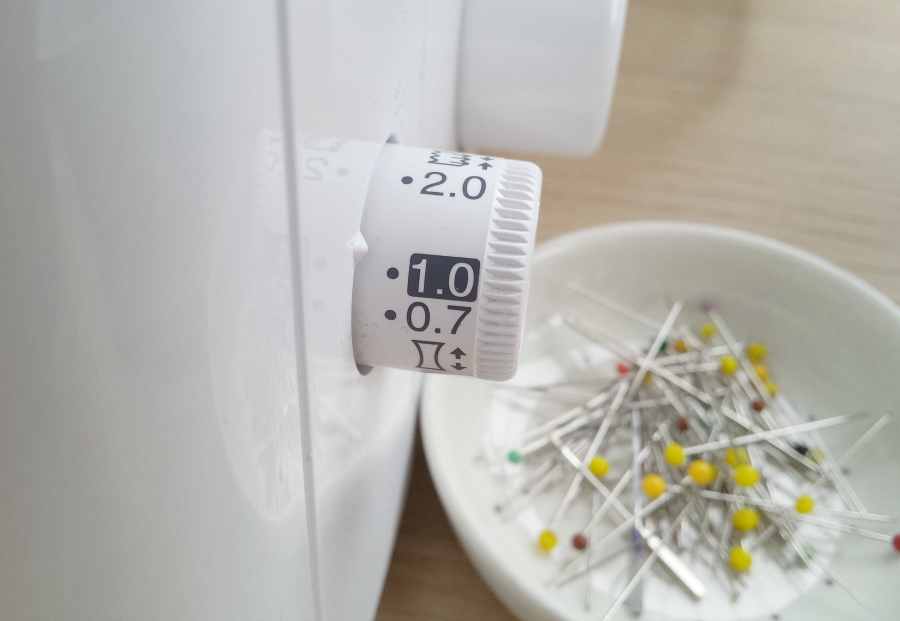
BOXY CUFFED TEE TUTORIAL (7)I had to employ the differential feed on this too. Only a teeny bit. But worth swatching first with this one to limit stretching or shifting of layers whilst serging.

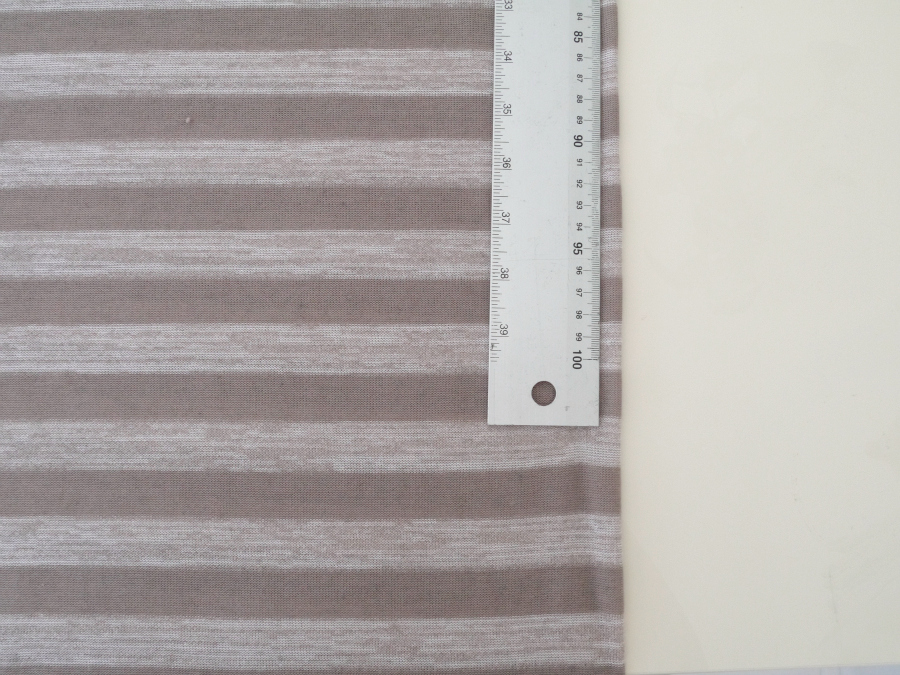
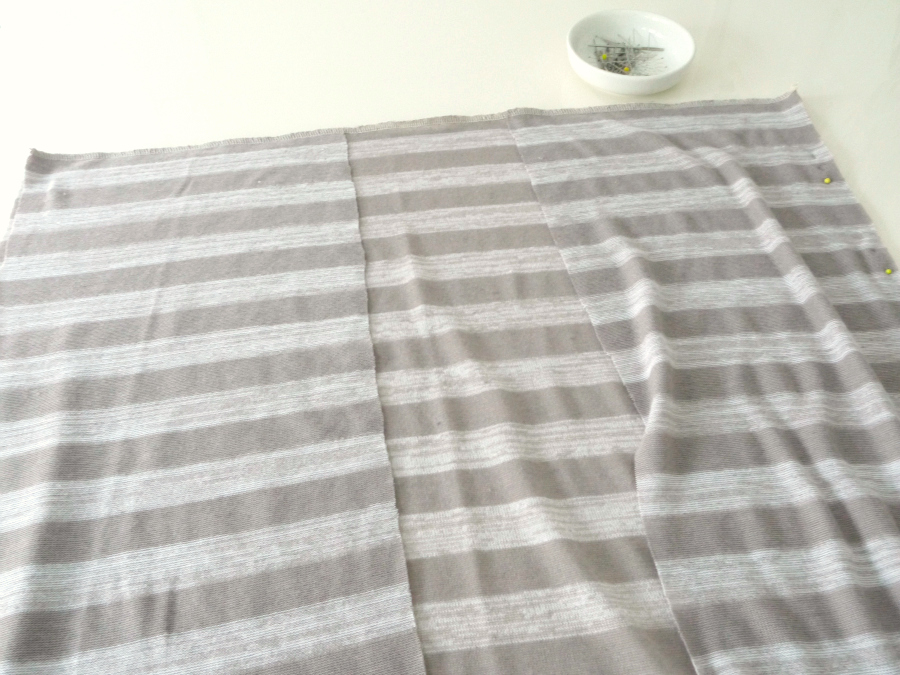
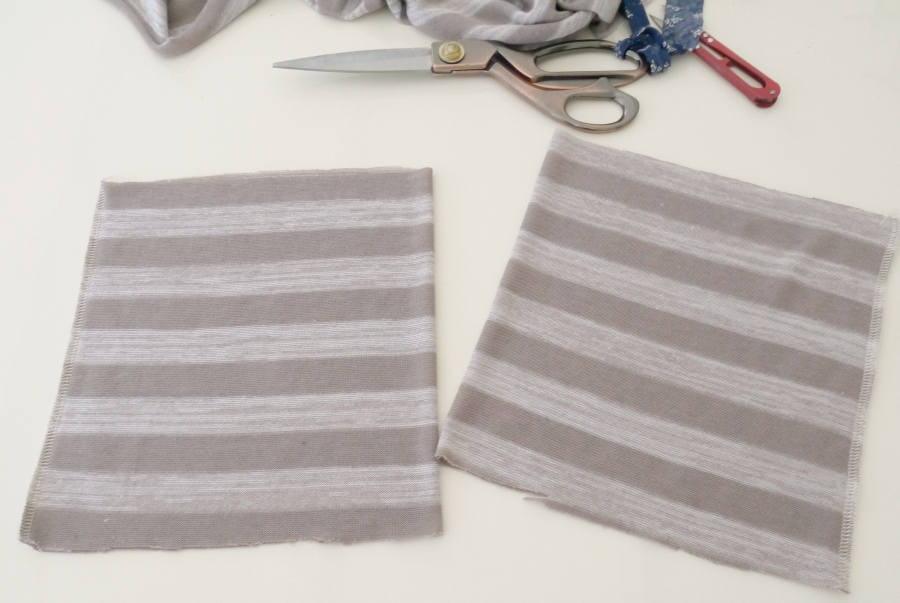
The top I made is 2 squares of fabric 28″ by 28″….BOXY CUFFED TEE

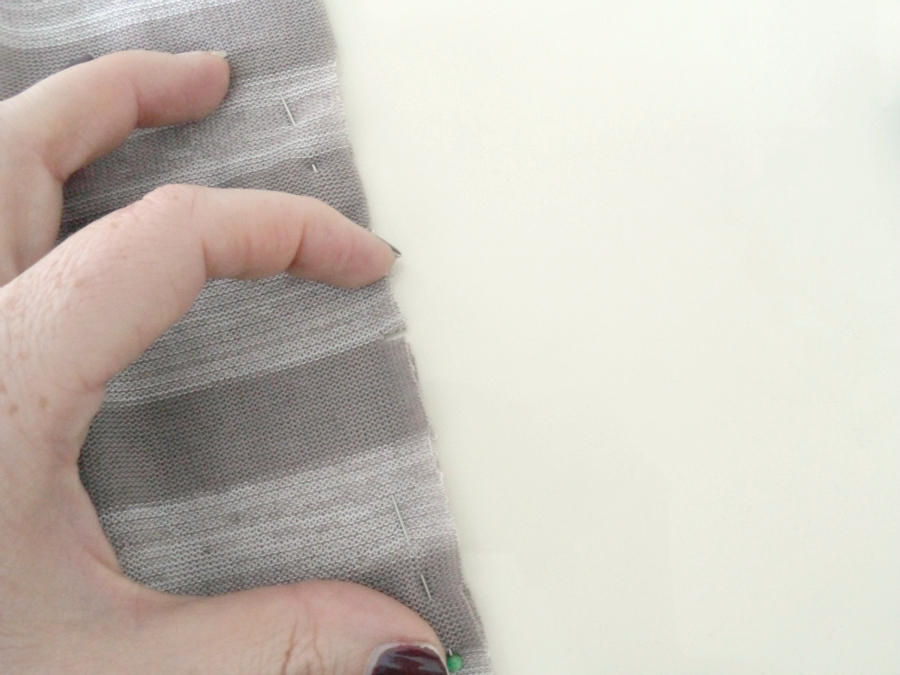
Pin along the outside edges to keep the stripes aligned….

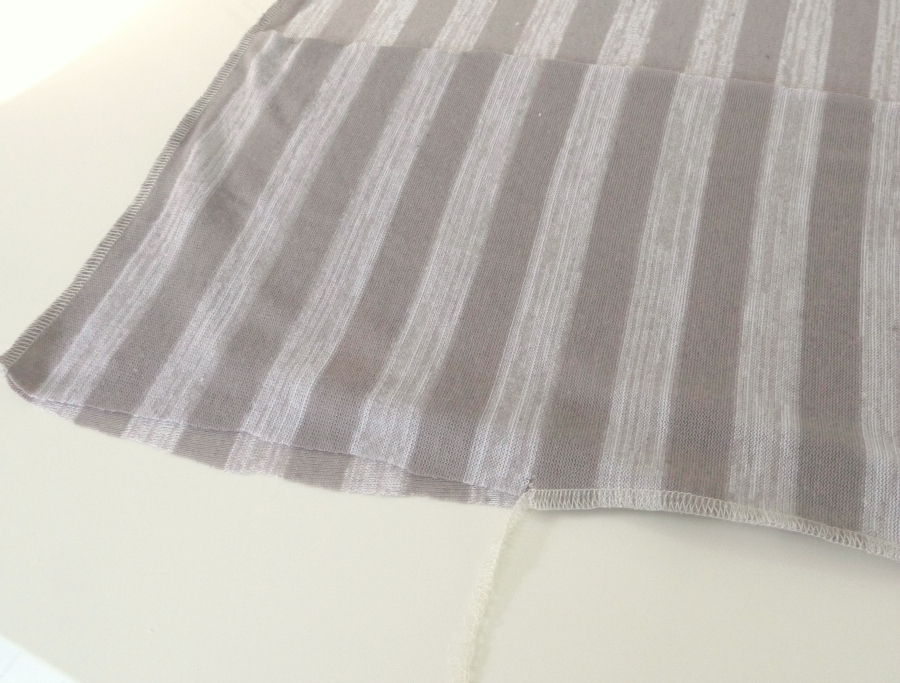
Then serge straight across the top (where the neckline will be)…BOXY CUFFED TEE

We’ll come back to the neckline in a moment…

Measure approx 8″ down and snip a notch into the side seam…BOXY CUFFED TEE

This marks the armhole opening and provides a starting point for the serger…

Simply peel back the layers above the notch and line the innermost part of the cut/notch up with your needles…BOXY CUFFED TEE
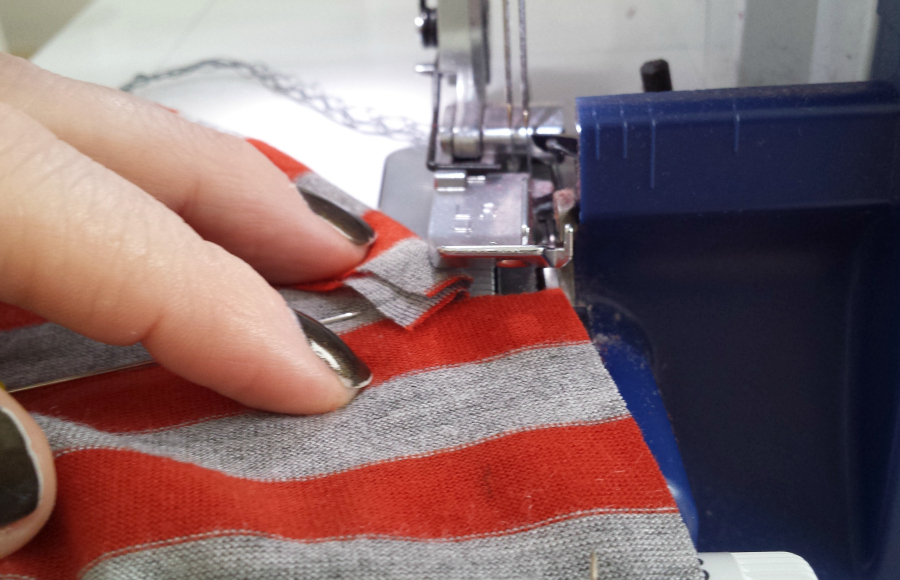
Serge the side seams together.

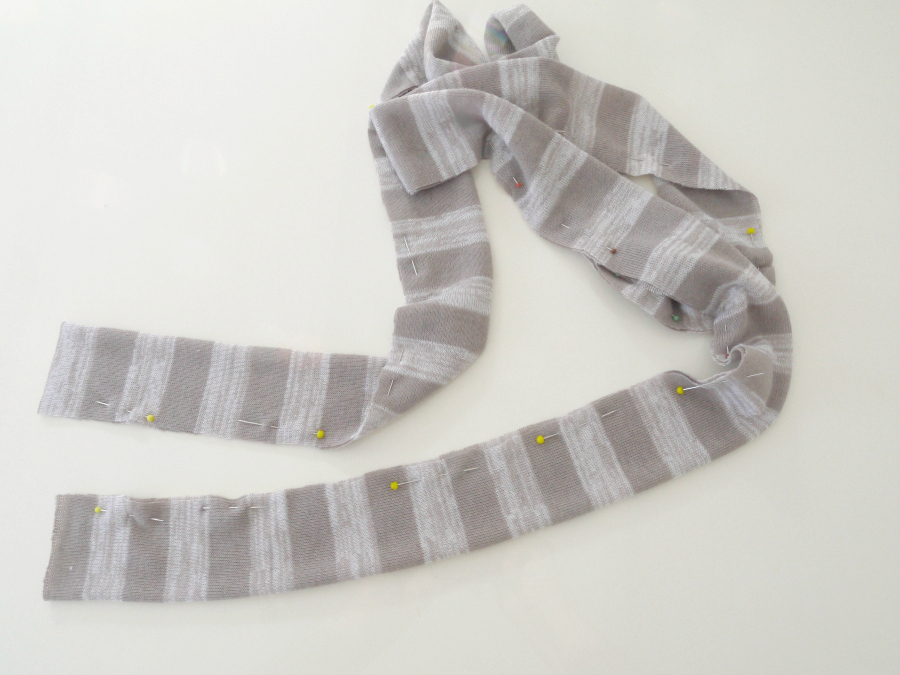
Create a band to fit the armhole opening…BOXY CUFFED TEE TUTORIAL (8)

Pin that the the opening RS together and raw edges aligned…

Serge together…BOXY CUFFED TEE
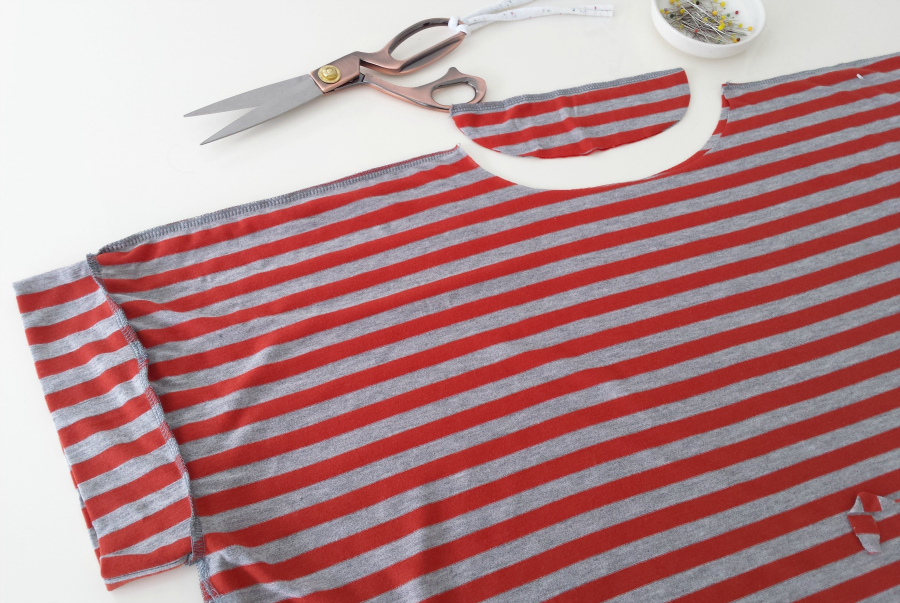
Then cut out a neck opening your desired width…

Measure the opening …BOXY CUFFED TEE

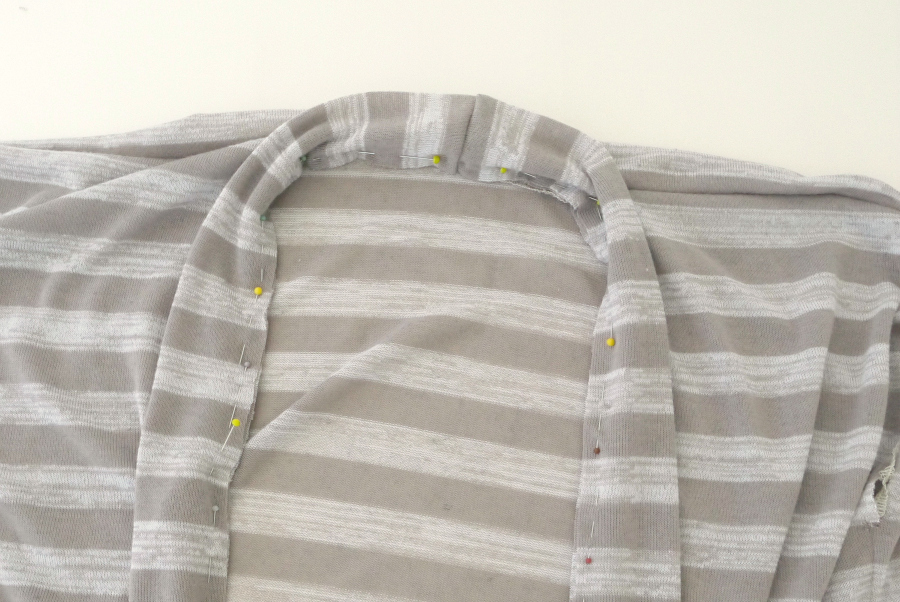
Then cut a band from your remaining fabric to fit. Cutting the neckband marginally smaller than the measurement of the neckline opening  (about 5/8″) helps the neckband to turn inwards and sit flat once it’s applied.

Apply the band to the neck opening…BOXY CUFFED TEE
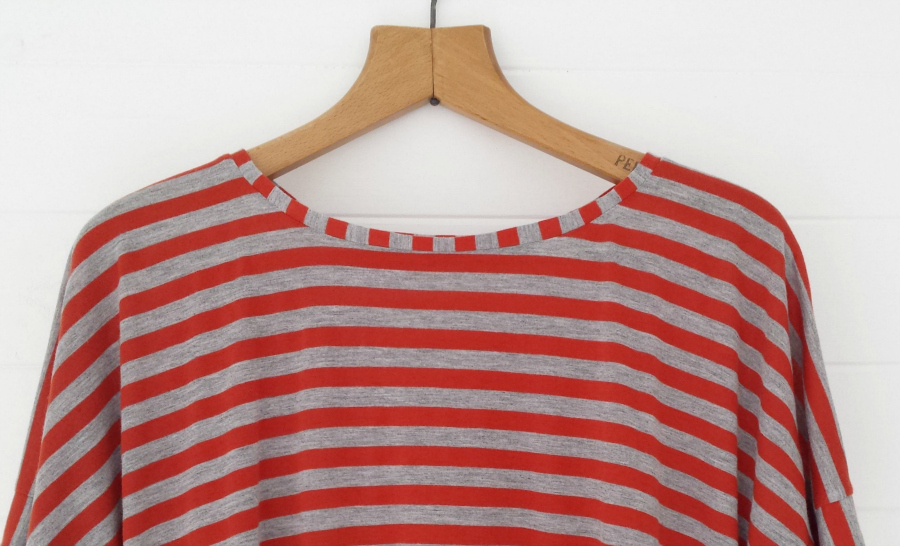
Press seam allowance down and top stitch if desired.

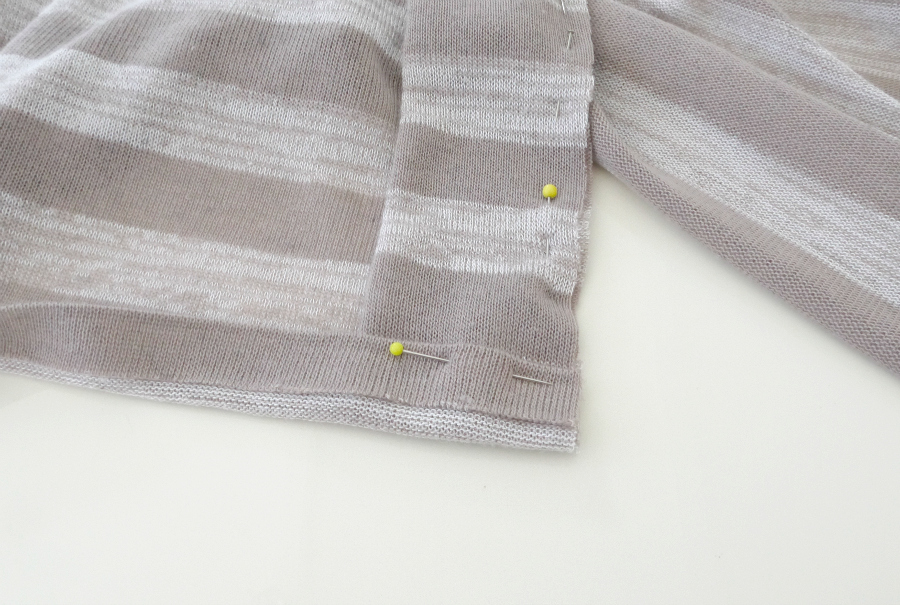
For the bottom hem the treatment is pretty much the same as the sleeves…BOXY CUFFED TEE

I cut off the bottom 6″ of the hem…

And folded it in half to create a band…BOXY CUFFED TEE
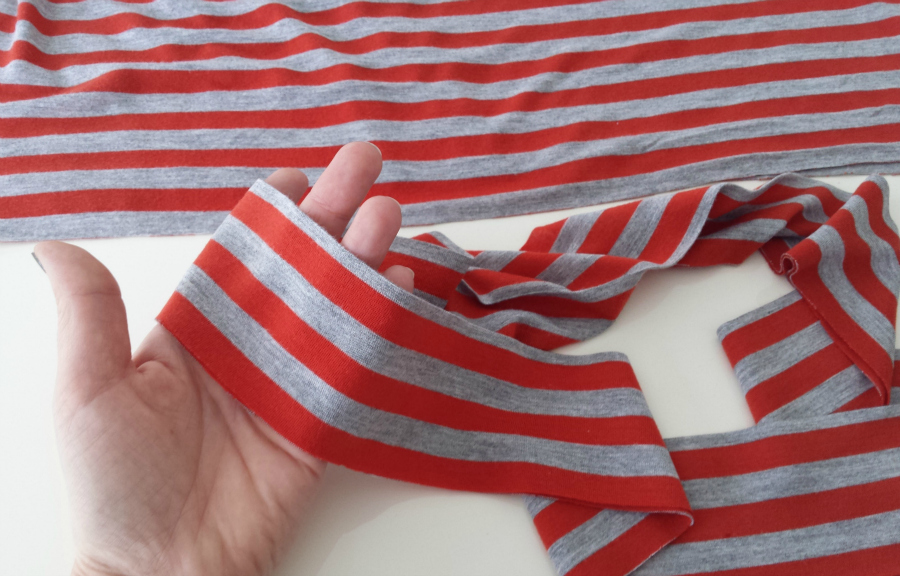
Then simply applied that to the hem.

Done!BOXY CUFFED TEE (2)

Super easy. Super quick. Super comfy. 🙂


DIY, how to, Sewing, Tutorials, Uncategorized

FO: Scuba Pencil Skirt + tutorial

10/20/15

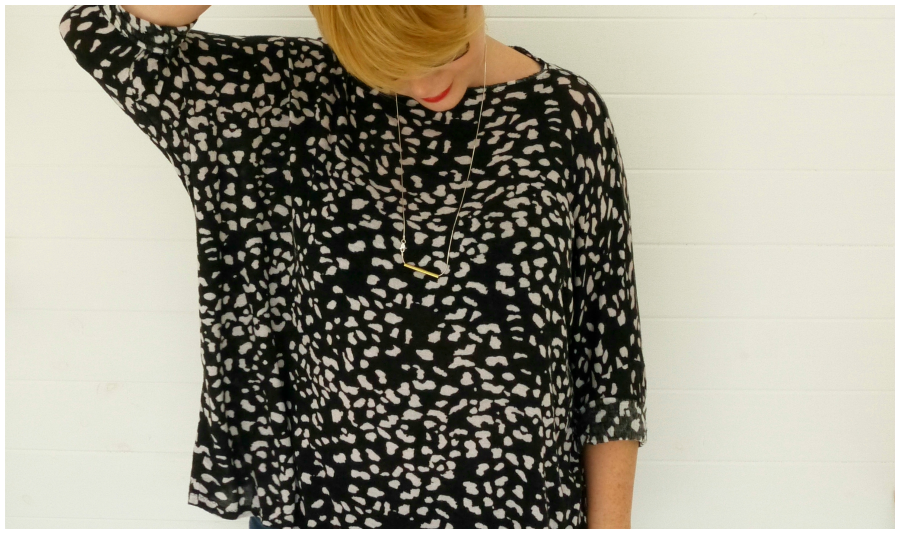
This may actually be one of the most versatile garments I’ve sewn! I don’t normally style a make in lot’s of different ways for a blog post, but since skirts are an alien concept to me I needed to try out a few ideas and see what worked best for me. It turns out quite alot works with a black pencil skirt which shouldn’t surprise me as it’s often touted as THE supreme wardrope staple. It’s just that as a lifelong tomboy I tend to stick resolutely to trousers. I may have been swayed with this make…SCUBA PENCIL SKIRT OUTFITS

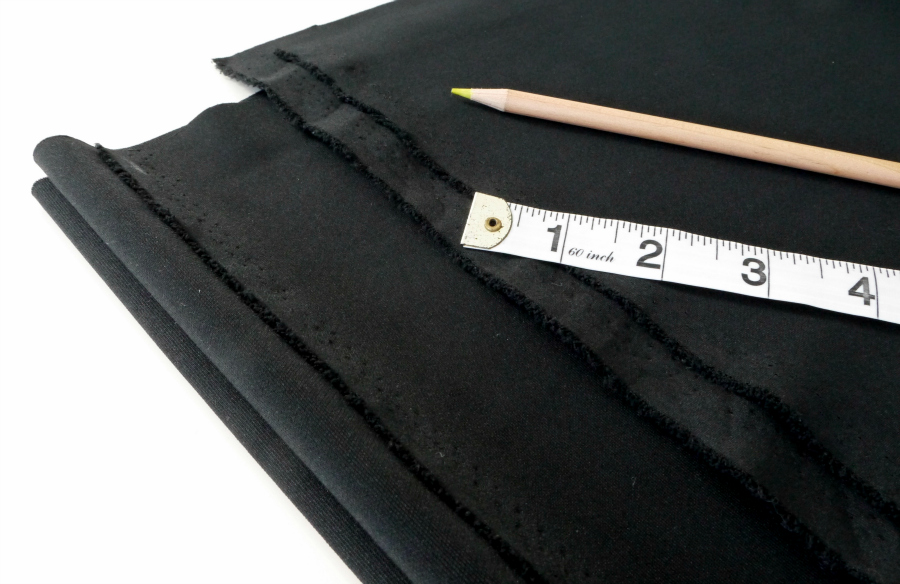
So…if I’m such a trousers devotee…you might ask what prompted me to sew a pencil skirt? Well….I’ll explain! I fell prey to the confusion that exists over the difference between neoprene and scuba. Know the difference? I didn’t! I saw the word scuba and thought I had ordered neoprene. Which is a foam core sandwiched between two layers of dense knit. (Yes, the stuff that wetsuits are made from hence the “Scuba” confusion) I planned to make a giant tote/shopper. Then my scuba arrived… (Remnant Kings at £9.99 a metre. This is the heavyweight scuba that they have currently sold out of but they have the medium weight and some new crepe scuba in stock which would also work for a lighter version of this. Get 10% off when you use the code MAKERY10 )SCUBA PENCIL SKIRT TUTORIAL

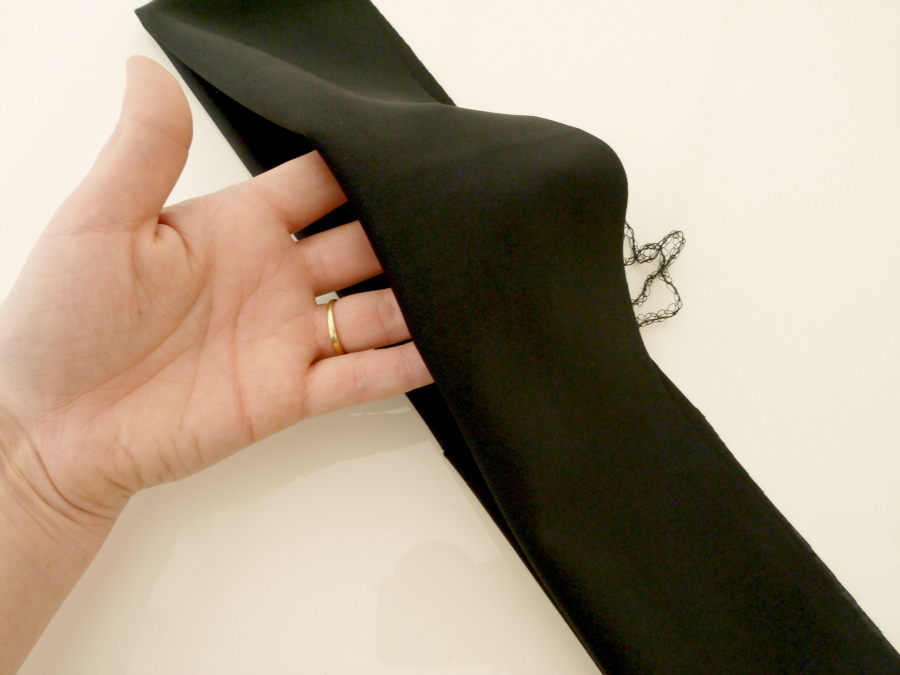
Scuba it turns out is a very dense knit. Sturdy but with some drape and firm stretch and a very slight sponginess. Definately apparel weight though. So I had to rethink my plans; and “The Scuba Skirt” was born!

It’s a simple make and requires no pattern. You just need your hip measurement…SCUBA PENCIL SKIRT TUTORIAL

And your desired length. With the fabric folded in half selvedge to selvedge, mark your length on the fold…SCUBA PENCIL SKIRT TUTORIAL

Then square across from this point by half your hip measurement (no SA needed as this is stretch and I’m serging…but add a little SA if you’re using your standard machine). Then square up to create a rectangle…SCUBA PENCIL SKIRT TUTORIAL

Cut along your lines and up the fold so you have 2 separate rectangles. Then sew along the sides to create a tube and try on…

SCUBA PENCIL SKIRT TUTORIAL

Pin to fit whilst you are wearing it. Tapering at the waist and hem to create that classic pencil skirt curve at the side seams….remove the skirt and even out the line of pins so it’s a smooth curve that  blends into the seam at the hip…SCUBA PENCIL SKIRT TUTORIAL

To mark the curve identically on both sides remove the pins from one side. Fold the skirt in half lengthwise, lining up the side seams; then using the remaining line of pins, pin through all layers at once…being careful not to change the position of the pins and retain the shape of the curve…SCUBA PENCIL SKIRT TUTORIAL

Mark the position of the pins with chalk on one side…SCUBA PENCIL SKIRT TUTORIAL

Then flip over and do the same on the back…

SCUBA PENCIL SKIRT TUTORIAL

When you remove those pins and open out the skirt you’ll have the outline of your curve marked identically on both sides…SCUBA PENCIL SKIRT TUTORIAL

Join those marks then use the line as a guide to sew your new curved side seams. Make sure the line is lined up with your needles and then serge or sew…SCUBA PENCIL SKIRT TUTORIAL

Create a simple folded over waistband. A strip of fabric, sewn together to fit your waist snugly (Make sure you can get it over your hips too) then folded over…SCUBA PENCIL SKIRT TUTORIAL


With the skirt RS out line up the waistband seam with the CB of your skirt and the sides of your waistband with the side seams of your skirt. The waistband will be marginally smaller…SCUBA PENCIL SKIRT TUTORIAL

Slide the waistband onto the skirt with raw edges aligned. Pin in place. Serge/Sew together. You’ll need to stretch slightly as you sew to take up the slight bit of slack between the waistband and the skirt itself….then hem…and you’re done! Easy right?!SCUBA PENCIL SKIRT TUTORIAL

Except a word of advice. Warning. Call it what you will. While I LOVE this fabric and my finished skirt. My serger did not and threw an absolute paddy when it came to the waistband. I have the Singer 14SH754. Yep the Lidl spesh that I got a few years back. (and I know a few of you have bought one recently). While I don’t deny that this fabric is sturdy…and dense…I’d liken it to sweatshirt fabric in terms of thickness and stretch. And it’s my honest belief, that when my manual gives instructions for sewing “heavyweight” fabrics…it should have been able to cope with this. It could not. I won’t go into the details of the injuries my machine sustained. Far too gruesome, lol! It’s with the servicing company as we speak . This is not the first thicker fabric that my Singer failed to cope with. And I’ve come to conclude that this machine is not actually powerful enough for thicker fabrics. So…my advice would be this if you intend to work with this fabric…SCUBA PENCIL SKIRT TUTORIAL

My serger managed 2 layers of this. But it didn’t like it. It grumbled at me while I was sewing and I should have listened. When attaching the waistband you’re looking at 3 layers of this stuff (+ seams!). If your serger in any way complains at 2 layers of this…do not even attempt to attach the waistband using a serger. In the end I used DENIM needles and a zig zag stitch on my standard machine (a Janome) for this stage. The fabric is completely non fray so the unfinished edge is not problematic. And trust me….you don’t need the heartache of a broken serger when you have projects to finish (and deadlines to meet, aaaargh!). In hindsight I wish I’d done the whole thing on my standard machine. She did me proud my Janome. If you go down the standard machine route, then definitely try the denim needles and look at increasing your stitch width and length to account for the the thicker fabric. Swatch it all first and you’ll be good.SCUBA PENCIL SKIRT TUTORIAL

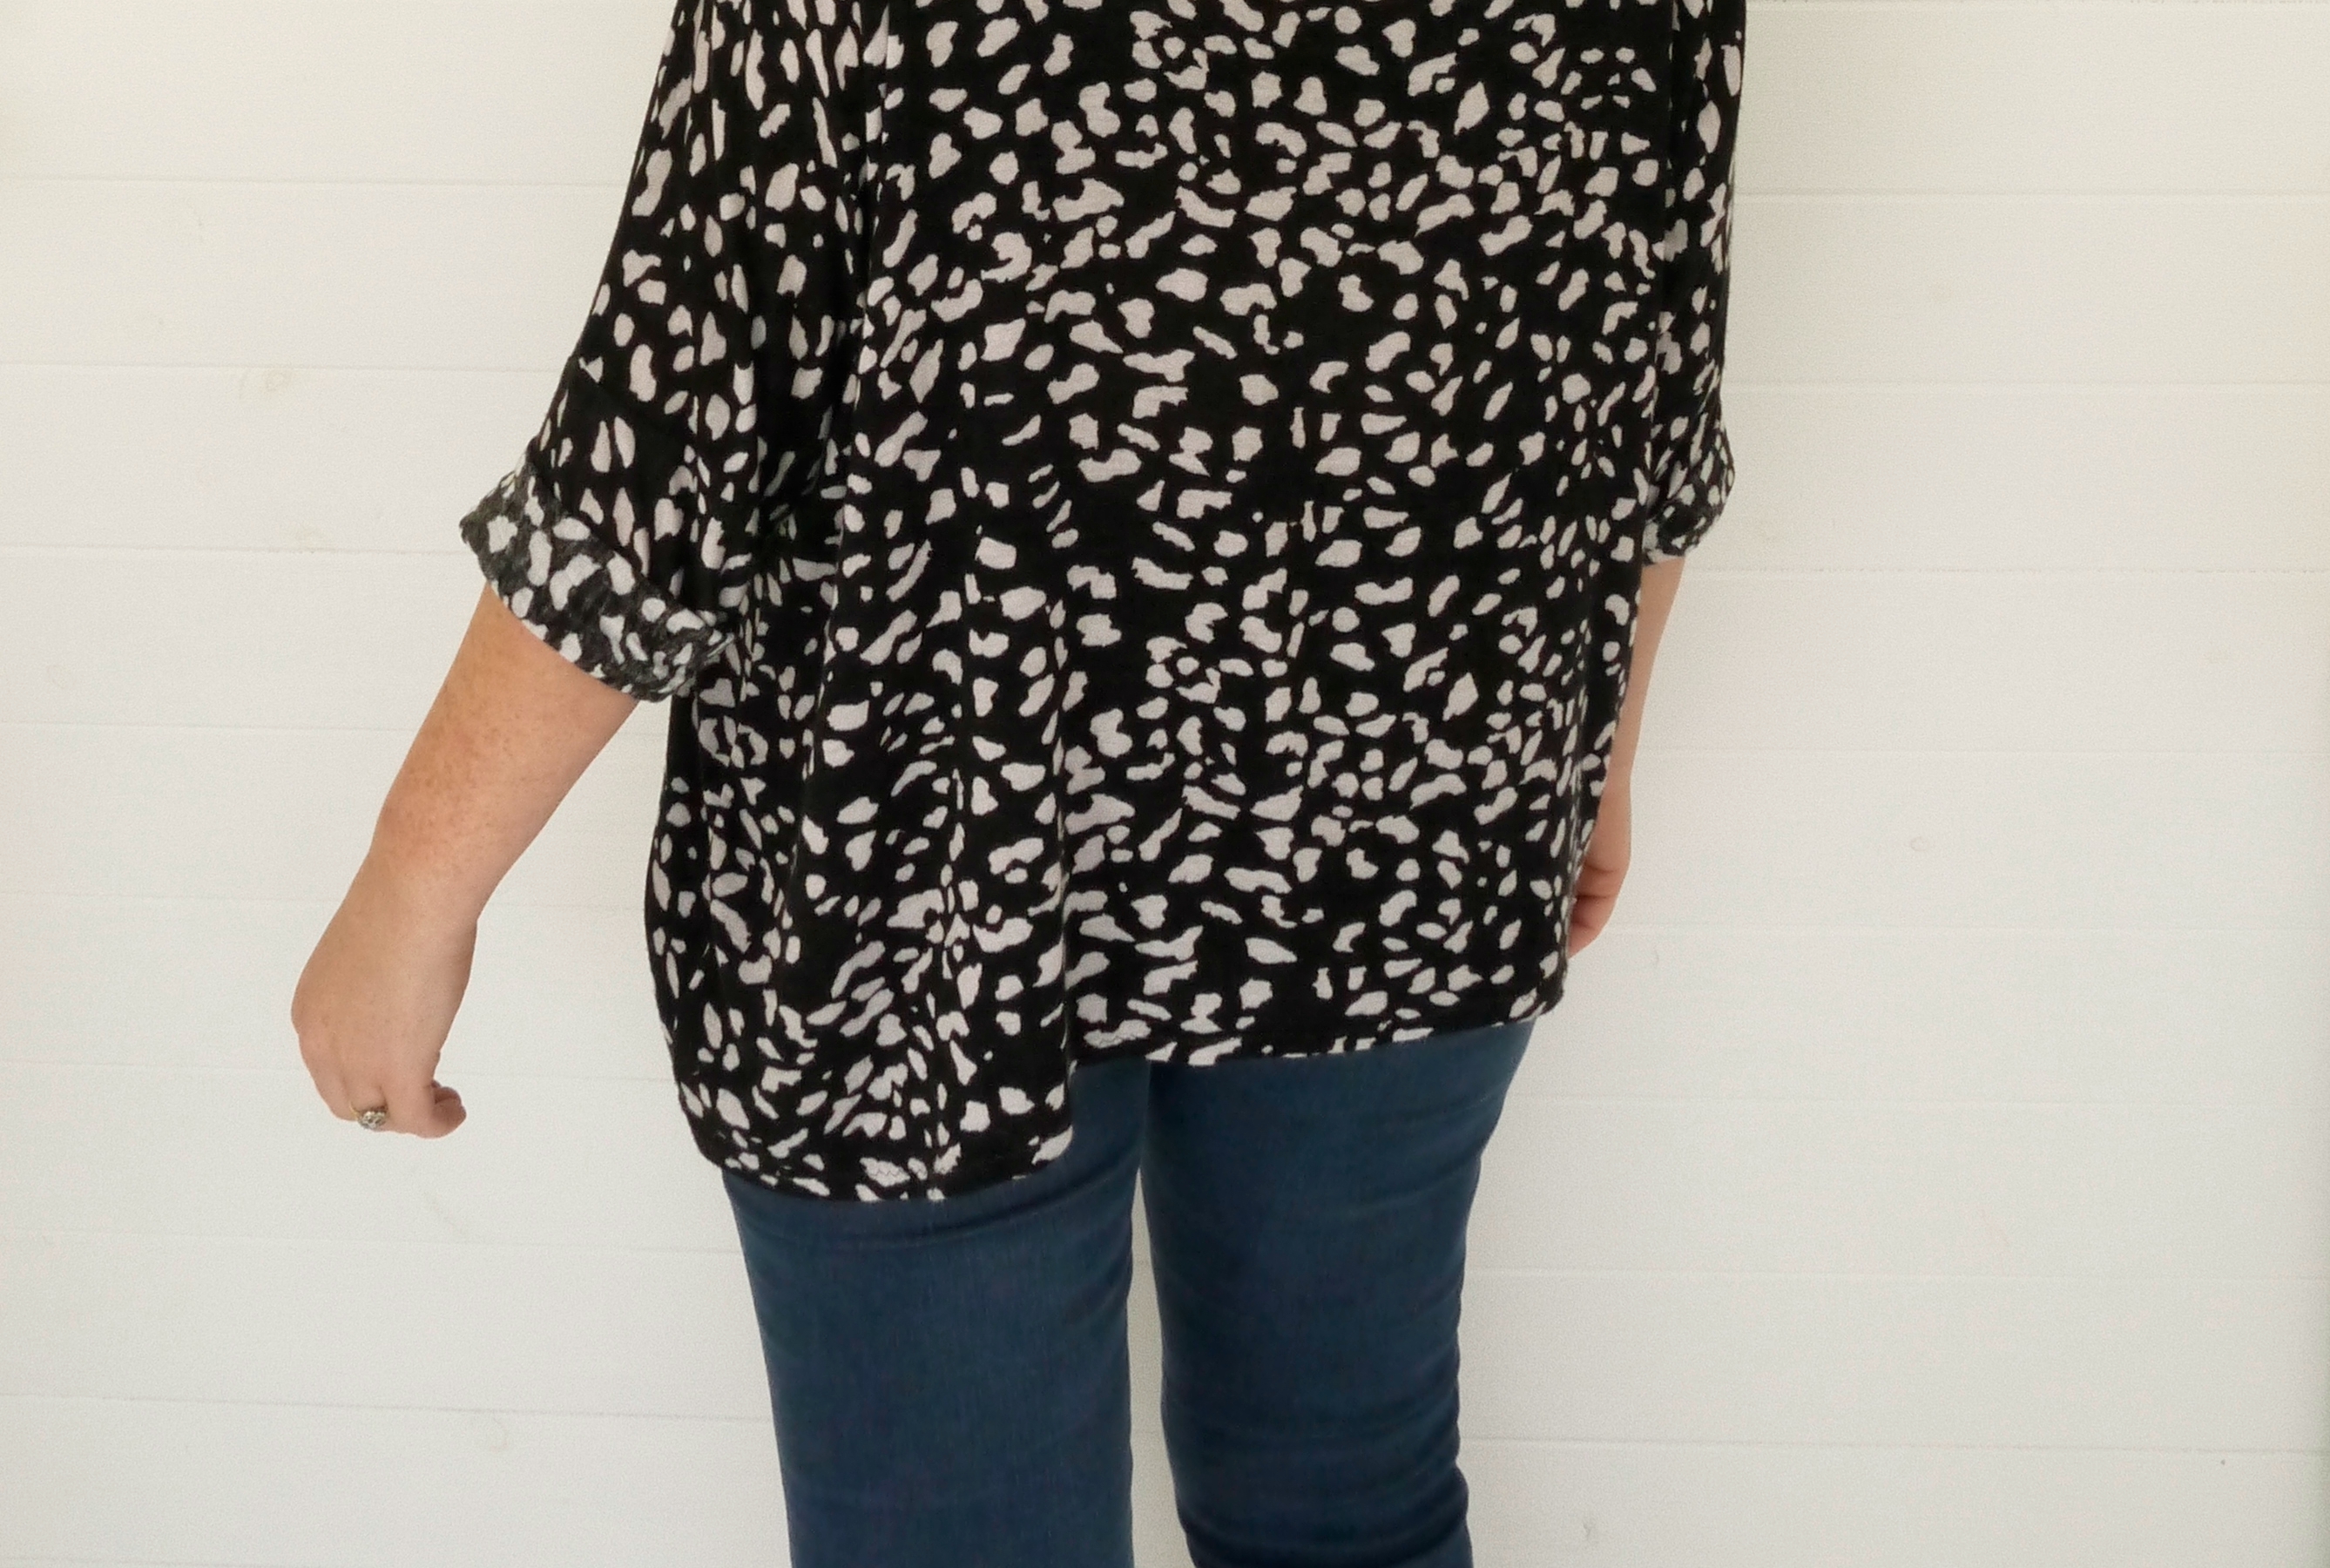
Despite the trauma of “sergergate” I sincerely do love this skirt which is quite a revelation to me. The scuba is perfect for smoothing over lumps, bumps and VPL. The waistband is CRAZY comfy and it really is a very comfy and versatile piece.  I tried out a few different looks…flat or heeled boots with a variety of tops…SCUBA PENCIL SKIRT OUTFITS

The first stripe top is the one I based my spotty box top on and is refashioned from a thrifted jersey nightdress. The camel and black stripe top is a cropped variation of a hemlock tee that I never blogged. Then grey hemlock blogged here. Then the camel top is refashioned from a skirt (due to be blogged) and the black top in the last pic is a black crepe test version of the 2 Hour Top. A free pattern from Sew Different. (I love it!) I think they all work as outfits. I think you can probably guess which 2 I am most likely to wear considering my tomboy tendencies. But at least now I know I have a dressier more ladylike option. To be fair, there is something about this skirt that makes me feel feminine (without being girly) which is a slightly odd and alien state for me. A totally new silhouette. And what is it with pencil skirts that makes you feel like you want to sashay like Jerry Hall when you walk?!

DIY, how to, Sewing, Tutorials

FO: Hacci Knit Kimono Cardi + tutorial

10/12/15

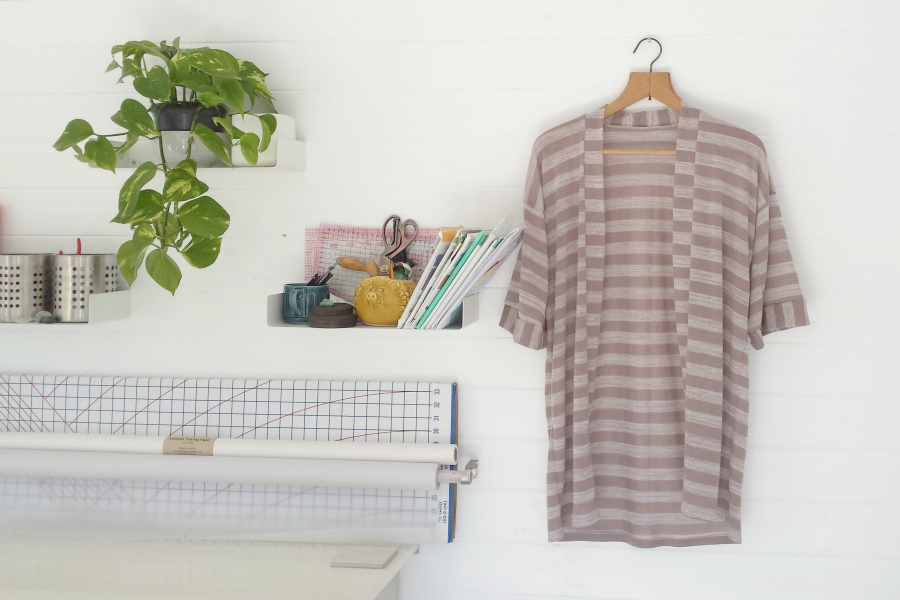
Happy Monday peops! If you fancy a really quick make to stave off the Monday blues then look no further! You could easily knock one of these up in a couple of hours. No pattern required. Just a few measurements, 1.5m of knit and you’re good to go….HACCI KIMONO DIY (1)

This is one of two Hacci knits kindly sent to me by Girl Charlee. You can see what I did with the other one here. Of the two, this was the easier to work with. Both my serger and standard machine handled this well with fine jersey needles. You’ll likely need to employ the differential feed on your serger due to the fabric’s urge to stretch under the pressure foot. So recommend swatching to perfect your settings before you get going 😉

Totally doable though as evidenced by the stripe matching I managed to achieve! On. A. Serger. Get in there!!! No fabric shifting going on there y’all!girl charlee hacci knit


While I stripe matched the side seams, I went for offset stripes on the kimono band to accentuate and make a feature of it…HACCI KIMONO DIY (10)


More stripe matching on that shoulder seam! (I was having a good day!!)HACCI KIMONO DIY (11)


For the kimono cuffs I went perpendicular with my stripes to add some more interest. Gotta love a bit of stripe play 😉HACCI KIMONO DIY (12)


Such a simple make. Let’s talk measurements. You need 2 identical rectangles. As long as you want your finished cardi + as wide as your “shoulder to shoulder” plus a couple of inches…HACCI KIMONO DIY (13)


Lay one rectangle on top of the other.  From the top layer only, cut a 4″ wide strip straight out of the centre then serge straight across the the top to join everything together…HACCI KIMONO DIY (1)


Snip in to your side seams approx 8″-9″ down to mark your armhole opening…HACCI KIMONO DIY (2)


Serge down the side seams from this notch all the way down the sides…HACCI KIMONO DIY (3)


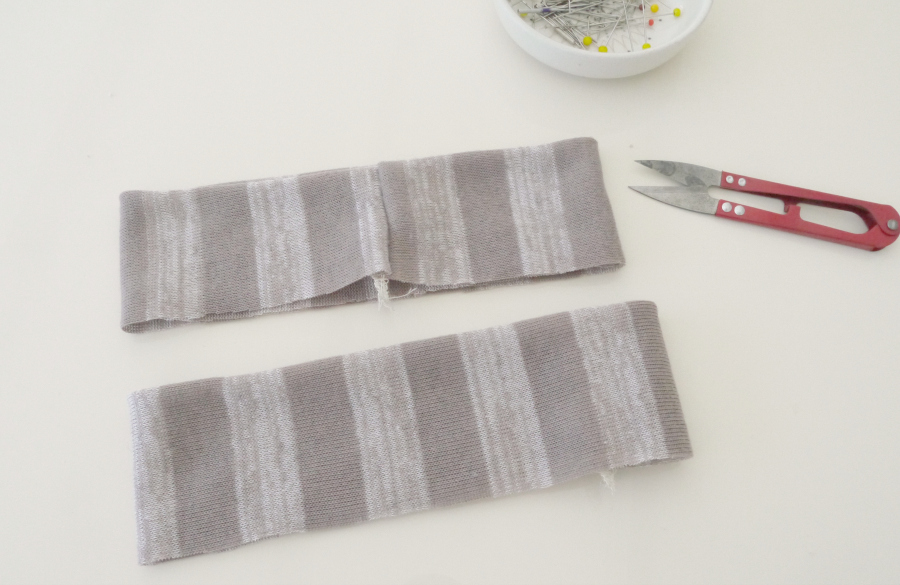
Create a 4″ wide strip long enough to go all the way around your cardi opening. Mine was cut in 2 pieces and joined. Fold in half RS together, serge the ends closed. Turn through RS out then align the raw edges and pin together to keep them aligned. Press.HACCI KIMONO DIY (4)


With the kimono RS out attach the band all the way around the opening with raw edges aligned…HACCI KIMONO DIY (5)


Before you sew, press the hem under 5/8″ on the WS. Then flip it over to enclose the end of your band like so. (This is the same technique as I used on my Kimono for The Refashioners if you want more detail). Serge all the way around the the band, secure threads. Turn the seam to the inside and push the corners through. Hem.HACCI KIMONO DIY (6)


Next create 2 tubes of fabric the same width as your armhole.  With the kimono WS out and the sleeves RS out pin in place around the armhole, aligning raw edges, then serge together…HACCI KIMONO DIY (7)


Lastly create 2 cuff bands (a tube folded in half) the same width as your sleeves and attach in the same way. RS together, raw edges aligned. Serge together.HACCI KIMONO DIY (8)


All done!! The nature of hacci knit (it’s very lightweight) will make this a perfect cover up for warmer days too and it’s a great way to layer without adding too much bulk 🙂 I fancy trying this in some french terry too for a warmer version!HACCI KIMONO DIY (9)
For this week only Girl Charlee are offering 15% off (plus free shipping on orders over £50) when you use the code PORTIA15 at checkout 🙂 Code expires Sunday 18th Oct Midnight GMT.
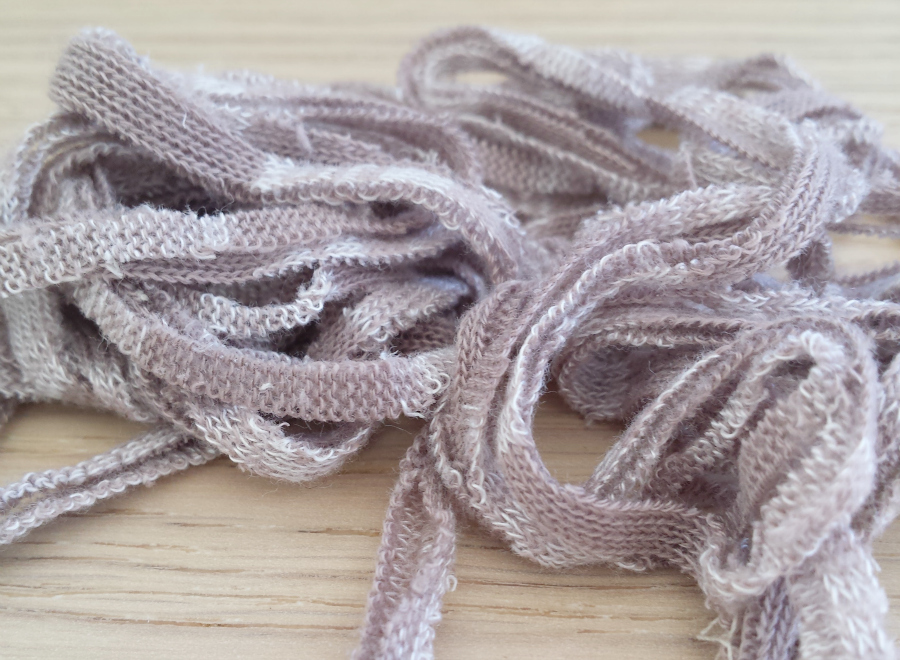
Here’s a gratuitous close up of my trimmings aka #sergerspew #sergerporn , lol! (It will give you a good idea of the texture so does actually serve a purpose. Plus it’s so puuuuurty! Happy Monday people!20151009_130901

DIY, how to, Sewing, Tips and Tricks, Tutorials, Uncategorized

Boxy Hacci Knit Top: Tutorial & Giveaway!!!

09/24/15

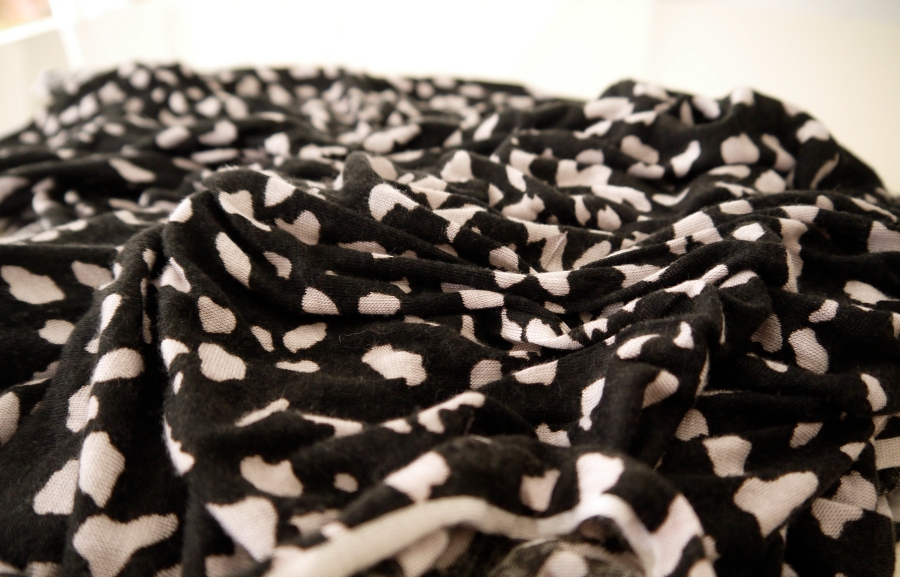
HACCI KNIT SPOTTY BOX TOP - DRAFTING TUTORIAL

The lovely folks at Girl Charlee got in touch a while ago and asked me if I’d be interested in having a play with some of their gorgeous knits.  Absoflippinlutely I would! One of the fabrics they sent me (they are a generous bunch, but more on that later!) was this delicious Hacci knit. (If anyone knows the correct pronunciation let me know. “Hachi or Hacki” ?? What say you??)

It’s times like this that I wish you guys could reach into the screen and pick this fabric up. Soft and drapey is an understatement. SOOOO soft….SOOO drapey….

HACCI KNIT SPOTTY BOX TOP - DRAFTING TUTORIAL

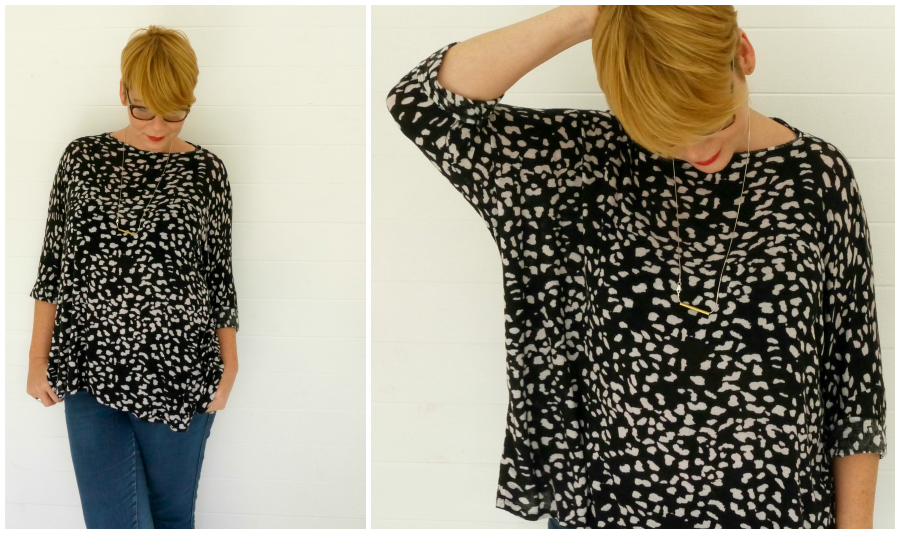
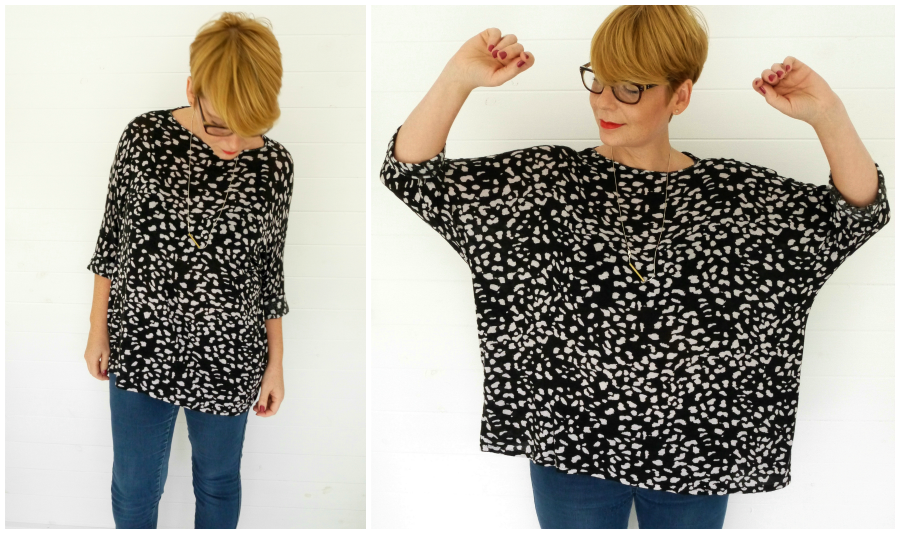
So as you may have gathered from the title this is a very boxy top.  Made up in a different fabric (ie heavier and less drapey) it would look much more voluminous. But the great thing about this one is it drapes to the body and doesn’t look like there’s huge amounts of fabric adding bulk to your frame. Only when I raise my arms is it obvious just how wide this top is….(and I don’t tend to walk around in a permanent “yay!” position. So we’re good!)HACCI KNIT SPOTTY BOX TOP - DRAFTING TUTORIAL

Approx 56″ around to give you an idea. (I’m a 38″ bust so that’s a full 18″ of ease). It’s so simple to draft your own pattern for this. It’s literally a couple of squares for the body and a trapezium shape for the sleeves. Here’s what I did…

The basis for this top was the RTW jersey top you can see in the background below…HACCI KNIT SPOTTY BOX TOP - DRAFTING TUTORIAL

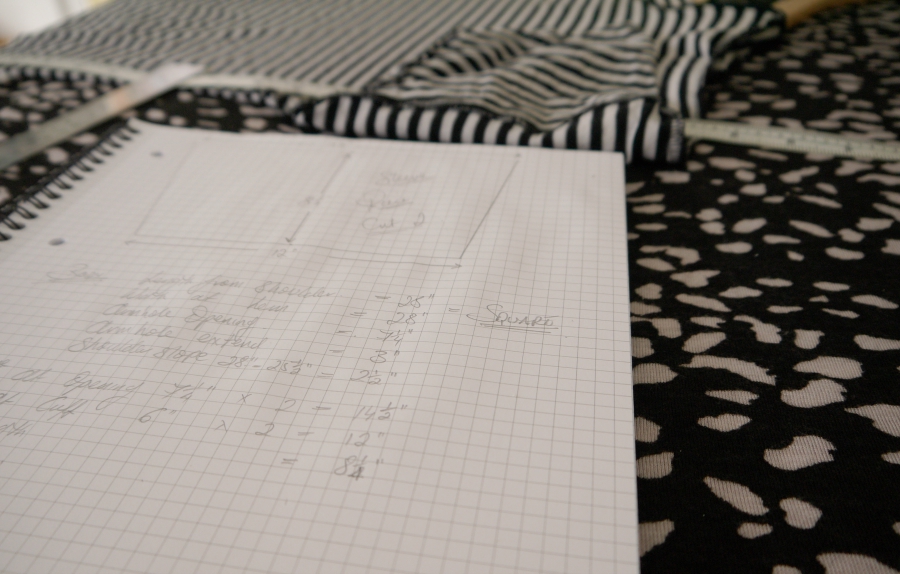
I took some measurements of the body, neckline and sleeves. Things like the neckline width, sleeve length and circumference at either end. Body length and width. Shoulder slope, how far the armhole extended out from the main body etc.

Then I took those measurements and went about drafting a simple template pattern. I established from the RTW top that the body (front and back) was essentially 2 squares measuring 28″ x  28″ ….identical bar the neckline depth, so I only really needed to draft one pattern piece for the body and cut 2 of those from my fabric.HACCI KNIT SPOTTY BOX TOP - DRAFTING TUTORIAL

Before we proceed it’s worth noting…this is “maverick” drafting. It’s not technically perfect as I haven’t added seam allowances the “right” way or anything of that nature; and purists out there…I apologise, lol! I am not a qualified pattern cutter. I work things out as I go and what I share here tends to be what works for me first as opposed to “technically perfect”.  But it does yield a wearable top because the size and boxy nature are very forgiving of such things! And it’s a top I love and is in use as soon as it comes out of the laundry. So if that’s the measure of a successful outcome, then this totally works for me. If you get easily “offended” by technically “incorrect” stuff…click away now! If you want a really quick easy bit of drafting that yields a comfortable drapey top….read on!

Patterns are drafted in quarters as we know. So I started with a rectangle that was 14″ wide and 28″ long…

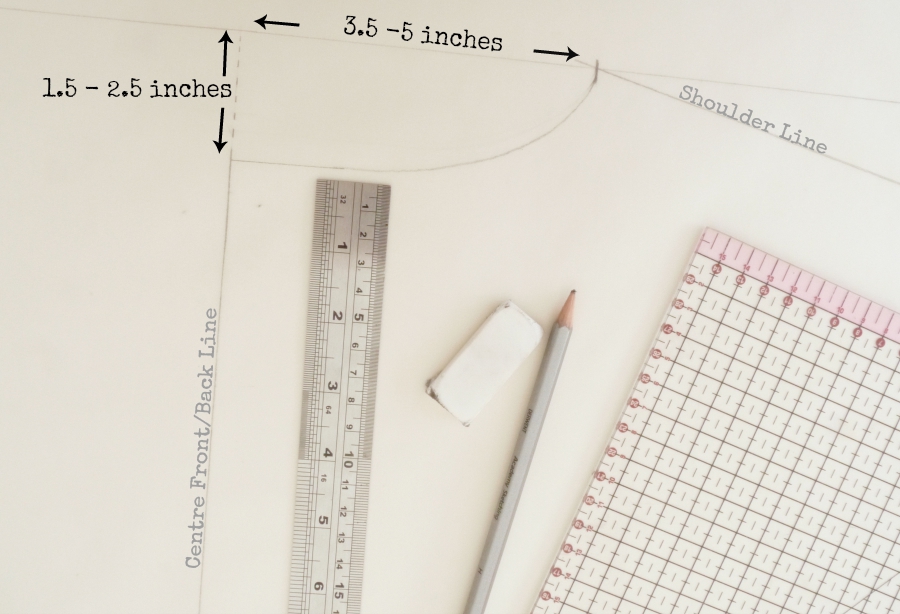
Neckline

  • Measure down 1.5″ to 2.5″ (or your preferred neckline depth) from the top left hand corner of your rectangle. Mark a point.
  • Measure across 3.5″ to 5″ (or your preferred neckline width divided by 2) from the top left hand corner of your rectangle. Mark a point.
  • Join with a curve ensuring a 90 degree angle where the curve meets the centre front and shoulder point.

HACCI KNIT SPOTTY BOX TOP - DRAFTING TUTORIAL

You have your neckline!

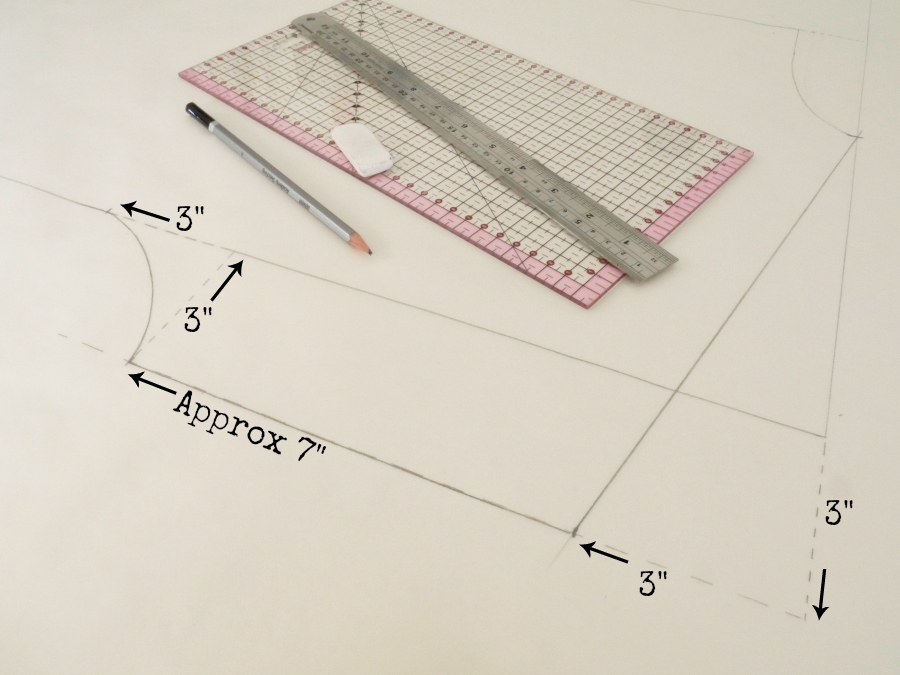
Armhole

This style has and extended/drop shoulder line and a curved under arm seam.

  • From the top right hand corner of your rectangle, extend a dotted line out by 3″
  • Square down from there another dotted line of 3″”
  • Join that to your neckline curve to get your shoulder line
  • Square down approx 7″ (your preferred armhole depth) from the end of your shoulder line to get your armhole opening
  • Join that to your side seam with a smooth gradual curve at least 3″ down the side seam

HACCI KNIT SPOTTY BOX TOP - DRAFTING TUTORIAL

You have your armhole and shoulder!

The sleeve

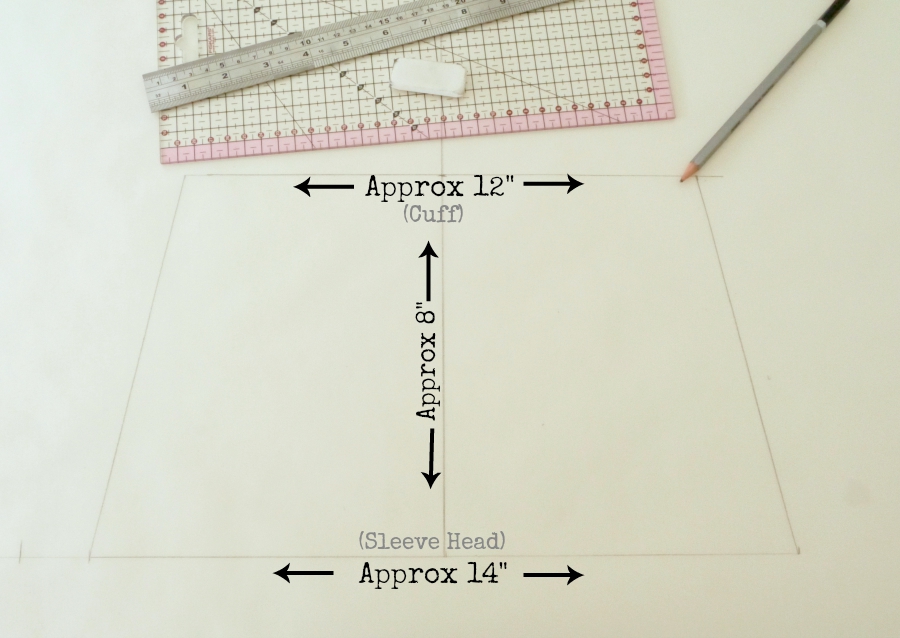
It’s a matter of preference here it terms of length and “snugness” around the arm. But essentially it’s a trapezium! The measurements shown are what I used for this top. You might prefer a longer or more/less fitted sleeve. Jut change the measurements to suit:

  • Draw a vertical line the length you want for your sleeve; incorporating a bit extra for hemming etc
  • Your sleeve head measurement must match that of the armhole. Draw a horizontal line of that width, across the base of ( and centred on) your vertical line.
  • Your cuff measurement will vary depending on the length of your sleeve. The longer the sleeve the narrower the cuff. Draw a horizontal line of that width, across the top of ( and centred on) your vertical line.
  • Join either side with a diagonal line

HACCI KNIT SPOTTY BOX TOP - DRAFTING TUTORIAL

You have your sleeve!

Cutting

  • Body – Cut 2 on the fold
  • Sleeve – Cut 2

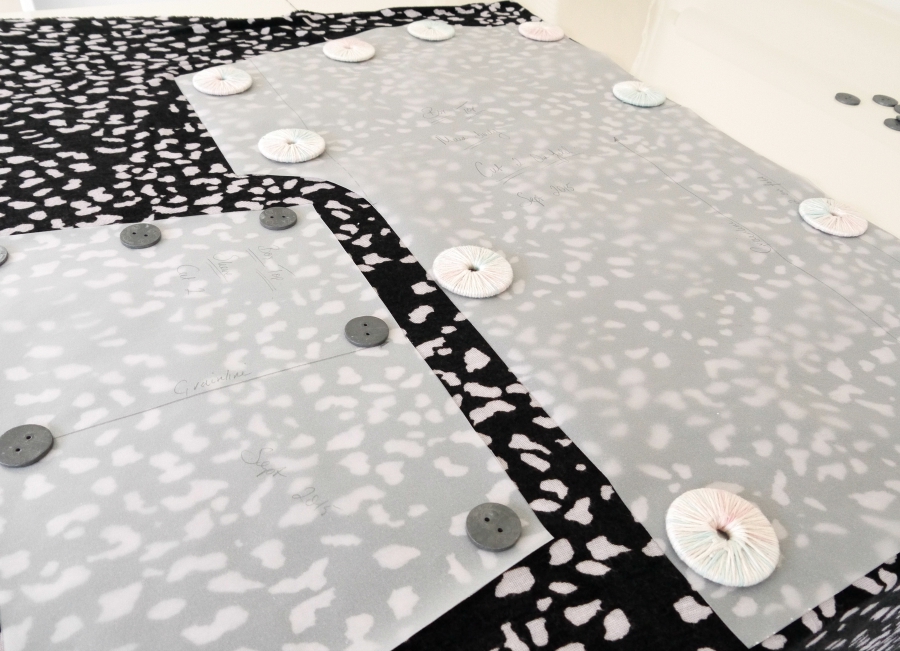
HACCI KNIT SPOTTY BOX TOP - DRAFTING TUTORIAL

Construction

  • Sew the shoulder seams RS together
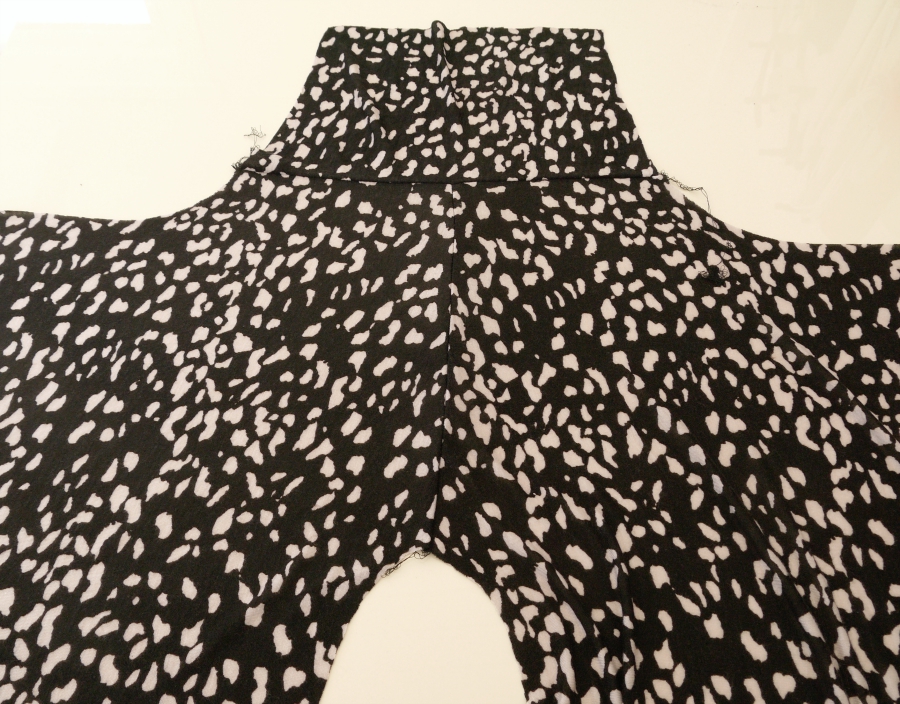
  • Sleeves are put in flat. Attach the sleeves RS together then flip and press out (see below)
  • Fold in half RS together and sew the sleeve, under arm and side seams in one go
  • Finish hem, sleeves (I just turned once and hemmed) and neckline  (here’s what I did) as you wish.

HACCI KNIT SPOTTY BOX TOP - DRAFTING TUTORIAL

The Fabric

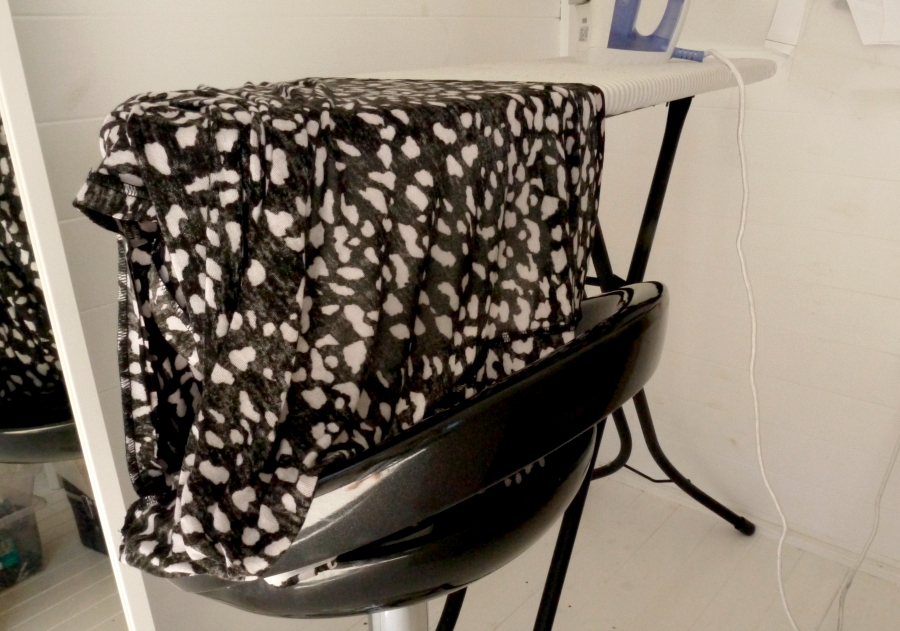
Now I LOVE this fabric. But it’s the very things I love about this fabric that make it a little tricky to work with. For instance, it is soooo drapey (actually “springy” and “boingy” would be suitable terms too I think!) that when you hang it off an ironing board to press the hem it drapes/stretches out (all the way to the floor in my case!) Which doesn’t make for even hemming. I resolved this by popping a stool underneath to “support” the fabric. Steam a seam to stabilise the hem for turning and sewing. I spray starched my pattern pieces around the edges after cutting to minimise curling. When it comes to cutting, the fabric stretches out as the scissor blades pass underneath it then “springs” back as soon as it is cut. I found cutting a couple of mm away from my pattern paper compensated adequately for this.  Apart from that, work relatively quickly, use the right needles and tension settings and you’re good. But SWATCH first and handle gently 🙂HACCI KNIT SPOTTY BOX TOP - DRAFTING TUTORIAL

It’s perfect for a loose fitting top like this…HACCI KNIT SPOTTY BOX TOP - DRAFTING TUTORIAL

HACCI KNIT SPOTTY BOX TOP - DRAFTING TUTORIAL

HACCI KNIT SPOTTY BOX TOP - DRAFTING TUTORIAL

Giveaway time!!

Now I mentioned that the folks at Girl Charlee are a generous lot! They are offering you the chance to win 2m of the fabric of your choice from their selection. To be in with a chance of winning, follow them on Instagram and Facebook. Then leave a comment here stating what fabric you would choose and any suggestions for what knits you would love to see them stocking in the future. Simples. Giveaway closes at midnight GMT on 9th October and the winner will be selected at random.

Good luck!!

DIY, how to, refashioning, Restyles, Sewing, Tutorials, Uncategorized

Refashion: Colour Block Tee

09/17/15

I’m not sure refashions can get much simpler than this! This one first appeared in Issue 2 of Simply Sewing Magazine way back at the start of the year (hence the older pic!)…The licence for the content I create for Simply Sewing reverts back to me after 6 months. So I am reproducing it here for my records and your reference 🙂 Enjoy!!Colour Block Tee Refashion - portialawrie.co.uk

It’s a super quick and easy way to lengthen a jersey tee or just combine two plain tees for a bit of colour blocking interest.

One of the things I find with T Shirts is that, over time and many machine cycles, they shrink. Now I’m quite particular about the length of my tee as I hate flashing my midriff when I raise my arms, sit down lean over etc. So once a top sits a little too short on me, it ends up languishing unworn in my wardrobe. This quick and simple refashion solves the problem of a too short top AND nails the colour blocking trend, all in one fell swoop. What’s more, because we’re using the top of one tee and the bottom of the other, all the neck, sleeve and hemline finishing is already done! Colour Block Tee Refashion - portialawrie.co.uk

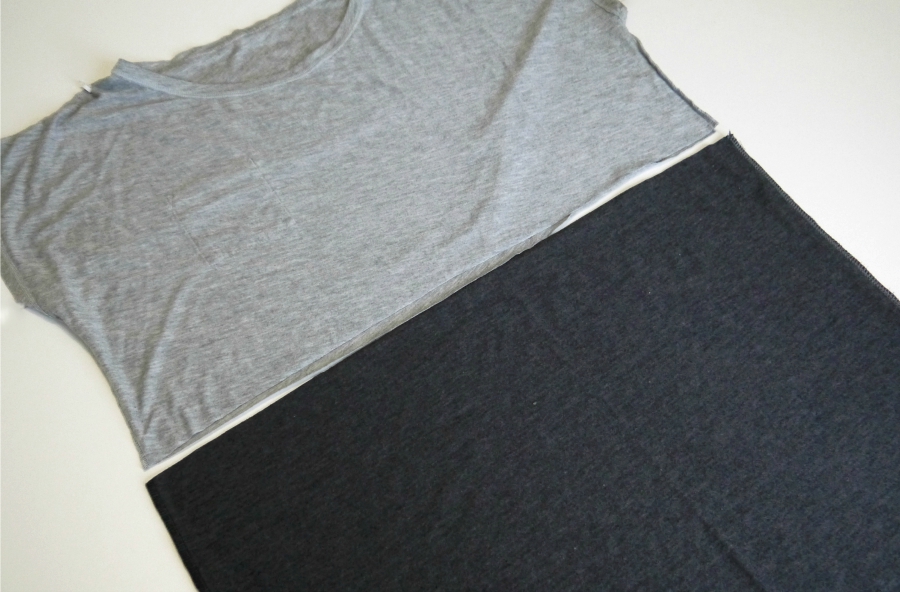
Cut your main tee (the light grey one in my case because I like the shape and fit of it) straight across from side seam to side seam, at the point you want the colour blocking to start, plus a little seam allowance. Retain the top portion.Colour Block Tee Refashion - portialawrie.co.uk

Cut the bottom half off your “donor” tee. (The dark grey one in my case. Ideally you want this one to be the same width or slightly wider than your main tee. I call it the “donor tee because it’s very kindly donating fabric to it’s  cousin, the light grey tee ;)) Colour Block Tee Refashion - portialawrie.co.uk

How much you cut off will depend on how deep you want your colour block band to be. For example, if you want a 12″ band, then measure 12″ up from the hem, plus a little seam allowance, and cut straight across at that point.Colour Block Tee Refashion - portialawrie.co.uk

Then, mark with a pin, how much you need to trim off to have your colour block band, be the same width as the top portion of your main tee…Colour Block Tee Refashion - portialawrie.co.uk

Sew, and trim the excess off the colour band to resize it. You need the side seams of the colour band to line up perfectly with the side seams of the main tee.Colour Block Tee Refashion - portialawrie.co.uk

Lay the two portions like so. The tee part right way out and the band part inside out, with the neckline of the tee facing the raw edge of the band…Colour Block Tee Refashion - portialawrie.co.uk

: Slide the tee all the way inside the band so that the two pieces are right sides together, and the raw edges of the tee line up with the raw edges of the band…Colour Block Tee Refashion - portialawrie.co.uk

Lining up the side seams first, and keeping raw edges even, pin and then sew all the way around.

Flip right side out, press the seam, and you’re done!Colour Block Tee Refashion - makery (9)


Tips:

T Shirt fabric can be a little tricky to work with. The raw edges can curl over and stretch out on jersey fabrics even if handled with care. To help with this, use a little spray starch on your fabric during construction, (especially along the cut edges) then launder it out afterwards

I used an overlocker for this project. But I happily sewed jersey fabric on my standard sewing machine before I was lucky enough to get an overlocker. They are fantastic for sewing with jersey but by no means essential, particularly on looser styles. A lot of modern sewing machines have a stretch stitch for exactly that reason. Failing that, use a straight stitch and hold the fabric under very slight tension/stretch as you feed it through the machine

Consider colour blocking skirts, jumpers and non jersey tops. Combine different textures and patterns. Combining different garments is a great way to rejuvenate and get more use out of old clothes as well as putting your own individual stamp on what you wear.


DIY, how to, Sewing, Tips and Tricks, Tutorials

How To: Split Hem Finish

09/14/15

What seems like eons ago now, ( just before The Refashioners took over my blog!) I promised a “how to” on this split hem finish….SPLIT HEM FINISH - TUTORIAL

As is often the case with me it was a happy accident born of a bodge up! A solution to a too short top that I ended up quite liking!

SPLIT HEM FINISH - TUTORIAL

So in this instance I’m making another Maya top. At this stage everything is finished, except the hem which I have overlocked to limit any fraying.  I cut long /wide strips from my leftover fabric, just a little bit wider than the top, laid flat. The bands folded in half RS together.

I measured from side seam to side seam on my top…SPLIT HEM FINISH - TUTORIAL

And marked this width on my fabric…

SPLIT HEM FINISH - TUTORIAL

Using those marks as a guide I drew out my bands. A line perpendicular from the folded edge at either end (where I just marked the width of the top). In this instance about 6cm from the folded edge. Then those joined  up with one long line.

SPLIT HEM FINISH - TUTORIAL

Cut 2 bands. One for the front. One for the back. (Measure both the front and back of the shirt as these can differ depending on style). I cut my back band a bit wider for an asymmetric look. I pinned along the long open edge to stop everything moving about and left my original markings in place as a stitching guide…SPLIT HEM FINISH - TUTORIAL

Just sewing the short edges at either end of the band (not the long edge) stitch directly on top of that pen line, press and trim the excess right down for turning…SPLIT HEM FINISH - TUTORIAL

Turn through, poke out corners and press thoroughly…SPLIT HEM FINISH - TUTORIAL

And you have your two bands 🙂
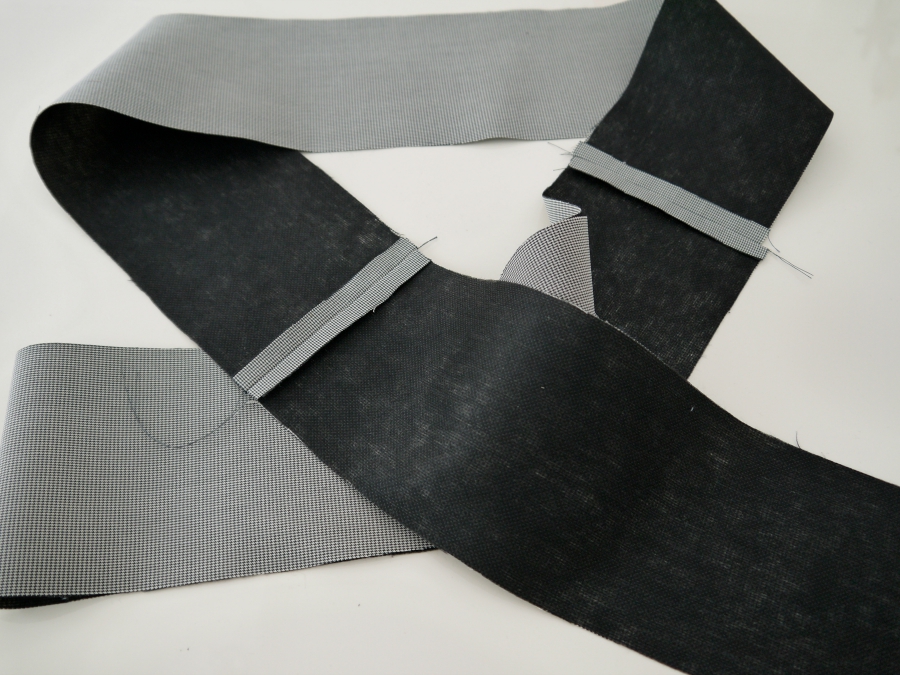
Now just attach them the the hem of your top. Line up the open edges of your bandwith the unfinished edge of the hem. Have the bands meet at the side seams. Pin in place at this point in particular and all along the edge…SPLIT HEM FINISH - TUTORIAL

Serge/Stitch in place. Flip down and press…SPLIT HEM FINISH - TUTORIAL


SPLIT HEM FINISH - TUTORIAL

Done!!


DIY, how to, jewelry, Tutorials, yarn crafts

DIY: Wood and Yarn Bangle

09/08/15

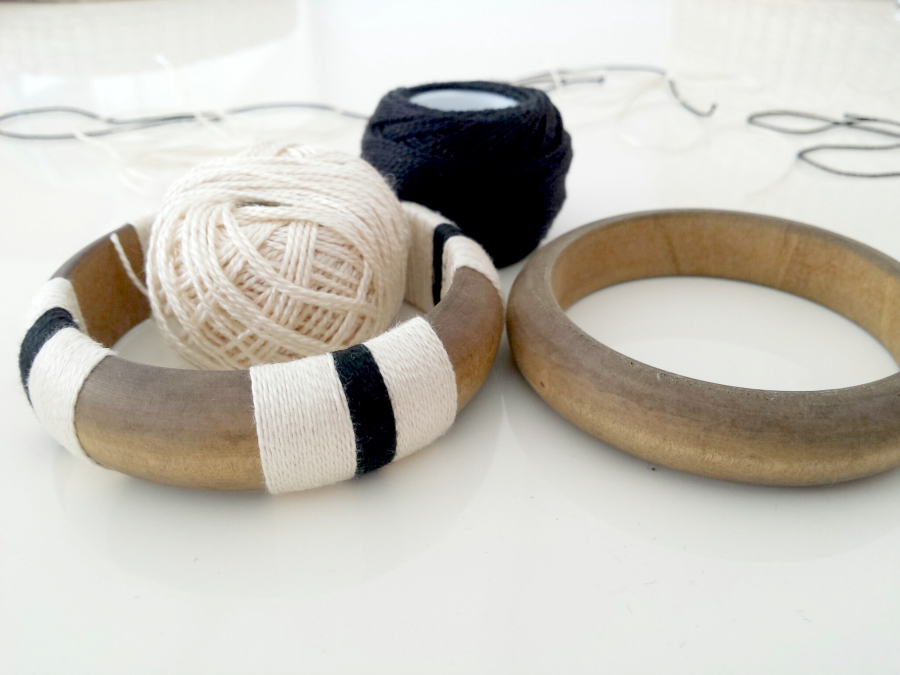
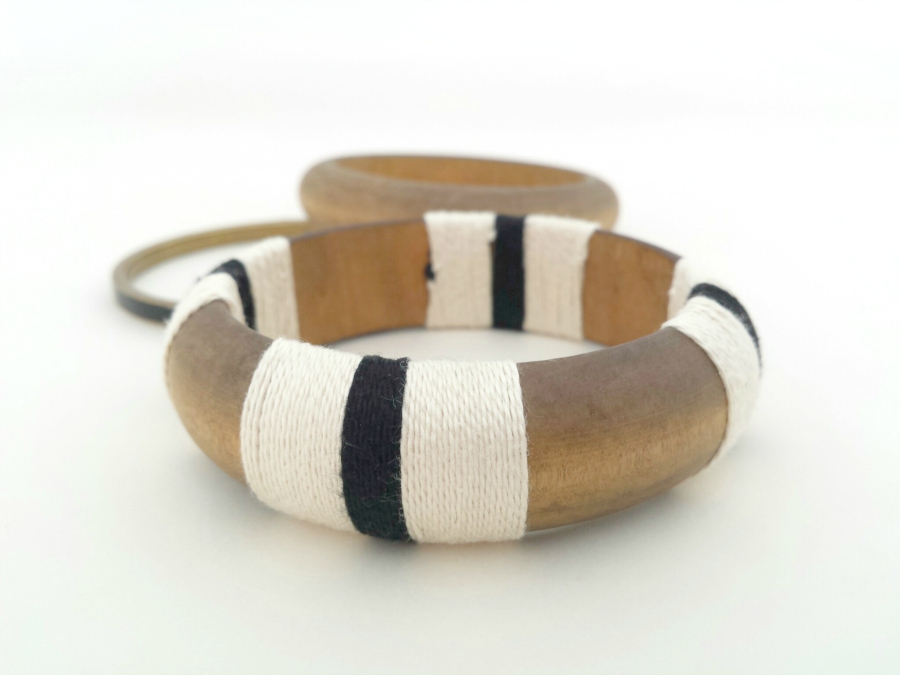
Ingrid recently asked me if I was happy to have my blog back.  I guess it’s a bit like having a house party. You’re glad to clear up and get your house back into shape the next day  but you had such a great time you could’ve carried on partying, lol! (Some of the party goers really like to partaaaay if you know what I mean! Empty gin bottles; and coffee tables with stiletto scratches on them from dancing on said tables. Or am I giving you a little too much insight into my 20’s here, lol??) After the whirlwind that was the blogger challenge for The Refashioners 2015 the dust is still settling here and I’m trying to wrestle myself back into some sort of blogging schedule again! Plus I’m having slight withdrawal from the frenetic and full on activity and inspiration of last month, lol! (No it’s not just you Tasha!) I’m busy behind the scenes putting together the first post showcasing some of YOUR makes for the community challenge element (and that amazing prize package!). But in the meantime I thought I’d share this quick and easy DIY for adding a little extra zing to a plain ole bangle!DIY YARN WRAPPED BANGLE


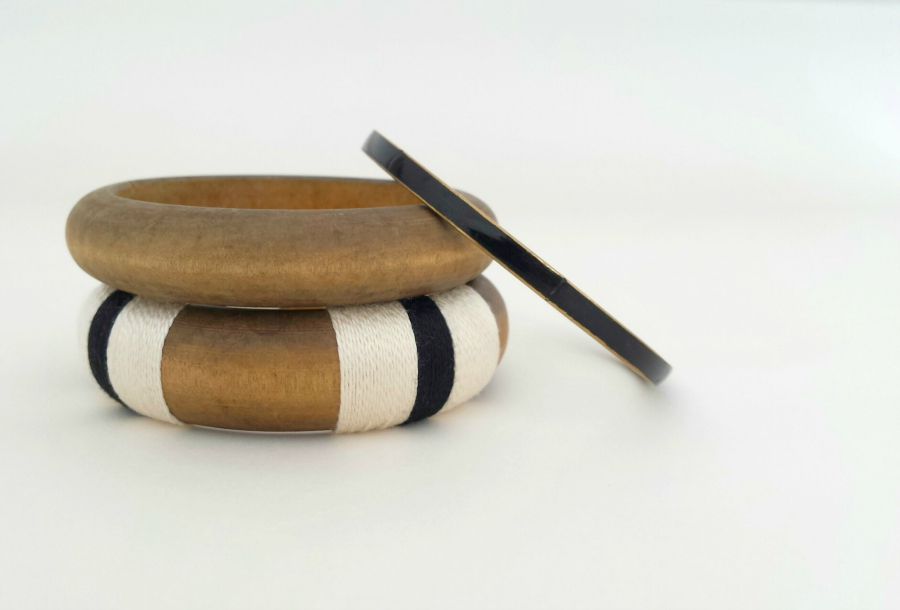
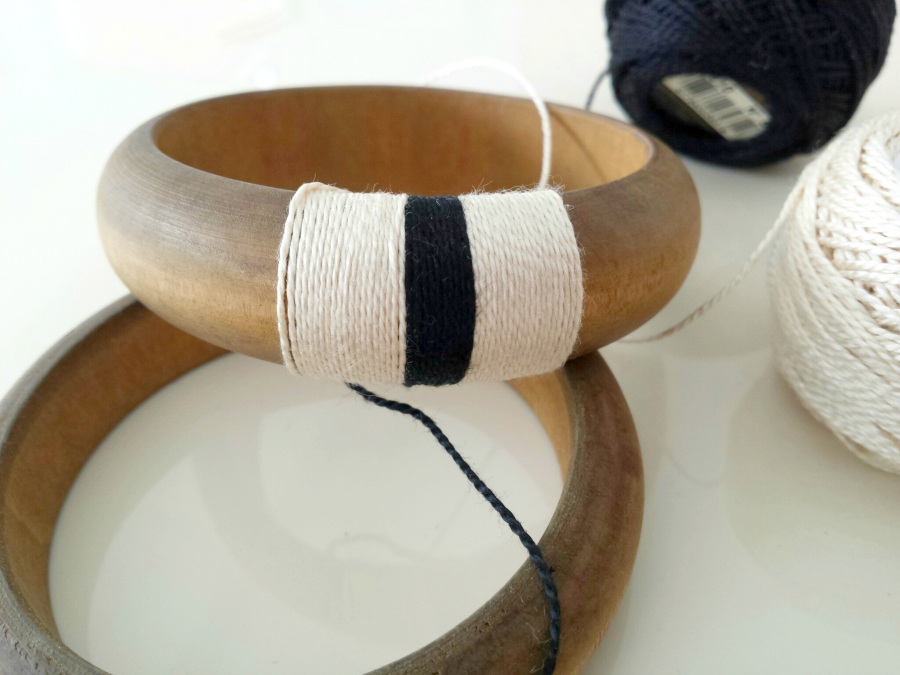
I’ve been subconsciously buying into the monochrome trend recently. So when I dug up these wooden bangles from the bottom of a drawer, I thought they’d be perfect for a little updating. I wanted to create a nod to monochrome rather than go all out. Plus I really like the look and feel of the wood and the way it contrasted with this delicious pearl cotton yarn. The finished effect is a subtle and stylish nod to one of the season’s hottest trends.DIY YARN WRAPPED BANGLE


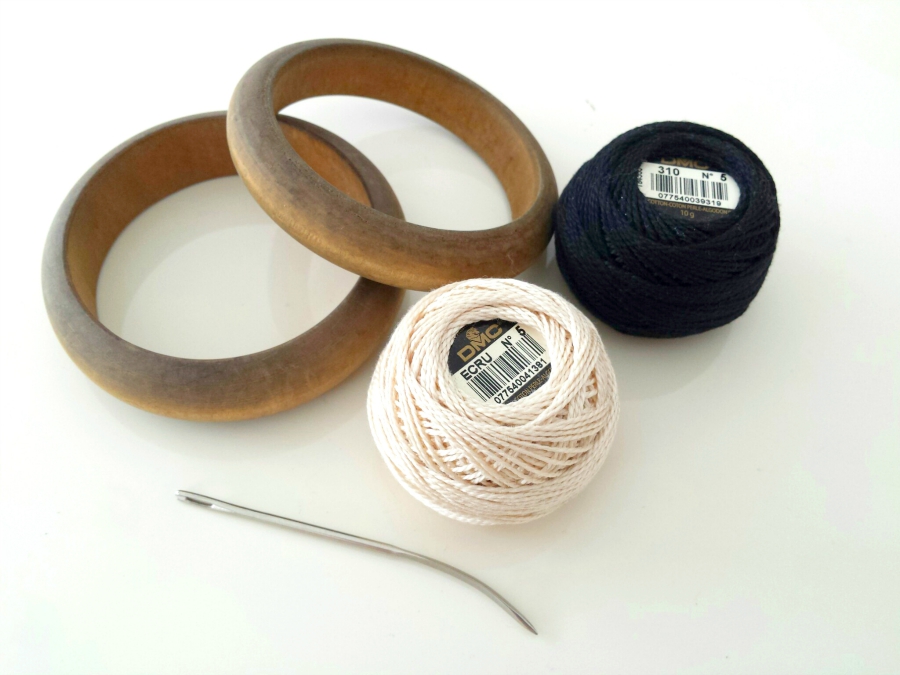
Materials: Wooden bangle, DMC Pearl Cotton #5 in Black & Off White, Yarn Needle and Thread Snips/Scissors.DIY YARN WRAPPED BANGLE


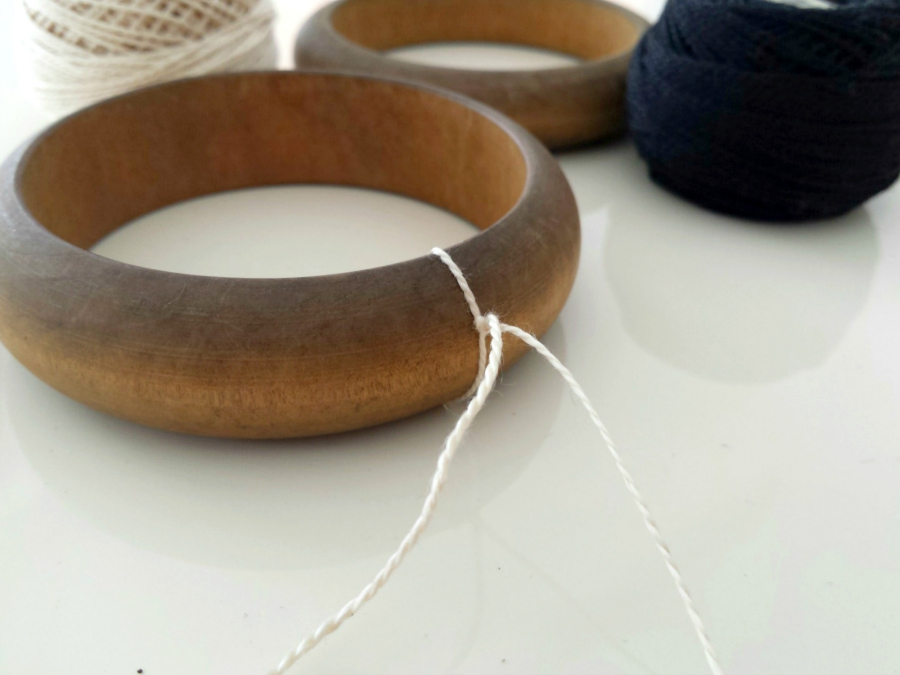
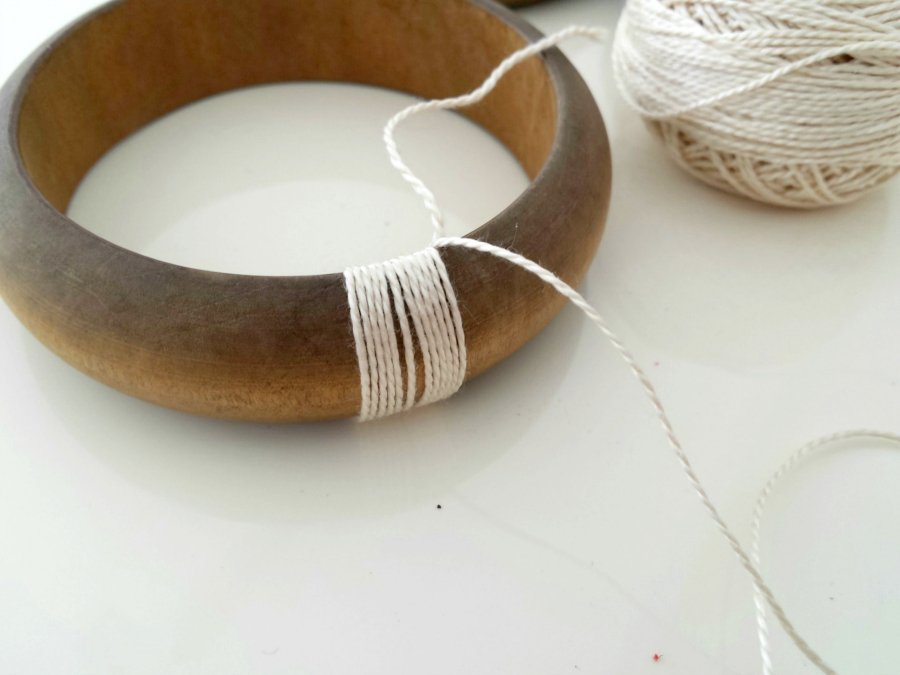
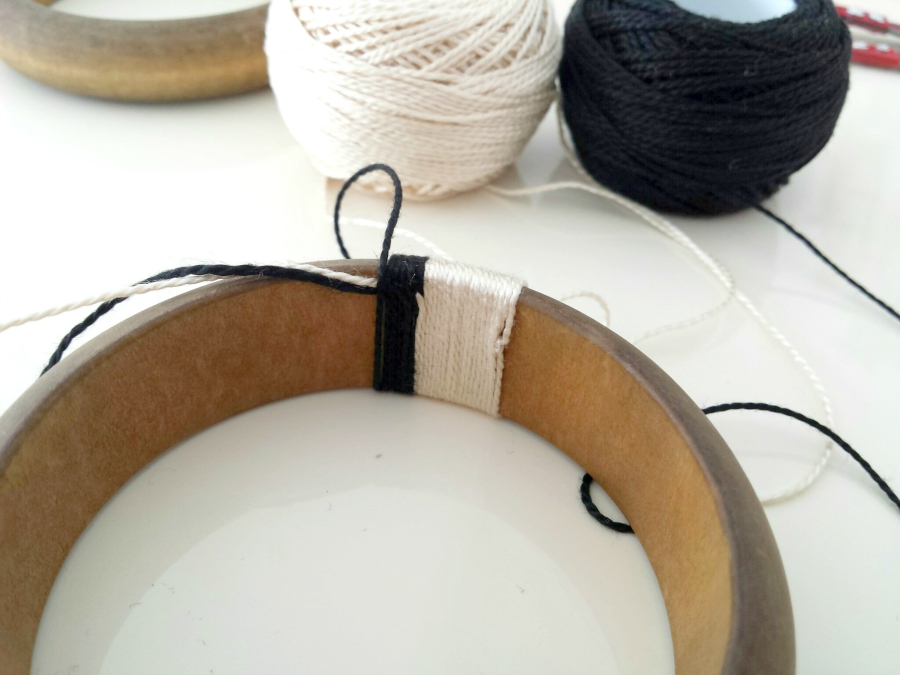
Start by tying a slipknot around the bangle using the white and snug it up against the bangle. (You’re not cutting off a length of yarn, but wrapping straight from the ball). Leave a tail of about 2”…DIY YARN WRAPPED BANGLE


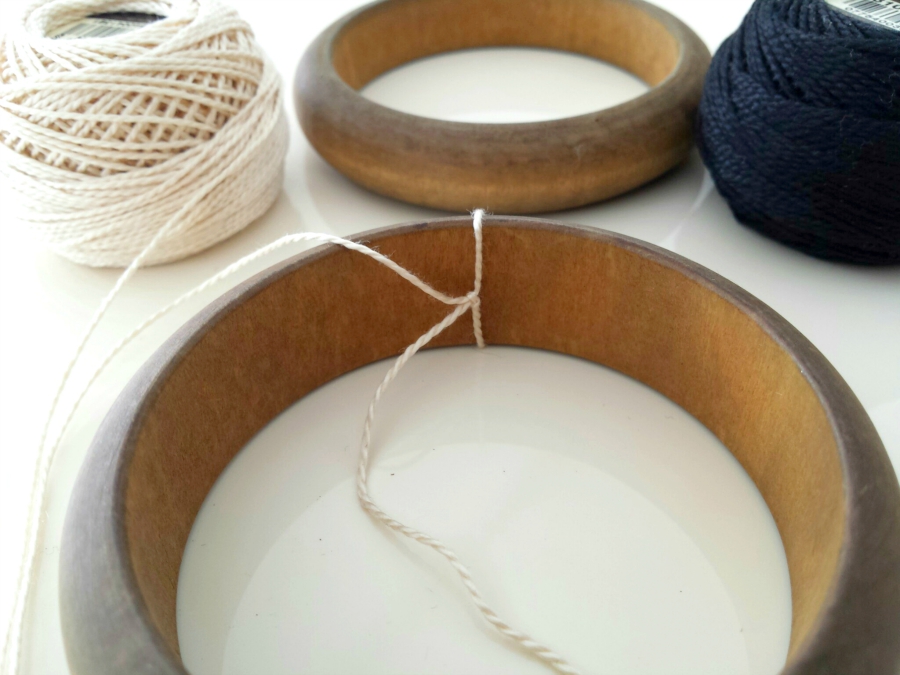
Flip the knot around to the inside…DIY YARN WRAPPED BANGLE


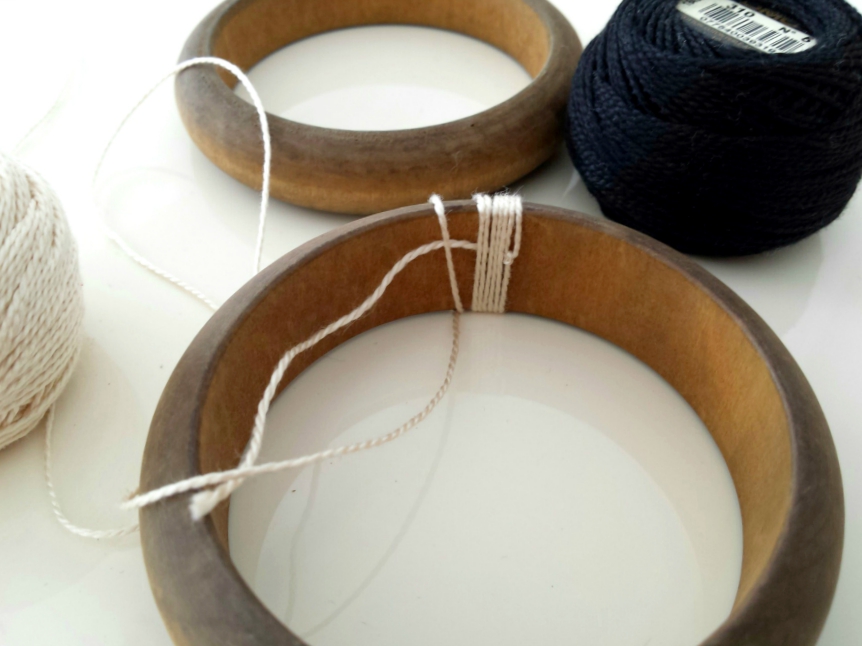
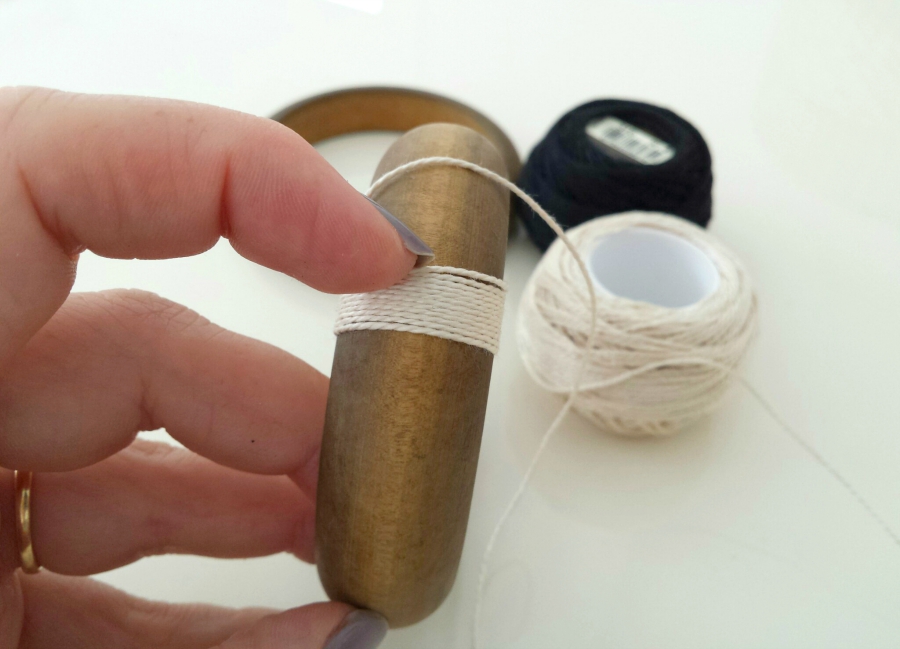
Make a few wraps by passing the ball of yarn through the bangle. Keep it under a really firm tension and wrap over the loose tail end of the yarn to secure it as you go…DIY YARN WRAPPED BANGLE


To get a nice even wrap without any gaps like this; stop every 6 or 7 wraps…DIY YARN WRAPPED BANGLE


And snug the wraps up against eachother with your nail…DIY YARN WRAPPED BANGLE


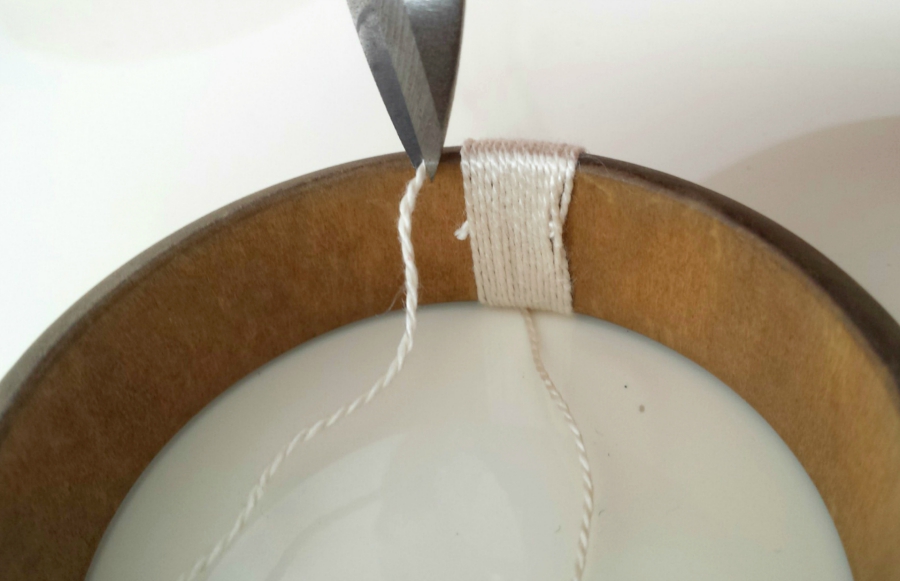
When you get halfway along, pull the yarn tail taught and snip off, then continue wrapping…DIY YARN WRAPPED BANGLE


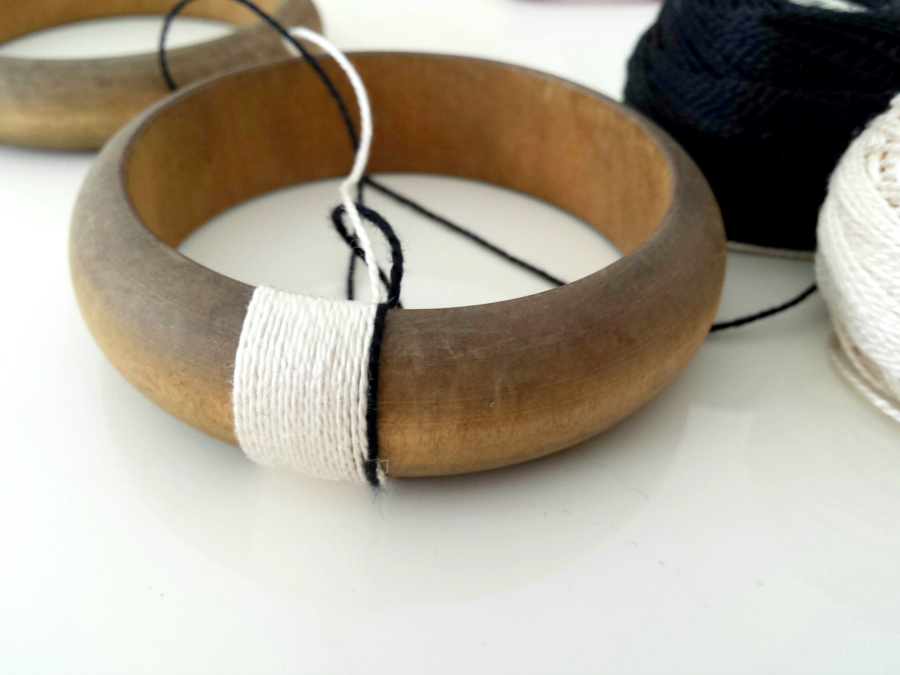
When you’re ready to add your black, don’t cut off the white! We’re going to carry the white yarn across behind the black so we can use it for the second band of white. So just secure it by tying it off at the back but leave it attached to the yarn ball. Then tie on your black with a slipknot as before. Leave a 2” tail of black…DIY YARN WRAPPED BANGLE


Wrap the black in the same way as you did the white. This time you’re wrapping around the tail of the black AND the white yarn that you’re carrying across. Snip off the black tail about half way through your black band; then continue with your black, with the white yarn running behind it…DIY YARN WRAPPED BANGLE


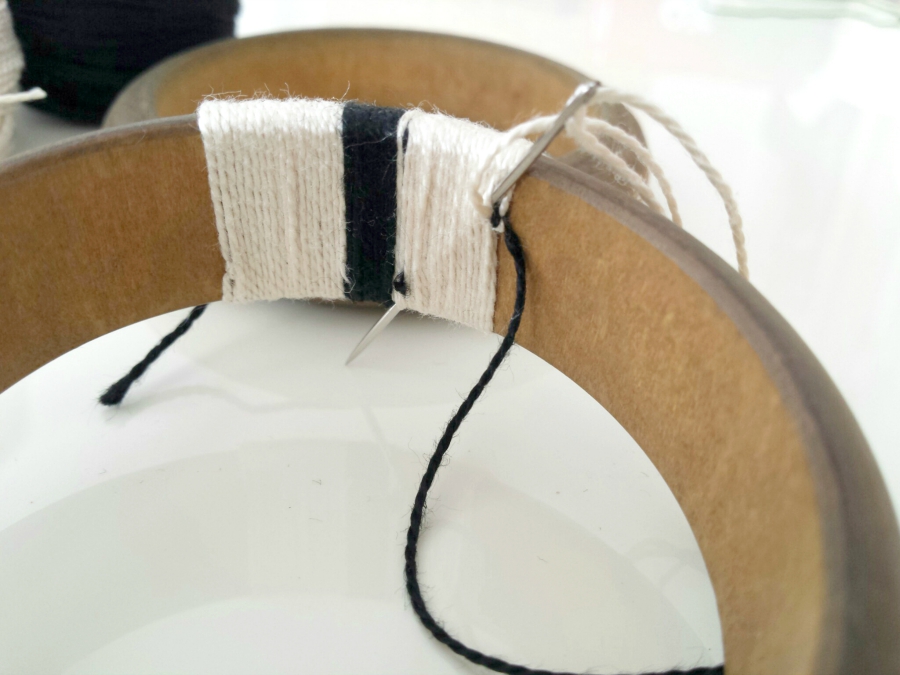
When you’re done with the black tie off and cut. Pick up your white yarn again and wrap exactly as before. Wrapping over the black tails as before. When you’re done, knot off and cut the white leaving a long tail…DIY YARN WRAPPED BANGLE


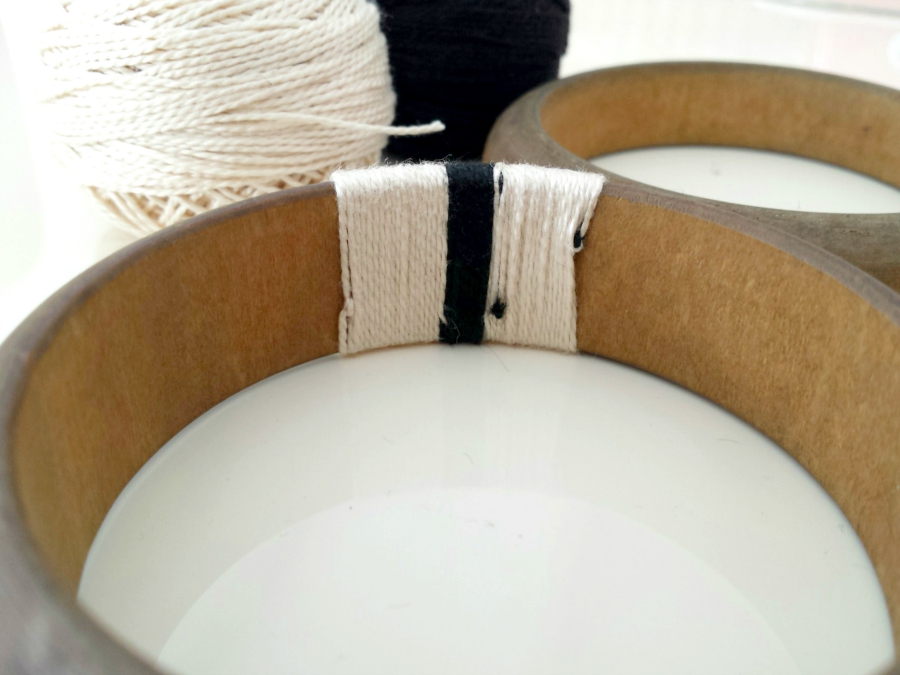
Thread the white yarn tail onto a yarn needle and pass under the wraps at the back/inside of the bangle. Pull through tight and snip off…DIY YARN WRAPPED BANGLE


DIY YARN WRAPPED BANGLE

Repeat all that 3 more times at equal intervals around the bangle!DIY YARN WRAPPED BANGLE


I wanted to add just a few subtle touches to my bangle (I also liked the wood so much I didn’t want to obscure it totally).DIY YARN WRAPPED BANGLE

But you could wrap the whole thing. You can use any colour yarn and any type of yarn. As long as it is strong (because you’ll need to wrap tight and keep it under tension!) there’s no limit to the colour combinations here!


DIY, how to, refashioning, Restyles, Sewing, the refashioners, Thrifting, Tutorials

The Refashioners 2015 – Me (gulp!)

08/28/15

PORTIA LAWRIE - THE REFASHIONERS 2015 (1)

Aaaaand here we are! Unbelievably, at the end of an entire month of refashioning inspiration and…lets face it….more than a little genius thrown in for good measure! Helloooo again everyone! Feel like I haven’t seen you for aaaaaages!!

The trouble with organising an event like this is that, as the host, there’s an inevitable weight of expectation. Real or imagined. Actual or self imposed. Playing alongside this line up of talent is mildly intimidating. I can’t lie! But “comparison is the thief of joy” so let’s be real and stay true to ourselves. I’m not a couture technique kind of gal.  Never will be. I like simplicity. Both in terms of process and the finished garment. If I churned out something amazingly clever that just wasn’t me and I would never wear, you guys would know in an instant.  Trying to be something I’m not is not really my bag. So true to form, here’s a simple but oh so effective little refashion for you…..(secret squirell…..shhhh…..I actually really love this….just because it’s easy…don’t mean it doesn’t count, ha ha!)PORTIA LAWRIE - THE REFASHIONERS 2015 (2)

Ever noticed how an oversized man’s shirt, when worn, has the perfect armhole size, dropped shoulder and wide sleeve configuration for a kimono jacket??! That was my starting point….

THE REFASHIONERS 2015 - PORTIA LAWRIE (1)

This shirt had been sat in my stash for months. Even before my first email went out about this series. I think it was originally intended for a magazine article. But I ended up taking a different direction so it sat there. What I loved about this shirt was it’s size. Lots of fabric to work with. It’s colour. I love a versatile neutral. and last but not least, the fabric. Not easy to photograph, but it’s medium weight and drapey with a very slight sheen.

THE REFASHIONERS 2015 - PORTIA LAWRIE (2)

I started by removing the pocket. Often the biggest obstacle in a shirt refashion is having a pocket when you absolutely don’t want one. Luckily I managed to all but vanish the stitch marks using this technique.

THE REFASHIONERS 2015 - PORTIA LAWRIE (3)

Next, cut all around the button bands and collar to remove…

THE REFASHIONERS 2015 - PORTIA LAWRIE (6)

Stay stitch the neckline so it doesn’t distort as you work. If you’re like me and do lots of trying on and test pinning as you work out what you’re going to do (I tend to work things out on the fly rather than have a plan) then stabilising that neckline curve is a 2 minute job that’s well worth doing…THE REFASHIONERS 2015 - PORTIA LAWRIE (1)

Here’s how it looked at this stage. (I actually quite like this shape too!) But I continued…

THE REFASHIONERS 2015 - PORTIA LAWRIE (4)

Fold up your shirt along the length, lining up the shoulders and armhole curves…

THE REFASHIONERS 2015 - PORTIA LAWRIE (5)

This enables you to cut both sleeves equally in one go. I cut mine just below the elbow…

THE REFASHIONERS 2015 - PORTIA LAWRIE (2)

I reviewed the shape and proportions at this stage and decided on my next steps…

THE REFASHIONERS 2015 - PORTIA LAWRIE (8)

Lop off the shaped hem to shorten and create a boxier hemline…

THE REFASHIONERS 2015 - PORTIA LAWRIE (9)

Take a line from the shoulder point/neckline curve right down to the hem….it’s a gentle diagonal in this pic…but you could also go straight down at right angles. Either will work.

THE REFASHIONERS 2015 - PORTIA LAWRIE (10)

Mark a cutting line on both sides (eyeball if you’re brave…but I had a rep to protect on this occasion, lol!)…

THE REFASHIONERS 2015 - PORTIA LAWRIE (3)

And there you have your basic kimono shape. Just the neckline, hem and sleeves to finish…

THE REFASHIONERS 2015 - PORTIA LAWRIE (11)

Enter “donor” shirt number two! I had a moment of panic here. The stuff that I had planned to use for the kimono bands didn’t work out ( it was the remnants of this top and the combo really worked but in truth I bodged it!!) and I had nothing left in my stash that worked. So I nipped out to the local charity shop 10 minutes down the road and bought this one!

THE REFASHIONERS 2015 - PORTIA LAWRIE (12)

I pieced a band from the sleeves, interfacing the pieces before I joined them….you’ll want the finished band to be about an inch shorter than the neckline/opening or your jacket so measure accordingly…if you want a less structured, more fluid lapel, you could try skipping the interfacing. Which I may try next time.

THE REFASHIONERS 2015 - PORTIA LAWRIE (13)

Folded in half , RS together, the ends sewn, then turned through and pressed. (use a point turner or knitting needle to get those corners crisp) I had my neckline band…

THE REFASHIONERS 2015 - PORTIA LAWRIE (14)

Two important steps before applying the band. First press up the raw edge of the bottom hem by about half an inch.THE REFASHIONERS 2015 - PORTIA LAWRIE (15)

And notch into that neckline curve…up to but not through the stay stitching.

THE REFASHIONERS 2015 - PORTIA LAWRIE (16)

Baste or pin the band all the way around the RS of the neckline and opening like so. It’ll need a little bit of easing on around that notched neckline curve…

THE REFASHIONERS 2015 - PORTIA LAWRIE (18)

When you get to the hem part flip it over like so.  The WS of the hem flips over to the RS and encloses the bottom of the neckline band like so. (Ignore the extra seam allowance of the shirt fabric on the right. I was just playing with the placement a bit)

THE REFASHIONERS 2015 - PORTIA LAWRIE (17)

Sew right to the end of your hem fold like so and backstitch to secure…(I know this looks a bit odd if you’ve never used this technique before…but bear with me. It will make sense in a moment)

THE REFASHIONERS 2015 - PORTIA LAWRIE (19)

I trimmed and bound my raw edges at this stage. I didn’t take the bias tape all the way down to the end. Because we’re going to turn that through in a minute and I didn’t want the extra bulk preventing a nice sharp corner….

THE REFASHIONERS 2015 - PORTIA LAWRIE (20)

So here’s where we are at. This is the outside of the jacket. Looks a bit odd I know…

THE REFASHIONERS 2015 - PORTIA LAWRIE (21)

But look what happens when you turn that corner RS out 🙂 Creates a lovely clean finish. THE REFASHIONERS 2015 - PORTIA LAWRIE (22)

Here it is from the outside. Simply hem along that line where the pin is, and up to the seam where the band is joined to secure the hem allowance.THE REFASHIONERS 2015 - PORTIA LAWRIE (4)THE REFASHIONERS 2015 - PORTIA LAWRIE (23)

Here’s where we’re at…

THE REFASHIONERS 2015 - PORTIA LAWRIE (24)

Measure the sleeve opening….THE REFASHIONERS 2015 - PORTIA LAWRIE (25)

Create matching cuffs!THE REFASHIONERS 2015 - PORTIA LAWRIE (26)

Baste/apply…THE REFASHIONERS 2015 - PORTIA LAWRIE (27)

trim, bind, turn through, press everything…alot…

And you’re done!! Simples!PORTIA LAWRIE - THE REFASHIONERS 2015 (2)PORTIA LAWRIE - THE REFASHIONERS 2015 (1)PORTIA LAWRIE - THE REFASHIONERS 2015 (3)

And that’s it! Our job is done for another year and now it’s over to YOU!! Grab a shirt, get refashioning, share it, and be in with a chance of winning that awesome prize. Now worth just under £700!! Jaw dropping right?! We’ll be sharing a selection of your refashions right here throughout Sept and there’ll be inspiration posts to give you even more ideas and directions in which to go with your shirt refashioning. You have until 27th Sept to submit yours. 

I’d like to take this opportunity to thank all of the talented stitchers who shared their ideas with us this August. I for one, have a much longer sewing queue than I did at the start of August; there are so many ideas I want to try out!! Love and hugs and much gratitude to everyone involved. Phew…that’s it…we are done!

What now?

Over to YOU….show us what ya got!


DIY, how to, refashioning, Restyles, Sewing, the refashioners, the refashioners 2015, Thrifting, Tutorials

The Refashioners 2015 – Erin

08/27/15

THE REFASHIONERS 2015 - ERIN - CALIVINTAGE

Hello everyone, and a huge thanks to Portia for inviting me to take part in The Refashioners! First things first, I have to preface this by saying that I am a complete sewing novice who was absolutely terrified and intimidated by this project! But when Portia asked me if I’d be interested in participating, I knew it was just the kick in the butt that I needed to venture out and try something new. So I dove right in, scissors first, and completely destroyed my first “dummy” shirt. I suppose in retrospect that I could have drafted up some sort of pattern using butcher paper, but hindsight is 20/20, my friends. And it’s all a part of the learning process. So when it came to tackling my second try, I knew immediately that I was going to have to do something that maintained as much of the integrity of the original shirt as possible while still transforming it into something more wearable for me.THE REFASHIONERS 2015 - ERIN - CALIVINTAGE

Making this simple shirt took only a few little snips and stitches to complete. I tried it on to determine the length that I wanted to crop it up to, then used the excess fabric at the bottom of the shirt to fashion the ties for my wrap. Then I simply cut out the new neckline, sewed everything up, and added the wrap ties. Most wrap tops and dresses have a hole in one side to thread the tie, but because my ties were at the very bottom, I skipped that step entirely. In retrospect, I think I will probably add that little slit into the side, but it is still perfectly functional as is.THE REFASHIONERS 2015 - ERIN - CALIVINTAGE

I like the way the back of the shoulders is now a front yoke detail, and that it has a slightly oversized fit, but doesn’t leave me completely swimming in the garment. THE REFASHIONERS 2015 - ERIN - CALIVINTAGE

1. I started with a really nice vintage men’s shirt made in a textured cotton linen blend. I had actually bought it prior to the challenge thinking it might just hem it into a crop top and wear it with an oversized fit. At this point in the photo, I’d already removed the front pocket and inner tags using a seam ripper. The back of the shirt will eventually become the front, but don’t worry about the seam across the back! This will become the front bib of your new wrap top.

2. I tried on the shirt and marked where to cut the new hem, leaving a bit of sewing allowance. Then I simply chopped off the bottom of the shirt using the grid pattern on the shirt as a guide. If it had been a solid, I probably would have used a straight edge to help myself along. The remaining pieces of the shirt will later become the ties for the wrap!
THE REFASHIONERS 2015 - ERIN - CALIVINTAGE
3. After cutting the shirt, I simply ironed the new hem in place and took it for a pass through the sewing machine.
THE REFASHIONERS 2015 - ERIN - CALIVINTAGE
4. Since I don’t have a dress form, I just went ahead and put the shirt on again to mark the new neckline and wrap back with a few pins. To cut, I folded the shirt in half lengthwise to try and get both sides to mirror one another. Then I simply ironed the new hems and sewed them up!
THE REFASHIONERS 2015 - ERIN - CALIVINTAGETHE REFASHIONERS 2015 - ERIN - CALIVINTAGETHE REFASHIONERS 2015 - ERIN - CALIVINTAGE
5. The last step isn’t pictured, but all I did was cut the remaining fabric in half lengthwise and then sewed them into two simple fabric ties to affix to the ends of the wrap on the shirt. If you’d like your wrap to be a bit more secure, you can cut a hole along one side seam of the shirt to thread your belt through, but since I have them affixed to the very bottom of the shirt, it also works just fine like this.
THE REFASHIONERS 2015 - ERIN - CALIVINTAGETHE REFASHIONERS 2015 - ERIN - CALIVINTAGE
 And that’s a wrap! (See what I did there?) It may not be the trickiest of ideas, but it works for me. The best part is that it’s something that I will genuinely wear and I’ve learned so much in the process!


Just goes to show, that even if you consider yourself a novice sewer, if you keep it simple you can still totally transform your shirt! I love this Erin . Thanks so much for leaping in and trying something new!  The yoke front and the fact that the wrap is at the back is an edgier twist on a classic wrap blouse. And of course, as ever, wonderful styling 🙂

You can find Erin here and here. And don’t forget amazing prizes to be won as part of The Refashioners 2015 Community Challenge. Including a little something handmade from Erin! So get involved for a chance to win!!! Grab a shirt and get refashioning! You have until Sunday 27th Sept to enter! Tomorrow is the last of the blogger inspiration posts and then it’s over to you!!!

DIY, how to, refashioning, Restyles, Sewing, the refashioners, the refashioners 2015, Thrifting, Tutorials

The Refashioners 2015 – Sasha

08/26/15

Sasha - Fruits Flowers and Clouds - The Refashioners 2015

For me “refashion” does not simply mean recovering the fabric from a garment and making  another garment but also recombining the existing elements to give new life and meaning to an old garment. I’ve always been quite attracted by the styles merging the very masculine with the very feminine so the idea of taking a men’s dress shirt and mixing it with the feminine shape of the victorian underbust corset, as my first refashion was very exciting to me.Sasha - Fruits Flowers and Clouds - The Refashioners 2015


The road was not without bumps. I had no clear view of how to go about it and spells of “I don’t have enough fabric” anxiety.  So here it is: my first refashion and I’m very pleased with the result. I anticipate I’ll be wearing this a lot.

Process outline:

The original shirt – a men’s size 42 dress shirt in cotton twill.Sasha - Fruits Flowers and Clouds - The Refashioners 2015

Take off the collar unit and the cuffs and form a neck dart.

Mirror everything from one side to another ( I used tailors wax tracing paper and a tracing wheel to do so).Sasha - Fruits Flowers and Clouds - The Refashioners 2015

Blend the neckline and trim the excess.

Measure and cut along a line under the bust leaving intact the button placket and including seam allowances.Sasha - Fruits Flowers and Clouds - The Refashioners 2015

Sasha - Fruits Flowers and Clouds - The Refashioners 2015

Pin, measure and cut the sleeves and sides to create a sloping/drop shoulder short sleeve which also has the effect of reducing the overall fullness of the shirt.

Pin a couple of pleats in the sleeve, make a slit and attach the cuffs. Depending on the original shirt size they are potentially going to be smaller than your bicep circumference. I ended up by creating an extension tab with two buttons to close the gap.Sasha - Fruits Flowers and Clouds - The Refashioners 2015

Measure the neckline opening, shorten the original collar stand accordingly and use it to create a mandarin collar.

Sasha - Fruits Flowers and Clouds - The Refashioners 2015

Gather the excess fabric under bust and at the back

Drape a form fitting midsection from a large strip of fabric. Be sure to cut based on the abdomen circ + ease + sa. I mistakenly did not and ended up having to insert some triangles at the sides.Sasha - Fruits Flowers and Clouds - The Refashioners 2015

I pinned also a couple of darts to help shaping the back. I considered doing so for the front also but in the end I decided against it as I prefer it more relaxed. With the remaining fabric from the body and the sleeves create a long strip (under bust circ. + hips circ. times three)…Sasha - Fruits Flowers and Clouds - The Refashioners 2015

…and create 1″ pleats. I used some light fusible interfacing to help hold the pleats because my fabric was too soft and drapey.

Attach a row of pleats and the original shirt tails&hem (reduced in size to fit the waist piece) to the bottom of the waist piece.Sasha - Fruits Flowers and Clouds - The Refashioners 2015

Attach the waist piece to the upper bodice sandwiching in between another row of pleats.Sasha - Fruits Flowers and Clouds - The Refashioners 2015

Attach the waist piece to the button placket. Trim the button placket and close the hem! Done!Sasha - Fruits Flowers and Clouds - The Refashioners 2015Sasha - Fruits Flowers and Clouds - The Refashioners 2015

Thank you again to Portia for inviting me. When she asked me to join the stellar cast of this year’s Refashioners I must admit I felt a bit scared.  Honored but scared. First I never did a refashion before and second have you seen the heavy talent she enrolled!!!

Talent that includes you Sasha! Wow! Hard to believe Sasha’s never refashioned before. But this is exactly why I’ll often approach sewers who don’t refashion to be part of the blogger challenge. You just get a fresher take on things that way. One of the biggest aims of The Refashioners is to show refashioning in a different light. That as well as it’s eco credentials,  it can be creative, edgy, modern, individual and uber cool. Think I just aptly described Sasha’s refashion there don’t you? Job done then!

You can find Sasha here and here. We are almost at the end of a month of  refashion inspiration and ideas!  Next week sees the community challenge element gather pace and don’t forget amazing prizes to be won as part of The Refashioners 2015 Community Challenge.  So get involved for a chance to win!!! Grab a shirt and get refashioning! You have until Sunday 27th Sept to enter! 

Newer Posts
Older Posts
Portia
Follow
Sewbox

© Copyright 2026. Portia Lawrie. All Rights Reserved. Managed by WordPress Web Dev Cornwall .