• About
    • Contact
    • Press
    • Sponsor
  • DIY
    • Home & Garden
    • Jewellery & Accessories
    • Yarn Crafts
  • Sewing
    • patternless & self drafted
    • Refashions
    • Commercial Patterns
    • Sewing Tips
    • Overlockers
  • The Refashioners

Portia Lawrie

DIY, the refashioners, the refashioners 2013, Tutorials

The Refashioners 2013 – Starts 3rd June!

05/27/13

People, I’m so excited! This year’s instalment of The Refashioner’s is just around the corner, and it’s promising to be a total inspirationfest, let me tell you! For newer readers who may be unfamiliar with the series, let me recap I first ran this challenge back in 2011. You can catch up on all past posts here. Essentially this is a blind challenge. A call to arms of some of the interweb’s best sewing bloggers to flex their creative muscles and step up to the plate. All of the bloggers below have done just that; and about 2 months ago they received a “mystery” package, from me, in the mail. A garment (or maybe something else…) that they were charged with turning into something amazing. They had no idea what they would receive. Would I be kind to them? Or would they hear a faint evil laugh echoing as they opened their parcels?? Well, in the fullness of time, they’ll tell you that themselves…..
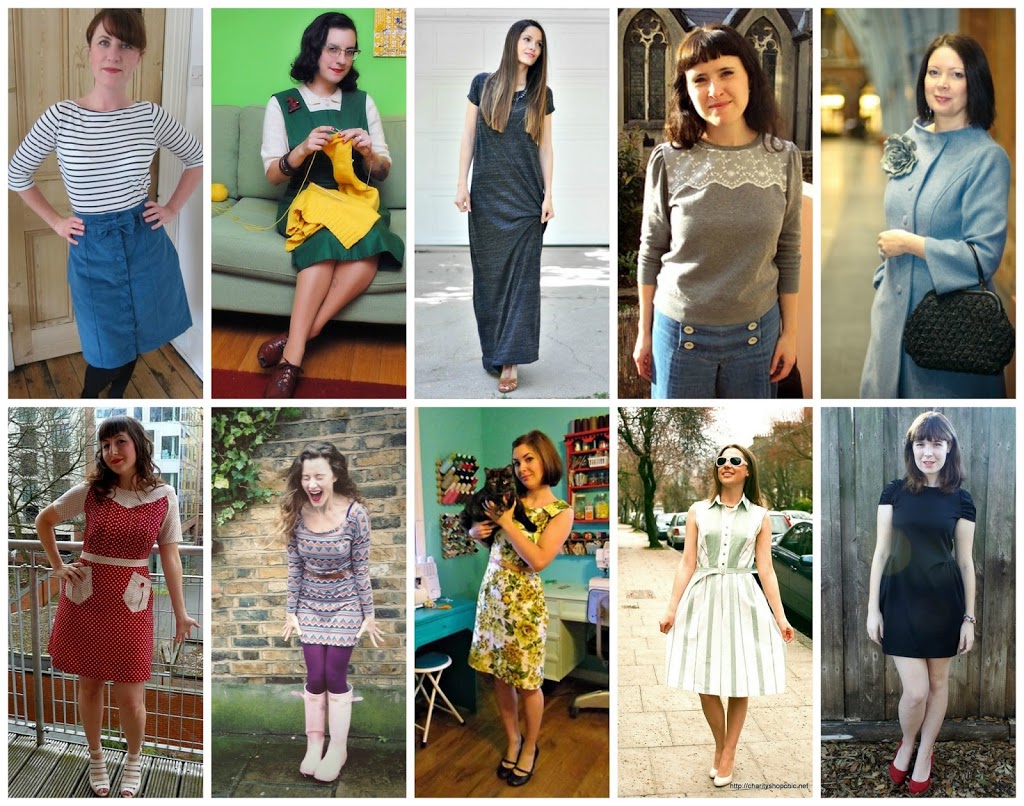
The Refashioners 2013: Joanne,  Tasha,  Liz,  Zoe,  Karen,  Marie,  Elisalex,  Lauren,  Sally,  Dixie.

The Refashioners 2013 Line up

Starting from 3rd June, there will be not 1, oh no, but 2 weeks of guest posts from the talented stitchers above! Some of whom are old hands at refashioning, and some who are dipping their stitching toes in the water for the very first time; and pushing themselves out of their familiar comfort zones. All in and effort to inspire us all to have a go at refashioning and show you  that a flat length of fabric is not the only starting point. That you have all the raw materials you need at the back of your wardrobe, or in your local charity shop/thrift store. I for one can’t wait to show you what they’ve come up with. This is going to be AWESOME!

DIY, the refashioners, Tutorials

Stop Press! The Refashioners is back!

03/11/13

Oh, yes!!! That’s right!! it’s back!! May I present to you, The Refashioners 2013…

This year, starting on 3rd June, there will be not one, but TWO weeks of fabulous and inspiring posts from some fabulous and inspiring bloggers from around the blogosphere. Just check out this years line up:

Karen – Did you make That
Zoe – So Zo…
Dixie – Dixie DIY
Marie – A Stitching Odyssey
Joanne – Stitch and Witter
Lauren – Lladybird
Tasha – By Gum By Golly
Elisalex – Stitch me Softly and By Hand – London
Sally – Charity Shop Chic

Ammended 12/03: Also Liz – Cotton & Curls

Oh and little ole me! Hello!

Sooooo, pop the dates in your diaries peops! You are not going to want to miss this! And spread the word and share the fun with your readers too (only if you want to that is!) Feel free to grab the code for one of the buttons below (2 sizes) and add it to your side bar 🙂

300px Wide:

The Refashioners

The Refashioners


350px Wide:

The Refashioners

The Refashioners

Watch this space! Eeeeep! I’m so excited about this one….!

casey, DIY, elegant musings, refashioning, Restyles, the refashioners, Tutorials

The Refashioners – Casey

09/14/11

Hello! Casey from Elegant Musings here. I am so excited to be participating in this series—it was such a fun idea (thank you to Portia for asking me to participate)! When Portia sent me the garment to refashion, I was quite delighted with this challenge. I had been thinking this summer about remaking a “dressmaker” suit (meaning a suit that doesn’t have the traditional tailoring we associate with a suit) into a cute, 40s-inspired number. This original garment proved just the piece to test my ideas on!

Refashion Inspiration! Don't miss out on the new upcoming series of The Refashioners at www.portialawrie.co.uk

I usually begin refashions by loosely sketching an idea and sometimes playing with various ideas on the dressform (straight and safety pins are a great way to test!). I find that this helps me envision the order of construction (or deconstruction!) rather than chopping away at a garment blindly. I wanted to take this suit from ho-hum to something that evoked the look of the 40s. I had a pattern in my stash, as well as some images on my computer, that proved to be the inspiration for this piece. Sometimes refashioning is not so much about creating a new garment, but rather refitting an old one to your aesthetic and size!

Refashion Inspiration! Don't miss out on the new upcoming series of The Refashioners at www.portialawrie.co.uk

To start the transformation and refit the (several sizes too large) suit, removed the sleeves from the jacket and set aside. (Note that in the before pictures I had to clip the suit in the back because it was too baggy for my dressform.) I unpicked the collar from the neckline, and removed the shoulder pads and opened the neckline facing away from the jacket. Trying on the jacket inside-out, I pinched away the excess fabric at either side seam and the shoulders (which brought the darts up to approximately the correct level) and pinned. It took a few tries to get the fit just right, but once I had I sewed the new seams and finished with serging. I also took this opportunity to redo the hem of the jacket and add a nicer (thrifted hem tape!) finish.


Next up was the fiddly part of redoing the neckline. I pinned an approximate outline while wearing the jacket, and then marked the outline in chalk. I added a 3/8” seam allowance, blending it into the back neckline. The neckline was trimmed to this line, as was the neckline facing. I sewed the facing and the neckline pieces right sides together for a smooth (and easy!) finish.


Adding the sleeves back to the jacket was perhaps the easiest step of this refashion! I measured the new armholes, and found a pattern with a sleeve cap measure of approximately the same. (In this case my trusty Swing Dress pattern). Using the original hem on the sleeves, I cut out new ones and sewed those in.


Finally, the jacket needed a few new details to add a bit more of a vintage flair. I dug through my button stash and found these two, beautiful vintage glass buttons to add to the front. They were slightly too large for the original buttonholes, so I slip stitched those shut, attached the buttons overtop and added snaps underneath. For the neckline, I wanted to add a bow, and used the piece that was originally the jacket collar to fashion this. This was permanently tacked to the overlap side of the jacket, and then secures on the underlap neckline with a snap.


To redo the skirt, I just drew a new a-line skirt pattern directly on the wrong side of the skirt. This was really winging it, but I wanted to keep the original hem intact, so using a pattern would have been a bit tricky (since the hems on even modest a-line have a definite shape). But, it would have been easy to just pick apart the entire skirt and use a simple a-line pattern. Redoing the skirt involved have to take out the old zipper, reinsert it, and add a waistband. I used some leftover pieces of the skirt fabric and Petersham ribbon for this to face the waistband.

This was probably one of the more extensive refashions I’ve done in a long, long time! It was quite worth it and I enjoyed the challenge of giving a rather ho-hum garment my own spin. I think if there was one additional adjustment I wish I had made, it would have to be overdying the fabric. I thought about it, but decided not to even try because of the high polyester content in the material—I didn’t want a splotchy dye job!

A big thank you again to Portia for asking me to be a part of The Refashioners!!! This project turned out to not only be a challenge in refitting, but also opened my eyes to some new possibilities when it comes to refashioning. Off to raid my stash of thrift store find that need altering to see what new life I can breathe into them…

Crikey, this looks so authentic!  Absolutely gorgeous. Who would ever know this started life as a frumpy 2 piece?! Thankyou so much Casey. You’ve inspred me to tackle a vintage suit jacket that’s been taunting me!
STILL more to come people so stay tuned!
Px

Did you Make That, DIY, Karen, refashioning, Restyles, the refashioners, Tutorials

The Refashioners – Karen

09/13/11

The Refashion Rookie 
http://didyoumakethat.wordpress.com/
When Miss P approached me to be one of her Refashioners, I was openly terrified. I’ve never tackled a refashion, mainly because I don’t – or didn’t – have much confidence in my ability to revision an item or do anything other than follow a set of pattern instructions. I also don’t feel that I have the charity shop antennae that allows a person to zone in on the hidden diamond crushed between rails of polyester. But Miss P is a charity shop expert. 
 
Refashion Inspiration! Don't miss out on the new upcoming series of The Refashioners at www.portialawrie.co.uk
She assured me that I was up to the challenge and that only natural fabrics would be sent my way. Soon, the postman was handing over a beautifully wrapped orange parcel. I tore it open to discover a voluminous gingham dress, circa 1980s I’m guessing. There was enough fabric there to open my mind to lots of opportunities. And who doesn’t like gingham? Miss P had done me proud.
So, what did I do? At first, nothing. I let the dress sit around, waiting for inspiration to strike. Then I woke up one Sunday morning and – bang! – the picture of an outfit and accessory was in my head. All I had to do was make it happen.
Mine wasn’t a sophisticated approach. The rotary cutter was my best friend during this exercise. I felt like Freddy Kreuger! First, I sliced the skirt section from the bodice and ripped out a load of pleats. (There was a lot of excess fabric in this dress! I’m not sure today’s retailers would tolerate such wastage.) I hacked a wedge off the bottom of the skirt – that would become my waistband. I wanted to make a feature of the row of buttons that ran down the front of the dress – why waste button holes that someone else has already made for you? I added the large button on the waistband, and love that it’s a pearl button to match all the others except in size. I bought some red piping from MacCullough and Wallis and already had some lace trim hanging around that I bought off Walthamstow market. One weekend of sewing, et voila! I had a new gathered skirt to wear with my cotton petticoat. A skirt that I can cycle in – double result!
Refashion Inspiration! Don't miss out on the new upcoming series of The Refashioners at www.portialawrie.co.uk


Refashion Inspiration! Don't miss out on the new upcoming series of The Refashioners at www.portialawrie.co.uk
There was still quite a lot of fabric left in the bodice, along with some neat embroidered white flowers on the gingham. Unfortunately, the embroidered flowers sat over sewn down pleats that would need unpicking if I tried to rescue the fabric – and the flowers would be ruined. So I decided to just hack away – this time with a pair of scissors. I used some spray starch and a brooch template from a recent issue of Mollie Makes. I love the spray starch – does exactly what it says on the tin!
 This brooch was a lot of fun to make. I adore the hidden details on the rear. The ‘felt’ is actually a scrap of my Paris red cashmere. (Well, if it’s just lying around…) The clay button was bought in Cornwall, so memories are threaded into this outfit – a detail I always love.
Refashion Inspiration! Don't miss out on the new upcoming series of The Refashioners at www.portialawrie.co.uk
 What are my conclusions? I’ve worn the skirt to death since it was made, so it’s definitely a success. I was surprised at my ability to envisage a new outfit, once my brain had relaxed into the exercise. I do worry that I didn’t make the most of this dress’s potential and would love to hear from readers and Miss P about what they might have made from it. But most importantly, I got past Fear Factor Ten and embraced refashioning. It’s a great way of producing new outfits and can free up the creative imagination more than following a set of instructions. But most of all, I think this make is a credit to the very clever Miss P who knew just the right thing to send me and reassured her little apprentice every step of the way.

I hope I did you proud, Miss P!

Indeed you have Karen! Thankyou sooo much. Great refashion. LOVE the red piping accents. I’ll bet you’re the best dressed cyclist in your neck of the woods!
See…..I told you you’d be brilliant ;) 

Still MORE fantastic refashioning inspiration to follow…stay tuned 🙂
Px

DIY, refashioning, Restyles, So Zo..., the refashioners, Tutorials, Zoe

The Refashioners – Zoe

09/13/11

Next up, it’s over to Zoe of So Zo…
When I first unwrapped my secret garment I was surprised to find a kilt! Well, a ladies kilt-style skirt to be precise, but definitely very traditional in nature. I must admit that initially I was a bit perplexed about how to approach the refashioning of this garment. This was a really good quality garment, but it’s not something I’d gravitate towards in a charity shop.

Refashion Inspiration! Don't miss out on the new upcoming series of The Refashioners at www.portialawrie.co.uk

But that’s the very genius of this mystery refashioning project: challenging the participants’ creativity, which is what you have to rely on when taken out of your comfort zone!

So I ‘sat on’ the garment for a while and let my ideas stew. Upcycling a garment can mean a dramatic remake into something unexpected, or simply shortening the hem line, and everything in between. My early ideas for this skirt erred towards the more extreme end of that spectrum. I was picturing some sort of cropped jacket or cape with the pleated sections being used for the sleeve parts and the buckles reused as an asymmetric fastening. But thinking about it, I realised there possibly wouldn’t be enough fabric and I didn’t have enough time to commit to such a major overhaul. So I scaled my thoughts down somewhat and settled on attempting to creating a sexier, updated version of the original traditional kilt-skirt style.

I started by carefully unpicking and ‘harvesting’ the waistband and buckle fastenings to be used later. I have to say that this skirt was solidly made! It felt like it had been welded rather than stitched together, unpicking took several sittings. I also unpicked the darts front the flat sections and gently pressed the area flat.
Refashion Inspiration! Don't miss out on the new upcoming series of The Refashioners at www.portialawrie.co.uk
Using a basic pencil skirt pattern, I cut the front piece from the flat part of the original skirt. I marked the new darts then stitched and pressed them inwards.
Refashion Inspiration! Don't miss out on the new upcoming series of The Refashioners at www.portialawrie.co.uk


The pleated section of the original skirt sat around the back. The pleats had been stitched in a kind of graduation so that they created a curve at the rear, rather than using darts. I really liked this and wanted to incorporate it into my refashioned version. I cut a section from the pleated part that was a bit bigger that my back skirt pattern piece. The pleats had been edge-stitched down to just below the wearers bottom, but I decided it would be fun to edge-stitch them down further so that the pleats flared and kicked out like a fish tail when the wearer walked. I pinned the pleats down and stitched to a certain horizontal line in the check, then gave the back section a press.

Refashion Inspiration! Don't miss out on the new upcoming series of The Refashioners at www.portialawrie.co.uk

Pinning the dart closed on the back skirt pattern piece, I laid this down on the pleated section and cut out the back piece of my skirt. With my front and back pieces now cut out, I overlocked all four side edges to neaten them. The front and back pieces were stitched together along the right hand side seam and the seam was pressed open.

Now was the time to reattach that previously harvested waistband. Measuring along the top edge of my pencil skirt pattern gave me the measurement I needed to cut my waistband to. The waistband had a stiff interfacing which I wanted to retain, so pinned it to the waistband to keep it in place until the final row of stitching caught it inside. I stitched the waistband along the top edge of the skirt, right sides facing.
With one half of the waistband attached, I measured the length of my zip and stitched the remaining side seam closed from the base of the zip will come to the hem. I pressed this seam open also. The zip was inserted into the opening on the left side seam trapping the waistband edges at the same time. I then ‘stitched in the ditch’ along the line where the waistband joins the upper skirt, thus trapping the remaining edge of the waistband to the skirt and the stiff interfacing inside.

Refashion Inspiration! Don't miss out on the new upcoming series of The Refashioners at www.portialawrie.co.uk

I wanted to include the original buckle fastenings because they are such an integral design feature of a kilt that no kilt reworking would look right without them. I placed them over the zip which served to slightly obscure the zip fastening.

Refashion Inspiration! Don't miss out on the new upcoming series of The Refashioners at www.portialawrie.co.ukWith that icing on the cake, I declared my kilt-skirt refashion complete!
Refashion Inspiration! Don't miss out on the new upcoming series of The Refashioners at www.portialawrie.co.uk
Thanks so much Zoe. My favourite part has got to be that fishtail effect. Genius! Sorry for sending you something with “welded” seams! But at least you’ll never be short of a sexy little number for Burns Night or Hogmanay! Great twist on a classic garment. Yay for refashioning!
Still loads more to come this week!

Px

Dixie DIY, DIY, free pattern download, refashioning, Restyles, the refashioners, Tutorials

The Refashioners – Dixie (Part I)

09/12/11

Hello Readers! I’m Dixie from DixieDIY.com and i’m here to share with you my new digs I made from restyling an old blouse and skirt. I’m so glad I got to be a part of The Refashioners, such a talented and skilled group of sewers and designers. Thanks Portia for including me!
Like everyone else I had no idea what to expect when my little package arrived all the way from the UK (I live in Austin, Texas). What was inside turned out to be a button down top and long faux wrap skirt. The fabric was 100% Rayon and had a cool, almost chevron stripe style print to it.

Refashion Inspiration! Don't miss out on the new upcoming series of The Refashioners at www.portialawrie.co.uk

The outfit was way too big but when you are looking for something to refashion, that could be a good thing. The more fabric you can use, the better. Now I don’t often shop at thrift stores (or charity shops as some might call them) not because I don’t want a good deal but I get easily overwhelmed with the quantity of items. That’s ok because sometimes the best restyles can be done with clothes from your own closet that you never wear anymore and need some new life. The one thing that I drew inspration from was the fabric print with the diagonal lines. Rather than deconstruct the garment and start from scratch, I decided to use the pieces of the original and adjust from there.

I used a pattern that I had lying around but never used – version b of an old simplicity pattern from the now discontinued Built By You series – Simplicity 4112. I loved the diagonal and gathered cut on the long sleeves, an interesting design detail that I’ve always wanted to make but never had the right fabric. I thought the directionality of my print would be perfect!

Refashion Inspiration! Don't miss out on the new upcoming series of The Refashioners at www.portialawrie.co.uk

To start, I cut the sleeves and side seams off the top. The front and back of the top were still attached at the shoulders.
Next I arranged my shirt tolay as flat as possible on my table and pinned my pattern’s bodice piece to the fabric. By lining up my pattern piece at the point where the shoulder and the neckline of the shirt met, i could keep the original collar and centre buttons but trim off the sides of the shirt to make it fit better. I remembered to take a mental note that the pattern piece had 5/8 seam allowances, and the shirt already had those seams sewn, and so I pinned the pattern piece accordingly.

Refashion Inspiration! Don't miss out on the new upcoming series of The Refashioners at www.portialawrie.co.uk

I had one small problem. The bottom armhole had to be lowered about an inch to accommodate the shirt’s original armhole. i made sure to make this change on the front, back and sleeve pattern pieces so they all matched. in the end this worked out fine beacause I like more room in the armpit area anyway. 😉
I did the same thing to both sides and the back, lining up pieces along the shoulder seam until I had my basic bodice. I stitched uo the sides and was ready for the sleeves!

Refashion Inspiration! Don't miss out on the new upcoming series of The Refashioners at www.portialawrie.co.uk

I was lucky that I had so much fabric in the skirt to use for my sleeves! Even then I still had do do some creative manouvering with pattern placement. when I took off the waistband and spread the skirt out it made one long rectangle, but there were several small darts and seams to contend with. I seam ripped the darts and worked around most of the seams. Luckily with the fabric design it is difficult to tell that there are seams there at all.

I sewed up the sleeves according to the pattern directions and attached them to the shirt bodice. Finally I switched over the old pearly coloured buttons for plain black ones. I would have had to get new buttons anyway beacause I needed two extra for the sleeve cuffs and I didn’t have any that matched the originals.

Refashion Inspiration! Don't miss out on the new upcoming series of The Refashioners at www.portialawrie.co.uk

Ta da!! One nice new (fitted) button down shirt appropriate for work or even something more casual. unfortunately I won’t get to wear this shirt for a few months because we’re currently experiencing global warming to the extreme here in Texas; but I’ll wear it often come Winter, I’m sure!

Refashion Inspiration! Don't miss out on the new upcoming series of The Refashioners at www.portialawrie.co.uk

But wait, I’m not finished yet! I still had some fabric left from the skirt. Enough to incorporate into another top….

So lookout for another post from Dixie in the next few days, this time with a FREE PATTERN DOWNLOAD especially for the occasion……! Thanks Dixie. Awesome refashion!
Px

DIY, gift ideas, Restyles, the refashioners, Tutorials

Revealed!

09/09/11

Ok, time to let the cat out of the bag! Remeber these suspect little packages from a previous post….?

THE REFASHIONERS 2011 (2)

Well it is with no small degree of excitment that I announce “The Refashioners” challenge…

THE REFASHIONERS 2011 (1)

Starting on Monday, and running all next week this blog will play host to a series of guest bloggers sharing their refashioning take (and tutorials) on the mystery packages I have sent them. I can’t wait to share these projects from some awesome women who just happen to be inspiring bloggers, crafters and sew-ers!!! So without futher jabbering on like an excited toddler, here’s the line up:

The “too cool for school” Zoe of So Zo…
The inimitable Karen of Did you Make That?
The very talented Dixie of Dixie DIY
The ever inspiring Casey of Elegant Musings
and
The gorgeous Tilly of Tilly and the Buttons

NOW, can you see why I was so excited!! Feel free to grab the button HTML and spread the word 🙂

Miss P
<div align="center"><a href="http://portialawrie.blogspot.com/" title="Miss P"><img src="http://portiatest.devulous.com/wp-content/uploads/2011/09/6123219092_5d348943ed_m.jpg" alt="Miss P" style="border:none;" /></a></div>

Have a great weekend and don’t forget to check back on Monday for the first post in the series!

Newer Posts
Portia
Follow
Sewbox

© Copyright 2026. Portia Lawrie. All Rights Reserved. Managed by WordPress Web Dev Cornwall .