It’s been some time since I indulged in some refashioning. But here is the first of several that I have coming up over the next few weeks. I’ve been trying some ideas out with jersey. I’ve not sewn with jersey before as I don’t have an overlocker and the last time I tried sewing jersey on my regular machine, it gobbled it up like a hungry posessed thing. However I was recently forced out of my comfort zone by a certain someone (who shall remain nameless for now. You know who you are!) and challenged to try sewing with jersey. So I gave it another go. This was my first practice run. As it happens, it’s not so bad. Without any real headaches I managed to come up with this pretty straightforward refashion…..
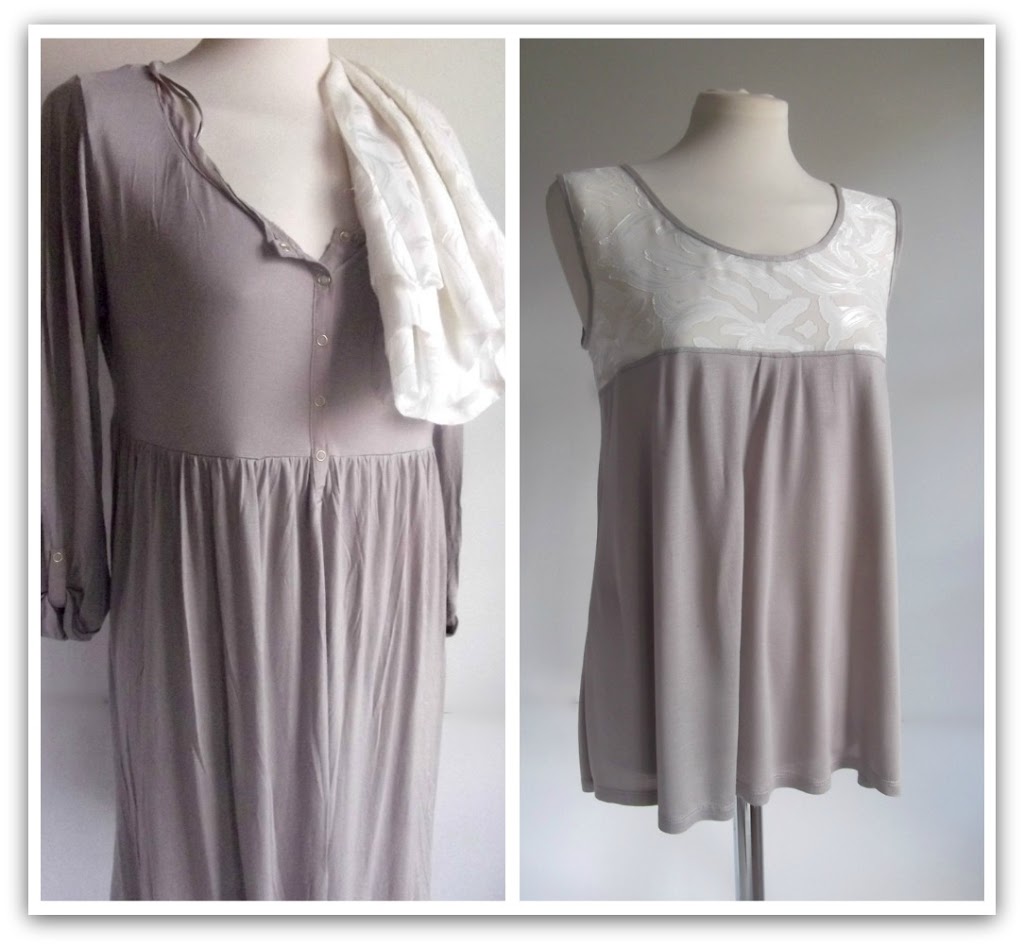
I started with a maternity tunic that doesn’t fit me, and some georgette that I saved from a damaged vintage dress and has been in my stash for over 3 years…with a little jiggery pokery, I came up with the refashion on the right….
To begin with I used my Sorbetto pattern to draft the top portion with the CF along the folded edge of my paper….

I only wanted the uppermost chest part to be lace so it took all of 30 seconds to trace this piece off…

and square it off from the CF to the side seam. I thought about shaping this “a la Zoe”, but in the end decided to keep it simple for this one…

I repeated the same for the back piece……

So I ended up with a front and back pattern piece like so….

I cut one front and one back piece from my lace…

Et voila….

I stay stitched all armhole and neckline curves since this is delicate stuff… French seamed the shoulders….

French seamed the side seams…….

Having cut away the top and sleeves from the bottom portion of the tunic, I used the pattern pieces to determine how much fabric I would need to cut from the original garment. I drew a diagonal line which will create a kind of A line/trapeze effect; and cut just ouside of the line to allow a little for seam allowances (this is not very scientific I know. I was “freestyling” a bit at this stage!)

Here’s the new bottom piece pinned and ready for sewing. The original tunic had the longer scooped hem at the back which was a feature I liked and wanted to keep so I pinned the side seams up from the hem upwards in order to preserve this…

I used one of the overlock style stitches on my machine. A kind of zig zag with a straight stitch underneath…

Then trimmed right up close to the stitching to neaten….

I used the same stitch to attach the top and bottom pieces together and pressed the seam allowances down toward the hem….

Then turned right side out, I topstitched a few mm away from the seamline. Understitching would work just as well though….

I’m not convinced with the finish here. It could be better. I could have matched the thread colour a bit more closely. I could have taken my time a bitmore and wobbled a bit less. But you get the idea….


