• About
    • Contact
    • Press
    • Sponsor
  • DIY
    • Home & Garden
    • Jewellery & Accessories
    • Yarn Crafts
  • Sewing
    • patternless & self drafted
    • Refashions
    • Commercial Patterns
    • Sewing Tips
    • Overlockers
  • The Refashioners

Portia Lawrie

Me Made May 12, Pattern Drafting, refashioning, Restyles

Me Made May – 1 Week down!

05/07/12

So, Me Made May 2012 is well under way and I’ve been enjoying seeing everyones outfits. Both on their blogs and in the Flickr group. I sympathise wholly with lighting woes expressed by fellow Brit bloggers due the relentlessly grey and wet weather AND I totally relate to those that find “self photography” the only part of the MM challenge that isn’t fun! You’ll notice in my pics I generally can’t bring myself to look at the camera. Heck, on Wednesday I look like a sulky teenager avoiding eye contact whilst being told off. The weird thing is, anyone that knows me IRL, will tell you I’m a pretty direct  and seemingly confident person. I’ll always maintain eye contact when I’m speaking to someone. I just hate having my picture taken. Always have. It’s the one aspect of writing a sewing related blog that I’m not entirely comfortable with. But I try! (on Sunday I gave myself a day off from photos, as I already had a photo of the exact outfit I was wearing, ha ha!) Anyway, I felt some explanation, nay, apology (!) was in order for the plonkeresque nature of my “poses” before getting on with the business of  outfits…

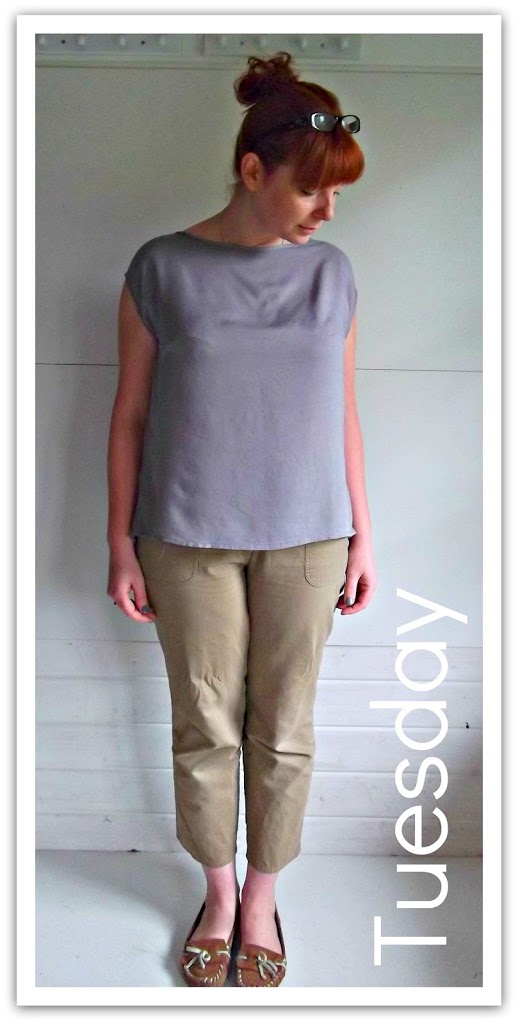
Tuesday: Grey top- Self drafted (fabric £4/m),  Cropped Jeans – Thrifted (£3) and refashioned.
Wednesday: Striped Tee- Refashioned (not blogged), Trousers – Thrifted (£1.50) and refashioned.
Thursday: Vintage plaid shirt – Thrifted (99p), Trousers – Thrifted (£1.50) and refashioned.

Tuesday wednesday thursday

Friday: White Blouse – Thrifted (99p), Trousers – Thrifted (£2) and refashioned
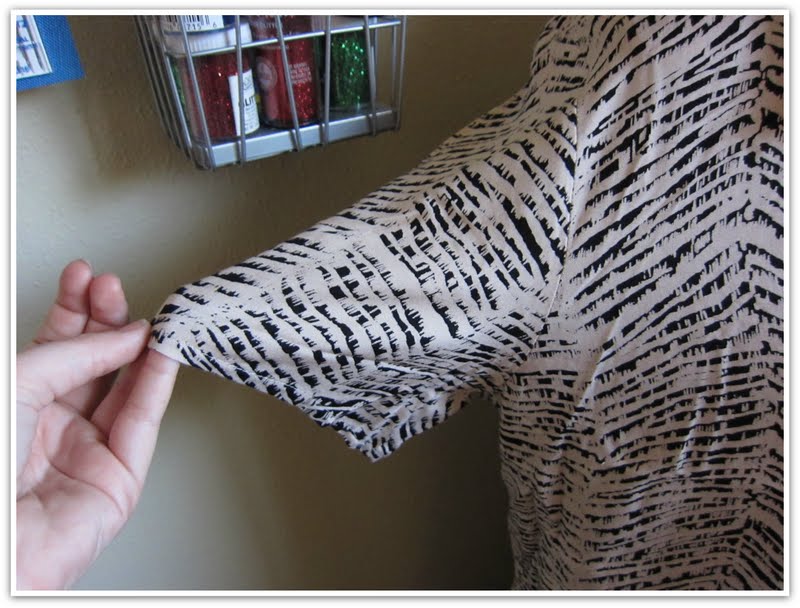
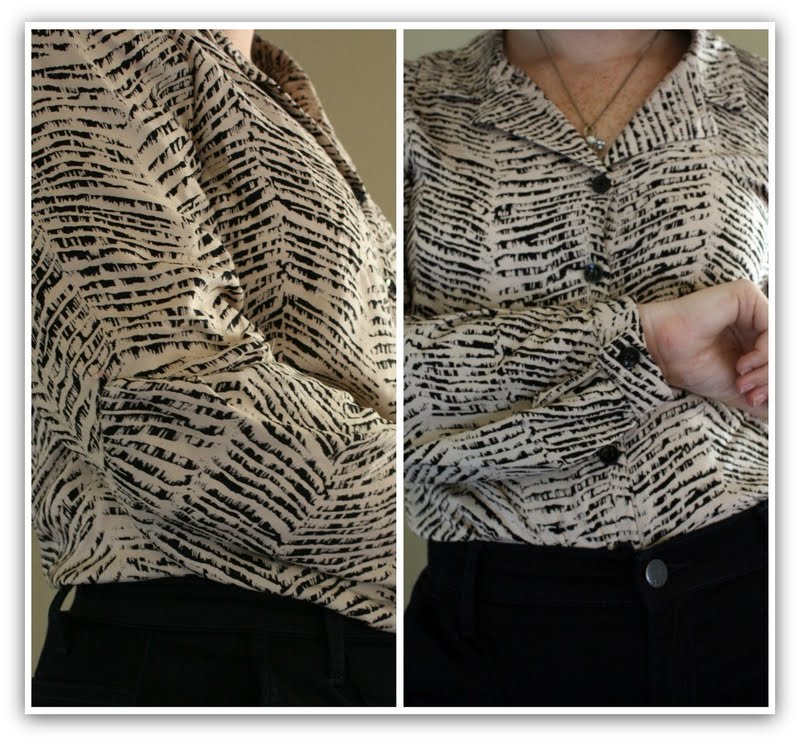
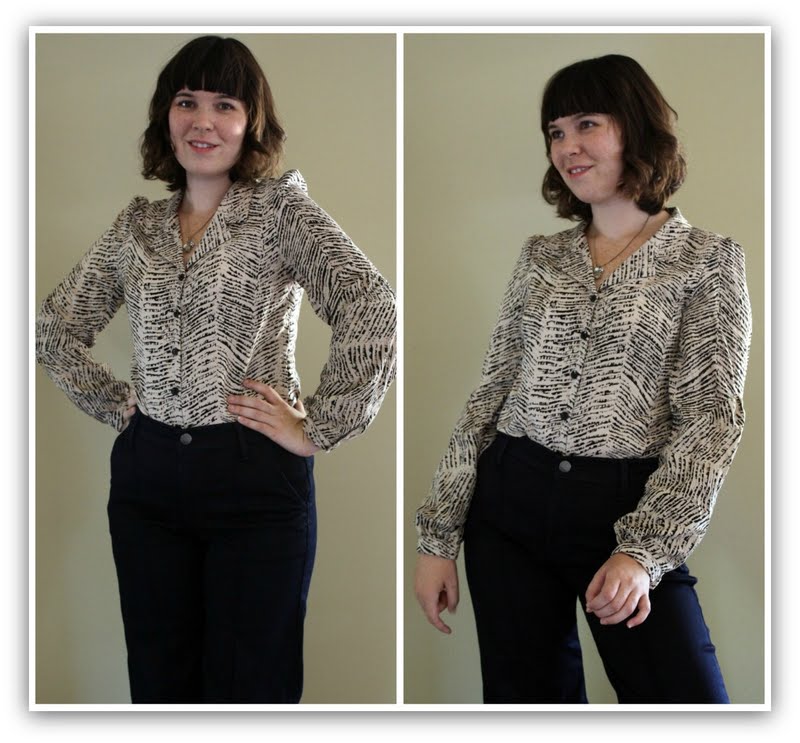
Saturday – Geometric Print Top – Self drafted (fabric £2), Flared Jeans – thrifted (£4)
Sunday– Denim Shirt – Thrifted (£1.50) and refashioned, Cropped Jeans – thrifted (£3) and refashioned

friday saturday sunday

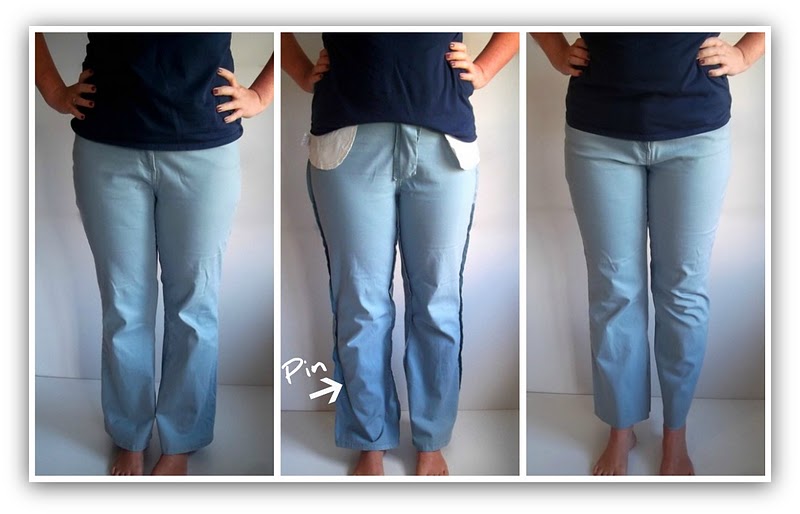
So, what have I gleaned so far? The last 3 outfits I like. Saturday and Sunday being the most flattering on me shape wise. Tuesday’s is ok. The shapes are good I think, but the fabric of the top looks too drapey. Not something I noticed whilst wearing it so self photography has it’s benefits! I’m feeling a wee bit ho hum about my sky blue cropped trousers (Weds/Thurs) I LOVE my blue cropped trousers but they look odd in both photos. Possibly I narrowed them too much at the ankle. I’m hoping it’s just the camera angle. Usually I only wear my plaid shirt (Thurs) with my flared jeans (Saturday) which is a combo that I think works well enough. But worn with those blue trousers? Well it’s not a combo I shall be repeating!
So onwards and upwards. I desperately need to do some laundry (or some speedy sewing)!!!
Take care

refashioning, Restyles, Thrifting

Restyle # 23 – Wide Leg to Tapered Trousers

09/22/11

I apologise if my refashioning posts are somewhat “safe” at the moment. There’s no show stoppers here I’m afraid. I’m just on a bit of a roll expanding on my wardrobe basics for Autumn! I currently have neither the funds for a shopping spree, nor the time for several “from scratch” sewing projects. So refashioning is my current weapon of choice…:)
These are some trousers that I thrifted for £1 last year. Nice light to medium weight drapey linen mix and really comfy on the waist and hips. I’ve already had a decent amount of wear out of these. So despite the fact that they’re  so long that they are now suffering from FHS (Frayed Hem Syndrome 😉 where they have swept the floor behind me as I’ve walked, and the original hook and eye closures have given up the ghost, these trousers still had potential. So I came up with this….

The first thing I did was to add button holes and some buttons from my stash to the waistband. I actually prefer these to the original fastenings, so happy days there.
Then I hacked off the hems and put them on inside out to assess the fit and shape without the distraction of all that fabric pooling around my feet.
Then I pinned out a general shape in the mirror and followed the same process as in my previous post.

I LOVE my new trousers and much like my powder blue ones, I can see these being used in heavy rotation in my winter wardrobe. Even better, I think these will transition perfectly into Spring too. The colour is so versatile. It will tone with the more autumnal colours I have in mind for the next few months but work equally well with pastels and other lighter colours come the Spring. Plus the fabric is light enough to be worn layered with tights (oooh, there’s a debate. Tights under trousers. Yea or Nay??) for the winter and on their own on warmer days.

The last couple of Self Stitched challenges have really got me analysing my wardrobe, how I choose what to sew or buy, and how I put things together. For the first time in my life I’m actually planning my wardrobe ahead of time. Sheesh! Check me out!
What have you been planning and scheming about? Sewing or otherwise! Fess up!
Px

refashioning, Restyles, Thrifting

Restyle # 22 – Straight Leg to Cigarette Pants

09/21/11

More restyling today. I’m on a roll 😉 I thrifted these “jeans” for £2. Brand new. Never been worn. The fabric is a lovely soft stretch twill and I loved the powdery blue colour. I didn’t however like the shape and length in the lower leg. (Left pic) They were semi bootcut and the kind of length that doesn’t reach quite the right point of your shoes. Kind of flapping around my ankles like a flag at half mast!
So I put them on inside out and pinned out a rough idea of the shape I wanted them to be, (middle pic). I then marked out a smoother stitching line using the pins as a guide, and sewed the new seamline, blending it into the existing seam. Oh, and I shortened them by about 3″ (Right Pic)
The result was a shape more akin to the tapered cigarette pants that I am absolutely loving at the moment. (The curvy girls version of skinny jeans, lol!) Try as I might I couldn’t get a full length shot to show the shaping at the ankle/hem. For some reason the way I stand (or perhaps the camera angle) makes it look as if they’re really tight at the ankle. (They’re not at all) So here’s a side on close up too…

I suspect I’m going to get have already had alot of wear out of these and have a couple more pairs of trousers lined up for the same treatment. These were simple to do because the inseam and outer seams were standard straight seams and easy to blend in with a new stitching line. However, I haven’t quite worked out how to do this on jeans as they tend to have flat fell seams (usually on the inseam only) which would be nowhere near as straightforward to blend into a new seam without having to unpick the whole thing and even then….Hmmm! Thinking cap is on….any thoughts?
Px

casey, DIY, elegant musings, refashioning, Restyles, the refashioners, Tutorials

The Refashioners – Casey

09/14/11

Hello! Casey from Elegant Musings here. I am so excited to be participating in this series—it was such a fun idea (thank you to Portia for asking me to participate)! When Portia sent me the garment to refashion, I was quite delighted with this challenge. I had been thinking this summer about remaking a “dressmaker” suit (meaning a suit that doesn’t have the traditional tailoring we associate with a suit) into a cute, 40s-inspired number. This original garment proved just the piece to test my ideas on!

Refashion Inspiration! Don't miss out on the new upcoming series of The Refashioners at www.portialawrie.co.uk

I usually begin refashions by loosely sketching an idea and sometimes playing with various ideas on the dressform (straight and safety pins are a great way to test!). I find that this helps me envision the order of construction (or deconstruction!) rather than chopping away at a garment blindly. I wanted to take this suit from ho-hum to something that evoked the look of the 40s. I had a pattern in my stash, as well as some images on my computer, that proved to be the inspiration for this piece. Sometimes refashioning is not so much about creating a new garment, but rather refitting an old one to your aesthetic and size!

Refashion Inspiration! Don't miss out on the new upcoming series of The Refashioners at www.portialawrie.co.uk

To start the transformation and refit the (several sizes too large) suit, removed the sleeves from the jacket and set aside. (Note that in the before pictures I had to clip the suit in the back because it was too baggy for my dressform.) I unpicked the collar from the neckline, and removed the shoulder pads and opened the neckline facing away from the jacket. Trying on the jacket inside-out, I pinched away the excess fabric at either side seam and the shoulders (which brought the darts up to approximately the correct level) and pinned. It took a few tries to get the fit just right, but once I had I sewed the new seams and finished with serging. I also took this opportunity to redo the hem of the jacket and add a nicer (thrifted hem tape!) finish.


Next up was the fiddly part of redoing the neckline. I pinned an approximate outline while wearing the jacket, and then marked the outline in chalk. I added a 3/8” seam allowance, blending it into the back neckline. The neckline was trimmed to this line, as was the neckline facing. I sewed the facing and the neckline pieces right sides together for a smooth (and easy!) finish.


Adding the sleeves back to the jacket was perhaps the easiest step of this refashion! I measured the new armholes, and found a pattern with a sleeve cap measure of approximately the same. (In this case my trusty Swing Dress pattern). Using the original hem on the sleeves, I cut out new ones and sewed those in.


Finally, the jacket needed a few new details to add a bit more of a vintage flair. I dug through my button stash and found these two, beautiful vintage glass buttons to add to the front. They were slightly too large for the original buttonholes, so I slip stitched those shut, attached the buttons overtop and added snaps underneath. For the neckline, I wanted to add a bow, and used the piece that was originally the jacket collar to fashion this. This was permanently tacked to the overlap side of the jacket, and then secures on the underlap neckline with a snap.


To redo the skirt, I just drew a new a-line skirt pattern directly on the wrong side of the skirt. This was really winging it, but I wanted to keep the original hem intact, so using a pattern would have been a bit tricky (since the hems on even modest a-line have a definite shape). But, it would have been easy to just pick apart the entire skirt and use a simple a-line pattern. Redoing the skirt involved have to take out the old zipper, reinsert it, and add a waistband. I used some leftover pieces of the skirt fabric and Petersham ribbon for this to face the waistband.

This was probably one of the more extensive refashions I’ve done in a long, long time! It was quite worth it and I enjoyed the challenge of giving a rather ho-hum garment my own spin. I think if there was one additional adjustment I wish I had made, it would have to be overdying the fabric. I thought about it, but decided not to even try because of the high polyester content in the material—I didn’t want a splotchy dye job!

A big thank you again to Portia for asking me to be a part of The Refashioners!!! This project turned out to not only be a challenge in refitting, but also opened my eyes to some new possibilities when it comes to refashioning. Off to raid my stash of thrift store find that need altering to see what new life I can breathe into them…

Crikey, this looks so authentic!  Absolutely gorgeous. Who would ever know this started life as a frumpy 2 piece?! Thankyou so much Casey. You’ve inspred me to tackle a vintage suit jacket that’s been taunting me!
STILL more to come people so stay tuned!
Px

Did you Make That, DIY, Karen, refashioning, Restyles, the refashioners, Tutorials

The Refashioners – Karen

09/13/11

The Refashion Rookie 
http://didyoumakethat.wordpress.com/
When Miss P approached me to be one of her Refashioners, I was openly terrified. I’ve never tackled a refashion, mainly because I don’t – or didn’t – have much confidence in my ability to revision an item or do anything other than follow a set of pattern instructions. I also don’t feel that I have the charity shop antennae that allows a person to zone in on the hidden diamond crushed between rails of polyester. But Miss P is a charity shop expert. 
 
Refashion Inspiration! Don't miss out on the new upcoming series of The Refashioners at www.portialawrie.co.uk
She assured me that I was up to the challenge and that only natural fabrics would be sent my way. Soon, the postman was handing over a beautifully wrapped orange parcel. I tore it open to discover a voluminous gingham dress, circa 1980s I’m guessing. There was enough fabric there to open my mind to lots of opportunities. And who doesn’t like gingham? Miss P had done me proud.
So, what did I do? At first, nothing. I let the dress sit around, waiting for inspiration to strike. Then I woke up one Sunday morning and – bang! – the picture of an outfit and accessory was in my head. All I had to do was make it happen.
Mine wasn’t a sophisticated approach. The rotary cutter was my best friend during this exercise. I felt like Freddy Kreuger! First, I sliced the skirt section from the bodice and ripped out a load of pleats. (There was a lot of excess fabric in this dress! I’m not sure today’s retailers would tolerate such wastage.) I hacked a wedge off the bottom of the skirt – that would become my waistband. I wanted to make a feature of the row of buttons that ran down the front of the dress – why waste button holes that someone else has already made for you? I added the large button on the waistband, and love that it’s a pearl button to match all the others except in size. I bought some red piping from MacCullough and Wallis and already had some lace trim hanging around that I bought off Walthamstow market. One weekend of sewing, et voila! I had a new gathered skirt to wear with my cotton petticoat. A skirt that I can cycle in – double result!
Refashion Inspiration! Don't miss out on the new upcoming series of The Refashioners at www.portialawrie.co.uk


Refashion Inspiration! Don't miss out on the new upcoming series of The Refashioners at www.portialawrie.co.uk
There was still quite a lot of fabric left in the bodice, along with some neat embroidered white flowers on the gingham. Unfortunately, the embroidered flowers sat over sewn down pleats that would need unpicking if I tried to rescue the fabric – and the flowers would be ruined. So I decided to just hack away – this time with a pair of scissors. I used some spray starch and a brooch template from a recent issue of Mollie Makes. I love the spray starch – does exactly what it says on the tin!
 This brooch was a lot of fun to make. I adore the hidden details on the rear. The ‘felt’ is actually a scrap of my Paris red cashmere. (Well, if it’s just lying around…) The clay button was bought in Cornwall, so memories are threaded into this outfit – a detail I always love.
Refashion Inspiration! Don't miss out on the new upcoming series of The Refashioners at www.portialawrie.co.uk
 What are my conclusions? I’ve worn the skirt to death since it was made, so it’s definitely a success. I was surprised at my ability to envisage a new outfit, once my brain had relaxed into the exercise. I do worry that I didn’t make the most of this dress’s potential and would love to hear from readers and Miss P about what they might have made from it. But most importantly, I got past Fear Factor Ten and embraced refashioning. It’s a great way of producing new outfits and can free up the creative imagination more than following a set of instructions. But most of all, I think this make is a credit to the very clever Miss P who knew just the right thing to send me and reassured her little apprentice every step of the way.

I hope I did you proud, Miss P!

Indeed you have Karen! Thankyou sooo much. Great refashion. LOVE the red piping accents. I’ll bet you’re the best dressed cyclist in your neck of the woods!
See…..I told you you’d be brilliant ;) 

Still MORE fantastic refashioning inspiration to follow…stay tuned 🙂
Px

DIY, refashioning, Restyles, So Zo..., the refashioners, Tutorials, Zoe

The Refashioners – Zoe

09/13/11

Next up, it’s over to Zoe of So Zo…
When I first unwrapped my secret garment I was surprised to find a kilt! Well, a ladies kilt-style skirt to be precise, but definitely very traditional in nature. I must admit that initially I was a bit perplexed about how to approach the refashioning of this garment. This was a really good quality garment, but it’s not something I’d gravitate towards in a charity shop.

Refashion Inspiration! Don't miss out on the new upcoming series of The Refashioners at www.portialawrie.co.uk

But that’s the very genius of this mystery refashioning project: challenging the participants’ creativity, which is what you have to rely on when taken out of your comfort zone!

So I ‘sat on’ the garment for a while and let my ideas stew. Upcycling a garment can mean a dramatic remake into something unexpected, or simply shortening the hem line, and everything in between. My early ideas for this skirt erred towards the more extreme end of that spectrum. I was picturing some sort of cropped jacket or cape with the pleated sections being used for the sleeve parts and the buckles reused as an asymmetric fastening. But thinking about it, I realised there possibly wouldn’t be enough fabric and I didn’t have enough time to commit to such a major overhaul. So I scaled my thoughts down somewhat and settled on attempting to creating a sexier, updated version of the original traditional kilt-skirt style.

I started by carefully unpicking and ‘harvesting’ the waistband and buckle fastenings to be used later. I have to say that this skirt was solidly made! It felt like it had been welded rather than stitched together, unpicking took several sittings. I also unpicked the darts front the flat sections and gently pressed the area flat.
Refashion Inspiration! Don't miss out on the new upcoming series of The Refashioners at www.portialawrie.co.uk
Using a basic pencil skirt pattern, I cut the front piece from the flat part of the original skirt. I marked the new darts then stitched and pressed them inwards.
Refashion Inspiration! Don't miss out on the new upcoming series of The Refashioners at www.portialawrie.co.uk


The pleated section of the original skirt sat around the back. The pleats had been stitched in a kind of graduation so that they created a curve at the rear, rather than using darts. I really liked this and wanted to incorporate it into my refashioned version. I cut a section from the pleated part that was a bit bigger that my back skirt pattern piece. The pleats had been edge-stitched down to just below the wearers bottom, but I decided it would be fun to edge-stitch them down further so that the pleats flared and kicked out like a fish tail when the wearer walked. I pinned the pleats down and stitched to a certain horizontal line in the check, then gave the back section a press.

Refashion Inspiration! Don't miss out on the new upcoming series of The Refashioners at www.portialawrie.co.uk

Pinning the dart closed on the back skirt pattern piece, I laid this down on the pleated section and cut out the back piece of my skirt. With my front and back pieces now cut out, I overlocked all four side edges to neaten them. The front and back pieces were stitched together along the right hand side seam and the seam was pressed open.

Now was the time to reattach that previously harvested waistband. Measuring along the top edge of my pencil skirt pattern gave me the measurement I needed to cut my waistband to. The waistband had a stiff interfacing which I wanted to retain, so pinned it to the waistband to keep it in place until the final row of stitching caught it inside. I stitched the waistband along the top edge of the skirt, right sides facing.
With one half of the waistband attached, I measured the length of my zip and stitched the remaining side seam closed from the base of the zip will come to the hem. I pressed this seam open also. The zip was inserted into the opening on the left side seam trapping the waistband edges at the same time. I then ‘stitched in the ditch’ along the line where the waistband joins the upper skirt, thus trapping the remaining edge of the waistband to the skirt and the stiff interfacing inside.

Refashion Inspiration! Don't miss out on the new upcoming series of The Refashioners at www.portialawrie.co.uk

I wanted to include the original buckle fastenings because they are such an integral design feature of a kilt that no kilt reworking would look right without them. I placed them over the zip which served to slightly obscure the zip fastening.

Refashion Inspiration! Don't miss out on the new upcoming series of The Refashioners at www.portialawrie.co.ukWith that icing on the cake, I declared my kilt-skirt refashion complete!
Refashion Inspiration! Don't miss out on the new upcoming series of The Refashioners at www.portialawrie.co.uk
Thanks so much Zoe. My favourite part has got to be that fishtail effect. Genius! Sorry for sending you something with “welded” seams! But at least you’ll never be short of a sexy little number for Burns Night or Hogmanay! Great twist on a classic garment. Yay for refashioning!
Still loads more to come this week!

Px

Dixie DIY, DIY, free pattern download, refashioning, Restyles, the refashioners, Tutorials

The Refashioners – Dixie (Part I)

09/12/11

Hello Readers! I’m Dixie from DixieDIY.com and i’m here to share with you my new digs I made from restyling an old blouse and skirt. I’m so glad I got to be a part of The Refashioners, such a talented and skilled group of sewers and designers. Thanks Portia for including me!
Like everyone else I had no idea what to expect when my little package arrived all the way from the UK (I live in Austin, Texas). What was inside turned out to be a button down top and long faux wrap skirt. The fabric was 100% Rayon and had a cool, almost chevron stripe style print to it.

Refashion Inspiration! Don't miss out on the new upcoming series of The Refashioners at www.portialawrie.co.uk

The outfit was way too big but when you are looking for something to refashion, that could be a good thing. The more fabric you can use, the better. Now I don’t often shop at thrift stores (or charity shops as some might call them) not because I don’t want a good deal but I get easily overwhelmed with the quantity of items. That’s ok because sometimes the best restyles can be done with clothes from your own closet that you never wear anymore and need some new life. The one thing that I drew inspration from was the fabric print with the diagonal lines. Rather than deconstruct the garment and start from scratch, I decided to use the pieces of the original and adjust from there.

I used a pattern that I had lying around but never used – version b of an old simplicity pattern from the now discontinued Built By You series – Simplicity 4112. I loved the diagonal and gathered cut on the long sleeves, an interesting design detail that I’ve always wanted to make but never had the right fabric. I thought the directionality of my print would be perfect!

Refashion Inspiration! Don't miss out on the new upcoming series of The Refashioners at www.portialawrie.co.uk

To start, I cut the sleeves and side seams off the top. The front and back of the top were still attached at the shoulders.
Next I arranged my shirt tolay as flat as possible on my table and pinned my pattern’s bodice piece to the fabric. By lining up my pattern piece at the point where the shoulder and the neckline of the shirt met, i could keep the original collar and centre buttons but trim off the sides of the shirt to make it fit better. I remembered to take a mental note that the pattern piece had 5/8 seam allowances, and the shirt already had those seams sewn, and so I pinned the pattern piece accordingly.

Refashion Inspiration! Don't miss out on the new upcoming series of The Refashioners at www.portialawrie.co.uk

I had one small problem. The bottom armhole had to be lowered about an inch to accommodate the shirt’s original armhole. i made sure to make this change on the front, back and sleeve pattern pieces so they all matched. in the end this worked out fine beacause I like more room in the armpit area anyway. 😉
I did the same thing to both sides and the back, lining up pieces along the shoulder seam until I had my basic bodice. I stitched uo the sides and was ready for the sleeves!

Refashion Inspiration! Don't miss out on the new upcoming series of The Refashioners at www.portialawrie.co.uk

I was lucky that I had so much fabric in the skirt to use for my sleeves! Even then I still had do do some creative manouvering with pattern placement. when I took off the waistband and spread the skirt out it made one long rectangle, but there were several small darts and seams to contend with. I seam ripped the darts and worked around most of the seams. Luckily with the fabric design it is difficult to tell that there are seams there at all.

I sewed up the sleeves according to the pattern directions and attached them to the shirt bodice. Finally I switched over the old pearly coloured buttons for plain black ones. I would have had to get new buttons anyway beacause I needed two extra for the sleeve cuffs and I didn’t have any that matched the originals.

Refashion Inspiration! Don't miss out on the new upcoming series of The Refashioners at www.portialawrie.co.uk

Ta da!! One nice new (fitted) button down shirt appropriate for work or even something more casual. unfortunately I won’t get to wear this shirt for a few months because we’re currently experiencing global warming to the extreme here in Texas; but I’ll wear it often come Winter, I’m sure!

Refashion Inspiration! Don't miss out on the new upcoming series of The Refashioners at www.portialawrie.co.uk

But wait, I’m not finished yet! I still had some fabric left from the skirt. Enough to incorporate into another top….

So lookout for another post from Dixie in the next few days, this time with a FREE PATTERN DOWNLOAD especially for the occasion……! Thanks Dixie. Awesome refashion!
Px

refashioning, Restyles

Restyle # 20 – Lace Tunic Tee (inc Tutorial)

09/05/11

It’s been some time since I indulged in some refashioning. But here is the first of several that I have coming up over the next few weeks. I’ve been trying some ideas out with jersey. I’ve not sewn with jersey before as I don’t have an overlocker and the last time I tried sewing jersey on my regular machine, it gobbled it up like a hungry posessed thing.  However I was recently forced out of my comfort zone by a certain someone (who shall remain nameless for now. You know who you are!) and challenged to try sewing with jersey. So I gave it another go.  This was my first practice run. As it happens, it’s not so bad. Without any real headaches I managed to come up with this pretty straightforward refashion…..

I started with a maternity tunic that doesn’t fit me, and some georgette that I saved from a damaged vintage dress and has been in my stash for over 3 years…with a little jiggery pokery, I came up with the refashion on the right….

To begin with I used my Sorbetto pattern to draft the top portion with the CF along the folded edge of my paper….

I only wanted the uppermost chest part to be lace so it took all of 30 seconds to trace this piece off…

and square it off from the CF to the side seam. I thought about shaping this “a la Zoe”, but in the end decided to keep it simple for this one…

I repeated the same for the back piece……

So I ended up with a front and back pattern piece like so….

I cut one front and one back piece from my lace…

Et voila….

I stay stitched all armhole and neckline curves since this is delicate stuff…
French seamed the shoulders….

French seamed the side seams…….

Having cut away the top and sleeves from the bottom portion of the tunic, I used the pattern pieces to determine how much fabric I would need to cut from the original garment. I drew a diagonal line which will create a kind of A line/trapeze effect; and cut just ouside of the line to allow a little for seam allowances (this is not very scientific I know. I was “freestyling” a bit at this stage!)

Here’s the new bottom piece pinned and ready for sewing. The original tunic had the longer scooped hem at the back which was a feature I liked and wanted to keep so I pinned the side seams up from the hem upwards in order to preserve this…

I used one of the overlock style stitches on my machine. A kind of zig zag with a straight stitch underneath…

Then trimmed right up close to the stitching to neaten….

I used the same stitch to attach the top and bottom pieces together and pressed the seam allowances down toward the hem….

Then turned right side out, I topstitched a few mm away from the seamline. Understitching would work just as well though….

I’m not convinced with the finish here. It could be better. I could have matched the thread colour a bit more closely. I could have taken my time a bitmore and wobbled a bit less.  But you get the idea….

Turning the garment wrong side out again you can see the seam finish from the inside. The idea was (and it has more or less worked out) that the row of topstitching then encloses the other edch of the zig zag stitch so that it more closely resembles what an overlocker would achieve…(with a few wobbles here and there!)
 I trimmed close to the stitching line again to neaten….
Now all I hat to do was finish the neckline and armholes. I opened up and pressed one of the sleeves. The plan was to make bias strips using a bias tape gadget. Since the purpose of cutting on the bias is to provide a bit of stretch, and jersey already has stretch; I figured I could dispense with actually having to cut on the bias. No need to measure either! Check this out…..I used 1″ wide masking tape to mark out strips….
Top Tip: The masking tape acts as a cutting guide AND stabilises the fabric whilst you are cutting. Preventing it from slipping and stretching and distorting the strips….I cut between the gaps of the masking tape strips…
and ended up with a whole bunch of strips that I then made into bias tape to finish the neckline and armholes….
That’s all there was to it really. Whilst the finish I managed to achieve on jersey with my standard machine was nowhere near as professional as it would have been had I used an overlocker….for clothes I’m only going to be wearing myself, it’s perfectly satisfactory in my view. Which was a pleasant surprise. I admit to having avoided the stuff like the plague up until now. Thinking there was now way I could sew with it on my standard machine. The process was helped by using a walking foot on my machine. It sounds and feels a bit clunky when sewing but it is very good at moving the layers of fabric through the machine evenly, and without stretching. I was also careful not to pull or stretch the jersey out when working with it as this causes the curling effect on the edges, that you’ve no doubt experienced if you have ever worked with jersey before.
All in all, I’m happy with the concept of this refashion and may well incorporate these elements in future projects on both jersey and wovens.
If you’re looking to have a go with jersey for the first time and don’t have an overlocker, then go for it! I’d say it’s doable as long as you take your time and don’t pull or stretch the fabric.
Hope this helps!
Px

Newer Posts
Portia
Follow
Sewbox

© Copyright 2026. Portia Lawrie. All Rights Reserved. Managed by WordPress Web Dev Cornwall .