• About
    • Contact
    • Press
    • Sponsor
  • DIY
    • Home & Garden
    • Jewellery & Accessories
    • Yarn Crafts
  • Sewing
    • patternless & self drafted
    • Refashions
    • Commercial Patterns
    • Sewing Tips
    • Overlockers
  • The Refashioners

Portia Lawrie

DIY, how to, refashioning, Restyles, Sewing, the refashioners, the refashioners 2015, Thrifting, Tutorials

The Refashioners 2015 – Oonaballoona

08/07/15

Oonaballoona - The Refashioners 2015

When Portia asked me if I wanted to refashion a man’s shirt, my response was HEEEWWWWWL NO. I can barely bring myself to make a man’s shirt from scratch. Could I actually bring myself to deconstruct and then reconstruct menswear?! And come out sane? I thought not.

But that Portia has a way with words. So flattering was her response to my tepid reply, my psyche would’ve be more bruised by refusing the challenge than by picking up the seam ripper. The clinching sentence on that lovely emaiI: “Shirts are just fabric and you’re awesome with fabric. ‘Nuff said.”

CHARMER! Was my response. And I was in.

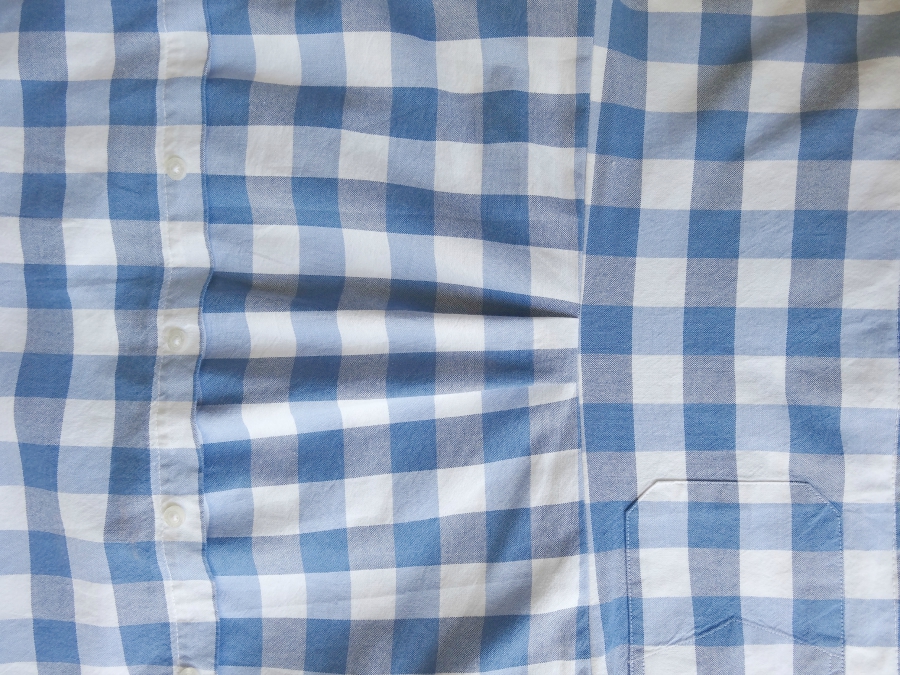
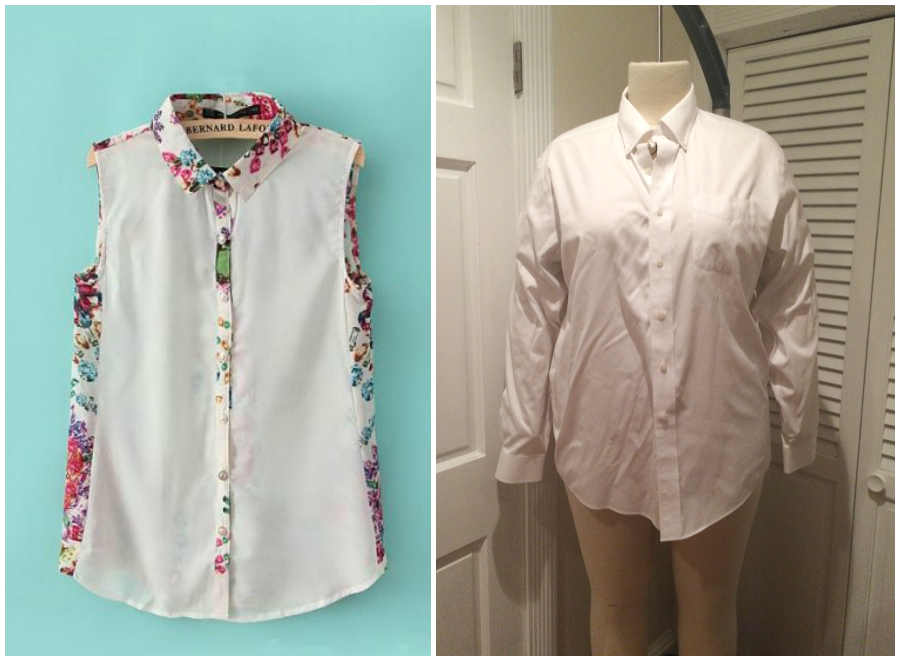
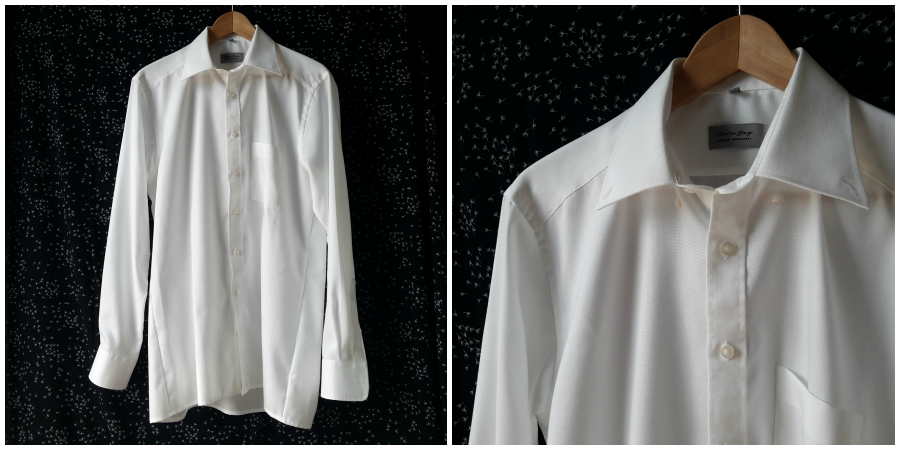
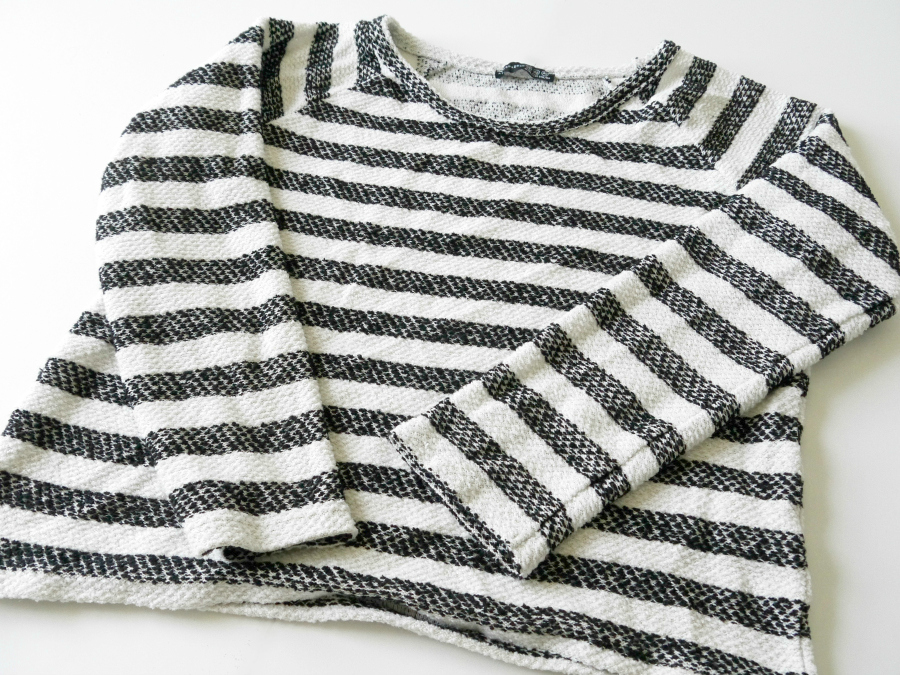
Now, there was zero chance that I was going to snag a shirt from Ruggy’s closet for this challenge, seeing as how I’m made him 3 shirts in my 7 years of sewing , only 1 of those being wearable. That’s just bad math. A few short weeks later, this arrived from our fearless leader’s neck of the woods:Oonaballoona - The Refashioners 2015

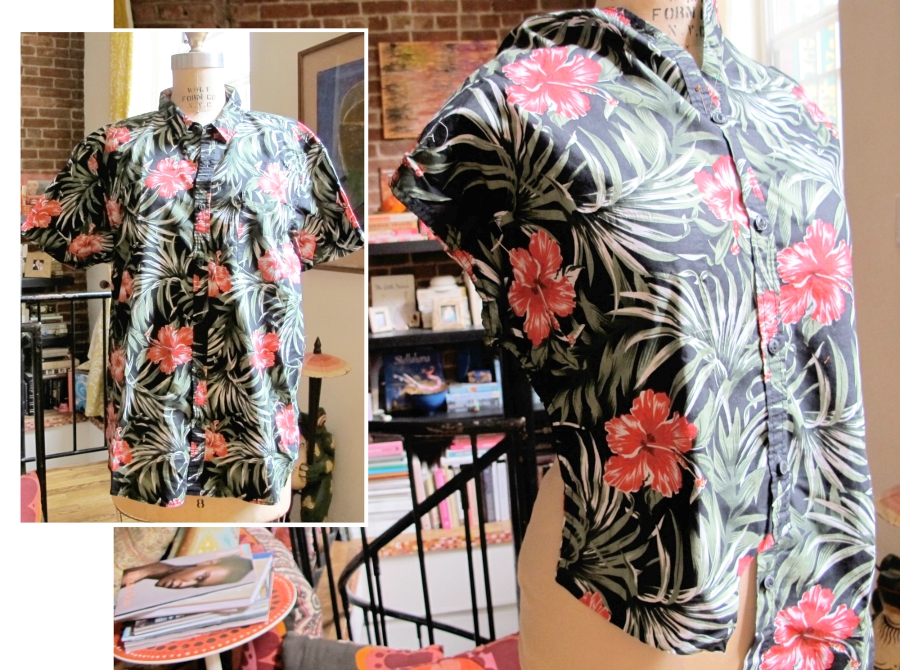
I did NOT want to rip this up! In fact, I wanted to give it straight to my Dad, a very stylish guy! I was stumped, which began another Portia conversation, involving her Lolita vision of me turning it into a woven Watson bra, then me picturing my dad in a Watson bra, then me needing to go wash my brain.

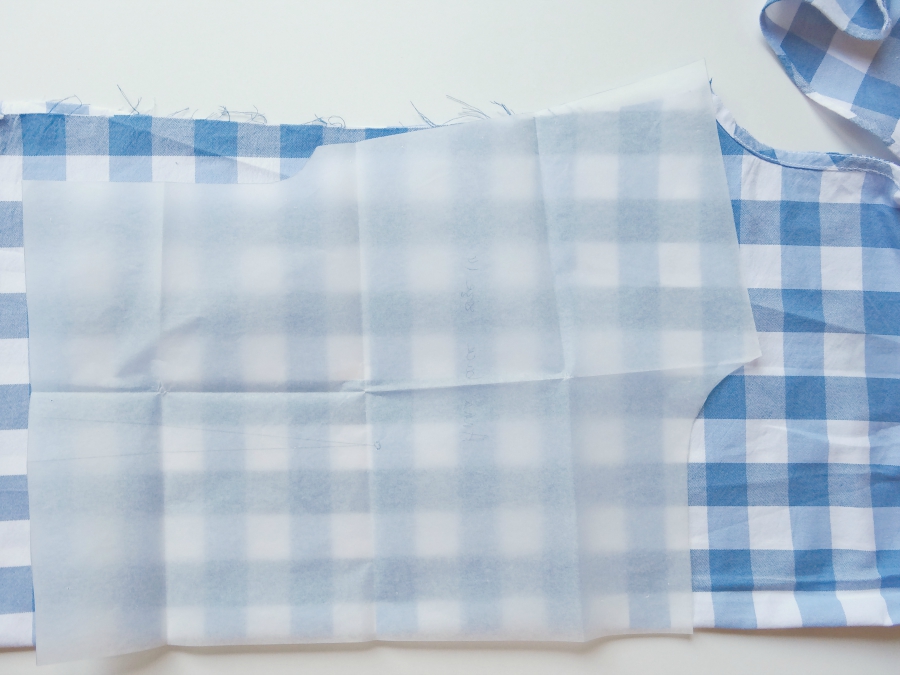
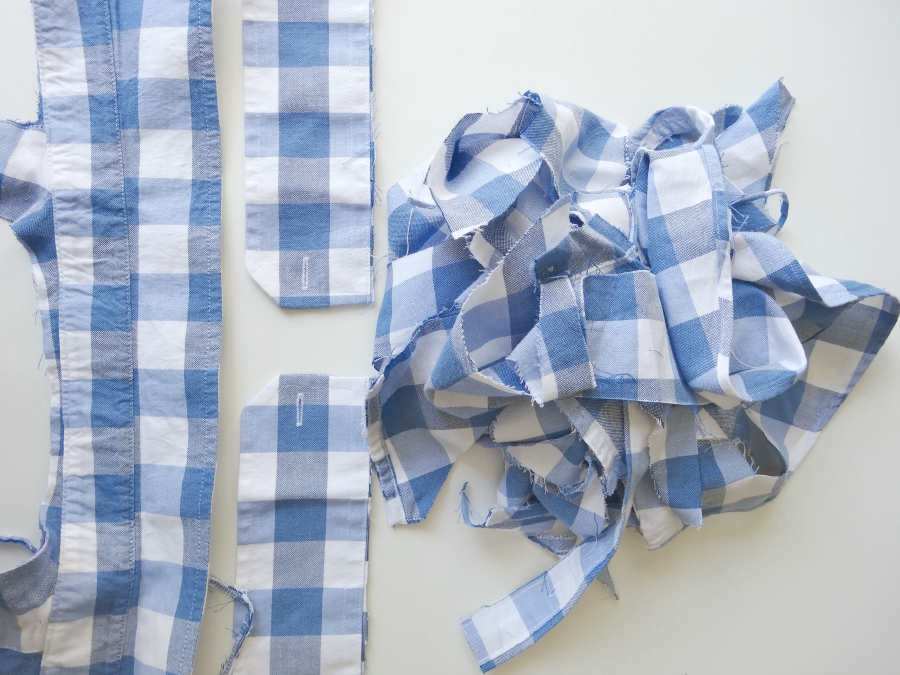
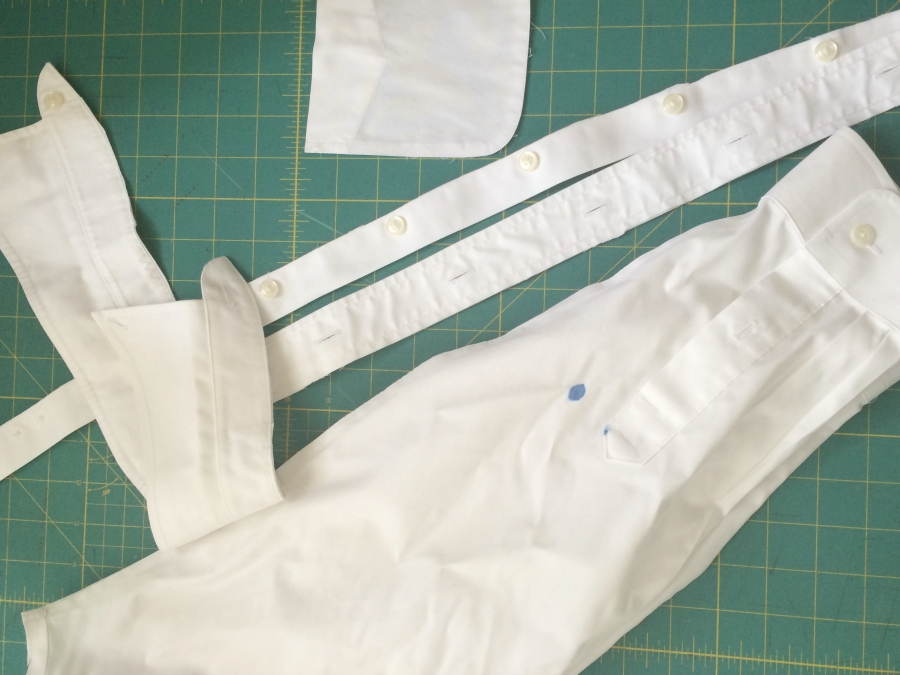
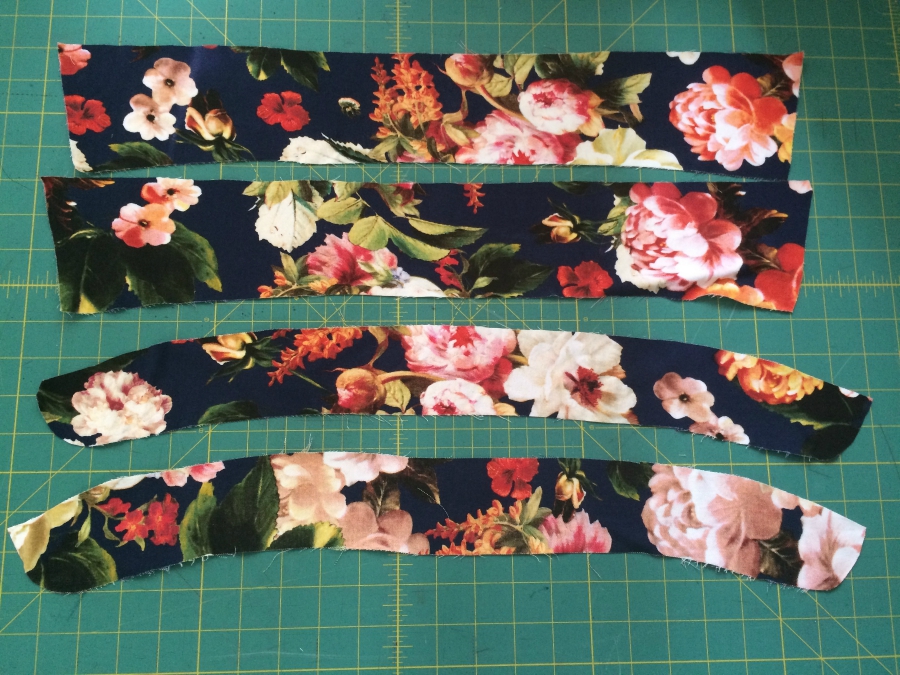
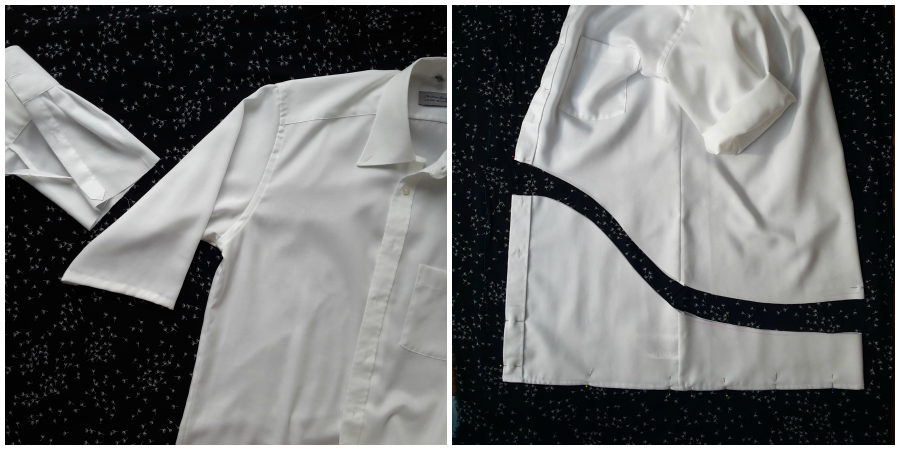
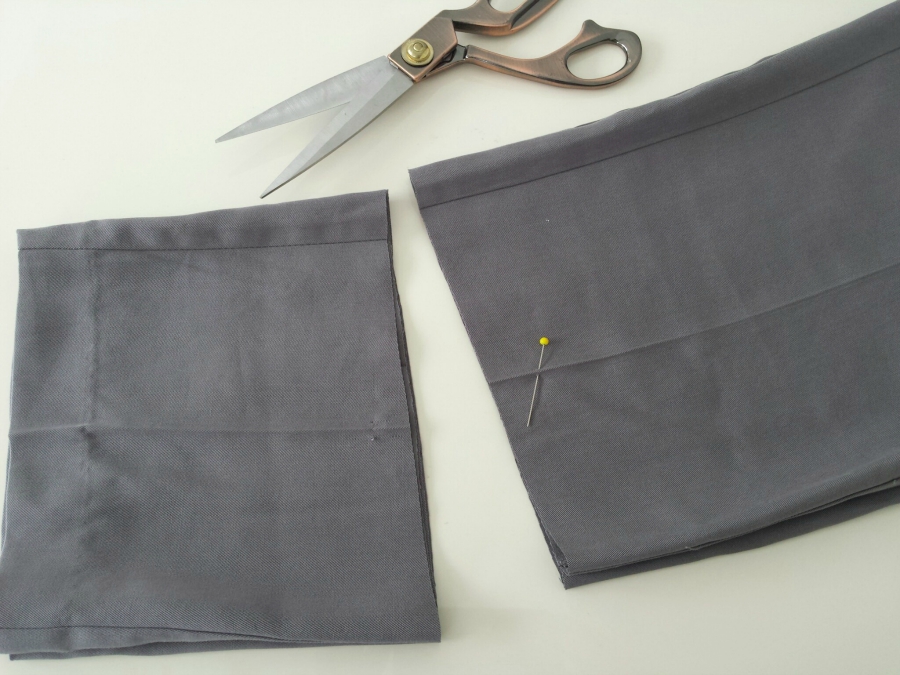
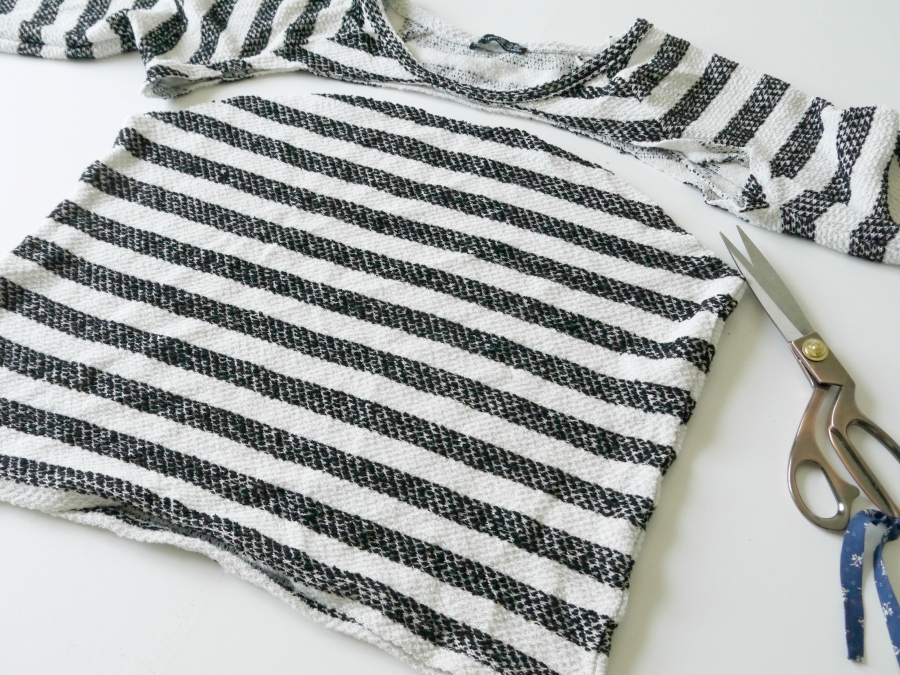
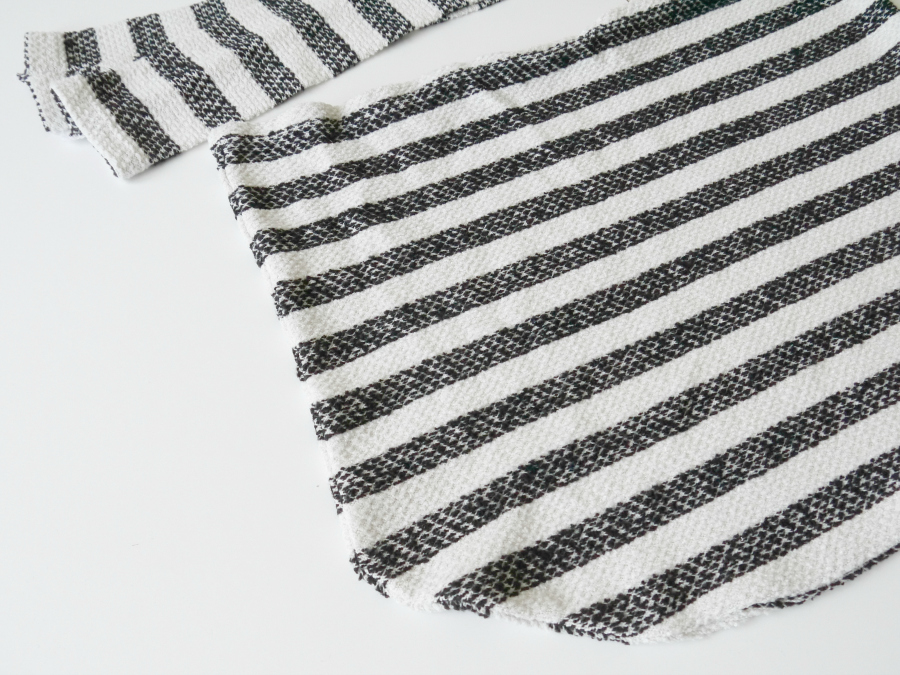
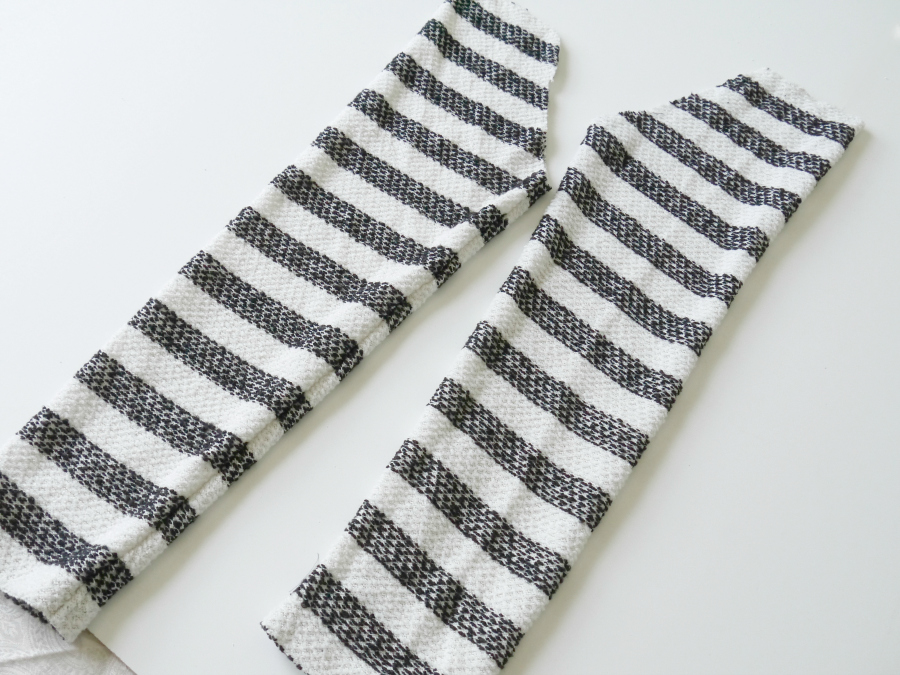
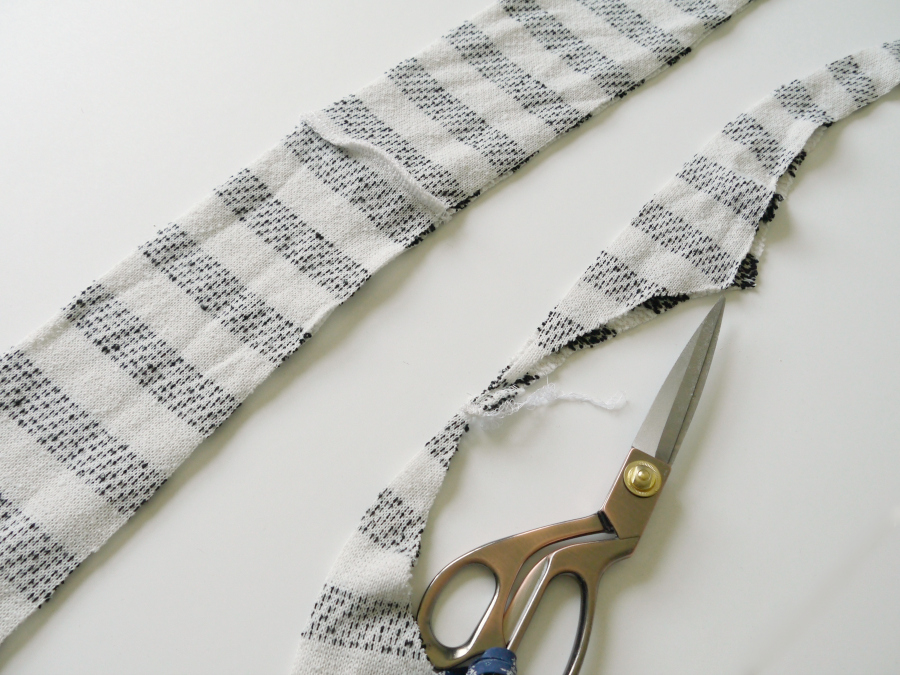
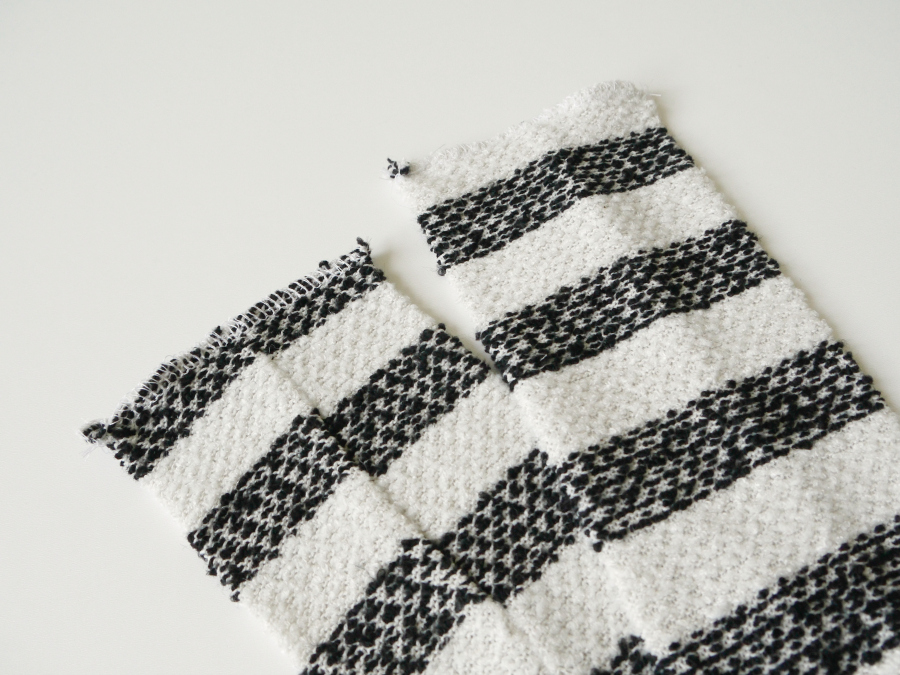
After a thorough rinsing, I got to ripping. Kiiiiind of. I hacked the sleeves and collar off, then cut it open at the side seams. To be honest, I was all about as little seam rippage as possible on this reboot. Although I am aware that the whole refashion thing is about being green, this was admittedly not my primary concern.  I was more into being happy and not worrying about scraps.The sleeves and collar went into the remnants bin without a thought of reappearing in the reboot. Mea culpa.

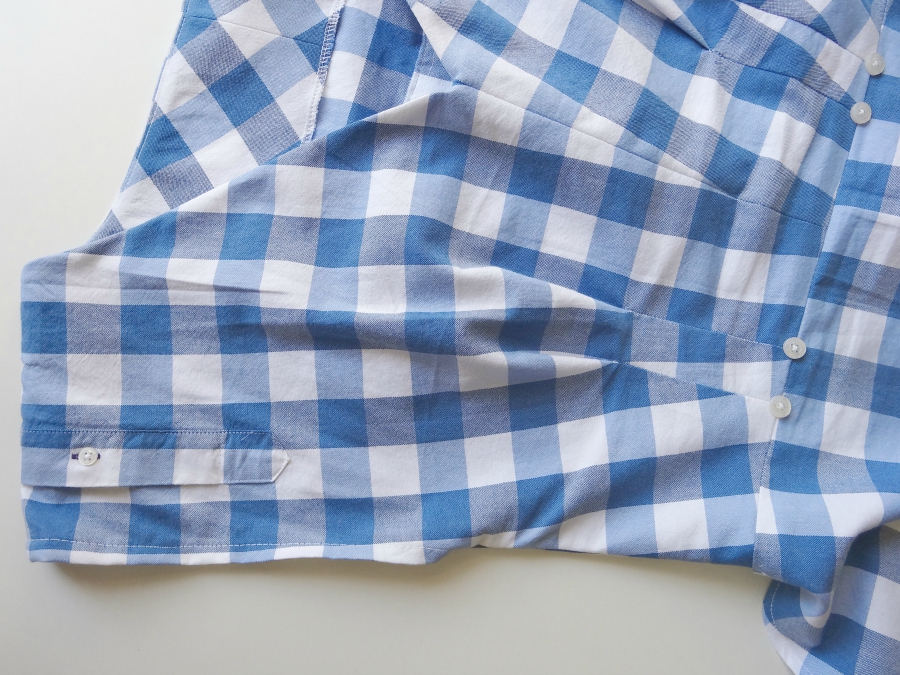
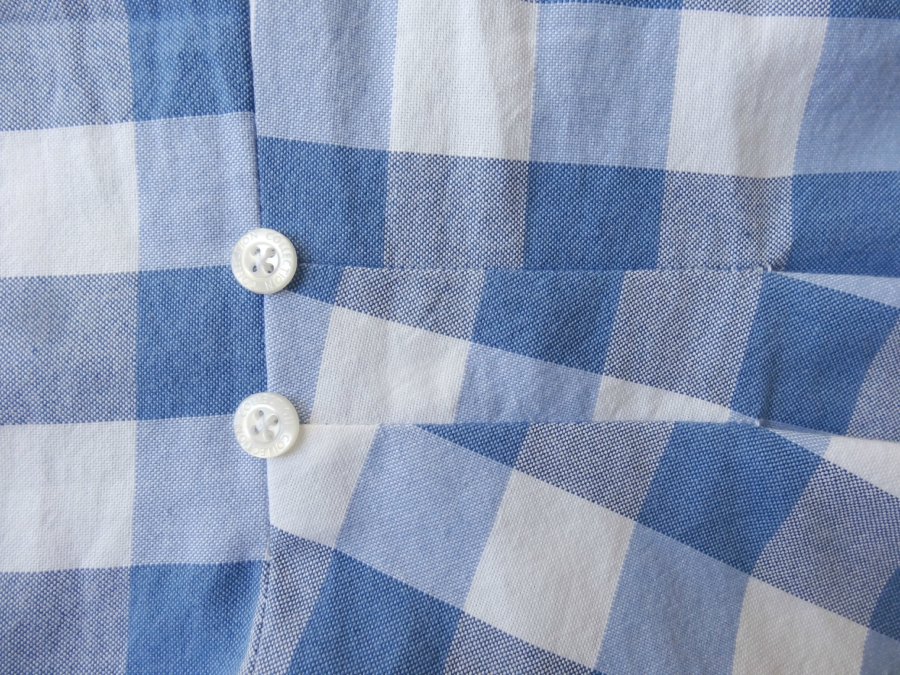
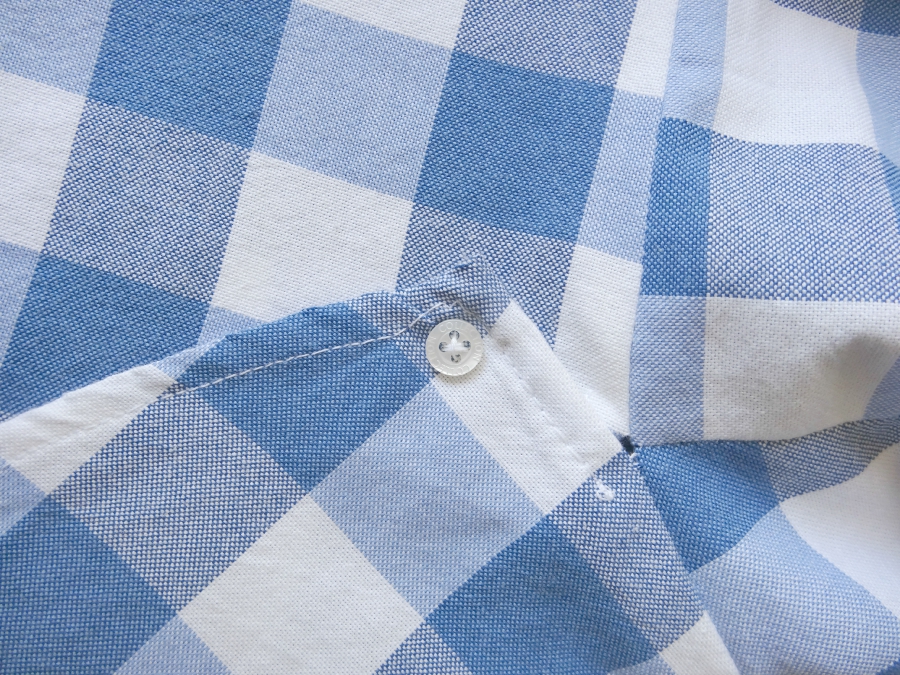
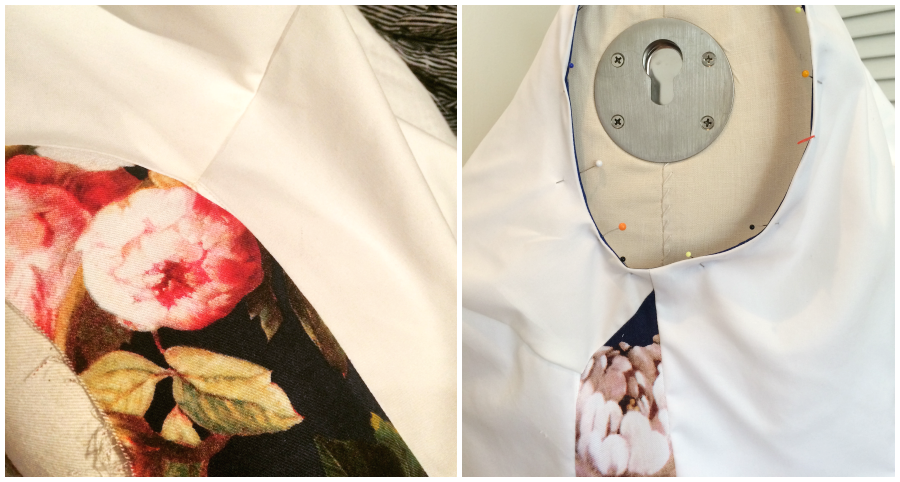
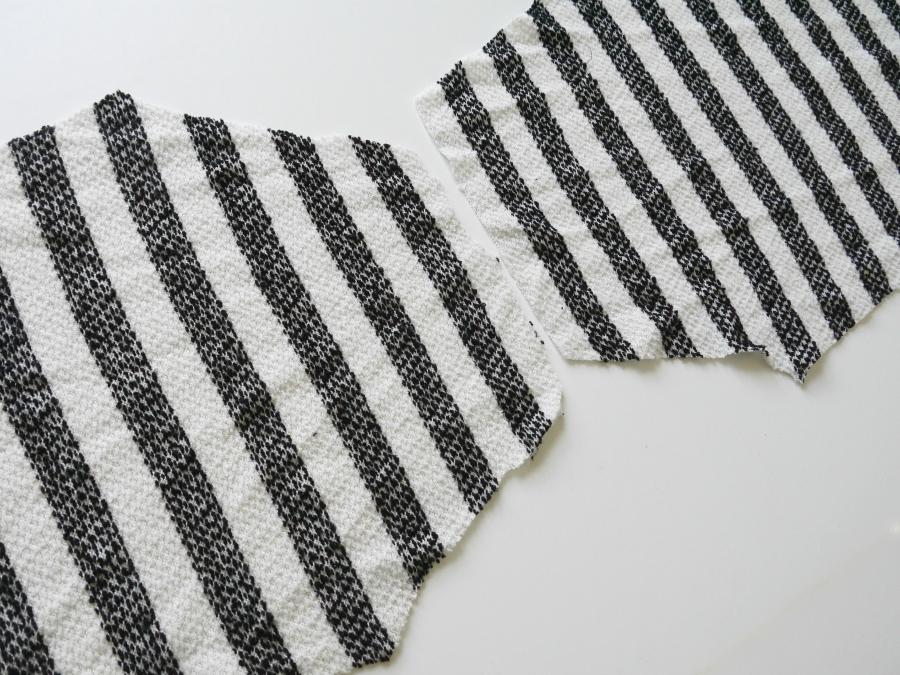
I flipped one front panel upside down and re-buttoned the front pieces, shifting the buttons up by one to get a pleasing print placement. Why did I do that? Hard to say. Maybe I thought there was (*extremely slight and now completely unnoticeable in hindsight*) twinning on the original shirt? Maybe it made me feel like I was really refashioning the shirt?? Maybe the gin and tonic was especially ginny that evening?Oonaballoona - The Refashioners 2015

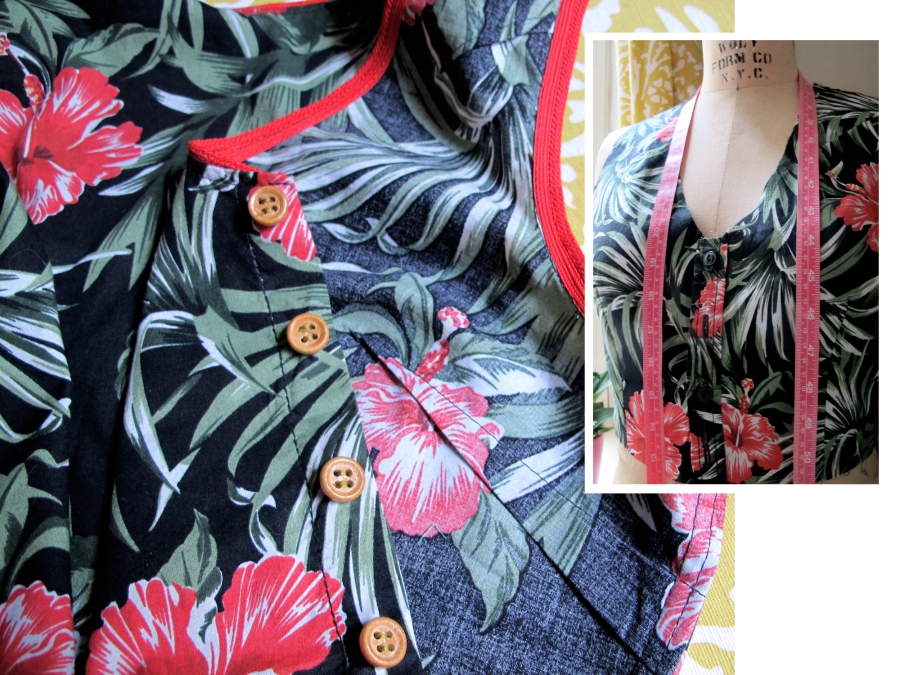
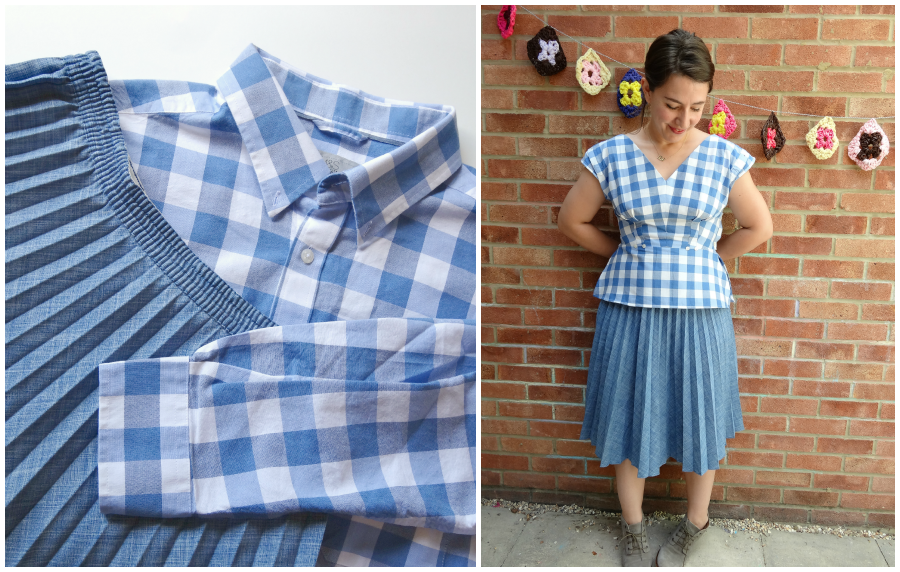
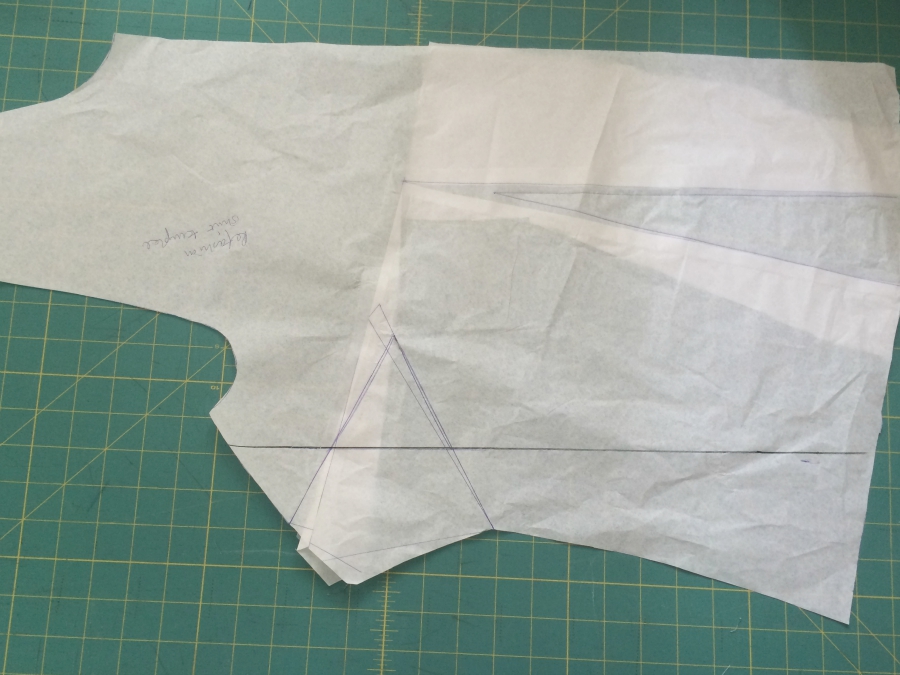
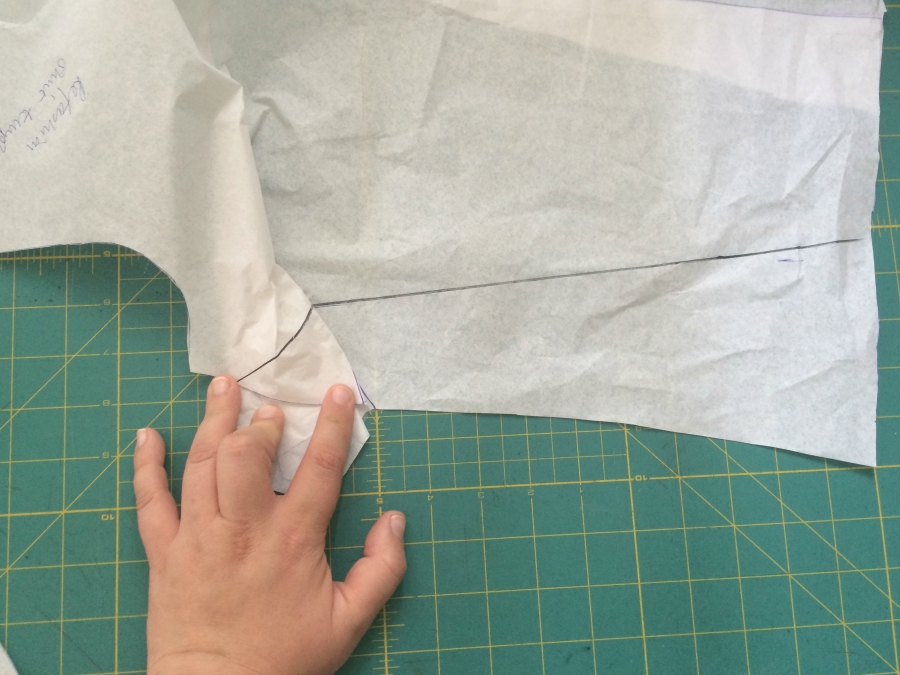
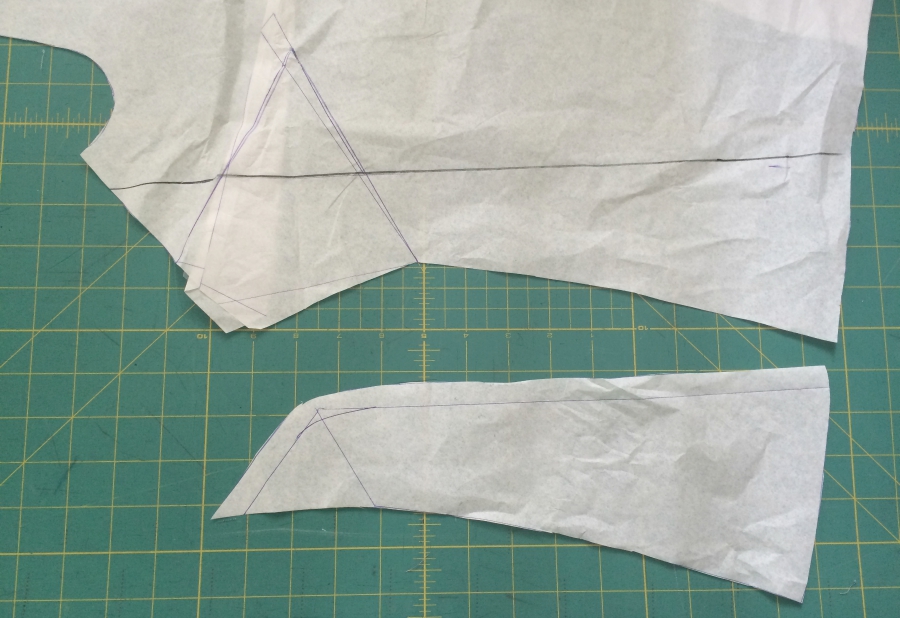
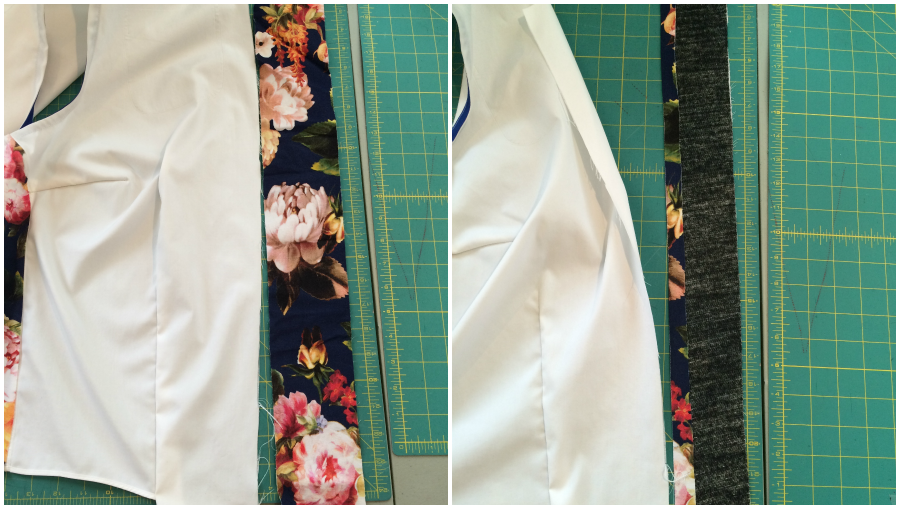
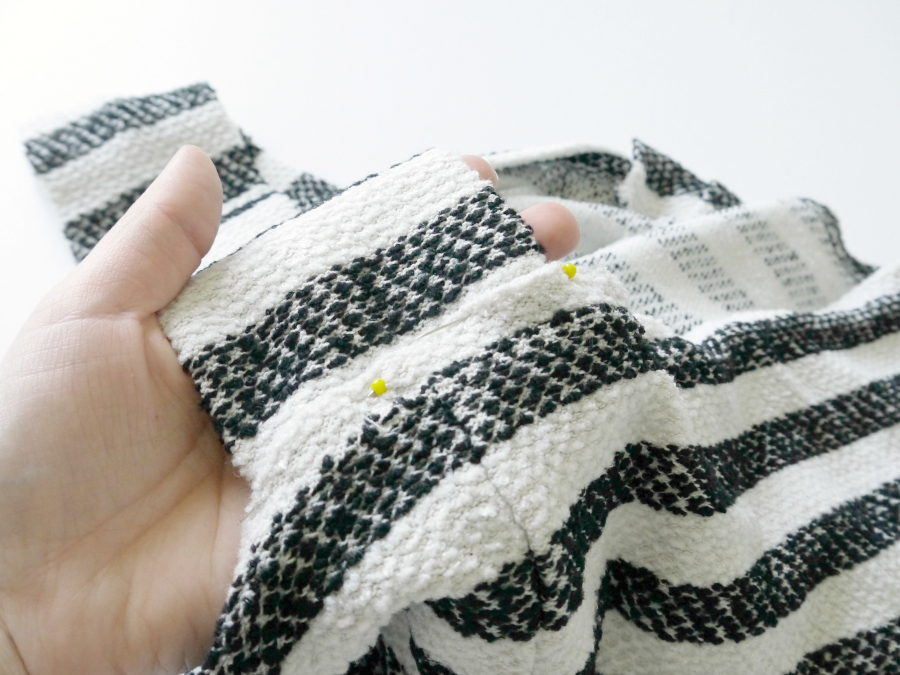
Imma go with ginny. Because my next step was going to be pleating and draping and pulling this into a cute top on my dressform, and I abandoned that route seconds after beginning it. Instead, I reached for my little pile of vintage patterns and came up with Simplicity 6284, a three piece women’s suit. The vest had two simple pattern pieces. BOOM.Oonaballoona - The Refashioners 2015

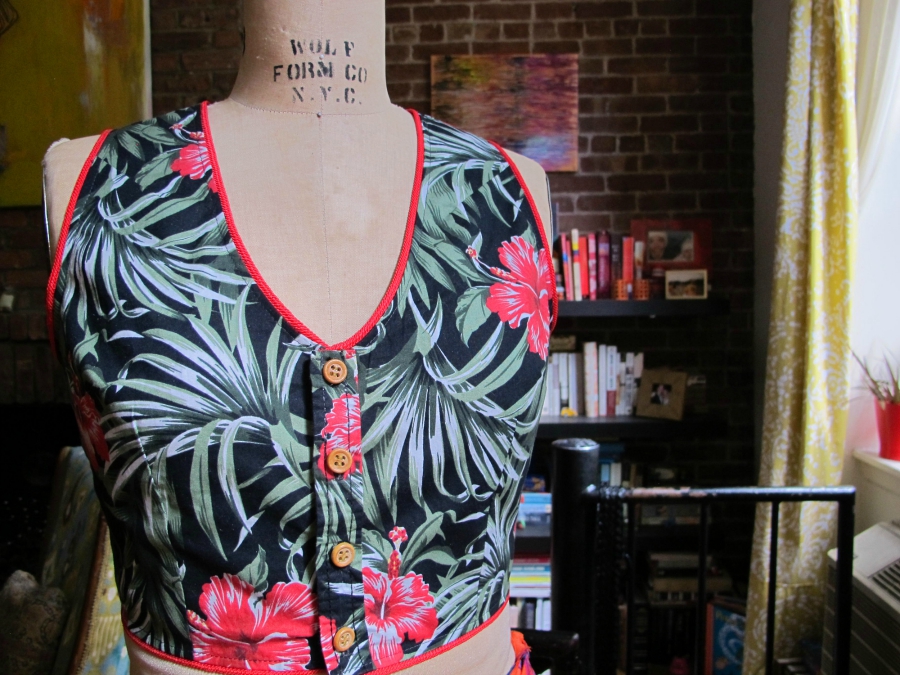
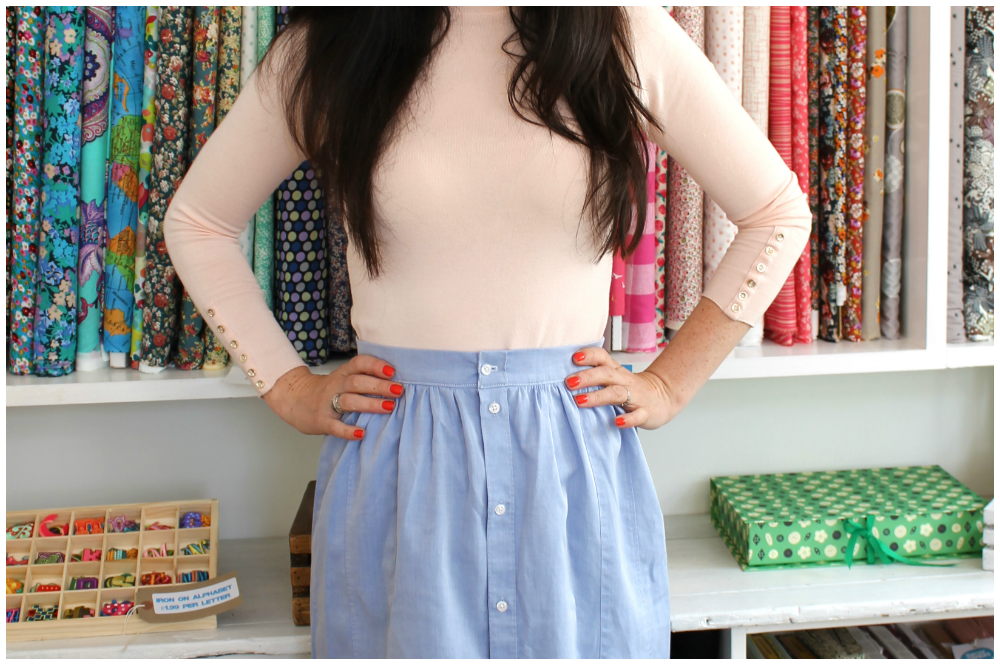
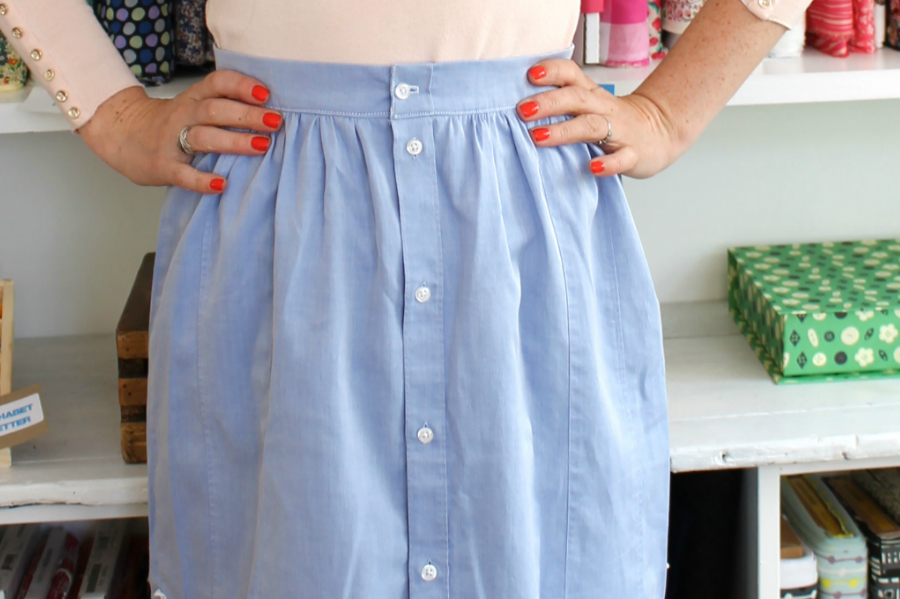
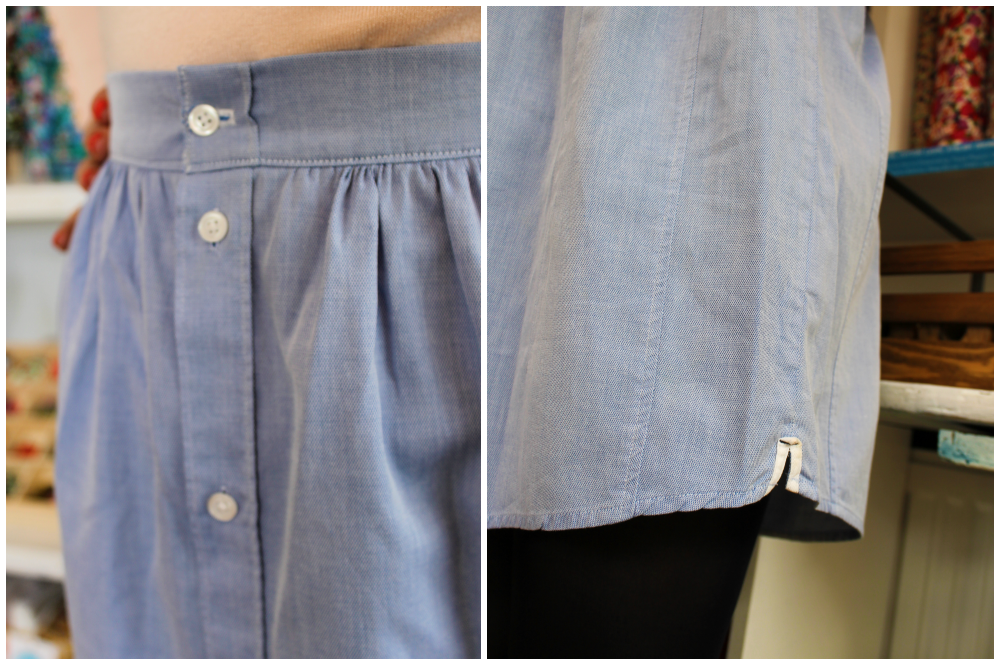
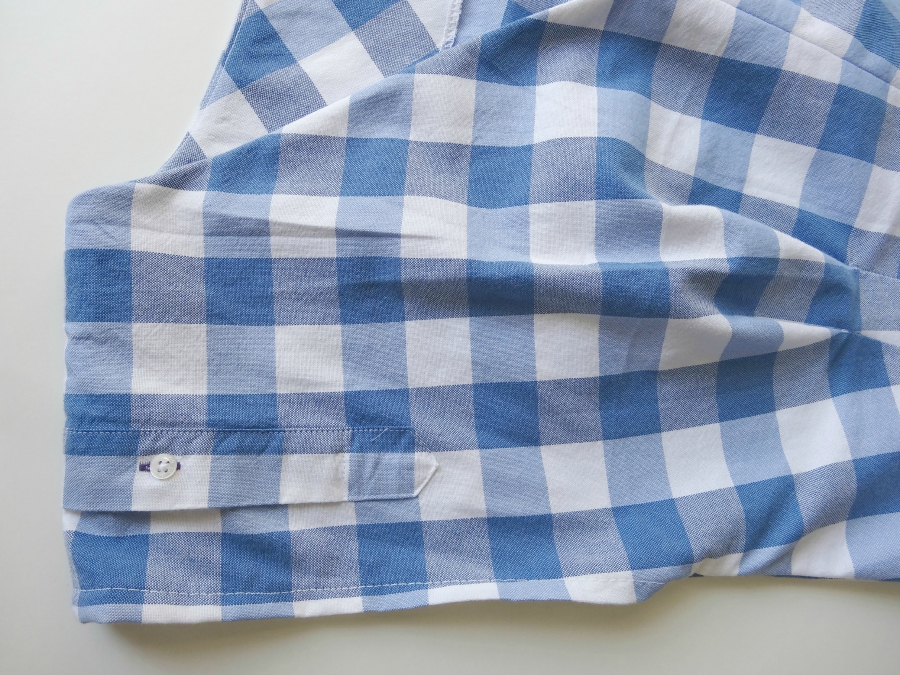
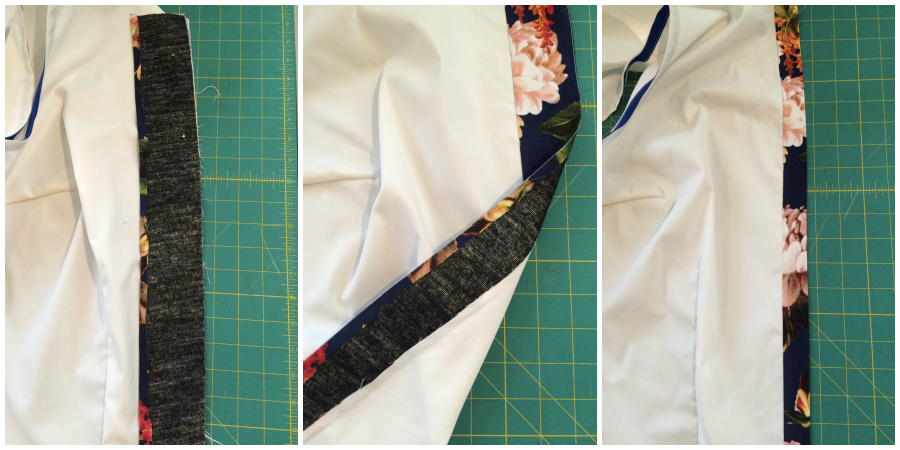
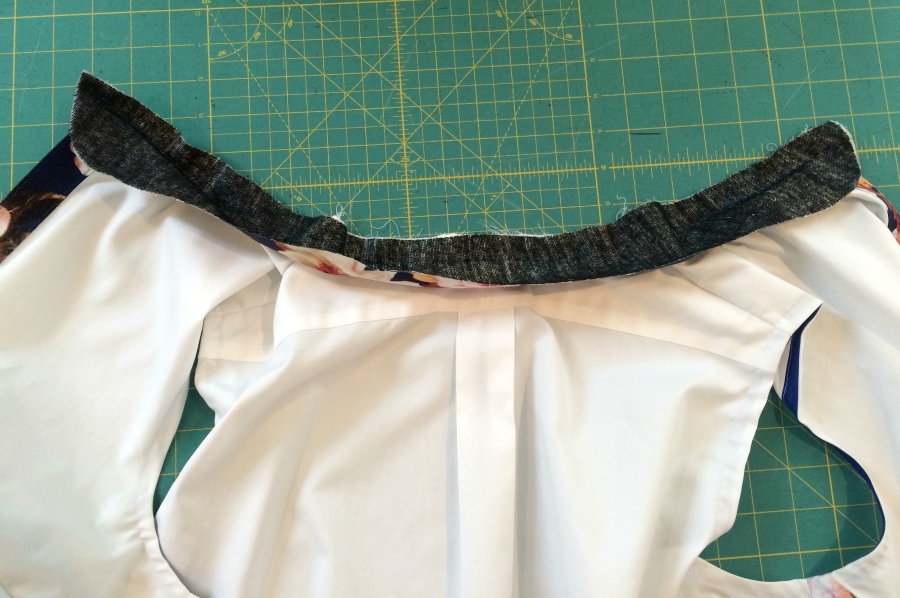
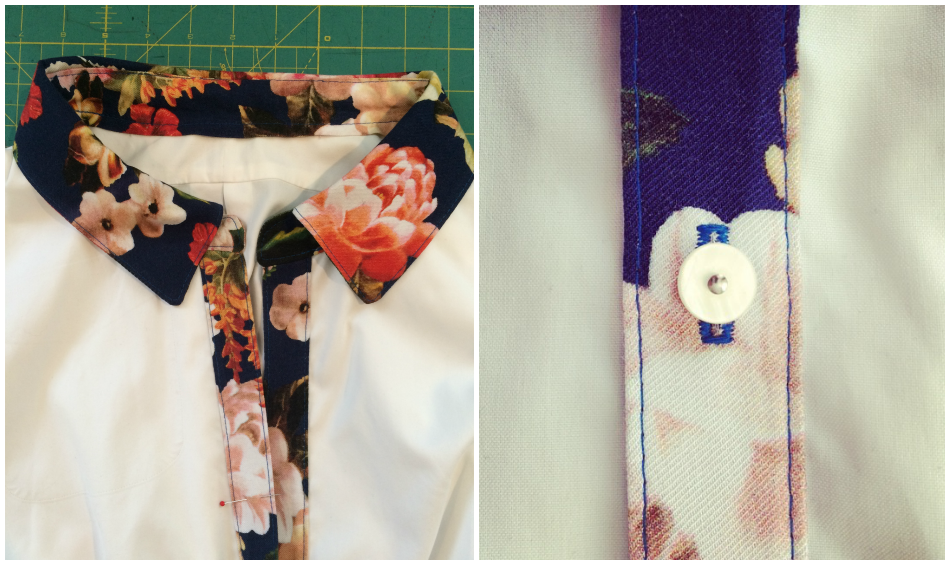
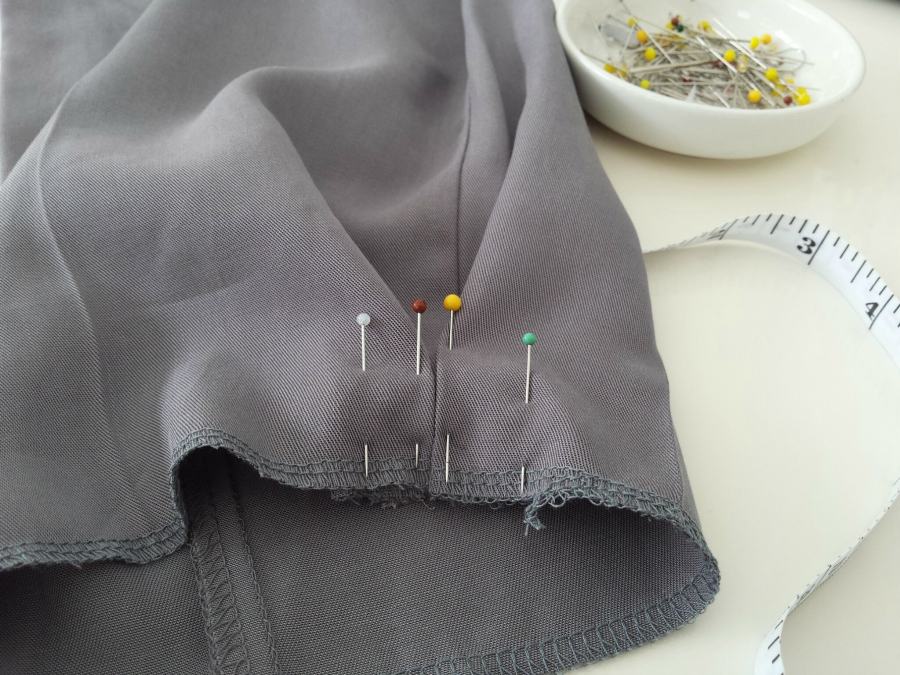
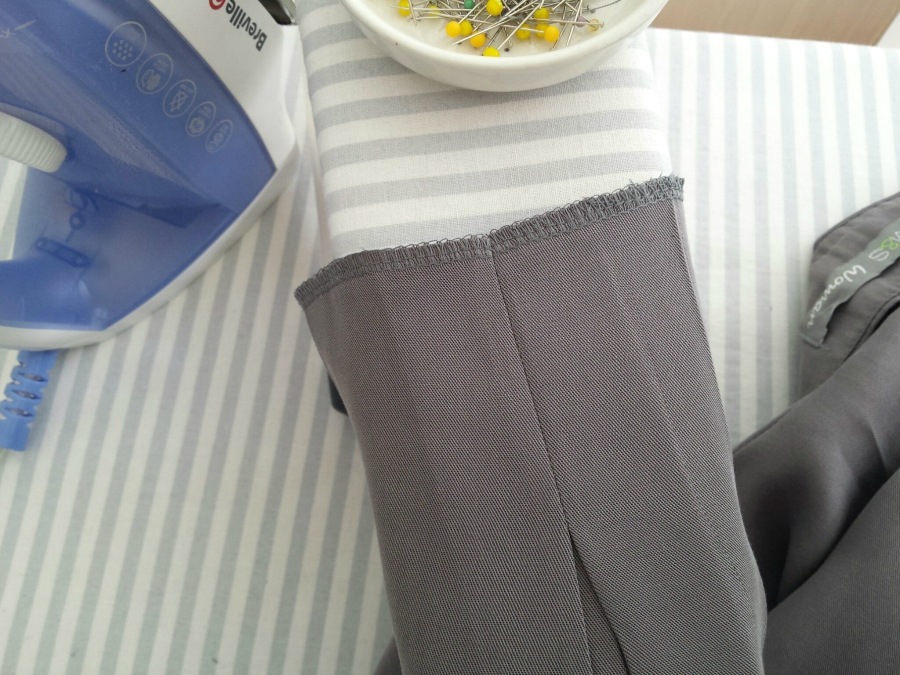
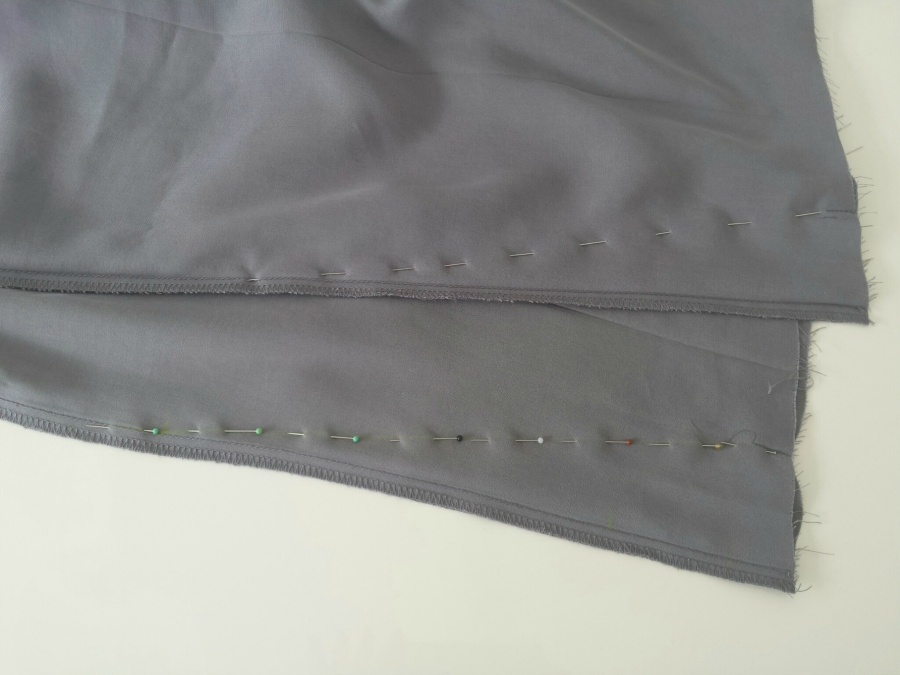
I used the original placket and changed up the buttons from black plastic to blonde wood, for a bit more tiki vibe, and used red braided piping for my seam finishes. Just stitched and turned under. Less worry, more happy.Oonaballoona - The Refashioners 2015

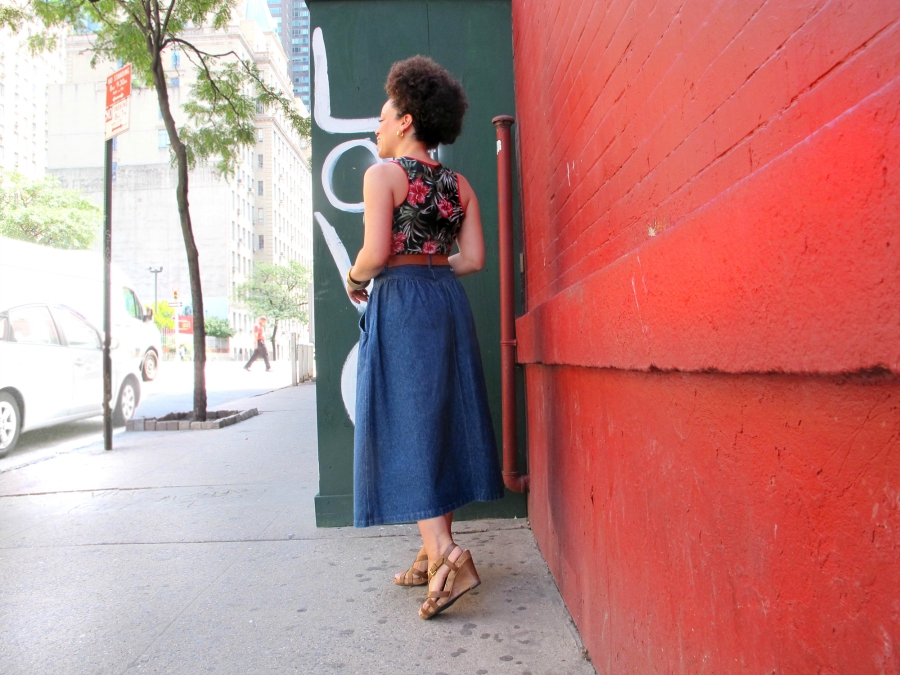
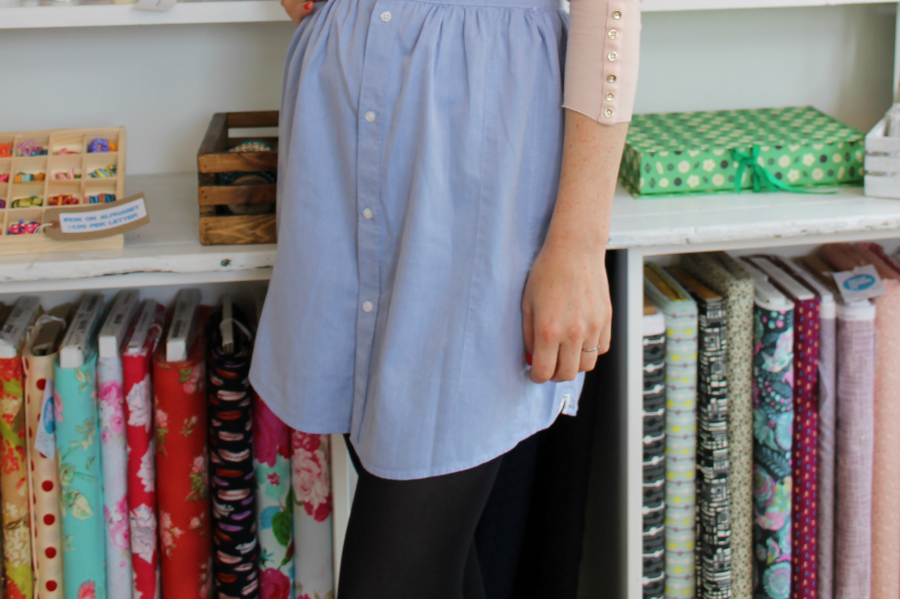
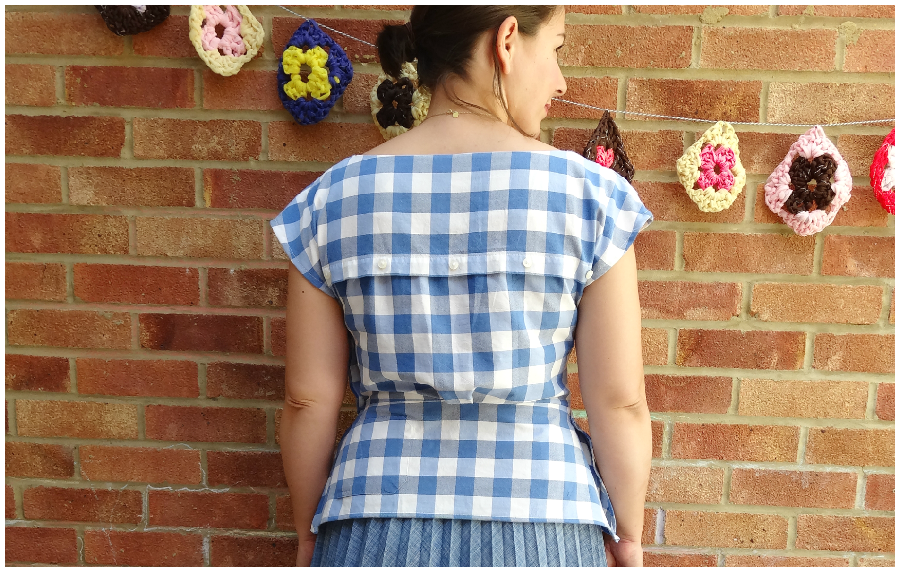
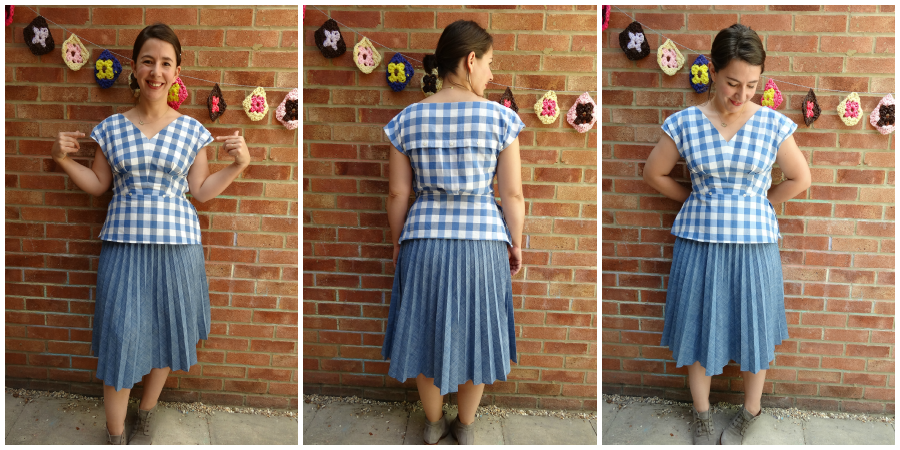
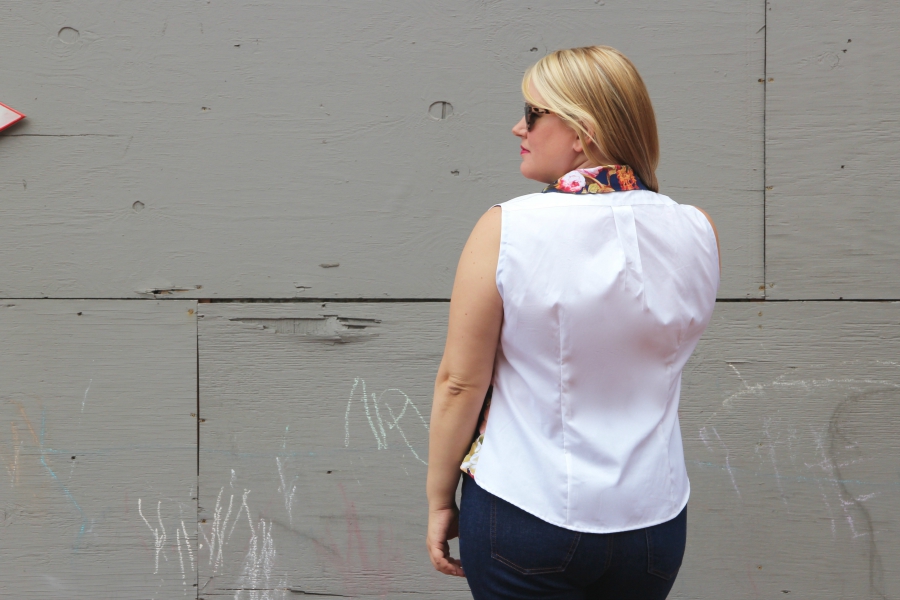
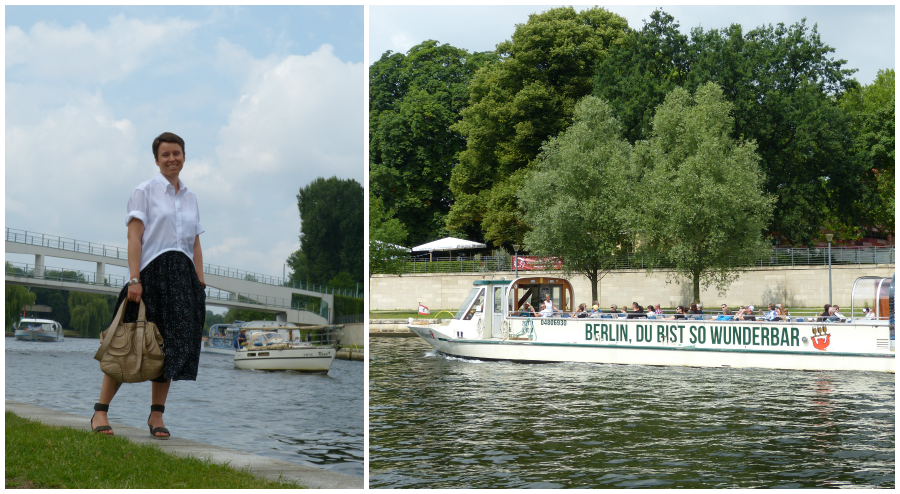
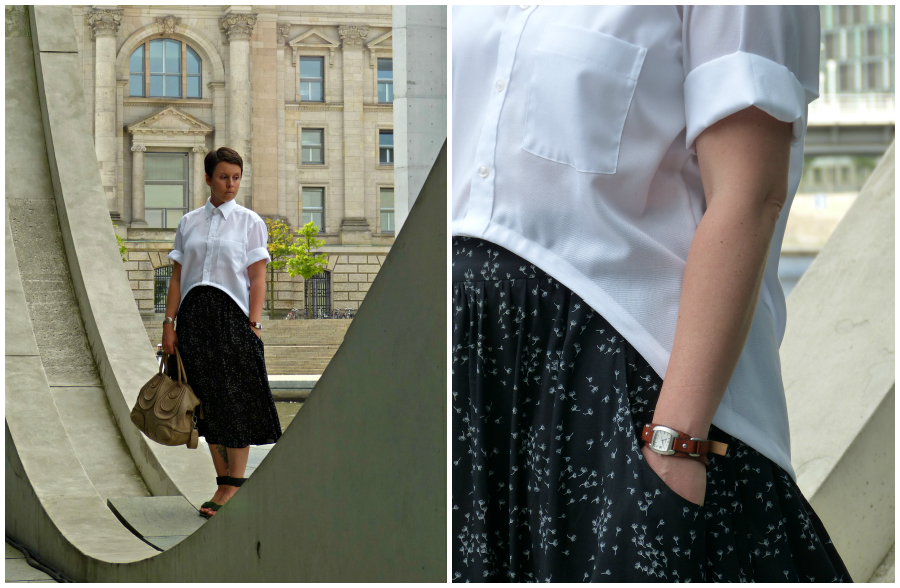
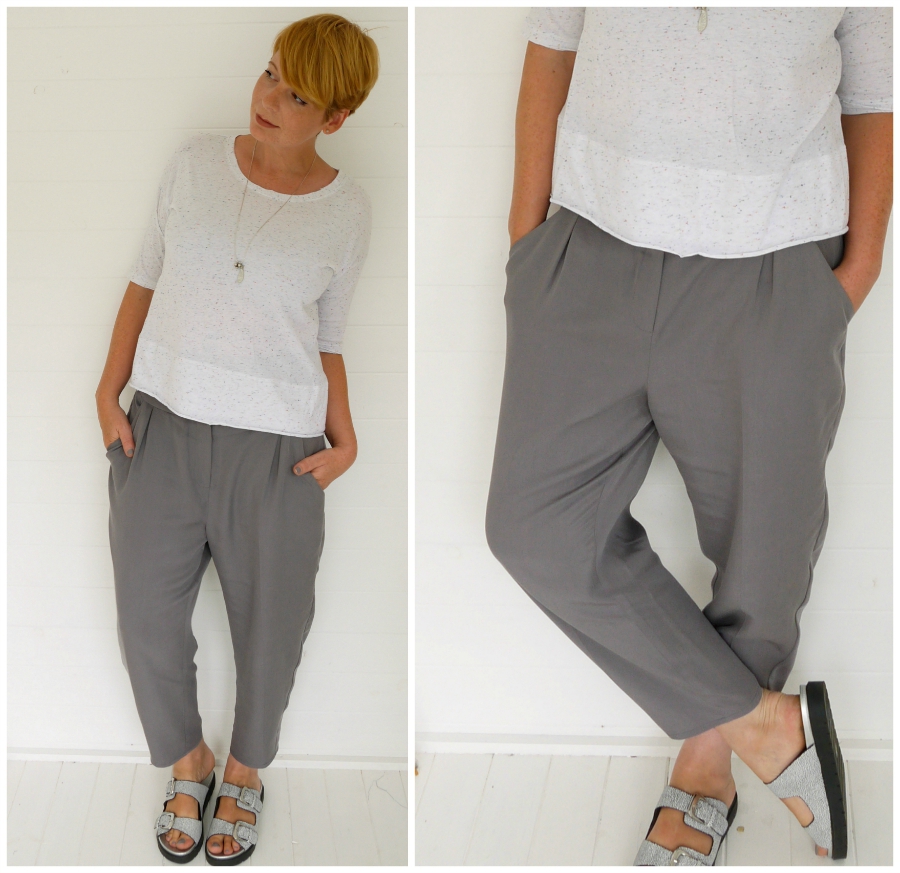
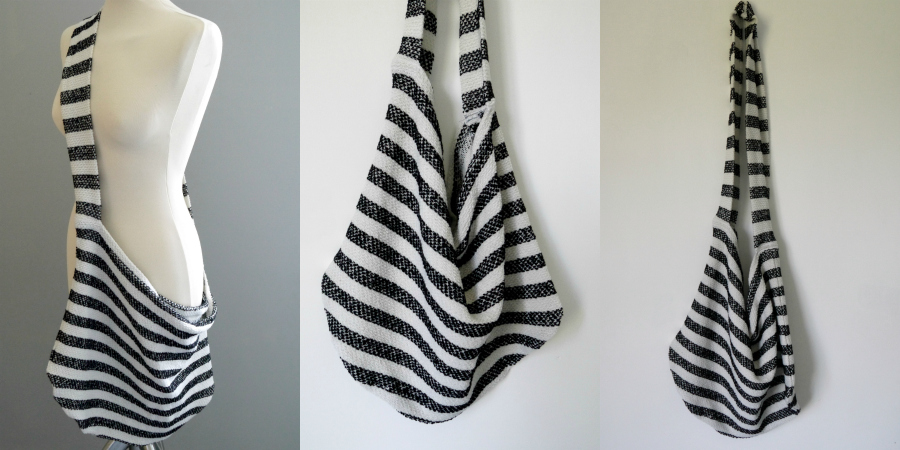
Though the pattern had a little gapiosis in the front, requiring an extra dart at the neckline, the back fit beautifully. I love the racerback vibe!Oonaballoona - The Refashioners 2015

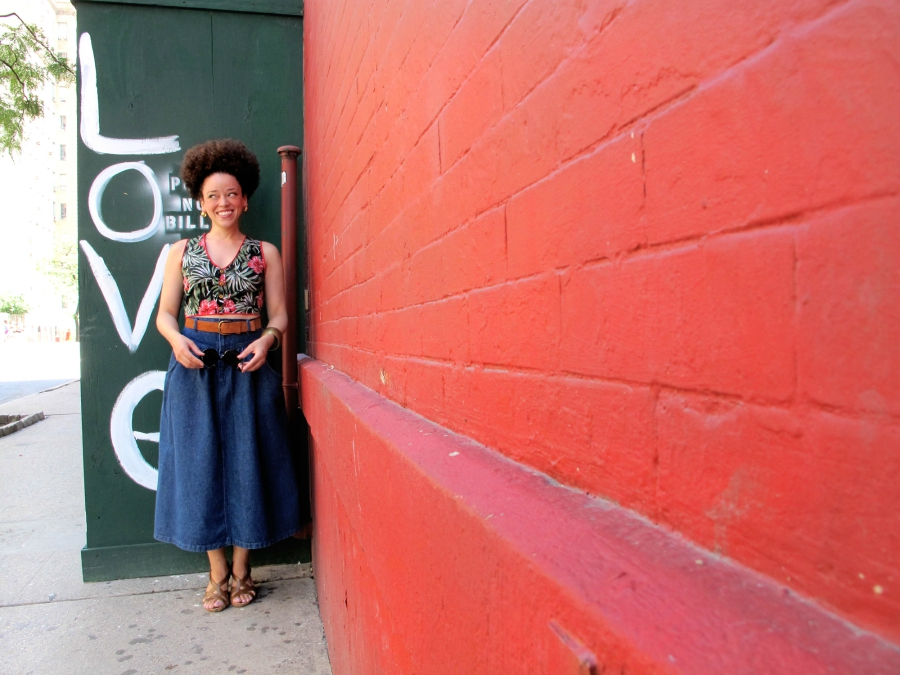
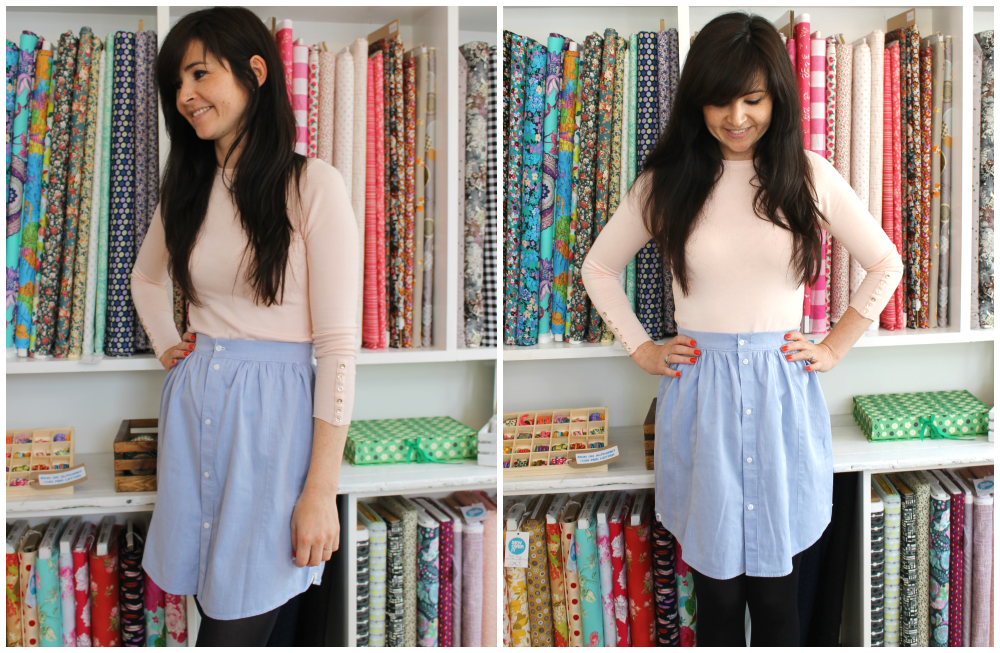
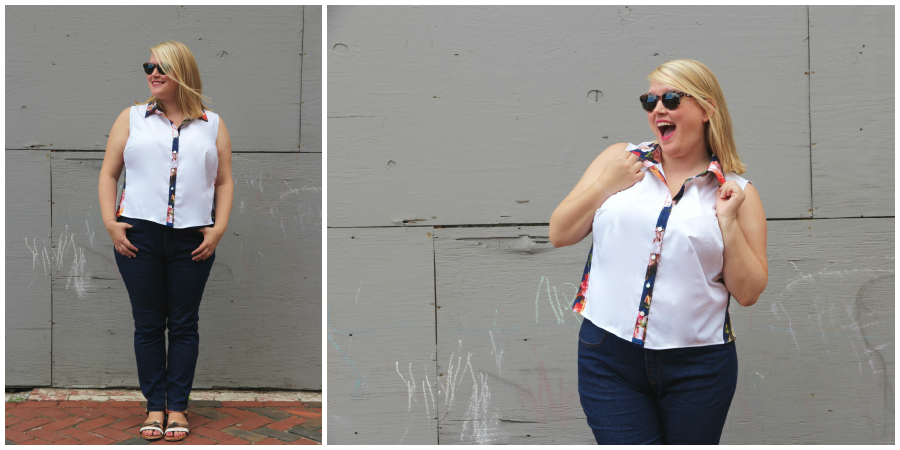
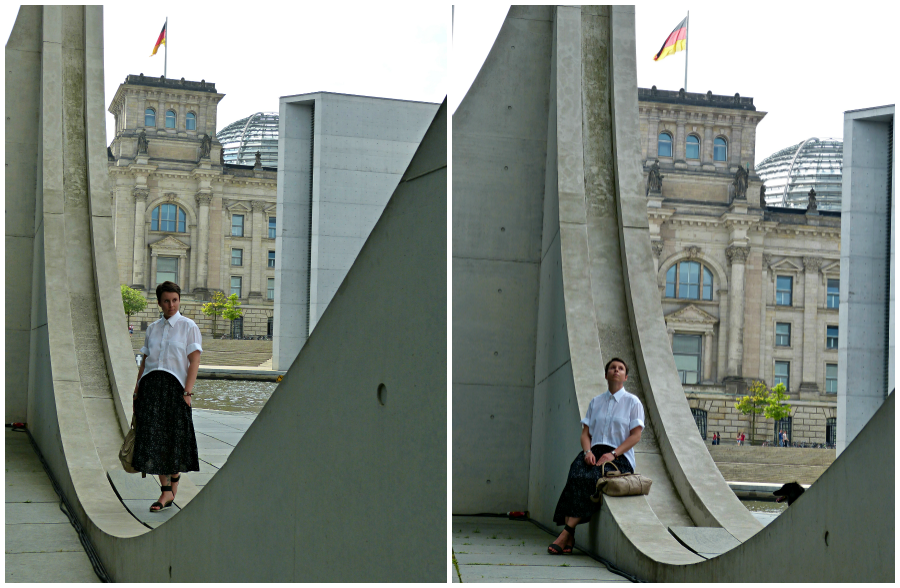
And it gives me enough armsyce coverage, which, guys. I HATE it when my shirts show Texan sized real estate of arm cleavage. What’s that you say, you can’t really tell from these shots? Again, mea culpa. I’ll let you in on a little secret: Ruggy full on ABHORS this vintage denim skirt. But I did think it was the perfect mate for this crop top. I’ve tried to wear this skirt out once on a date night. The look on his face was so pained, I changed immediately. Guys. If you know how I dress, you know that this look said a lot. And then I made him take eighty pictures of it.

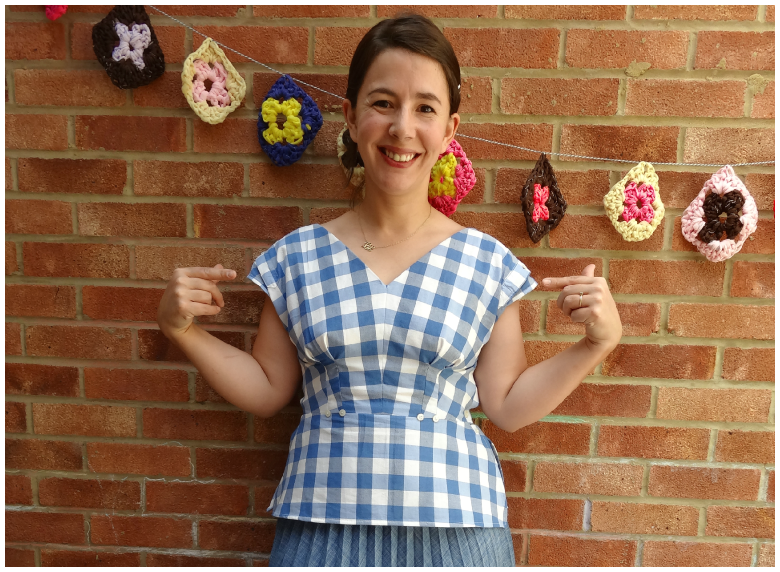
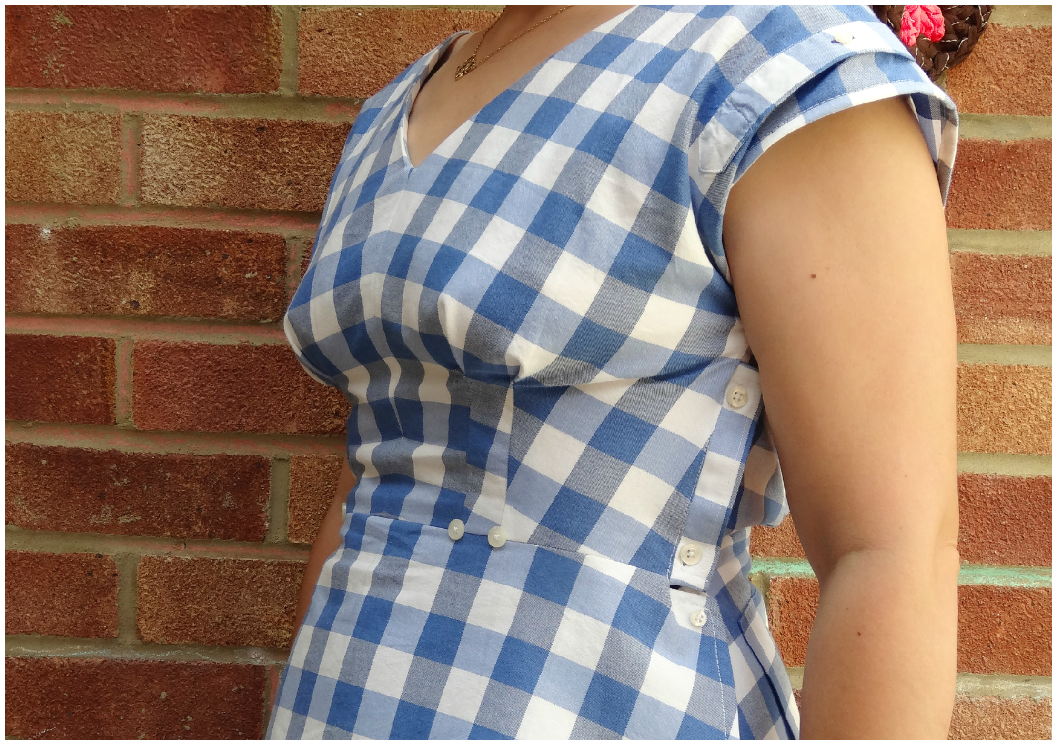
I think he had a hard time doing it. To wit, what  is the focal point of this next shot?Oonaballoona - The Refashioners 2015

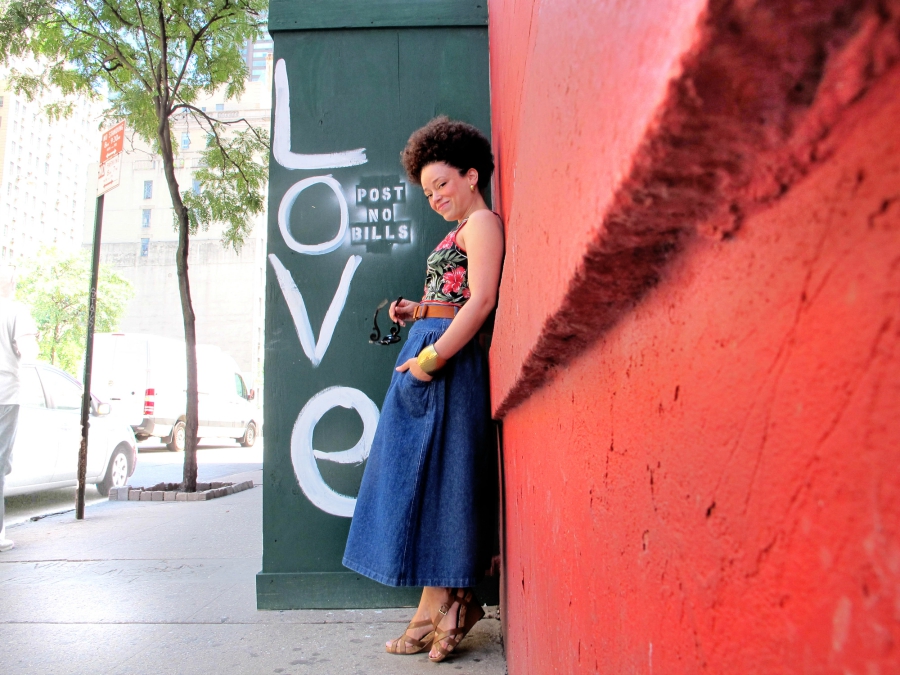
Mmmm hmmm. What a pretty red wall. But there’s the armscye for ya. Thanks for bearing the vibe, Ruggy.Oonaballoona - The Refashioners 2015

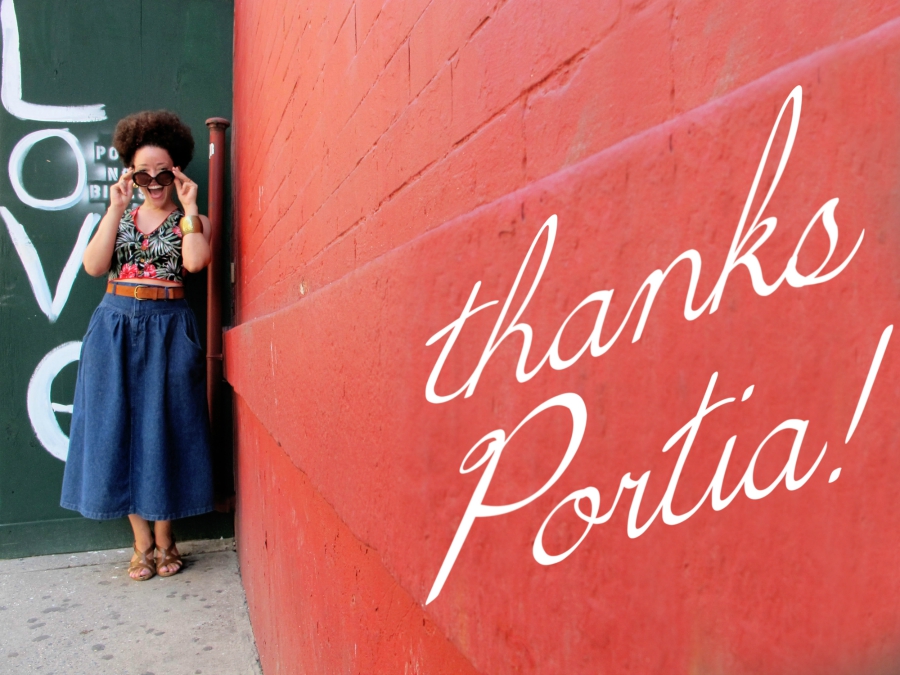
And thanks for nudging me into this, Portia! I love my little top, and since diving into this challenge, I’ve refashioned three RTW tops in my closet into a more pleasing configuration! This refashioning thing is infectious!

Ha ha! As are you my lovely, lol! But you had to go and remind me of that conversation about your Dad in a Lolita style Watson bra didn’t you?! Now I’m picturing it all over again. Sorry Papa Balloona!! ;) So, yes. I selected this shirt. Well I had to pick something a touch “kerching” for Oonaballona didn’t I?! But it’s a case in point in terms of looking at shirts as fabric. Those really crazy 80s print shirts you see but would never wear? They may not be de rigeur as they are but boy do they make awesome sun tops! Look for huge oversized mens shirts in crazy prints and get chopping!

You can find Ooonaballoona here and here. And don’t forget amazing prizes to be won as part of The Refashioners 2015 Community Challenge. So get involved for a chance to win!!! Grab a shirt and get refashioning! You have until Sunday 27th Sept to enter! Stay tuned for more inspiration throughout the WHOLE of August!

DIY, how to, refashioning, Restyles, Sewing, the refashioners, the refashioners 2015, Thrifting, Tutorials

The Refashioners 2015 – Sew Over It (London)

08/06/15

As a huge fan of customising and upcycling, I couldn’t have been happier when Portia asked me to be part of this year’s Refashioners project. I loved reading along in 2013 – so many great transformations! I knew I had to get involved.

The theme this year is shirts, and Portia asked us whether we’d like to be sent one “blind”, or if we’d prefer to source our own.  I got lucky as our Course Coordinator Andrea’s boyfriend was having a clear out, so I scored this lovely blue oxford shirt for my refashion. Very pleased not to have to scour the charity shops of Clapham on a shirt hunt!SEW OVER IT LONDON - LISA COMFORT - THE REFASHIONERS 2015

Initially I struggled with what I might make from my new shirt. I wanted it to be classic and wearable – it needed to look like I’d refashioned it with purpose. I wanted it to be able to integrate into my wardrobe so I could mix and match it and get a lot of wear from it. After a quick jolly on Pinterest I went for a good old dependable skirt!

I cut the whole skirt from the body of the shirt, cutting straight across the shoulders and lopping off the arms. With the side seams and the buttonholes already sewn, I fashioned a waistband from the top of the body, measuring around my waist to find the correct size. To give it some stability I interfaced it with a good quality medium-weight interfacing. I then gathered the skirt into the waistband, making sure to match up the side seams, before stitching a buttonhole onto the waistband.SEW OVER IT LONDON - LISA COMFORT - THE REFASHIONERS 2015

Waistband buttonholes take more strain than the rest of the buttonholes, so it’s best to make this one horizontal. I also did a line of decorative topstitching around the waistband as I thought it was in-keeping with the original shirt design.

SEW OVER IT LONDON - LISA COMFORT - THE REFASHIONERS 2015

It was as easy as that! It’s not the most exciting refashion in the world but I love my new skirt, especially as the original features of the shirt are still there.

SEW OVER IT LONDON - LISA COMFORT - THE REFASHIONERS 2015


The hem is slightly curved, and I am really enjoying the cute little tab details at the side seams.SEW OVER IT LONDON - LISA COMFORT - THE REFASHIONERS 2015

If you’re new to refashioning try this project out! If you’ve got a big enough shirt you could even just elasticate the top to make a waistband and leave the buttons as a decorative feature. Or if you’re feeling adventurous why not add some pockets? Easy to make out of the sleeves… Ooh I’m giving myself ideas now.SEW OVER IT LONDON - LISA COMFORT - THE REFASHIONERS 2015

A great big thank you for Portia for having me, long may the refashions continue!

Lisa x

Thank you so much Lisa! Refashioning needn’t be complex and this kind of project is a great starting point if you’re feeling trepidatious! Shirts come in all manner of fabrics. (Some of you may recall Tasha’s plaid flannel version from the last series). I’m thinking denim or corduroy shirts (oh yes they exist. I’ve seen them! So do velvet ones. Just ask Karen!) would be awesome for this too!

You can Sew Over It London here and here. Their Vintage Shirt Dress pattern is just one of the amazing prizes to be won as part of The Refashioners 2015 Community Challenge. So get involved for a chance to win!!! Grab a shirt and get refashioning! You have until Sunday 27th Sept to enter! Stay tuned for more inspiration throughout the WHOLE of August!


DIY, how to, refashioning, Restyles, Sewing, the refashioners, the refashioners 2015, Thrifting, Tutorials

The Refashioners 2015 – Marilla

08/05/15

Hello, Marilla here! I’m so excited to be included in this year’s ‘refashioners’ line-up and have totally lapped up the challenge. The practice of refashioning garments is so close to my heart and actually how I started making clothes. The first wearable thing I sewed was a waistcoat made from a pair of my brothers old pyjamas when I was about 13!Marilla Walker - The Refashioners 2015

I chose to go and select/buy a shirt of my choosing (Portia also offered to send everyone something blind) and had a clear idea of what I was looking for before I set out. It was either to be a chambray, linen or large check I was looking for and it had to be from the largest size racks to give me maximum fabric. Other than that I was open to what I may find, but I found it helpful to have a guide before setting out. I was able to walk in and out of charity shops very quickly and was lucky to find a good quality (barely worn) large check M&S shirt. As a side note, I expanded my refashion plans after finding the shirt to include an elasticated waist skirt I have had for a while, as they go well together.Marilla Walker - The Refashioners 2015

My first thought was to make something Japanese and simple in style. The fabric reminds me of lovely Japanese check fabrics I have seen online and imagined it looking great as a basic, boxy garment, but ideas are not set in stone and with the recent #internationalannaparty happening over on Instagram, I was lured in a different direction.Marilla Walker - The Refashioners 2015

Refashioning is all about going with the flow in my experience and taking your time to let the garment speak to you. I started by removing the sleeves and cutting up the sleeve seam to open them out and also cut up the shirt side seams to get an idea of the fabric I had to play with. The biggest pieces of fabric were in the sleeves, the main back and the fronts (unsurprisingly). I got my BHL Anna dress pattern out and started to lay the pieces over the shirt. I found the bodice fronts seemed to work best on the sleeves (with a centre front seam added to the pattern)…Marilla Walker - The Refashioners 2015

…and was also pretty chuffed to make a feature of the cuff plackets repositioned to the shoulders. They work really well as a kind of epaulette type detail.Marilla Walker - The Refashioners 2015

The back was the hardest bit to place really, as the shirt back was not quite wide enough. I wanted to sew the back as one piece and remove the centre back seam (to make life more difficult). I could have made the shoulders narrower on the pattern, but didn’t want to, so after some thought cut the back yoke away from the main back and added the shirt front with the buttons as a yoke instead with the button strip running across the shoulders (if that makes sense).Marilla Walker - The Refashioners 2015

This gave me the extra width I needed at the shoulders and also made a nice feature of all those lovely buttons. There was a nice back pleat at the yoke of the original shirt that was lost in dissecting it, so I put a new pleat at the centre back waist in place of back darts as a shirty design feature/homage.

Other than those considerations, everything else was fairly straight forward. The construction of the Anna bodice is nice and simple, so no worries there.

The next stage is where the pleated skirt was going to come in! I thought of cutting off the waistband and simply attaching the sunray pleated skirt to the Anna bodice. This would have looked lovely I’m sure, but I didn’t want pleats going over my tummy. I then planned to make a fabric yoke for the top of the skirt portion from the remaining shirt fabric and went about cutting some panels. I had no choice but to cut with the straight grain and decided to cut extra width, so that I could sew and fit at the same time. After attaching the panels to the bodice I realised that this was not going to look great at all. It may have worked cut on the bias (not an option), but was quite unflattering fitted across my tummy cut on the straight grain. The solution was to keep the side seams of the panels open. It creates a mini and unusual peplum that has a slight wrap either side that is secured by a tiny button. The peplum edges are finished with a double turned hem. The Anna blouse was born!!!Marilla Walker - The Refashioners 2015

The skirt remains untouched, but my new top makes it so much more wearable to me. Win, win, win!!!!

Once the shape was finalised I then added a button fastening to the bodice side seam using the original button placket and set about sewing on all remaining buttons to anything that looked like it could be a feature!Marilla Walker - The Refashioners 2015

This is not my usual ‘everyday’ style of clothing, but certainly something I feel more than comfortable in. It’s kind of got the look of a vintage dress with all the little details you don’t find anywhere else, but without the restriction or discomfort I sometimes get from ‘true’ vintage.

That’s the main construction covered, so now onto a barrage of pictures!

The back is the only part of this that has not quite panned out how I would like. There is a lot of excess fabric there that I really should remove, but I’m just not sure what to do with it. I may release the back pleat and flatten the back out for a looser fit. There is enough peplum width to do this, but I’m just sad to lose the pleat at the moment, so haven’t gotten around to it. I also don’t know if I’m really unhappy about the extra blousy fabric!Marilla Walker - The Refashioners 2015

Look! Here it is laid out flat in all its pleated splendour. Notice the breast pocket is still present on the peplum piece? Love that bit!

Here’s a close up shot of the side button detail using original button placket. A complete result for not having to sew my own buttonholes!Marilla Walker - The Refashioners 2015

Some of the many buttons dotted around!Marilla Walker - The Refashioners 2015

Marilla Walker - The Refashioners 2015A nice bit of the facing which still has the original labels attached!Marilla Walker - The Refashioners 2015

I tried to use as much of the shirt as possible and actually (unintentionally) made it my mission to use any interesting design element somewhere within my garment. I hope that this comes across as interesting and intricate and not costume like, because this is a very wearable piece. It’s important to me to take as much care as possible when refashioning items of clothing that are otherwise perfectly serviceable. Marilla Walker - The Refashioners 2015

After all, this would have found a good home in some mans wardrobe had I not come along with my scissors. Not that I want to pass on a sense of guilt if you’ve tried a refashion that’s not worked out to plan! 😉

This challenge has been brilliant and really got my creative juices flowing. I hope this inspires you to look at clothes you may no longer wear and unlock any possible potential. Refashioning is a great way of entering the world of sustainable sewing without having to spend a lot of money, plus it’s good fun thinking outside the box from time to time and can lead you to unexpected and wonderful outcomes!Marilla Walker 1 - The Refashioners 2015

Happy refashioning everyone and thanks for reading about my project! xxx

Wow Marilla! ! See?!!…using patterns in refashioning IS NOT cheating, lol!! Shirts can be just a source of fabric from which to cut your pieces. Ultimately you’re still transforming that garment; and using any possible means at your disposal to do so. What a great take on the Anna Pattern and the whole thing looks so authentically vintage and feminine it’s hard to believe it was once a man’s shirt! One of my favourite details is the original button placket running horizontally across the back. Although there are so many great details it’s hard to pick just one! 

You can find Marilla here and here. her Maya Pattern and the Anna Pattern from By Hand London are just some of the amazing prizes to be won as part of The Refashioners 2015 Community Challenge. So grab a shirt and get refashioning! You have until Sunday 27th Sept to enter! Stay tuned for more inspiration throughout August!


DIY, how to, refashioning, Restyles, Sewing, the refashioners, the refashioners 2015, Thrifting, Tutorials

The Refashioners 2015 – Jenny

08/04/15

Jenny of Cashmerette and The Curvy Sewing Collective

Cashmerette - The Refashioners 2015

I’ll confess: as a sewist I mostly stay in my comfort zone. Wrap dresses, tanks, jeans and the occasional coat, and I do just fine with my TNTs! But when Portia invited me to participate in the Refashioners 2015 challenge I took a deep breath and decided to try something new for the first time. Cashmerette - The Refashioners 2015

Unlike lots of people who learned to sew as teenagers, I never went through the “oooh I’ll hack up this old top” stage – no, I just jumped straight into the magical world of fabric shopping! But I’ve always been amazed by people like Portia and Charity Shop Chic, not to mention those refashioning challenges on the GBSB, so I thought I’d give it a go.Cashmerette - The Refashioners 2015

Off to the charity shop I went (Goodwill, in America) and I immediately looked for the biggest men’s shirts I could find – my bust rivals the chest measurement of a large chap, and I wanted as much to go around! I did make a rookie mistake – I bought an LLBean shirt because it looked in great condition.

Turns out, that’s because it’s been treated with something to make it stain resistant and crease resistant – which also means it doesn’t really press… at all! So, please excuse upcoming not-entirely-pressed-looking darts.Cashmerette - The Refashioners 2015

For my inspiration, this shirt from Pinterest popped up and it immediately stole my heart. So chic! I love the use of the floral on the collar, button placket and sporty stripes up the sides. I had remants of a blue floral rayon that sadly didn’t weather well in the wash, but was fine for details, so I dug that out to accompany my shirt.

Here’s how I went about my refashioning:

Cut it apart – I removed the collar and stand, button placket and sleeves, and unpicked the breast pocket Cashmerette - The Refashioners 2015

Placed an existing shirt pattern over the pieces, and cut around them – perhaps not entirely in the spirit of refashioning but it worked pretty well! I didn’t have enough width in the front once I put the darts in, but  that was OK because I still needed to add the floral stripes. So, I marked where the existing shirt piece came to on my pattern, folded to remove the dart, and cut a princess seamed side piece.  Cashmerette - The Refashioners 2015

Cashmerette - The Refashioners 2015Cashmerette - The Refashioners 2015I sewed the shirt back together at the shoulders and side seams. For the armholes, I made bias tape from the floral and attached it the usual way. Cashmerette - The Refashioners 2015

For the button placket, I cut a piece of the floral 3 inches wide by the length of the front, and interfaced it.Cashmerette - The Refashioners 2015

I attached it to the front by pressing over 5/8 to the wrong side, sewing the other raw side to the shirt front, pressing it in half, then topstitching it down.Cashmerette - The Refashioners 2015

I constructed the collar by sewing the interfaced collar stand to the shirt, making the collar, basting it to the stand, then placing the remaining stand piece on top and sewing around. Cashmerette - The Refashioners 2015

Cashmerette - The Refashioners 2015

Cashmerette - The Refashioners 2015

Cashmerette - The Refashioners 2015

Cashmerette - The Refashioners 2015

Finally I made the buttonholes in the placket and used my Japanese buttons to finish it off! Cashmerette - The Refashioners 2015

I really like my final shirt! It’s a little boxy for me, and those darned darts won’t lie flat, but it was so fun transforming something mundane into a much more fun garment. Cashmerette - The Refashioners 2015

Next time, I’ll pay more attention to fiber content, and might even try draping instead of using a pattern (which I suspect is “cheat” refashioning!). I’m also excited to find interesting fabrics and use them… I’m a sucker for a big print. All in all, a successful comfort zone challenge!

Thanks Jenny!! LOVE this too! And no…using patterns in refashioning IS NOT cheating, lol!! Nor is the addition of fabric which as you can see here, elevates a plain white shirt from bland to edgy. I think that’s the big take away from this. That beautiful contrast between the floral and white and the substitution of the original collar and placket is something I think I might have to copy! As a side note, (excuse the pun!) the addition of gussets (love that word) in the side seams is a great way to add fullness and/or detail.  I have myself fallen prey to the unpressable fabric of some men’s shirts in the past!! I think they DO actually treat fabric with Teflon right?

You can find Jenny here and here. her Curvy Sketchbook is just one of the amazing prizes to be won as part of The Refashioners 2015 Community Challenge. So grab a shirt and get refashioning! You have until Sunday 27th Sept to enter! Stay tuned for more inspiration throughout August!


DIY, how to, refashioning, Restyles, Sewing, the refashioners, the refashioners 2015, Thrifting, Tutorials

The Refashioners 2015 – Ute

08/03/15

How refashioning a shirt can make you feel awesome

The Refashioners 2015 - Ute

Seriously. I don’t even like wearing shirts. Or skirts. Or having my picture taken. But in this outfit I feel awesome and even cool and fashionable. That does not happen very often. Be prepared to see a lot of pics in this post.

The Refashioners 2015 - Ute

To make it a little less boring we took the photos in different locations in the parliamentary district of Berlin, so you are also getting a little tour of one of my favorite spots in the city.

The Refashioners 2015 - Ute

The Refashioners 2015 - UteWhen the lovely Portia invited me to be part of The Refashioners 2015 with a guest post on her blog, I said yes without hesitation. And then I found out who else is part of it this year and nearly fainted. I frantically browsed my “sewing inspiration” pinterest board and surprisingly almost immediately found something I really liked.

The Refashioners 2015 - Ute

source; source
One phone call to my dad later and I even had a white shirt. That actually fit me without any changes and pretty much looked like the perfect white shirt to me. I was very reluctant to cut into it.

The Refashioners 2015 - Ute

As you can see, my modifications were very moderate and at first I was skeptical if it would even classify as a “refashion”.

The Refashioners 2015 - Ute

I simply chopped off the sleeves and free handedly drew a new high low hem line. The new hem was bound with wide satin bias binding which gives it a bit more structure and stability similar to the inspiration shirt. I tried to recreate the collar of the shirt on the right, but in the end liked the original collar better.

The Refashioners 2015 - Ute

Like I mentioned above, I don’t really like wearing skirts. But I had started to secretly covet a midi skirt for a while now.
To recreate the look I used the fabulous Brumby Skirt pattern by Megan Nielsen (which is part of the awesome prize package you can win for sewing along!) in the softest viscose ever (from Anna Ka Bazaar)

The Refashioners 2015 - UteThe Refashioners 2015 - Ute

I could be Audrey Hepburn in Roman Holiday, right? (image source)

And that´s it! Now go find a shirt and get shirty with us! I already know what my next refashion will be.The Refashioners 2015 - Ute

ute 2Thank you so much Portia, for asking me to be part of The Refashioners! And since I already feel like I have just received an Oscar – a big thank you to my colleague Michael for taking these pictures and thanks for the shirt, Dad!

Ute, thank you so much! I LOVE this! Just goes to show how a few simple changes can turn a shirt into something that is uniquely you, right?! You can find Ute here and here. As she says, the Brumby Skirt pattern by Megan Nielsen is just one of the amazing prizes to be won as part of The Refashioners 2015 Community Challenge. So grab a shirt and get refashioning! You have until Sunday 27th Sept to enter! Stay tuned for more inspiration throughout August!

refashioning, Restyles, Sewing, Uncategorized

Refashion: My new favourite trousers

07/21/15

Reshaping trousers at www.portialawrie.co.uk

Being a skinny jeans kinda gal, the arrival of the hot weather here in the UK a few weeks back, left me a in a bit of a spot.  Way too hot for skinnies. It’ was beginning to dawn on me that  my uniform of skinny jeans and long tops just ain’t gonna cut it over the summer.  I needed more lightweight and looser fitting trousers. I didn’t have any. What does a refashioner do when faced with a gap in their wardrobe?

Raid the local charity shop of course 😉Reshaping trousers at www.portialawrie.co.uk

These M&S softly tailored trousers in, gasp, powder grey (!) were so soft and drapey; featured my perfect waistband (I Iike a wide, shaped waistband) and perfect front pleating; and perfect pockets! Basically…perfect! Brand new. £4.

Ooooonly problem was the hems. As you can see in the “before” picture above; REALLY long. I mean, I’m not particularly short. They weren’t marked as tall/long so not sure what was going on there!

Reshaping trousers at www.portialawrie.co.uk

Anyhow, as well as shortening I had a plan for reshaping them too. It was a really cool plan too. It was supposed to look really awesome. But it didn’t quite work out so I had to back track and opt for a simple tapering of the side seams to narrow the hems. But it WAS a cool idea and I think it could still work on a different fabric so thought I’d share anyway!

Reshaping trousers at www.portialawrie.co.uk

The obvious first step is to establish where you want the new hem to be. I mark mine with a pin while I’m wearing them. Then cut just below the line.

Reshaping trousers at www.portialawrie.co.uk

Then finish the raw edge with zig zag or serger.

Reshaping trousers at www.portialawrie.co.uk

So this was the original plan. A box pleat at the ankle to echo and balance the pleating at the waistband. Has the effect of narrowing and tapering the leg and adding a fun and quirky design element.

Reshaping trousers at www.portialawrie.co.uk

See?! It was looking really good! Then I tried them on. It didn’t hang quite how I had envisaged but I still liked the overall effect. It was the bulk of fabric at the hem caused by the box pleat that was proving problematic with hemming. It was impossible to hem the trousers without making the ankle really bulky, which is not the effect I wanted. Hemming was also messing up the drape of the pleat which defeated the whole point. So, I conceded defeat (for now)….

Reshaping trousers at www.portialawrie.co.uk

I opted for the old TNT technique of simply reshaping at the side seams. Marking my shape out with pins, sewing along that line and then serging off the excess.

Reshaping trousers at www.portialawrie.co.uk

The outcome. I’m happy. LOVE these trousers. What they do do, is completely change my usual silhouette of skinny jeans and long, loose tops. I think the looser fit of these trousers calls for a shorter more fitted top half to balance it out. So plugging one hole in my wardrobe has essentially created another because I don’t have alot of tops of that style either, lol! Luckily this hemlock tee variation/hack that I made recently is the perfect partner for this outfit. (separate blog post lined up because it has slightly fun/different hem and neckline details). I am inclined to explore this silhouette a little further (spoiler: I have been playing with this pattern. Deets to follow) and it could be a new, or at least additional, direction for me in terms of silhouette.  You know when you get an outfit that you juuuust feel great in? This was it for me. I felt cool (in both senses of the word) and comfortable all day. Physically comfortable AND like this outfit is just…well…me! 🙂

The best thing is it only cost me £4 to experiment and find out out was a shape I now love. Gotta love refashioning!!


refashioning, the refashioners, Uncategorized

A Potted History of The Refashioners!

07/19/15

With the launch of The Refashioners 2015 hurtling ever closer (2 weeks to go peops! Eeeep!) I thought it might be quite fun to take a look at how the series has evolved since it’s launch in 2011.  I’m aware that some of you who may have discovered this blog recently, may not be aware of the first 2 series and for those of you that have followed along before, it’s fun to see a visual representation of how much it has grown and also to remember some of the amazing refashions that have resulted!

Series 1 – 2011

The first series launched in 2011 with Casey, Dixie, Tilly, Karen, Zoe, et Moi! 6 participants in total and running over a week only. Participants were sent a variety of secret garments by me; with the challenge to turn them from “Meh” to amazing and share the results and the “how to” in the hope that it would inspire others to get refashioning…A potted history of The Refashioners at www.portialawrie.co.uk

I had only been sewing and blogging for about 18 months at this stage and The Refashioners was the seed of an idea. My blog had nowhere near the following that it does now. I was a blogging newbie and I was very much in awe of these ladies. So it took a bit of courage to ask them and it felt like I was punching well and truly above my weight in doing so! But I took a deep breath, asked, and they were all lovely and they all said yes; and The Refashioners was born! Casey and Zoe have both become Mum’s since these pictures were taken and Tilly has gone on to pretty colossal success following her appearance on GBSB. (I totally think she should release the pattern she used in this refashion!) And me, well  my sewing and style have evolved dramatically since then! (HOW much hair?!)

Series 2 – 2013

Fast forward to 2013 and the series has doubled in size and runs over a fornight as opposed to a week. Eleven participants this year: Liz, Tasha, Karen, Zoe, Lauren, Dixie, Sally, Marie, Elisalex, Me, and Joanne. Again, I sourced all garments and the participants had NO idea on what they were getting and this is what they came up with! Awesome right?!A potted history of The Refashioners at www.portialawrie.co.uk

This series was much more formed than the first. I had more of an idea of what I wanted and didn’t want for the series; and how to go about doing it.  I learnt from little hiccups from the previous series (never again would I buy a kilt. However purple velvet shirts are another story ;). I started sourcing garments way ahead of time.  Approaching participants with a little more notice too. Something that I had not considered as a novice blogger back in 2011, which seemed like a no brainer 2 years on. Bloggers tend to fill their schedules weeks, sometimes months ahead. If you want people to take part you kinda gotta give them time to fit it in, lol! Plus I knew more people in the sewing and blogging community because I’d been a part of it for longer. The 2013 series was awesome. The response was huge compared to the first series. To give you an idea, the surge in traffic and interest saw my little blog (temporarily!) jump to #1 in Bloglovin’s DIY/Craft blog category. I was seriously flying high after this one. All these ladies. Awesome. (Oh yeah…and yet another hairstyle for me,lol!). Both these series ran under my original blogging moniker of Miss P. Shortly after Series 2 I started working full time and all but dropped out of the blogosphere for 18 months.

Series 3 – 2015

In the spring of this year, circumstances meant that I could leave my full time job and start sewing and blogging regularly again, which made me very happy indeed! I rebranded from Miss P to Makery (I feel like I’m a little old to be clinging to the “Miss” moniker! Time to grow up. Sorta!)and migrated my blog over to a self hosted WordPress site with a new look and better functionality. One of the first things I then started doing was planning a new series of The Refashioners! TWENTY ONE participants this year including me (not pictured because there wasn’t space in the collage, lol!) Heather Lou, Ooonaballona, Zoe, Marie, Sunni, Wendy, Lisa Comfort/Sew Over It, Ingrid, Elisalex, Erin, Tasha, Marilla, Dixie, Jenny, Jenna, Sasha, Ute, Sarah, Andrea, Sally…and Me…A potted history of The Refashioners at www.portialawrie.co.uk

The first emails went out in March of this year (once again punching above my weight in terms of who I asked!) and this years series has required more planning and co-ordination on my part than ever before. Not only are there more bloggers than ever before but this year we are throwing the doors open to all and, for the first time ever, running a community challenge alongside the blogger challenge. (Huge prize package for that to be announced shortly!! Watch this space!) and there’ll be some media coverage too. The aim is to make this series bigger and more far reaching than ever before. To get as much of the sewing community refashioning in August (and beyond!) as we can. We want you all to #getshirty with us this August.  Be inspired by what these ladies are about to share with you right here on this blog in 2 weeks time. Grab a shirt and turn it into something amazing!

It remains to be seen what The Refashioners 2015 will hold. Although I’ve seen some of the completed refashions already and OH.MY.WORD!!  This year could be stratospheric! If the reaction when the line up was announced is anything to go by, (100s of new blog and social media followers and a surge of traffic crashing my blog!) the appetite for this series is definitely there!

We can’t wait!! Are you in??

Giveaways, refashioning, the refashioners

The Refashioners 2015 – We Want YOU too!!

07/13/15

This August, in a little over a fortnight, will see an awesome line up of 20 bloggers take The Refashioners challenge right here on this blog. For your delight and inspiration. But this year is going to be a little different….this year we’re throwing the doors wide open and inviting you to take the challenge too!!!

The Refashioners 2015 - we want you too

We want YOU to play along with us! That’s right!  We want YOU to be a Refashioner and take part in this years challenge alongside the bloggers you’ll see here. This years theme is “Get Shirty” and we want you to share your awesome shirt refashions with us too. What’s more, there’ll be an AWESOME prize package for the best of the best at the end of the challenge!! (Watch this space for further deets on that!) Here’s how it works:

  • The community challenge will run from today and alongside the blogger challenge for the whole of August. You can start sharing now to enter!! Entry deadline for the prize package is 31st Aug 2015. Now extended to 27th September! Midnight GMT.
  • You can share your shirt refashions via Instagram using the hashtag #therefashioners2015 OR on our dedicated Pinterest board (you’ll need to follow the board and then request an invite from me to join in order to pin to it. You can email me at kitschycoo(at)hotmail(dot)co(dot)uk with your email address or leave it in the comments below and I’ll add you to the board). UPDATE: It may be easier if you just let me know your pinterest username!! You do not need a blog to take part.
  • Throughout September we will select and share your best and most awesome shirt refashions right here and ask readers to give their views.
  • A winner will be selected by a panel of Refashioners (past & present) at the end of September
  • Refashions must predominantly involve a button down man’s shirt. What you do with it from there is entirely down to you!!
  • You can enter as many different refashions as you like

So what do you say? Fancy joining us and be in with a chance of winning a fantastic prize at the end of it?? Well get refashioning, pinning and sharing; and watch this space for an announcement regarding the AWESOME prize package we’re lining up for you!!!

DIY, how to, Me Elsewhere, refashioning, Restyles, sewing publications, Uncategorized

Simply Sewing: Issue 5

06/25/15

So Issue 5 of Simply Sewing has hit the stands with the lovely Lisa Comfort from Sew Over It gracing the cover. First time so far they’ve used an actual sewing industry personality on the cover as opposed to a model and personally, I find it pretty cool to see a familiar face from the sewing community up there….Simply Sewing Magazine

Kinda lends some credibility and legitimacy to the whole affair, ya know?? I like recognising the person on the cover of a magazine. You immediately identify with that magazine as then being part of your community rather than just another generic sewing magazine taking up shelf space. So good shout there Simply Sewing!

Simply Sewing Magazine

Here’s a peek at the contents page…

Simply Sewing Magazine

My contribution this month is this shirt refashion. Super simple! I honestly love the zingy floral contrast here; and the brief for this was “super summery”. Check that then! Having said that, personally I could see this working so well with neutrals/stripes/chambray….that kinda thing. I may have a shirt or two in my refashioning pile somewhere…..

Simply Sewing Magazine

This issue sees the start of a 3 issue sewalong with this month’s cover girl. Here’s a random piece of trivia….that there skirt in the picture? That was made as a sample by our very own Zoe! Small world huh?

Simply Sewing Magazine

I am always intrigued and often in awe of people that manage to carve a living in this emerging sewing community so this interview with Claire Louise Hardie is particularly interesting to me…

Simply Sewing Magazine

Nice little guide to one of my favourite notions….bias binding!

Simply Sewing Magazine

I’ve had this wooden yardstick stashed for a while with plans for doing exactly this!

Issue 5 is out now and available in larger supermarkets and branches of WH Smiths, or you can subscribe via the website 🙂

DIY, how to, refashioning, Restyles, Tutorials

Refashion: Turn a Jumper into a Slouchy Boho Bag

04/15/15

Turn an unwanted jumper into a slouchy boho bag at www.portialawrie.co.uk

Another take on a sweater to bag refashion! This time, instead of a tote style bag, a cross body slouch boho style bag; and considering the sun we’ve had today, (Summer….is it really you?!) I can see this heading down the beach with me this weekend. So easy and quick. Want to make your own? Read on….

Turn an unwanted jumper into a slouchy boho bag at www.portialawrie.co.uk

So another sweater that  has shrunk over time. But I really like the bold black and white stripe so it would be a shame not to reincarnate it in some way…

Turn an unwanted jumper into a slouchy boho bag at www.portialawrie.co.uk

Cut an even curve from side seam to side seam, under the arms like so…

Turn an unwanted jumper into a slouchy boho bag at www.portialawrie.co.uk

Turn inside out, serge that curve closed, turn right side out and flip the other way up. Your old hem is now the top of your bag….the bottom is now serged closed.

Turn an unwanted jumper into a slouchy boho bag at www.portialawrie.co.uk

Separate/cut the sleeves from the rest of the sweater following the armhole curve and cutting straight across/at a 90 degree at the shoulder….

Turn an unwanted jumper into a slouchy boho bag at www.portialawrie.co.uk

Cut the sleeves right open. Those two edges you see aligned in the pic are the shoulders. Align those RS together and serge/zig zag to join…

Turn an unwanted jumper into a slouchy boho bag at www.portialawrie.co.uk

Fold in half lengthways, RS together then trim away the excess as pictured so you have one looooong folded strip an even width all the way along…

Turn an unwanted jumper into a slouchy boho bag at www.portialawrie.co.uk

Serge/zigzag the long edge together. Turn RS out, press, and serge/zig zag the ends…

Turn an unwanted jumper into a slouchy boho bag at www.portialawrie.co.uk

Pin the strap in place either side of the inside of your bag. Secure with a couple of rows of zig zag stitch the entire width of the strap…

Turn an unwanted jumper into a slouchy boho bag at www.portialawrie.co.uk

Job’s a goodun’ and you’re ready for the beach, the farmers market, the coffee shop….wherever you want your sweater bag to take you!

Newer Posts
Older Posts
Portia
Follow
Sewbox

© Copyright 2026. Portia Lawrie. All Rights Reserved. Managed by WordPress Web Dev Cornwall .