• About
    • Contact
    • Press
    • Sponsor
  • DIY
    • Home & Garden
    • Jewellery & Accessories
    • Yarn Crafts
  • Sewing
    • patternless & self drafted
    • Refashions
    • Commercial Patterns
    • Sewing Tips
    • Overlockers
  • The Refashioners

Portia Lawrie

DIY, how to, refashion, refashioning, Thrifting, Tutorials

Refashion: Oversize Cardi to Tunic Sweater

01/04/15

I’ve seen a few tutorials out there for converting sweaters into cardigans. Which I shall no doubt do at some stage. But what if you want to do it the other way round? Turns out it’s easy peasy…

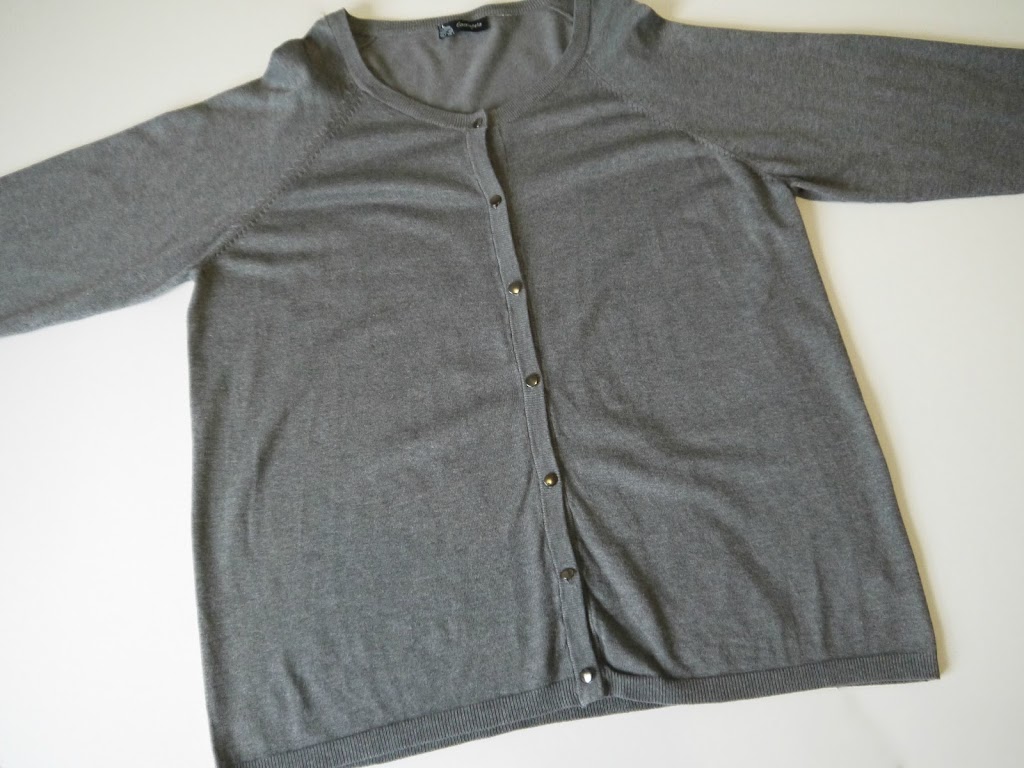
I started with this thrifted cardigan. (£2). It’s a really nice fine knit but a little too boxy and shapeless as a cardi…

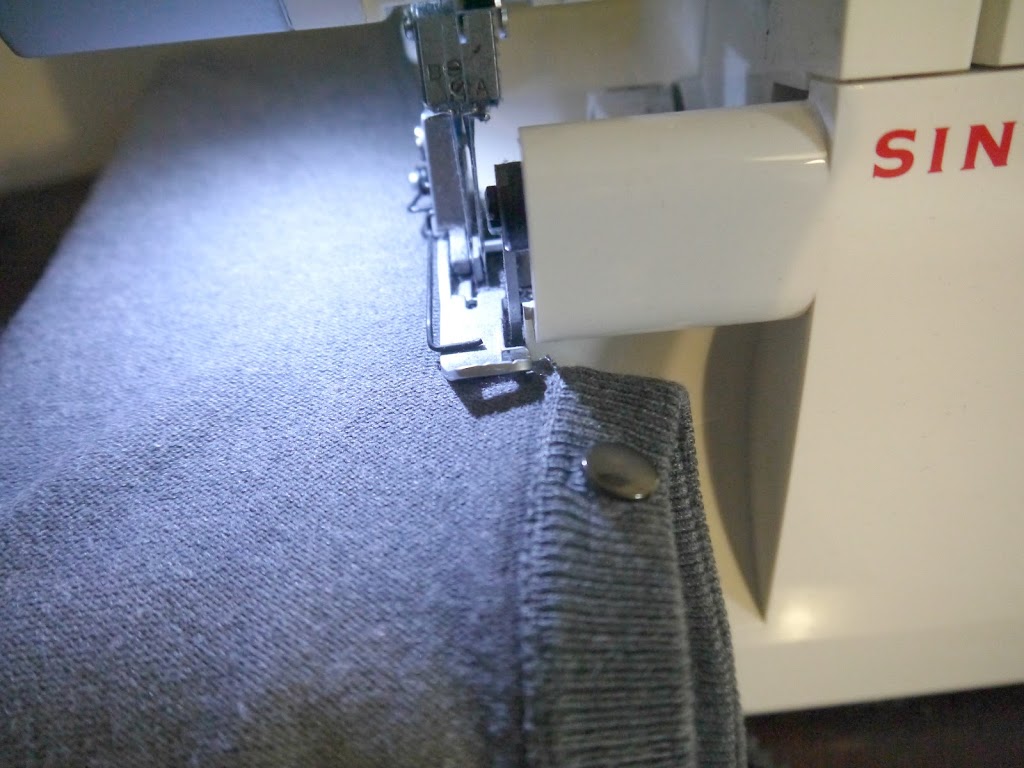
Flipped inside out and with right sides together I fastened the button placket all the way down so the placket ribbing was all aligned (no pins necessary!)

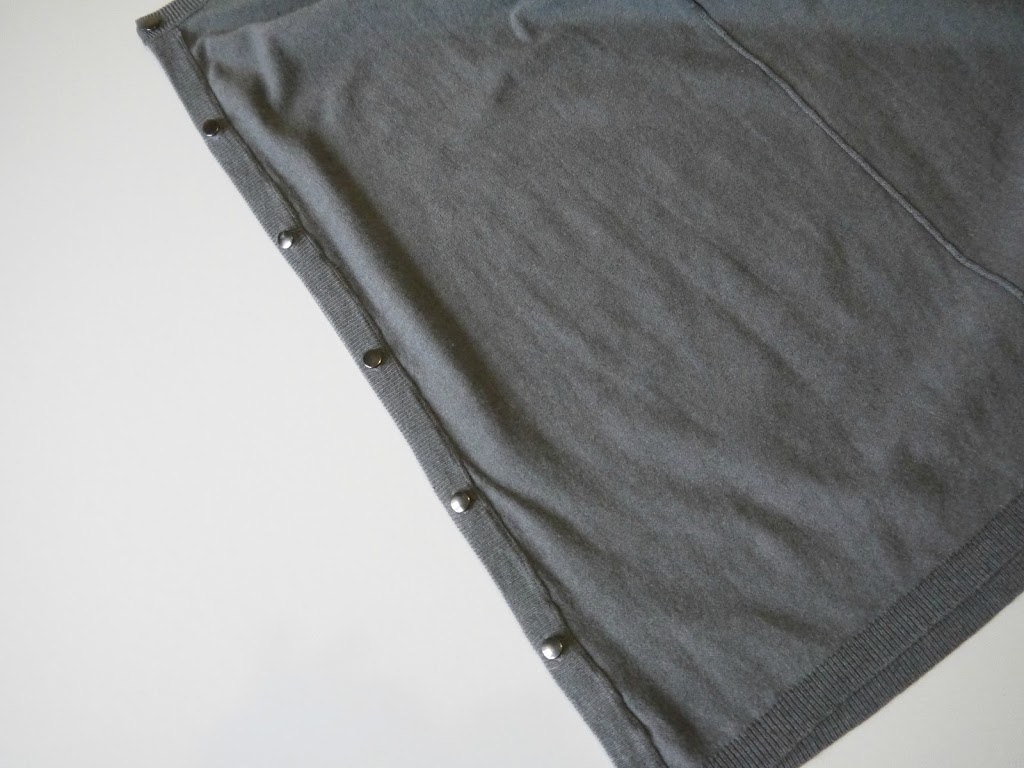
Next I serged all the way down with the edge of the placket, with the ribbing to the right of the blade so it got removed as I serged….

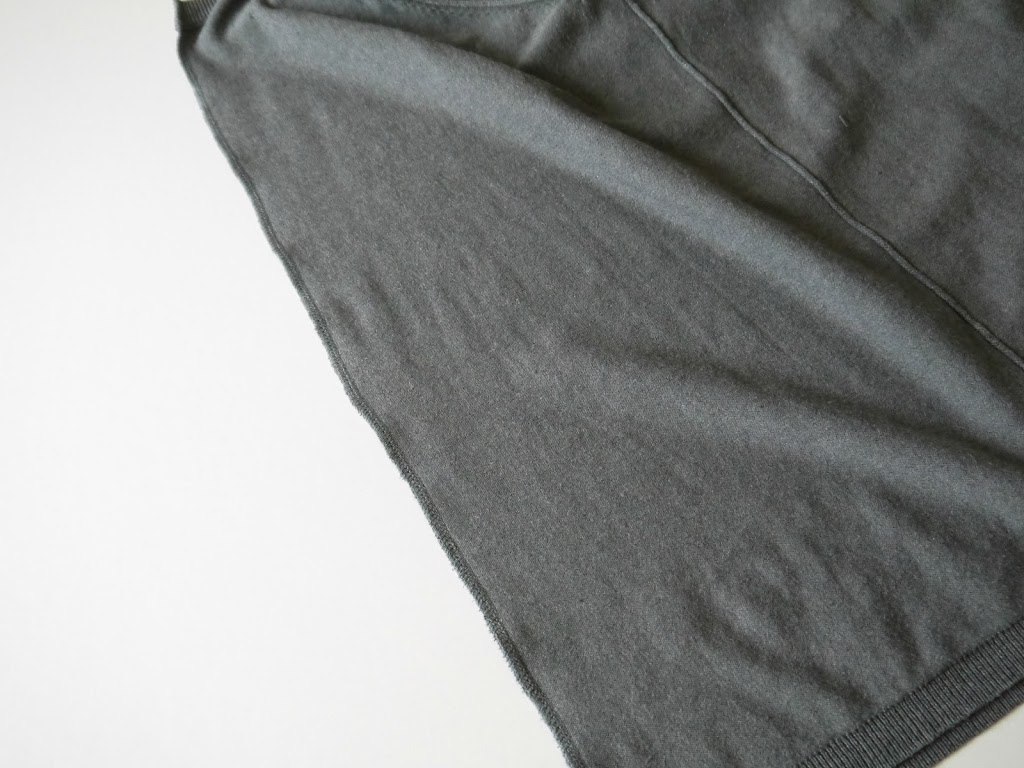
Here’s the new centre front seam all serged….

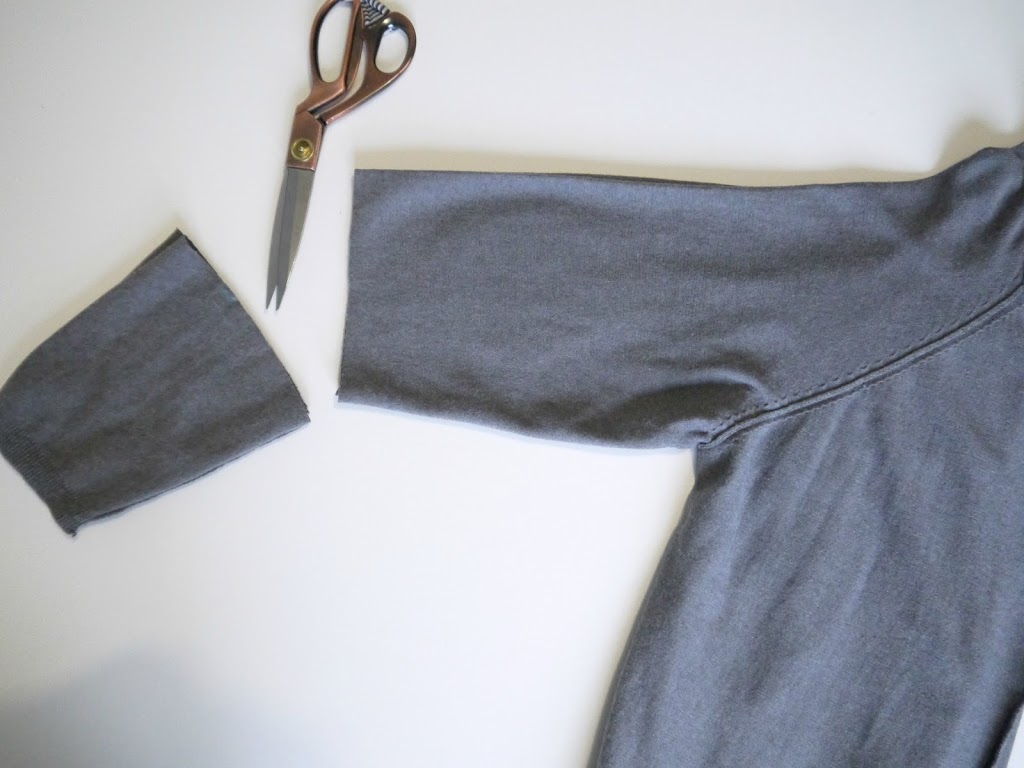
I like my sleeves elbow length. So I cut the bottom of the sleeves off, leaving a turning allowance of 2″…

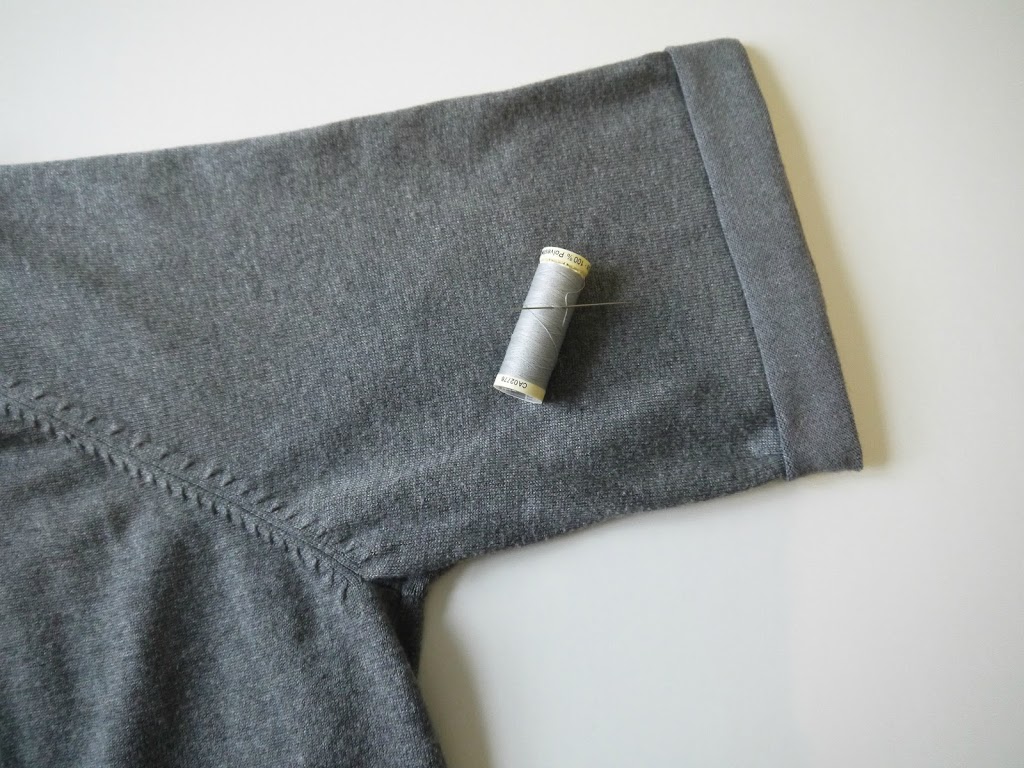
…serged the new sleeve hems to prevent unravelling, turned, and hand stitched in place….

I used what was left of the sleeves to cut some oversized pockets for the front and edge stitched those in place using the stretch stitch on my standard machine…

…and that was it…

This was everything I had left…so a super minimal waste refashion. Can’t be bad 🙂

This is a great way to adapt oversized men’s cardis. I for one will be on the lookout for those on my next trip to the charity shop!


DIY, how to, leather, refashion, refashioning, rit dye, Tutorials

DIY: Dyed Leather Gloves (inc DIY leather conditioner & cleaner)

12/01/14

As I mentioned in my previous post, I had a stockpot of the Rit Dye simmering on the stove whilst I worked on another project. (Deets of that to follow soon I promise. Just waiting for some decent daylight to photograph it, as it’s soooo grey skies here right now it’s not even funny! If you follow me on instagram you’ll know what the “big project” is…just not the end result 😉 Today I thought I’d share another little experiment with Rit dye. Whilst my stockpot was simmering away I began pondering what else I could use all that lovely rich dye liquor for. I like to get value for money! (BTW, did you know you can bottle unused Rit dye liquid once it’s cooled and reuse it months later! Apparently so…result, huh?)

Anyway, I decided on a whim to randomly chuck this pair of leather gloves into the mixture…and what do you know? It worked! They didn’t crisp up when they dried and the result is relatively even…so I guess…you CAN dye leather with Rit dye!

Essentially I started with these soft leather gloves that I had thrifted and then never worn because the colour never quite fit with any of my coats. (£2 in case you were wondering ;). My dye was already mixed and simmering but as I mentioned in my previous post, was MUCH more concentrated than the instructions required. (The black and maroon powder packs you see + the whole bottle of navy liquid dye to 10pints of water gave me a concentrated dye solution that was an inky blue/purple).
1) Simply submerged my gloves in the stock pot and left for an hour with the lid on.
2) Turn them every 10 mins or so to ensure even coverage
3) Remove after an hour and rinse relentlessly in running water, graduating from hand hot to cold until it runs clear.
4) Leave to dry thoroughly (mine took a couple of days!). I wouldn’t personally be tempted to speed this process up (with a hairdryer for instance) as I’d be worried about “crisping” or shrinking the leather. I guess I thought I’d pushed my luck enough having them simmering in a dye bath for an hour, lol!

When they were finally dry I treated them to a bit of conditioning. You don’t need special products either. This works beautifully on leather of any kind. Shoes, bags, sofas…saddles!
1) Just mix equal parts of white vinegar and olive oil in a bottle.
2) Shake well and apply to leather using a cotton wool pad
3) Buff to a soft shine with a soft cloth
Et voila! Trust me when I tell you…do not bother buying expensive leather creams again. This stuff really works 🙂
4) As a final touch spray with Scotchgard or similar

So, here they are, my new, old, gloves! I like that the stitching wasn’t dyed and now contrasts with the new colour… and talking of colour…you can just about make out an aubergine tinge in these pics…not what I expected AT all. But I really love it! There are a few areas where the dye got veeeery subtly patchy (like in the creases of the leather) which lends them a slight vintage feel too…I totally knew that would happen of course… ahem…cough…;)

I’m quickly learning with dye projects, not to be too invested in achieving a specific colour. Results are not guaranteed to be what you plan! I think it’s better rather to aim for a particular area on the colour wheel and remain open to where that takes you. Sometimes it’ll be a triumph! (Sometimes not!) Even though it may be a case of more luck than judgement…shhhh…don’t tell anyone that part….just let them tell you how clever you are 😉

NB: as a little “disclaimer” and in the interests of full disclosure…I haven’t yet had a chance to wear these out. While I’m confident the exterior is colour fast due to the scotchgard, I’ve yet to test the colour fix on the inside fabric except a rub test on a towel which was fine…on sweaty hands though it’s possible it could transfer and I could end up all Smurfette…I guess I could turn them inside out and use a spray fixative of some kind…but I’ll risk it and see what happens I think…will keep you posted on that!

UPDATE: All is fine. No dye transfer on wearing for a full afternnoon!

DIY, dyeing, how to, refashion, refashioning, shibori, Tutorials

DIY: Bleach Shibori…

11/17/14

I’ve been wanting to have a dabble with Shibori for a while. I particularly love all the indigo Shibori projects that are popping up all over. But I’m also a fan of using everyday household materials/supplies for creative projects. I guess I just love the idea that if the creative mood strikes, I can just have a rummage in my cupboards and whip something up from what’s there. Rather than having to drive 40mins to my nearest craft store or order supplies online and wait with baited breath for them to arrive. This is one such project. Bleach, string, and a cotton kaftan top I had languishing in my stash, and hey presto….bleach Shibori!

Shibori is a method of dying pattern into cloth (or in these case a kind of reverse dyeing with bleach) through a process of folding, pleating, gathering, and binding. Bleaching works best on natural cellulose fibres as opposed to synthetics, so this cotton kaftan was the perfect subject to experiment with. I started with folding my garment in half, and then pleating it concertina style up from the hem…

….folded the whole thing in half, and then bound tightly with randomly wrapped string….

Place in bleach solution and weight down with bowls or similar to ensure it’s fully submerged. I used a whole 79p bottle of bleach to about half a sink of water. That’s about as technical as I get! I left it in for just under an hour, checking the colour lift intermittently….

…and this is how it came out after I’d removed the string! (That hole on the left? Managed to that when I cut the fabric along with the string! Duh!)

After that I rinsed and rinsed and rinsed again in cold water, hung to dry and pressed.  (I’ve since discovered that it’s recommended to use a solution to neutralise the bleaching process as it continues even after washing apparently. So just a heads up if you’re planning on replicating this. Google neutralising bleach. It seems a product called bleach stop aka Sodium Thiosulphate is quite popular. But also a solution of hydrogen peroxide in a 1:10 ratio with water will apparently do the same job.)

I think this turned out rather cute! I like the way the sleeve edges and hem carry the bulk of the lightening, and the slight “ink blot” effect down the centre that comes from folding the garment in half before bleaching, and I love the effect the string binding has given along the hem in particular, like a forest of sapling trees in silhouette 🙂

I’m already hatching plans for objects to use in more Shibori!

DIY, finished garments, how to, refashion, refashioning, Thrifting, trousers, Tutorials

Refashion: M&S Maxi to Slouchy Harem Pants

09/08/14

Before our house move (and the temporary loss of sewing facilities) a couple of weeks ago I had time to squeeze in a few projects. One was this refashion of a thrifted maxi into some so so comfy (read “worn to death whilst chilling at home”) slouchy harem pants. Difficult to tell from the picture but the skirt comprised of central jersey panels with the side panels made from a kind of textured crepe with utility style slouchy pockets….

You can kinda see the panelling and seaming in this photo

This could not have been simpler really! I marked out new inseams and a curved “dropped crotch” seam with pins…I completely eyeballed this…

Then I cut out the excess leaving a little allowance for serging…

…and…er…serged basically. That was it.

These are sooooo comfy for lounging around in at home, and were lovely to wear dressed up a bit more on an evening out during our trip to Malta, back in August. So much so that I used these as a base to draft a similar pair from scratch. Deets on that coming soon!


refashion, refashioning, Restyles, Thrifting

Refashion: Men’s Tee to 3/4 sleeve Tunic Tee

08/12/14

So….it’s been a little while…and posting on this blog may be erratic for a little while more…however there are changes afoot that should put pay to that and mark my return to a more consistent blogging and sewing/DIY schedule…and that makes me very happy indeed. If you follow me on instagram you’ll have seen a few little references to some of those changes. You’ll also have seen that there is a backlog of makes that have yet to make it onto this blog. Lately it’s been a straight choice between either making OR blogging. My schedule isn’t currently allowing me to do both….and at some points hasn’t allowed me to do either. Well…that’s about to change as I can’t continue with that particular status quo any longer. But in the meantime…back to that backlog of makes…

First up is this quick and dirty tee refashion. Nothing spesh. A simple tee reshaping that takes about 20mins. ALMOST not blogworthy at all, except that I thought it would be a good opportunity to share my little technique for ensuring I adjust both sides of a garment evenly and identically…..

…(and let’s face it, a 20min refashion when your schedule sucks in sewing terms, is absolutely noteworthy!)

The first step is to establish a new stitching line on one side of the  garment. I tend to do this using a combo of pinning, eyeballing and very occasionally, when I’m feeling virtuous…measuring…

Next, fold the tee in half lining up armscyes, underarm and side seams; then pin along the newly marked line through all layers…

Pin through all layers directly on top of the marked line making sure not to angle the pins in any way, so the entry and exit points are completely consistent with the marked line…

Now flip over and there’ll be a line of pins that will mirror exactly, the line that is marked on the other side…

Mark between these pins and you duplicate exactly the line that is on the other side of the garment. Remove the pins, serge along these lines, and hey presto. The garment is reshaped identically on both sides!

I use this method on jeans and trousers that I want to reshape too. A quick and easy way to ensure that adjustments are even on both sides of any garment!


Newer Posts
Portia
Follow
Sewbox

© Copyright 2026. Portia Lawrie. All Rights Reserved. Managed by WordPress Web Dev Cornwall .