• About
    • Contact
    • Press
    • Sponsor
  • DIY
    • Home & Garden
    • Jewellery & Accessories
    • Yarn Crafts
  • Sewing
    • patternless & self drafted
    • Refashions
    • Commercial Patterns
    • Sewing Tips
    • Overlockers
  • The Refashioners

Portia Lawrie

DIY, finished garments, grainline, hemlock tee, how to, Sewing, Tips and Tricks, Tutorials, Uncategorized

FO: Double Hemmed Hemlock Tee Hack

07/30/15

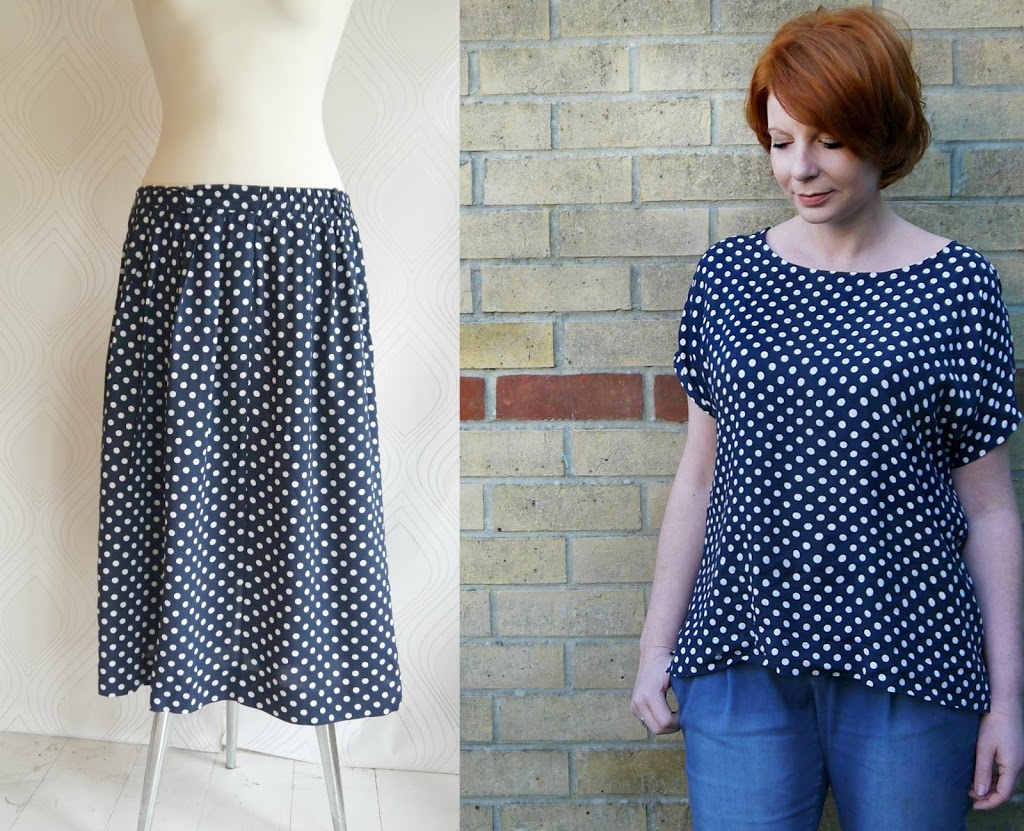
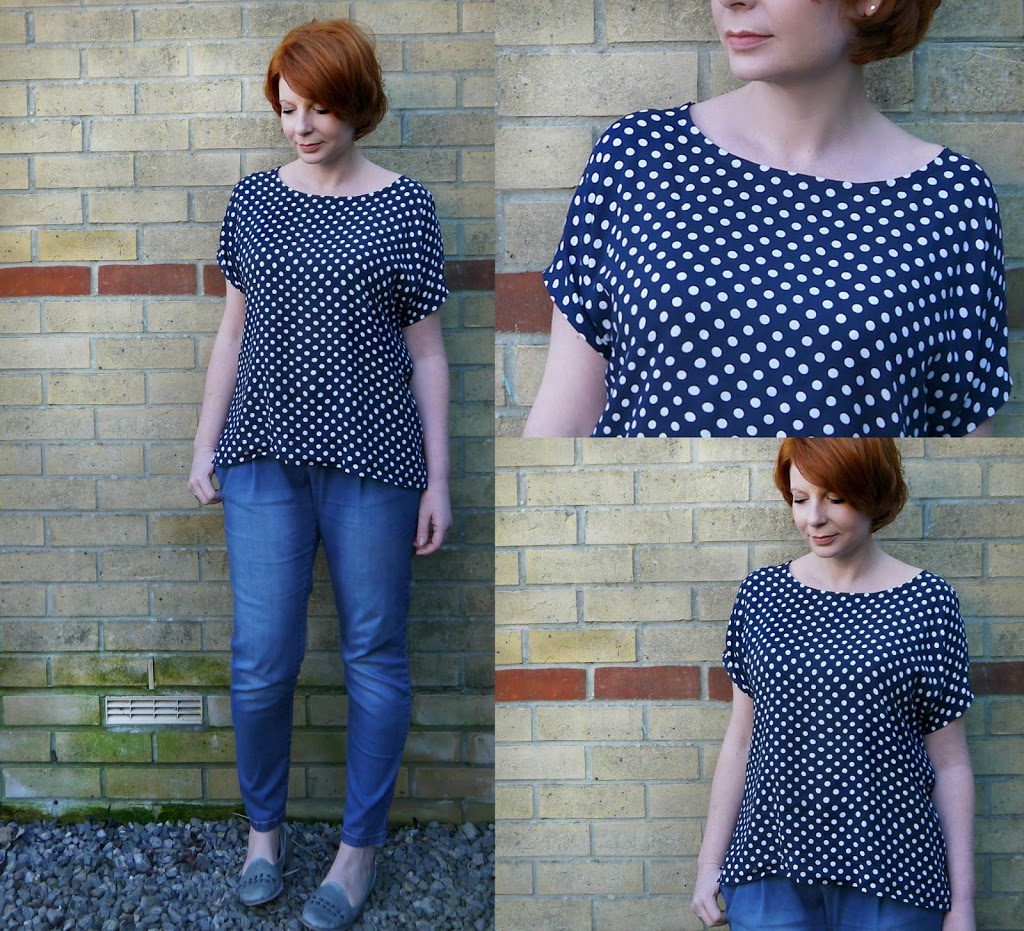
Time for some deets on another hemlock tee hack! Man I just can’t leave that pattern alone can I?!! I’d say I’m getting my money’s worth out of this pattern except I can’t say that because it’s free to download here! I bought another pattern from Jen’s collection so my feelings of guilt over getting so much for nothing, feel assuaged for now! You’ll have seen this top in my post about these refashioned trousers. But here’s the lowdown on what I did…DOUBLE HEMMED HEMLOCK TEE HACK

The neckline, cuffs and hemline are all finished using the deconstructed finish I described in this post. But I played with the overall silhouette and proportions of the design as well…

DOUBLE HEMMED HEMLOCK TEE HACK

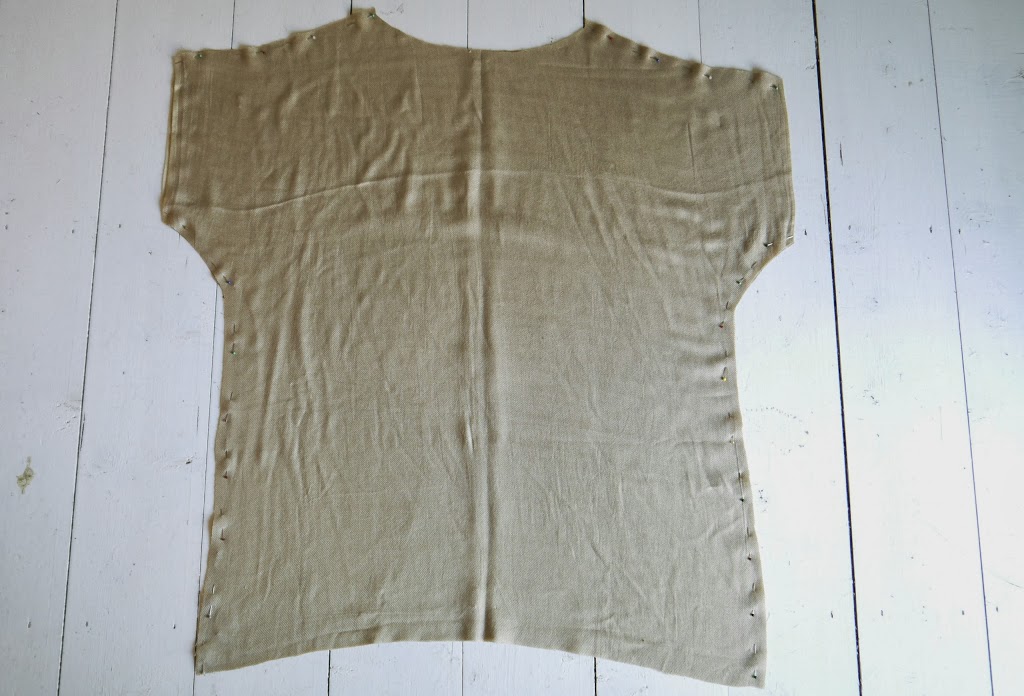
The hem features a wide double hem band with the edges left raw to curl. The idea came about when I realised this jersey lacked weight and was a little too see through in the muffin top area if you know  what I mean! So a double thickness of fabric added weight and solved the see through part as well.

DOUBLE HEMMED HEMLOCK TEE HACK

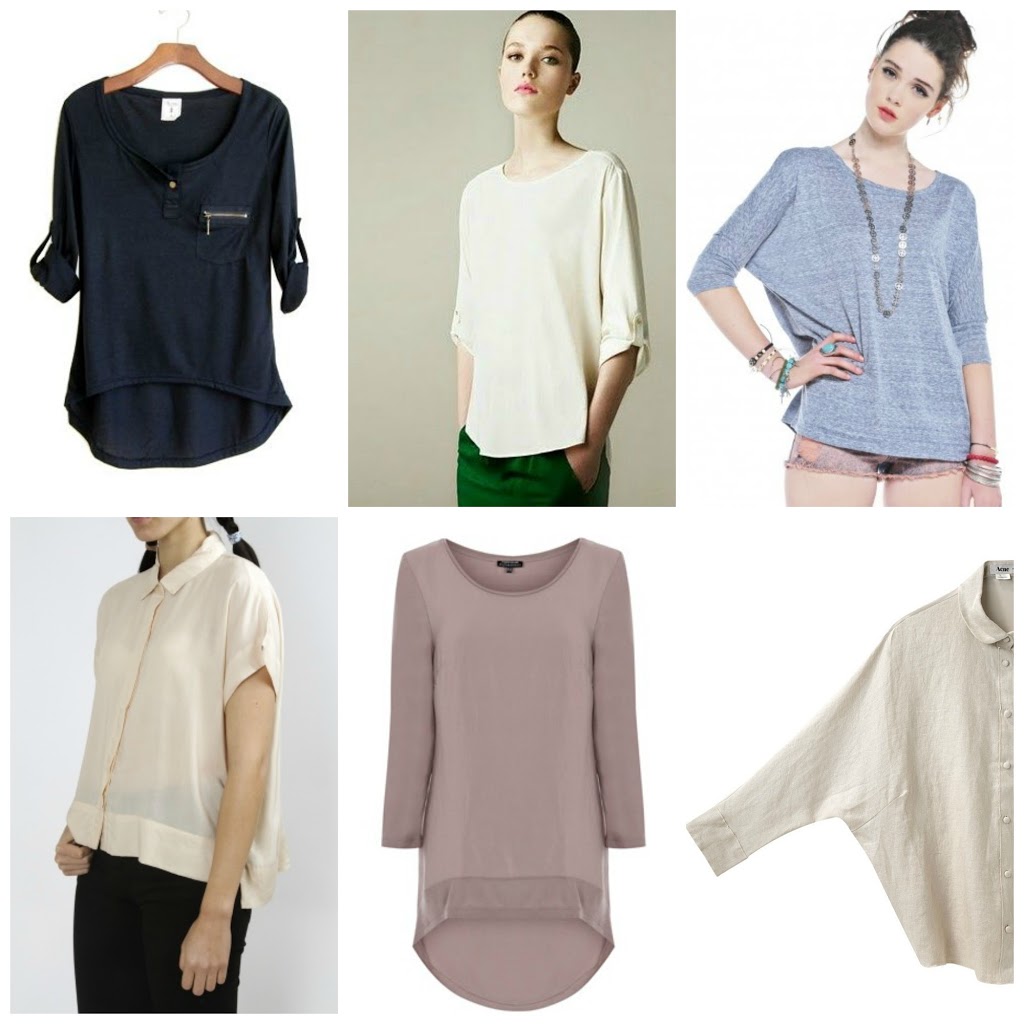
In terms of proportions I’m weirdly being drawn to a more cropped and fitted silhouette up top. So the hem and the sleeves got chopped on this incarnation…


DOUBLE HEMMED HEMLOCK TEE HACK

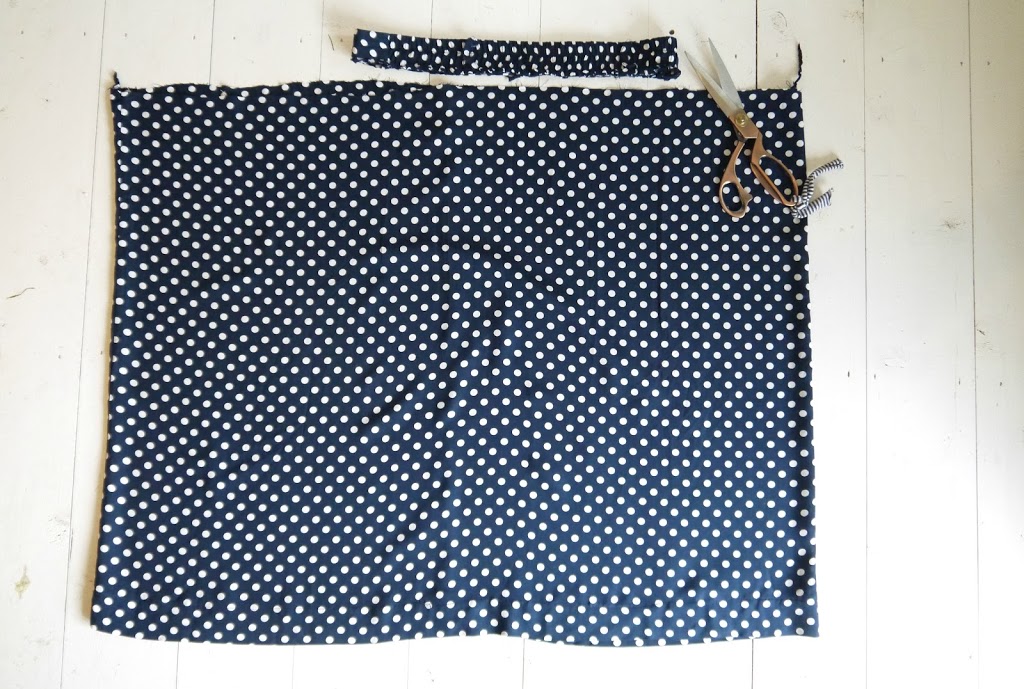
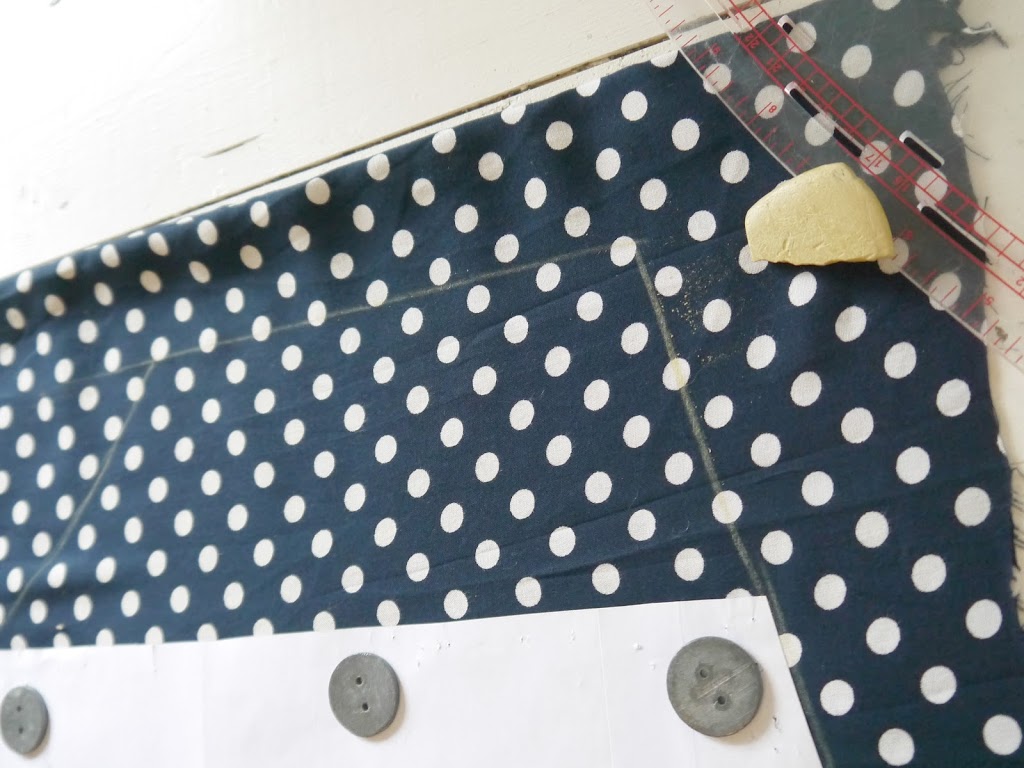
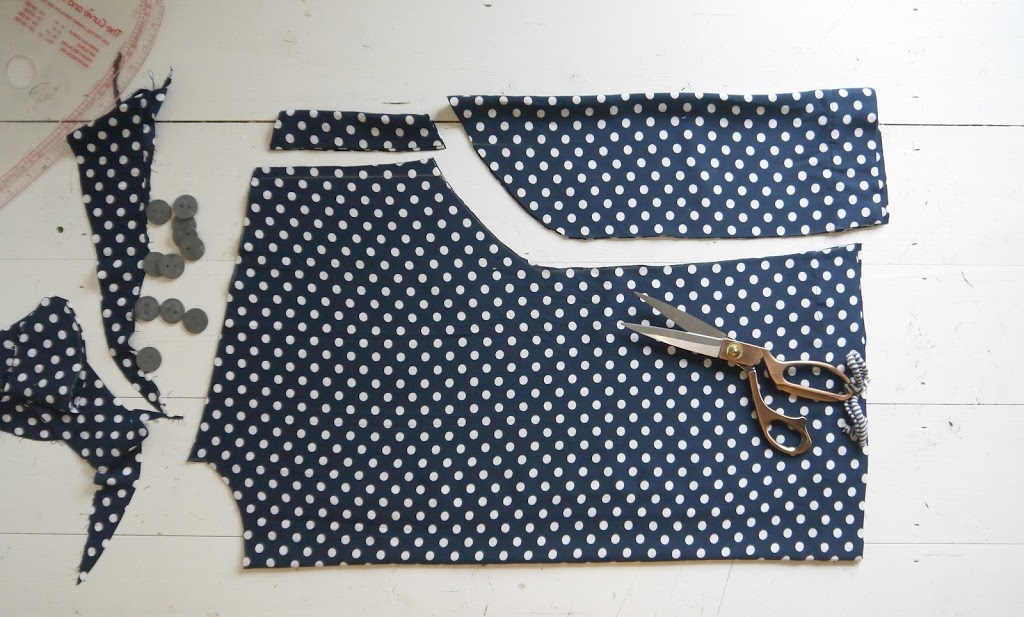
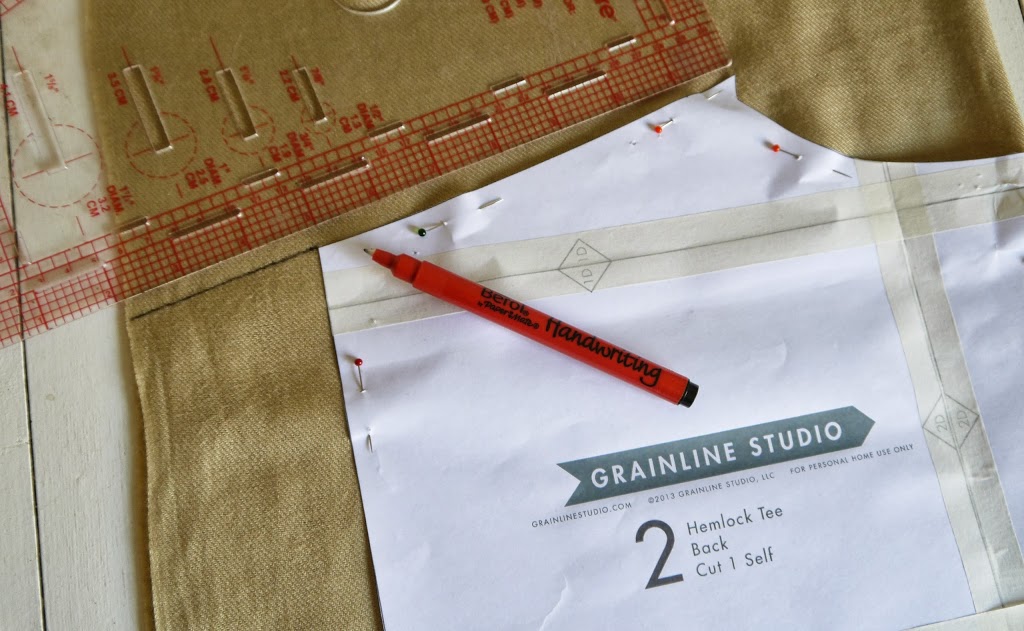
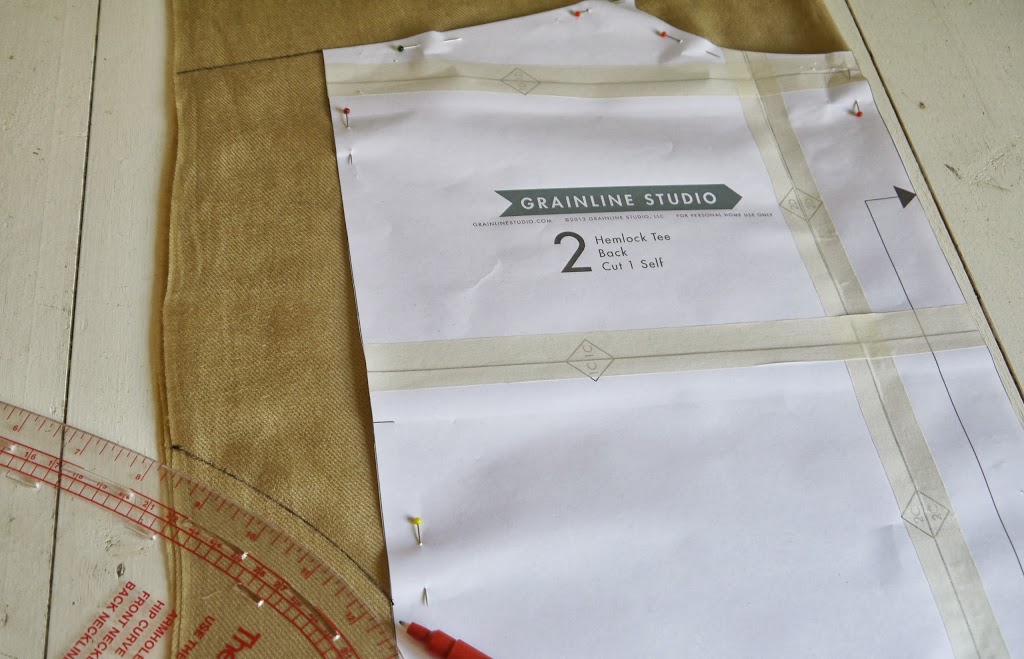
To create the hem band I made the hemlock up as normal, then cut straight across the hem at hip level (yes that is masking tape as a cutting guide)…

DOUBLE HEMMED HEMLOCK TEE HACK

I used the piece I cut off to create the hem band by folding it in half WS together…

DOUBLE HEMMED HEMLOCK TEE HACK

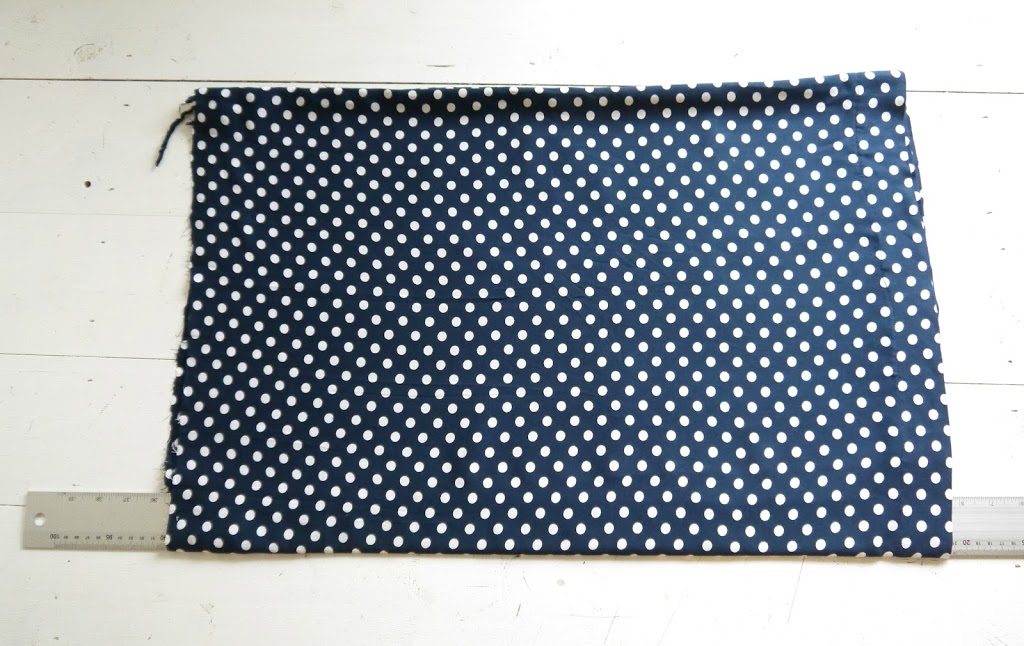
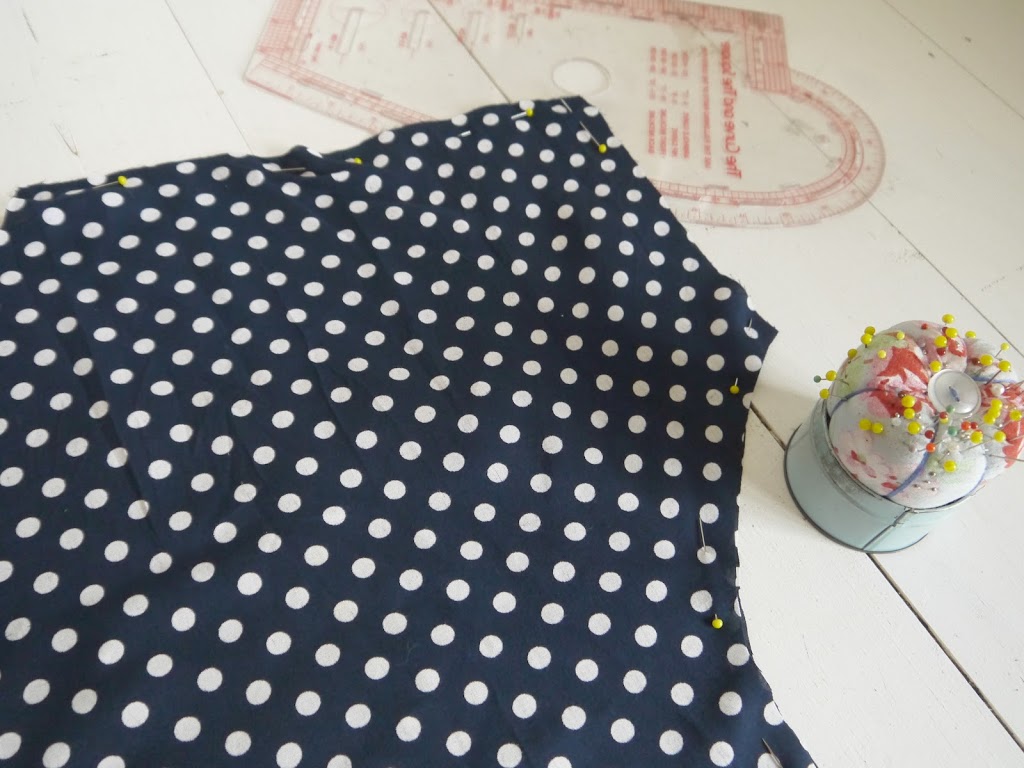
Then serged it around the hem of the shirt. RS together and folded edge of the band aligned with the raw edge of the hem…

DOUBLE HEMMED HEMLOCK TEE HACK

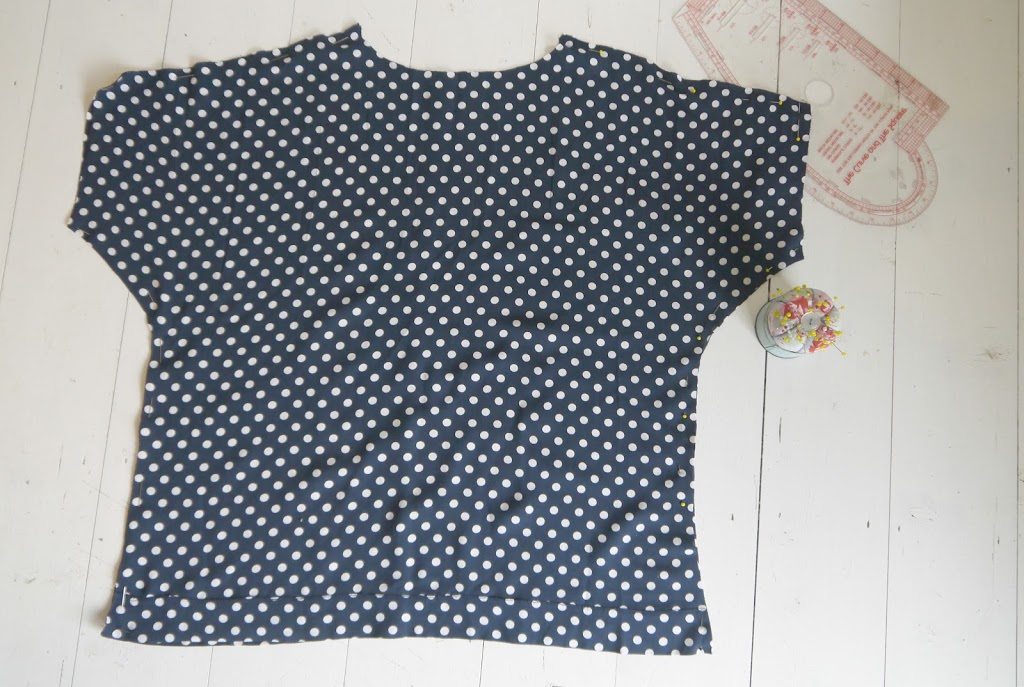
This results in a double layer of fabric with raw edges that will curl with wear and laundering. An effect I personally love. But you could always reverse the process and end up with a clean, folded edge at the bottom if the deconstructed/raw edge look isn’t your bag…

DOUBLE HEMMED HEMLOCK TEE HACK

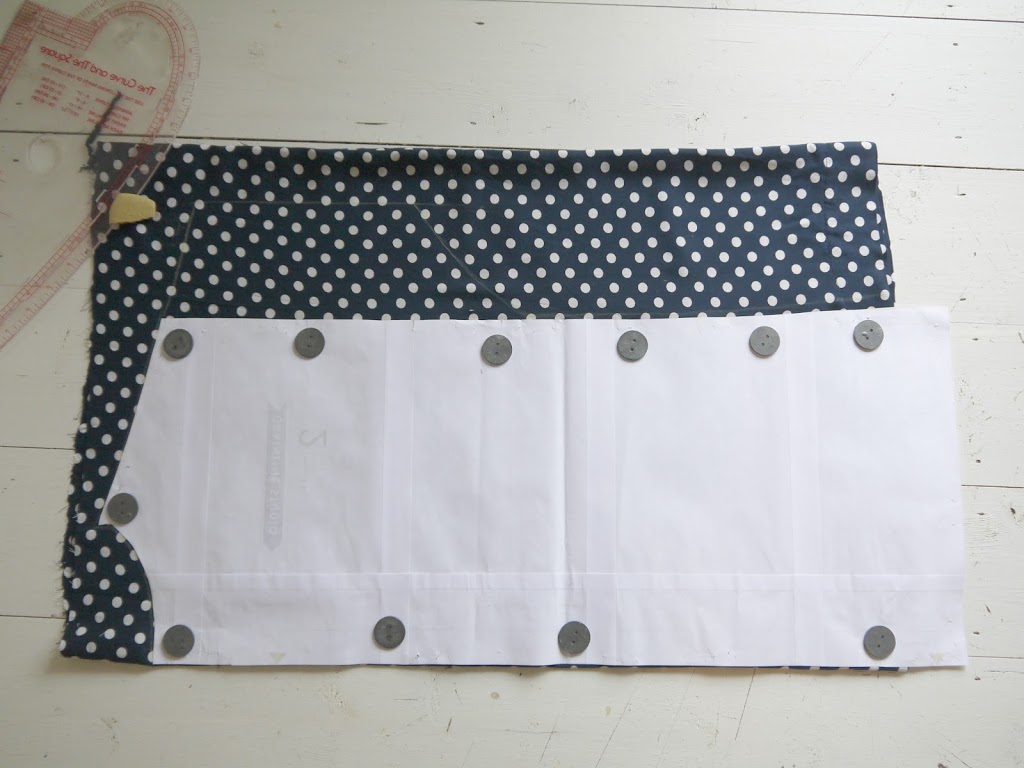
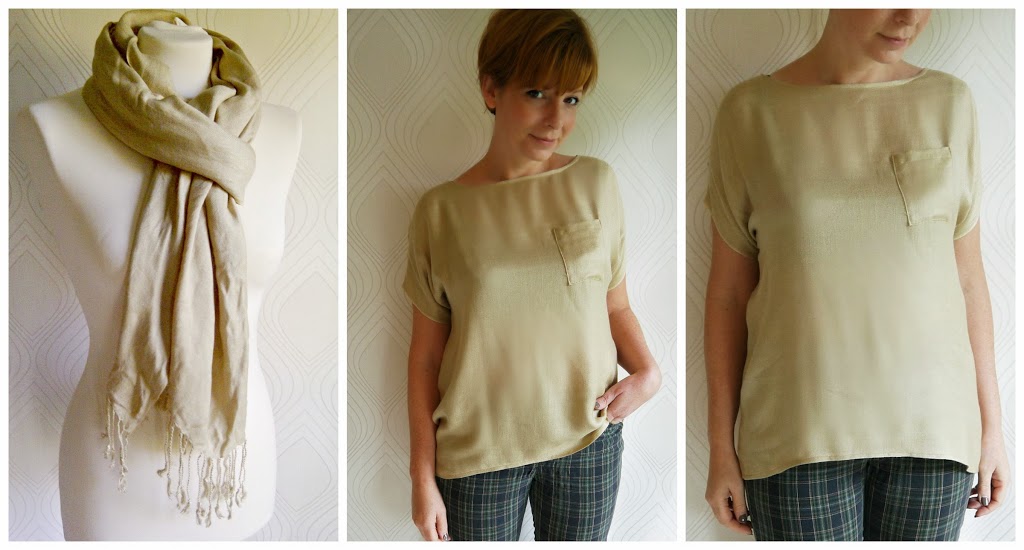
Sleeve wise, I wanted to echo the cropped proportions of the body so cut them to elbow length…

DOUBLE HEMMED HEMLOCK TEE HACK

I cut strips from my fabric remnants using, you guessed it, masking tape as my guide. (See this post on why masking tape is so useful in the sewing room!)

DOUBLE HEMMED HEMLOCK TEE HACK

(I find a bit of spray starch along the edges of jersey keeps it from curling so much during the cutting/construction process. 😉 )


DOUBLE HEMMED HEMLOCK TEE HACK

Then used those strips to finish the neckline and cuffs with the same raw edge finish. Full  step by step on that can be found here . This is a less trimmed down version of the neckline in that post…

DOUBLE HEMMED HEMLOCK TEE HACK

There are 2 more hemlocks that I haven’t blogged, and I think I now have 6 in total ha! The Hemlock by Grainline Studio  and the Maya by Marilla Walker are fast becoming….scratch that…they ARE my two TNT top patterns. Not because they have show stopping qualities. But because they are well drafted simple wardrobe basics that are ripe for little customisations like this. And Amen to more patterns like that!

DIY, Dressmaking, fabric, finished garments, free pattern download, Freebies, grainline, hemlock tee, how to, knits, minerva, overlocker, serger, Sewing, sewing patterns, Tips and Tricks, tops, Tutorials, Uncategorized

Hemlock Tee: How to Sew a Deconstructed Jersey Neckline Finish

07/24/15

Not really a secret that I love the Hemlock Tee pattern from Grainline Studio. If you follow me on Instagram you’ll have seen a few of these pop up recently that haven’t yet been blogged. One you will have seen in my previous post. This one is just a simple grey jersey…DECONSTRUCTED JERSEY NECKLINE FINISH

This would not be particularly noteworthy apart from the fact I wanted to let you know this jersey from Minerva Crafts is frikkin gorgeous! So soft. So drapey. Not too flimsy. Need more in my life!

I also wanted to share my favourite jersey neckline finish of the moment! I’m not a massive fan of conventional ribbed neck bands . I like my tees to look a little more deconstructed and I really like the raw edge of jersey fabric. The way it curls  when you stretch it! But obviously  a neckline still needs some stability. So recently I’ve been opting for this neckline finish…DECONSTRUCTED JERSEY NECKLINE FINISH

It’s applied in exactly the same way as the pattern describes, with one exception. Instead of the folded edge of the neck band edging your neckline…you flip the band the other way round before applying it,  and have the raw edge exposed instead!

Here’s a quick step by step. If you’ve never applied a jersey neckband before you may also find this useful as it covers the whole process…at least this is how I do it!DECONSTRUCTED JERSEY NECKLINE FINISH

Take your neckband pattern piece and press it with some spray starch (helps stop the edges curling too much as you work); sew together the ends to form a loop then fold in half.

DECONSTRUCTED JERSEY NECKLINE FINISH

Taking the join as your centre back marker, mark your centre front point using a pin. Do this by folding the band in half with the join smack band in the middle. Mark the CF point with a pin on the opposite side.

DECONSTRUCTED JERSEY NECKLINE FINISH

Mark the sides with of the neckband with a pin too..

Have your tee right side out…DECONSTRUCTED JERSEY NECKLINE FINISH

Pin the CF of your neckband to the CF of your neckline. I’m going for that raw edge finish on mine remember. So I’m lining up the folded edge of my neckband with the raw edge of my neckline. If you want the clean/folded edge finish to your neckline, then line up the raw edges of your neck band with the raw edge of your neckline. Savvy?

DECONSTRUCTED JERSEY NECKLINE FINISH

Pin the sides of your neck band to your shoulder seams and the CB of your neck band to the  CB of your neckline. So your neckband is now pinned at both shoulders seams, the BB, and the CF of the right side of your neckline.

DECONSTRUCTED JERSEY NECKLINE FINISH

Serge to join. I work in 1/4 sections at a time. ie from pin to pin. Hold the layers of fabric under just enough tension for the neckband to match the length of the neckline. It will be drafted ever so slightly smaller than the neckline circumference which enables it to naturally want to turn to the inside .  So pull on it juuuust enough as it runs through the serger, but be careful not to stretch it out.

DECONSTRUCTED JERSEY NECKLINE FINISH

Press! Seam allowance/serged edge downwards…

DECONSTRUCTED JERSEY NECKLINE FINISH

Top/Edge stitch around the neckline to secure the seam allowance. So you now have a finished neckline with a raw edge detail (or if you attached the band the other way, a finished neckline with a clean folded edge!). If you want it a bit narrower you can start with a narrower band in the first place OR trim it down at this stage….

DECONSTRUCTED JERSEY NECKLINE FINISH

Make a notch/snip to the depth you want…

DECONSTRUCTED JERSEY NECKLINE FINISH

And trim!

DECONSTRUCTED JERSEY NECKLINE FINISH

I went even narrower on this one and part of me wishes I’d  restrained myself a little, lol! After laundering, the edges will soften, and depending on how long you’ve left them, (ahem) curl a little too.

You might ask what the point is in lining up the folded edge of the band with the raw edge of the neckline in the first place. You could just attach the band as normal, trim, and you still end up with a raw edge. I just prefer to do it this way because I find it easier to line up a folded edge with one raw edge, than it is to align 3 raw edges; and I find the inside finish cleaner this way too. Either way would work and it’s one of those cases of personal preference.

I’ve done a variation with a twist  of this on the hemlock in my previous post. The one I’ve yet to blog about! Then there’s one more that I’ve made; (and two more that I’m about to make). Plus my first stab at Suzy Pants and 3 completed Maya variations that are also unblogged!

I literally have too many blog posts to squeeze in before the launch of The Refashioners 2015.

Oh yeah, and I ought to refashion a shirt too, gasp!!

Dressmaking, hemlock tee, refashioning, Sewing, Thrifting

Refashion: Polka Dot skirt to Tee

04/21/14

Simple gathered skirts are a great source of fabric for refashioning…

Once you remove the waistband lay the fabric flat, just look how much there is to play with…essentially a very wide tube of fabric…

To create this top I simply folded the tube in half…

When I have a slippery fabric like this (a very light drapey polycotton) I sometimes find it tricky to get a double fold. The under layer will slip and slide and flop about. To overcome this I fold over my metre rule which acts to butt the underneath fold right up against the outer fold. Then I gently slide the metre rule out again and place my pattern pretty sharpish, before the fold slips again!

I used the hemlock tee as a base pattern…

and extended the shoulder line to create a grown on sleeve. Exactly as I did here….and here…

cut out….

Pinned…

and sewed along the shoulder and side seams…

I hemmed the sleeves, bias faced the neckline and the hem is original to the skirt (so no sewing required there). I incorporated a couple of side slits in the hem for comfort and ease and I was done 🙂

Even though I’m not a skirt wearer, I’ll always check out the skirt rail in a charity shop. Look for simple skirts gathered into a simple waistband, in a fabric and print you love, and turn it into a cool and comfortable summer top 🙂


finished garments, grainline, hemlock tee, knits, overlockers, refashioning

FO: Sheer Knit Hemlock Tee Variation…

02/22/14

I recently whipped up this variation on Grainline’s Hemlock Tee. It’s made using a sheer knit fabric (hence I also had to whip up the vest top underneath!) that I bought from Minerva crafts at £4.99/m available here. I bought the ivory, which as you can see is much more white in reality. I used the exact same process on this make as I used for this pashmina refashion if you want more step by step deets….;)

Thinking I might whip up a few vest tops in different colours to layer underneath. (In fact if Minerva had this type of fabric in a range of colours  I’d probably make more of these too) I kinda hashed this vest top a bit. It hardly qualifies as self drafted as I literally laid a vest top I already had straight onto the jersey fabric, cut around it, and then whizzed it through the overlocker. Not my finest hour, lol!  Can any of you recommend a simple vest pattern??

Oh,and I had a couple of emails asking to see what my recently refashioned coat actually looked like on…and being the obedient gal that I am…

My best friend, who is extremely honest (which I love about her 😉  said that when she had seen my recent post about this coat, she thought it looked a bit “granny’ish” on the mannequin; but that actually it looked better on. I’m still not sure whether that meant that she approved overall. But I’m happy to settle for “granny chic”….

finished garments, hemlock tee, jersey, minerva

FO: My Hemlock Dress

09/27/13

So I had a step by step all photographed for this make. Unfortunately someone, who shall rename nameless, managed to delete all the photos from our SD card. So when I came to write up this post….erm….no photos! Aaaargh! But, I’m sure you’ll get the gist. Let me explain….

This is yet another incarnation of the fabulously versatile and free Hemlock Tee pattern. The fabric is a lovely medium weight jersey with a fine fleecy underside from Minerva Crafts. It’s from their clearance section & priced at £5.99/m. In fact they have a whole heap of jersey on clearance at the moment from as little as £1.99/m. You may have also noticed from my sidebar ads that they are one of my new sponsors….which means if you use the code PORTIA10 at checkout, you’ll get a further 10% off. So if you wanted to recreate a jersey Hemlock dress of your own….hop over there if you fancy a bargain 😉 With a free pattern and discounted fabric, what’s not to love! I would recommend medium to heavy weight jersey for this make. Perhaps even a ponte?

On the subject of how this little number was created, clearly I made a few adjustments:

  • I used the back pattern piece to cut both the front and back pieces of this dress. It makes for a higher, slash neck effect at the front.
  • I lengthened my main pattern piece by several inches.
  • I shortened the sleeve pattern piece so the sleeves are elbow length (I always pull ’em up anyway so why not!)
  • I also shaped the dress so it followed the curve of my body. Not snugly, but it made for a subtly more flattering silhouette in this dress version.

Because of the way the Hemlock Tee is constructed, it is perfect for “pinning to shape”.  The shoulder seams are sewn first. Then the sleeves are attached whilst the fabric is flat (rather than inserted into an armhole). THEN, the sleeves and side seams are sewn in one continuous line. So at THIS stage, rather than stitching as per the instructions, I pinned it to fit me the way I wanted (yes I am a contortionist at weekends) then removed the dress (yes I did stab myself with pins in the process) and used the pins as a guide to draw in my new, more shapely, side seams. Does that make sense?! You could of course pin it so it was much more body con than I have done. Jersey’s great like that!

Man I’m so bummed I don’t have the step by step photos. I was all set to show you the difference between the original seam and the new curvier one AND how I managed to draw in the new seam lines symmetrically on both sides. Also how I achieve a finish similar to an overlocker on my standard machine! But alas, there is no use crying over spilt milk! I shall just have to make another, and next time, guard the SD card with my life!!

BTW, I don’t normally wear dresses. But I can officially confirm HOW comfy this is. I can definitely see a few more of these on the horizon. Quite liberating not having to match seperates! I feel as if I’ve been missing a trick all this time….


DIY, hemlock tee, how to, pashminas, refashioning, Restyles, Thrifting, Tutorials

DIY Pashmina Refashion – Number 3

09/24/13

Of the 3 pashmina refashions, this is the one where I treated the pashmina, essentially, as a piece of flat fabric. With the other two I utilised the full width and/or length of the pashmina as well as retaining the selvedges. They were completely patternless projects. For this make, I used an existing pattern, with one minor alteration….

Essentially, this one is an incarnation of the Hemlock Tee. The only difference being that instead of using the set in sleeve that came with the pattern, I adapted the pattern to incorporate a “grown on” kimono style sleeve.  Although the Hemlock Tee is designed with knits in mind, there was enough ease in this pattern for me to use it on a woven fabric like this pashmina…

To start I folded the pashmina in half length ways, then again width ways, placing the pattern piece on the folded long edge…

To create the kimono sleeve I simply extended the shoulder line up to the selvedge….

Starting on the selvedge, in line with the armhole notch on the pattern, I drew a curved line that blended into the side seam about 3″ down from the armhole notch….

Once cut and opened out I had two identical pieces.  Note the sleeve hems…they won’t require finishing as they are selvedges…..

Otherwise this make is a simple following of the Hemlock Tee pattern instructions, plus a patch pocket! Download it for free here. For me, it’s proving to be a fantastic “base” pattern, that I can tinker with and add little details too.
I guess you could call it a pattern crush then!

Dressmaking, finished garments, grainline, hemlock tee, knits, Sewing, tops

FO: Hemlock Tee (& a haircut!)

09/09/13

So, the mission for some new tops for Autumn has begun in earnest. I’ve made 4 so far in the past week. First up is this version of Grainline’s Hemlock Tee. This is a heavyweight jersey. Not quite a sweatshirt. I guess you could say somewhere between a jersey and a ponte. So it’s toasty warm 🙂 I picked this length of fabric up from a charity shop for a mere £1 so it’s a super cheap and super quick make too.

Oh, yeah, and I had all my hair lopped off too. Bit of a spur of the moment thing. I spent the night before my appointment pinning hairstyles on Pinterest. Heck I just felt like a change and blow drying that bob everyday was becoming a faff. (Especially now my mornings involve a proper school run). Still getting used to it and can’t stop fiddling with it for the moment. It’s only been 2 days. You’ll probably notice the stark contrast in colour too. I haven’t coloured my hair for a few months over the summer (just no point!). So all the colour has been sun bleached  out and this is the nearest I’ve been to my natural colour for some years (ahem, grey included! You can’t see it in these pics, but it’s there!)….

Anway, back to the Hemlock Tee. Seriously, what’s not to love about this pattern?! It’s quick, easy, FREE, and it chimes perfectly with my hankering for some slouchy, comfy tops for Autumn. In fact, if you saw my previous post you may have noticed it is almost identical to one of the inspiration pics I posted there…

I made some slight changes. I omitted the neckline band the pattern calls for and simply rolled the neckline under and narrow hemmed it. (Same with the hem and cuffs) I cut the ubiquitous high low hem, and added a patch pocket. I don’t have an overlocker so the whole thing was sewn on my standard sewing machine. As this fabric doesn’t fray there was no need for me to finish the raw edges. (I was going for quick rather than thorough 😉 Similarly, this is quite a stable knit; so neither did I have to employ any special stitches. I used a standard straight stitch on all seams and hems; and simply held the fabric under a small amount of tension (in other words I stretched it slightly) as it fed through my machine, and that seems to have done the job beautifully!

I spent so long avoiding knits.  (Probably because my first attempt to sew jersey on my machine involved a cheap low quality jersey and a hungry feed dog….)
I thought they were preserve of sergers, but apparently not! Yes a serger provides a better finish, but I think as long as you choose a relatively stable, good quality jersey, they’re not the “be all and end all” of sewing with knits by any means…


free pattern download, Freebies, hemlock tee, Inspiration

Inspiration: Slouchy tops for Autumn/Winter

09/05/13

Now the school holidays are over (It was Elliott’s first day at primary school this week, sigh….) my thoughts can finally begin to return to my sewing plans. Namely my Autumn/Winter sewing plans; although it’s been such a scorcher this week it’s verging on ridiculous to even contemplate it. But I have it on BBC authority that the weather is on the turn and, first thing this morning, there was a different kind of feel in the air. A definite and distinctive whiff of autumn. I’ll let you in on a little secret….to me it was a very welcome whiff. Autumn is my favourite season of them all; and right now I feel the need to celebrate it’s imminent arrival with some new, slouchy and comfy tops for the cooler weather.

Here’s what I’m thinking….

I have a drawer full of skinnified jeans in various hues. So I’m good to go for Autumn on that front. But I need me some more tops and have either refashions or fabric in mind for at least half a dozen of the styles above. (You can find all the original image sources on this Pinterest board). And I’ve found the perfect jumping off point for a whole slew of slouchy tops….

Grainline’s FREE Hemlock Tee Pattern!  I’ve already utilised this in two new makes, (pics to follow) and undoubtedly there will be more! It’s a great little pattern. Quick and easy and very generous of Jen to share it. I’d definately recommend it. And don’t be put off if you don’t have a serger….neither do I 🙂

Portia
Follow
Sewbox

© Copyright 2026. Portia Lawrie. All Rights Reserved. Managed by WordPress Web Dev Cornwall .