• About
    • Contact
    • Press
    • Sponsor
  • DIY
    • Home & Garden
    • Jewellery & Accessories
    • Yarn Crafts
  • Sewing
    • patternless & self drafted
    • Refashions
    • Commercial Patterns
    • Sewing Tips
    • Overlockers
  • The Refashioners

Portia Lawrie

DIY, Dressmaking, fabric, finished garments, free pattern download, Freebies, grainline, hemlock tee, how to, knits, minerva, overlocker, serger, Sewing, sewing patterns, Tips and Tricks, tops, Tutorials, Uncategorized

Hemlock Tee: How to Sew a Deconstructed Jersey Neckline Finish

07/24/15

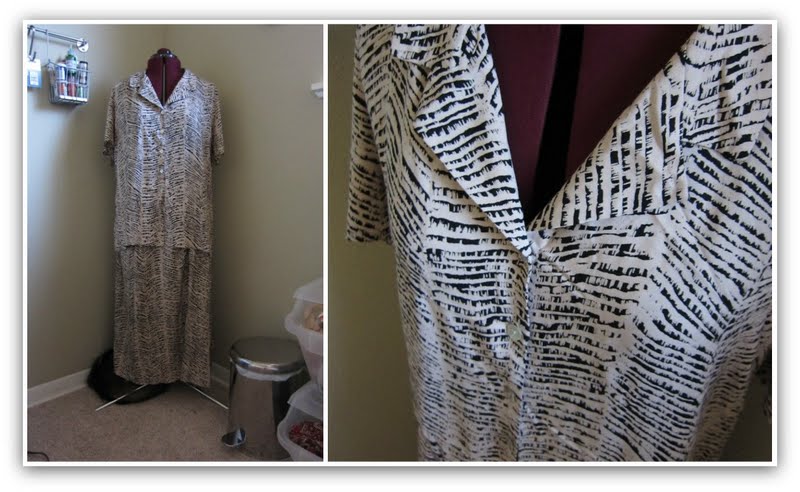
Not really a secret that I love the Hemlock Tee pattern from Grainline Studio. If you follow me on Instagram you’ll have seen a few of these pop up recently that haven’t yet been blogged. One you will have seen in my previous post. This one is just a simple grey jersey…DECONSTRUCTED JERSEY NECKLINE FINISH

This would not be particularly noteworthy apart from the fact I wanted to let you know this jersey from Minerva Crafts is frikkin gorgeous! So soft. So drapey. Not too flimsy. Need more in my life!

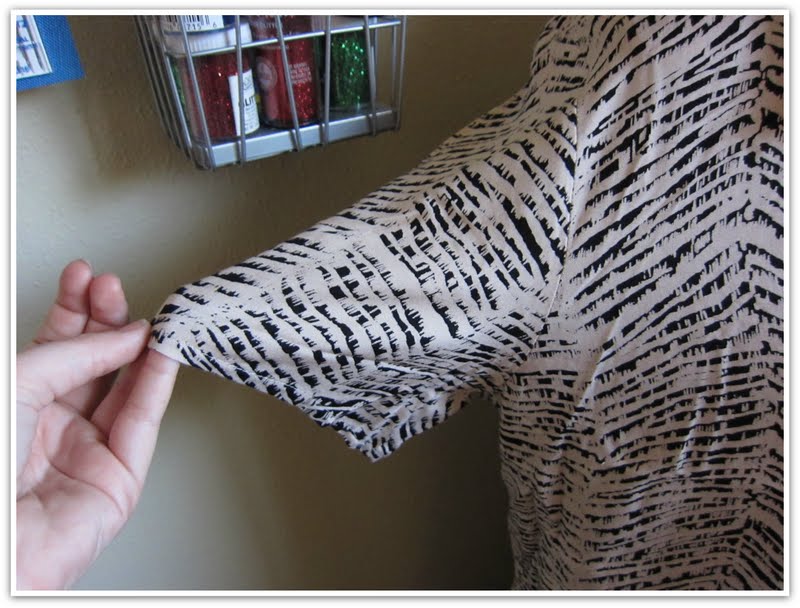
I also wanted to share my favourite jersey neckline finish of the moment! I’m not a massive fan of conventional ribbed neck bands . I like my tees to look a little more deconstructed and I really like the raw edge of jersey fabric. The way it curls  when you stretch it! But obviously  a neckline still needs some stability. So recently I’ve been opting for this neckline finish…DECONSTRUCTED JERSEY NECKLINE FINISH

It’s applied in exactly the same way as the pattern describes, with one exception. Instead of the folded edge of the neck band edging your neckline…you flip the band the other way round before applying it,  and have the raw edge exposed instead!

Here’s a quick step by step. If you’ve never applied a jersey neckband before you may also find this useful as it covers the whole process…at least this is how I do it!DECONSTRUCTED JERSEY NECKLINE FINISH

Take your neckband pattern piece and press it with some spray starch (helps stop the edges curling too much as you work); sew together the ends to form a loop then fold in half.

DECONSTRUCTED JERSEY NECKLINE FINISH

Taking the join as your centre back marker, mark your centre front point using a pin. Do this by folding the band in half with the join smack band in the middle. Mark the CF point with a pin on the opposite side.

DECONSTRUCTED JERSEY NECKLINE FINISH

Mark the sides with of the neckband with a pin too..

Have your tee right side out…DECONSTRUCTED JERSEY NECKLINE FINISH

Pin the CF of your neckband to the CF of your neckline. I’m going for that raw edge finish on mine remember. So I’m lining up the folded edge of my neckband with the raw edge of my neckline. If you want the clean/folded edge finish to your neckline, then line up the raw edges of your neck band with the raw edge of your neckline. Savvy?

DECONSTRUCTED JERSEY NECKLINE FINISH

Pin the sides of your neck band to your shoulder seams and the CB of your neck band to the  CB of your neckline. So your neckband is now pinned at both shoulders seams, the BB, and the CF of the right side of your neckline.

DECONSTRUCTED JERSEY NECKLINE FINISH

Serge to join. I work in 1/4 sections at a time. ie from pin to pin. Hold the layers of fabric under just enough tension for the neckband to match the length of the neckline. It will be drafted ever so slightly smaller than the neckline circumference which enables it to naturally want to turn to the inside .  So pull on it juuuust enough as it runs through the serger, but be careful not to stretch it out.

DECONSTRUCTED JERSEY NECKLINE FINISH

Press! Seam allowance/serged edge downwards…

DECONSTRUCTED JERSEY NECKLINE FINISH

Top/Edge stitch around the neckline to secure the seam allowance. So you now have a finished neckline with a raw edge detail (or if you attached the band the other way, a finished neckline with a clean folded edge!). If you want it a bit narrower you can start with a narrower band in the first place OR trim it down at this stage….

DECONSTRUCTED JERSEY NECKLINE FINISH

Make a notch/snip to the depth you want…

DECONSTRUCTED JERSEY NECKLINE FINISH

And trim!

DECONSTRUCTED JERSEY NECKLINE FINISH

I went even narrower on this one and part of me wishes I’d  restrained myself a little, lol! After laundering, the edges will soften, and depending on how long you’ve left them, (ahem) curl a little too.

You might ask what the point is in lining up the folded edge of the band with the raw edge of the neckline in the first place. You could just attach the band as normal, trim, and you still end up with a raw edge. I just prefer to do it this way because I find it easier to line up a folded edge with one raw edge, than it is to align 3 raw edges; and I find the inside finish cleaner this way too. Either way would work and it’s one of those cases of personal preference.

I’ve done a variation with a twist  of this on the hemlock in my previous post. The one I’ve yet to blog about! Then there’s one more that I’ve made; (and two more that I’m about to make). Plus my first stab at Suzy Pants and 3 completed Maya variations that are also unblogged!

I literally have too many blog posts to squeeze in before the launch of The Refashioners 2015.

Oh yeah, and I ought to refashion a shirt too, gasp!!

bow tie, DIY, Elephant in my Handbag, free pattern download, Freebies, Giveaways, how to, mens, Sewing, Tutorials

DIY: Bow Tie (tutorial + free pdf pattern + a giveaway!!)…

11/12/13


Now, look…I hate to be the first to mention it. You know what I’m referring to. “That” time of year that is fast approaching. I can’t quite bring myself to say “that” word yet. It’s far too soon. So lets just talk about gifts. Nuff said? Nuff said! If like me you like to give the occasional handmade gift, you’ll probably find  it relatively easy to come up with something for a female friend/relative. But blokes?? Well, that’s a little trickier I find. They’re trickier to buy for and definitely trickier to “make” for, as a rule.  Ah but hang on a minute! Bow ties look set to stick around for a while, so if your man is game enough to wear one, how about whipping up a cute little number to pop in his C*****mas stocking? They’re super quick to make and you can easily squeeze one of these out of a fat quarter or indeed a modest size remnant. So a great way to stash bust too. Bonus!

You’ll need a light weight fabric. (I used about 2/3 of a fat quarter) Mine came from the Riley & Blake Range from Elephant in My Handbag. This moustache print makes for a perfect, quirky take on a classic bow tie. You’ll need to interface your fabric with a lightweight fusible interfacing; then print off and assemble the free pdf pattern (link at the bottom of this post). I cut mine from card to enable me to trace around it rather that pin it on the fabric….

Once the reverse of your fabric has been interfaced, trace 4 pattern pieces directly onto the interfacing. 2 in one direction, 2 in the other. (eg 2 with the fat end to the left, 2 with the fat end to the right), to ensure the pattern lines up when you come to join your pieces. Of course this is because I was working with a FQ and therefore didn’t have the width to cut on the fold. But with a larger piece of fabric you could cut on the fold so you end up with 2 complete pieces (as opposed to 4 pieces that need joining) and skip the next  step…

RS together, stitch the skinny ends together with 1/4″ seam allowance. Press the stitching line then press seam allowances open…you’ll now have 2 bow tie pieces. Front & back…

RS together again, stitch the 2 pieces together with a 1/4″ seam allowance. Leave approxa 3″ gap for turning…

Trim seam allowance by about half. Snip corners and notch all curves…

Use a knitting needle to turn the tie through on itself…

Once turned through it will look a little like this. Some serious pressing required!

I used my chunky wooden knitting need as a kind of pressing aid to press all the seams around the outside of the tie…

Then pressed the hell out of it!

Whip stitch the opening closed…

Et voila!!

Now all you need to learn is how to tie the thing! There are loads of tutorials out there. Mine is technically tied incorrectly. At some point I’ll get around to learning how to tie it properly, but this pic adequately conveys the finished tie for now!

You can download the free PDF pattern here! Make sure you print with no scaling/actual size. When it comes to sizing your bow tie pattern, you’ll need to know the neck size of the person you are making for. You can lengthen or shorten “piece B” before joining it to “piece A” to get the correct length of tie…


Now as it happens, I have a couple of spare FQ’s left over. “Moustaches on White” by Riley Blake (the multi coloured one in the pic) and “Moustaches/Beards on Cream” (The bottom one in the pic) from the Manscaping range by Michael Miller. So essentially I have two FQ’s to giveaway to two lucky peops! To be in with a chance of winning simply go to Elephant in My Handbag, have a mooch, then leave a comment below sharing your fave fabric (and if you like, what you would make with it!) Giveaway is open worldwide and closes for entries on Sunday 17th Nov at midnight (GMT).…


free pattern download, Freebies, hemlock tee, Inspiration

Inspiration: Slouchy tops for Autumn/Winter

09/05/13

Now the school holidays are over (It was Elliott’s first day at primary school this week, sigh….) my thoughts can finally begin to return to my sewing plans. Namely my Autumn/Winter sewing plans; although it’s been such a scorcher this week it’s verging on ridiculous to even contemplate it. But I have it on BBC authority that the weather is on the turn and, first thing this morning, there was a different kind of feel in the air. A definite and distinctive whiff of autumn. I’ll let you in on a little secret….to me it was a very welcome whiff. Autumn is my favourite season of them all; and right now I feel the need to celebrate it’s imminent arrival with some new, slouchy and comfy tops for the cooler weather.

Here’s what I’m thinking….

I have a drawer full of skinnified jeans in various hues. So I’m good to go for Autumn on that front. But I need me some more tops and have either refashions or fabric in mind for at least half a dozen of the styles above. (You can find all the original image sources on this Pinterest board). And I’ve found the perfect jumping off point for a whole slew of slouchy tops….

Grainline’s FREE Hemlock Tee Pattern!  I’ve already utilised this in two new makes, (pics to follow) and undoubtedly there will be more! It’s a great little pattern. Quick and easy and very generous of Jen to share it. I’d definately recommend it. And don’t be put off if you don’t have a serger….neither do I 🙂

Dixie DIY, DIY, free pattern download, refashioning, Restyles, the refashioners, Tutorials

The Refashioners – Dixie (Part I)

09/12/11

Hello Readers! I’m Dixie from DixieDIY.com and i’m here to share with you my new digs I made from restyling an old blouse and skirt. I’m so glad I got to be a part of The Refashioners, such a talented and skilled group of sewers and designers. Thanks Portia for including me!
Like everyone else I had no idea what to expect when my little package arrived all the way from the UK (I live in Austin, Texas). What was inside turned out to be a button down top and long faux wrap skirt. The fabric was 100% Rayon and had a cool, almost chevron stripe style print to it.

Refashion Inspiration! Don't miss out on the new upcoming series of The Refashioners at www.portialawrie.co.uk

The outfit was way too big but when you are looking for something to refashion, that could be a good thing. The more fabric you can use, the better. Now I don’t often shop at thrift stores (or charity shops as some might call them) not because I don’t want a good deal but I get easily overwhelmed with the quantity of items. That’s ok because sometimes the best restyles can be done with clothes from your own closet that you never wear anymore and need some new life. The one thing that I drew inspration from was the fabric print with the diagonal lines. Rather than deconstruct the garment and start from scratch, I decided to use the pieces of the original and adjust from there.

I used a pattern that I had lying around but never used – version b of an old simplicity pattern from the now discontinued Built By You series – Simplicity 4112. I loved the diagonal and gathered cut on the long sleeves, an interesting design detail that I’ve always wanted to make but never had the right fabric. I thought the directionality of my print would be perfect!

Refashion Inspiration! Don't miss out on the new upcoming series of The Refashioners at www.portialawrie.co.uk

To start, I cut the sleeves and side seams off the top. The front and back of the top were still attached at the shoulders.
Next I arranged my shirt tolay as flat as possible on my table and pinned my pattern’s bodice piece to the fabric. By lining up my pattern piece at the point where the shoulder and the neckline of the shirt met, i could keep the original collar and centre buttons but trim off the sides of the shirt to make it fit better. I remembered to take a mental note that the pattern piece had 5/8 seam allowances, and the shirt already had those seams sewn, and so I pinned the pattern piece accordingly.

Refashion Inspiration! Don't miss out on the new upcoming series of The Refashioners at www.portialawrie.co.uk

I had one small problem. The bottom armhole had to be lowered about an inch to accommodate the shirt’s original armhole. i made sure to make this change on the front, back and sleeve pattern pieces so they all matched. in the end this worked out fine beacause I like more room in the armpit area anyway. 😉
I did the same thing to both sides and the back, lining up pieces along the shoulder seam until I had my basic bodice. I stitched uo the sides and was ready for the sleeves!

Refashion Inspiration! Don't miss out on the new upcoming series of The Refashioners at www.portialawrie.co.uk

I was lucky that I had so much fabric in the skirt to use for my sleeves! Even then I still had do do some creative manouvering with pattern placement. when I took off the waistband and spread the skirt out it made one long rectangle, but there were several small darts and seams to contend with. I seam ripped the darts and worked around most of the seams. Luckily with the fabric design it is difficult to tell that there are seams there at all.

I sewed up the sleeves according to the pattern directions and attached them to the shirt bodice. Finally I switched over the old pearly coloured buttons for plain black ones. I would have had to get new buttons anyway beacause I needed two extra for the sleeve cuffs and I didn’t have any that matched the originals.

Refashion Inspiration! Don't miss out on the new upcoming series of The Refashioners at www.portialawrie.co.uk

Ta da!! One nice new (fitted) button down shirt appropriate for work or even something more casual. unfortunately I won’t get to wear this shirt for a few months because we’re currently experiencing global warming to the extreme here in Texas; but I’ll wear it often come Winter, I’m sure!

Refashion Inspiration! Don't miss out on the new upcoming series of The Refashioners at www.portialawrie.co.uk

But wait, I’m not finished yet! I still had some fabric left from the skirt. Enough to incorporate into another top….

So lookout for another post from Dixie in the next few days, this time with a FREE PATTERN DOWNLOAD especially for the occasion……! Thanks Dixie. Awesome refashion!
Px

Portia
Follow
Sewbox

© Copyright 2026. Portia Lawrie. All Rights Reserved. Managed by WordPress Web Dev Cornwall .