• About
    • Contact
    • Press
    • Sponsor
  • DIY
    • Home & Garden
    • Jewellery & Accessories
    • Yarn Crafts
  • Sewing
    • patternless & self drafted
    • Refashions
    • Commercial Patterns
    • Sewing Tips
    • Overlockers
  • The Refashioners

Portia Lawrie

Dixie DIY, DIY, refashioning, the refashioners, the refashioners 2013, Thrifting, Tutorials

The Refashioners 2013 – Dixie of Dixie DIY

06/13/13

Hey readers and refashioners! I’m so excited to be included again in this challenge. Last time I played along I got a matching button down top and shirt and others received clothing as well. This year I expected similar garments but Portia had something up her sleeve. Pillowcases! Two standard sateen pillowcases with subtle stripes.
At first I thought – well this’ll be easy. It’s basically just fabric. I can do whatever I want, but as I worked on it I realized that these pillowcases presented their own challenges. When I looked at these pillowcases I thought it was quite enough fabric for a project but I really had to be efficient with my fabric.
I knew immediately what I wanted to do. I decided to make a variation on the Grainline Scout Woven Tee and add a cross-over layered back.
 Refashion Inspiration! Don't miss out on the new upcoming series of The Refashioners at www.portialawrie.co.uk
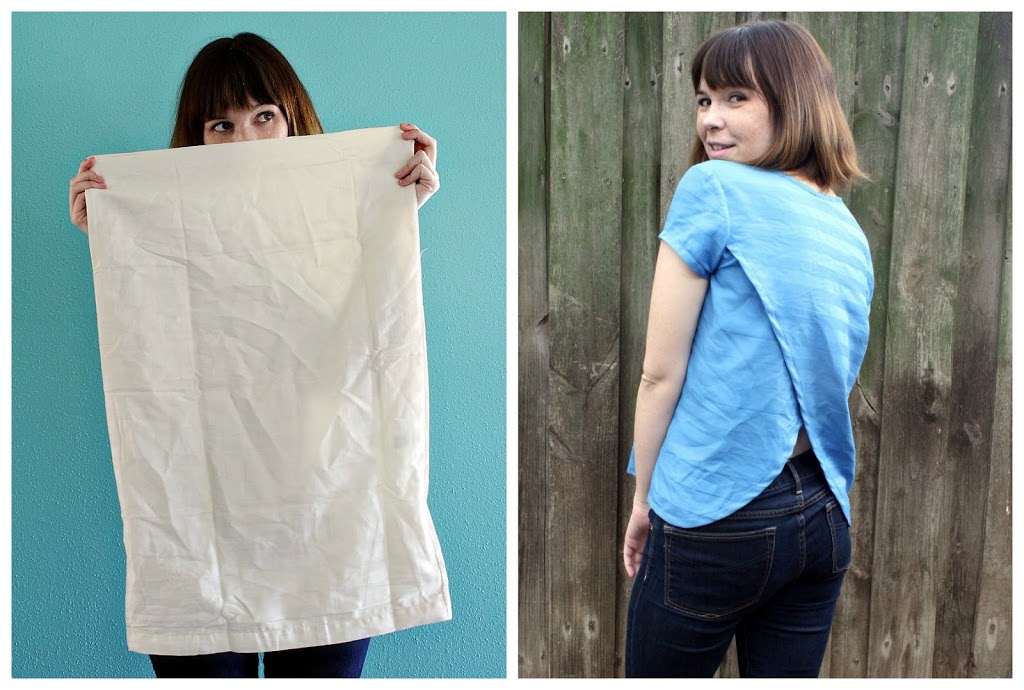
First I dyed both pillowcases in my washing machine with iDye. They came out a nice shade of blue.
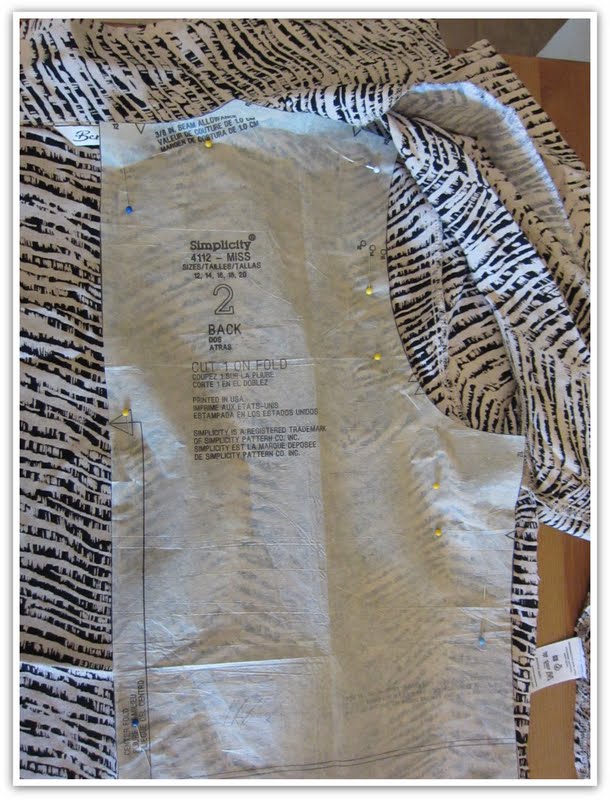
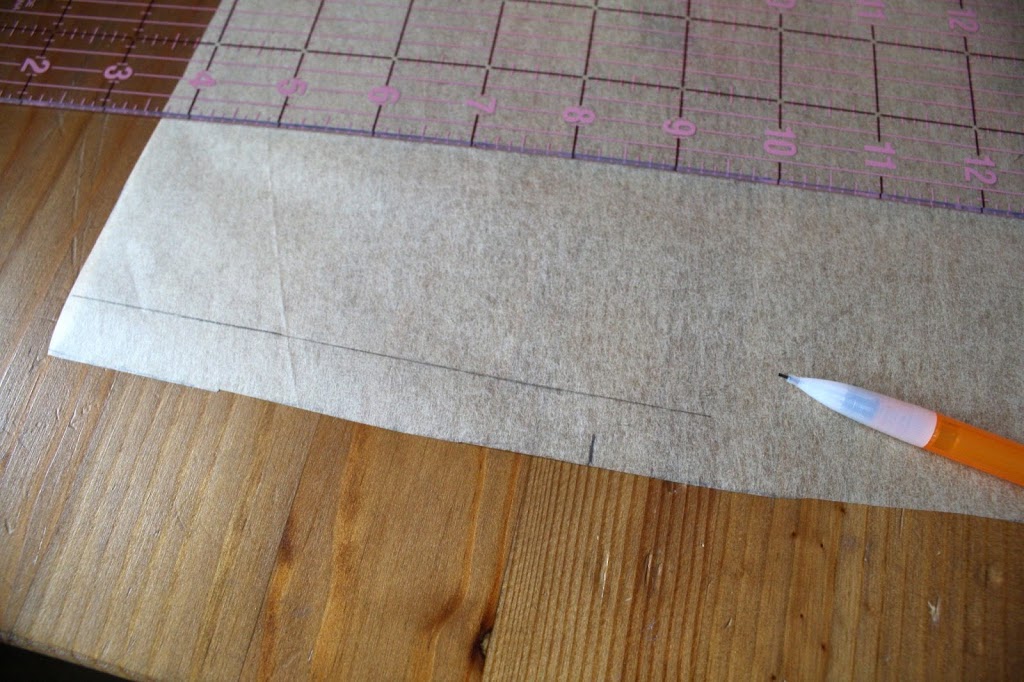
Next I worked on my pattern pieces. My front and sleeve pieces will remain the same I just need to adjust the back piece. I traced the back piece and created a full size piece.
Refashion Inspiration! Don't miss out on the new upcoming series of The Refashioners at www.portialawrie.co.uk
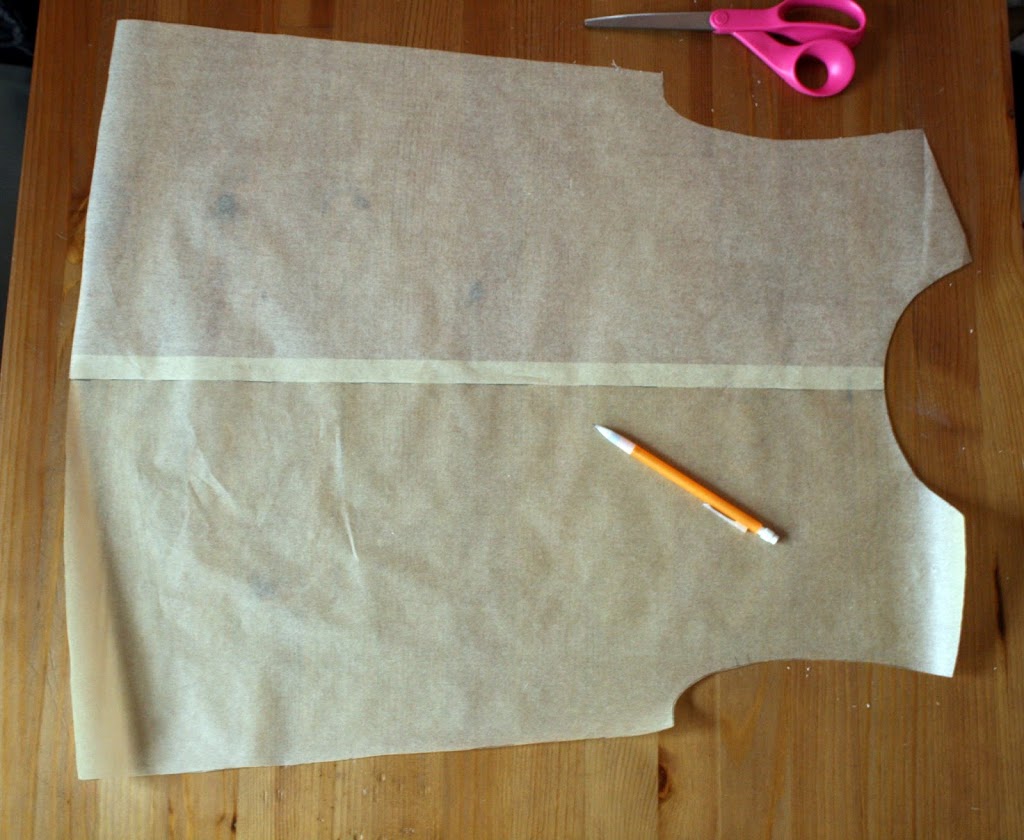
Then I measured about 5″ in from the side seam, made a mark and drew in the stitching line.
 Refashion Inspiration! Don't miss out on the new upcoming series of The Refashioners at www.portialawrie.co.uk
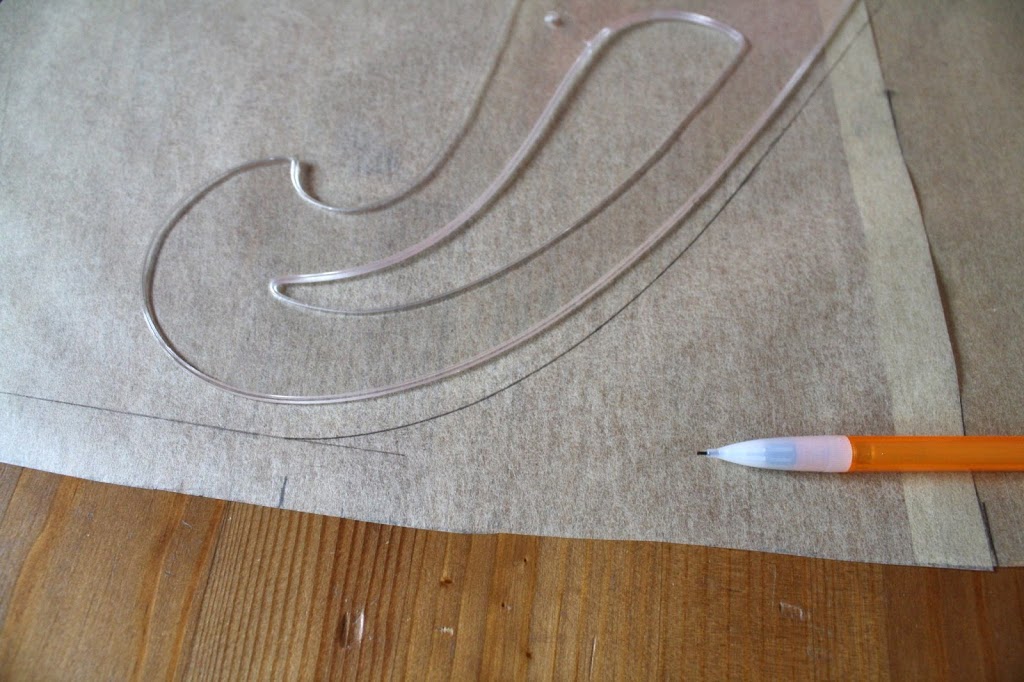
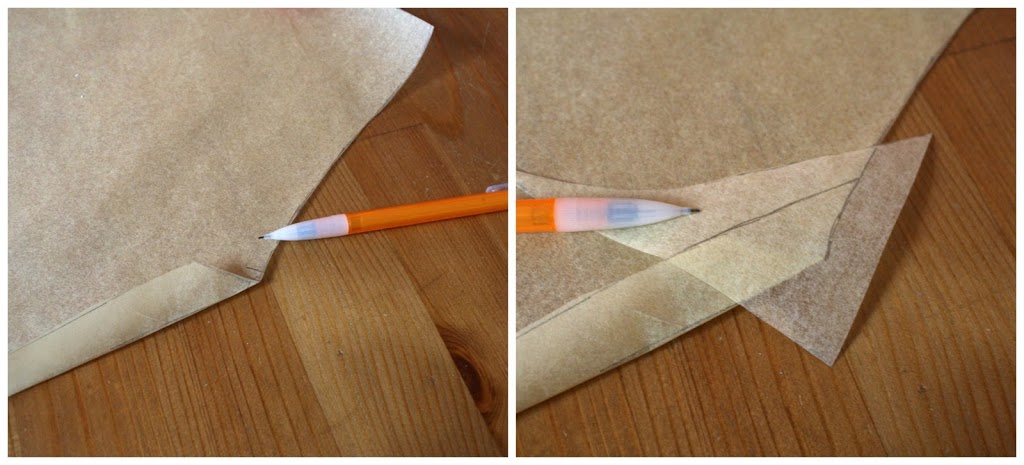
After that I decided I wanted my overlapping pieces to connect at the armcye. The sleeve cap markings make an easy match point.
Refashion Inspiration! Don't miss out on the new upcoming series of The Refashioners at www.portialawrie.co.uk
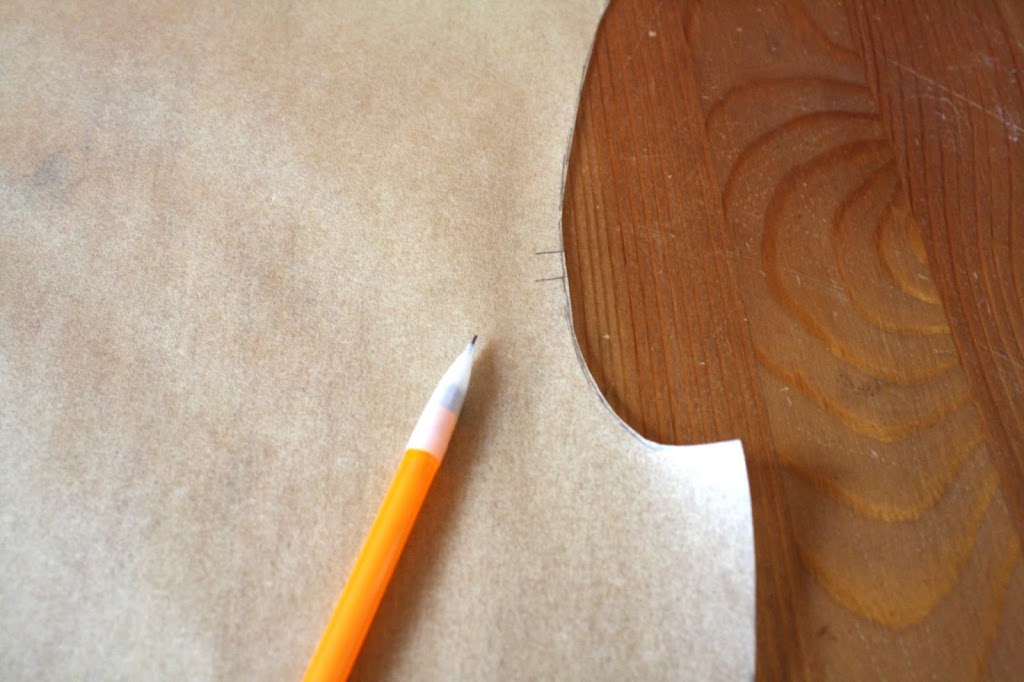
Now I connect the point at the hem to the armcye point using a french curve. This will be my stitching line.
 Refashion Inspiration! Don't miss out on the new upcoming series of The Refashioners at www.portialawrie.co.uk
From there I measured and drew new seam allowances.
 Refashion Inspiration! Don't miss out on the new upcoming series of The Refashioners at www.portialawrie.co.uk
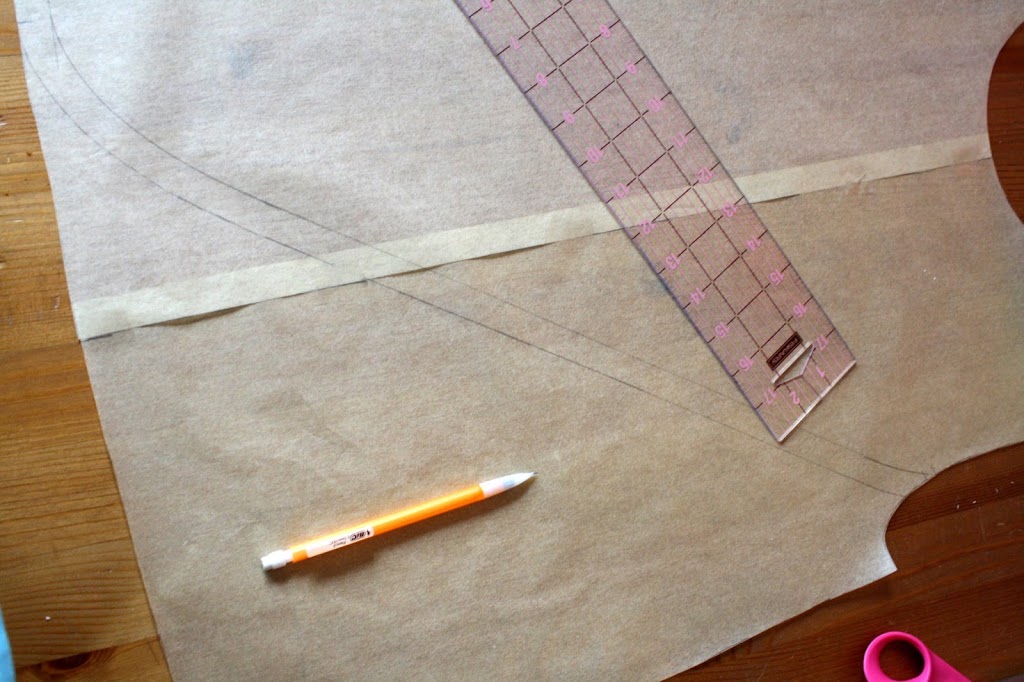
After I cut off the excess from the pattern piece I folded the seam allowance under. At the top I noticed there’s a gap from the armscye edge and the seam allowance so I used a scrap piece of paper that I taped to the seam allowance and drew a connecting section.
Refashion Inspiration! Don't miss out on the new upcoming series of The Refashioners at www.portialawrie.co.uk
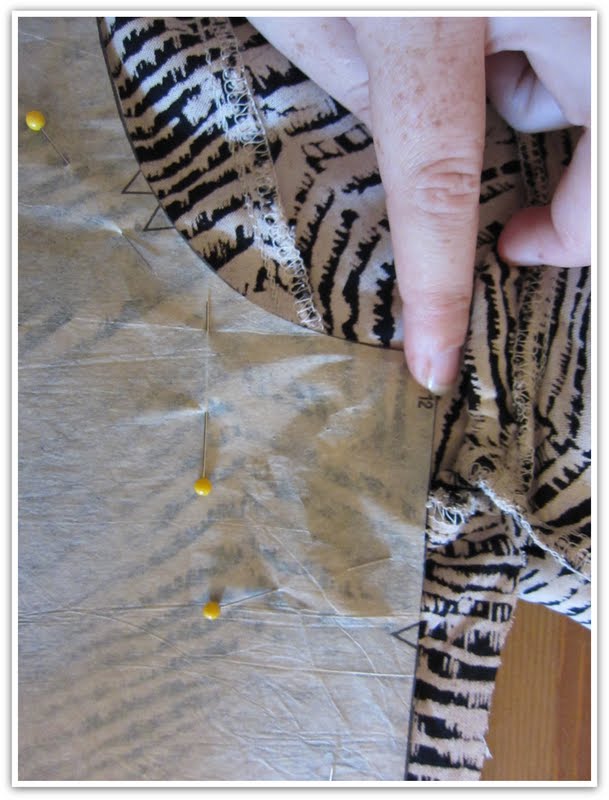
Now I’m ready to cut. This new larger back piece justbarelyfit on one pillow case. I squeezed out as much room as I could.
 Refashion Inspiration! Don't miss out on the new upcoming series of The Refashioners at www.portialawrie.co.uk
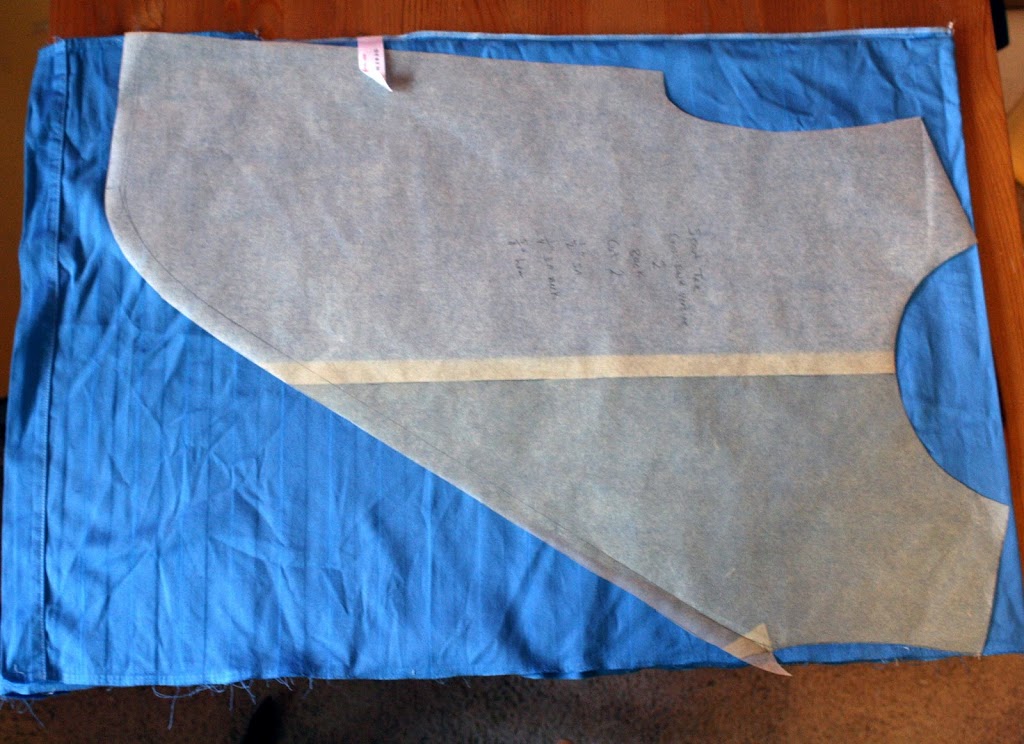
For the sleeves there was just enough room down where the pillowcase opened to cut out a piece. I cut the second sleeve from the other pillowcase.
The other pillowcase was too narrow to fit a full size front piece so I cut the front with a center seam, making sure to match the side seam stripes. Unfortunately whoever sewed these pillowcases wasn’t so careful. I had to seam-rip and re-sew the front seam to match the stripes. Even so, I accidentally sewed the stripes off by one. Oops. But it’s nothing that normal people would notice. These stripes are made by alternating the weave, they’re not printed so they’re not very noticeable.
To assemble I sewed the bodice side seams then stitched the hem. You have to hem it before you attach the sleeves. I matched the back armcyes and basted the layers together.
The rest is easy. I just assembled everything following the normal pattern instructions.
Refashion Inspiration! Don't miss out on the new upcoming series of The Refashioners at www.portialawrie.co.uk
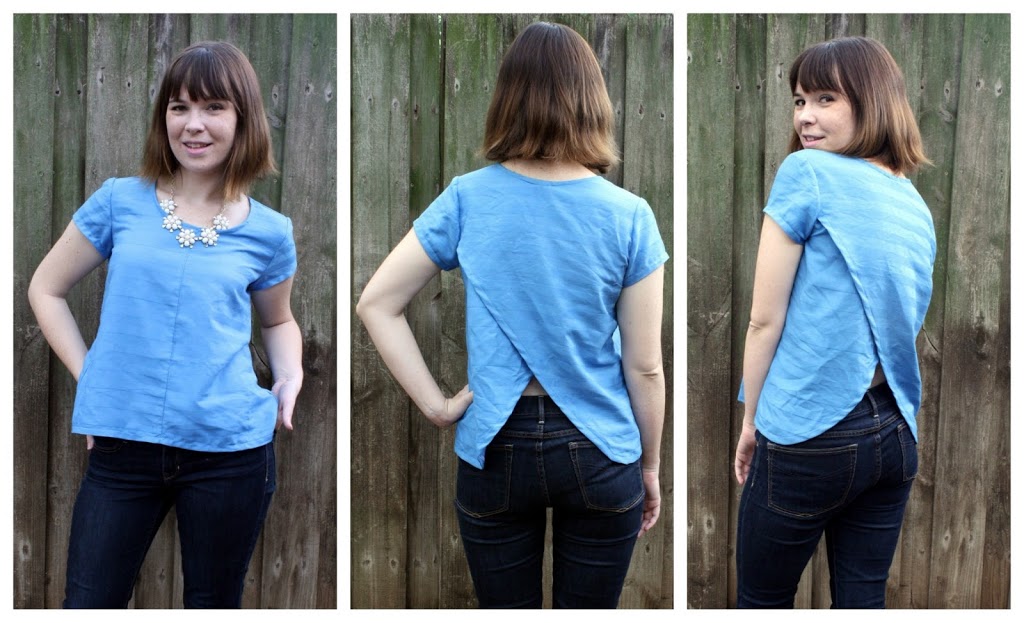
The look is pretty cool and it’s a simple pattern alteration if you want to try it at home – so long as you have enough fabric. 😉
Thanks Portia so much for including me again! I loved receiving my package wondering what was going to be inside. I often refashion clothes in my own wardrobe but I tend to get overwhelmed going to thrift shops so having someone else do the dirty work for me and I just get to be creative is pretty fun. 😉
Dixie of Dixie DIY
I am sooooo doing this! I’ve been pondering the Scout Woven Tee for a while but I think this has just sealed the deal for me! Who’d have thought you could turn 2 standard pillowcases into a cute, edgy top like this? I sent Joanne and Dixie a pair of pillowcases each; and as a result we have 2 very different takes from the same starting point. Interesting, no?! 
Just the act of dyeing these pillowcases has transformed them and brought out the woven stripe, which is a great touch. I love garments where the “business” is all going on at the back and plain in front. It gives an unexpected twist 😉
Brilliant Dixie!!
Dixie DIY, DIY, free pattern download, refashioning, Restyles, the refashioners, Tutorials

The Refashioners – Dixie (Part I)

09/12/11

Hello Readers! I’m Dixie from DixieDIY.com and i’m here to share with you my new digs I made from restyling an old blouse and skirt. I’m so glad I got to be a part of The Refashioners, such a talented and skilled group of sewers and designers. Thanks Portia for including me!
Like everyone else I had no idea what to expect when my little package arrived all the way from the UK (I live in Austin, Texas). What was inside turned out to be a button down top and long faux wrap skirt. The fabric was 100% Rayon and had a cool, almost chevron stripe style print to it.

Refashion Inspiration! Don't miss out on the new upcoming series of The Refashioners at www.portialawrie.co.uk

The outfit was way too big but when you are looking for something to refashion, that could be a good thing. The more fabric you can use, the better. Now I don’t often shop at thrift stores (or charity shops as some might call them) not because I don’t want a good deal but I get easily overwhelmed with the quantity of items. That’s ok because sometimes the best restyles can be done with clothes from your own closet that you never wear anymore and need some new life. The one thing that I drew inspration from was the fabric print with the diagonal lines. Rather than deconstruct the garment and start from scratch, I decided to use the pieces of the original and adjust from there.

I used a pattern that I had lying around but never used – version b of an old simplicity pattern from the now discontinued Built By You series – Simplicity 4112. I loved the diagonal and gathered cut on the long sleeves, an interesting design detail that I’ve always wanted to make but never had the right fabric. I thought the directionality of my print would be perfect!

Refashion Inspiration! Don't miss out on the new upcoming series of The Refashioners at www.portialawrie.co.uk

To start, I cut the sleeves and side seams off the top. The front and back of the top were still attached at the shoulders.
Next I arranged my shirt tolay as flat as possible on my table and pinned my pattern’s bodice piece to the fabric. By lining up my pattern piece at the point where the shoulder and the neckline of the shirt met, i could keep the original collar and centre buttons but trim off the sides of the shirt to make it fit better. I remembered to take a mental note that the pattern piece had 5/8 seam allowances, and the shirt already had those seams sewn, and so I pinned the pattern piece accordingly.

Refashion Inspiration! Don't miss out on the new upcoming series of The Refashioners at www.portialawrie.co.uk

I had one small problem. The bottom armhole had to be lowered about an inch to accommodate the shirt’s original armhole. i made sure to make this change on the front, back and sleeve pattern pieces so they all matched. in the end this worked out fine beacause I like more room in the armpit area anyway. 😉
I did the same thing to both sides and the back, lining up pieces along the shoulder seam until I had my basic bodice. I stitched uo the sides and was ready for the sleeves!

Refashion Inspiration! Don't miss out on the new upcoming series of The Refashioners at www.portialawrie.co.uk

I was lucky that I had so much fabric in the skirt to use for my sleeves! Even then I still had do do some creative manouvering with pattern placement. when I took off the waistband and spread the skirt out it made one long rectangle, but there were several small darts and seams to contend with. I seam ripped the darts and worked around most of the seams. Luckily with the fabric design it is difficult to tell that there are seams there at all.

I sewed up the sleeves according to the pattern directions and attached them to the shirt bodice. Finally I switched over the old pearly coloured buttons for plain black ones. I would have had to get new buttons anyway beacause I needed two extra for the sleeve cuffs and I didn’t have any that matched the originals.

Refashion Inspiration! Don't miss out on the new upcoming series of The Refashioners at www.portialawrie.co.uk

Ta da!! One nice new (fitted) button down shirt appropriate for work or even something more casual. unfortunately I won’t get to wear this shirt for a few months because we’re currently experiencing global warming to the extreme here in Texas; but I’ll wear it often come Winter, I’m sure!

Refashion Inspiration! Don't miss out on the new upcoming series of The Refashioners at www.portialawrie.co.uk

But wait, I’m not finished yet! I still had some fabric left from the skirt. Enough to incorporate into another top….

So lookout for another post from Dixie in the next few days, this time with a FREE PATTERN DOWNLOAD especially for the occasion……! Thanks Dixie. Awesome refashion!
Px

Portia
Follow
Sewbox

© Copyright 2026. Portia Lawrie. All Rights Reserved. Managed by WordPress Web Dev Cornwall .