• About
    • Contact
    • Press
    • Sponsor
  • DIY
    • Home & Garden
    • Jewellery & Accessories
    • Yarn Crafts
  • Sewing
    • patternless & self drafted
    • Refashions
    • Commercial Patterns
    • Sewing Tips
    • Overlockers
  • The Refashioners

Portia Lawrie

Recipes, The Little Tornado

The Perfect Basic Cookie Recipe….

10/29/14

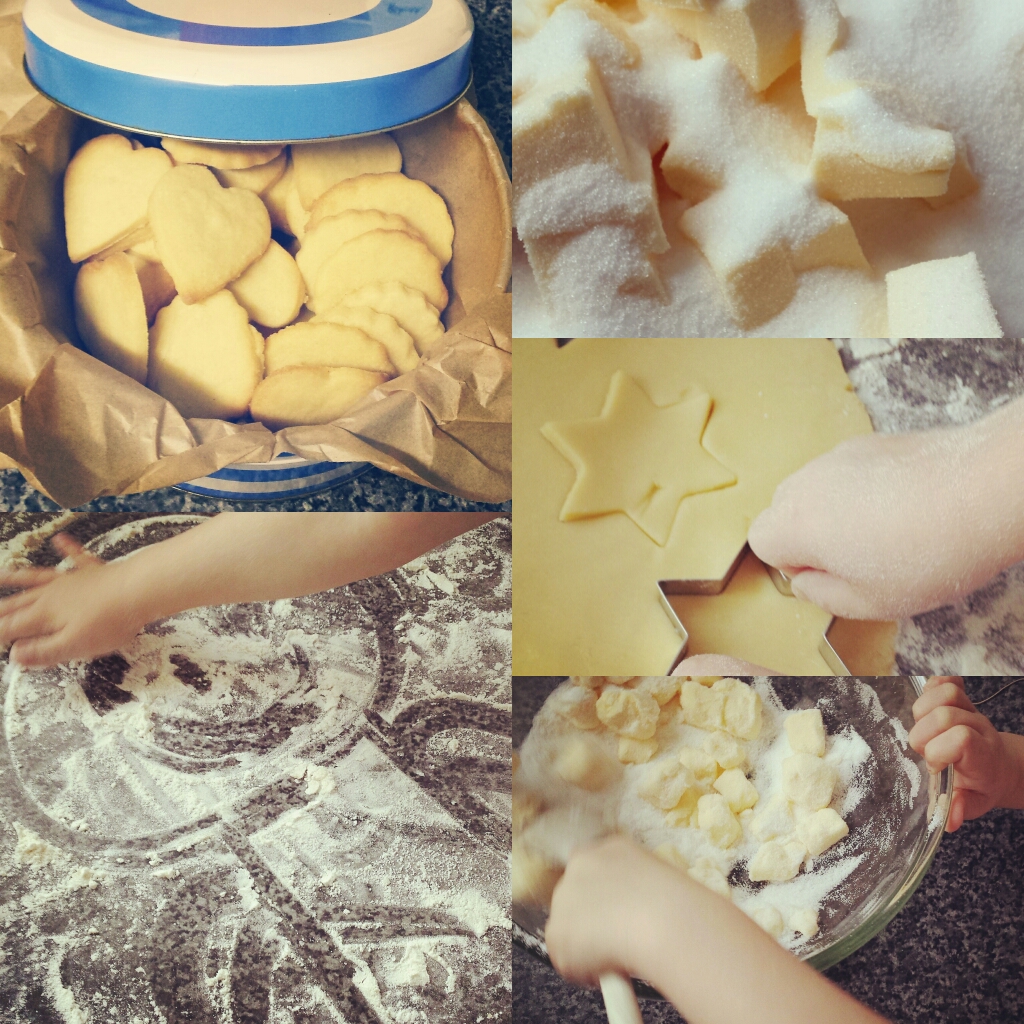
Sunday just past, felt like the first proper family Sunday we’ve had in our new home, in fact, for longer than that. I ended up not sitting down pretty much all day, because I wanted to squeeze as much out of it as possible. I mowed the lawn, put away the laundry that had sat there for two days, cooked brunch (the boys cleared up! Yay!), had some one to one time with the Little Tornado baking cookies (messy!!) and rustled up a beef and ale stew with giant Yorkshire puds for tea. Nom!

Elliott had a blast making these. Hilariously he hated getting his hands in there with the “sticky stuff”. So we settled for putting him in charge of flour and cutting out. He was visibly proud of himself when he tasted his cookies. Simple, delicious and very very moreish! I’m not really a baker. So I asked an acquaintance who is, for a simple, easy and delicious recipe for a basic biscuit/dough. Boy did he deliver! These have a lovely buttery melt in the mouth texture. Recipe below…

Basic Biscuit Dough

Ingredients
250g Butter
150g Caster Sugar
1 Egg Yolk
2tsp Vanilla Extraxt
300g Plain Flour

Method

  • Cream together the butter and sugar
  • Add the egg yolk and vanilla extract and combine well
  • Add the flour and mix to form a dough.
  • Roll out on a floured surface and cut out desired shapes
  • Place on a baking sheet covered in greaseproof paper. (These spread a little so leave space)
  • Bake each batch for approx 10-12mins in a pre heated oven at 180-200 degrees F.
  • Allow to cool/harden slightly on baking sheet for 5mins before transferring to a cooling rack
Enjoy!
DIY, elderflower, foraging, Recipes, Tutorials

A Bit of Summer Fizz….How to make Elderflower Champagne

06/28/12

I missed out on making this delicious fizz last year. Gutted? Just a bit! Seriously peops. If you haven’t tried this before then you’re missing out! This is the most delicious summer tipple you will have ever tasted. Scouts honour.

The flowers of the Elder tree can go from being white and creamy (ie perfect for making champagne) to brown within a few days. Last year it happened so early (due to a heatwave in April) and quickly, that it caught me on the hop and I totally missed my chance. So I was determined not to miss out again this year.  The recent weather had nearly scuppered my chances again. The elderflower blooms in my neck of the woods are on the turn already and the persistent strong winds have blown alot of the delicate flowers from the trees already. So there were slim pickings today but I managed to get enough (I think) to make a good size batch of the stuff this afternoon.
So, if you live in an area where these blooms are still plentiful on the trees (depending on how far North you live in the UK you could still have some well into July but you may need to be quick if you’re down south), then here’s what you need (these quantities can obviously be downscaled or upscaled according to the amount you wish to make)…

  • 8 Large Elderflower heads (freshly picked, preferably on a sunny morning when they are at their most fragrant)
  • 4 Lemons (unwaxed is better)
  • 1.5 kg White Granulated Sugar
  • 4 tbsp White Wine or Cider Vinegar
  • 5 litres of Boiling Water

The method couldn’t be much more straight forward…

  • Put the sugar and boiling water in a sterilised plastic bucket (I use Milton or homebrew sterilising powder to sterilise). Stir to dissolve the sugar and leave to cool.
  • Meanwhile, shake the flower heads to dislodge any bugs. Remove flowers from the main stalk. (Doesn’t matter about the tiniest parts of stalk that the flowers are actually  attached to. Just remove as much as poss)
  • Slice the lemons (I grated some of the rind and squeezed some of the juice for good measure too)
  • Once your sugar solution has cooled to hand hot, add the flowers, lemons and cider vinegar.
  • Stir and cover with a clean tea towel then leave for a few days, stirring once a day.
  • After a few days, strain the mixture through a sterile cloth (muslin is good), pour into sterile bottles (see below) and seal. Leave in a cool, dry place for at least a fortnight before drinking. The longer the better. We had a bottle a full 18 months later and it was even more beautiful for the wait.
 
A few words on bottling…
The high level of natural yeast present in the flowers will react with the sugar to start fermentation. It’s worth bearing this process in mind. One, because it means the finished drink is slightly alcoholic (cheers!) Two, because when you come to bottle it you will need to decide if you use glass or plastic bottles, because these babies can have a habit of exploding! It’s not happened to me personally but I have read alot on the forums about it. So it’s worth doing your research. (Just google “exploding elderflower”!) However, I suspect the reason I had no such problems with my last batch, was due to the length of time I left it in the bucket before bottling it. Most of the recipes you’ll find online will tell you to leave it “overnight” or for 24hrs, then bottle it. The recipe I followed for my last batch instructs you to leave it covered for 5-7 days before bottling. I suspect this is key to avoiding explosions, since the fermentation process is significantly slowed down after this time.
I really wanted to use traditional glass lemonade bottles when I last made this, and I’ll do the same when this batch is ready for bottling.  (I like to give them as gifts to family and friends) So to be extra cautious I leave a good gap at the top of each bottle when filling, to allow for a little more expansion from the remaining fermentation. I also fill a plastic squash/cordial bottle with some of the liquid. Again leaving a gap at the top. This acts as my “gauge”.  As the weeks went on it gave me a good idea of how much expansion was going on. The plastic bottle became firmer and firmer over the next few days as the gas from fermentation filled the space left in the bottle. If it had started to bulge (which thankfully it didn’t) it’d tell me that there was potentially an excess of pressure in my glass bottles and I may have had to release some of the pressure by opening the tops up, letting some of the gas out, and resealing them. This wouldn’t of course be ideal, as it would risk compromising their sterile environment. But it would be a preferable to shards of glass from exploding bottles! There would have to be an awful lot of pressure for a glass bottle to explode, but it’s best to take a few precautions anyway. Otherwise, if you’re more fussed about the fizz that the bottle it’s in, use plastic fizzy drinks bottles. But most importantly, ENJOY!!!
christmas, foraging, Recipes

A Little Christmas Tipple…..

10/04/11

Being a thrifty kinda gal, I love a good freebie. Mother nature is generous indeed and if you know where to look, when to look and what to look for…..then hedgerows, woodland and fields (so long as you’re not trespassing!!) are great sources of fruits, herbs, berries and more.  The whole foraging thing is such fun to me and an area I really want to learn more about. For instance, when it comes to wild mushrooms? I see them all the time but wouldn’t have a clue and knowing my luck I’d end up picking something hallucinogenic, or worse! Some berries can be toxic too. So I err on the side of caution for now (I have a few foraging books on my wishlist!) and stick to what I know. My favourite summer tipple is to make Elderflower champagne. OMG, if you haven’t tasted the stuff before, oh how you have missed out. It’s heavenly on a summers day and oh so simple to make. Alas, I totally missed the boat this year.

Our weird seasons this year, meant that the Elderflowers came out much earlier. There was so little sunshine (essential to release the fragrance) and they went over so quickly that I didn’t have a chance to gather my supplies and free a space in my day to make it. So, I decided instead to wait patiently for the subsequent berries to ripen and try my hand at some Elderberry Wine instead. So when my step mum was visiting at the weekend we picked these (with permission of course) from our neighbours tree. Just look at the colours……..

As luck would have it, my step mum used to be an avid winemaker so knew just the right technique to get the berries off the stalks……

Even the bare stalks are gorgeous to look at. I love this time of year for it’s stunning colour palette…

Eventually you end up with a bowl of  beautful shiny Elderberries (pick out any remaining stalk)

This is the recipe I’m following….

Elderberry Wine
There are any number of recipes for elderberry wine, but this one can be drunk either hot or cold.
Ingredients:
  • 1 kg (approx 2lb) elderberries, stripped from stems
  • 4 1/2 litres (one gallon) of water
  • 454g (1lb) of raisins
  • Pinch of ground ginger
  • Six cloves
  • 1/2 tsp of wine yeast (eg, Burgundy)
  • 150 ml (1/4 pint) of brandy
Method:
  1. Rinse the berries in cold water, and place them in a large plastic container. It’s essential to remove every last piece of stalk, which can impart a bitter taste to the wine.
  2. Boil the water, pour it over the berries and leave it to stand for 24 hours.
  3. Press the mixture through a muslin cloth.
  4. Put the juice and all the other ingredients, apart from the brandy and yeast, into a preserving pan and simmer gently for an hour, skimming when necessary.
  5. Allow the mixture to cool and, when it is lukewarm, stir in the yeast. Transfer it into a fermentation jar, top up, fit an air lock and leave to stand in the dark for two weeks.
  6. Rack off into a clean vessel and add the brandy. Then siphon off into clean, corkable wine bottles.
This wine is best if allowed to mature for a few months – so Christmas is a good time to bring it out.
It’s all “blup-blup’ing” away in the Demijohns as we speak. I shall let you know how I get on. It’s either going to be really really gorgeous…..or really really bad head inducing. We shall see..;)
Px 
chutney, DIY, gift ideas, Recipes

Autumn Marrow Chutney – Recipe inc

09/09/11

Morning friends. You’ll be happy to know I’m sure, that I have decided to embrace the changing of the seasons in a positive manner; and focus on all the lovely things this time of year has to offer. Namely chutney making! I’ve tried my hand at it before when we’ve had gluts of tomatoes. The chutney was pretty successful but I managed to demolish two of our best pans in the process. Well, as luck would have it, I managed to bag myself a proper jam making pan (large, deep, aluminium, 2 handles) on Freecycle the other week. I was beyond excited at the prospects of making some more chutney…and try my hand at jam..then it dawned on me. We’d already eaten all our homegrown tomatoes and all the fruit trees in our local area had long been plundered by birds and passers by alike…so what was I going to make it with? It was only when I was looking for ideas for what to do with this marrow (now now!! It’s a beast isn’t it? It was a gift from the staff at Elliott’s pre-school for helping to dig out and plant the new garden area during the holidays) that I stumbled upon this site and put two and two together. I can only imagine what this is going to taste like after some maturing, because let me tell you, straight from the pan, this stuff is seriously DELICIOUS!

I combined two of the recipes I found on the site (apparently you can make chutney out of pretty much anything!) and came out with this:

  • 3 lb (1.4 kg) marrow flesh
  • Salt
  • 4 small apples
  • ½ lb (225 g) sultanas (optional)
  • 1 pint (570 ml) vinegar 
  • 2 medium onions
  • 8 oz brown sugar
  • 3 tsp lazy(!) ginger
  • 2 tsp powdered paprika
  • 2tsp powdered turmeric
  • 1 tsp lazy(!) chillies

6 whole cloves

Method:
  1. Peel and cut the marrow into quarter inch cubes, removing all the seeds. Layer with salt in a bowl. Then mix well.

There’s loads!

Transfer to a colander placed over a bowl. Place a plate/pan lid or similar on top and weight down. Leave overnight.
Discard the water that comes out. (It’s mad how much actually comes out!)
Rinse thoroughly under cold running water to remove the majority of the salt
Heat vinegar, sugar and spices in a large saucepan and once simmering add the marrow, chopped onions and peeled/diced apples and sultanas if using (I didn’t add my sultanas in the end)
Bring to the boil very slowly and then simmer gently until cooked and thick. Mine took a good hour to get to this point. Then there was probably another 20 mins of constant stirring to make sure it didn’t stick as the remainder of the liquid cooked off and it looked ready for jars…
Pour into hot, clean, sterilized jars and seal at once. Label with contents when fully cooled.
Makes about 6 jars of chutney. Nom nom nom….;)
Px
Crafty Christmas Capers, DIY, Recipes, Tutorials, Weekend Wonders

Homemade Salt Dough Tree Decorations (inc Tutorial)

12/17/10

I wanted to have a go at these last year but time ran away with me! It’s such a traditional craft that puts me in mind of the autumn harvest festivals at church when I was little. But I think salt dough lends itself to all sorts of things. (Loads more info here) It’s kind of like a store cupboard Fimo!

For the Salt Dough You’ll Need: 2 cups of Plain Flour, 1 cup of Table Salt, 1 cup Water (cool but not cold). Mixing bowl, rolling pin, cookie cutters,  palette knife, baking tray, greaseproof paper, cooling rack.
You can mix up any amount of dough you like as long as you stick to this ratio. 2 parts flour to 1 part each of salt and water.

Method: Mix the flour and salt in a bowl. Make a well in the centre and pour in a little of the water and mix. Keep adding the water a little at a time, (You may not need all of the water) & mix until it starts to form a dough. Then squeeze, knead & roll in your hands until it’s a smooth, pliable ball of dough.

Lightly flour your work surface and rolling pin and roll out the dough to about 50mm thickness. Cut out shapes using cookie cutters, or freehand if you’re a bit more skilled than I am. I left the surface of my shapes plain as I’m going to paint them. But I guess at this stage you could carefully etch patterns or designs into the surface.

Carefully lift your shapes, using a palette knife, onto a baking sheet covered in greaseproof paper. (A couple of my stars got stuck because I didn’t flour my work surface properly). Punch out holes for hanging ribbons. (I used a sturdy drinking straw for this)

Bake in the oven for an hour on a low heat (say 60C) turning them over half way through. Then turn them out onto a wire rack and leave until completely cool.  Leave for another 24 hrs before painting or varnishing, which hopefully we shall be doing this weekend….

Portia
Follow
Sewbox

© Copyright 2026. Portia Lawrie. All Rights Reserved. Managed by WordPress Web Dev Cornwall .