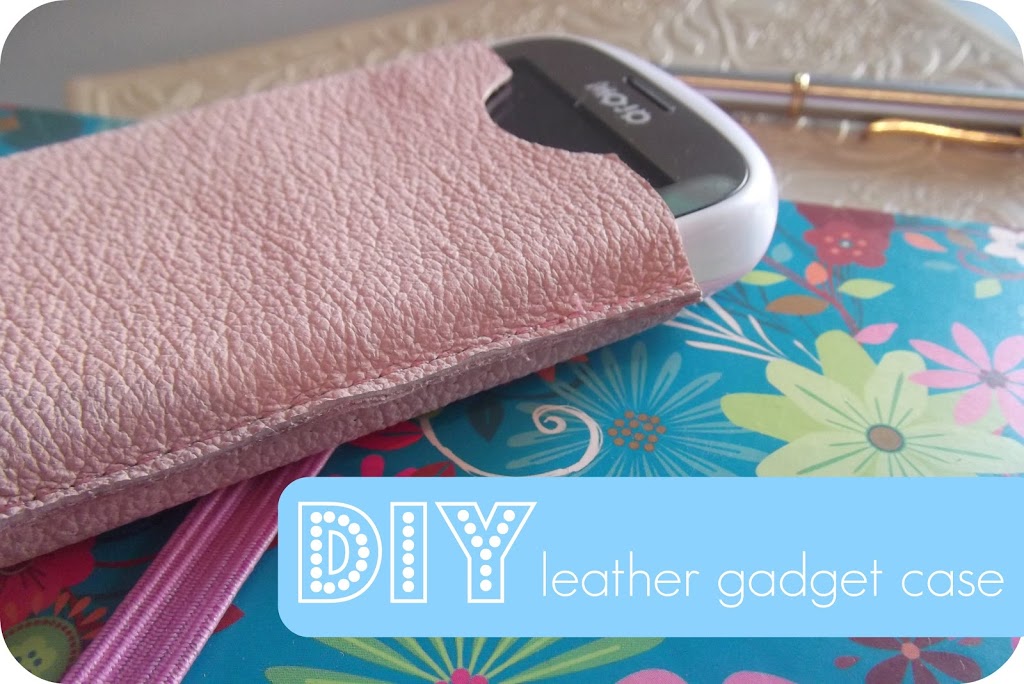
Recently I’ve been playing around with some leather and suede scraps and thought I’d share this super quick project with you. This method could be applied to any slimline tech gadget such as ipads/phones, kindles, tablets etc. (or my cheap and cheerful mobile!) The leather I’m using was harvested from a pair of 80’s pink suede trousers that I picked up from the £1 rail in my local charity shop. So you could either keep an eye out in charity shops for old leather jackets, bags etc OR leather scraps are readily available online from auction sites and craft suppliers….
The first thing I did was make a template/pattern as follows:
- Draw around your phone/gadget on paper
- Smooth out the lines using a ruler/curve so they’re nice and even and symmetrical
- Add on a seam allowance to the sides and bottom
- I used a cotton reel to draw in a little half circle in the middle of the top line to enable me to access my phone once it was in the case


Then to cut out:
- I didn’t want to use pins to fix my template to my leather scrap in case it left holes. So I stuck it down with masking tape. I seem to recall that freezer paper (?) will temporarily adhere to a surface so I guess you could make a template out of this to solve that problem.
- I then cut one piece for the back and one for the front. I left the back piece with a straight top edge and cut my little semi circle from the front piece only
- I made sure I had the right needles for the job!
- Again, I didn’t want to pin my front and back pieces so I used these mini pegs I had in my stash. Paper clips or bulldog clips would work just as well too. I pieced mine so the soft sude part was on the inside and the leather on the outside


To construct:
- Then with a longer machine stitch (test on scraps first to establish what works best) stitch all the way around the sides and the bottom. Backstitch either side of the opening to reinforce. I used a walking foot on my machine to help feed the leather through evenly. I stitched only half way into the seam allowance to allow for the depth/thickness of my phone. (If I were really accurate I would have measured the width of my phone at the start, divided by 2 and added this to the template at the start before adding the seam allowance. But I was winging it a bit!)
- Then trim close to the stitching line


Next time I make one of these, I’ll probably stay stitch the top edges to reinforce, and maybe try out a bit of embellishment…..but otherwise I’m super happy with my new phone case!

Happy Monday to you! The sun is shining and I’m a happy gal today 🙂 What are you up to?
