• About
    • Contact
    • Press
    • Sponsor
  • DIY
    • Home & Garden
    • Jewellery & Accessories
    • Yarn Crafts
  • Sewing
    • patternless & self drafted
    • Refashions
    • Commercial Patterns
    • Sewing Tips
    • Overlockers
  • The Refashioners

Portia Lawrie

DIY, endless leather, gift ideas, how to, Tutorials, Uncategorized

DIY: Leather Tassle Key Fob/Bag Charm

02/16/15

diy leather tassle header

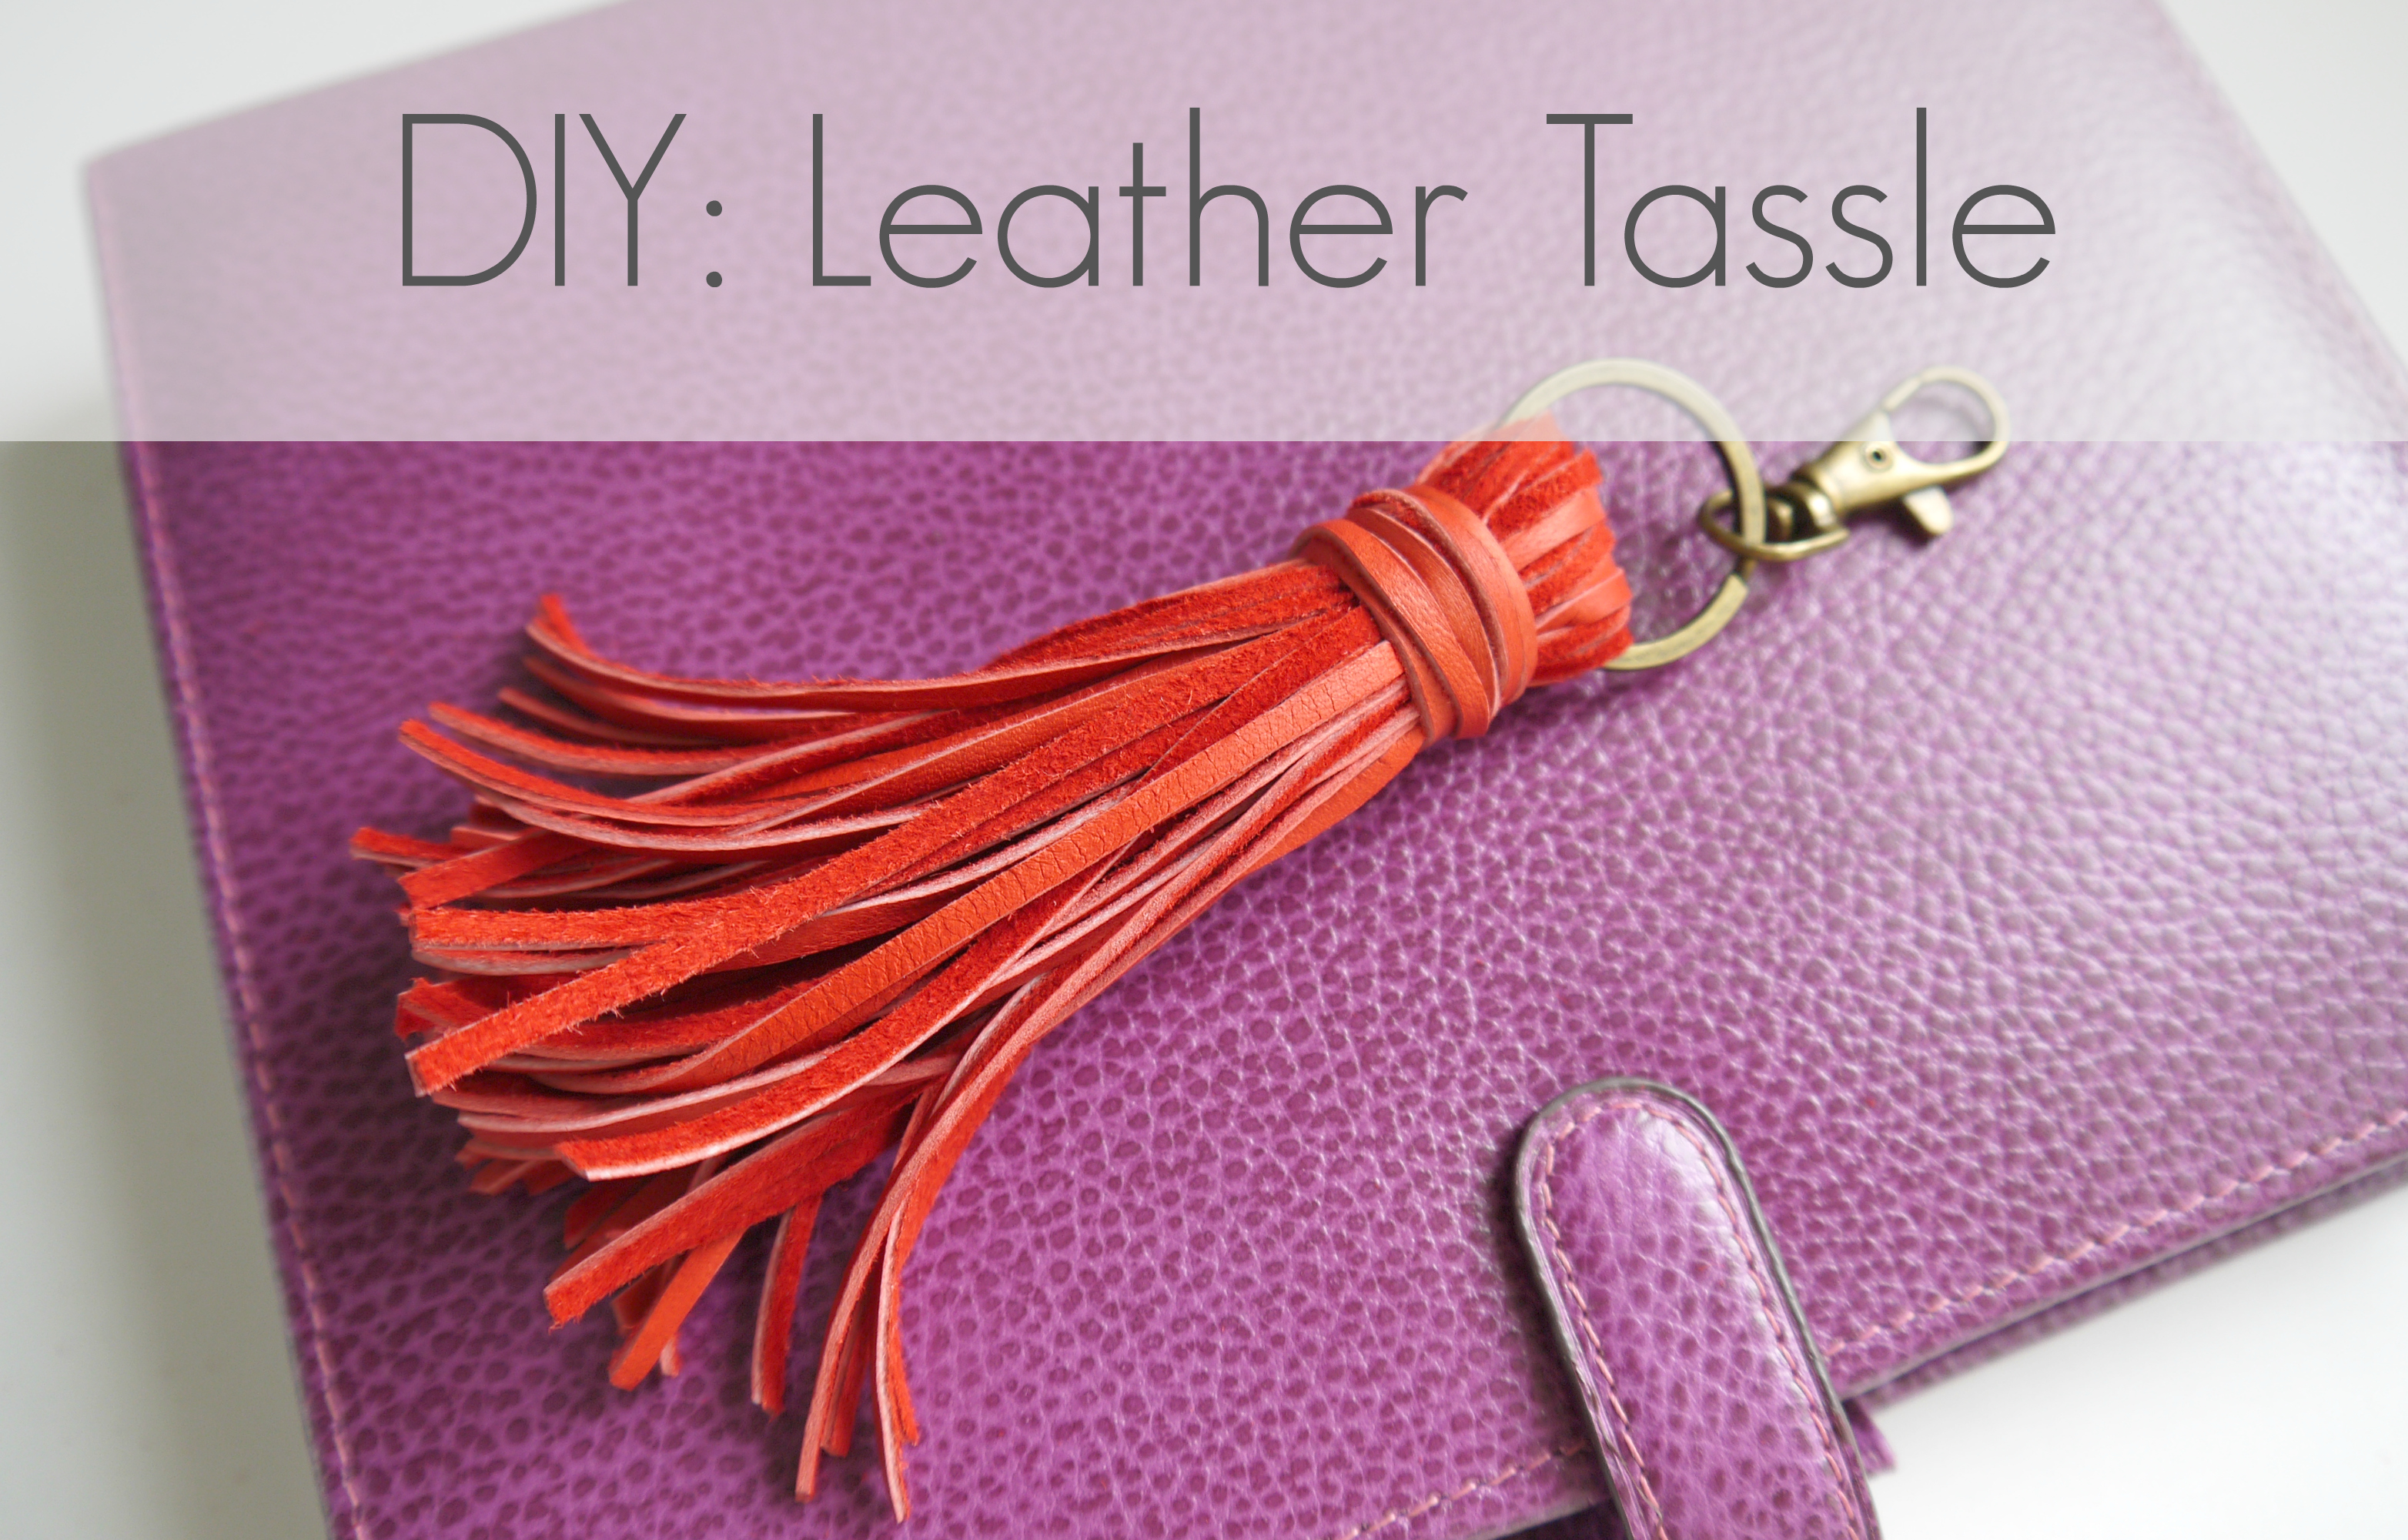
Today is a teeny bit momentous. My first post from my new home. I finally completed my migration from Blogger to this here self hosted WordPress site. What do you think of the new pad? I’m still tweaking. (Please let me know if you see anything amiss!)  Lord knows it is not as straightforward as I’d hoped BUT it is doable and so far the pros are far outweighing the cons. (If there’s an appetite for it I thought I might do a post to explain the process and share the resources I found useful. What d’ya think?) With the last couple of weeks being a blur of html, file transfers, 301 redirects and  a few headaches, I’ve been itching to get back to some DIY therapy. So today I thought I’d kick off with a quick and satisfying DIY. This leather key fob/bag charm…
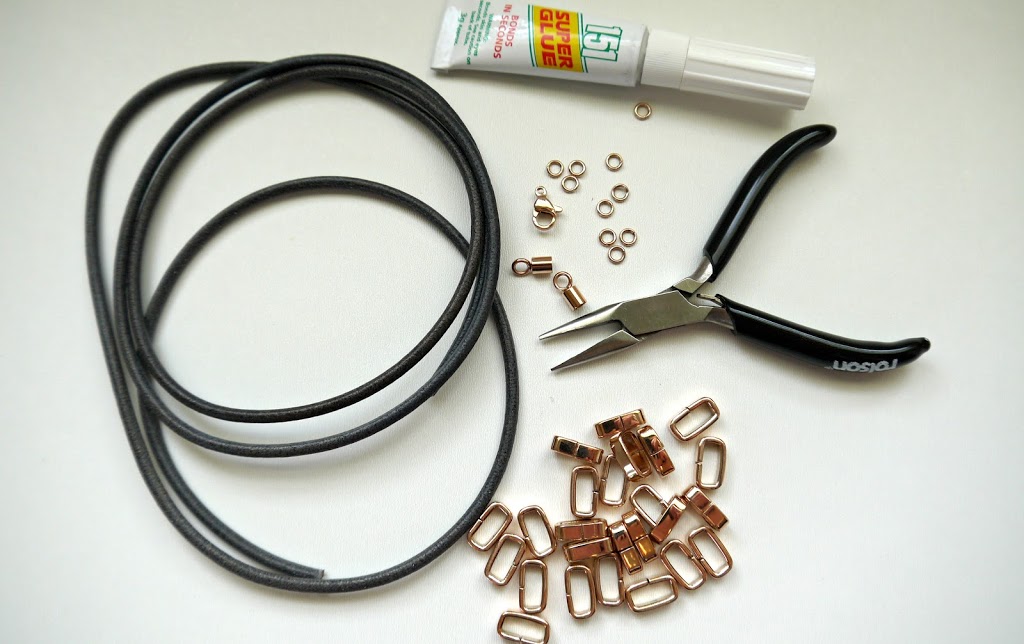
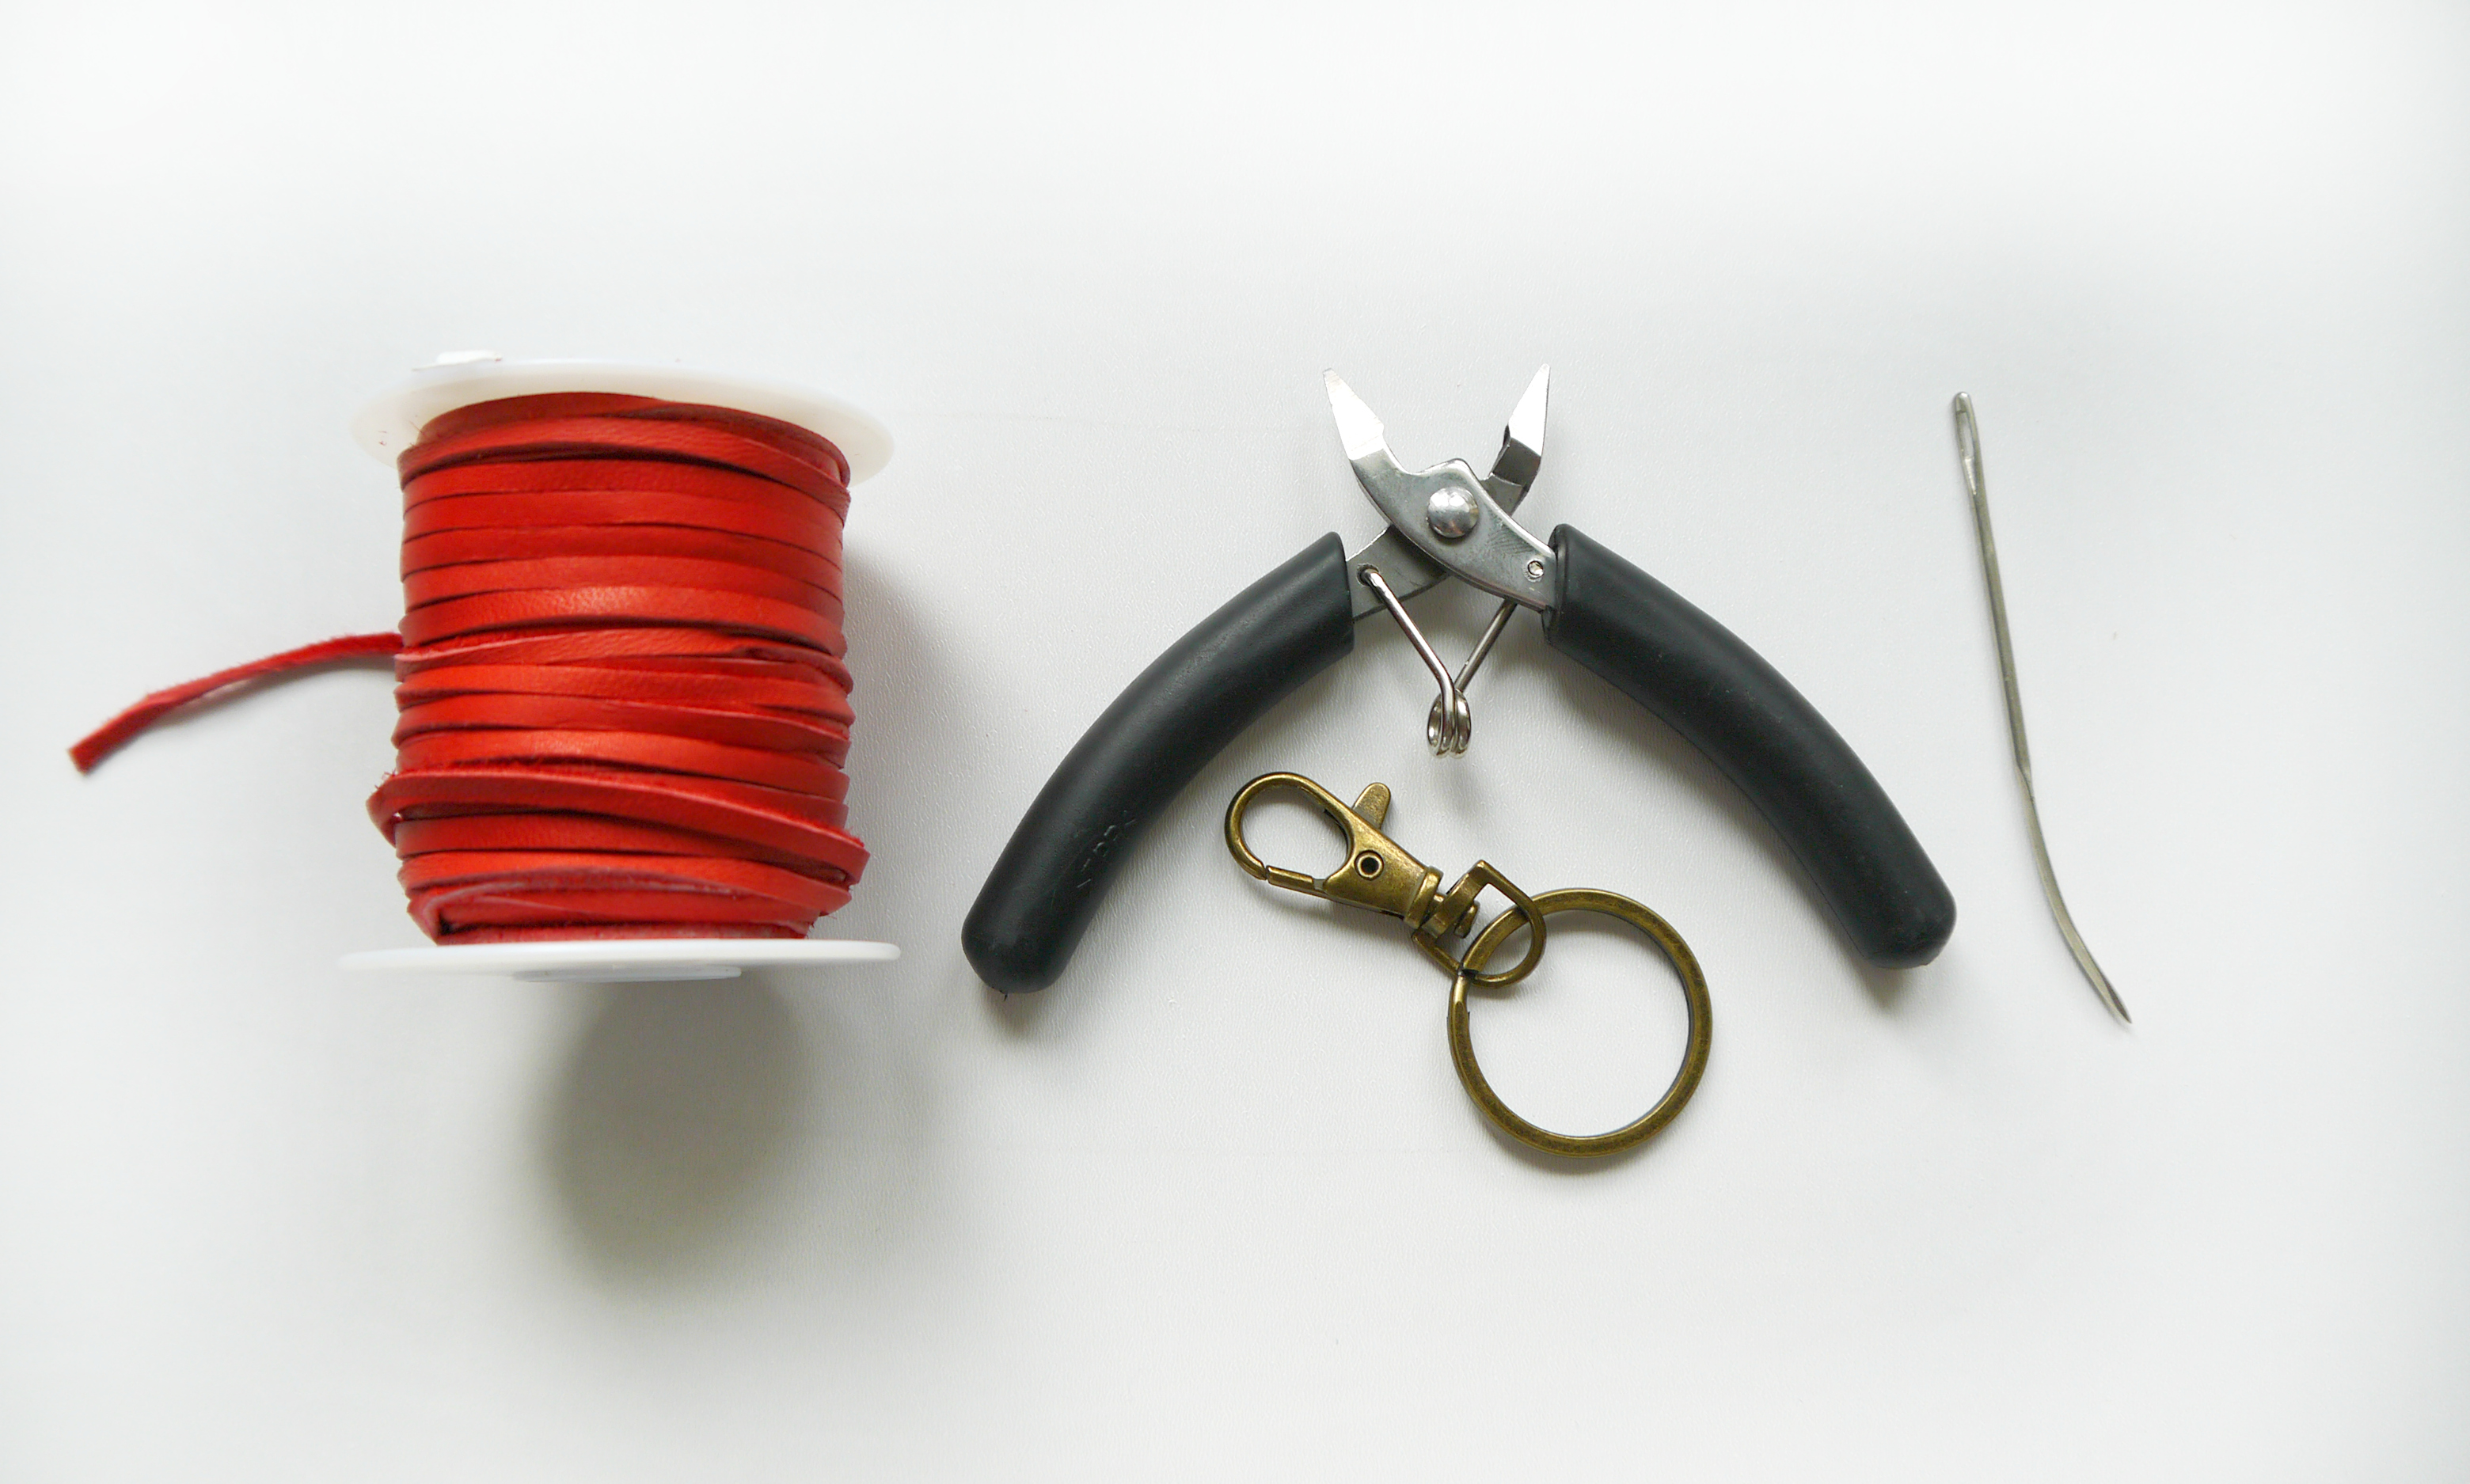
You’ll Need:

Approx 12m of leather lace. (Mine is from Endless Leather)

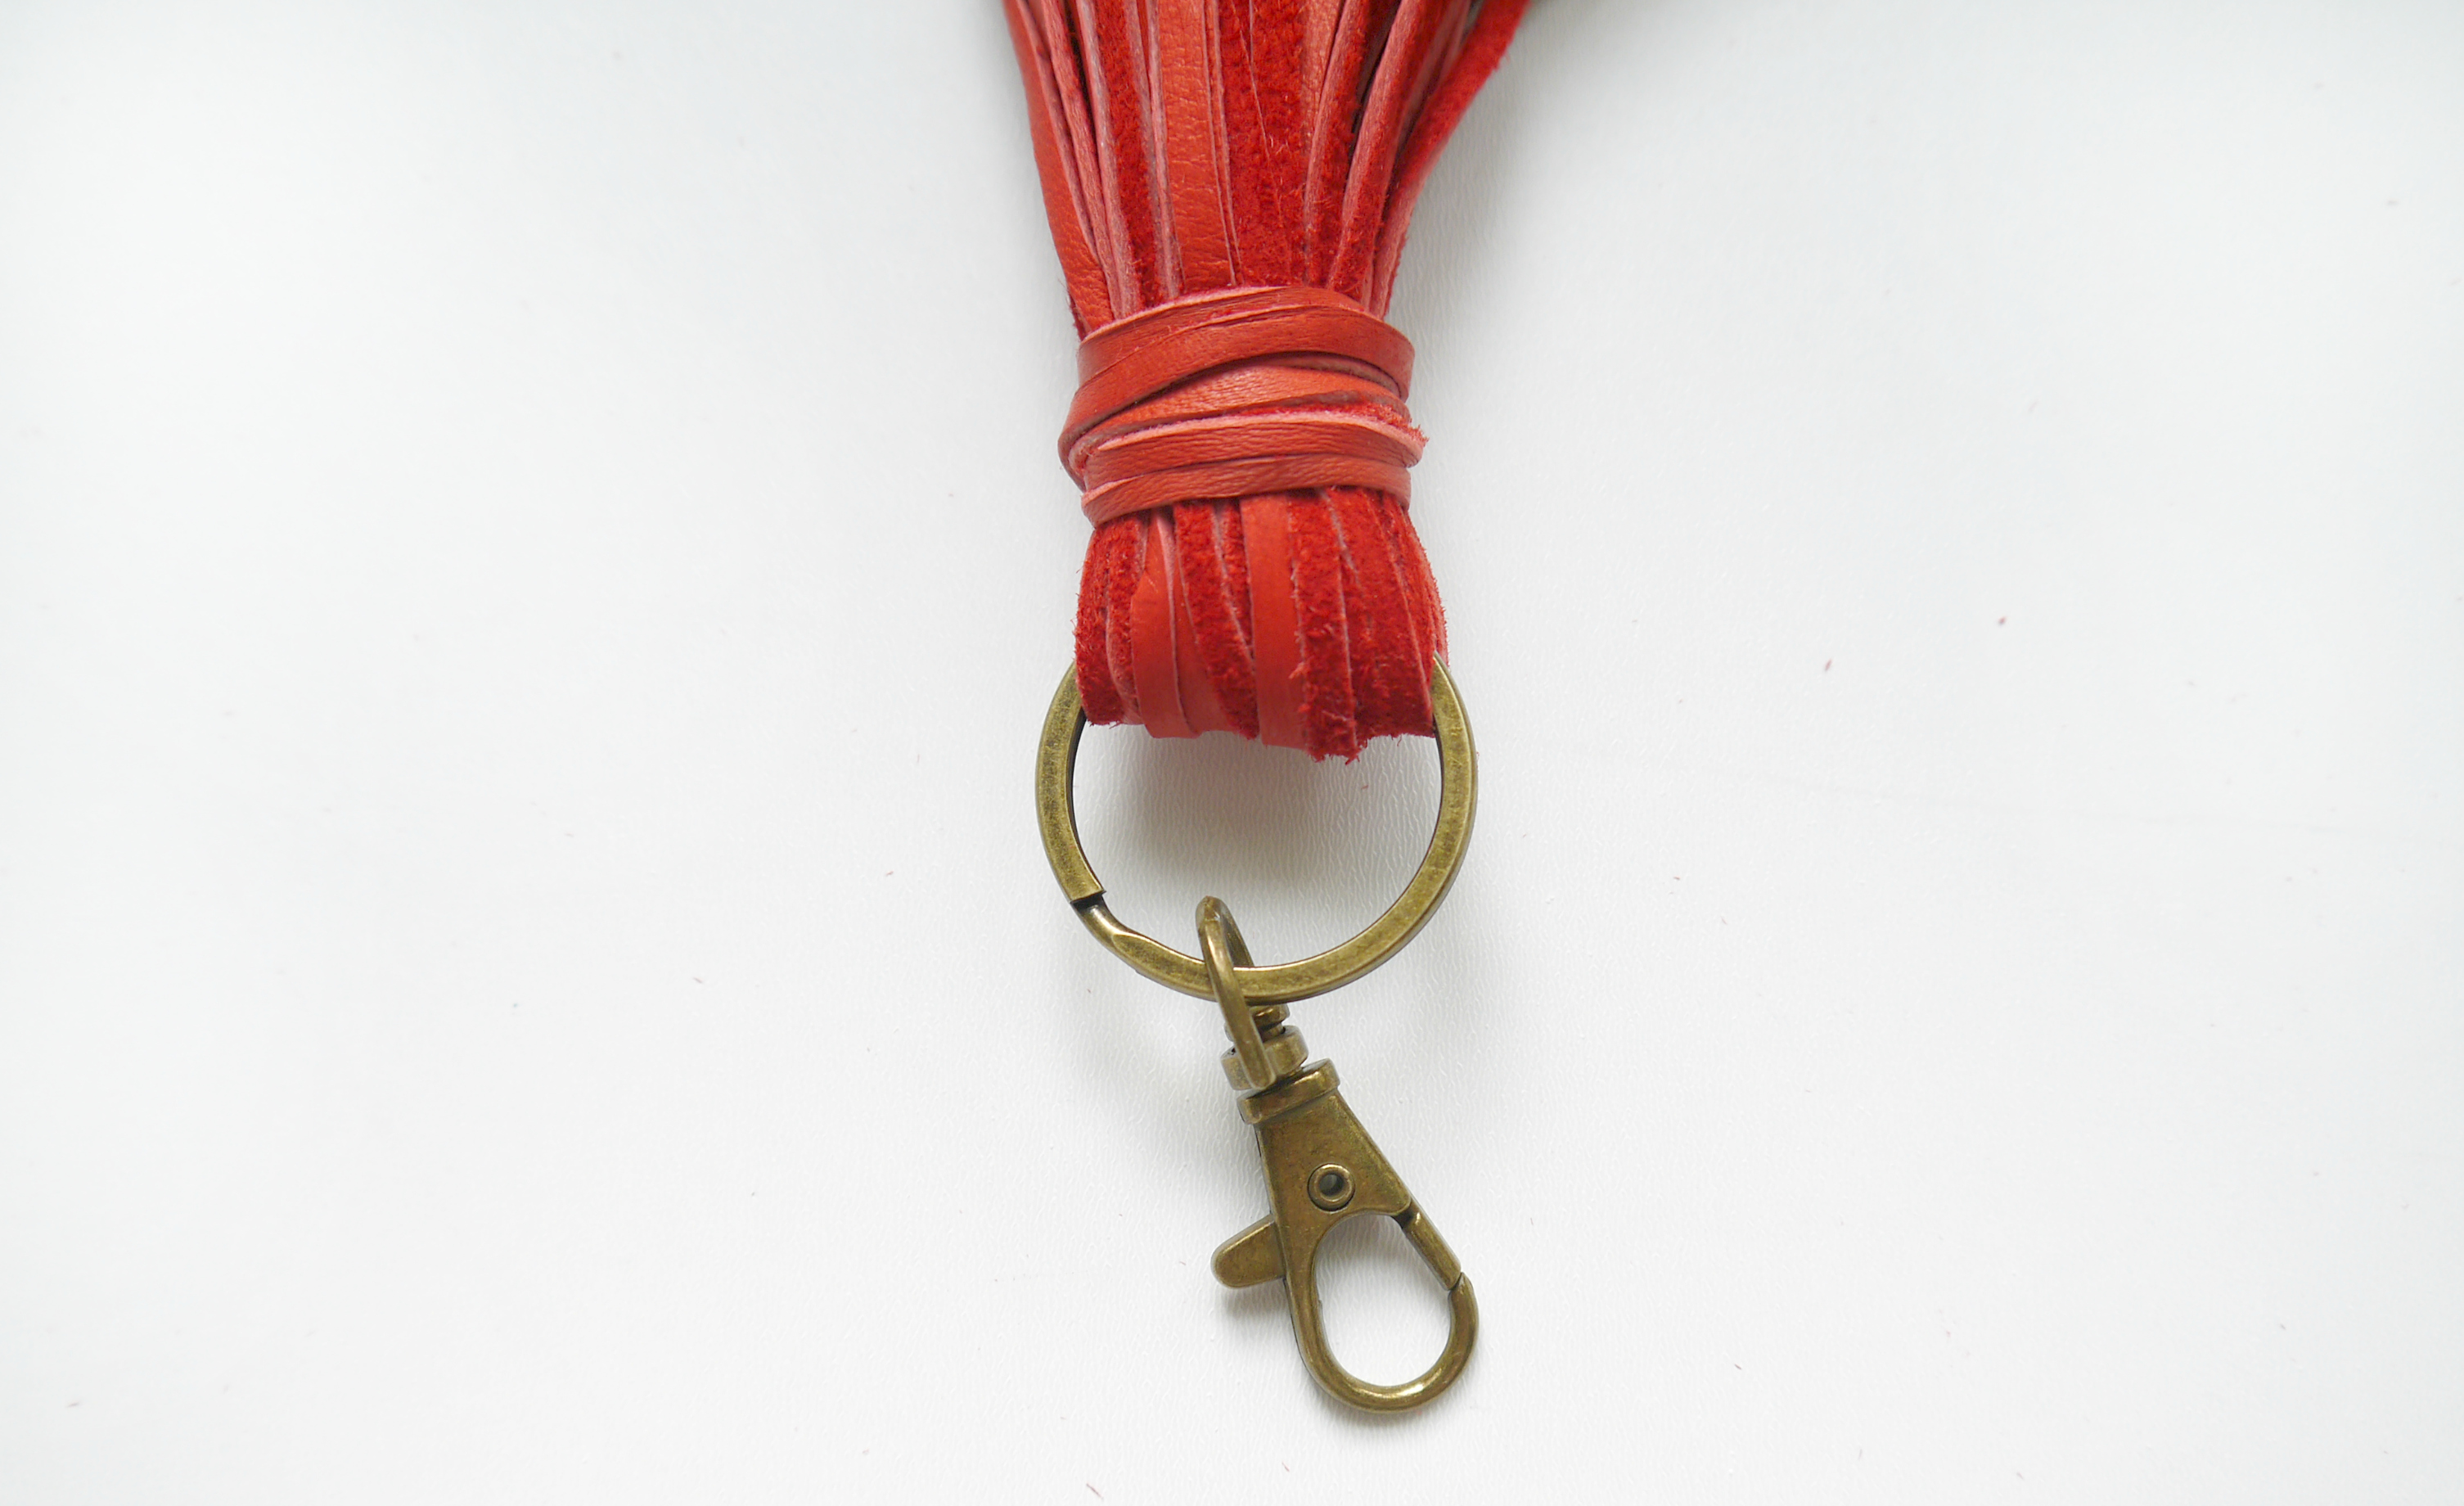
1.2″ Diameter Split Ring with Lobster Clasp (I got this one and removed the bits I didn’t need)

Side cutters (or Scissors)

Leather Needle (or one with a wide enough eye to fit your leather through)

LEATHER TASSLE - MATERIALS

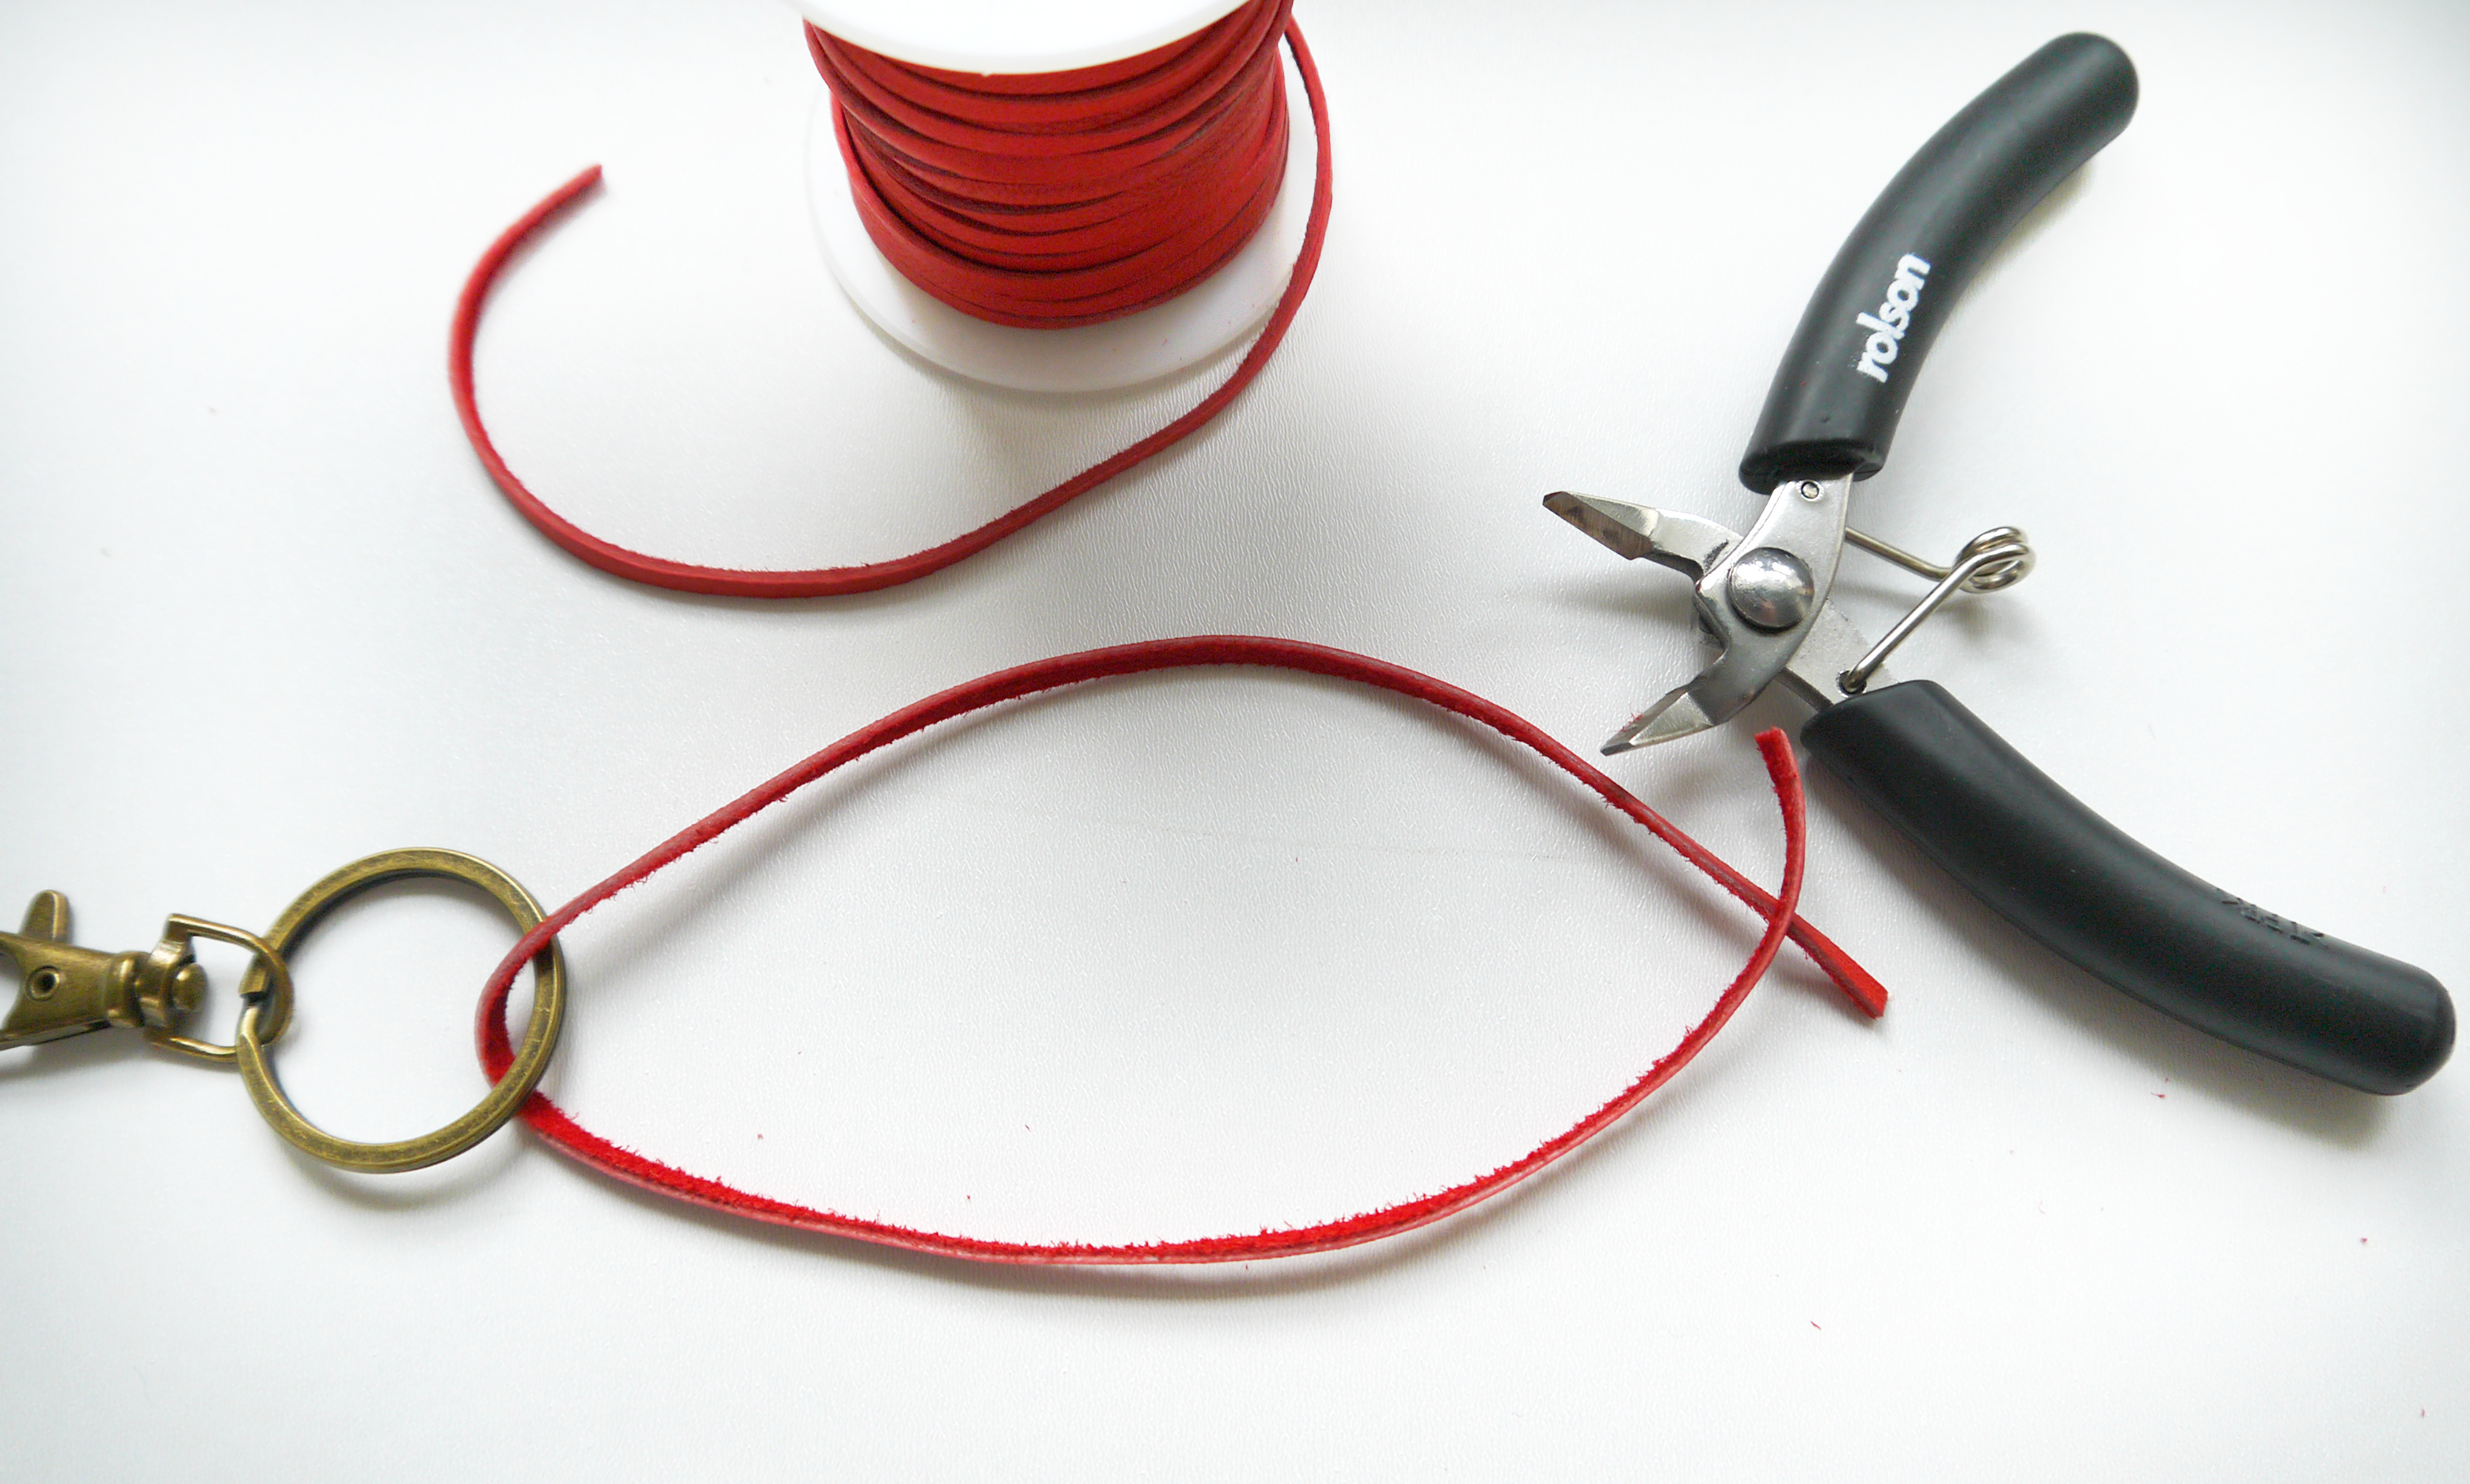
Set a 30″ length of leather aside. Then establish how long you want each strip of leather to be by cutting a strip and testing it out in your keyring. Once you’re happy, measure the length…

LEATHER TASSLE - STEP 1

Find a book (or similar) who’s circumference is roughly double the length that you want and wrap the remainder of the leather repeatedly and snugly around it…

LEATHER TASSLE - STEP 2

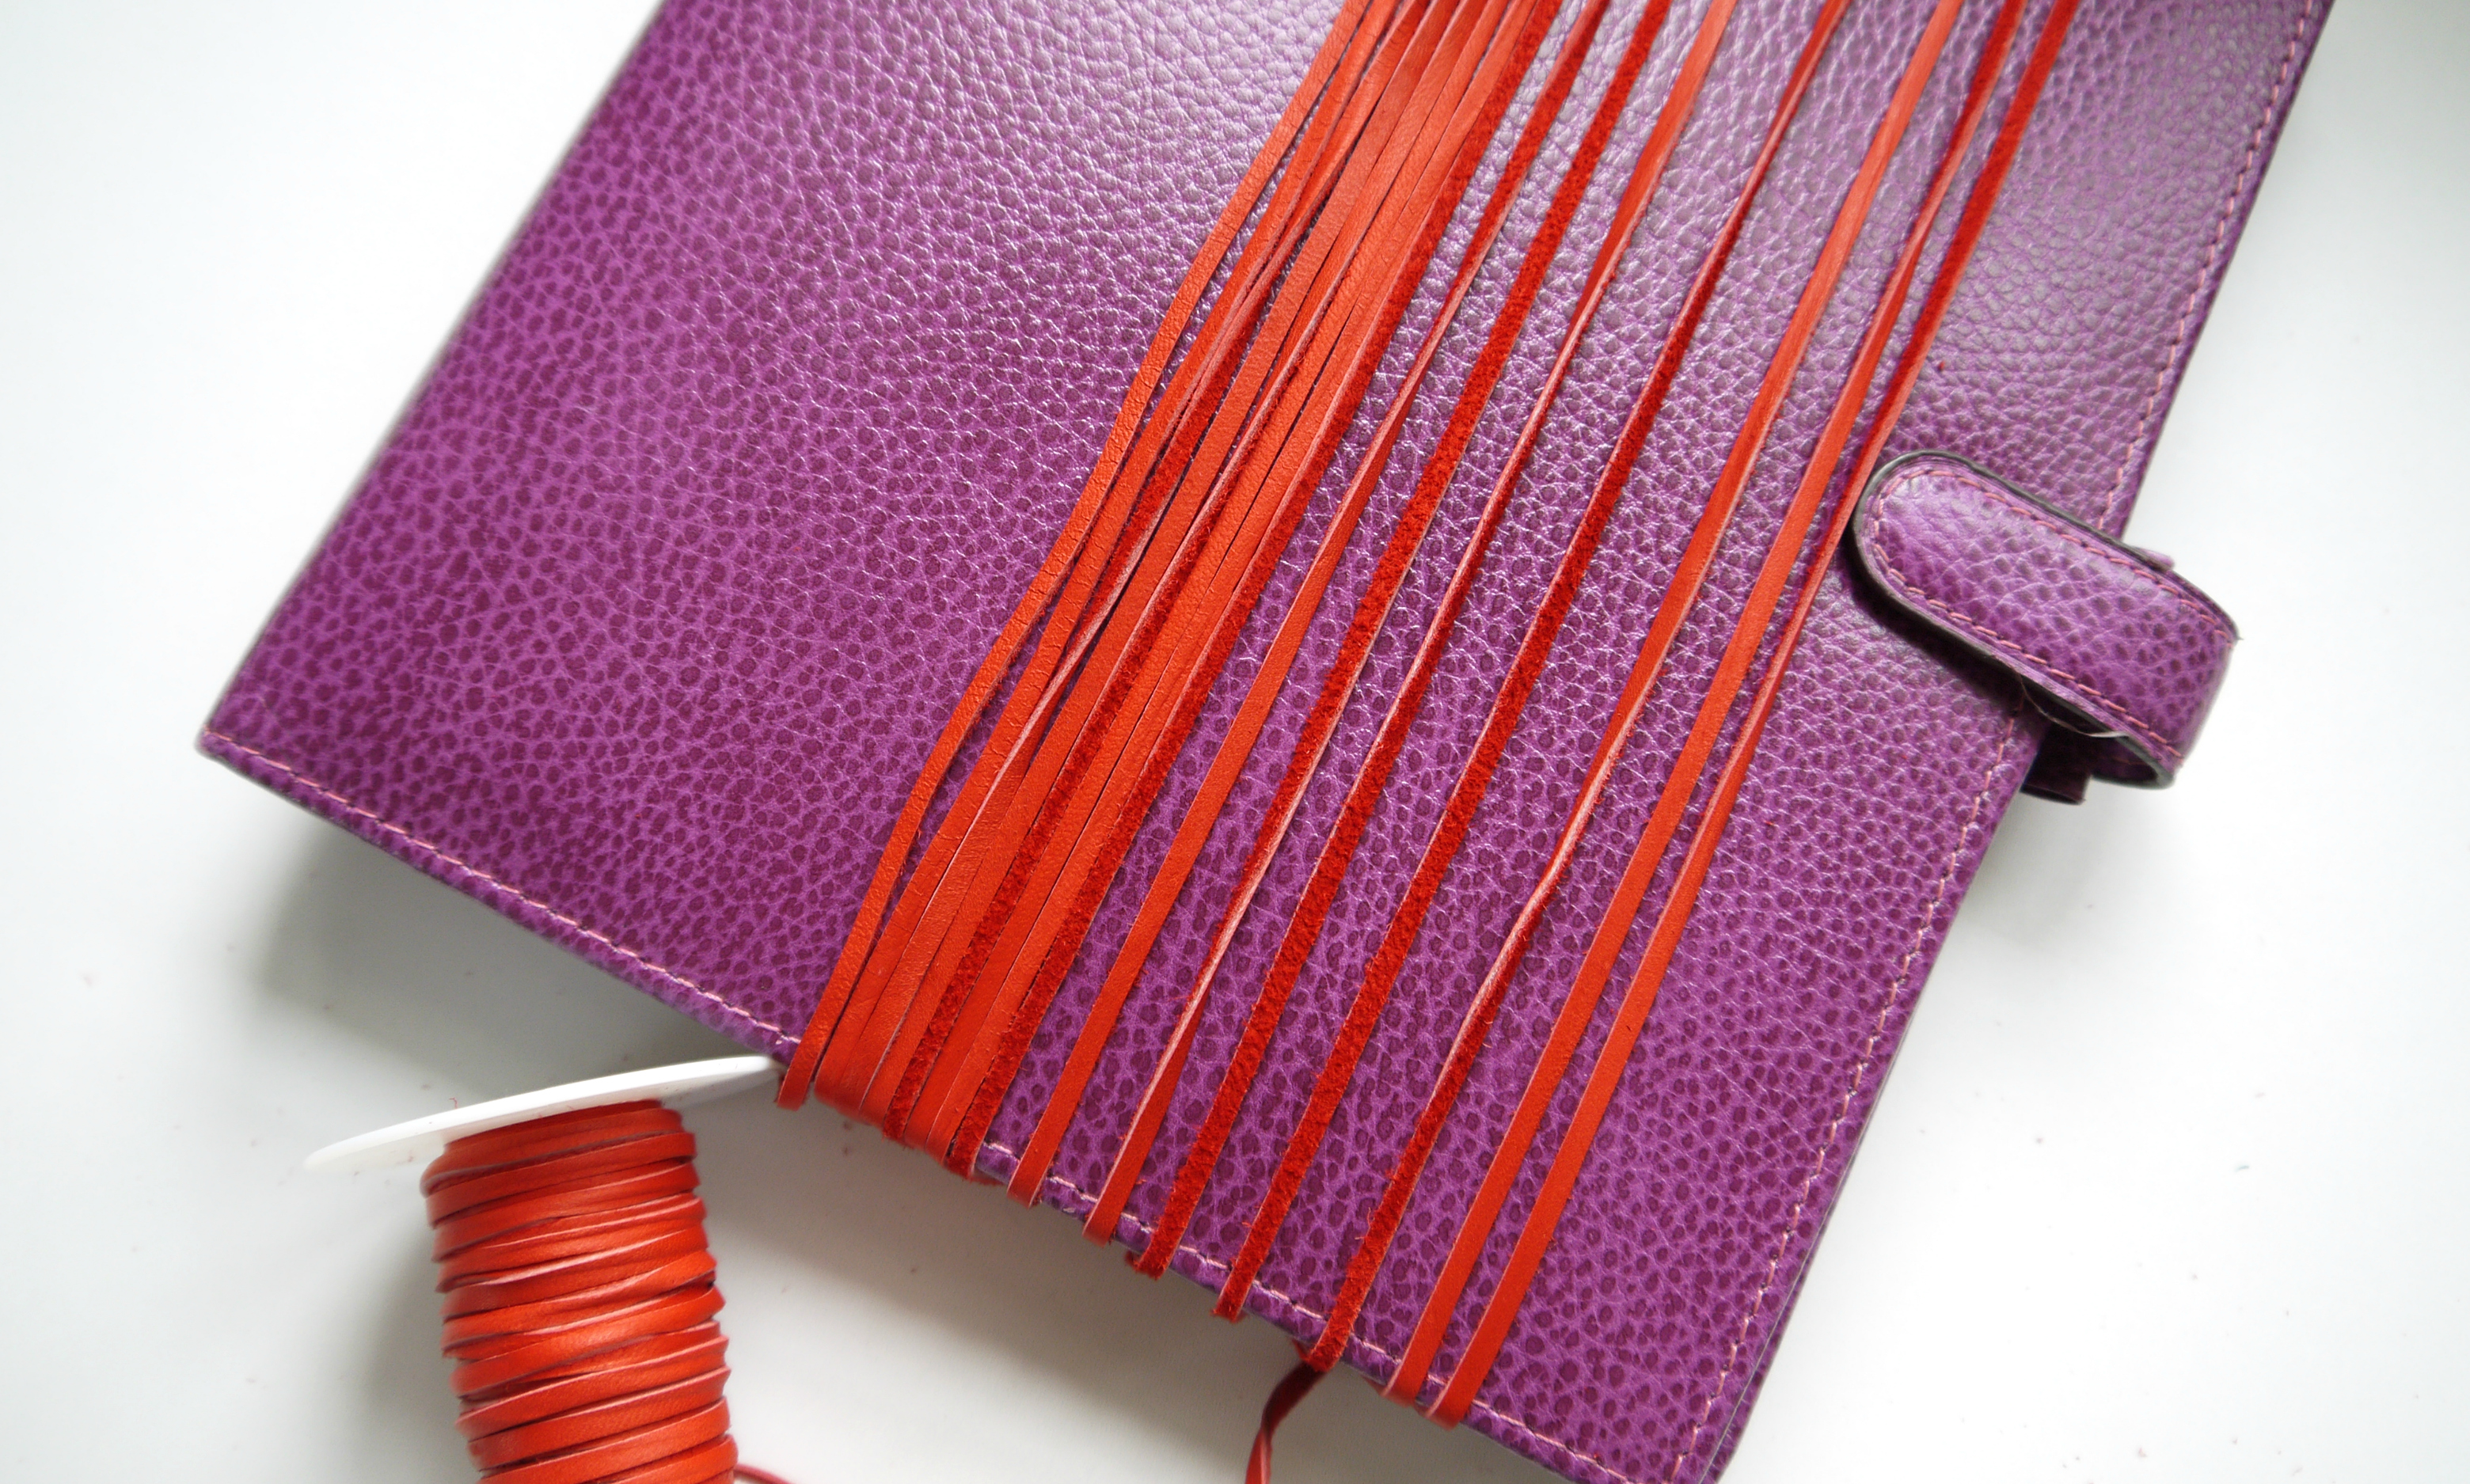
Cut the loops at either end and you’ll have a whole batch of leather pieces approximately the length you want them…

LEATHER TASSLE - STEP 3

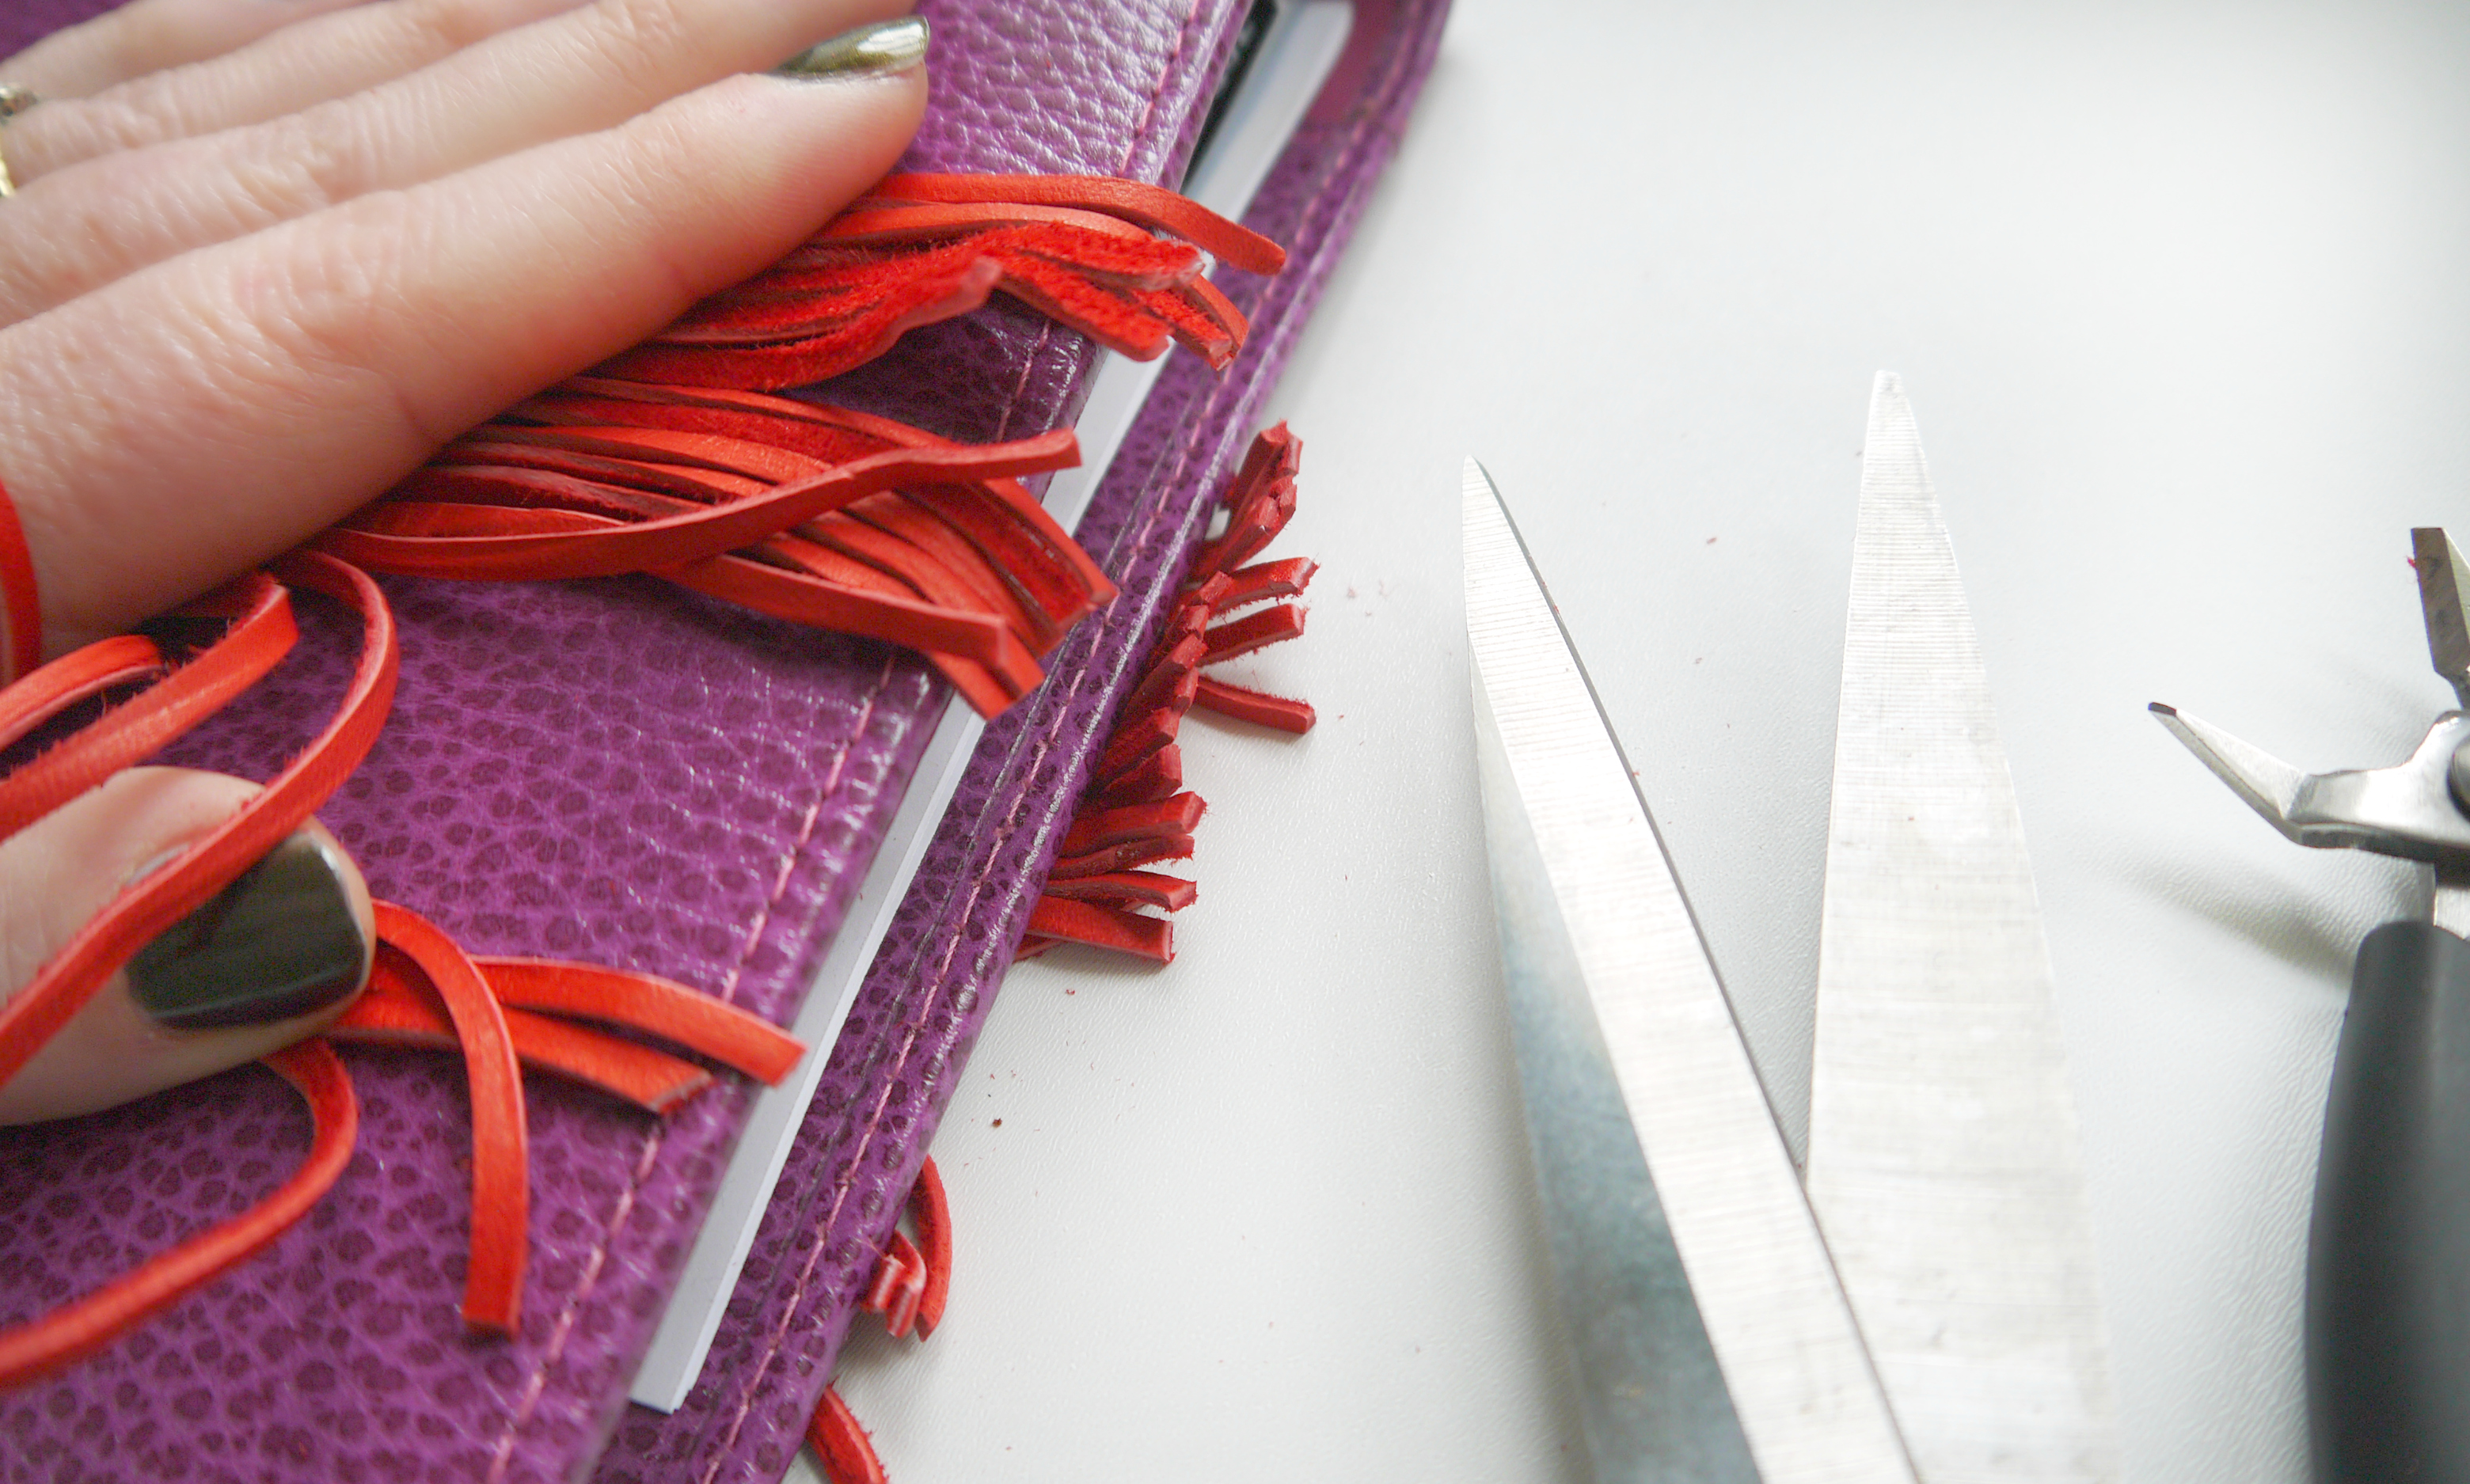
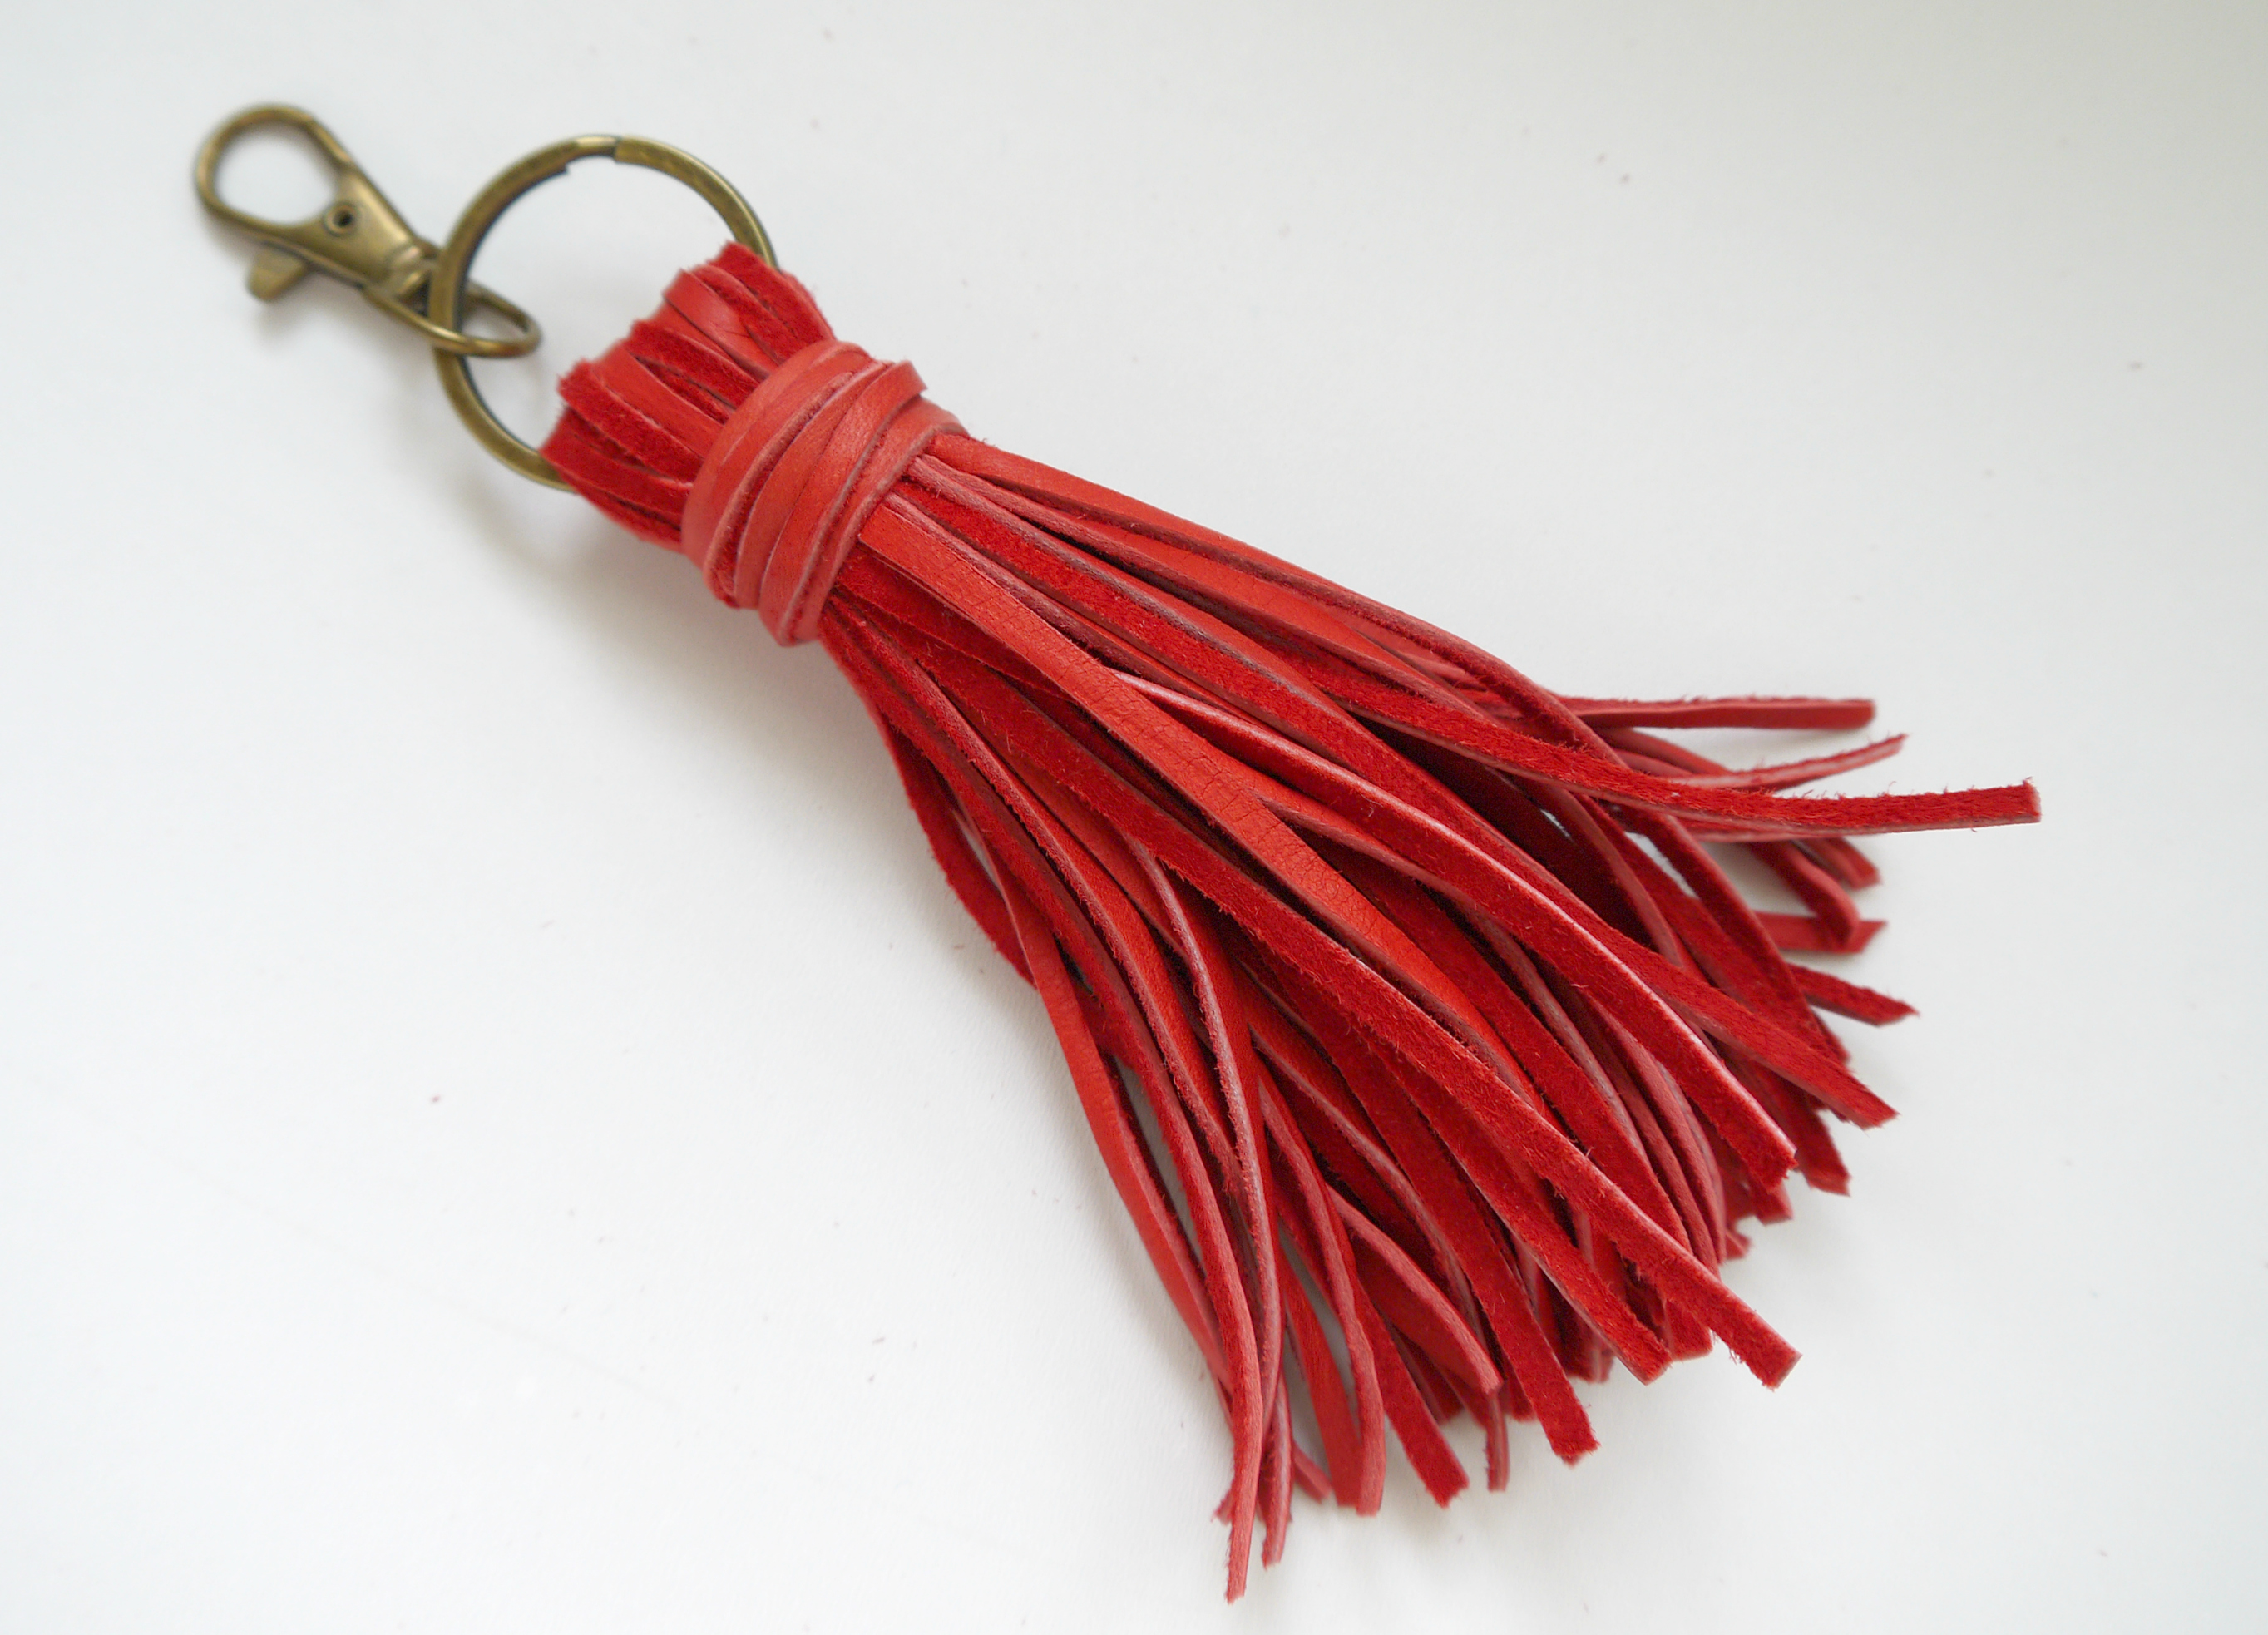
Gather them all together (I used approx 40 x 12″ lengths)…

LEATHER TASSLE - STEP 4

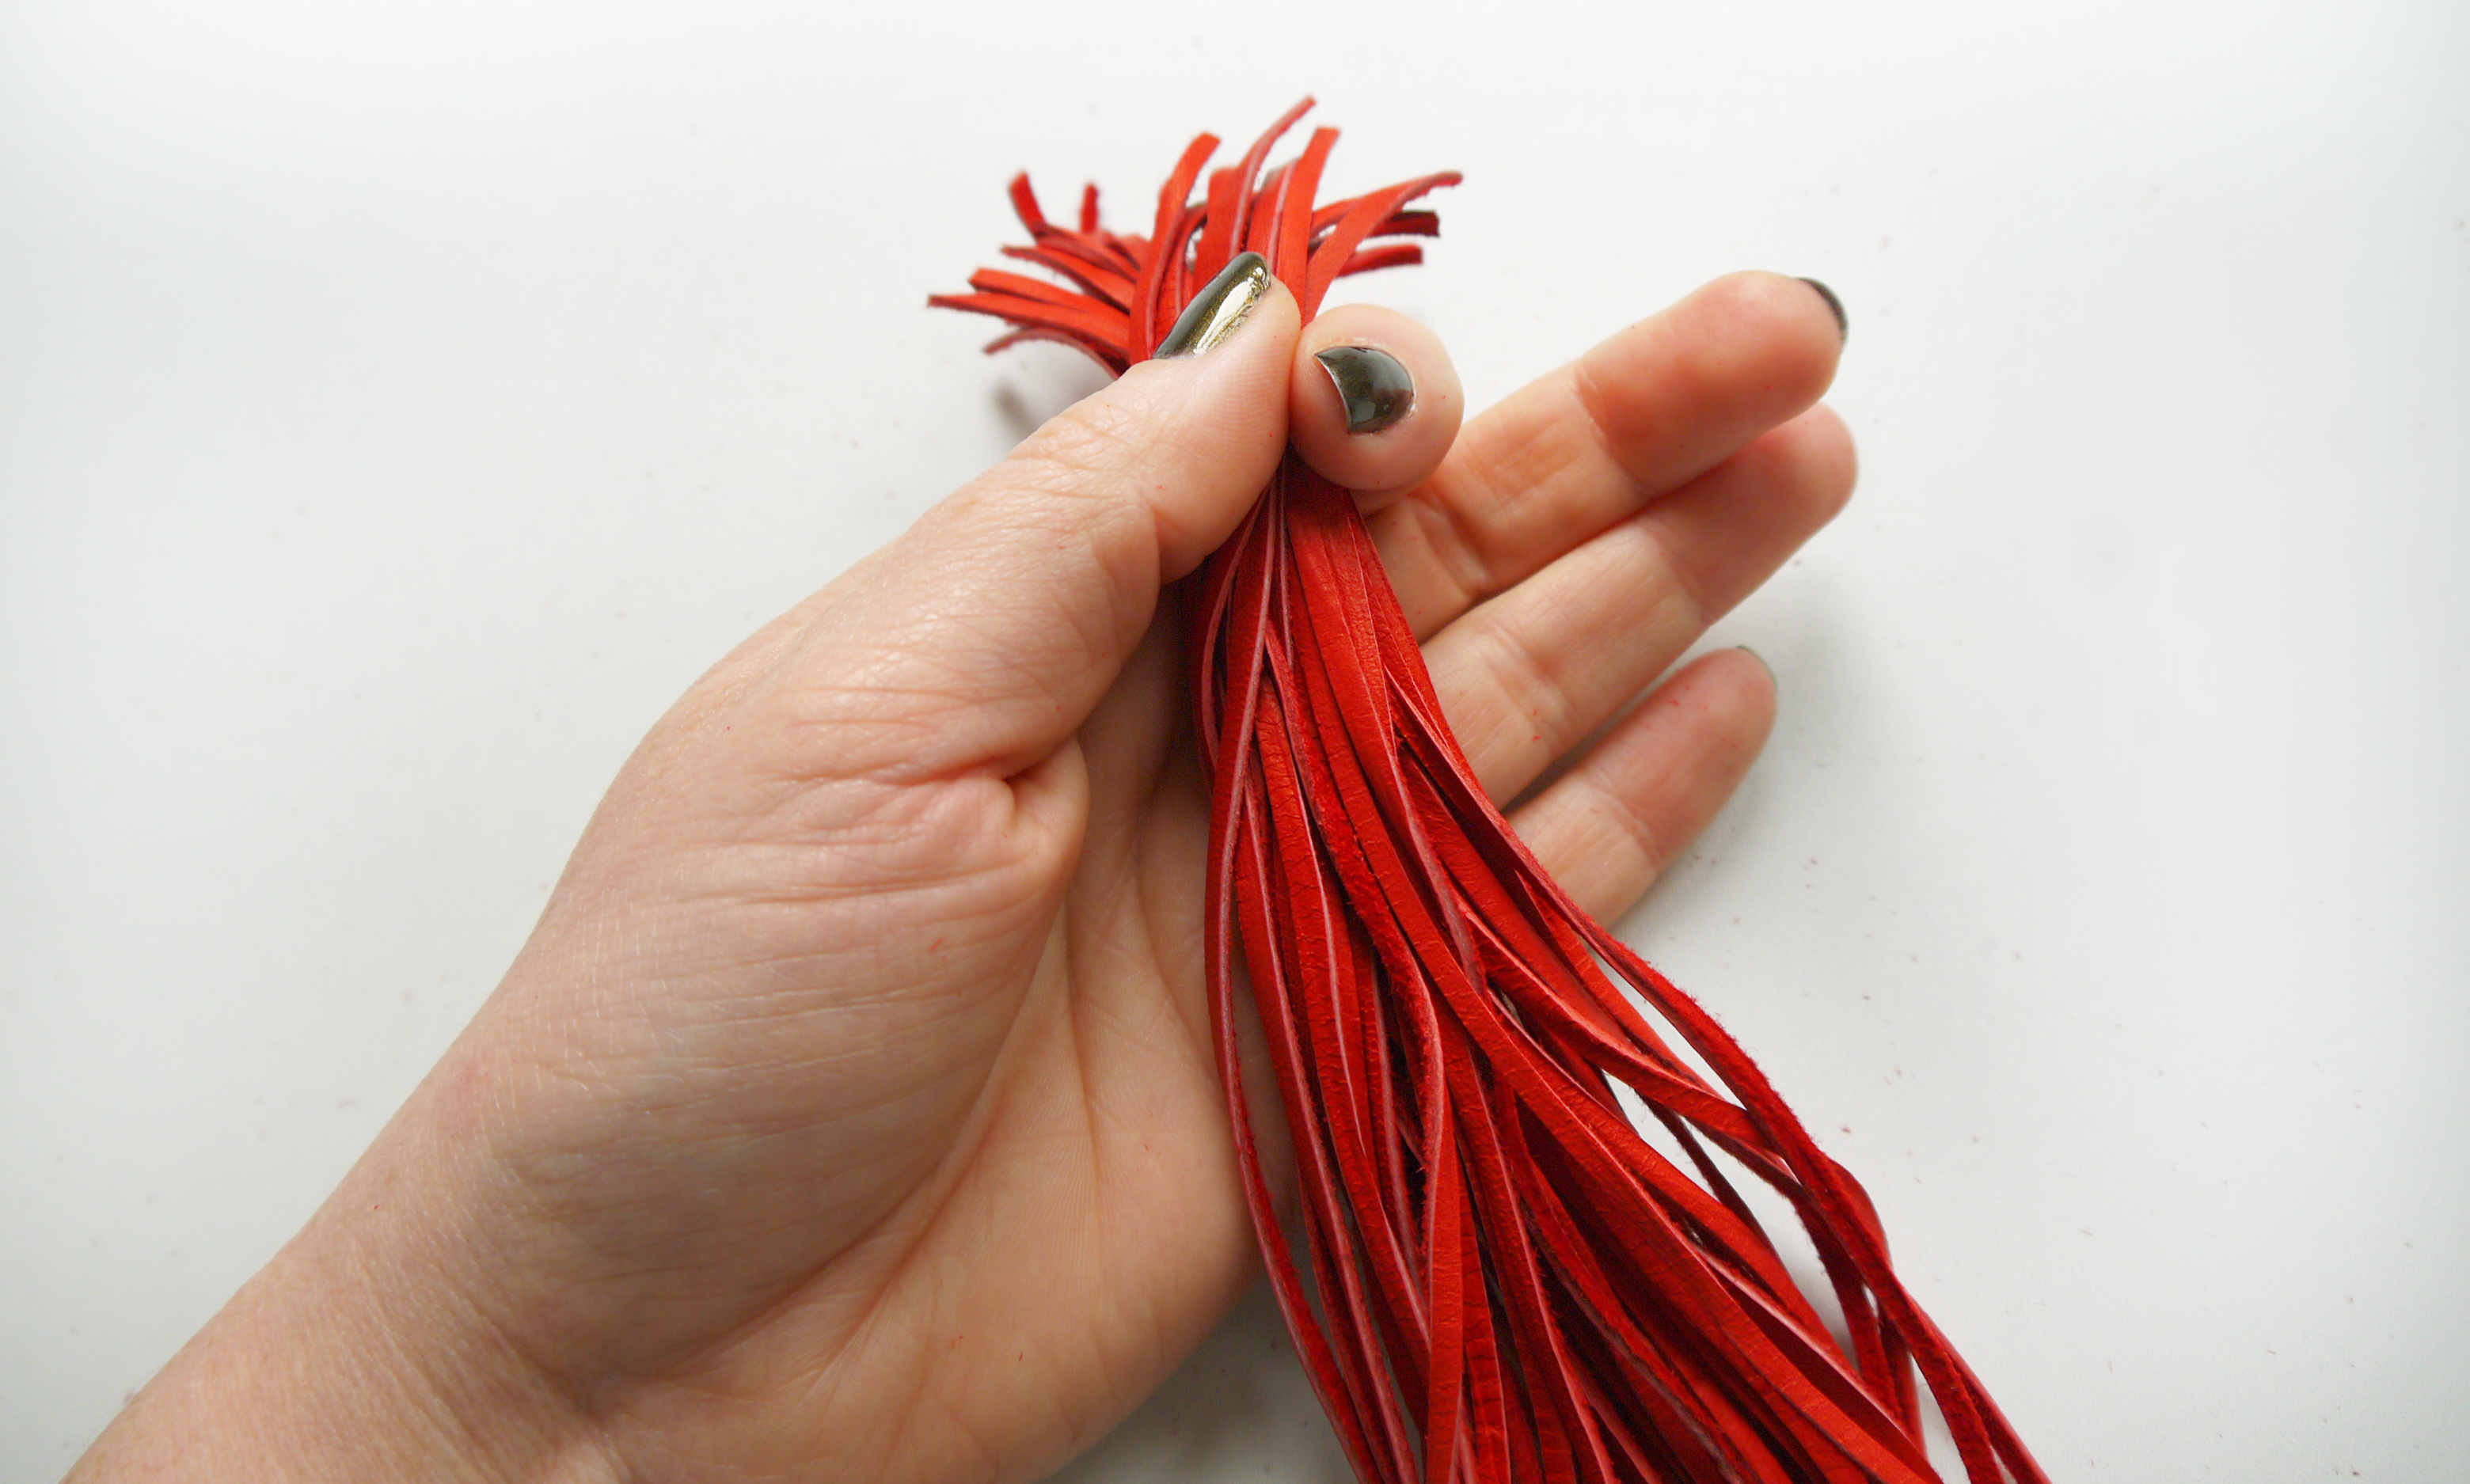
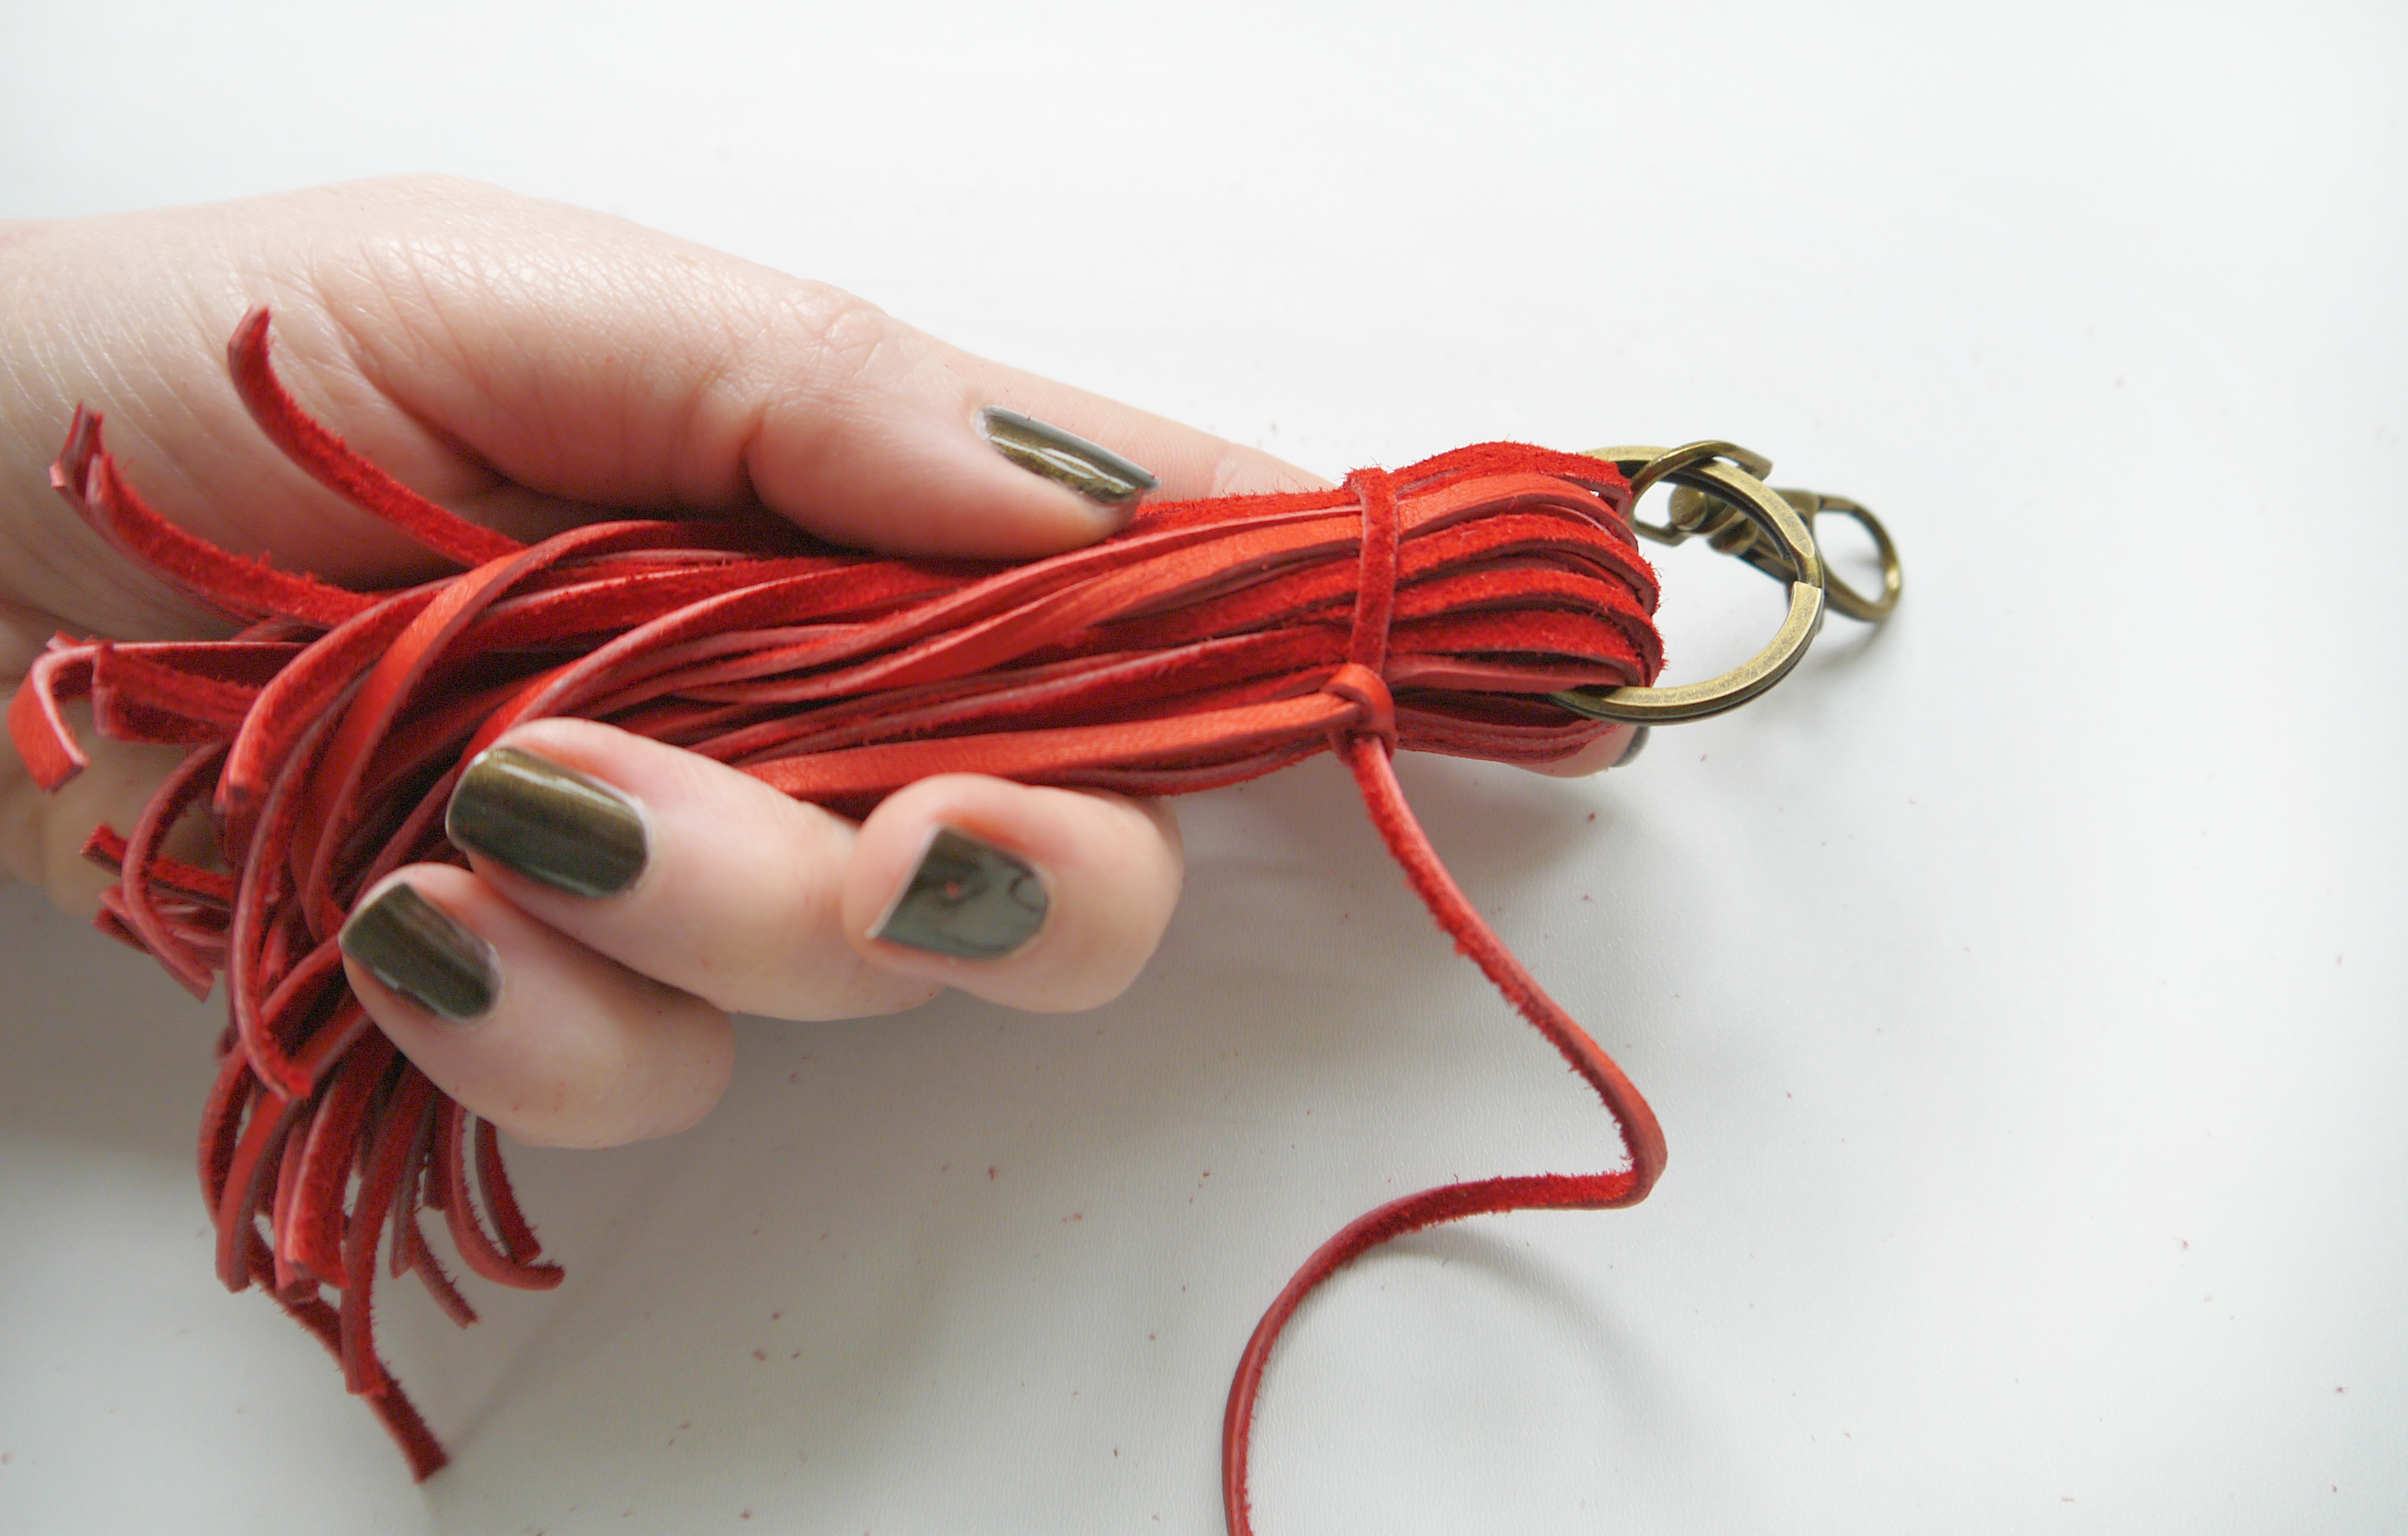
…and thread through the split ring…

LEATHER TASSLE - STEP 5

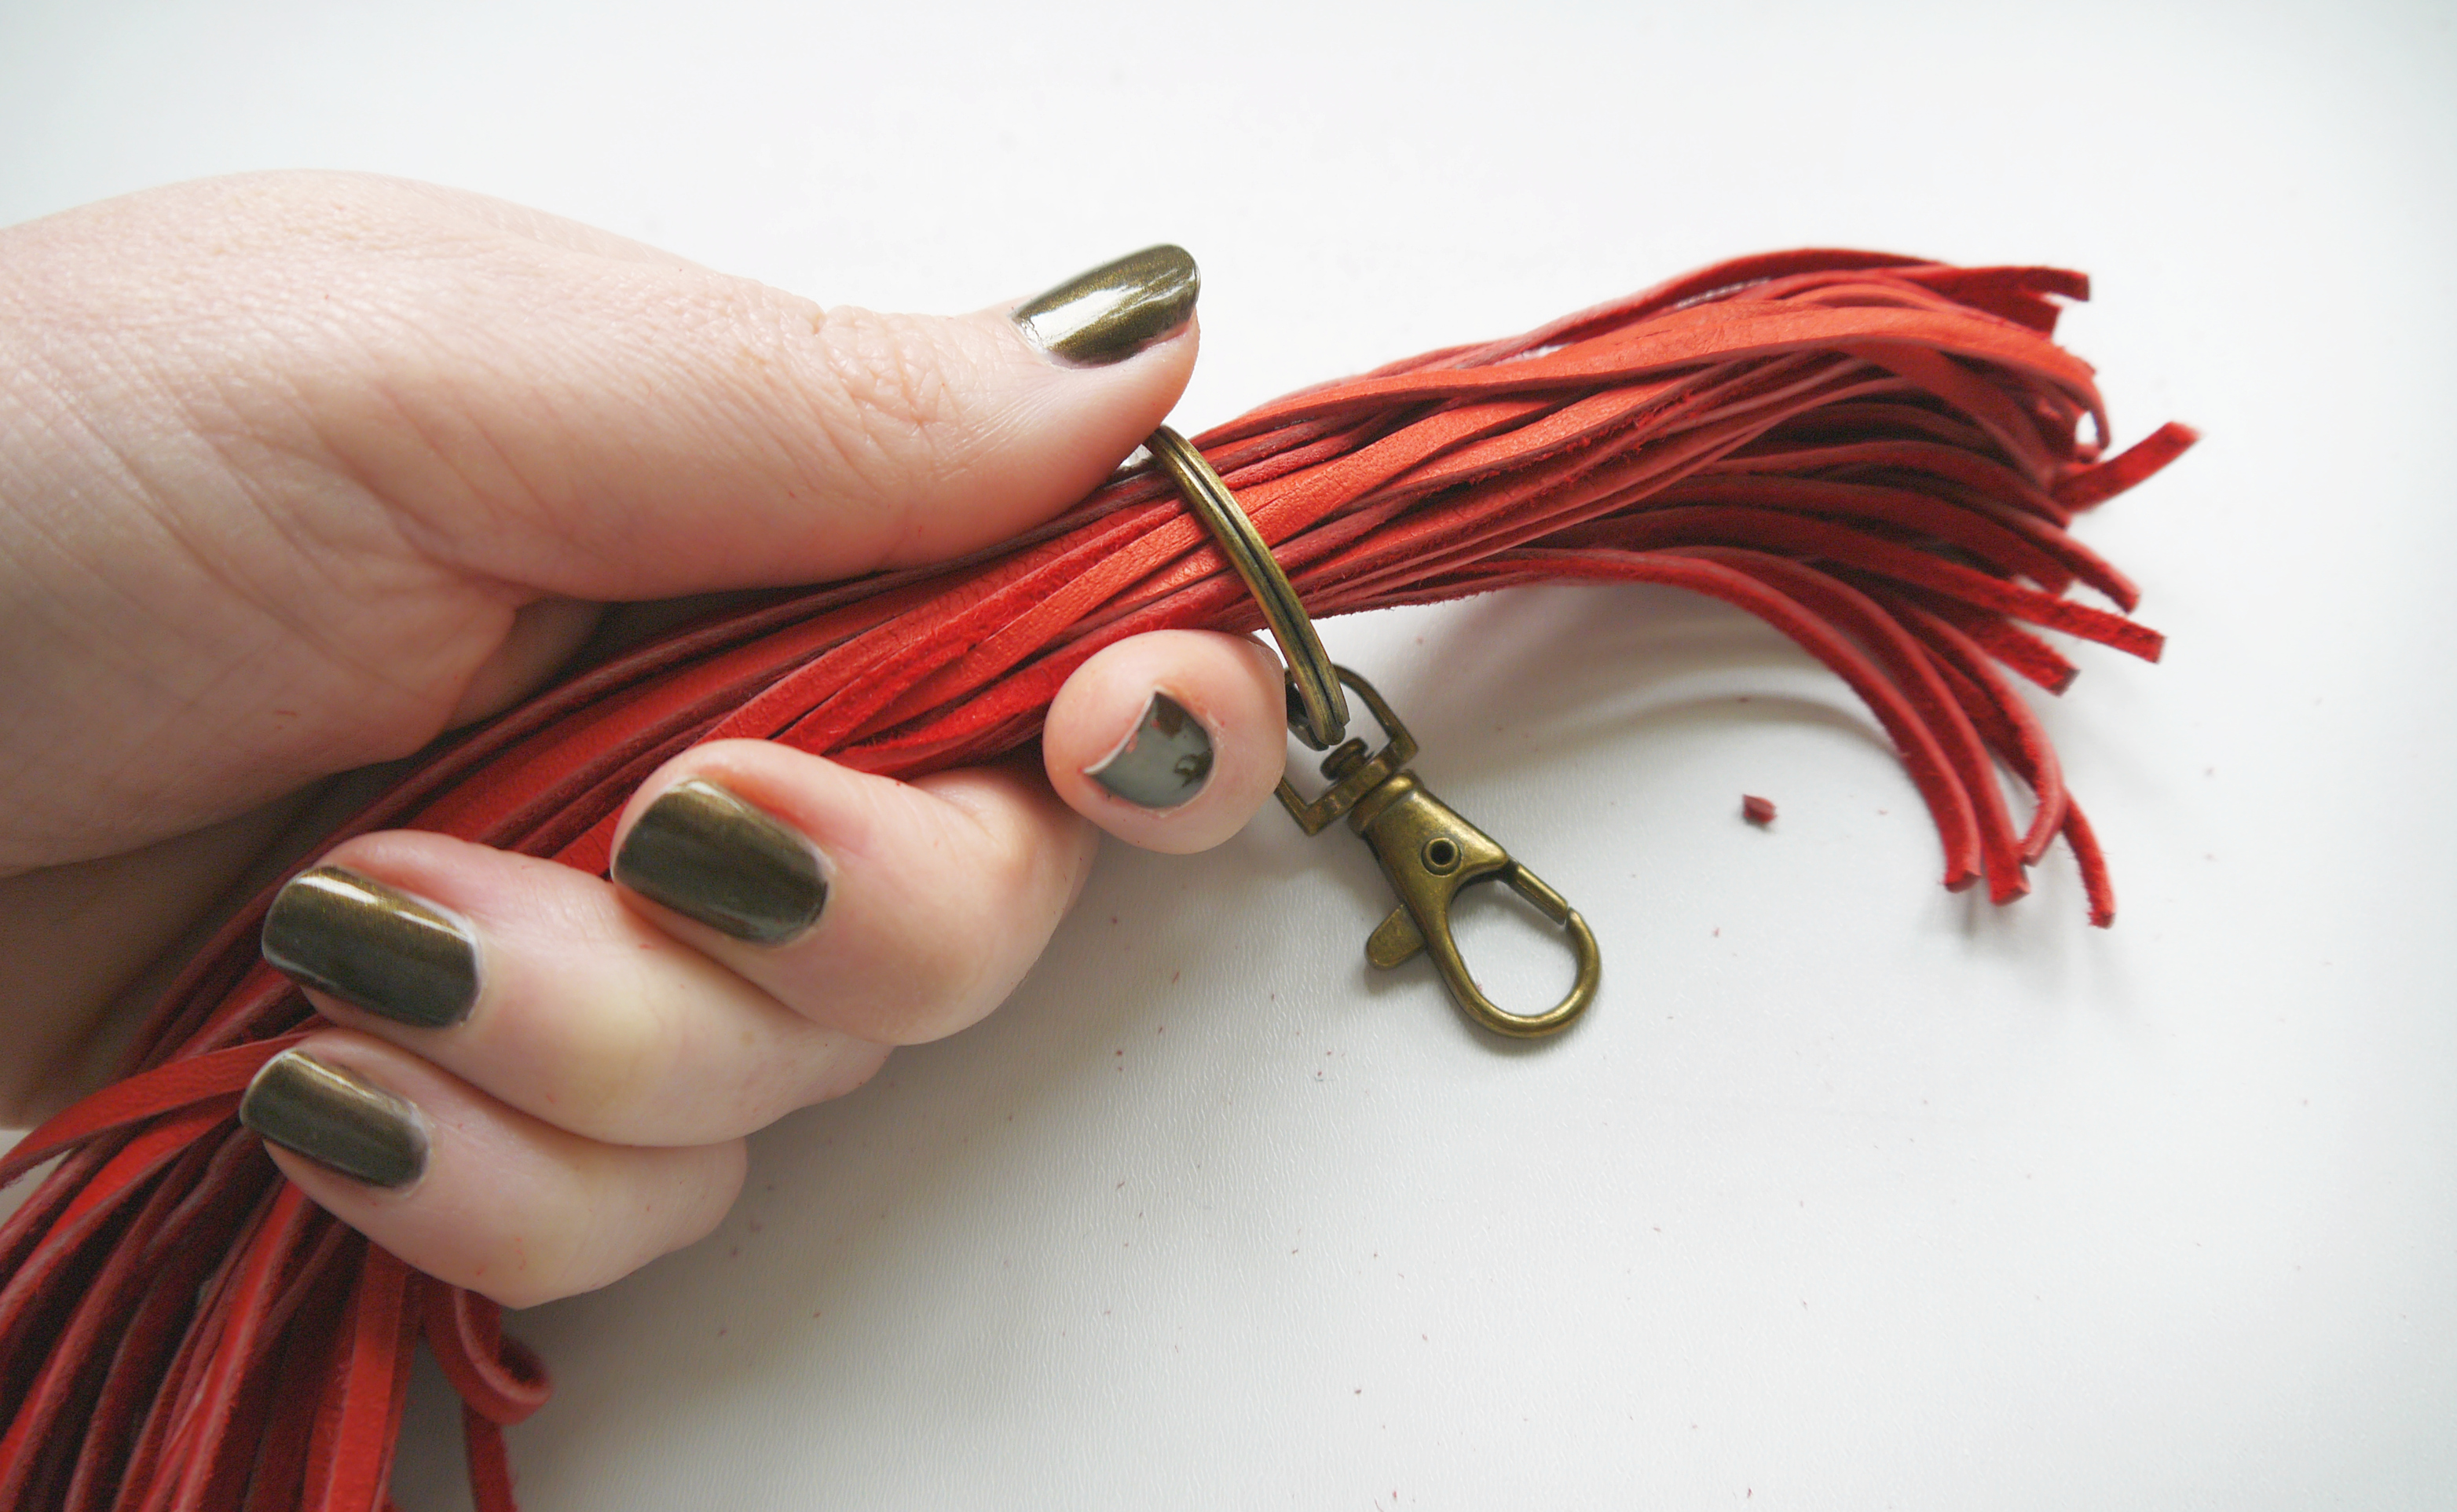
…with the split ring in the middle or your strips of leather, fold them in half. Enclosing the split ring in the fold. Grab the 30″ length you set aside and tie a slip knot. Leave a short tail end that is the same length as your folded tassle.

LEATHER TASSLE - STEP 6

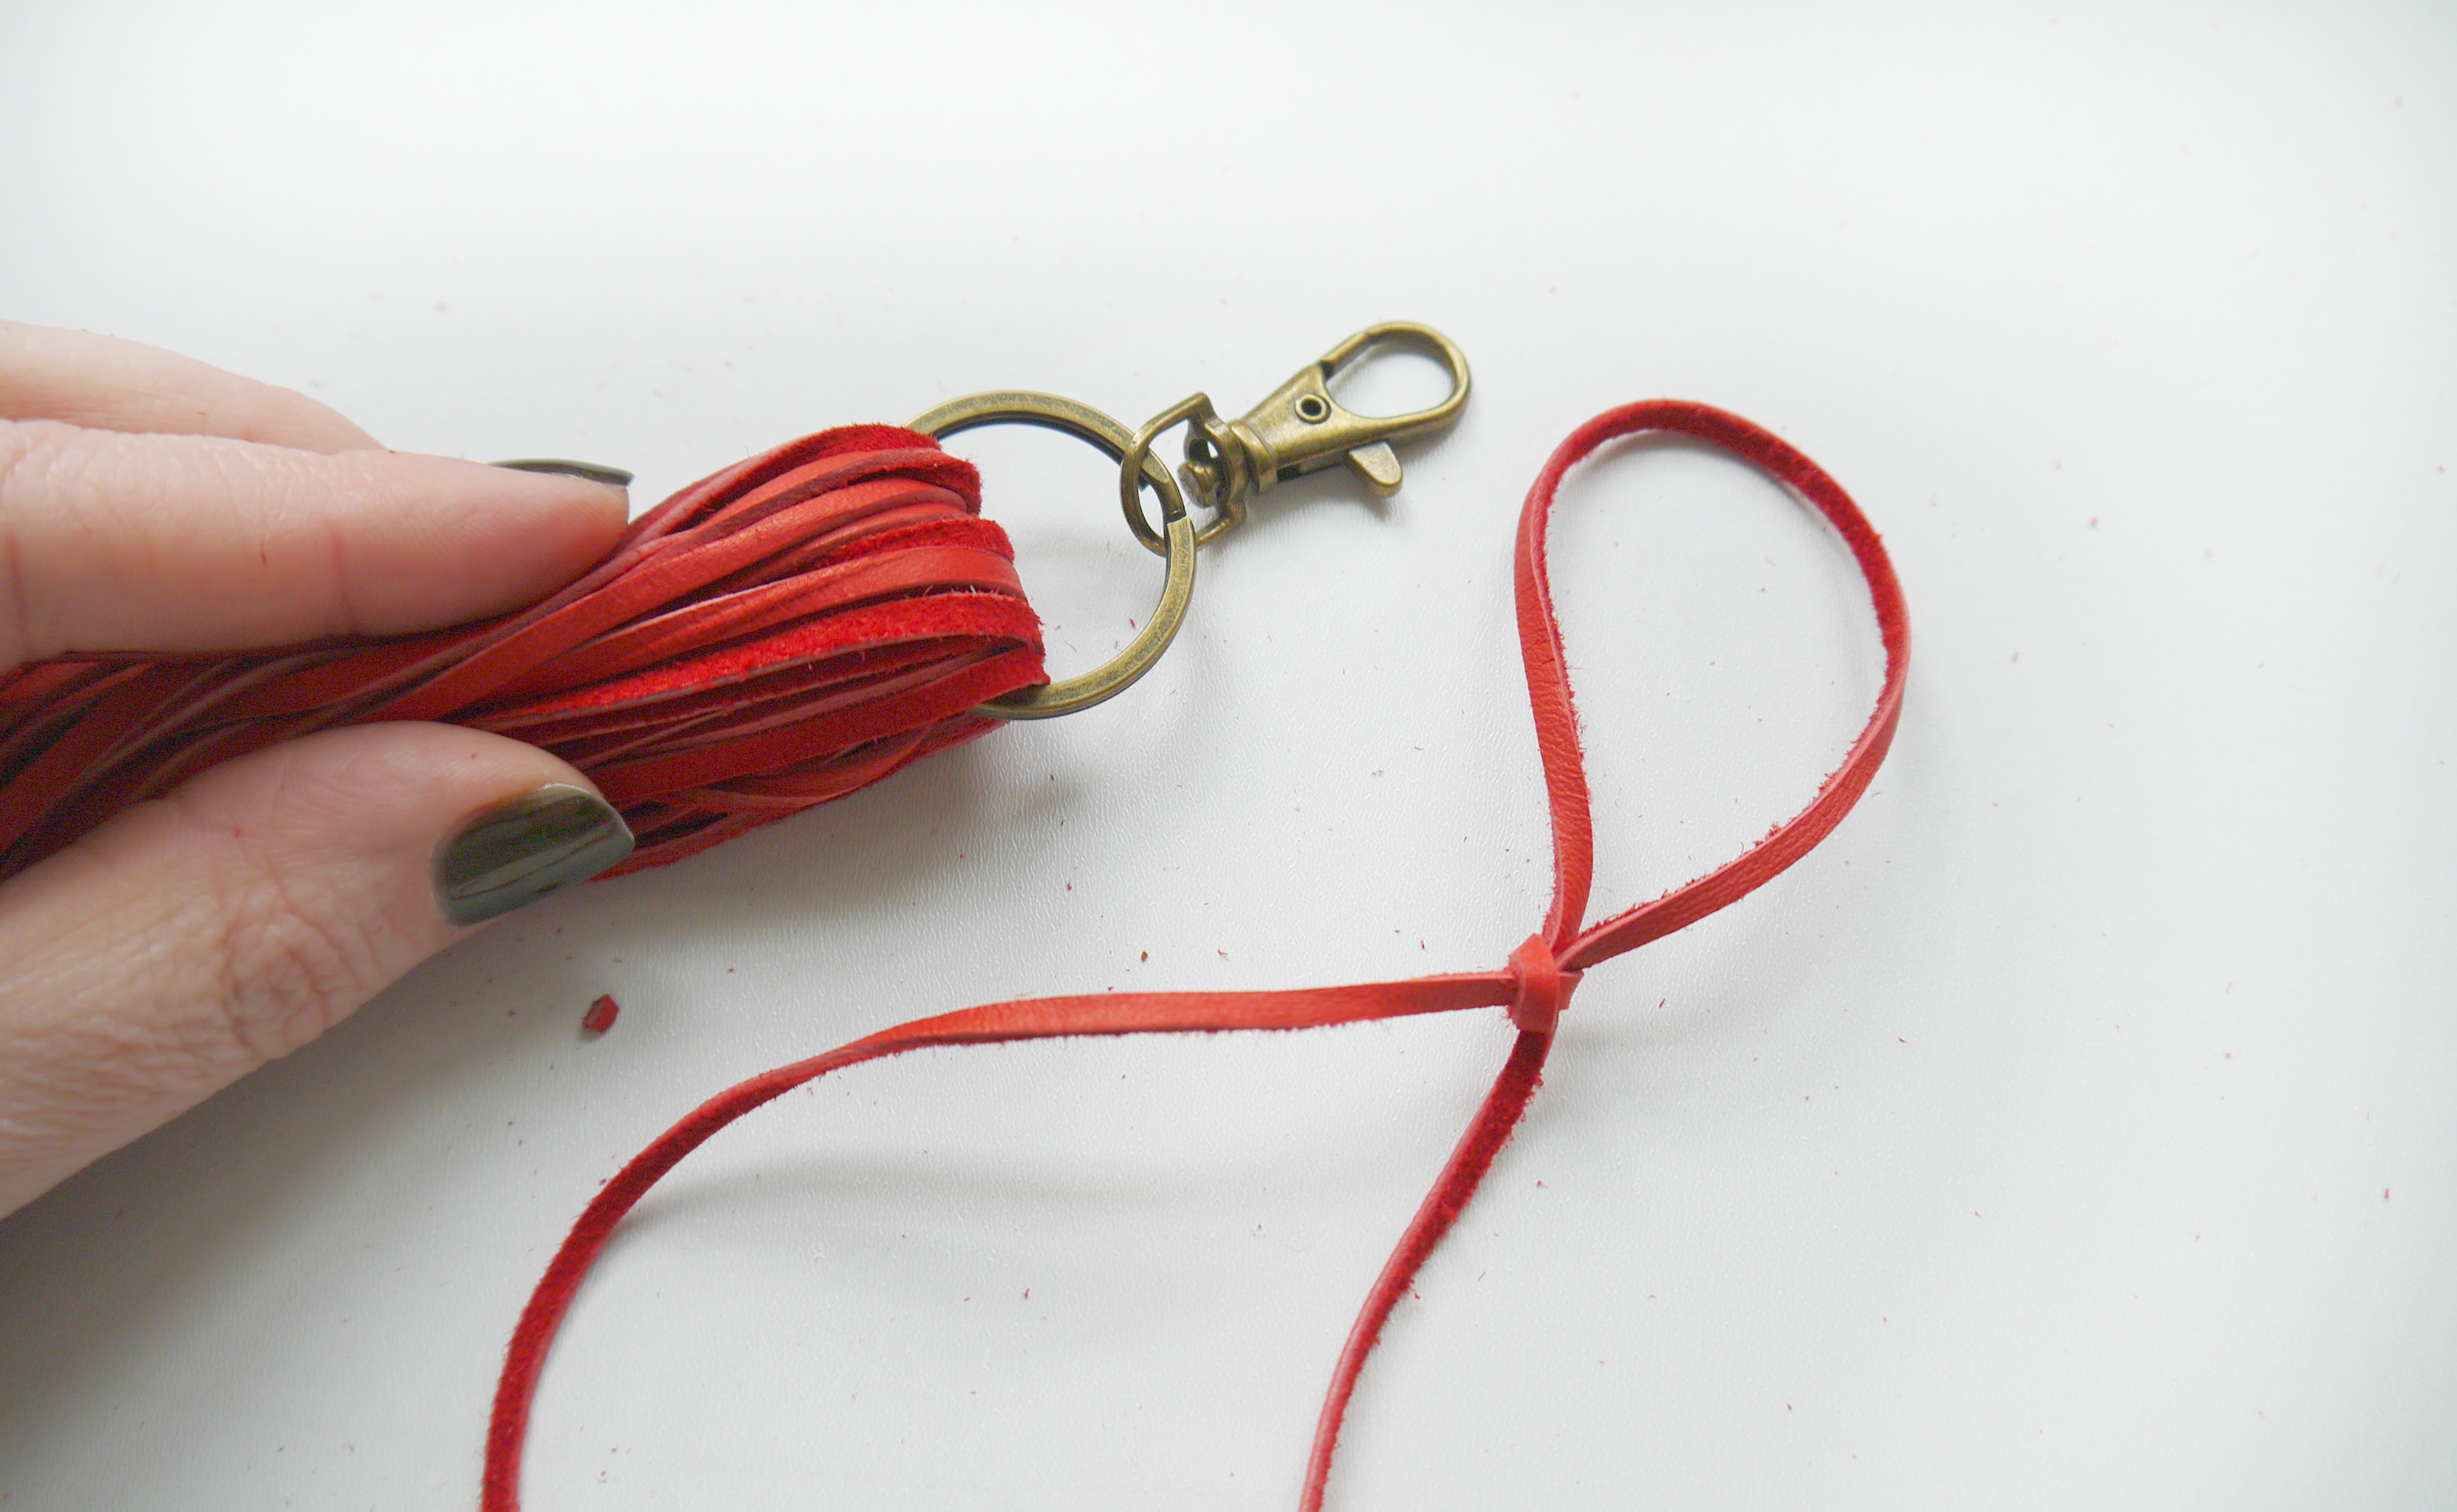
Slip the loop of your slip knot over the top of your tassle and slide it snugly closed like so, with the short tail pointing downwards towards the end of the tassle.

LEATHER TASSLE - STEP 7

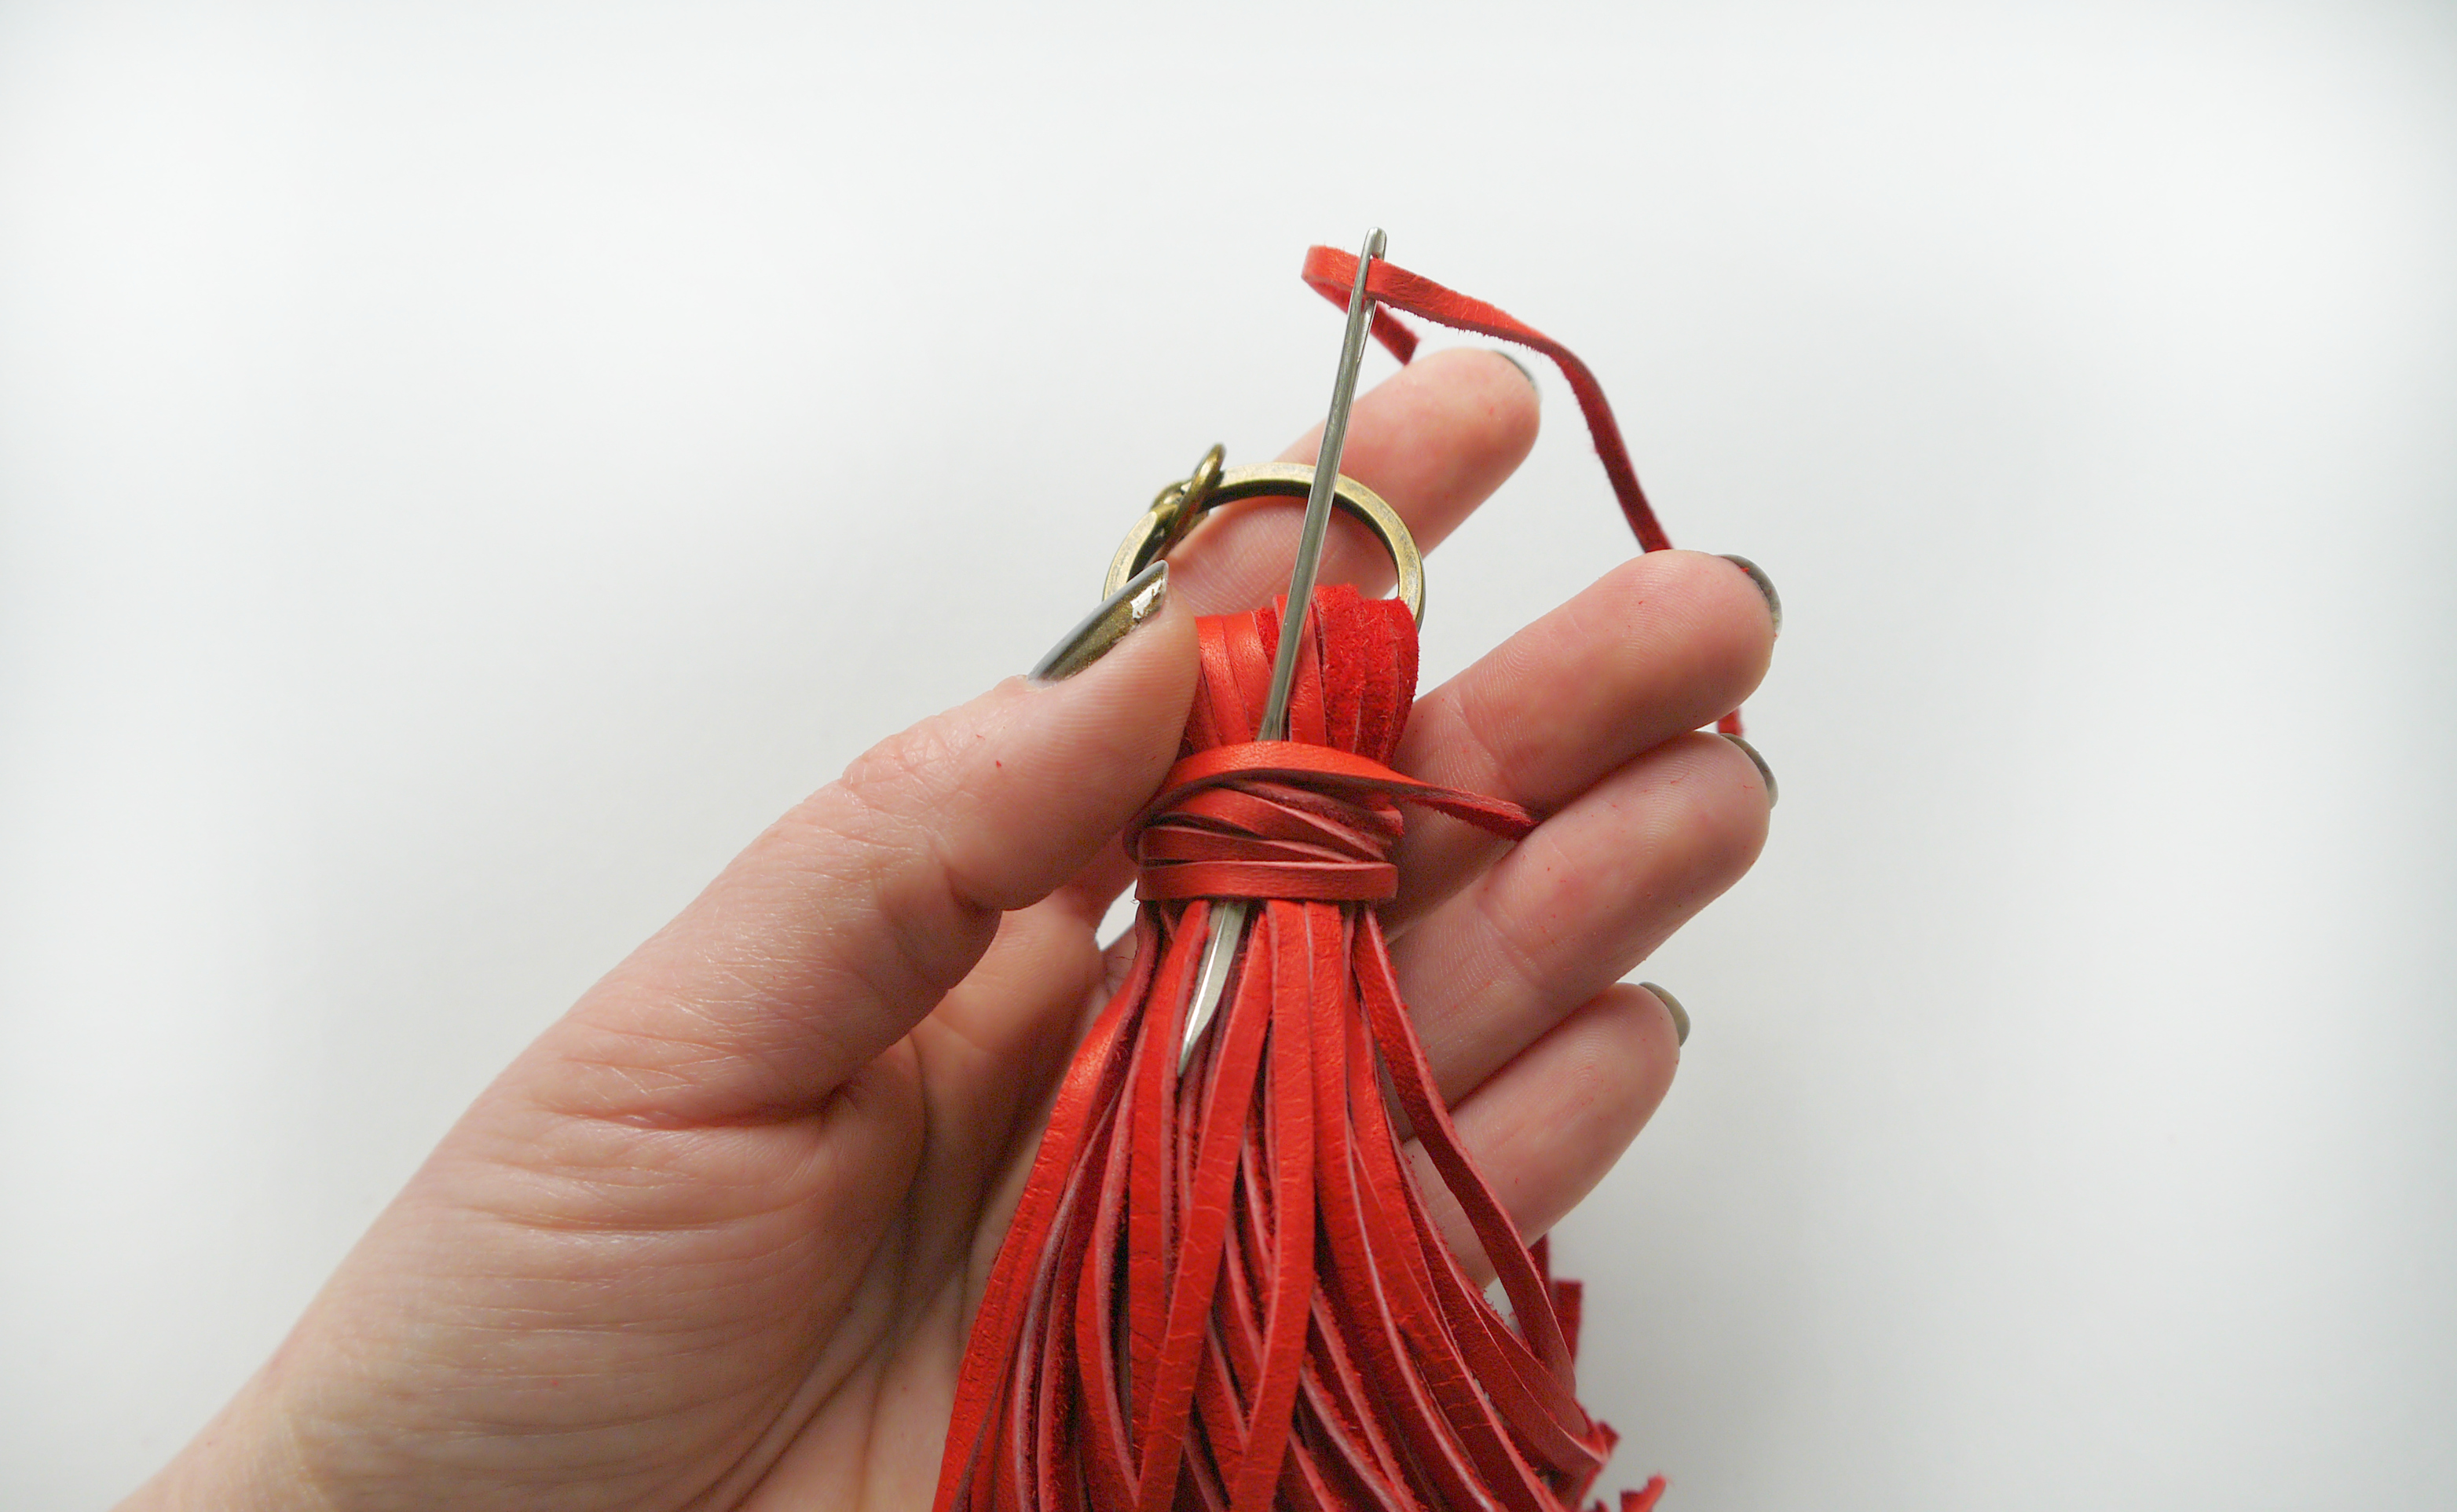
Then take the long tail and wrap it tightly around the neck of your tassle covering the slip knot as you go. When you have all but run out of tail, thread the end into a needle and pass it through/behind the wrapped part. Pull tightly to secure.

LEATHER TASSLE - STEP 8

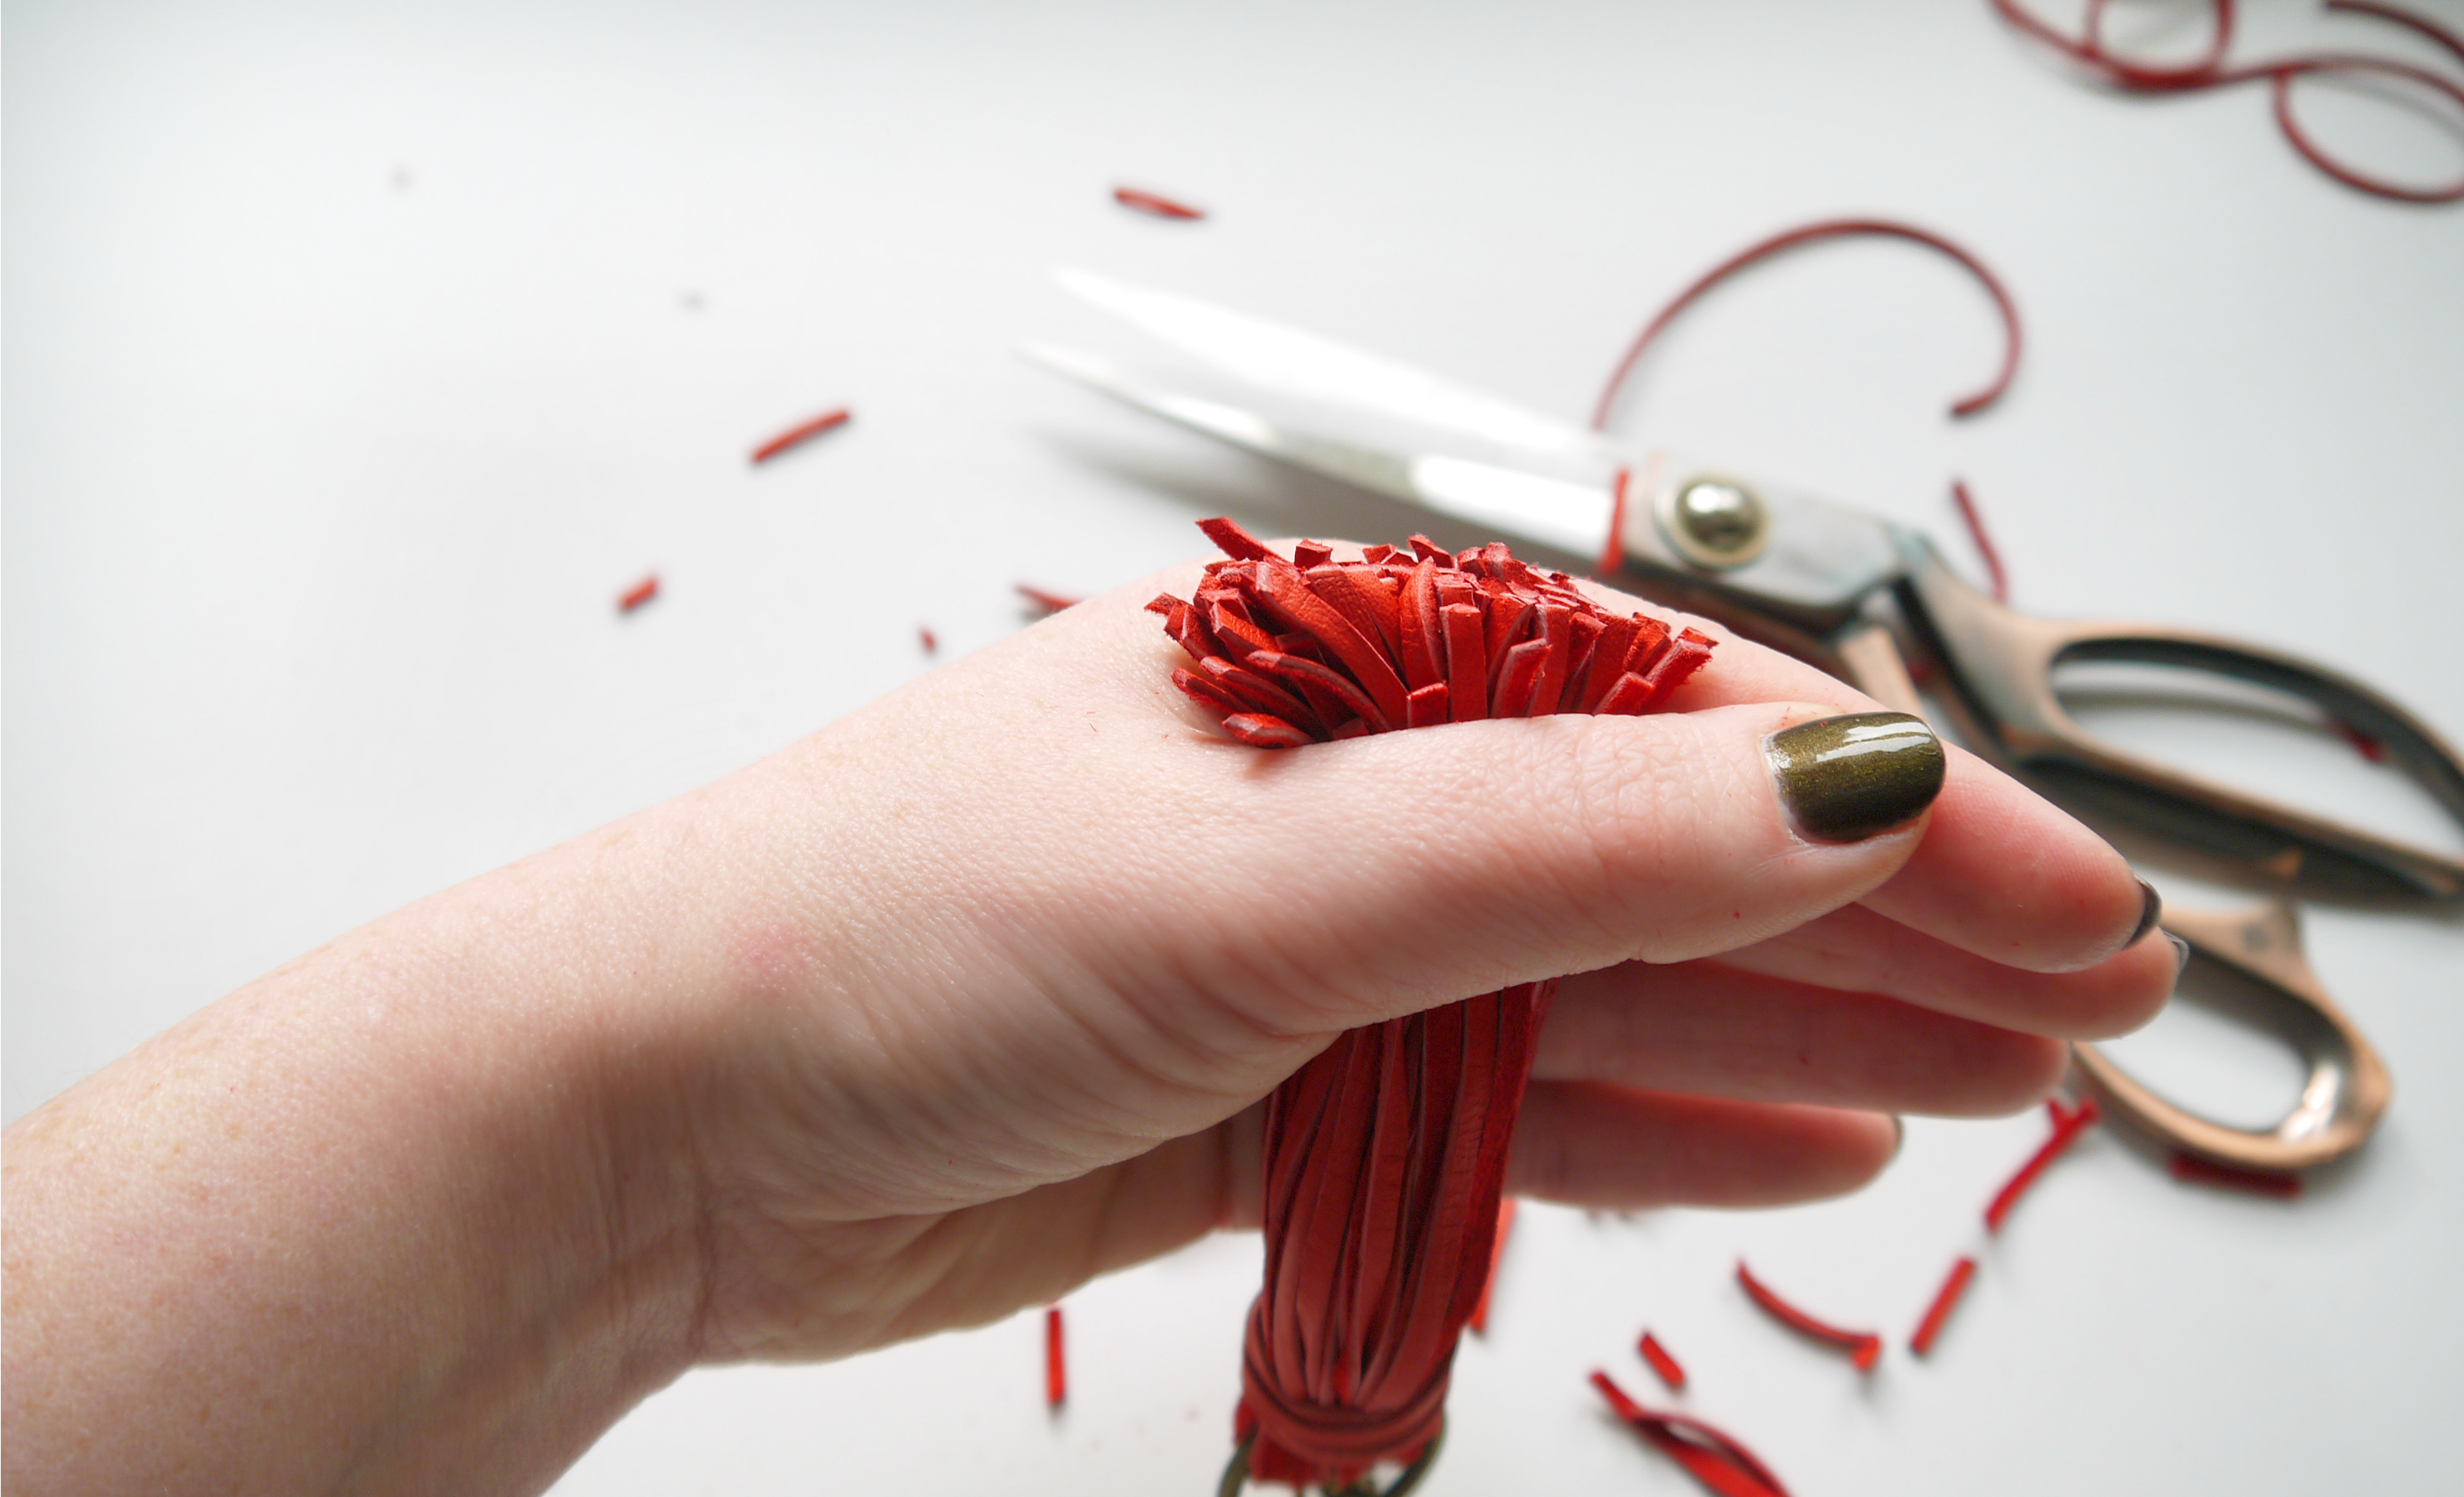
Bunch the end of your tassle together and trim the ends to even them out..

LEATHER TASSLE - STEP 9

Aaaaand you’re done!

LEATHER TASSLE 1


LEATHER TASSLE 2


LEATHER TASSLE 3

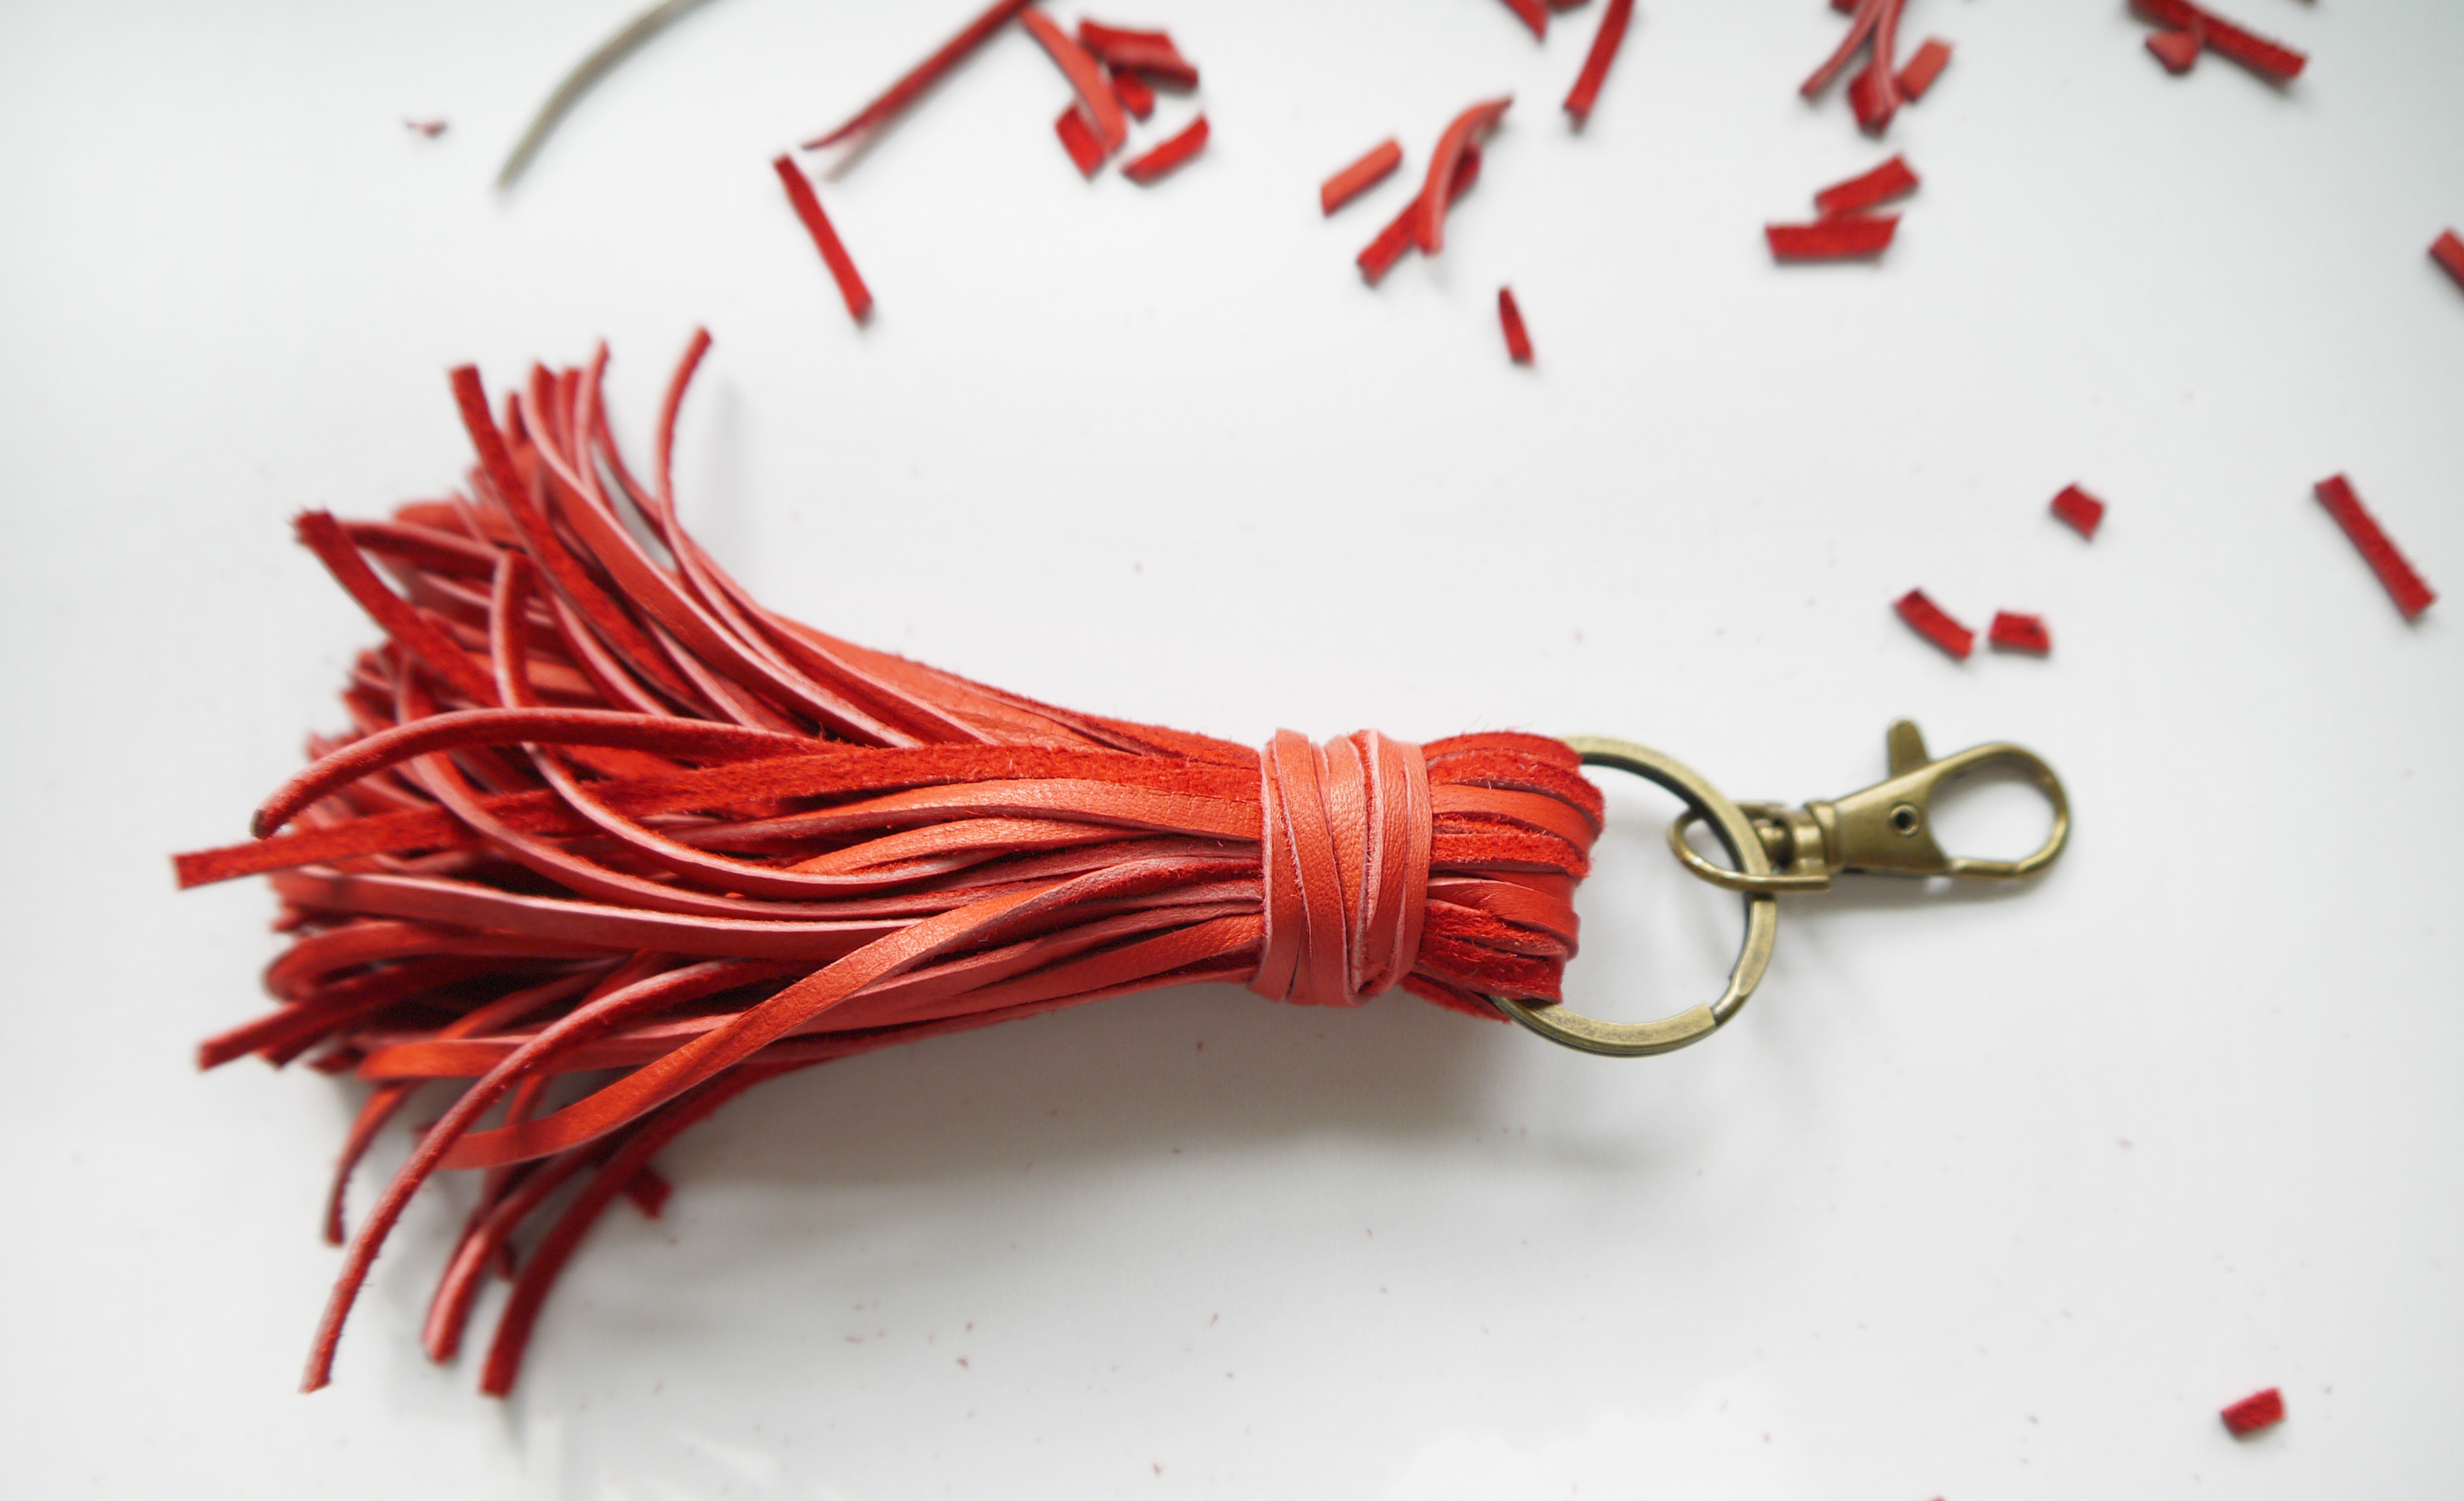
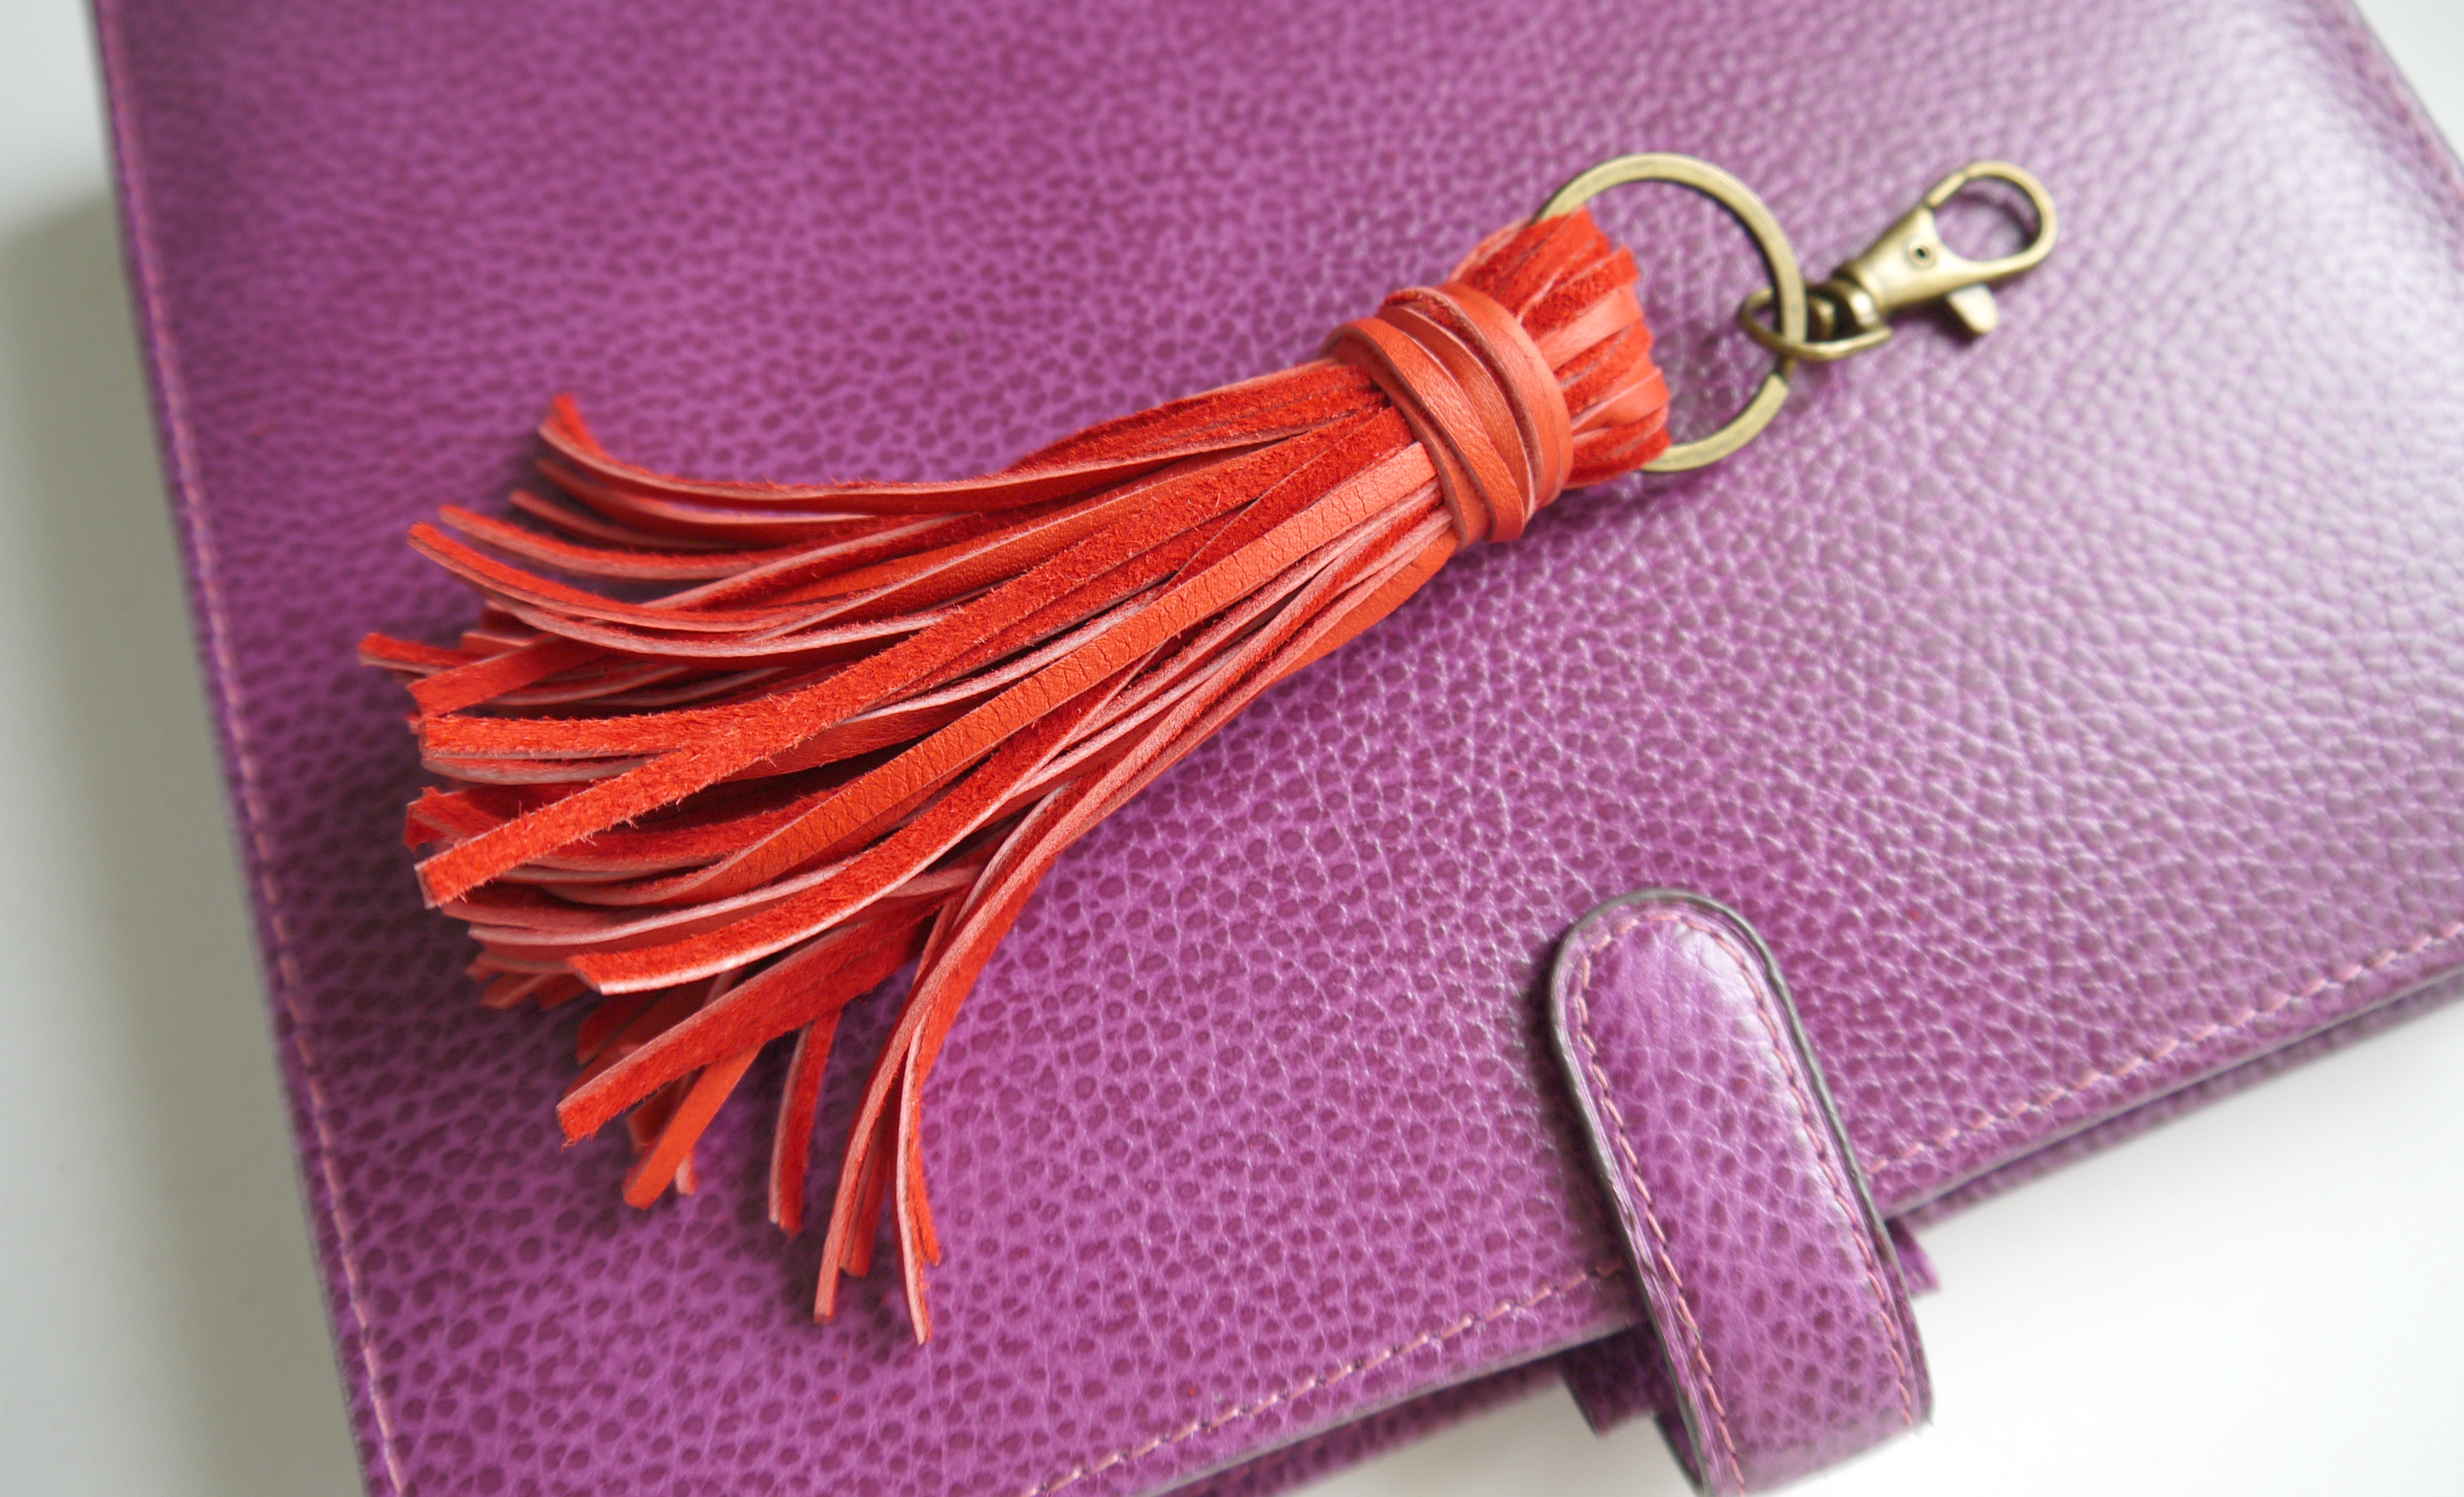
Your leather tassle is ready for some keys…or simply to add a pop of colour to a leather bag …

LEATHER TASSLE 4


Have a great day! And don’t forget to let me know of any little gremlins you find in the new site! I would sooooo appreciate your eagle eyes on this! If you’re interested in finding out about the Blogger to WordPress migration, perhaps you’re considering the move yourself but you’re not sure, then let me know, and I’ll put a summary post together so you can see what it involves!

DIY, endless leather, how to, jewelry, Tutorials

DIY: Rose Gold & Leather Necklace

02/03/15

I get a little kick out of finding a different use for things that are intended for a particular purpose. Re-imagining. Repurposing. Whatever you like to call it. I do that thing. You know that thing. Where you look at something, tilt your head and think, “what could I use that for?” Do you ever do that?

The decorative rose gold elements of this necklace are actually meant to have a more functional use. But they were way too pretty to be limited to that….

They are actually known as sliders. Intended for use singularly, to secure a loop end in leather cord, like so. They remind me of miniature metal belt hardware 🙂 As is often the case with the simplest of items, when displayed in volume they can take on a much more decorative persona, and the effect can be minimalist, modern, simplistic, edgy…but oh so gorgeous! (I really LOVE this necklace. Can you tell?)

You will need:
1m of leather cord (1m will give you enough for 2 necklaces depending on finished length),
2 x cord end caps
1x matching jumpring
1 x matching lobster clasp
20-25 Sliders
Superglue

Thread the sliders onto the leather cord. I used this grey cord, but it comes in a huge range of colours, and you can probably make out I chucked in a single stainless steel slider to contrast with the rose gold ones…

Cut to desired length…

Squeeze the cut end slightly to compact it a little….

Then dab the inside of the end cap with a teeny amount of super glue and insert the cut end of the cord….set aside and allow to dry completely

Once dry add a lobster clasp….

…and you’re done! You can see the contrasting steel slider more clearly in this pic. Might be quite fun to alternate the two different finishes to create a pattern!

Flipping the sliders the “wrong way round” also gives it an extra little design element…

This necklace looks really cute made in a shorter length and worn over a collared shirt so the metallic elements “peek out” between the collar:)

Full Disclosure: All of the supplies below were supplied to me c/o Endless Leather. The eternally helpful Daniel, dropped me a line and asked me if I would like have a browse and choose some materials for a DIY. I have received no money for this post nor will I receive any kind of commission related to the links herein. The views expressed are entirely my own. Had I not liked these products when they arrived I simply wouldn’t have written this post. Luckily for me I loved them, and would have no hesitation in recommending both the quality of the products AND almost as importantly, the level of service. Poor Daniel must’ve got fed up with me in the end as we went back and forth so many times deciding on materials. But he bent over backwards to be helpful. A rare thing these days. So thankyou Daniel 🙂 If you get a chance, check out their range. Amazing colours, embossing, printed leathers. Literally ALL sorts….;) And even better the prices are wholesale with no minimum  order quantity. So whether you want a few bits for your own personal use, or you want to go into full scale production and buy in volume, they’re well worth a look IMHO. 🙂


Portia
Follow
Sewbox

© Copyright 2026. Portia Lawrie. All Rights Reserved. Managed by WordPress Web Dev Cornwall .