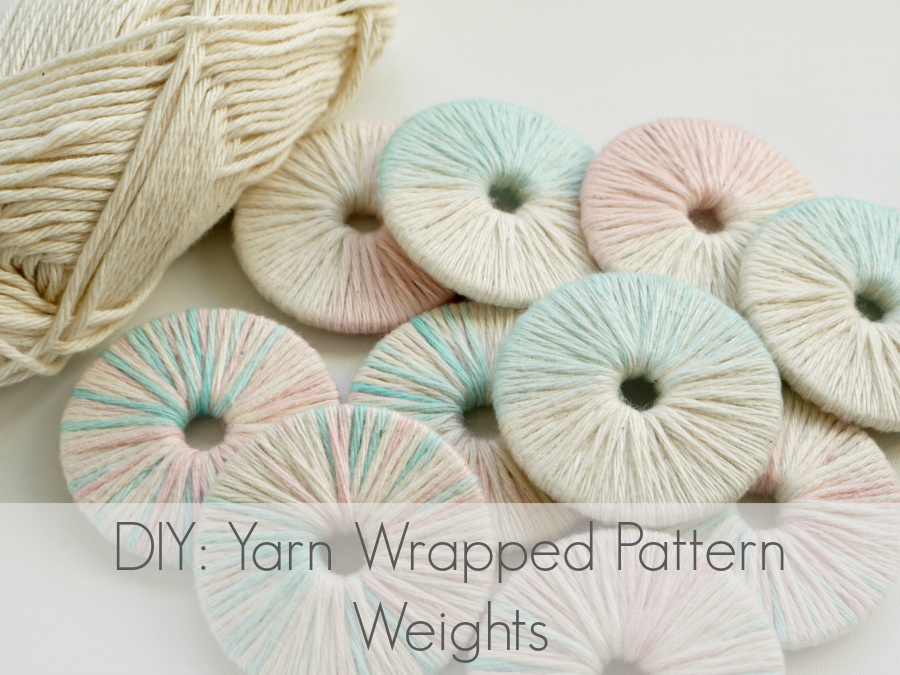
A little while ago we were talking about budget friendly pattern weights and I mentioned that I had ordered some giant washers and had plans to prettify them a little. Actually I had a couple of ideas and am waiting on a delivery of some more washers to try out the other(s) but in the meantime here’s one way of prettying them up! I’ve seen these done with ribbon on pinterest which can work equally well, but here’s my little twist on the idea with some seasonally appropriate pastel ombre touches….
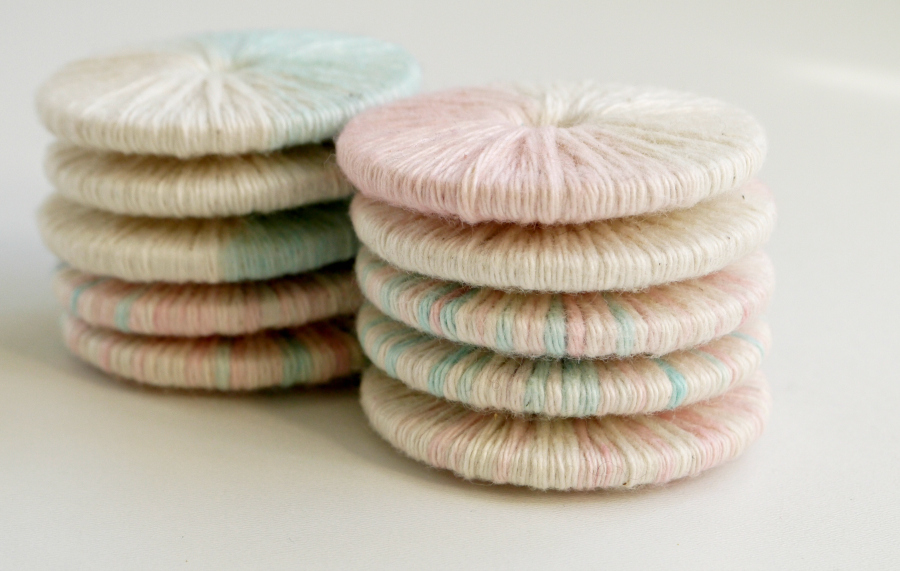
They remind me slightly of pastel macarons when stacked like this
They’re a decent size too!
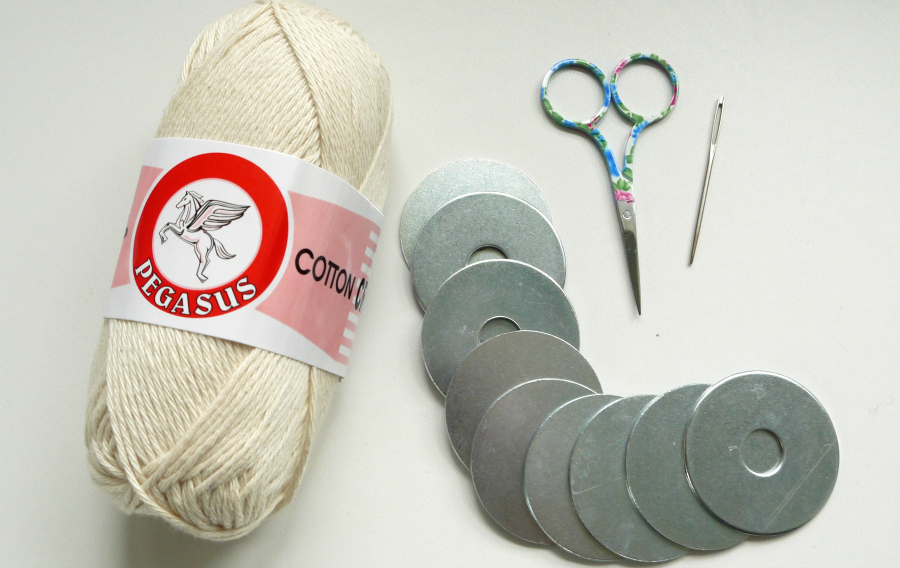
If you fancy making your own you’ll need some yarn. (I used simple cotton dischcloth yarn). Â Large metal washers (I used these). A yarn needle. Scissors.
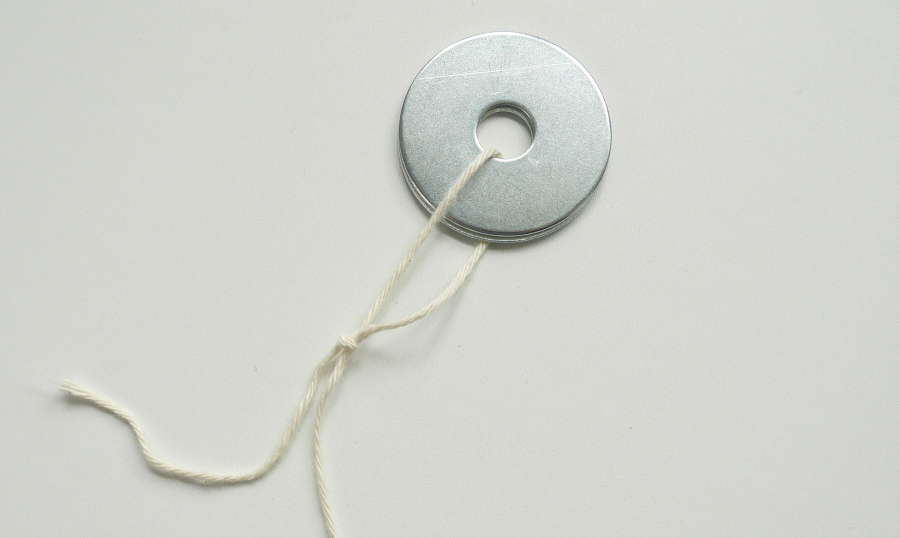
The washers singly are not quiiiiite heavy enough so we’re doubling them up. Start by  cutting a length of yarn approx 4m long and tying a slipknot through the central hole of both washers.
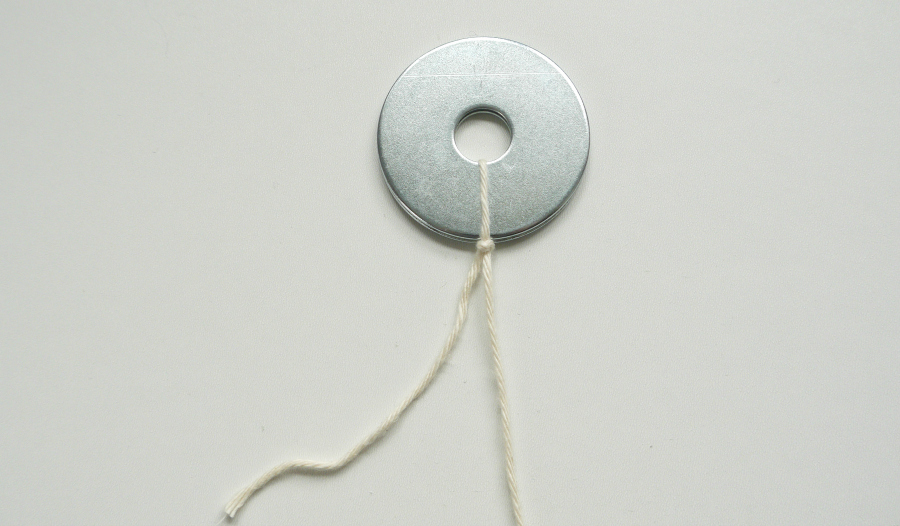
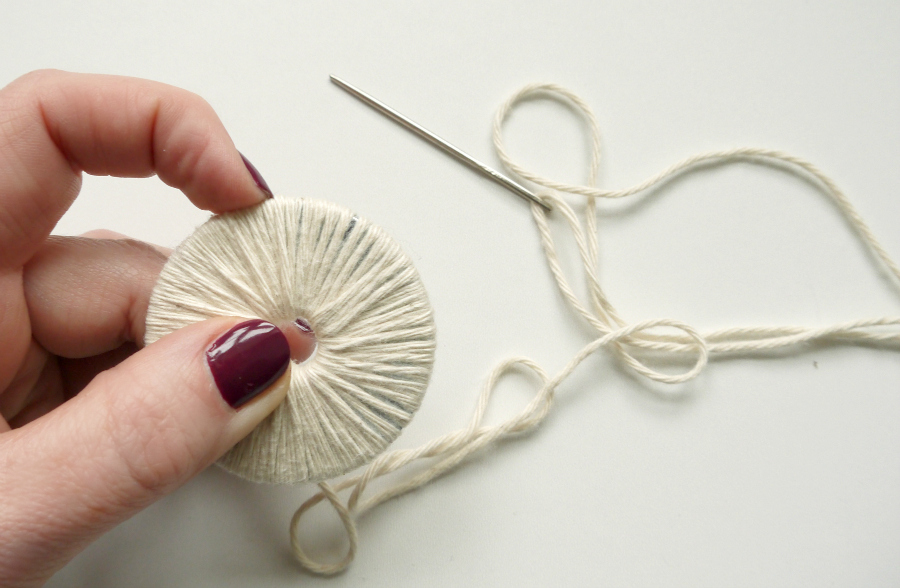
Tighten the slipknot then twist the knot and tail around to the back…
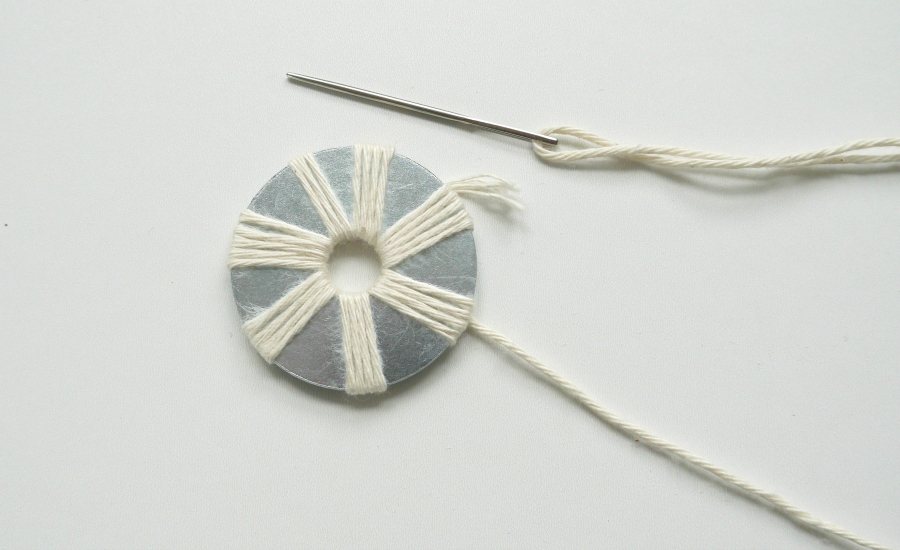
Thread the long end through a yarn needle and start wrapping. The first few wraps are a little cumbersome as you’ve got so much yarn to play with, but it gets easier as you go. The wrapping part is not quite as straightforward as wrapping one strand next to another all the way round. Â You have to do it in sections like this, then work your way around about 3 more times, filling in the gaps each time. Â So the first round looks something like this.
This is it flipped over to the reverse. Use the first round to “bury” the tail of the slipknot and snip off the end once it’s secure…
Then it’s just a question of working your way round filling in the gaps that the last round left. 3, possibly 4 times with this yarn. More if it’s thinner, less if it’s thicker. The yarn from the current round will slot in between the yarn strands from the previous round. On the final round, when the wrapping has become more compact, use your nail to move the wraps up close against eachother (behind my finger in the pic) and make space (in front of my finger in the pic) for the final round of wrapping. Â See those teeny gaps where you can see the metal through the yarn? The final strands of yarn will snug in those inbetween places.
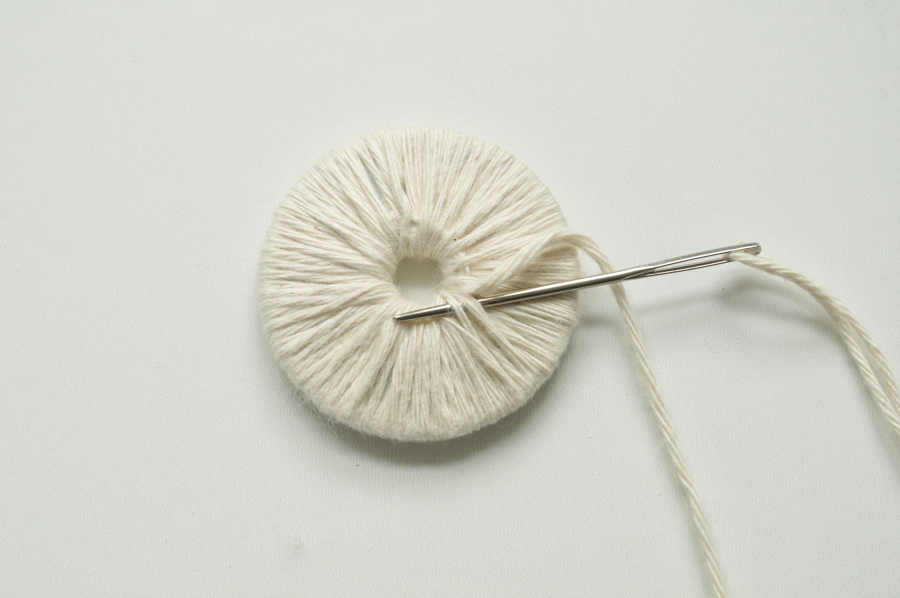
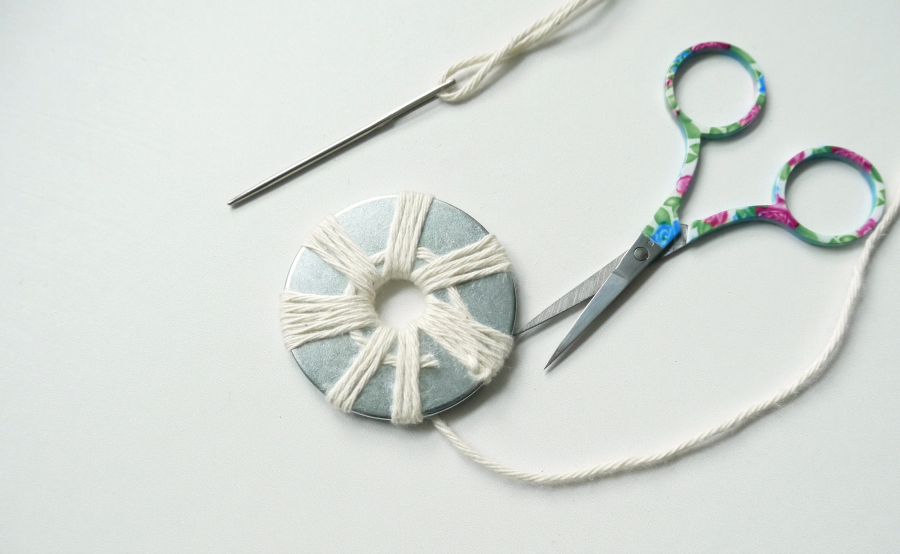
When you’re done feed the tail under the uppermost yarn strands around the hole in the centre to bury it and snip off the excess…
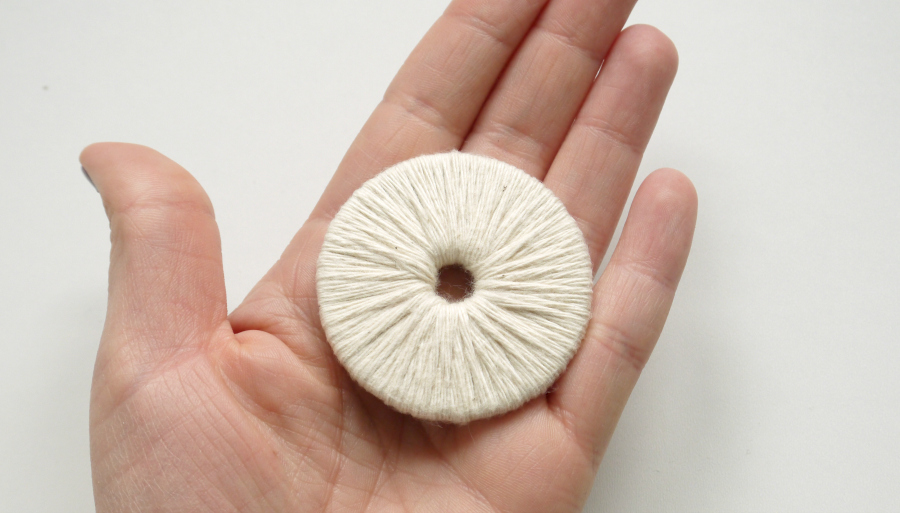
Done! (Each one takes about 15 mins).
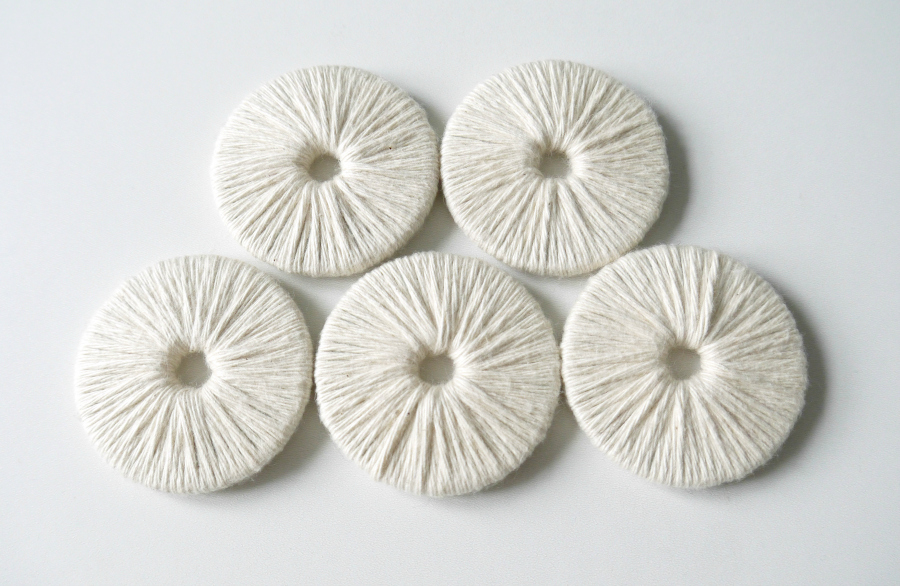
I rather like the simplicity of them as they are and they are VERY tactile!
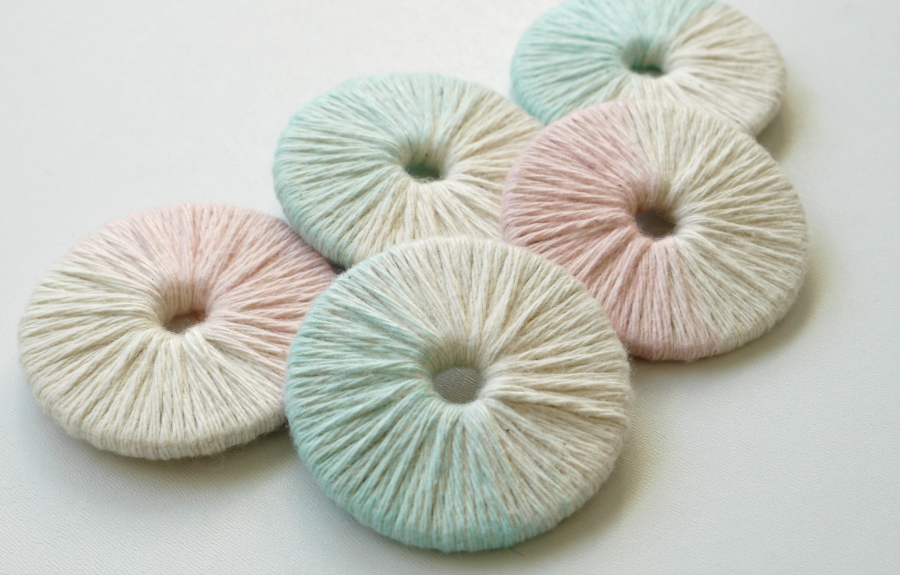
These ones have been dipped in food colouring to give the pastel ombre effect…
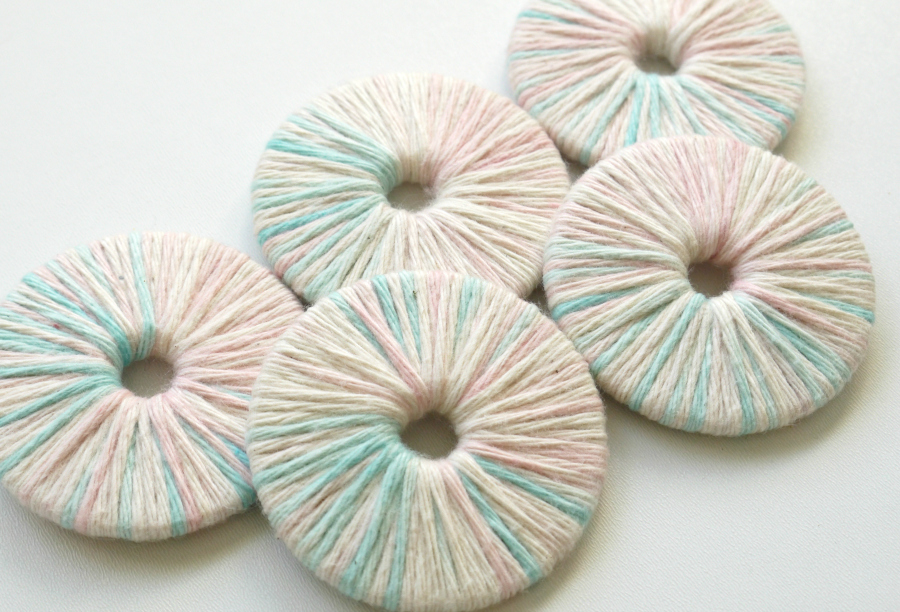
These ones I dyed the yarn first with food colouring to create an ombre effect (mini tute on that to follow), and then wrapped my washers…

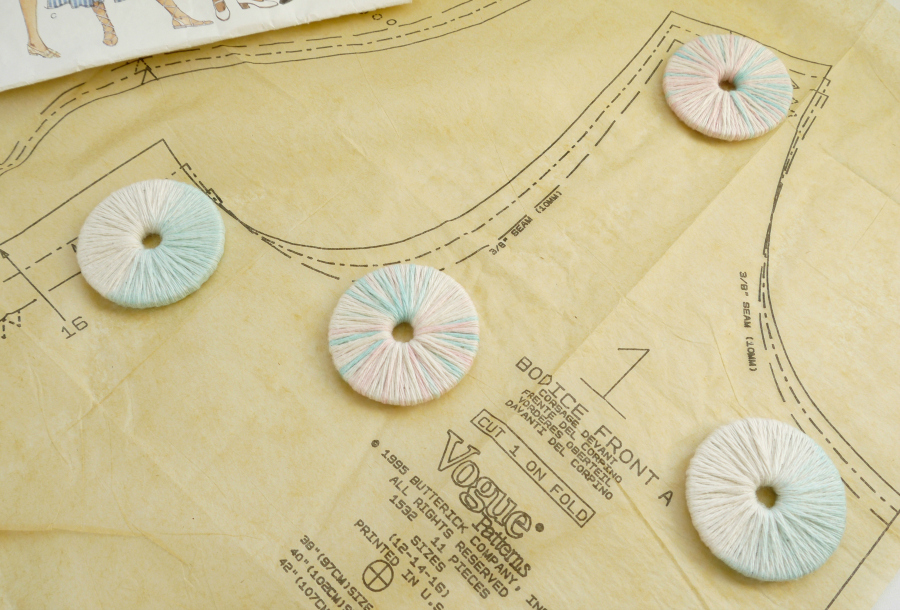
They’re definitely much prettier than your standard metal washer now! Wouldn’t they make great tablecloth weights for outdoor dining in the summer too?? Just add a loop!